 |
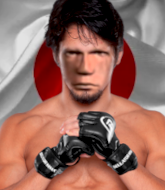
Slavic FL 34 Takeda - White PBP Commentary |
Undercard bout
|
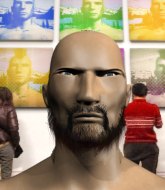
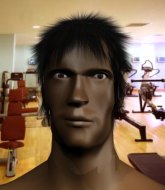
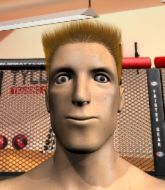
Coming up we have a featherweight MMA rules bout between Grace Neko (ranked 5689 p4p, 4051 weight class) and Scott Armstrong (ranked 459 p4p, 382 weight class). Over to our ring announcer for the fighter introductions!
 |
|
 |
| 159 cm
23
155
0 - 1 - 0 |
|
169 cm
20
156
2 - 3 - 0 |
BJJ Blue Belt
Counter fighter
Good in bed |
|
BJJ White Belt
Excellent boxer
Heavy handed |
|
| |
|
Ladies and gentlemen. This fight is 3 rounds, in the featherweight division.
Introducing the fighter to my left, fighting out of the red corner.
With a record of 0 - 1 - 0, fighting out of Tokyo, Grace Neko!
And introducing the fighter to my right, fighting out of the blue corner.
With a record of 2 - 3 - 0, fighting out of Las Vegas, Scott Armstrong!
The judges for this bout are Don Winkell, Jack Bonds and Timothy Bukovac.

The bell rings for round one and we are underway!
Neko with a lazy takedown attempt
and Armstrong counters with a lovely straight right hand!

Neko has managed to clinch.
Neko has a couple of punches blocked by Armstrong.
Neko has Armstrong pushed against the cage.
Neko is stalling here.
Neko gets a warning from the ref for wasting time.

Armstrong's corner calls for him to break the clinch, which he does.
We've had a slow start to the round here - hopefully the action picks up.
Neko walks into a jab.
Armstrong misses with a series of wild punches.

Oooooh!!! Armstrong has knocked Neko down with a huge combo! Armstrong steps away and waves a wobbly Neko back to his feet! This one might not go much longer!
 Neko is rocked! Neko is rocked!

That's one minute gone in the round.
Armstrong fails to land with a series of punches.
Oh Neko is still all over the place! His legs are completely gone! Will he be able to recover?!!
Armstrong gets in close and tags Neko with a short punch that almost sends Neko to the mat! Oh Neko is in big trouble! He turns his back on Armstrong, trying to create some distance but Armstrong rushes him, striking wildly and Neko goes down! The referee tackles Armstrong into the cage to end the fight! Armstrong is one violent man!
Ladies and gentlemen, after 1:15 of round 1, we have a winner by way of TKO (Strikes). Scott Armstrong!
|
|
|
|
|
|
|
|
|
|
|
|
|
|
|
|
|
|
|
|
|
|
|
| S |
C
A |
G |
S |
C
B |
G |
|
S |
C |
G |
|
energy
A | B |
|
hype
A | B |
|
pop
A | B |
|
mgr
A | B |
|
FIGHT
RATING
66% |
|
|
|
|
|
|
|
Undercard bout
|
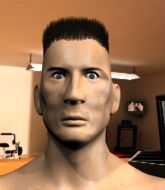
Coming up we have a heavyweight MMA rules bout between Andre King (ranked 4060 p4p, 4349 weight class) and Tyrone Muesli (ranked 488 p4p, 510 weight class). Andre King had a look across the cage there at his opponent. He definitely means business
 |
|
 |
| 192 cm
23
260
2 - 2 - 0 |
|
210 cm
23
264
2 - 1 - 0 |
BJJ White Belt
World class boxer
Cardio machine |
|
BJJ Purple Belt
Excellent MT
Good gas tank |
|
| |
|
Ladies and gentlemen. This fight is 3 rounds, in the heavyweight division.
Introducing the fighter to my left, fighting out of the red corner.
With a record of 2 - 2 - 0, fighting out of New York, Andre King!
And introducing the fighter to my right, fighting out of the blue corner.
With a record of 2 - 1 - 0, fighting out of Amsterdam, Tyrone Muesli!
The judges for this bout are Don Winkell, Frank Antenori and Timothy Bukovac.
The bell rings for round one and we are underway!
Muesli takes a shot to the eye socket. That's gotta hurt.

Muesli rushes King and pushes him back against the cage in a clinch.

King breaks the clinch.
Muesli fakes with an overhand right and moves in to clinch with King, pushing him back against the cage.
Muesli is looking for a takedown.
Muesli doesn't land with the attempted body shot.
Muesli tries a body shot but King blocks it.
Muesli tries for a takedown but King manages to get underhooks.
A short right hand to the side of the head by Muesli.
King breaks from the clinch.
King misses with a body kick.
Muesli slips under a jab from King.
King looks to have improved his striking defense since last time we saw him fight.
We've had a slow start to the round here - hopefully the action picks up.
Muesli instigates a clinch.
Muesli throws a blind hook that connects with the side of Kings head.
King takes a shot to the head.
We've seen a great period of action over the last minute or so - credit to both fighters for going all out!
Muesli has King pressed against the cage.
Muesli working aggressively here.
That's one minute gone in the round.
A short right from Muesli on the inside.
Muesli working on landing some head shots here - that one got through nicely.
Muesli can't get the takedown.
Andre King has stuffed three takedown attempts in the round now. That's going to take a lot out of Tyrone Muesli.
Muesli is looking for a takedown up against the cage. King gets underhooks though and prevents the takedown attempt.
Muesli swings away with an uppercut that misses.
Muesli drops down looking for an ankle pick but King pulls his leg out and moves away.
Muesli throws a looping overhand right but King ducks down to avoid it.
A combination from King does no damage.
Muesli drops down looking to force a counter takedown but King defends it well.
King throws a big shot that misses.
King throws a jab but it's blocked by Muesli.
Tyrone Muesli seems to be the more aggressive standup fighter in this bout.
King tries to keep at a distance but Muesli has taken the fight into the clinch.
Muesli lands a left hand that snaps the head of King backwards.
Muesli lands with a short head shot on the inside.

That's two minutes gone in the round.
Muesli is working for a takedown up against the cage. He can't get it on this occasion though.
Muesli lands on the inside with an uppercut.
 It looks like Andre King has been cut. It looks like Andre King has been cut.
Muesli working on landing some head shots here - that one got through nicely.
The fans in attendance giving it up for the two fighters, who have really let it all hang out in the last minute or so!
Muesli has King pressed up against the cage and is working for takedown. King manages to improve position though and keeps the fight standing.
An uppercut on the inside fails to land for Muesli.
Muesli misses with a shot to the kidneys.
King prevents a takedown attempt there.
Muesli goes for a body shot but it's blocked.
Muesli prevents King from breaking the clinch.
Muesli misses with a punch on the inside.
Muesli escapes the clinch and we're back to striking.
Muesli instigates a clinch.
Muesli misses with a short punch on the inside.
Muesli pushes King back against the cage and unloads with a body punch.

That's three minutes gone in the round.
Muesli lands with a short head shot on the inside.
Muesli lands a left hand that snaps the head of King backwards.
Muesli has been looking to improve his clinch game in recent weeks. King seems to have the measure of him in the clinch so far, so let's see if Muesli can turn it around.
Muesli is trying to drag King to the mat but King just about manages to keep his footing. He used the cage to his advantage there.
Muesli presses King against the cage and delivers a mid-strength body shot.
Muesli swings wildly with an uppercut but King uses good head movement to avoid it.
Muesli working aggressively here.
A head punch on the inside from Muesli fails to land.
Muesli gets through King's defenses to land a nice punch to the side of the head.
King looks like he'd prefer to be striking at range right now.

Muesli gets a trip takedown into half guard.
Muesli throwing shots but they're hitting the canvas more than the man.

That's four minutes gone in the round.
Muesli takes a deep breath and rests his weight momentarily on top of his opponent, to control the position.

Muesli is trying for a guillotine from the top but the pressure isn't in the right place so King is just riding it out for now. Muesli eventually gives up the hold.
Muesli is working for a submission of some sort.
Muesli frees up his trapped foot and advances to mount.
The crowd cheering loudly, showing their appreciation for the quality fight we're seeing here.
Muesli goes for an armbar but he's not got it
King turns into him and now he's in Muesli's guard.
And that is the end of the round. The fighters go back to their corners.
Tyrone Muesli dominated that round.
The cut man is working on Andre King's cut.
That's time! King's corner gives him a slap on the ass as he gets ready to fight.

Muesli rushes King and presses him up against the cage.
King has had enough of the clinch but Muesli keeps him there for the moment.
Muesli throws a head punch that misses.
King gets underhooks to prevent Muesli's takedown attempt.
A short body shot lands from Muesli as the two fighters clinch.
Muesli tries to land a shot to the body but it's blocked.
Muesli has a body lock and is looking for a takedown. King is bouncing around trying to prevent the takedown and somehow he has indeed managed to stay on his feet.
A head punch blocked on the inside by King.
We've had a slow start to the round here - hopefully the action picks up.
Muesli wants to take the fight to the mat but King manages to get underhooks and keep the fight in the clinch.
Andre King has stuffed three takedown attempts in the round now. That's going to take a lot out of Tyrone Muesli.
Muesli misses with a hook from the clinch.
Muesli has dropped down and is looking to force the takedown but it's defended by King after a bit of a struggle.
King prevents a takedown attempt there.
That's one minute gone in the round.
A head punch blocked on the inside by King.
Muesli keeps control of King as he tries to wriggle out of the double underhooks.
Muesli misses with a hook to the ribs.
Muesli misses with a hook from the clinch.
King tries to break the clinch but Muesli is controlling the position.
Muesli can't find room to land a body shot as King controls the action.
Muesli tries to throw a body punch but King avoids it by throwing Muesli back against the cage.
Muesli holding his opponent close, against the cage.
Muesli misses with a shot to the kidneys.
Nice body punch from Muesli - that landed with a thud.
A shot in the inside from Muesli.
King wants to break free but Muesli has control.
A frustrated look appears on King's face as he tries to break the clinch.
That's two minutes gone in the round.
Muesli lands a left hand.
The referee is keeping an eye on King - much more stalling and he will separate the fighters.
Muesli lands a left hand.
Muesli doesn't land with the attempted body shot.
Muesli lands a left hand.
King is trying to work out of this bad position, with his back against the cage.
Muesli misses with the head strike.
Muesli wants to take the fight to the mat but King manages to get underhooks and keep the fight in the clinch.
King blocking some punches.
Muesli tries a shoulder strike but it doesn't do any damage.
Still in the clinch, Muesli scores with a nice short uppercut.
Muesli doesn't land with the attempted body shot.
With the fighters clinched against the cage, Muesli creates a bit of distance for himself and scores with a nice uppercut.
That's three minutes gone in the round.
Muesli is working for takedown but King is calmly controlling the position for now.
Muesli tried to land a shot to the body but connects with King's elbow.
Muesli swings away with an uppercut that misses.
King is trying to work out of this bad position, with his back against the cage.
King gets underhooks to prevent Muesli's takedown attempt.
King tries to circle away but Muesli has him pinned against the cage.
Muesli stalling the fight.
Muesli lands with a short shot to the head.
King prevents the takedown attempt.
Muesli drops down looking for an ankle pick but King pulls his leg out and moves away.
Muesli blocks the body kick.
Muesli shoots in looking for a double leg takedown. King defends it nicely.
That's four minutes gone in the round.
Muesli missing with a left hand there. King was out of range so wasted energy throwing that one.
King scores with a decent looking hook.
King throws an overhand right that lands on Muesli's shoulder, as Muesli tries to avoid the shot.
King throws out a loose jab but Muesli uses good head movement to avoid it.
The sound of bone on bone echoes around the arena as Muesli checks a leg kick.
King looks to score with a jab to the body but Muesli is just out of range.
Muesli uses good footwork to avoid the strikes from King.
Andre King is looking to throw some combinations by the looks of things.
Muesli on the wrong end of a vicious looking body shot.
King clinches up against the cage.
Muesli breaks the clinch and we're back to striking at distance.
Muesli tries to clinch but King moves out of range.
The crowd thankful this round is nearly over.
King takes a jab right on the nose. That must have hurt but he shrugs his shoulders and looks to return the favor.
This has been an exciting period of action!
Some bone on bone action there as Muesli checks a low kick. Luckily it wasn't a particularly hard one.
Muesli tries to counter by closing the distance.
Muesli gets to the clinch - let's see what his plan is here.
And that is the end of the round. The fighters go back to their corners.
Tyrone Muesli showed his class in that round. I'd imagine he'll take it on all the scorecards.
The cut man is working on Andre King's cut.
That's time! King's corner gives him a slap on the ass as he gets ready to fight. This is the final round!

Muesli closes the distance and pushes King back into the cage.
Muesli stalling against the cage.
A short uppercut from Muesli.
Muesli swings away with an uppercut that misses.
A left hand lands to the body for Muesli.
Muesli breaks the clinch and we're back to striking at distance.
Muesli gets a clinch.
Muesli misses with a body punch.
Muesli lands a hook that snaps the head of King backwards.
We've had a slow start to the round here - hopefully the action picks up.
Muesli lands a right uppercut that snaps the head of King backwards.
Muesli is working for takedown but King is calmly controlling the position for now.
Muesli lands with a quick shot inside that doesn't really do much damage.
King blocks a couple of punches on the inside.
That's one minute gone in the round.
Muesli lands on the inside with an uppercut.
King is rocked!
Muesli lands punches inside but they're not really causing much damage.
Oh King is still all over the place! His legs are completely gone! Will he be able to recover?!!
Muesli lands punches inside but they're not really causing much damage.
Muesli creates a bit of space for himself and rocks King with a big uppercut! King tries to clinch up but Muesli pushes him back against the cage and lands another monster strike that crumples King to the mat! King covers up and Muesli unloads with more strikes until the referee steps in to end the bout!
Ladies and gentlemen, after 1:17 of round 3, we have a winner by way of TKO (Punches). Tyrone Muesli!
|
|
|
|
|
|
|
|
|
|
|
|
|
|
|
|
|
|
|
|
|
|
|
| S |
C
A |
G |
S |
C
B |
G |
|
S |
C |
G |
|
energy
A | B |
|
hype
A | B |
|
pop
A | B |
|
mgr
A | B |
|
FIGHT
RATING
54% |
|
|
|
|
|
|
|
Undercard bout
|
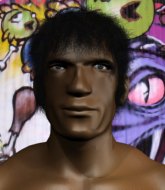
Coming up we have a heavyweight MMA rules bout between Bartolomeu Ganz (ranked 3220 p4p, 2702 weight class) and Oaza Madero (ranked 395 p4p, 337 weight class). Both fighters look fresh as a daisy as they make their way towards the cage.
 |
|
 |
| 193 cm
23
259
2 - 1 - 0 |
|
190 cm
23
264
2 - 0 - 0 |
Good wrestling
World class boxer
Granite chin |
|
Good wrestler
Basic striking
Granite chin |
|
| |
|
Ladies and gentlemen. This fight is 3 rounds, in the heavyweight division.
Introducing the fighter to my left, fighting out of the red corner.
With a record of 2 - 1 - 0, fighting out of London, Bartolomeu Ganz!
And introducing the fighter to my right, fighting out of the blue corner.
With a record of 2 - 0 - 0, fighting out of Amsterdam, Oaza Madero!
The judges for this bout are Percy O'Donnell, Timothy Bukovac and Jack Bonds.
The bell rings for round one and we are underway!
Madero gets his takedown attempt stuffed easily
and Ganz counters with a slapping leg kick.
Madero fails with a takedown attempt.
As Madero backs away, Ganz returns fire with a leg kick that just misses.
Madero doesn't succeed with the takedown
and Ganz counters with a lovely straight right hand!
 It looks like Oaza Madero has been cut. It looks like Oaza Madero has been cut.
Bartolomeu Ganz has stuffed three takedown attempts in the round now. That's going to take a lot out of Oaza Madero.
Madero gets his head snapped back by a nice shot there.
Ganz throws a jab when Madero was well out of range.
Madero misses with an uppercut
and Ganz counters with a crisp hook to the side of the head.
Madero tries to close the distance and clinch up but Ganz swats him away and circles back towards the center.
We've had a slow start to the round here - hopefully the action picks up.
Madero with a lazy takedown attempt
and Ganz counters with a low kick, right behind Madero 's knee.
Madero dives in and grabs Ganz's left leg, looking for a takedown. Ganz pushes down on Madero's head and hops out.
Ganz swung with a counter right hand that didn't connect.
Madero fails with a takedown attempt from distance.
Ganz tries to land with a swinging hook to the body but Madero was well out of range. Poor timing from Ganz.
Ganz stuffs the takedown attempt from Madero. Madero gets slowly back to his feet.
That's one minute gone in the round.
Ganz lands with a hook. Madero tried to avoid it but it clipped the top of his head.
Ganz throws a shot to the body.
Madero misses with a takedown
and Ganz counters with a leg kick.
Madero shoots in for a takedown. He's persisting with it as Ganz sprawls well. Ganz wins this battle and keeps the fight standing. Madero gets slowly back to his feet.
Madero fails to land the takedown.
Madero fails to land the takedown.
And Ganz counters with a quick kick to the body but Madero blocks it.
That's two minutes gone in the round.
Madero misses the jab.
A nice inside leg kick there by Ganz. That's going to slow Madero down.
No luck with that takedown attempt from Madero.
Ganz has been working on his boxing with his coaches at Dr Hatsumi's Clinic in the buildup to the fight.
Madero shoots in for a double leg but Ganz sprawls well. That's going to sap some energy.
It looked like Ganz was looking amped, ready to throw a big counter but didn't commit.
Madero scores with a nice takedown into half guard. Let's see what he's got on the ground.
Wooooo! Give it up for these two warriors! They are putting on a show!
Ganz regains full guard. Nicely done.
Ganz pulls Madero in close to prevent any damage.
Ganz is working the butterfly guard. He manages to land a nice scissor sweep and is now in half guard on the top. Nice move.

Ganz is just sitting in half guard, waiting for something to happen.
Ganz is keen to just control but Madero is a slippery customer.
That's three minutes gone in the round.
Ganz content to sit in half guard and control for a moment.
Madero is looking to control Ganz's leg but it's slowly edging free. Can Madero avoid being mounted?

Ganz decides to stand up.
Madero tries to score a power double leg takedown but Ganz sees that one coming and sprawls well. That will dishearten Madero somewhat.
Madero gets his takedown attempt stuffed easily
and Ganz counters with a straight right hand.
That has opened up Oaza Madero's cut even more.
Madero shoots in but doesn't get the takedown
and Ganz counters with a body kick.
Ganz slaps away a takedown attempt from Madero, before circling back to the center of the mat.
That's four minutes gone in the round.
Ganz lands an overhand left. A wild punch that just about connected.
Madero gets cracked there but stands up to it.
Madero shoots in for a takedown. "Ole!" shouts Ganz as he jumps to the side.
Madero tries for a takedown but Ganz circles away easily
and Ganz counters with a good low kick that Madero was not able to check.
Ganz misses with an uppercut. Madero saw that one coming.
Madero drops down looking to force a counter takedown but Ganz defends it well.
Bartolomeu Ganz is looking to keep the fight on the feet at all costs.
Ganz throws a nice outside leg kick.
Madero has his takedown stuffed
and Ganz moves into the clinch.
The crowd cheering loudly, showing their appreciation for the quality fight we're seeing here.
Ganz lands punches inside but they're not really causing much damage.
Madero lands a right hand that snaps the head of Ganz backwards.
And that is the end of the round. The fighters go back to their corners.
Bartolomeu Ganz dominated that round.
The cut man is working on Oaza Madero's cut.
That's the end of the interval. I'm sure that seemed a lot quicker than a minute for our two fighters! Back to the action.
Madero shoots in for a takedown - he's clinched up with Ganz but Ganz pushes him off and we're back to square one.
It looked like Ganz wanted to counter with a hook but didn't fully commit.
Madero shoots and misses
and Ganz counters with a good right hand that lands right on the jaw.
Madero with a lazy takedown attempt
and Ganz connects with a straight left hand counter down the middle.
Bartolomeu Ganz has stuffed three takedown attempts in the round now. That's going to take a lot out of Oaza Madero.
Madero misses the body punch
and Ganz counters with an outside leg kick.
Madero misses with a takedown attempt
and Ganz counters with a good right hand that lands right on the jaw.
The cut above Oaza Madero's eye is starting to cause him problems now.
Madero drives through with a really nice takedown into side control.
Ganz is trying to get back to half guard. He's pushing on Madero's leg. He's managed it. Nice work.
Ganz wants to get back to full guard.
Madero trying to control from Ganz's half guard. Ganz has other ideas though and has regained full guard.
The crowd are loving this. Great action here.
Ganz looking to sweep here. No luck so far.
Madero postures up to throw the ground and pound strikes but they don't connect.
Ganz utilising some decent striking defenses from the guard, preventing the ground and pound.
That's one minute gone in the round.
Madero is fighting to break Ganz's control of his arms but Ganz is doing a good job of controlling the position at the moment.
Madero is looking to work some ground and pound but Ganz has wrist control.
The fighters are starting to perspire pretty heavily.
Madero preventing the sweep.
Bartolomeu Ganz overall seems to be getting the better of the ground position in the fight so far.
Madero landing with the ground and pound.
A big thud reverberates around the arena there as Madero accidentally thumps the mat. Hopefully he's not broken his hand.
Ganz tries to land a sweep but no joy.
Ganz controlling Madero's posture.
Madero postures up in Ganz's guard and throws a big left but Ganz blocks it.
Madero content to strike from guard, landing some decent shots.
Ganz is working an open guard here, looking to improve his position. No doubt that will leave him open to counters but at least he's being more offensive.
Madero trying to control the position from guard on top but Ganz is wriggling around, looking for whatever he can.
That's two minutes gone in the round.
Madero passes easily into side control. Nice work.
You can see the frustration on Ganz's face, being in this tough position on the bottom.
Ganz prevents Madero from improving position.
The ref warns both fighters not to hold the cage as they work up against the meshing.
Madero in side control, just content to control the action for now.
Ganz is looking to work his way out of this bad position but Madero is controlling him well.
Madero cracks Ganz with a big elbow.
Ganz takes a couple of big shots there - the referee warns him that he has to defend himself better.
Madero is looking to take a break and control but Ganz is keeping him honest, looking to work from the bottom.
Ganz knows he needs to get back to his feet asap. He's simply no match for Madero on the ground.
Madero working away.
That's three minutes gone in the round.
Ganz taking a bit of punishment here - Madero scoring with strikes.
Ganz is looking for a sweep.
Madero postures up a little and throws a couple of hammerfists but they don't connect properly.
Madero tries to score with some ground and pound. Ganz controls his posture well this time though and the shots don't do any damage.
Madero working the body and head with strikes.
Ganz takes an elbow right on the bridge of the nose and winces in pain.
Madero misses with an attempted head punch from side control.
The fighters are pressed up against the cage, both looking to find a bit of space to work.
Madero in side control, trying to ground and pound but not landing this time.
Ganz on his back here. We all know that wrestlers don't like being on their back so let's see if Ganz tries to get out of the position.
Madero is looking for a kimura. He might have it! No, Ganz has escaped the position, nice work there.
Madero grinds an elbow into Ganz's temple.
Ganz gives up the full mount - oops, sloppy defensive grappling there!
Madero lands a big elbow.
That's four minutes gone in the round.
Ganz regains half guard.
Madero thows a wild elbow that connects with the canvas.
Ganz wants to control but Madero is keeping busy.
Madero throwing shots but they're hitting the canvas more than the man.
Madero controlling the action here.
Ganz keeping his head moving to avoid the ground and pound.
Ganz is not content to let Madero control the position.
Madero is thwarting Ganz's attempts to control the position.
The crowd thankful this round is nearly over.
Madero seems very keen to just sit and control from half guard but Ganz does not like that idea so much and is remaining active off his back.
And that is the end of the round. The fighters go back to their corners.
Oaza Madero showed his class in that round. I'd imagine he'll take it on all the scorecards.
The cut man is working on Oaza Madero's cut.
That's the end of the round. The referee orders the cornermen out of the cage so we can get back down to business. Let's hear some noise people - this is the final round!
Madero drops down and drives through with a powerful takedown into guard.
Ganz preventing the ground and pound from doing any damage.
Ganz looking for a sweep. Not yet Ganz, not yet.
Ganz wants to stand but Madero is controlling the position.
Ganz has momentary wrist control but Madero slips an elbow through the middle.
Ganz is avoiding any damage by keeping wrist control.
Madero postures up to throw the ground and pound strikes but they don't connect.
Madero pressing down on his opponent's thigh, looking to pass guard. Ganz is keeping the position for now.
Madero lands a nice shot whilst sitting in his opponent's guard.
We've had a slow start to the round here - hopefully the action picks up.
Ganz is working from a closed guard but he's struggling to control his opponent.
Madero pushing down on Ganz's thigh, trying to pass to half guard. He's managed it... Nice work.
Ganz avoiding damage under a succession of punches from Madero.
Madero is trying to control. Ganz wants to improve his position but can't escape this time.
That's one minute gone in the round.
Madero wants to work for an arm triangle but Ganz is really keeping half guard well and defending the submission attempt.
Madero trying to control from half guard but Ganz is working away.
Ganz wants to get back to full guard.
Madero not landing any meaningful shots this time.
Ganz gets back to full guard.
Ganz wants to stand and escape but Madero is having none of it.
Ganz looking to sweep here. No luck so far.
Madero postures up and lands a big shot to Ganz's brow.
Madero trying to control but Ganz is working from the bottom.

Ganz is active off his back here, looking for submissions.
Ganz keeping moving, preventing Madero from controlling successfully.
That's two minutes gone in the round.
The crowd are getting on the fighters' backs, as the pace has dropped off in the last minute or so.
Ganz utilising some decent striking defenses from the guard, preventing the ground and pound.
Ganz keeping moving, preventing Madero from controlling successfully.
Madero might have to switch it up a bit here because his efforts to control Ganz haven't been going to plan, at least at the current moment in time.

The referee has stepped in and called for a break in the action. We'll restart on the feet.
Madero closes the distance and scores a nice trip takedown into half guard. Ganz did well to prevent Madero getting side control.
Madero trying to pass the guard but Ganz defending well.
Ganz trying to control from the bottom.
Ganz is trying to defend against the ground and pound but Madero scores with a couple of nice shots.
Ganz is trying to get back to full guard.
Ganz wants to control but Madero is keeping busy.
Madero takes a deep breath and rests his weight momentarily on top of his opponent, to control the position.
That's three minutes gone in the round.
Madero throwing shots but they're hitting the canvas more than the man.
Madero seems content to maintain position for now, rather than mounting any offense.
Madero has the superior BJJ but he's also working some ground strikes into his gameplan.
The two fighters exchange a few words. I couldn't hear what they were saying but maybe it's more fun if you make it up yourself. Madero connects with a nice short shot to Ganz's temple.
Madero is pressing down on Ganz's thigh, looking to free his foot. Ganz is holding on for now.
Madero is just content to waste time from the top position. Ganz takes advantage of the situation and regains full guard.
Ganz wants to sweep but no luck.
Madero controls the pace of the fight for a moment.
Madero stands up over Ganz, holding his feet. He dives back in and lands a decent shot to the head.
Madero throwing strikes but missing.
Madero loading up with the ground and pound but he's missing more than he's landing in this flurry.
Madero postures up to throw the ground and pound strikes but they don't connect.
That's four minutes gone in the round.
Madero trying to control the position from guard on top but Ganz is wriggling around, looking for whatever he can.
Ganz not looking particularly offensive just at the moment.
Ganz keeping moving, preventing Madero from controlling successfully.
The referee decides to stand the fighters back up.
Oaza Madero seems to be the more aggressive standup fighter in this bout.
Madero misses with a takedown attempt
and Ganz makes him pay by landing a nice hook to the body before moving out of range.
Madero takes a big intake of breath there - he's definitely tired.
Horrible takedown attempt by Madero or perhaps it was just good defense by Ganz, which made it look bad.
Madero shoots for a takedown but Ganz saw that one coming a mile off and avoided it easily.
Bartolomeu Ganz has stuffed three takedown attempts in the round now. That's going to take a lot out of Oaza Madero.
Ganz uses decent footwork to sidestep a right hand from Madero.
Ganz defends well against a solid takedown attempt from Madero.
Ganz swung with a counter right hand that didn't connect.
The crowd thankful this round is nearly over.
No luck with that takedown attempt from Madero.
It looked like Ganz wanted to counter with a hook but didn't fully commit.
Nice uppercut lands for Ganz. That snapped Madero's head back.
And that's the end of the fight!
Oaza Madero comfortably won the final round on my scorecard.
I think Madero has won this one but let's see whether the judges agree with me. Over to the ring announcer for the scorecards.
Ladies and gentlemen, after 3 rounds of action, we go to the scorecards for a decision.
Judge Percy O'Donnell scores the fight 28:29
Judge Timothy Bukovac scores the fight 28:29
Judge Jack Bonds scores the fight 28:29
In favor of your winner, by unanimous decision... Oaza Madero!
|
|
|
|
|
|
|
|
|
|
|
|
|
|
|
|
|
|
|
|
|
|
|
| S |
C
A |
G |
S |
C
B |
G |
|
S |
C |
G |
|
energy
A | B |
|
hype
A | B |
|
pop
A | B |
|
mgr
A | B |
|
FIGHT
RATING
40% |
|
|
|
|
|
|
|
Undercard bout
|
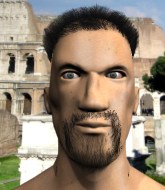
Coming up we have a light heavyweight MMA rules bout between Eomer Greydorian (ranked 2238 p4p, 4084 weight class) and Teriibe Galgo (ranked 281 p4p, 495 weight class). Man, I cannot wait for this one!
 |
|
 |
| 192 cm
21
206
2 - 0 - 0 |
|
196 cm
23
205
2 - 0 - 0 |
Dangerous GnP
Excellent boxer
Insanely flexible |
|
Good wrestler
Excellent boxer
Good gas tank |
|
| |
|
Ladies and gentlemen. This fight is 3 rounds, in the light heavyweight division.
Introducing the fighter to my left, fighting out of the red corner.
With a record of 2 - 0 - 0, fighting out of Helsinki, Eomer Greydorian!
And introducing the fighter to my right, fighting out of the blue corner.
With a record of 2 - 0 - 0, fighting out of Amsterdam, Teriibe Galgo!
The judges for this bout are Percy O'Donnell, Frank Antenori and Don Winkell.
The bell rings for round one and we are underway!
Greydorian throws a big shot that misses.
Galgo gets in close and instigates a clinch.
An uppercut on the inside fails to land for Galgo.
Galgo breaks the clinch and we return to the middle of the mat.
Greydorian shoots in for a takedown. "I don't think so" says Galgo as he avoids it easily.
Galgo closes the distance and clinches.
A hook to the body from Galgo.
Greydorian prevents a body shot from Galgo.
Greydorian tries to pull guard but Galgo holds him up against the cage and eventually Greydorian drops back down to his feet.
Greydorian prevents a body shot from Galgo.
Galgo scores with a shot to the side of Greydorian's head.
Galgo softening up his opponent with strikes, against the cage.
We've had a slow start to the round here - hopefully the action picks up.
Galgo tries to land a shot to the body but it's blocked.
A nice right hand lands inside from Galgo.
Galgo pushes off and circles away, back to the middle of the mat.
Greydorian shoots in for a double leg but Galgo sprawls well. That's going to sap some energy.
That's three failed takedown attempts in the round for Eomer Greydorian. That's going to take a lot out of him.
Galgo closes the distance and clinches.
Wooooo! Give it up for these two warriors! They are putting on a show!
A short right from Galgo.
It looks like Eomer Greydorian has been cut.
Galgo lands a nice uppercut.
That's one minute gone in the round.
Greydorian looking for a takedown.
Galgo tries to work over Greydorian's body with a swooping hook but it only glances the target.
A short right from Galgo on the inside.
Galgo gets through Greydorian's defenses to land a nice punch to the side of the head.
Greydorian tries for a takedown. No joy.
Greydorian has had enough of the clinch and is looking to separate.
Greydorian can't break the clinch.
Galgo scores with a nice hook to the head.
Galgo softening up his opponent with strikes, against the cage.
Galgo tries to throw a body punch but Greydorian avoids it by throwing Galgo back against the cage.
Galgo scores with a nice hook to the head.
A nice right hand lands inside from Galgo.
Greydorian is rocked!
Galgo struggles to land a body shot inside as Greydorian controls his hands.
Greydorian is trying to pull guard but Galgo turns him against the cage and we stay in the clinch.
Greydorian being controlled against the cage.
Greydorian changes levels and goes for a takedown here. Galgo fights it off and pushes away nicely.
Galgo instigates a clinch.
That's two minutes gone in the round.
Greydorian goes for a takedown attempt but Galgo pushes him away and we're back to fighting at a distance.
Greydorian has been working on his balance at HELLsinki, so perhaps that has help him stuff some of the takedown attempts by Galgo.
Greydorian tries to keep at a distance but Galgo has taken the fight into the clinch.
This is a great period of action - very entertaining stuff!
Galgo tries to throw a body punch but Greydorian avoids it by throwing Galgo back against the cage.
Galgo working aggressively here.
Greydorian tries to land a shot to the body but it's blocked.
Greydorian is working for takedown but Galgo is calmly controlling the position for now.
Still in the clinch, Galgo scores with a nice short uppercut.
Greydorian tries to take the fight to the ground by pulling guard but can't manage it.
Greydorian is looking for a takedown.
Still in the clinch, Galgo scores with a nice short uppercut.
Greydorian tries to score a body lock takedown but Galgo shows good agility there to stay on his feet.
Greydorian tries to jump guard but he falls flat on his backside. Galgo smiles and moves away.
Galgo has managed to clinch.
That's three minutes gone in the round.
Galgo lands a shoulder strike that jolts his opponent's head backwards.
Galgo lands with a short head shot on the inside.
Galgo is stalling here.
A short right from Galgo on the inside.
Greydorian tries for a takedown. No joy.
Greydorian is looking for a takedown.
Galgo working on landing some head shots here - that one got through nicely.
Greydorian tries to pull guard but Galgo won't allow it.
Galgo pushes Greydorian back against the cage and lands a hook to the side of the head.
Galgo lands a body shot.
Galgo lands with a left to the head.
Greydorian lands with a good tight uppercut to the head.
Greydorian is trying to pull guard but Galgo has him pressed against the cage.
Galgo is leaning against Greydorian and scores with a nice uppercut to the body.
Greydorian is breathing heavily.
The fans in attendance giving it up for the two fighters, who have really let it all hang out in the last minute or so!
Galgo presses Greydorian against the cage and delivers a mid-strength body shot.
Good body shot from Galgo.
Galgo stalling here - the referee won't stand for too much of that.
That's four minutes gone in the round.
A short uppercut from Galgo.
Galgo presses Greydorian against the cage and delivers a mid-strength body shot.
Galgo lands a left hand.
Galgo lands with a short shot to the head.
Galgo stalling against the cage.
Greydorian wants to push off and get back to the center of the mat but Galgo has him pressed against the cage.
Galgo breaks the clinch and we return to the middle of the mat.
Galgo fakes with an overhand right and moves in to clinch with Greydorian, pushing him back against the cage.
Galgo pushes Greydorian back against the cage and unloads with a body punch.
Galgo working on landing some head shots here - that one got through nicely.
Eomer Greydorian's cut is getting worse.
A short right from Galgo on the inside.
Still in the clinch, Galgo scores with a nice short uppercut.
Greydorian's head jolts backwards as he takes an uppercut right on the button!
The crowd applaud the fighters' efforts here as the round comes to an end.
Galgo scores with a shoulder strike.
Galgo lands a right hand.
Oh Greydorian is still all over the place! His legs are completely gone! Will he be able to recover?!!
Galgo throws a punch but it's blocked by Greydorian.
And that is the end of the round. The fighters go back to their corners.
Teriibe Galgo dominated that round.
The cut man is working on Eomer Greydorian's cut.
The fighters' corners scream their final instructions, as the referee calls time. Here we go, back to the action!
Galgo closes the distance and presses his opponent up against the cage.
Greydorian seems to have got his legs back now.
Galgo lands a hook to the body. It's hard to tell if that hurt Greydorian or not.
Galgo lands with a right to the head.
Galgo drops Greydorian with a big right hand! Galgo charges in looking to finish - Greydorian manages to keep Galgo in his guard and seems to have recovered somewhat.
Greydorian can't do much from the bottom at the moment, as Galgo controls the pace.
Galgo postures up in Greydorian's guard and throws a big left but Greydorian blocks it.
Galgo throws a big right hand that misses.
Galgo in full guard, throwing the ground and pound. No damage this time.
Galgo is intent on slowing down the pace of the fight, simply looking to control.

Galgo stands up from Greydorian's guard - Galgo perhaps looking for a knockout.
Fantastic stuff here - a very entertaining period of action, which has drawn cheers from the crowd.
Galgo connects with a body shot.
That's one minute gone in the round.
Galgo moves into range and clinches up with Greydorian.
Greydorian blocks a punch to the side of the head.
Galgo has been the more effective fighter overall so far.
Galgo breaks the clinch and we're back to striking at distance.
Greydorian dips down and scores with a jab to the body.
Galgo closes the distance and pushes Greydorian back into the cage.
Greydorian is trying to pull guard but Galgo has him pressed against the cage.
Galgo scores with an uppercut up the middle.
Galgo keeps the fight in the clinch, despite Greydorian's efforts to push away.
Galgo working some nice short punches in the clinch.
Galgo scores with a shoulder strike.
Greydorian tries to score a body lock takedown but Galgo shows good agility there to stay on his feet.
Galgo breaks the clinch.
Galgo paws at his opponent with the jab and then lunges in with a straight, right on the button.
Galgo clinches with his opponent.
Wooooo! Give it up for these two warriors! They are putting on a show!
Galgo lands a shoulder strike that jolts his opponent's head backwards.
Galgo working on landing some head shots here - that one got through nicely.
That's two minutes gone in the round.
Galgo lands an uppercut.
We are yet to see a takedown attempt from Galgo in the fight. On paper you would think he is the more dominant ground fighter so let's see if these unusual tactics pay off.
Galgo will no doubt start fighting again in a minute but for now he's just having a little rest, leaning Greydorian up against the cage.
Galgo is leaning against Greydorian and scores with a nice uppercut to the body.
Both fighters are absolutely exhausted here.
Greydorian's head jolts backwards as he takes an uppercut right on the button!
Galgo scores with a shot to the side of Greydorian's head.
A short right hand to the side of the head by Galgo.
Galgo lands with a short punch from the clinch.
Galgo scores with a shot to the side of Greydorian's head.
Eomer Greydorian's cut is bleeding quite badly. He's got to try and protect it.
Greydorian wants to break free. God knows he wants to breaaaak freeee.
Galgo lands an uppercut in the clinch that drops Greydorian to his knees! Galgo keeps firing more shots against his stricken opponent and the referee jumps in to save him!
Ladies and gentlemen, after 2:46 of round 2, we have a winner by way of TKO (Strikes). Teriibe Galgo!
|
|
|
|
|
|
|
|
|
|
|
|
|
|
|
|
|
|
|
|
|
|
|
| S |
C
A |
G |
S |
C
B |
G |
|
S |
C |
G |
|
energy
A | B |
|
hype
A | B |
|
pop
A | B |
|
mgr
A | B |
|
FIGHT
RATING
70% |
|
|
|
|
|
|
|
Undercard bout
|
Coming up we have a featherweight MMA rules bout between Saul Pousa (ranked 3724 p4p, 2347 weight class) and Hoosein Abdul (ranked 360 p4p, 253 weight class). On his way into the cage it seems that Saul Pousa has been attacked by a crazed fan! It looks like it might have been the just bleed guy! Luckily Saul Pousa seems to be OK! I thought that lunatic was in prison!?
 |
|
 |
| 177 cm
25
156
3 - 0 - 0 |
|
180 cm
24
156
4 - 0 - 0 |
BJJ Blue Belt
Brawler
Granite chin |
|
BJJ Purple Belt
Basic striking
Powerful |
|
| |
|
Ladies and gentlemen. This fight is 3 rounds, in the featherweight division.
Introducing the fighter to my left, fighting out of the red corner.
With a record of 3 - 0 - 0, fighting out of London, Saul Pousa!
And introducing the fighter to my right, fighting out of the blue corner.
With a record of 4 - 0 - 0, fighting out of Los Angeles, Hoosein Abdul!
The judges for this bout are Don Winkell, Frank Antenori and Percy O'Donnell.
The bell rings for round one and we are underway!
Pousa throws a body punch but Abdul moves out of range.
Abdul lands with an uppercut that bounces Pousa off the cage and back into range.
Abdul swinging wildly here.
Jab, jab by Abdul - just one landing.
Abdul shoots in and bounces Pousa off the cage to secure the takedown into guard.
Pousa working away from the bottom but not quite defensive enough there because Abdul has passed into half guard!
Pousa slips a foot under and gets full guard. Nice work.
Abdul with a flurry of punches that miss.
Pousa has a loose triangle. He'll be looking to tighten that up but Abdul can see exactly what he's planning and manages to posture up and free himself.
That's one minute gone in the round.
Pousa looking to control but Abdul passes into half guard.
Pousa knows he needs to get back to his feet asap. He's simply no match for Abdul on the ground.
Pousa actively working from the bottom here.
The two fighters exchange a few words. I couldn't hear what they were saying but maybe it's more fun if you make it up yourself. Abdul connects with a nice short shot to Pousa's temple.
Abdul lands strikes from half guard.
Pousa looking for submissions off his back.
Pousa is looking to sinch up a guillotine here but Abdul pulls his head out easily.
Pousa taking some punishment here, with Abdul in his half guard.
That's two minutes gone in the round.
Abdul seems to be taking a bit of a break to think of his next move. He lands a short punch in the meantime.
Abdul lands with an elbow from half guard - that looked like it hurt.
Pousa won't allow Abdul to pass to mount.
Abdul has hold of the far side arm. He's working for the Kimura, can Pousa defend it? Abdul steps over the head and cranks it - Pousa is tapping out! That was textbook stuff right there - nice submission victory for Abdul!
Ladies and gentlemen, after 2:29 of round 1, we have a winner by way of Submission (Kimura). Hoosein Abdul!
Hoosein Abdul made sure to mention his sponsor, Warrior's Way in his post fight interview.
|
|
|
|
|
|
|
|
|
|
|
|
|
|
|
|
|
|
|
|
|
|
|
| S |
C
A |
G |
S |
C
B |
G |
|
S |
C |
G |
|
energy
A | B |
|
hype
A | B |
|
pop
A | B |
|
mgr
A | B |
|
FIGHT
RATING
39% |
|
|
|
|
|
|
|
Undercard bout
|
Coming up we have a light heavyweight MMA rules bout between Milan Ponjevic (ranked 2524 p4p, 3311 weight class) and Masa Saitoh (ranked 320 p4p, 416 weight class). Well, I have no idea who's going to take this one!
 |
|
 |
| 191 cm
19
215
2 - 0 - 0 |
|
182 cm
20
205
2 - 1 - 0 |
Powerful takedowns
Basic striking
Very strong |
|
Good wrestler
Decent boxing
Heavy handed |
|
| |
|
Ladies and gentlemen. This fight is 3 rounds, in the light heavyweight division.
Introducing the fighter to my left, fighting out of the red corner.
With a record of 2 - 0 - 0, fighting out of Los Angeles, Milan Ponjevic!
And introducing the fighter to my right, fighting out of the blue corner.
With a record of 2 - 1 - 0, fighting out of St Petersburg, Masa Saitoh!
The judges for this bout are Timothy Bukovac, Percy O'Donnell and Frank Antenori.
The bell rings for round one and we are underway!
Saitoh is moving around nicely and scores here with a single head shot.
Saitoh comes forward and lands a shot to the body, then darts back out of range.
Saitoh looks to score with a jab to the body but Ponjevic is just out of range.
Ponjevic takes a shot to the body in his stride.
Saitoh moves away from the strike by Ponjevic.
Saitoh lands a jab to Ponjevic's midsection.
Saitoh stuffs the takedown attempt from Ponjevic. Ponjevic gets slowly back to his feet.
Ponjevic fails with a rather predictable takedown attempt.
Ponjevic misses with a takedown attempt
and Saitoh counters nicely by changing levels and landing a hook to the body.
That's three failed takedown attempts in the round for Milan Ponjevic. That's going to take a lot out of him.
Ponjevic shoots in for a takedown. He's persisting with it as Saitoh sprawls well. Saitoh wins this battle and keeps the fight standing. Ponjevic gets slowly back to his feet.
A countering left hand to the body from Saitoh misses.
Ponjevic with a poor takedown
and Saitoh counters with a nice body shot.
Saitoh lands a jab to Ponjevic's midsection.
Saitoh is throwing a lot of body shots here, looking to wear down Ponjevic rather than just go for the knockout.
This is a great period of action - very entertaining stuff!
Ponjevic throws a looping overhand right but Saitoh ducks down to avoid it.
The crowd cheers as Saitoh lands an impressive looking overhand right. Ponjevic doesn't seem phased though.
Nice uppercut there from Saitoh.
That's one minute gone in the round.
Ponjevic shoots in for a takedown. "Ole!" shouts Saitoh as he jumps to the side.
Saitoh scores with a jab to the body.
Ponjevic ducks right into an uppercut from Saitoh.
A jab lands there for Saitoh.
No luck with that takedown attempt from Ponjevic.

Saitoh tries to sprawl but Ponjevic drives through with a takedown into half guard.
The fighters are pressed up against the cage, both looking to find a bit of space to work.
Ponjevic is looking for an arm triangle, whilst trying to pass to side control. Saitoh doesn't seem that keen to cooperate though. No luck this time Ponjevic.
Ponjevic definitely looks more muscular than last time we saw him fight.
Saitoh is doing well to control the position and prevent Ponjevic from advancing to side control.
Saitoh tries to get to full guard but Ponjevic has control of the leg.
That's two minutes gone in the round.
Ponjevic in half guard on the top. He's looking for a kimura... He's got it locked and he's managed to free his trapped foot. Saitoh tries to escape but it's on too tight and he has to tap! Great BJJ skills there from Ponjevic!
Ladies and gentlemen, after 2:24 of round 1, we have a winner by way of Submission (Kimura). Milan Ponjevic!
|
|
|
|
|
|
|
|
|
|
|
|
|
|
|
|
|
|
|
|
|
|
|
| S |
C
A |
G |
S |
C
B |
G |
|
S |
C |
G |
|
energy
A | B |
|
hype
A | B |
|
pop
A | B |
|
mgr
A | B |
|
FIGHT
RATING
58% |
|
|
|
|
|
|
|
Co-main event
|
Coming up we have a welterweight MMA rules bout between Suga Timmons (ranked 6043 p4p, 1808 weight class) and Toe Jam (ranked 575 p4p, 242 weight class). Over to our ring announcer for the fighter introductions!
 |
|
 |
| 176 cm
20
176
0 - 0 - 0 |
|
175 cm
20
175
5 - 1 - 0 |
BJJ Blue Belt
Excellent boxer
Cardio machine |
|
BJJ White Belt
World class boxer
Granite chin |
|
| |
|
Ladies and gentlemen. This fight is 3 rounds, in the welterweight division.
Introducing the fighter to my left, fighting out of the red corner.
With a record of 0 - 0 - 0, fighting out of Tokyo, Suga Timmons!
And introducing the fighter to my right, fighting out of the blue corner.
With a record of 5 - 1 - 0, fighting out of Las Vegas, Toe Jam!
The judges for this bout are Frank Antenori, Percy O'Donnell and Don Winkell.
The bell rings for round one and we are underway!
Timmons uses good head movement to avoid the hook from Jam.
Jam swings widly with a right hand
and Jam takes a counter punch right on the button for his troubles.
Jam fakes a head punch and goes low to the body. Nicely done.
Jam looks more muscular than last time we saw him. He must have been on the weights.
Jam with a body punch. A glancing blow.
Jam throws a hook to the body but it doesn't connect.
Timmons moves out of range as Jam strikes.
Jam throws a right hand that misses
and Timmons counters with a stiff right hand.
Jam throws an overhand right that lands on Timmons's shoulder, as Timmons tries to avoid the shot.
Jam jabs at Timmons's body.
Jam is the aggressor but that punch slipped nicely by Timmons.
Timmons was looking to counter that last move with a shot to the body but he didn't commit.
Timmons takes one to the side of the head.
Jam ducks low and lands a nice hook to the body of his opponent.
That's one minute gone in the round.
Timmons steps to the side to avoid the strikes from Jam.
Jam connects with a lovely right hand, straight down the pipe.
Timmons displays some good footwork, moving neatly out of range as Jam throws out the jab.
A little feinted left hand from Timmons on the counter but he doesn't commit to it.
Jam throws an off balance right hand
and Timmons counters with a left and a right that stings Jam.
Jam throws an off balance right hand
and Timmons counters with a good right hand that lands right on the jaw.
Jam misses with a left hand
and Timmons counters with a straight right hand.
Jam connects with a single shot there.
It looks like Suga Timmons has been cut.
Jam thows a left - swing and a miss!
Jam misses with a lunging right hand
and Timmons counters with a straight punch to the midsection.
Timmons takes a solid shot to the body. That one hurt him but he's trying not to show it.
Toe Jam seems to be the more aggressive standup fighter in this bout.
This has been an exciting period of action!
Jam pushing out the jab but it's not landing.
Jam tries to land with a swinging hook to the body but Timmons was well out of range. Poor timing from Jam.
It looked like Timmons wanted to counter with a hook but didn't fully commit.
That's two minutes gone in the round.
Jam throws a poor cross that misses
and Timmons counters with a nice jab to the body that keeps Jam thinking.
Jam misses with a shot to the body
enabling Timmons to counter with a crisp jab.
Jam connects with a body shot that sends Timmons's belly button to the back.
Jam throws a jab but it's blocked by Timmons.
Timmons swung with a counter right hand that didn't connect.
Jam works Timmons's body with a nice hook.
Timmons steps to the side to avoid the strikes from Jam.
Jam misses with a wild combination.
Timmons swung with a counter punch to the body but it didn't connect.
Jam lands a head shot.
Jam misses with a shot to the body
and Timmons counters with a nice uppercut.
That's three minutes gone in the round.
Jam changes levels and scores with a jab to the body.
Jam throws a series of punches but Timmons moves out of range.
Timmons moves out of range of the strikes.
It looked like Timmons wanted to counter with a hook but didn't fully commit.
Jam lands a slapping body shot.
Jam lands a really nice looking cross but Timmons seems unphased.
Timmons's hands are dropping dangerously low here and Jam connects clean with a right hook that sends him down to one knee! Timmons scrambles back to his feet.
Nice defenses there by Timmons.
A little feinted left hand from Timmons on the counter but he doesn't commit to it.
Timmons takes one to the side of the head.
Jam misses with a right hand
and Timmons counters with a straight right hand.
Jam throws an overhand right that lands on Timmons's shoulder, as Timmons tries to avoid the shot.
Timmons is looking to counter punch.
The fighters circling - Jam throws out the jab but it was never going to land.
Timmons was looking to counter that move with a punch but didn't quite pull the trigger.
That's four minutes gone in the round.
Timmons steps to the side to avoid the strikes from Jam.
Timmons throwing a counter right hand but Jam manages to avoid it.
The crowd are loving this. Great action here.
Jam misses with a looping right.
Timmons appears to be looking for a big counter.
Jam misses with a hook.
Timmons avoids the body shot from Jam.
Jam rushes in with a sloppy looking punch
and Timmons counters with a quick right hand to the jaw.
Timmons ducks under an overhand right and circles away with a smile on his face.
Jam looks to score with a jab to the body but Timmons is just out of range.
It looked like Timmons was trying to counter with a body shot coming off that last attack from Jam.
Jam misses with an uppercut
and Timmons connects with a straight left hand counter down the middle.
Boom, another hit is landed. "You're gunna get knocked out" taunts Jam, as that shot connected.
Timmons is pinned up against the cage taking some big shots here. The referee is looking closely deciding whether he should stop the fight.
Nice shot lands for Jam.
And that is the end of the round. The fighters go back to their corners.
Toe Jam dominated that round.
The cut man is working on Suga Timmons's cut.
The fighters get back to their feet, the hooter sounds and we're back to the action!
Jam slips in close and lands a nice hook before moving back out of range.
Timmons ducks under a wild hook from Jam.
Jam throws a left and a right that both miss
and Timmons connects with a straight left hand counter down the middle.
Jam throws a left and a right that both miss
and Timmons cracks him with a counter punch right on the button.
Timmons avoids the body shot from Jam.
Timmons is looking for a counter combo.
Jam misses the jab.
Jam throws a jab but it's blocked by Timmons.
Jam misses with a looping right.
Toe Jam seems to be getting the better of the standup.
We've had a slow start to the round here - hopefully the action picks up.
Jam throws a lazy right hand but Timmons sees it coming a mile off and sidesteps it easily.
A little feinted left hand from Timmons on the counter but he doesn't commit to it.
Timmons is really head hunting here, hardly looking to strike to the body at all.
Timmons avoids a lazy jab quite easily.
Jam lands with an uppercut that bounces Timmons off the cage and back into range.
Timmons uses good footwork to avoid the strikes from Jam.
Timmons was looking to counter that move with a punch but didn't quite pull the trigger.
That's one minute gone in the round.
Timmons avoids the body shot from Jam.
Jam looks to score with a jab to the body but Timmons is just out of range.
Jam punishes Timmons's body with a nice straight punch.
Timmons ducks under a wild hook from Jam.
An attempted straight right counter from Timmons misses the target.
Timmons moves out of range of the strikes.
It looked like Timmons was trying to counter with a body shot coming off that last attack from Jam.
Timmons slips a straight right by Jam.
Timmons throwing a counter right hand but Jam manages to avoid it.
Timmons moves away from the strike by Jam.
Timmons throwing a counter right hand but Jam manages to avoid it.
Jam throws out a token jab with nothing on it.
Jam throws the left hand but Timmons avoids the punch easily.
Jam misses with a telegraphed body shot
and Jam takes a counter punch right on the button for his troubles.
Jam throws an overhand right that lands on Timmons's shoulder, as Timmons tries to avoid the shot.
Timmons seem to be loading up, looking for a big counter.
That's two minutes gone in the round.
Timmons takes a hook to the side of the head. I wonder if that's got his ears ringing.
Jam missing with a left hand there. Timmons was out of range so wasted energy throwing that one.
Timmons swung with a counter right hand that didn't connect.
Timmons tries to move into range but Jam moves to the side and lands with a nice right hand.
The fighters circling - Jam throws out the jab but it was never going to land.
A quick step to the side and Timmons tries to counter with a shot to the body but it doesn't connect.
Jam lands a vicious shot with the stealth of a sniper and the strength of a viper. Are vipers that strong? I can think of lots of things that are stronger than a viper - not many rhyme with sniper though.
We've seen a great period of action over the last minute or so - credit to both fighters for going all out!
Timmons moves out of range as Jam strikes.
Timmons was looking to counter that last move with a shot to the body but he didn't commit.
Timmons moves away from the strike by Jam.
An attempted straight right counter from Timmons misses the target.
Jam misses with a straight left.
Timmons swung with a counter right hand that didn't connect.
Jam throws a hard body shot but it just misses.
As Jam looks to move away, Timmons throws a big counter combo but Jam just gets out of the way.
This entire fight has taken place on the feet so far and you wonder whether Timmons might be better served trying to take this one to the ground because he's losing the standup battle so far.
Jam throws an uppercut from half a mile away. Timmons sees it coming and avoids it easily.
Jam misses with a straight left.
That's three minutes gone in the round.
A slow jab from Jam misses its intended target.
Jam jabbing away but nothing is landing.
Timmons bobs and weaves well there to avoid the strikes.
Timmons is looking for a counter combo.
Jam ducks low and lands a nice hook to the body of his opponent.
Jam throws a hard body shot but it just misses.
Jam swings for the body but Timmons moves out of range.
Jam misses with an uppercut. Timmons saw that one coming.
Nice body punch from Jam.
Jam throws a jab when Timmons was well out of range.
Jam misses with a straight left.
Jam jabbing away but nothing is landing.
It looked like Timmons was looking amped, ready to throw a big counter but didn't commit.
That's four minutes gone in the round.
Timmons has his head slapped from side to side by a 3 punch combination. That must have hurt him.
Jam misses with a lunging right hand
enabling Timmons to counter with a crisp jab.
Jam misses with a right hand
and Timmons counters nicely by changing levels and landing a hook to the body.
The fans in attendance giving it up for the two fighters, who have really let it all hang out in the last minute or so!
Timmons doesn't react quick enough there as he takes a shot to the body.
Timmons takes an uppercut right on the button but keeps his composure.
Timmons keeping a good distance there, avoiding the body shot.
Nice jab there from Jam.
Timmons steps to the side to avoid the strikes from Jam.
Timmons appears to be looking for a counter punch to the body.
Timmons defending well as Jam loads up on a big left hand.
Jam lands with a hook. Timmons tried to avoid it but it clipped the top of his head.
Jam throws an overhand right that lands on Timmons's shoulder, as Timmons tries to avoid the shot.
It looked like Timmons was trying to counter with a body shot coming off that last attack from Jam.
And that is the end of the round. The fighters go back to their corners.
Toe Jam showed his class in that round. I'd imagine he'll take it on all the scorecards.
The cut man is working on Suga Timmons's cut.
The minute break is over - no more time for sponges and pep talks - back to the action! And we move into the final round!
Jam misses with a left hand
and Timmons counters with a shot to the ribs. That looked like it hurt.
Jam ducks down and throws a hook to the body but Timmons moves away.
It looked like Timmons wanted to counter with a hook but didn't fully commit.
Jam throws a monster uppercut resembling something out of street fighter but it doesn't land.
It looked like Timmons was trying to counter with a body shot coming off that last attack from Jam.
Jam jabs Timmons to the body, keeping him at a distance.
Timmons walks into a stiff left hand from Jam.
Jam misses with the combination.
It looked like Timmons wanted to counter with a hook but didn't fully commit.
Timmons uses decent footwork to sidestep a right hand from Jam.
We've had a slow start to the round here - hopefully the action picks up.
Timmons slips under a jab.
Jam uses good footwork to get in and out, landing a nice hook.
Timmons slips under a jab from Jam.
That's one minute gone in the round.
Jam throws a hook to the body but it doesn't connect.
A little feinted left hand from Timmons on the counter but he doesn't commit to it.
Timmons avoids a lazy jab quite easily.
Timmons swung with a counter right hand that didn't connect.
Jam misses with a hook
and Timmons makes him pay by landing a nice hook to the body before moving out of range.
Jam throws a jab when Timmons was well out of range.
Timmons appears to be looking for a counter punch to the body.
Timmons avoids a lazy jab quite easily.
It looked like Timmons was looking amped, ready to throw a big counter but didn't commit.
Jam swings widly with a right hand
and Timmons counters with a one-two to the body.
Jam swings wildly with a right hand that was never going to find it's target.
Jam misses with a lunging right hand
and Timmons cracks him with a counter punch right on the button.
Jam throws a shot from downtown. Timmons moves away and avoids it.
Jam misses with a left hand
and Timmons counters with a shot to the ribs. That looked like it hurt.
Jam throws a lazy uppercut
and Timmons counters with a quick right hand to the jaw.
Toe Jam is fighting for a decision - hopefully he's judged it right and he's actually winning the fight.
That's two minutes gone in the round.
Jam misses with an uppercut
and Timmons connects with a straight left hand counter down the middle.
Wooooo! Give it up for these two warriors! They are putting on a show!
Timmons displays some good footwork, moving neatly out of range as Jam throws out the jab.
Timmons swung with a counter right hand that didn't connect.
Good exchange - Jam coming out on top.
Jam takes a step towards his opponent and connects with a left hand, before circling away.
Jam misses with a double jab.
Jam keeps his opponent at a distance with a nice jab.
Nice defenses there by Timmons.
Jam is the aggressor but that punch slipped nicely by Timmons.
Jam misses the body punch
and Timmons counters with a good right hand that lands right on the jaw.
Jam wings a very wild body shot but it does the job and lands to the midsection.
Jam throws an uppercut from half a mile away. Timmons sees it coming and avoids it easily.
It looked like Timmons wanted to counter with a hook but didn't fully commit.
That's three minutes gone in the round.
Jam scores with a straight right hand, right through his opponent's guard.
Jam moves into range and throws a combination. A nice jab followed by a hook to the body.
Jam throws a lazy right hand but Timmons sees it coming a mile off and sidesteps it easily.
Timmons swung with a counter punch to the body but it didn't connect.
Timmons looks like he's developed a pretty tasty lump over his left eye. He'll need to avoid taking much more damage to that.
Jam throws out a loose jab but Timmons uses good head movement to avoid it.
Timmons is looking to counter punch.
Timmons slips a jab and a cross from Jam.
A counter left hand to the body from Timmons misses its target.
Timmons takes a hook to the side of the head. I wonder if that's got his ears ringing.
Good shot there by Jam.
Jam loads up on a big right hand but Timmons slips the punch.
A little feinted left hand from Timmons on the counter but he doesn't commit to it.
Jam lands a powerful looking uppercut that connected with his opponent's jaw.
Jam jabbing away but nothing is landing.
Jam misses with a straight right.
An attempted straight right counter from Timmons misses the target.
That's four minutes gone in the round.
Jam misses with an uppercut
letting Timmons counter with a right hand.
Timmons takes a body punch that cleary hurt but he's trying not to show any weakness.
This is a great period of action - very entertaining stuff!
Jam lands a body shot.
Jam jabbing away but nothing is landing.
Jam misses with the combination.
Timmons staying out of range there.
Jam scores with a three punch combo!
Jam throws out a loose jab but Timmons uses good head movement to avoid it.
Jam moving in and out of range nicely, whilst landing the scoring shot.
And that's the end of the fight!
Toe Jam comfortably won the final round on my scorecard.
Well Jam has outworked and out performed his opponent in all aspects of the game today. He was simply too good and the decision should be no more than a formality. Over to the ring announcer for the scorecards.
Ladies and gentlemen, after 3 rounds of action, we go to the scorecards for a decision.
Judge Frank Antenori scores the fight 27:30
Judge Percy O'Donnell scores the fight 27:30
Judge Don Winkell scores the fight 27:30
In favor of your winner, by unanimous decision... Toe Jam!
Toe Jam bigged himself up after the win. The crowd seemed to love it.
|
|
|
|
|
|
|
|
|
|
|
|
|
|
|
|
|
|
|
|
|
|
|
| S |
C
A |
G |
S |
C
B |
G |
|
S |
C |
G |
|
energy
A | B |
|
hype
A | B |
|
pop
A | B |
|
mgr
A | B |
|
FIGHT
RATING
64% |
|
|
|
|
|
|
|
Main event
|
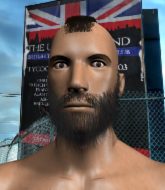
Coming up we have a welterweight MMA rules bout between Kazuki Takeda (ranked 584 p4p, 1383 weight class) and Fredrik White (ranked 86 p4p, 189 weight class). Fingers crossed for an exciting fight - I'm sure both fighters are looking for a nice under the table bonus!
 |
|
 |
| 185 cm
25
184
13 - 5 - 0 |
|
185 cm
27
180
8 - 0 - 0 |
Abu Dhabi Champ
Excellent boxer
Very quick |
|
BJJ White Belt
Excellent MT
Granite chin |
|
| |
|
Ladies and gentlemen. This fight is 3 rounds, in the welterweight division.
Introducing the fighter to my left, fighting out of the red corner.
With a record of 13 - 5 - 0, fighting out of Tokyo, Kazuki Takeda!
And introducing the fighter to my right, fighting out of the blue corner.
With a record of 8 - 0 - 0, fighting out of New York, Fredrik White!
The judges for this bout are Timothy Bukovac, Frank Antenori and Percy O'Donnell.
The bell rings for round one and we are underway!
White moves in looking to clinch but Takeda pushes him off.
Takeda drives through with a really nice takedown into side control.
Takeda is working to tighten his grip on White's neck. He's isolated an arm and is working for an arm triangle. White has recognised the danger and is trying to turn with the submission but Takeda is really squeezing tight and eventually White passes out! Takeda breaks the hold and jumps onto the cage to celebrate! Submission of the night, I'd say!
Ladies and gentlemen, after 0:25 of round 1, we have a winner by way of Submission (Arm Triangle). Kazuki Takeda!
Our winner, Kazuki Takeda, made sure he spent some time buttering up the crowd during his post fight interview, which will no doubt bring him a few more fans.
|
|
|
|
|
|
|
|
|
|
|
|
|
|
|
|
|
|
|
|
|
|
|
| S |
C
A |
G |
S |
C
B |
G |
|
S |
C |
G |
|
energy
A | B |
|
hype
A | B |
|
pop
A | B |
|
mgr
A | B |
|
FIGHT
RATING
100% |
|
|
|
|
|
|
|
|
|
|
