|
TWGC 36 (205lbs, D3): Tokyo Qualifier - Round 2 PBP Commentary |
Co-main event
|
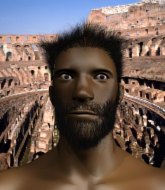
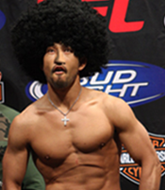
This TWGC bout is 1 fifteen minute round in the light heavyweight division. Introducing today's competitors. In the red corner, competing out of Montreal, with a TWGC record of 1 wins and 0 losses; Hole Reemer! And in the blue corner, fighting out of Rio de Janeiro, with a TWGC record of 1 wins and 0 losses; Jxjdjxjxjxx Bxjxjxndjd!
The judges for this bout are Kenichi Hosakawa, Shigeki Fujiwara and Taro Takaoka.
The fighters bow as they face eachother in the middle of the mat and we are under way.
Bxjxjxndjd shoots in for a takedown. He's persisting with it as Reemer sprawls well. Reemer wins this battle and keeps the fight standing. Bxjxjxndjd gets slowly back to his feet.
Reemer wants to take advantage of his opponent's missed offense by moving into the clinch.
Bxjxjxndjd tries to clinch but fails miserably #TD#
so Reemer counters with a double leg into guard. Good agility. Score +2 for takedown into guard / half guard: Reemer (2) vs (0) Bxjxjxndjd
Bxjxjxndjd keeping full guard, as Reemer tries to pass. #SUB2#
Bxjxjxndjd working for a triangle but Reemer defends it easily.
We've had a slow start to the round here - hopefully the action picks up.
Reemer sitting in guard here, content to control. #T1#
Bxjxjxndjd looking to hit a scissor sweep but Reemer is one step ahead there.
Reemer controls the pace of the fight for a moment.
Bxjxjxndjd is trying to control the position from the bottom.
Reemer slips nicely into half guard.
Bxjxjxndjd wants to get back to full guard but Reemer has mounted him! Score +3 for passing guard: Reemer (5) vs (0) Bxjxjxndjd
Bxjxjxndjd wants to control but Reemer is having none of it.#T2#
Bxjxjxndjd regains half guard.
Reemer wants to pass the guard but Bxjxjxndjd is defending well.
Reemer is just sitting in half guard, waiting for something to happen.
Bxjxjxndjd manages to get to full guard.
#T3#
Reemer stays in close to Bxjxjxndjd's body and controls the position.
Reemer tries to free his leg and advance position but Bxjxjxndjd is retaining full guard.
Reemer controlling from the top position.
Bxjxjxndjd wants to control the position but Reemer says "no thanks buddy" and passes to half guard. #T4#
Bxjxjxndjd wants to improve his position but Reemer is controlling well.
Reemer stalling.
Reemer passes the half guard and he's now in mount! Big trouble for Bxjxjxndjd! Score +3 for passing guard: Reemer (8) vs (0) Bxjxjxndjd
Reemer controlling from mount.
Bxjxjxndjd is writhing around trying to get back to his feet. #T5#
Bxjxjxndjd stops Reemer from taking his back. Still, being mounted isn't any better.
Bxjxjxndjd wants to hold on but Reemer pushes him away.
Reemer wants to take his opponent's back but Bxjxjxndjd doesn't allow it.
Reemer sitting in mount, just looking to control for the moment.
Reemer prevents Bxjxjxndjd from getting the reversal.#T6#
Reemer tucks in and makes sure he doesn't lose the dominant position.
Reemer moves to take his opponent's back. Score +3 for taking back: Reemer (11) vs (0) Bxjxjxndjd
Bxjxjxndjd manages to reverse the position and now he's in Reemer's guard. Nice work there by Bxjxjxndjd.
Score +2 for sweep to guard / half guard: Reemer (11) vs (2) Bxjxjxndjd
Bxjxjxndjd tries to free his leg and advance position but Reemer is retaining full guard. #T7#
Reemer is working an open guard here, looking to improve his position. No doubt that will leave him open to counters but at least he's being more offensive.
Reemer keeping moving, preventing Bxjxjxndjd from controlling successfully.
Reemer is adopting a defensive guard.
Bxjxjxndjd stands up and looks to throw the legs aside to pass to side control. Reemer swivels though and keeps the full guard.
Bxjxjxndjd wants to control from the top but Reemer keeps moving. #T8#
Reemer is avoiding any damage by keeping wrist control.
Reemer has controlled the position for a good 20 seconds, which will no doubt be starting to frustrate his opponent.
Bxjxjxndjd trying to control but Reemer is working from the bottom.
Reemer manages to sweep nicely, so he's now on top. Bxjxjxndjd manages to get himself to full guard.
Score +2 for sweep to guard / half guard: Reemer (13) vs (2) Bxjxjxndjd
Reemer is intent on slowing down the pace of the fight, simply looking to control.#T9#
Reemer wants to pass the guard but Bxjxjxndjd is keeping the position.#SUB2#
Bxjxjxndjd is looking for a triangle but Reemer pushes his legs off easily.
Reemer is intent on slowing down the pace of the fight, simply looking to control.#SUB2#
Bxjxjxndjd looks to be working for a triangle here. Oh, it looks like he might have it! Reemer has picked Bxjxjxndjd up and slammed him! Bxjxjxndjd can't keep hold of the triangle and Reemer manages to pass to side control! Score +3 for passing guard: Reemer (16) vs (2) Bxjxjxndjd
Bxjxjxndjd is trying to get back to half guard. He's pushing on Reemer's leg. He's managed it. Nice work.
Reemer controlling the action here.#T10#
Reemer tries to pass the half guard into mount. Bxjxjxndjd knows what he's doing though and prevents the attempt.
The referee calls for the fighters to work.
Reemer is working hard to pass the guard. He's done it - he's now in full mount! Trouble for Bxjxjxndjd! Score +3 for passing guard: Reemer (19) vs (2) Bxjxjxndjd
The fighters are pressed up against the cage, both looking to find a bit of space to work.#T11#
Reemer controlling his opponent.
The ref warns both fighters not to hold the cage as they work up against the meshing.
Reemer is dominating on the ground here - he's now on his opponent's back, looking to sink in the hooks. Bxjxjxndjd is in real trouble.
Score +3 for taking back: Reemer (22) vs (2) Bxjxjxndjd
Reemer trying to secure his dominant position for a moment - making sure Bxjxjxndjd doesn't escape. #T12#
Reemer's ground tactics aren't going to win him many fans. Let's hope he's got fireworks for us if he gets back to his feet because he's not doing much on the ground.#T13#
Bxjxjxndjd rolls, trying to escape but Reemer keeps control of the position.
Reemer has good solid back control here. #T14#
You can see the frustration on Bxjxjxndjd's face
He knows he is in trouble unless he improves his position sooner rather than later.
Bxjxjxndjd is still trying to improve position.
Bxjxjxndjd trying to control the hands but Reemer won't let him.
Bxjxjxndjd tries to roll but Reemer sticks to his back.
Boooooooooooooooooooo!!! God, this has been a terrible round. Come on you two, sort yourselves out!
Reemer keeps control of the position easily here as Bxjxjxndjd tries to buck him off.
I really don't envy Bxjxjxndjd right now.
And that's the end of the fight!
Reemer takes the fight on points by 22 to 2.
Hole Reemer tried to hype himself up post fight but didn't word it too well and it ended up with him sounding like a bit of a tool. |
|
|
|
Main event
|
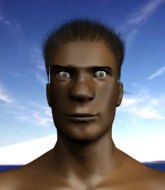
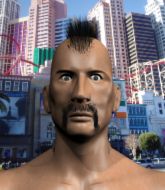
This TWGC bout is 1 fifteen minute round in the light heavyweight division. Introducing today's competitors. In the red corner, competing out of Tokyo, with a TWGC record of 1 wins and 0 losses; Minato Tokugawa! And in the blue corner, fighting out of Tokyo, with a TWGC record of 1 wins and 0 losses; Kataro Kimura!
The judges for this bout are Hirohito Nitta, Sosuke Kotani and Yuuki Gou.
Let's get this grappling contest under way! Who will be victorious?#CL#
Tokugawa clinches up against the cage.
Kimura is trying to drag Tokugawa to the mat but Tokugawa just about manages to keep his footing. He used the cage to his advantage there.
Kimura is looking for a takedown up against the cage. Tokugawa gets underhooks though and prevents the takedown attempt.#TD#
Tokugawa pulls guard successfully.
Tokugawa seems keen to control Kimura's posture.
Tokugawa continues to stall.
We've had a slow start to the round here - hopefully the action picks up.
Tokugawa wants to sweep but no luck.
The fighters are pressed up against the cage, both looking to find a bit of space to work.
Kimura is fighting to break Tokugawa's control of his arms but Tokugawa is doing a good job of controlling the position at the moment.
Tokugawa's ground tactics aren't going to win him many fans. Let's hope he's got fireworks for us if he gets back to his feet because he's not doing much on the ground.#T1#
Tokugawa lands a beautiful sweep and he's now moved into his opponent's guard. Score +2 for sweep to guard / half guard: Tokugawa (2) vs (0) Kimura
Tokugawa looking to control the position here, rather than advance.
Tokugawa looking to pass the guard. #T2#
Kimura looking to hit a scissor sweep but Tokugawa is one step ahead there.
Tokugawa sneaks a leg through and gets to half guard. That was like a knife through butter how easily he passed Kimura's guard.
Kimura is positioning himself well to prevent Tokugawa advancing to mount.
Tokugawa is just sitting in half guard, waiting for something to happen.
Further stalling from Tokugawa.
Tokugawa will need to keep those long limbs tucked in whilst he's on the ground, to prevent any submissions.
Kimura is looking to control Tokugawa's leg but it's slowly edging free. Can Kimura avoid being mounted?
Still in half guard, Tokugawa seems content to control.
Tokugawa has controlled the position for a good 20 seconds, which will no doubt be starting to frustrate his opponent.
The ref warns both fighters not to hold the cage as they work up against the meshing.#T3#
Kimura trying to control here.
Kimura is looking to regain full guard. Not this time though.
Tokugawa is working hard to pass the guard. He's done it - he's now in full mount! Trouble for Kimura! Score +3 for passing guard: Tokugawa (5) vs (0) Kimura
Kimura tries to get back to half guard but can't.
Tokugawa tucks in and makes sure he doesn't lose the dominant position.
Kimura slips a leg in and gets back to half guard.#T4#
Tokugawa controlling the action here.
Kimura is trying is best to control the position here.
Tokugawa not doing much here.
Tokugawa passes the half guard and he's now in mount! Big trouble for Kimura! Score +3 for passing guard: Tokugawa (8) vs (0) Kimura
Tokugawa tucks in and makes sure he doesn't lose the dominant position.
Tokugawa tries to control but Kimura wriggling away.
Kimura is trying to escape the mount.
We get told so often about how wrestlers don't like to be on their backs. Let's see if Kimura can do anything to dispel that myth.
Tokugawa content just to control the position here. #T5#
Kimura gets back to half guard.
Kimura trying to control here.
Kimura won't allow Tokugawa to pass to mount.
Tokugawa prevents Kimura from improving his position.
Tokugawa is just sitting in half guard, waiting for something to happen.
Tokugawa is thwarting Kimura's attempts to control the position.
Well, if Tokugawa is going to just lie there, perhaps we should talk about what we're having for dinner tonight
I'm having a ham and pineapple pizza
Yum. Can't wait.
#T6#
More hug and hope from Tokugawa.
The fighters are battling for position here. Kimura manages to regain full guard. Nice work.
Tokugawa controls from within his opponent's guard.
Kimura trying to keep a closed guard but Tokugawa is proving a slippery customer.
Tokugawa won't allow Kimura to sweep him here.
Kimura wants to control here, rather than go for any submissions from the bottom. At least for now.
Tokugawa is taking a break and basically stalling. The referee will not allow him to do that for long.
Kimura not looking particularly offensive just at the moment.
#T7#
Tokugawa passes easily into side control. Nice work. Score +3 for passing guard: Tokugawa (11) vs (0) Kimura
Tokugawa controls the position.
Tokugawa working away.
Kimura gives up the full mount - oops, sloppy defensive grappling there! Score +2 for reaching mount: Tokugawa (13) vs (0) Kimura
Kimura is in all sorts of trouble here.
Tokugawa looking to control and managing it successfully.
Tokugawa looking to control but Kimura is working nicely, looking to advance position himself.
Kimura is writhing around trying to get back to his feet.
Tokugawa controlling his opponent. #T8#
Kimura keeping his composure momentarily, calmly looking to get back to half guard.
Tokugawa takes a little breather and maintains the position. The referee will be looking for him to stay active from such a dominant position though.
Kimura tries to hold on but Tokugawa postures up.
Kimura is looking to get to half guard.
Kimura wants to hold on but Tokugawa pushes him away.#T9#
Tokugawa controlling from mount.
If it seems like I'm not saying a lot, it's just because Tokugawa is stinking the place up with his stalling.
Kimura really trying hard to get back to half guard here.
Tokugawa sitting in mount, just looking to control for the moment.
This is a sustained period of stalling by Tokugawa.#T10#
Tokugawa continues to hold on tight.
Kimura is in all sorts of trouble here.
Kimura wants to hold on but Tokugawa pushes him away.
Kimura is looking to improve his position but Tokugawa isn't that keen on the idea.
Tokugawa takes a little breather and maintains the position. The referee will be looking for him to stay active from such a dominant position though.
Kimura is wriggling around trying to escape.
Tokugawa sitting in mount, just looking to control for the moment. #T11#
Tokugawa tries to control but Kimura wriggling away.
Tokugawa controlling his opponent.
Kimura tries to hold on but Tokugawa pushes him away.
Kimura is trying to escape the mount.
Tokugawa sitting in mount, just looking to control for the moment. #T12#
Kimura working to try and regain half guard.
Tokugawa content just to control the position here.
Kimura is working to get back to half guard.
#T13#
Tokugawa controlling from mount.
Kimura is wriggling around trying to escape.
Tokugawa takes a little breather and maintains the position. The referee will be looking for him to stay active from such a dominant position though.
Kimura is squirming around, avoiding Tokugawa's attempts to control the action.
Kimura holds on for dear life.
Tokugawa controlling his opponent.
Tokugawa looking to control but Kimura is working nicely, looking to advance position himself.
Tokugawa takes a little breather and maintains the position. The referee will be looking for him to stay active from such a dominant position though.
Kimura is desperately trying to improve his position but Tokugawa has a good base and remains in mount.
Tokugawa takes a little breather and maintains the position. The referee will be looking for him to stay active from such a dominant position though.
Kimura tries to get back to half guard but can't. #T14#
Tokugawa content just to control the position here.
Kimura can't escape the position.
Kimura is still trying to improve position.
Tokugawa content just to control the position here.
Boooooooooooooooooooo!!! God, this has been a terrible round. Come on you two, sort yourselves out!
Kimura is trying to escape the mount.
Tokugawa controlling the position easily from mount.
And that's the end of the fight!
Tokugawa takes the fight on points by 13 to 0.
Minato Tokugawa seemed lost for words in his post fight interview but he remembered to thank his fans and directed everyone to his website. |
|
|
|
|
|
|