|
TWGC 35 (145lbs, D4): Finals - Round 2 PBP Commentary |
Co-main event
|
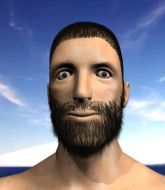
This TWGC bout is 1 fifteen minute round in the featherweight division. Introducing today's competitors. In the red corner, competing out of Amsterdam, with a TWGC record of 2 wins and 0 losses; Frank Froggly! And in the blue corner, fighting out of Hilo, with a TWGC record of 2 wins and 0 losses; Naked Kimura!
The judges for this bout are James Ackerman, Daniel Bishop and William Gold.
The fighters bow as they face eachother in the middle of the mat and we are under way.#TD2#
Kimura drops down and drives through with a powerful takedown into guard. Score +2 for takedown into guard / half guard: Froggly (0) vs (2) Kimura
Kimura told us pre-fight that he has been working on his escapes in training. Let's see if he can call on some of his new skills to get back to his feet.
Kimura stands and throws Froggly's legs to the side, diving into side control. Score +3 for passing guard: Froggly (0) vs (5) Kimura#SUB2#
Kimura working hard here to secure a kimura but he's not really in the right position for it. #SUB2#
Kimura working hard here to secure a kimura but he's not really in the right position for it. #SUB2#
Kimura goes for an armbar! This could be all over! Wait, no, Froggly rolls with the submission and now he's on top in Kimura's guard! Nice work there by Froggly! Score +2 for sweep to guard / half guard: Froggly (2) vs (5) Kimura
We've had a slow start to the round here - hopefully the action picks up.#SUB2#
Kimura looking for subs off his back but Froggly has passed one foot through into half guard.
Froggly sitting and controlling from the half guard. #T1#
Kimura is looking to regain full guard. Not this time though. #SUB2#
Kimura is looking to sinch up a guillotine here but Froggly pulls his head out easily.
Froggly takes a deep breath and rests his weight momentarily on top of his opponent, to control the position.#T2#
Froggly's ground tactics aren't going to win him many fans. Let's hope he's got fireworks for us if he gets back to his feet because he's not doing much on the ground.#SUB2#
Kimura looking to work for a kimura from the bottom.
Kimura manages to get to full guard.
#SUB2#
Kimura is looking for a triangle here but Froggly uses the submission attempt to pass into side control.
Score +3 for passing guard: Froggly (5) vs (5) Kimura
Froggly gets to mount! Kimura was on the offensive and wasn't defending properly. Score +2 for reaching mount: Froggly (7) vs (5) Kimura
Kimura is in all sorts of trouble here.
#T3#
The fighters are pressed up against the cage, both looking to find a bit of space to work.
Froggly is dominating on the ground here - he's now on his opponent's back, looking to sink in the hooks. Kimura is in real trouble.
Score +3 for taking back: Froggly (10) vs (5) Kimura
Kimura tries to escape the position.
The ref warns both fighters not to hold the cage as they work up against the meshing.#T4#
Froggly trying to secure his dominant position for a moment - making sure Kimura doesn't escape.
Froggly has the hooks in. Kimura is trying to push off one leg but he has to do so cautiously to avoid being submitted.
Froggly biding his time, looking for the opening.
Kimura is really stuck here.
Kimura is very frustrated here, being controlled quite effectively by Froggly.
Kimura is in bad spot here.
Kimura keeps trying to improve his position.
Froggly keeps control of the position easily here as Kimura tries to buck him off.
#T5#
Kimura can't escape the position.
Kimura manages to reverse the position and now he's in Froggly's guard. Nice work there by Kimura.
Score +2 for sweep to guard / half guard: Froggly (10) vs (7) Kimura
Froggly looking to control the pace of the fight rather than finish it. #SUB2#
Kimura has gone for a leg lock! Froggly slips out almost immediately though and dives into Kimura's guard. Score +2 for sweep to guard / half guard: Froggly (12) vs (7) Kimura
Froggly content to stall in guard here. #T6#
Kimura looking to sweep here. No luck so far. #SUB2#
Kimura looking for a guillotine here but Froggly defends easily.
Kimura is a painfully thin specimen of a man. You do wonder whether a good body kick would snap him clean in two.#SUB2#
Kimura throws his legs up looking to secure a triangle. Oh, that looks pretty tight, I gotta say! Froggly escapes and throws Kimura's legs to the side, diving into side control! Score +3 for passing guard: Froggly (15) vs (7) Kimura
Kimura is trying to get back to half guard.#T7#
Froggly moves into full mount! Score +2 for reaching mount: Froggly (17) vs (7) Kimura
Kimura is trying desperately to improve position.
Froggly manages to capitalize on a mistake by Kimura to take his back! Score +3 for taking back: Froggly (20) vs (7) Kimura
Kimura manages to reverse the position and now he's in Froggly's guard. Nice work there by Kimura.
Score +2 for sweep to guard / half guard: Froggly (20) vs (9) Kimura
Froggly lands a beautiful sweep and he's now moved into his opponent's guard. Score +2 for sweep to guard / half guard: Froggly (22) vs (9) Kimura#SUB2#
Kimura is throwing his legs up, looking for submissions. Froggly is aware though and is defending well.
Froggly sitting in guard here, content to control. #SUB2#
Kimura looking for submissions from the bottom but instead Froggly passes into side control.
Score +3 for passing guard: Froggly (25) vs (9) Kimura#T8#
Froggly just content to control the position.
Kimura gives up the full mount - oops, sloppy defensive grappling there! Score +2 for reaching mount: Froggly (27) vs (9) Kimura
Kimura is trying to escape the mount.
#T9#
Froggly controlling from the full mount.
Kimura tries to get back to half guard but can't.
Froggly content just to control the position here.
Froggly prevents Kimura from getting the reversal.#T10#
Kimura has given up his back - I dont know if this is a deliberate ploy to try and escape or if he is just struggling down there.
Score +3 for taking back: Froggly (30) vs (9) Kimura
Kimura is trying to break free.
Kimura looks winded!#SUB#
Kimura preventing the rear naked choke attempt from Froggly.
Froggly is hanging on to Kimura's back as he tries to escape.
#T11#
Froggly has the hooks sunk in and you can see the will to fight slowly draining out of Kimura's body.
Kimura is really stuck here.
Froggly controls the position.
Froggly keeps control of the position as Kimura tries to break free.
Kimura is persisting with the attempt to improve his position.
Kimura is still trying to improve position.#T12#
Froggly has good solid back control here.
Further stalling from Froggly.
Kimura tries to escape but Froggly has the hooks in and won't let him break free.
Froggly just keeping the dominant position. He can't wait too long though, otherwise the referee will stand them back up.
Kimura is defending well here and trying to improve his position.
Kimura is very frustrated here, being controlled quite effectively by Froggly.
Kimura tries to roll but Froggly sticks to his back.
#T13#
What can Kimura do to escape this position? He's going to have to figure it out pretty quick if he wants to stay in the fight!
Froggly is hanging on to Kimura's back as he tries to escape.
Good control from Froggly.
Kimura is trying to break free.
Good control from Froggly.#T14#
Kimura turns into Froggly and is now in his guard.
Score +2 for sweep to guard / half guard: Froggly (30) vs (11) Kimura#SUB2#
Kimura drops back for a leg but he's not going to get it - he lets go and Froggly dives on top into guard. Score +2 for sweep to guard / half guard: Froggly (32) vs (11) Kimura#SUB2#
Kimura looking for subs off his back but Froggly has passed one foot through into half guard.
#SUB2#
Kimura has guillotine here! It looks pretty tight! Could this be all over! No, Froggly escapes and passes into side control at the same time. Nice work there by Froggly! Score +3 for passing guard: Froggly (35) vs (11) Kimura
Boooooooooooooooooooo!!! God, this has been a terrible round. Come on you two, sort yourselves out!
Froggly is staying tight to Kimura's torso, preventing him from escaping.
And that's the end of the fight!
Froggly takes the fight on points by 35 to 11.
Frank Froggly seemed lost for words in his post fight interview but he remembered to thank his fans and directed everyone to his website.
Naked Kimura was interviewed post fight and said 'AYE MAN GIMME A REMATCH'. |
|
|
|
Main event
|
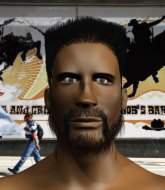
This TWGC bout is 1 fifteen minute round in the featherweight division. Introducing today's competitors. In the red corner, competing out of Los Angeles, with a TWGC record of 2 wins and 0 losses; Jorgen Kruth! And in the blue corner, fighting out of Hilo, with a TWGC record of 2 wins and 0 losses; Reni Manfield!
The judges for this bout are William Gold, Donald Grub and Paul Tew.
The fighters connect hands in the middle of the mat and we are under way.
Manfield doesn't succeed with the takedown#CL#
and Kruth counters by moving into the clinch.
Kruth has dropped down and is looking to force the takedown but it's defended by Manfield after a bit of a struggle.
Kruth is trying to drag Manfield to the mat but Manfield just about manages to keep his footing. He used the cage to his advantage there.
Kruth can't get the takedown.
That's three failed takedown attempts in the round for Jorgen Kruth. That's going to take a lot out of him.#TD#
Kruth gets double underhooks and manages to take the fight to the ground. Score +2 for takedown into guard / half guard: Kruth (2) vs (0) Manfield
We've had a slow start to the round here - hopefully the action picks up.
Manfield being controlled here, momentarily.
Kruth stands up and looks to throw the legs aside to pass to side control. Manfield swivels though and keeps the full guard. #T1#
Kruth is intent on slowing down the pace of the fight, simply looking to control.
Manfield wants to sweep here but Kruth controlling him for the moment.
Kruth knows he needs to get back to his feet asap. He's simply no match for Manfield on the ground.
Kruth stands up and looks to throw the legs aside to pass to side control. Manfield swivels though and keeps the full guard. #SUB2#
Manfield had isolated an arm as going for a kimura. Kruth defends it easily.
Manfield being controlled here, momentarily. #T2#
Kruth will need to keep those long limbs tucked in whilst he's on the ground, to prevent any submissions.
The fighters are pressed up against the cage, both looking to find a bit of space to work.
Kruth forces his way into half guard.
Neither fighter is being very active at the moment, with Kruth in particular looking to stall.
Manfield wants to improve his position but Kruth is controlling well.
#T3#
Kruth is controlling the pace.
Manfield should think about turning a few of those tyres round his middle into muscle if he wants people to take him seriously as an athlete.
Kruth wants to pass the guard but Manfield is defending well.
Manfield is trying to get back to full guard.
Kruth keeping composed on the top, looking to control the action.
Kruth wants to free his trapped foot but Manfield is holding on for dear life with his legs. #T4##SUB#
Kruth is looking for a kimura here.
Kruth controlling the action here. #T5#
Kruth wants to pass the guard but Manfield is defending well.
Kruth perhaps working for something from half guard, or maybe not. It looks like he's just sitting there. #SUB#
Kruth wants to work for an arm triangle but Manfield is really keeping half guard well and defending the submission attempt.
Kruth wants to free his trapped foot but Manfield is holding on for dear life with his legs. #T6#
Kruth slows the pace down in half guard.
Kruth seems to have a rather negative gameplan on the ground. He seems keen to just score the takedown and hold down Manfield for as long as he can get away with.
Manfield wants to control but Kruth is keeping busy.
Kruth content to control rather than advance. #T7#
Kruth continues to stall.
Kruth trying to pass the guard but Manfield defending well.
The referee calls for the fighters to work.
The ref warns both fighters not to hold the cage as they work up against the meshing.
Kruth's ground tactics aren't going to win him many fans. Let's hope he's got fireworks for us if he gets back to his feet because he's not doing much on the ground.#T8#
Kruth is pressing down on Manfield's thigh, looking to free his foot. Manfield is holding on for now.
Manfield makes his way to full guard. A much better position for Manfield.#T9#
Kruth slips nicely into half guard.
Kruth controlling the action here.
Kruth has controlled the position for a good 20 seconds, which will no doubt be starting to frustrate his opponent.
Kruth is pressing down on Manfield's thigh, looking to free his foot. Manfield is holding on for now. #T10#
Manfield moves into full guard.
Kruth is intent on slowing down the pace of the fight, simply looking to control.#SUB2#
Kruth got a little sloppy there for a moment and Manfield has worked his way into a loose triangle - can he finish it?! No, Kruth has managed to get both his arms back between Manfield's legs - danger averted.
Manfield keeping full guard, as Kruth tries to pass. #T11##SUB2#
Manfield working for a triangle but Kruth defends it easily.
Kruth showing good wrestling skills to control the position.
Kruth passes Manfield's left leg - he's now in half guard.
Manfield is looking to improve his position.
Kruth performing his best blanket impression for a moment. #T12#
Kruth looking to pass the half guard. Not this time.
Manfield is looking to regain full guard. Not this time though.
Manfield slips a foot under and gets full guard. Nice work.
Kruth controlling from the top position.
Manfield wants to sweep here but Kruth controlling him for the moment. #T13#
Manfield trying to control the position.
Kruth slows down the pace of the fight for a moment. He'll need to remain active if he doesn't want to see the fight stood back up.
Kruth won't allow Manfield to sweep him here.
Kruth sitting in guard here, content to control. #T14#
Manfield keeping full guard, as Kruth tries to pass.
Kruth seems content to control from guard here. He's going to have to remain active though if he doesn't want to get stood back up.
Manfield not looking particularly offensive just at the moment.
#SUB2#
Manfield is throwing his legs up, looking for submissions. Kruth is aware though and is defending well.#SUB2#
Manfield working from the bottom, still in full guard. He's managed to get a loose triangle. Kruth doesn't seem to be doing much to defend here, obviously he feels comfortable in the position. Kruth manages to throw the legs off his shoulder and he's back into guard - no problem.
Manfield looks winded!#SUB2#
Manfield looking for submissions off his back, moving his hips, looking for an opening.
Boooooooooooooooooooo!!! God, this has been a terrible round. Come on you two, sort yourselves out!
Kruth looking to pass the guard.
And that's the end of the fight!
Kruth takes the fight on points by 2 to 0. |
|
|
|
|
|
|