|
TWGC 35 (185lbs, D3): Sydney Qualifier - Round 1 PBP Commentary |
Co-main event
|
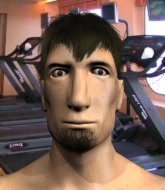
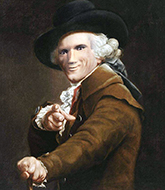
This TWGC bout is 1 fifteen minute round in the middleweight division. Introducing today's competitors. In the red corner, competing out of Rio de Janeiro, with a TWGC record of 0 wins and 0 losses; John Hardin! And in the blue corner, fighting out of Montreal, with a TWGC record of 0 wins and 0 losses; Joseph Ducreux!
The judges for this bout are John Mangel, Ben Hemmingworth and Donatello Bradman.
The fighters connect hands in the middle of the mat and we are under way.
Ducreux keeps the fight on the outside.
Ducreux tries to counter by closing the distance.
Ducreux keeps the fight on the outside.
Ducreux is trying to avoid his opponent's strikes and get into the clinch.
Hardin tries to clinch there but Ducreux circles away.
Hardin is looking to clinch.
Ducreux wants to counter the offense by Hardin and move into the clinch position.
Hardin tries to clinch but Ducreux is having none of it.
Hardin sets himself, and Ducreux steps forward looking for the clinch! Hardin avoids it this time.
Hardin fails in his attempt to clinch.
We've had a slow start to the round here - hopefully the action picks up.
Hardin tries to close the distance and clinch but Ducreux swats him to one side with an open hand palm strike and circles away.
The fight stays on the outside here - Hardin looks like he's thinking about clinching though.
John Hardin seems to be the more aggressive standup fighter in this bout.#T1#
Hardin is looking to clinch but Ducreux is avoiding it.
The fight stays on the outside here - Hardin looks like he's thinking about clinching though.
Hardin tries to clinch but Ducreux moves out of range.
Ducreux tries to counter by closing the distance.
Hardin is looking to clinch but Ducreux is avoiding it.
Hardin tries to clinch but Ducreux moves out of range.
Ducreux tries to counter by closing the distance.
Hardin wants to clinch.
Hardin sets himself, and Ducreux steps forward looking for the clinch! Hardin avoids it this time.#T2#
Hardin is looking to clinch.
Ducreux wants to counter with a clinch but Hardin pushes him away.
Hardin wants to clinch.
Ducreux is trying to avoid his opponent's strikes and get into the clinch.#CL#
Ducreux tries to keep at a distance but Hardin has taken the fight into the clinch.
Hardin wants a takedown but no success here.
#T3##TD2#
Ducreux manages to pull guard.
Hardin trying to control the position from guard on top but Ducreux is wriggling around, looking for whatever he can.
Ducreux can't do much from the bottom at the moment, as Hardin controls the pace.
Ducreux is working from a closed guard but he's struggling to control his opponent.
The fighters are pressed up against the cage, both looking to find a bit of space to work.
Ducreux is working the butterfly guard. He manages to land a nice scissor sweep and is now in half guard on the top. Nice move. Score +2 for sweep to guard / half guard: Hardin (0) vs (2) Ducreux
Hardin is trying to maintain the position but Ducreux is very close to passing his half guard.#T4#
Hardin tries to get to full guard but Ducreux has control of the leg.
Hardin moves his hips nicely and gets into full guard.
Ducreux wants to control from the top but Hardin keeps moving.
Ducreux wants to pass the guard but Hardin is keeping the position.#SUB#
Hardin is active off his back here, looking for submissions.
Ducreux advances to half guard.
Hardin is trying to get back to full guard.#T5#
Ducreux is looking to take a break and control but Hardin is keeping him honest, looking to work from the bottom.
Ducreux tries to pass to full mount but Hardin defends it.
Ducreux moves into full mount! Hardin won't be happy about that! Score +3 for passing guard: Hardin (0) vs (5) Ducreux
Hardin gets back to half guard.
Hardin works his way to full guard. Good work.
Ducreux pressing down on his opponent's thigh, looking to pass guard. Hardin is keeping the position for now.
Ducreux is frustrating his opponent with some stalling tactics from top position.#SUB#
Hardin looking for a guillotine here but Ducreux defends easily.
#T6#
Ducreux content to stall in guard here.
Hardin pulls Ducreux in close to prevent any damage.
Hardin is trying to keep Ducreux in close.
#SUB#
Hardin has a loose triangle. He'll be looking to tighten that up but Ducreux can see exactly what he's planning and manages to posture up and free himself. #T7#
Ducreux wants to pass the guard but Hardin is keeping the position.
Ducreux wants to control from the top but Hardin keeps moving.
Ducreux passes Hardin's left leg - he's now in half guard.
Ducreux is trying to control. Hardin wants to improve his position but can't escape this time.
Hardin has his hands clasped together around Ducreux's back. He's all about the action.
Ducreux trying to mount his opponent but Hardin defends it. #SUB#
Hardin looking to work for a kimura from the bottom.#T8#
Ducreux trying to control the action but Hardin is working from the bottom.
Ducreux is pressing down on Hardin's thigh, looking to free his foot. Hardin is holding on for now.
Ducreux trying to control from half guard but Hardin is working away.
Hardin is looking to control Ducreux's leg but it's slowly edging free. Can Hardin avoid being mounted?
Hardin makes his way to full guard. A much better position for Hardin.
The ref warns both fighters not to hold the cage as they work up against the meshing.
Ducreux trying to control the position from guard on top but Hardin is wriggling around, looking for whatever he can. #T9##SUB#
Hardin looking for subs off his back but Ducreux has passed one foot through into half guard.
Ducreux controlling the action here.
Hardin trying to control from the bottom.
Ducreux passes the half guard and he's now in mount! Big trouble for Hardin! Score +3 for passing guard: Hardin (0) vs (8) Ducreux
Hardin is desperately trying to improve his position but Ducreux has a good base and remains in mount.
Ducreux controlling from the full mount. #T10#
Hardin is desperately trying to improve his position but Ducreux has a good base and remains in mount.
Ducreux content just to control the position here.
Ducreux is dominating on the ground here - he's now on his opponent's back, looking to sink in the hooks. Hardin is in real trouble.
Score +3 for taking back: Hardin (0) vs (11) Ducreux#SUB2#
Ducreux is looking for the choke from the back position but Hardin is controlling his hands well.
Ducreux avoiding Hardin 's attempts to control his hands.
A bit of a pause in the action here. Ducreux controlling the positon.
Hardin is defending well here and trying to improve his position.
#T11##SUB2#
Ducreux is remaining active here, looking for the choke. The more discerning members of the crowd will appreciate his efforts.
Ducreux tries to get the hooks in deep but Hardin pushed the leg off.
I really don't envy Hardin right now.
Ducreux trying to control.#SUB2#
Ducreux patiently working for the choke. Which fighter will keep their nerve here?
Ducreux has the hooks sunk in and you can see the will to fight slowly draining out of Hardin's body.
Ducreux tries to keep control of the position but Hardin is staying busy.#T12#
Ducreux trying to secure his dominant position for a moment - making sure Hardin doesn't escape.
Ducreux trying to control.
Ducreux controls the action.
Hardin manages to reverse the position and now he's in Ducreux's guard. Nice work there by Hardin.
Score +2 for sweep to guard / half guard: Hardin (2) vs (11) Ducreux
Well,Hardin is on his way to losing a decision here. Can he use his experience to pull something off in the closing minutes?
Ducreux keeping moving, preventing Hardin from controlling successfully. #SUB2#
Ducreux had isolated an arm as going for a kimura. Hardin defends it easily.#T13##SUB#
Hardin drops back looking for a heel hook - he quickly realises he's not going to get it but Ducreux manages to dive on top of him before he can escape and now Hardin has Ducreux in his guard. Score +2 for sweep to guard / half guard: Hardin (2) vs (13) Ducreux
Hardin has a butterfly guard looking to sweep but Ducreux has passed into side control.
Score +3 for passing guard: Hardin (2) vs (16) Ducreux
Ducreux is moving around in side control but his primary objective seems to be to maintain the position.
Hardin is trying to improve his position.#T14#
Hardin is working hard here to advance position.
Ducreux controlling from side mount.
Hardin prevents Ducreux from improving position.
Ducreux moving around in side mount but really he's just happy to control for now.
Boooooooooooooooooooo!!! God, this has been a terrible round. Come on you two, sort yourselves out!
Ducreux tries to cartwheel into mount but he doesn't manage it. #SUB2#
Ducreux tries for an arm triangle. That looks pretty tight to me. Is this one over!?! Possibly, maybe, no Ducreux has let go of the choke. Obviously it wasn't as tight as we thought!
And that's the end of the fight!
Ducreux wins on points by 16 to 2.
Joseph Ducreux spent the whole post fight interview bigging himself up. It didn't go down that well with the fans after a while as they thought it was a bit arrogant. |
|
|
|
Main event
|
This TWGC bout is 1 fifteen minute round in the middleweight division. Introducing today's competitors. In the red corner, competing out of Sydney, with a TWGC record of 0 wins and 0 losses; Billy Costigan ! And in the blue corner, fighting out of Las Vegas, with a TWGC record of 0 wins and 2 losses; Antonio Walters!
The judges for this bout are John Mangel, Topper Green and Eliza Hachem.
Let's get this grappling contest under way! Who will be victorious?#CL2#
Walters clinches up with Costigan and pushes him back against the cage.#TD2#
Walters lands a takedown into guard.
Score +2 for takedown into guard / half guard: Costigan (0) vs (2) Walters
Walters sitting in guard here, content to control. #SUB#
Costigan throwing his legs up looking for a triangle.
Costigan has a closed guard, preventing anything of note from happening. Perhaps he's looking to stall.
Walters must be cautious of submissions here, given that his opponent has the superior Jiu Jitsu.
We've had a slow start to the round here - hopefully the action picks up.
Walters is stalling in the full guard. #T1#
Costigan is trying to control the position but Walters postures up.
Walters is stalling in the full guard.
Costigan is doing well to control the posture of his opponent and prevent any damage. #T2#
Costigan tries to land a sweep but no joy.
Costigan wants to control the position but Walters says "no thanks buddy" and passes to half guard.
Costigan controlling the leg, holding on to half guard.
Walters is pressing down on Costigan 's thigh, looking to free his foot. Costigan is holding on for now. #T3#
Costigan trying to get back to full guard but Walters takes advantage of the position and moves to full mount! Score +3 for passing guard: Costigan (0) vs (5) Walters
Costigan is working to get back to half guard.
Walters is trying to take his opponent's back.
Costigan reaches up to try and control the position but Walters seems to have an arm triangle now! Uh oh! Costigan rolls and tries to escape and now Walters has his back!
Score +3 for taking back: Costigan (0) vs (8) Walters
Costigan looks to control his opponent's hands but he's not mananging it at the moment. #T4#
Walters has the hooks sunk in and you can see the will to fight slowly draining out of Costigan 's body.
I really don't envy Costigan right now.
Walters avoiding Costigan 's attempts to control his hands.
Costigan is in a bad position, trying to hold on for dear life but he is really struggling to maintain any sort of control.#T5#
Walters controlling well, preventing Costigan from escaping the position.
Walters is trying to stick to Costigan 's back but Costigan is turning into Walters. He's managed to reverse the position - now he's in Walters's guard. Polite applause from the crowd in appreciation of some nice Jiu Jitsu by Costigan . Score +2 for sweep to guard / half guard: Costigan (2) vs (8) Walters
Costigan seems content to control from guard here. He's going to have to remain active though if he doesn't want to get stood back up.
Costigan has controlled the position for a good 20 seconds, which will no doubt be starting to frustrate his opponent.
Costigan wants to control from the top but Walters keeps moving. #T6#
Walters tries to land a sweep but no joy.
Walters keeping full guard, as Costigan tries to pass.
Costigan wants to control from the top but Walters keeps moving.
Costigan controls the pace of the fight for a moment.
Costigan pressing down on his opponent's thigh, looking to pass guard. Walters is keeping the position for now.
Costigan trying to control but Walters is working from the bottom. #T7#
Walters is doing well to control the posture of his opponent and prevent any damage.
Walters keeping moving, preventing Costigan from controlling successfully.
Costigan wants to pass the guard but Walters is keeping the position.
Walters keeping moving, preventing Costigan from controlling successfully.
Walters seems keen to control rather than go for a submission, at least for now. #T8#
Costigan looking to sit in guard and control but Walters gets the butterfly guard and sweeps. He's now in the guard on the top. Score +2 for sweep to guard / half guard: Costigan (2) vs (10) Walters#SUB#
Costigan is looking for a guillotine. You can't force these things though and Walters defends well.
Costigan wants to sweep but no luck.
Costigan being controlled here, momentarily. #T9#
Walters pressing down on his opponent's thigh, looking to pass guard. Costigan is keeping the position for now.
Costigan working a defensive guard here.
Walters won't allow Costigan to sweep him here.
Costigan being controlled here, momentarily.
Costigan is trying to keep Walters in close.
#T10#
Walters trying to control the position from guard on top but Costigan is wriggling around, looking for whatever he can.
Costigan pulls Walters in close to his closed guard and prevents Walters from doing any damage or advancing position.
Costigan wants to control but instead he gets his guard passed and Walters is now in half guard. #T11#
Costigan moves into full guard.
Costigan controlling the position.
Walters wants to control from the top but Costigan keeps moving.
Walters tries to free his leg and advance position but Costigan is retaining full guard.
A real slowdown in the pace of the fight for a moment, as Costigan holds on and takes a little breather. #T12#
Costigan is trying to keep Walters in close.
Walters controlling from the guard. I say controlling but really, he's stalling.
Costigan is trying to control the position but Walters postures up.
Costigan keeping moving, preventing Walters from controlling successfully. #T13#
Costigan has a butterfly guard looking to sweep but Walters has passed into side control.
Score +3 for passing guard: Costigan (2) vs (13) Walters
Costigan wants to control but Walters postures up.
Costigan is looking to regain half guard here but Walters keeps moving and retains side control. #T14#
Walters wants to control but Costigan is keeping him busy.
Costigan sneaks a leg under to get back to half guard.
Walters is trying to control. Costigan wants to improve his position but can't escape this time.
Costigan has no desire to be mounted, so is trying to control. Walters is working away from the top position though.
Boooooooooooooooooooo!!! God, this has been a terrible round. Come on you two, sort yourselves out!
Costigan trying to keep hold of his opponent's head but Walters manages to pass to mount!
Score +3 for passing guard: Costigan (2) vs (16) Walters
And that's the end of the fight!
Walters wins on points by 16 to 2. |
|
|
|
|
|
|