 |
SSSD 13: Rand vs Elliot PBP Commentary |
Undercard bout
|
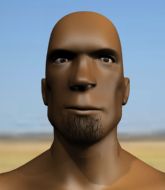
Coming up we have a featherweight MMA rules bout between Ben Kongo (ranked 4878 p4p, 6109 weight class) and Ryu Yamauchi (ranked 403 p4p, 448 weight class). Chooooooooon! I think Kongo might be my favorite fighter, now he's come out to Biggest and best - Clawfinger. Ryu Yamauchi will no doubt be trying to keep this one on the feet, where he has a distinct advantage.
 |
|
 |
| 169 cm
25
145
0 - 0 - 0 |
|
170 cm
22
154
3 - 2 - 0 |
Decent wrestler
Counter fighter
Likes comics |
|
BJJ Purple Belt
Decent boxing
Heavy handed |
|
| |
|
Ladies and gentlemen. This fight is 3 rounds, in the featherweight division.
Introducing the fighter to my left, fighting out of the red corner.
With a record of 0 - 0 - 0, fighting out of Sydney, Ben Kongo!
And introducing the fighter to my right, fighting out of the blue corner.
With a record of 3 - 2 - 0, fighting out of Tokyo, Ryu Yamauchi!
The judges for this bout are Steve Erwin, Topper Green and Francis DeMontford.

The bell rings for round one and we are underway!
Yamauchi ducks down and throws a hook to the body but Kongo moves away.

Kongo looks for a takedown. He's got it. We're now in half guard.
We could do with one of the fighters taking the initiative a bit more on the ground - they're both waiting to capitalize on a mistake.
Yamauchi is looking to control Kongo's leg but it's slowly edging free. Can Yamauchi avoid being mounted?
Yamauchi is trying to avoid being dragged into an even worse position than he's already in but Kongo is staying active.
Yamauchi is looking to improve his position.
Kongo not landing any meaningful shots this time.
We've had a slow start to the round here - hopefully the action picks up.
The fighters are battling for position here. Yamauchi manages to regain full guard. Nice work.
The ref warns both fighters not to hold the cage as they work up against the meshing.
Yamauchi is working from a closed guard but he's struggling to control his opponent.
Kongo chips away with some ground and pound.

That's one minute gone in the round.
Kongo slows down the pace of the fight for a moment. He'll need to remain active if he doesn't want to see the fight stood back up.

Kongo avoids a guillotine attempt easily.
Kongo trying to control but Yamauchi is working from the bottom.
Kongo lands a couple of decent looking shots.
Yamauchi tries to land a sweep but no joy.
Kongo with a couple of shots to the head there. Not particularly brutal.
Kongo lands a couple of decent looking shots.
Kongo not doing a lot at the moment. He'll have to show some more aggression or the fight will get stood up.
Kongo lands a couple of digs.

That's two minutes gone in the round.
There's a bit of a scramble here and now Yamauchi is on top in guard.

The fighters are pressed up against the cage, both looking to find a bit of space to work.
Kongo tries to land a sweep but no joy.
Kongo keeping moving, preventing Yamauchi from controlling successfully.
Yamauchi is in a good position here but he's just trying to control... And he's not even managing to do that successfully.
Kongo is working the butterfly guard. He manages to land a nice scissor sweep and is now in half guard on the top. Nice move.


That's three minutes gone in the round.
The fighters are starting to perspire pretty heavily.
Kongo winds up and cracks Yamauchi with a swinging punch to the side of the head.
Kongo wants to control but Yamauchi is keeping him busy.
Kongo prevents Yamauchi from standing back up.

Kongo is sneakily working for an arm triangle but Yamauchi sees it coming and defends easily.
Kongo looks over to his corner - he wants some instructions but his corner are not responding.
Kongo prevents Yamauchi from improving his position.
Kongo wants to work for an arm triangle but Yamauchi is really keeping half guard well and defending the submission attempt.
Kongo is just sitting in half guard, waiting for something to happen.

That's four minutes gone in the round.
The crowd are hurling abuse towards the fighters... You can hardly blame them though because there isn't a lot going on in the fight.
The two fighters exchange a few words. I couldn't hear what they were saying but maybe it's more fun if you make it up yourself. Kongo connects with a nice short shot to Yamauchi's temple.
Yamauchi taking some punishment here, with Kongo in his half guard.
Yamauchi tries to roll over but Kongo keeps him under control.
Kongo is scoring with some nice ground and pound from the dominant position.
Yamauchi is trying to control but can't.
Kongo working Yamauchi over with strikes.
Kongo working over Yamauchi with some ground and pound. Yamauchi looks like he wants out of this position, which is understandable.
The crowd thankful this round is nearly over.
Yamauchi is looking to improve his position.
Yamauchi taking some punishment here, with Kongo in his half guard.
And that is the end of the round. The fighters go back to their corners.
Ben Kongo dominated that round.
Well, the break between rounds is over. Let's get back to the scrappin!

Kongo dives in and scores a takedown into Yamauchi's guard.
Kongo makes a bit of distance and scores with some ground and pound, still in guard.
Kongo scores with a decent looking elbow strike.
Kongo pressing down on his opponent's thigh, looking to pass guard. Yamauchi is keeping the position for now.
Yamauchi is trying to control the position from the bottom.
Kongo is really dominating this fight. Is there anything that Yamauchi can do to turn this around?
Kongo chips away with some ground and pound.
Yamauchi is looking to cinch up a triangle. Kongo throws the leg off to one side though and gets in tight to Yamauchi's body to avoid the submission. Yamauchi has instead reached around Kongo's neck and now has a guillotine! Oh, this is biiiig trouble! Yamauchi arches his back and squeezes and forces the tap from his hapless opponent.
Ladies and gentlemen, after 0:58 of round 2, we have a winner by way of Submission (Guillotine). Ryu Yamauchi!
|
|
|
|
|
|
|
|
|
|
|
|
|
|
|
|
|
|
|
|
|
|
|
| S |
C
A |
G |
S |
C
B |
G |
|
S |
C |
G |
|
energy
A | B |
|
hype
A | B |
|
pop
A | B |
|
mgr
A | B |
|
FIGHT
RATING
34% |
|
|
|
|
|
|
|
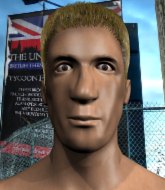
Undercard bout
|
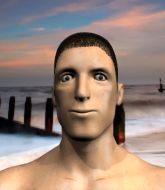
Coming up we have a lightweight MMA rules bout between Ewan Striker (ranked 6424 p4p, 4803 weight class) and Briet Neer (ranked 616 p4p, 505 weight class). Over to our ring announcer for the fighter introductions!
 |
|
 |
| 185 cm
24
165
1 - 1 - 0 |
|
180 cm
17
160
2 - 0 - 0 |
BJJ Blue Belt
Brawler
Good chin |
|
BJJ Blue Belt
Counter fighter
Very confident |
|
| |
|
Ladies and gentlemen. This fight is 3 rounds, in the lightweight division.
Introducing the fighter to my left, fighting out of the red corner.
With a record of 1 - 1 - 0, fighting out of Los Angeles, Ewan Striker!
And introducing the fighter to my right, fighting out of the blue corner.
With a record of 2 - 0 - 0, fighting out of Sydney, Briet Neer!
The judges for this bout are Topper Green, John Mangel and Winston Howard.
The bell rings for round one and we are underway!
Neer showing good head movement there, avoiding the strikes from Striker.
Neer with the counter takedown but Striker avoids it easily.
Striker throws a nice looking combination but Neer bobs and weaves to avoid any damage.
Neer walks into a stiff left hand from Striker.
Striker falls off balance throwing a combination

and Neer counters with a single leg into guard. Striker didn't expect that.
Neer not doing a lot at the moment. He'll have to show some more aggression or the fight will get stood up.
Neer thinks about going for a leg but decides against it, in order to maintain the position.
Striker tries to land a sweep but no joy.
We've had a slow start to the round here - hopefully the action picks up.
Striker is looking to stand up but Neer isn't so interested in that idea.
Striker is trying to control the position from the bottom.
That's one minute gone in the round.
Neer thinks about going for a leg but decides against it, in order to maintain the position.
Striker keeping moving, preventing Neer from controlling successfully.
The referee is pacing around the two fighters, thinking about a standup.
Neer postures up in Striker's guard and throws a big left but Striker blocks it.
Neer wants to pass the guard but Striker is keeping the position.

The referee has motioned to the fighters to stand back up.
Striker throws a body shot but no joy.
Good standup being displayed there by Striker as he connects with a hook.
Striker throws an off balance right hand
and Neer counters with a nice double leg into side control. Striker won't be happy with that.
Neer is trying to land an Americana. He has the arm isolated but Striker is keeping cool and he's avoided the danger for now.
You can see the frustration on Striker's face, being in this tough position on the bottom.
That's two minutes gone in the round.
Neer tries for a kimura. Not really close to a finish though.
Neer is trying to get an arm triangle but Striker is defending well.
Striker tries to bench press Neer off him but Neer keeps the position.
Neer thinks about going for a far side armbar but bails out and retains the dominant position instead.
The fighters are pressed up against the cage, both looking to find a bit of space to work.
That's three minutes gone in the round.
Striker tries to bench press Neer off him but Neer keeps the position.
Striker trying to remain calm as Neer controls from the top position.
You can see the frustration on Striker's face, being in this tough position on the bottom.
Striker is trying to improve his position.
Neer misses with a strike but at least he's keeping busy, looking to cause some damage - that will still help him when it comes to the judges scorecards.
That's four minutes gone in the round.
The crowd are showing their displeasure at the lack of action as loud boos ring out around the arena.
Neer throwing strikes but Striker manages to buck up and roll into a nice reversal - now he's on top in side control!
Striker working away.
Neer looks to move to half guard but instead Striker has passed into mount! Damn!
The ref warns both fighters not to hold the cage as they work up against the meshing.
Neer wants to control but Striker is having none of it.
Neer bucks up and manages to get a nice reversal! He's in guard on the top - nicely done!
Neer wants to pass the guard but Striker is keeping the position.
The crowd thankful this round is nearly over.
Neer working some ground and pound from guard but it's not doing any damage.
Neer trying to pass the guard but can't manage it just yet.
And that is the end of the round. The fighters go back to their corners.
A close round but Briet Neer will probably get the nod.
That's the end of the interval. I'm sure that seemed a lot quicker than a minute for our two fighters! Back to the action.
Neer takes an uppercut right on the button but keeps his composure.
Striker displaying good standup as he scores with a three punch combination.
Striker looks to land a combination. Neer sees it coming but can only parry a couple of the shots.
Neer needs to keep his hands up - Striker had a free shot at his head there.
Neer's coach down at Briet’s Fight Club was telling us pre-fight that they have been working on Neer's balance. Obviously they view that as a key factor in the outcome of this fight.
Boom, another hit is landed. "You're gunna get knocked out" taunts Striker, as that shot connected.
 Neer is rocked! Neer is rocked!
BOOM! Striker lands a beautiful left hook that drops Neer. Neer tries to recover but Striker is having none of it, landing more punishing shots from mount. One final crushing shot and Neer lies motionless on the canvas. The fight is over!
Ladies and gentlemen, after 0:29 of round 2, we have a winner by way of TKO (Strikes). Ewan Striker!
|
|
|
|
|
|
|
|
|
|
|
|
|
|
|
|
|
|
|
|
|
|
|
| S |
C
A |
G |
S |
C
B |
G |
|
S |
C |
G |
|
energy
A | B |
|
hype
A | B |
|
pop
A | B |
|
mgr
A | B |
|
FIGHT
RATING
38% |
|
|
|
|
|
|
|
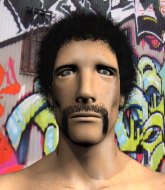
Undercard bout
|
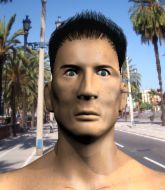
Coming up we have a middleweight MMA rules bout between Paul Price (ranked 6145 p4p, 5864 weight class) and Vosu Saase (ranked 702 p4p, 685 weight class). Fingers crossed for an exciting fight - I'm sure both fighters are looking for a nice under the table bonus!
 |
|
 |
| 188 cm
18
195
1 - 1 - 0 |
|
187 cm
18
194
0 - 1 - 0 |
BJJ White Belt
Excellent boxer
KO power |
|
BJJ White Belt
Excellent MT
Solid chin |
|
| |
|
Ladies and gentlemen. This fight is 3 rounds, in the middleweight division.
Introducing the fighter to my left, fighting out of the red corner.
With a record of 1 - 1 - 0, fighting out of Las Vegas, Paul Price!
And introducing the fighter to my right, fighting out of the blue corner.
With a record of 0 - 1 - 0, fighting out of St Petersburg, Vosu Saase!
The judges for this bout are Skip Squint, Bruno Hogan and Chris Dean.
The bell rings for round one and we are underway!
Saase tries to clinch but Price is having none of it.
Price fakes a head punch and goes low to the body. Nicely done.
Saase wants to clinch but Price slips to the side
letting Price counter with a right hand.
Price goes to the watering hole and comes back with a big thumbs up from the judges as he scores a three punch combo.
Saase tries to clinch but fails miserably
and Price counters with a lovely shot to the body.
Saase tries to clinch but is not successful on this occasion.
A swing and a miss from Saase.

Saase darts in and clinches Price up against the cage.
Price wants to break the clinch but can't.
Saase looking to stall.
Saase goes for a body shot but it's blocked.
Saase misses with a hook from the clinch.

Price manages to break the clinch.
Saase fakes a head punch and goes low to the body. Nicely done.
Fantastic stuff here - a very entertaining period of action, which has drawn cheers from the crowd.

Price drops Saase with a beautiful combination! Saase stares up at his opponent, who ushers him back to his feet - Price is looking for the KO!
Saase is rocked!
Price lands with a precision combination! Left, right, uppercut and Saase falls flat on his face, eyes wide open but he's out!
Ladies and gentlemen, after 1:56 of round 1, we have a winner by way of KO (Punches). Paul Price!
A very excited looking Paul Price made sure he remembered to thank all the fans both in the arena and on the internet. He said all the coolest people spend all day on MMA websites, which got a big reaction.
|
|
|
|
|
|
|
|
|
|
|
|
|
|
|
|
|
|
|
|
|
|
|
| S |
C
A |
G |
S |
C
B |
G |
|
S |
C |
G |
|
energy
A | B |
|
hype
A | B |
|
pop
A | B |
|
mgr
A | B |
|
FIGHT
RATING
92% |
|
|
|
|
|
|
|
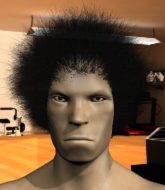
Co-main event
|
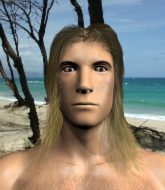
Coming up we have a super heavyweight MMA rules bout between Vern Vurris (ranked 2433 p4p, 2165 weight class) and Tall Guy (ranked 94 p4p, 85 weight class). This should be fireworks!
 |
|
 |
| 201 cm
22
270
8 - 2 - 0 |
|
225 cm
26
300
3 - 1 - 0 |
Good takedowns
Basic striking
Very quick |
|
BJJ White Belt
Good kicks
Solid chin |
|
| |
|
Ladies and gentlemen. This fight is 3 rounds, in the super heavyweight division.
Introducing the fighter to my left, fighting out of the red corner.
With a record of 8 - 2 - 0, fighting out of Tokyo, Vern Vurris!
And introducing the fighter to my right, fighting out of the blue corner.
With a record of 3 - 1 - 0, fighting out of Helsinki, Tall Guy!
The judges for this bout are Skip Squint, Ben Watson and Hugh Johnson.
The bell rings for round one and we are underway!
Vurris throws a jab to the body, straight down the pipe. Boom. That sent Guy stumbling backwards but he manages to regain his composure quickly.
Guy throws a right and a left that Vurris avoids nicely.

Vurris clinches.
Vurris gets a trip takedown into half guard.
Vurris working the head and body with strikes.
Vurris lands strikes from half guard.
Guy looks more muscular than last time we saw him. He must have been on the weights.
Vurris passes the half guard and he's now in mount! Big trouble for Guy!
Guy wants to hold on but Vurris pushes him away.
Vurris lands a big elbow.
This is a great period of action - very entertaining stuff!
Vurris landing punches.
 It looks like Tall Guy has been cut. It looks like Tall Guy has been cut.
Vurris controlling his opponent.
Vurris has hold of Guy's left arm, perhaps looking for a submission. The two fighters tussle over control of the isolated limb and Guy manages to get his arm back to his side and away from danger.
That's one minute gone in the round.
Vurris is going oldschool here, as he tries to force Guy to tap using a forearm choke. This isn't 1993 though, so Guy shrugs it off.
Vurris looking to isolate an arm here. Guy doesn't see it coming and as Vurris extends the arm, he's forced to tap out! Nice submission by Vurris!
Ladies and gentlemen, after 1:34 of round 1, we have a winner by way of Submission (Armbar). Vern Vurris!
Vern Vurris decided to go for the less than humble approach in his post fight interview, telling everyone how he is going to conquer the world. The crowd seemed to like it when really that sort of approach could have gone either way.
|
|
|
|
|
|
|
|
|
|
|
|
|
|
|
|
|
|
|
|
|
|
|
| S |
C
A |
G |
S |
C
B |
G |
|
S |
C |
G |
|
energy
A | B |
|
hype
A | B |
|
pop
A | B |
|
mgr
A | B |
|
FIGHT
RATING
74% |
|
|
|
|
|
|
|
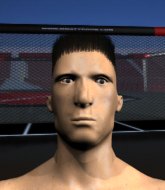
Main event
|
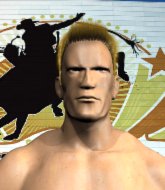
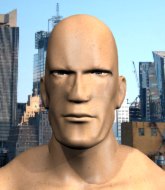
Coming up we have a featherweight MMA rules bout between Danny Rand (ranked 4013 p4p, 4105 weight class) and TS Elliot (ranked 353 p4p, 362 weight class). Rand comes to the cage accompanied by Wu Tang-Protect Ya Neck. Danny Rand is staring across the cage at his opponent, tweaking his nipples... Tweaking his own nipples that is.
 |
|
 |
| 176 cm
30
144
7 - 5 - 1 |
|
175 cm
21
155
1 - 0 - 0 |
BJJ Purple Belt
Solid Muay Thai
Experienced |
|
BJJ White Belt
Brawler
Enjoys gardening |
|
| |
|
Ladies and gentlemen. This fight is 3 rounds, for the featherweight championship of the world!
Introducing the champion to my left, fighting out of the red corner.
With a record of 7 - 5 - 1, fighting out of Sydney, Danny Rand!
And introducing the challenger to my right, fighting out of the blue corner.
With a record of 1 - 0 - 0, fighting out of Amsterdam, TS Elliot!
The judges for this bout are Summer Carpenter, Damien Edna and Eliza Hachem.
The bell rings for round one and we are underway!
Rand fakes a head punch and goes low to the body. Nicely done.
Rand gets a clinch.
Rand connects with a nasty looking knee right to Elliot's face.
Elliot lands a knee to the body.
Rand has Elliot pressed up against the cage and is working for takedown. Elliot manages to improve position though and keeps the fight standing.
Good anti-grappling being displayed by Rand as Elliot tries to tie him up.
Rand breaks the clinch and we return to the middle of the mat.
Rand closes the distance and clinches.
Elliot putting his Muay Thai to good use. He has Rand in a tight clinch and is doing some damage with knees to the body.
Elliot takes a knee to the side of the body.
Elliot trying to stall but Rand improves his position.
Elliot lands a hook to the body. It's hard to tell if that hurt Rand or not.
The pace slowing considerably in the clinch, as Rand takes a break from that fighting nonsense to think about the finer things in life.
Elliot swings away with an uppercut that misses.
Rand definitely looks more muscular than last time we saw him fight.
Rand breaks the clinch.
This has been an exciting period of action!
Elliot stuffs the takedown.
Despite the aggression on Elliot's face he doesn't fully commit to the counter.
Elliot tries to close the distance and clinch but Rand swats him to one side with an open hand palm strike and circles away.
That's one minute gone in the round.
Left hook, right uppercut from Elliot.
Rand tests Elliot's chin there with a solid looking shot.
Rand takes an uppercut right on the jaw but it doesn't phase him.
Elliot clinches.
Rand breaks the clinch and we return to the middle of the mat.
Elliot tries to clinch but Rand moves out of range.
Rand has closed the distance and engaged Elliot in a clinch.
Rand with the Thai clinch. He's looking to land a big knee but he's not managed it this time.
An uppercut on the inside fails to land for Elliot.
Elliot has been looking to improve his clinch game in recent weeks. Rand seems to have the measure of him in the clinch so far, so let's see if Elliot can turn it around.
A short body shot lands from Elliot as the two fighters clinch.
Rand misses with an elbow over the top.
A head punch blocked on the inside by Rand.
Rand prevents Elliot from breaking the clinch.
A right handed body shot lands from Elliot.
The fans in attendance giving it up for the two fighters, who have really let it all hang out in the last minute or so!
Elliot is looking to control Rand's arms but Rand gets an underhook and turns him. Now Elliot has his back to the cage.
Elliot misses with a punch on the inside.
That's two minutes gone in the round.
Elliot misses with the head strike.
Rand drops to a knee looking for a takedown but Elliot gets the underhooks and prevents it.
That's three failed takedown attempts in the round for Danny Rand. That's going to take a lot out of him.
Rand tries to land a knee to the head but Elliot blocks with his arms.
Rand is looking to take this one to the mat.
Elliot has Rand pressed against the cage.
Elliot tries to throw a body punch but Rand avoids it by throwing Elliot back against the cage.
Elliot tried to land a shot to the body but connects with Rand's elbow.
Elliot tries to land a shot to the body but it's blocked.
Rand blocks a knee to the body. He'll have a nicely bruised forearm in the morning.
Rand pushes Elliot back against the cage and lands a hook to the side of the head.
Still in the clinch, Rand scores with a nice short uppercut.
Elliot leaning his opponent against the cage.
Elliot misses with some punches.
That's three minutes gone in the round.
A real battle for position is taking place between these two warriors.
Rand tries to land a knee to the head but misses.
Elliot dictating the pace here, as the fighters clinch against the cage.
Rand managing to block the knees to the body from Elliot.
Rand breaks the clinch and we're back to striking at distance.
Elliot takes a nasty kick to the mid section... That should keep him thinking. Does he try and block and risk a head kick landing?
Elliot wants to clinch up but Rand keeps it at a distance.
Rand looking for a takedown here - he's got it.

Rand gets to his feet and steps away from his opponent.
Rand closes the distance and pushes Elliot back into the cage.
Elliot is trying to break the clinch but Rand is controlling him.
A bit of stalling here from Elliot.
Elliot misses with a body punch.
That's four minutes gone in the round.
Rand slowing the pace effectively.
Elliot stops a takedown attempt from Rand.
Elliot tries to circle away but Rand has him pinned against the cage.
Elliot throws a punch but it's blocked by Rand.
Elliot tries to throw a body punch but Rand avoids it by throwing Elliot back against the cage.
Elliot misses the knee to the body. Nice hip positioning from Rand.
An uppercut on the inside fails to land for Elliot.
Elliot crunches a lovely knee into Rand's ribcage.
Fantastic stuff here - a very entertaining period of action, which has drawn cheers from the crowd.
Rand has clasped his hands together around Elliot's back... aaand, he's got a takedown into side control. Nicely done.
Elliot tries to get back to his feet but has found himself mounted instead. Damn, that's gotta suck.
We get told so often about how wrestlers don't like to be on their backs. Let's see if Elliot can do anything to dispel that myth.
Rand landing strikes from the mount.
The fighters are starting to get a bit slippery now, which will make submissions a bit more difficult.
Elliot working to try and regain half guard.
Elliot is trying to get back to his feet but can't.
And that is the end of the round. The fighters go back to their corners.
That was a close round but I would say that Danny Rand will probably get the nod.
That's time! Back to the action!
Rand circles away from the clinch attempt.
Rand moves in looking to clinch but Elliot pushes him off.
Elliot throws a sloppy head kick and Rand moves out of range easily.
Rand moves into the clinch successfully.
Elliot is struggling to control the position.
Rand tries for a takedown. No joy.
Elliot throws a punch but it's blocked by Rand.
Elliot swings wildly with an uppercut but Rand uses good head movement to avoid it.
Elliot is trying to break free.
Elliot tries to throw a body punch but Rand avoids it by throwing Elliot back against the cage.
We've had a slow start to the round here - hopefully the action picks up.
Rand lands an elbow just above Elliot 's eye.
Rand breaks the clinch and we return to the middle of the mat.
Rand misses with a few strikes there.
Rand throws a looping left and ducks down for a takedown. He's got his arms around Elliot's waist but Elliot gets an underhook and avoids the takedown by throwing Rand off to one side.
Danny Rand is looking to throw some combinations by the looks of things.
Rand gets tackled into the cage by Elliot. Elliot maintains the clinch.
That's one minute gone in the round.
Rand is working for takedown but Elliot is calmly controlling the position for now.
That's three failed takedown attempts in the round for Danny Rand. That's going to take a lot out of him.
Elliot working aggressively here.
Rand lands an uppercut.
Rand has Elliot pressed up against the cage and is working for takedown. Elliot manages to improve position though and keeps the fight standing.
Rand scores a nice knee to the body.
Elliot fails to land with a short punch on the inside.
Rand tries to score a body lock takedown but Elliot shows good agility there to stay on his feet.
Rand breaks the clinch and we're back to striking at distance.
Elliot shoots in looking for a takedown but Rand manages to keep the fight standing, pushing Elliot's face into the canvas for good measure before circling away.
It looked like Rand wanted to counter with a hook but didn't fully commit.
Rand moves into range and clinches up with Elliot.
Rand lands a good knee to the midsection. Elliot won't want to take too many of those.
Elliot working aggressively here.
Elliot misses with a punch to the body.
Elliot tries to land a knee to the body but he is off balance and Rand avoids it.
Rand's corner calls for him to break the clinch, which he does.
Elliot clinches.
That's two minutes gone in the round.
Elliot tried to land a shot to the body but connects with Rand's elbow.
TS Elliot seems to be working more effectively in the clinch in the fight so far.
Elliot tries to land knees in the clinch but Rand avoids the damage to the body.
Elliot tries to jump guard but he falls flat on his backside. Rand smiles and moves away.
Rand slips a jab and a cross from Elliot.
The crowd are loving this. Great action here.
Rand fails miserably with a takedown attempt.
Elliot scores with a jab.
A momentary lapse in concentration from Elliot enables Rand to shoot in and score with a neat double leg. Elliot manages to secure a closed guard as the fighters hit the mat.
Elliot can't do much from the bottom at the moment, as Rand controls the pace.
The fighters are pressed up against the cage, both looking to find a bit of space to work.
Rand trying to control but Elliot is working from the bottom.
Rand stands up and looks to throw the legs aside to pass to side control. Elliot swivels though and keeps the full guard.
That's three minutes gone in the round.
Rand works a leg free and moves into half guard.
Rand is keen to just control but Elliot is a slippery customer.
Rand is working for a kimura but Elliot is defending it quite comfortably.
Rand is looking for a kimura. It's going to be difficult to finish that from half guard though and Elliot defends it well.
Elliot is looking to sinch up a guillotine here but Rand pulls his head out easily.
Rand wants to pass to mount but Elliot is defending the position.
That's four minutes gone in the round.
Rand passes the guard and advances to mount!
Rand raining down hammerfists from mount.
Elliot tries to lock up and control but Rand gives him a forearm to the face and pushes him away.
Rand is going oldschool here, as he tries to force Elliot to tap using a forearm choke. This isn't 1993 though, so Elliot shrugs it off.
Elliot wants to control but Rand is having none of it.
Rand is working to isolate an arm here. It's a telegraphed submission attempt but he's gone for it anyway - and he's got it! Rand extends the arm and Elliot is forced to tap!
Ladies and gentlemen, after 4:59 of round 2, we have a winner by way of Submission (Armbar). Danny Rand!
Danny Rand is the new featherweight champion!
Danny Rand decided to thank the fans in attendance for making a great atmosphere. It seemed to go down pretty well.
|
|
|
|
|
|
|
|
|
|
|
|
|
|
|
|
|
|
|
|
|
|
|
| S |
C
A |
G |
S |
C
B |
G |
|
S |
C |
G |
|
energy
A | B |
|
hype
A | B |
|
pop
A | B |
|
mgr
A | B |
|
FIGHT
RATING
57% |
|
|
|
|
|
|
|
|
|
|
