|
TWGC 31 (185lbs, D1): Finals - Round 1 PBP Commentary |
Undercard bout
|
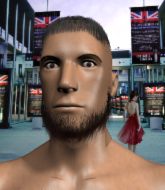
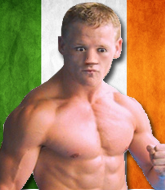
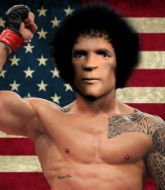
This TWGC bout is 1 fifteen minute round in the middleweight division. Introducing today's competitors. In the red corner, competing out of Helsinki, with a TWGC record of 10 wins and 9 losses; Paul Hunt! And in the blue corner, fighting out of St Petersburg, with a TWGC record of 2 wins and 0 losses; Peter Barnkvist!
The judges for this bout are Richard Clark, Colin Fotheringham and Donald Grub.
The fighters bow as they face eachother in the middle of the mat and we are under way.#CL2#
Barnkvist moves into the clinch successfully.
#TD2#
Barnkvist gets the body lock takedown. After a quick scramble, Hunt regains guard.
Score +2 for takedown into guard / half guard: Hunt (0) vs (2) Barnkvist
Hunt wants to control here, rather than go for any submissions from the bottom. At least for now.
Barnkvist stands up and looks to throw the legs aside to pass to side control. Hunt swivels though and keeps the full guard.
Barnkvist must be cautious of submissions here, given that his opponent has the superior Jiu Jitsu.
Barnkvist pushing down on Hunt's thigh, trying to pass to half guard. He's managed it... Nice work. #SUB2#
Barnkvist is thinking about going for an arm triangle but he can't free his leg.
Barnkvist wants to pass to mount but Hunt is defending the position.
We've had a slow start to the round here - hopefully the action picks up.
Hunt is looking to regain full guard. Not this time though.
Hunt won't allow Barnkvist to pass to mount. #T1#
Barnkvist is just sitting in half guard, waiting for something to happen.
Barnkvist trying to mount his opponent but Hunt defends it.
Hunt manages to get to full guard.
Barnkvist wants to pass the guard but Hunt is keeping the position.
Barnkvist stopping the sweep attempt from Hunt.#T2#
Barnkvist stands up and looks to throw the legs aside to pass to side control. Hunt swivels though and keeps the full guard.
Hunt keeping moving, preventing Barnkvist from controlling successfully.
Barnkvist passes easily into side control. Nice work. Score +3 for passing guard: Hunt (0) vs (5) Barnkvist
Barnkvist trying to control the position but Hunt is working away.
Hunt prevents Barnkvist from moving into mount. #T3##SUB2#
Barnkvist wants to work for a kimura but he's foiled early by Hunt, who protects the arm well. #SUB2#
Barnkvist is trying to land an Americana. He has the arm isolated but Hunt is keeping cool and he's avoided the danger for now.
This fight is sponsored by Chainsaw 7. More blood and guts and stuff like that, in cinemas everywhere now!
Hunt is trying to get back to half guard. He's pushing on Barnkvist's leg. He's managed it. Nice work.
Barnkvist prevents Hunt from improving his position.
Hunt makes his way to full guard. A much better position for Hunt.#T4#
Hunt pulls Barnkvist in close to prevent any damage. #SUB#
Hunt is looking for a guillotine. You can't force these things though and Barnkvist defends well.
Hunt managing to control the position.
Barnkvist wants to control from the top but Hunt keeps moving.
Barnkvist stands and throws Hunt's legs to the side, diving into side control. Score +3 for passing guard: Hunt (0) vs (8) Barnkvist#T5#
Barnkvist tries to move to mount but Hunt blocks the move with his legs.
Barnkvist is still trying to improve position.
The fighters are pressed up against the cage, both looking to find a bit of space to work.
Barnkvist wants to lay and pray for a moment but Hunt keeps working.
Barnkvist controlling from side mount.
Barnkvist tries to move to mount but Hunt blocks the move with his legs.
Hunt definitely looks more muscular than last time we saw him fight.
Hunt tries to bench press Barnkvist off him but Barnkvist keeps the position. #T6#
Barnkvist advances nicely into full mount. Score +2 for reaching mount: Hunt (0) vs (10) Barnkvist#SUB2#
Barnkvist moves into side control, trying to work for a kimura. That looks painful! Will he finish!!?? No, Hunt has worked his arm free - good work by Hunt!
#SUB2#
Barnkvist is trying to get an arm triangle but Hunt is defending well.
Hunt tries to get back to half guard but can't.#SUB2#
Barnkvist goes for an armbar! This could be all over! Wait, no, Hunt rolls with the submission and now he's on top in Barnkvist's guard! Nice work there by Hunt! Score +2 for sweep to guard / half guard: Hunt (2) vs (10) Barnkvist
Barnkvist tries to land a sweep but no joy. #T7#
Barnkvist is working the butterfly guard. He manages to land a nice scissor sweep and is now in half guard on the top. Nice move. Score +2 for sweep to guard / half guard: Hunt (2) vs (12) Barnkvist
Hunt works his way to full guard. Good work.
Barnkvist wants to control from the top but Hunt keeps moving.
Barnkvist tries to free his leg and advance position but Hunt is retaining full guard.
Barnkvist is looking to pass into half guard but Hunt pushes him away with his feet and jumps on top - now Hunt is in guard. Score +2 for sweep to guard / half guard: Hunt (4) vs (12) Barnkvist
Hunt is frustrating his opponent with some stalling tactics from top position.
Barnkvist wants to sweep but no luck.
Barnkvist keeping moving, preventing Hunt from controlling successfully.
Barnkvist is working an open guard here, looking to improve his position. No doubt that will leave him open to counters but at least he's being more offensive.#T8#
Hunt trying to control but Barnkvist is working from the bottom.
Barnkvist not looking particularly offensive just at the moment.
Barnkvist looking to hit a scissor sweep but Hunt is one step ahead there.
Hunt sitting in guard, not really doing much.
Barnkvist looking for a sweep. Not yet Barnkvist, not yet. #T9##SUB2#
Barnkvist is looking for a guillotine. You can't force these things though and Hunt defends well.
The ref warns both fighters not to hold the cage as they work up against the meshing.
Hunt is frustrating his opponent with some stalling tactics from top position.
Barnkvist wants to sweep but no luck.
Barnkvist working a defensive guard here.
Hunt trying to control but Barnkvist is working from the bottom. #T10#
Hunt pressing down on his opponent's thigh, looking to pass guard. Barnkvist is keeping the position for now.
Hunt pushes down on Barnkvist's leg and manages to get into half guard.
Barnkvist tries to get to full guard but Hunt has control of the leg.
Barnkvist regains full guard. Nicely done.
Hunt trying to control the position from guard on top but Barnkvist is wriggling around, looking for whatever he can.
There's a bit of a scramble here and now Barnkvist is on top in guard.
Score +2 for sweep to guard / half guard: Hunt (4) vs (14) Barnkvist#T11#
Hunt keeping full guard, as Barnkvist tries to pass.
Hunt trying to control the position.
Hunt keeping full guard, as Barnkvist tries to pass.
Hunt manages to sweep nicely, so he's now on top. Barnkvist manages to get himself to full guard.
Score +2 for sweep to guard / half guard: Hunt (6) vs (14) Barnkvist#SUB2#
Barnkvist has his foot on Hunt's thigh. He's trying to push off and get in position for a triangle, I think. Hunt works his way back into a safe position though.
Barnkvist is working the butterfly guard. He manages to land a nice scissor sweep and is now in half guard on the top. Nice move. Score +2 for sweep to guard / half guard: Hunt (6) vs (16) Barnkvist#SUB2#
Barnkvist is sneakily working for an arm triangle but Hunt sees it coming and defends easily.#T12#
Hunt is pressing down on Barnkvist's left leg trying to get back to full guard. He's managed it.
Hunt trying to control the position.
Hunt keeping moving, preventing Barnkvist from controlling successfully.
Well,Hunt is on his way to losing a decision here. Can he use his experience to pull something off in the closing minutes?
Barnkvist pressing down on his opponent's thigh, looking to pass guard. Hunt is keeping the position for now. #SUB2#
Barnkvist has gone for a leg lock! Hunt slips out almost immediately though and dives into Barnkvist's guard. Score +2 for sweep to guard / half guard: Hunt (8) vs (16) Barnkvist
Barnkvist keeping moving, preventing Hunt from controlling successfully. #T13#
Hunt trying to pass the guard but can't manage it just yet. #SUB#
Hunt drops back for a leg! It's a sloppy attempt though and Hunt jumps back into guard quickly, to retain the dominant position.
Barnkvist keeping moving, preventing Hunt from controlling successfully.
Barnkvist looking to sweep here. No luck so far.
Hunt trying to control but Barnkvist is working from the bottom.
Barnkvist keeping full guard, as Hunt tries to pass.
Hunt is stalling in the full guard. #T14#
Barnkvist has his hands on Hunt's head, controlling the position.
Hunt preventing the sweep.
Barnkvist keeping full guard, as Hunt tries to pass.
Boooooooooooooooooooo!!! God, this has been a terrible round. Come on you two, sort yourselves out!
Barnkvist manages to sweep nicely, so he's now on top. Hunt manages to get himself to full guard.
Score +2 for sweep to guard / half guard: Hunt (8) vs (18) Barnkvist
Barnkvist stands up and looks to throw the legs aside to pass to side control. Hunt swivels though and keeps the full guard.
And that's the end of the fight!
Barnkvist wins on points by 18 to 8.
A victorious Peter Barnkvist thanked his army of followers in his post fight interview, telling people to make sure they follow him on Twitter. |
|
|
|
Undercard bout
|
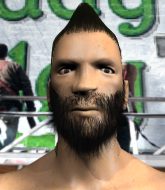
This TWGC bout is 1 fifteen minute round in the middleweight division. Introducing today's competitors. In the red corner, competing out of New York, with a TWGC record of 1 wins and 1 losses; Jamaica Jones! And in the blue corner, fighting out of Amsterdam, with a TWGC record of 2 wins and 0 losses; Yuri Boshtok!
The judges for this bout are William Gold, James Atkins and Andrew Berry.
Let's get this grappling contest under way! Who will be victorious?#TD2#
Boshtok darts in and lands a nice takedown into half guard. Score +2 for takedown into guard / half guard: Jones (0) vs (2) Boshtok
Jones gets back to full guard.
Boshtok stopping the sweep attempt from Jones.
Boshtok content to stall in guard here. #SUB#
Jones working from the bottom, still in full guard. He's managed to get a loose triangle. Boshtok doesn't seem to be doing much to defend here, obviously he feels comfortable in the position. Boshtok manages to throw the legs off his shoulder and he's back into guard - no problem.
We've had a slow start to the round here - hopefully the action picks up.
Boshtok trying to pass the guard but can't manage it just yet.
Jones wants to sweep but no luck.
Jones keeping moving, preventing Boshtok from controlling successfully. #T1#
Boshtok is in a good position here but he's just trying to control... And he's not even managing to do that successfully.
Jones is trying to keep Boshtok in close.
Jones bucks up whilst keeping hold of a body lock, managing to reverse the position. Now he's in top in Boshtok's guard. Score +2 for sweep to guard / half guard: Jones (2) vs (2) Boshtok#SUB2#
Boshtok looking for a guillotine here but Jones defends easily.
#SUB2#
Boshtok is actively looking for submissions from his back. He's worked himself a little space on the bottom and seems to be going for a triangle. No, he's switched into an armbar! That was slick! Jones rolls with it to try and escape but Boshtok cranks on the arm and Jones is forced to tap out! This one is aaaaaaaaall over!
Ladies and gentlemen, after 1:55 of round 1, we have a winner by way of Submission (Armbar). Yuri Boshtok!
After the big win, Yuri Boshtok made sure to do all the important stuff like thanking his sponsors Free Bands inc. and telling the interviewer how much he loves him. |
|
|
|
Co-main event
|
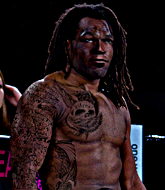
This TWGC bout is 1 fifteen minute round in the middleweight division. Introducing today's competitors. In the red corner, competing out of Amsterdam, with a TWGC record of 10 wins and 3 losses; Shane MacGowan! And in the blue corner, fighting out of New York, with a TWGC record of 22 wins and 13 losses; Vulcahn Dravezesdi!
The judges for this bout are Steven Brown, James Ackerman and Colin Fotheringham.
The official calls the fighters to the middle and the contest is under way.
MacGowan darts in looking for a takedown but Dravezesdi gets double underhooks and turns MacGowan into the cage. #TD2#
Dravezesdi scores with a nice takedown into half guard. Let's see what he's got on the ground. Score +2 for takedown into guard / half guard: MacGowan (0) vs (2) Dravezesdi#SUB2#
Dravezesdi is looking for a kimura. It's going to be difficult to finish that from half guard though and MacGowan defends it well.
MacGowan's coaches at Fenrir MMA have been working on his defensive grappling in preparation for this fight so let's see if he can get out of this tricky position.
Dravezesdi is trying to control the action in half guard but MacGowan is working away on the bottom, looking perhaps to get back to full guard.
MacGowan tries to get to full guard but Dravezesdi has control of the leg.
MacGowan has his hands clasped together around Dravezesdi's back. He's all about the action.
We've had a slow start to the round here - hopefully the action picks up.
MacGowan is refusing to be controlled, as Dravezesdi sits in half guard. #T1#
Dravezesdi looking to pass the half guard. Not this time.
MacGowan is not content to let Dravezesdi control the position.
The referee calls for the fighters to work.
MacGowan wants to get back to full guard.
MacGowan is working for an escape here. He's hooked one of Dravezesdi's legs and he's managed to sneak out and take Dravezesdi's back! Score +4 for clean sweep to past guard: MacGowan (4) vs (2) Dravezesdi
I really don't envy Dravezesdi right now.
The ref warns both fighters not to hold the cage as they work up against the meshing.
MacGowan is not going to allow Dravezesdi to sit and survive in this position. #T2#
MacGowan has the hooks sunk in and you can see the will to fight slowly draining out of Dravezesdi's body.
Dravezesdi is defending well here and trying to improve his position.
MacGowan has the hooks sunk in and you can see the will to fight slowly draining out of Dravezesdi's body.
MacGowan has the hooks in. Dravezesdi is trying to push off one leg but he has to do so cautiously to avoid being submitted. #T3#
MacGowan is controlling his opponent, waiting for an opportunity to finish.
Dravezesdi has found himself in a tricky position here. He's been working his transitions in training so let's see if he can work his way out of it.
MacGowan has the hooks in. Dravezesdi is trying to push off one leg but he has to do so cautiously to avoid being submitted.
A bit of a pause in the action here. MacGowan controlling the positon.
Dravezesdi is really stuck here.
Dravezesdi tries to escape the position - he's now mounted. Is that better or worse? Hard to tell!
Dravezesdi can't escape the position.
The fighters are pressed up against the cage, both looking to find a bit of space to work.#T4#
The fighters are starting to perspire pretty heavily.
Dravezesdi is still trying to improve position.
MacGowan avoids the attempt from Dravezesdi to control.
Dravezesdi is desperately trying to improve his position but MacGowan has a good base and remains in mount.#T5#
MacGowan is trying to take his opponent's back.
MacGowan trying to control but Dravezesdi is having none of it.
Dravezesdi tries to reverse the position but MacGowan maintains control.
MacGowan controlling from the full mount.
Dravezesdi is trying desperately to improve position.
Dravezesdi is persisting with the attempt to improve his position.
MacGowan will need to keep those long limbs tucked in whilst he's on the ground, to prevent any submissions.#T6#
Dravezesdi looking to escape from mount but he's given up his back! Score +3 for taking back: MacGowan (7) vs (2) Dravezesdi
MacGowan wants to control but Dravezesdi is keeping busy.
Dravezesdi manages to reverse the position and now he's in MacGowan's guard. Nice work there by Dravezesdi.
Score +2 for sweep to guard / half guard: MacGowan (7) vs (4) Dravezesdi
Dravezesdi tries to free his leg and advance position but MacGowan is retaining full guard. #T7#
MacGowan is trying to control the position from the bottom.
Dravezesdi engaging in some classic timewasting tactics.
Dravezesdi wants to control from the top but MacGowan keeps moving.
MacGowan trying to control the position here.
Dravezesdi trying to control but MacGowan is working from the bottom. #T8#
Dravezesdi stands up and looks to throw the legs aside to pass to side control. MacGowan swivels though and keeps the full guard.
Dravezesdi pushing down on MacGowan's thigh, trying to pass to half guard. He's managed it... Nice work.
Dravezesdi controlling the pace.
MacGowan won't allow Dravezesdi to pass to mount. #T9#
MacGowan gets back to full guard.
Dravezesdi wants to control from the top but MacGowan keeps moving.
MacGowan keeping full guard, as Dravezesdi tries to pass.
Dravezesdi wants to control from the top but MacGowan keeps moving. #T10#
Dravezesdi slows down the pace of the fight, as he sits in guard.
Dravezesdi trying to control the position from guard on top but MacGowan is wriggling around, looking for whatever he can.
Dravezesdi looking to sit in guard and control but MacGowan gets the butterfly guard and sweeps. He's now in the guard on the top. Score +2 for sweep to guard / half guard: MacGowan (9) vs (4) Dravezesdi
Dravezesdi is trying to control the position from the bottom.
MacGowan sitting in guard, not really doing much. #T11#
There's a bit of a scramble here and now Dravezesdi is on top in guard.
Score +2 for sweep to guard / half guard: MacGowan (9) vs (6) Dravezesdi
Dravezesdi is just sitting in guard, looking to avoid any submissions.
MacGowan wants to control here, rather than go for any submissions from the bottom. At least for now. #T12#
MacGowan looking for a sweep. Not yet MacGowan, not yet.
Dravezesdi trying to move into half guard but instead MacGowan has managed to sweep! Score +2 for sweep to guard / half guard: MacGowan (11) vs (6) Dravezesdi
Dravezesdi trying to control the position.
Dravezesdi tries to land a sweep but no joy.
MacGowan slows down the pace of the fight, as he sits in guard.
Dravezesdi working a defensive guard here.
#T13#
MacGowan trying to control the position from guard on top but Dravezesdi is wriggling around, looking for whatever he can.
Dravezesdi is working from a closed guard but he's struggling to control his opponent.
Dravezesdi bucks up whilst keeping hold of a body lock, managing to reverse the position. Now he's in top in MacGowan's guard. Score +2 for sweep to guard / half guard: MacGowan (11) vs (8) Dravezesdi
Dravezesdi trying to control the position from guard on top but MacGowan is wriggling around, looking for whatever he can. #T14#
MacGowan seems keen to control Dravezesdi's posture.
Dravezesdi not doing a lot at the moment. He'll have to show some more aggression or the fight will get stood up.
MacGowan is doing well to control the posture of his opponent and prevent any damage.
MacGowan working a defensive guard here.
Boooooooooooooooooooo!!! God, this has been a terrible round. Come on you two, sort yourselves out!
And that's the end of the fight!
MacGowan takes the fight on points by 11 to 8. |
|
|
|
Main event
|
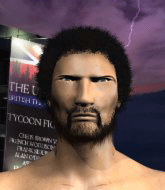
This TWGC bout is 1 fifteen minute round in the middleweight division. Introducing today's competitors. In the red corner, competing out of Las Vegas, with a TWGC record of 14 wins and 4 losses; Aedan Declan! And in the blue corner, fighting out of Los Angeles, with a TWGC record of 6 wins and 3 losses; Kurt Diesel!
The judges for this bout are Andrew Berry, James Glass and Phil Schofield.
The fighters connect hands in the middle of the mat and we are under way.#TD#
Declan closes the distance and gets a trip takedown into side control. Diesel quickly recovers to half guard. Score +2 for takedown into guard / half guard: Declan (2) vs (0) Diesel
Declan looks over to his corner - he wants some instructions but his corner are not responding.
Declan wants to free his trapped foot but Diesel is holding on for dear life with his legs.
Neither fighter is being very active at the moment, with Declan in particular looking to stall.
Declan is keen to just control but Diesel is a slippery customer.
Diesel controlling the leg, holding on to half guard.
Diesel tries to roll over but Declan keeps him under control.
We've had a slow start to the round here - hopefully the action picks up.
Declan is pressing down on Diesel's thigh, looking to free his foot. Diesel is holding on for now.
Diesel is not content to let Declan control the position.#T1#
Declan is controlling the pace.
Declan trying to mount his opponent but Diesel defends it.
Declan is trying to control. Diesel wants to improve his position but can't escape this time.
Declan looks over to his corner - he wants some instructions but his corner are not responding.
Diesel has been taking part in the yoga sessions down at Convicted Fight Club. Presumably he's going to look for a slick submission... Or maybe he's looking to avoid one.
The fighters are pressed up against the cage, both looking to find a bit of space to work.
Diesel moves his hips nicely and gets into full guard.
Declan has been talking about how he's improved his wrestling in the run up to the fight so let's see if that's enough to sway the balance.#T2#
Declan trying to control the position from guard on top but Diesel is wriggling around, looking for whatever he can.
Declan trying to move into half guard but instead Diesel has managed to sweep! Score +2 for sweep to guard / half guard: Declan (2) vs (2) Diesel#SUB#
Declan working for a triangle but Diesel defends it easily.
Declan wants to sweep but no luck.
Diesel trying to control but Declan is working from the bottom.
Declan is working an open guard here, looking to improve his position. No doubt that will leave him open to counters but at least he's being more offensive.#T3##SUB#
Declan is working actively off his back, looking to secure an arm or perhaps work for a triangle.
Declan looking to hit a scissor sweep but Diesel is one step ahead there. #SUB#
Declan is throwing his legs up, looking for submissions. Diesel is aware though and is defending well.
Diesel won't allow Declan to sweep him here. #SUB#
Declan is working actively off his back, looking to secure an arm or perhaps work for a triangle.
Diesel is intent on slowing down the pace of the fight, simply looking to control.#T4##SUB#
Declan working from the bottom, still in full guard. He's managed to get a loose triangle. Diesel doesn't seem to be doing much to defend here, obviously he feels comfortable in the position. Diesel manages to throw the legs off his shoulder and he's back into guard - no problem.
Declan looking to control.
Declan wants to sweep but no luck. #SUB#
Declan has a loose triangle. He'll be looking to tighten that up but Diesel can see exactly what he's planning and manages to posture up and free himself.
Diesel works a leg free and moves into half guard. #T5#
Diesel is working hard to pass the guard. He's done it - he's now in full mount! Trouble for Declan! Score +3 for passing guard: Declan (2) vs (5) Diesel
Declan is looking to improve his position but Diesel isn't that keen on the idea.
Declan wants to control but Diesel is having none of it.
Declan tries to get back to half guard but can't.
Declan gets back to half guard.
Declan is looking to control Diesel's leg but it's slowly edging free. Can Declan avoid being mounted?
Declan wants to improve his position but Diesel is controlling well.
#T6#
Diesel passes the guard and advances to mount! Score +3 for passing guard: Declan (2) vs (8) Diesel
Diesel looking to control but Declan is working nicely, looking to advance position himself.
Diesel controlling from the full mount.
Diesel prevents Declan from getting the reversal.
Diesel avoids the attempt from Declan to control.
Declan is trying desperately to improve position.#T7#
Declan tries to lock up and control but Diesel gives him a forearm to the face and pushes him away.
Declan keeping his composure momentarily, calmly looking to get back to half guard.
Diesel looking to control and managing it successfully.
Declan is trying to escape the mount.
Declan tries to lock up and control but Diesel gives him a forearm to the face and pushes him away.
Declan is working to get back to half guard.
#T8#
Declan tries to hold on but Diesel pushes him away.
Declan tries to reverse the position but Diesel maintains control.
Diesel fails to move to back control.
Declan is trying desperately to improve position.
Diesel content just to control the position here. #T9#
Declan can't escape the position.
The ref warns both fighters not to hold the cage as they work up against the meshing.
Diesel trying to control but Declan is having none of it. #SUB2#
Diesel has control of Declan's right arm, working for a kimura. It's a bit of a token attempt though and Declan regains control of the situation pretty easily.
Declan is working to get back to half guard.
Declan looking to escape from mount but he's given up his back! Score +3 for taking back: Declan (2) vs (11) Diesel#T10#
Diesel has the hooks in. Declan is trying to push off one leg but he has to do so cautiously to avoid being submitted.
Declan is keeping busy.
Good control from Diesel.
You can see the frustration on Declan's face
He knows he is in trouble unless he improves his position sooner rather than later.
Declan rolls and manages to get back to half guard. Nicely done.
Declan wants to improve his position but Diesel is controlling well.
#T11#
Neither fighter is being very active at the moment, with Diesel in particular looking to stall.
Declan has no desire to be mounted, so is trying to control. Diesel is working away from the top position though.
Declan tries to get to full guard but Diesel has control of the leg.
Declan makes his way to full guard. A much better position for Declan.
Declan not looking particularly offensive just at the moment.
Diesel preventing the sweep.
Diesel works a leg free and moves into half guard.
Diesel prevents Declan from improving his position.#T12#
Declan is pressing down on Diesel's left leg trying to get back to full guard. He's managed it.
Declan is looking to sweep but instead, Diesel has passed into half guard.
Declan is staying active underneath Diesel, who seems content to just control the action from this position.
Declan is looking to regain full guard. Not this time though.
Diesel works his foot free and advances to mount. Score +3 for passing guard: Declan (2) vs (14) Diesel
Declan is looking to get to half guard.#T13#
Diesel wants to control the pace but Declan is squirming around nicely.
Diesel looking to control and managing it successfully.
Declan tries to reverse the position but Diesel maintains control.
Diesel sitting in mount, just looking to control for the moment.
Declan is trying to escape the mount.
#T14#
Diesel content just to control the position here.
Declan is looking to get to half guard.
Boooooooooooooooooooo!!! God, this has been a terrible round. Come on you two, sort yourselves out!
And that's the end of the fight!
Diesel wins on points by 14 to 2.
A victorious Kurt Diesel thanked his army of followers in his post fight interview, telling people to make sure they follow him on Twitter. |
|
|
|
|
|
|