 |
BFC Fight Night 4 PBP Commentary |
Undercard bout
|
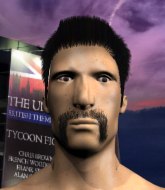
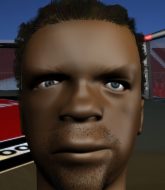
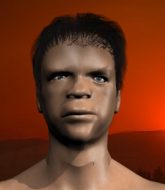
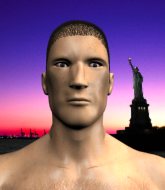
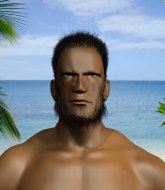
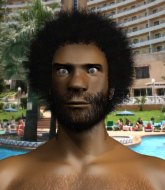
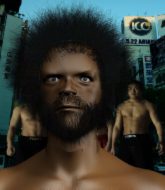
Coming up we have a heavyweight MMA rules bout between Lion Tiger (ranked 3936 p4p, 5163 weight class) and Maikel Canel (ranked 395 p4p, 468 weight class). Tiger comes to the cage accompanied by Alok - Hear Me Tonight. Maikel Canel will no doubt be looking to use his reach advantage to good effect.
 |
|
 |
| 190 cm
19
225
1 - 1 - 0 |
|
224 cm
21
267
1 - 0 - 0 |
BJJ White Belt
Counter fighter
Very strong |
|
Decent wrestler
Basic striking
Good gas tank |
|
| |
|
Ladies and gentlemen. This fight is 3 rounds, in the heavyweight division.
Introducing the fighter to my left, fighting out of the red corner.
With a record of 1 - 1 - 0, fighting out of Rio de Janeiro, Lion Tiger!
And introducing the fighter to my right, fighting out of the blue corner.
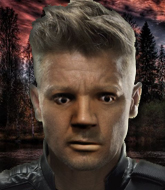
With a record of 1 - 0 - 0, fighting out of Los Angeles, Maikel Canel!
The judges for this bout are Daniel Cesar, Seu Braga and Paulo Santos.

The bell rings for round one and we are underway!
The bell rings for round one and we are underway!
Canel shoots in for a takedown but Tiger shows good takedown defense.
Canel looks for a takedown here. Will he get it? Tiger is fending him off so far but Canel persists. Nope, Tiger circles away and we're back to standing.
Canel defending well as Tiger loads up on a big left hand.
Canel shoots in but doesn't get the takedown
and Tiger counters with a straight punch to the midsection.
Lion Tiger has stuffed three takedown attempts in the round now. That's going to take a lot out of Maikel Canel.
Tiger scores with a nice looking left hook and follows it up with an uppercut!
 It looks like Maikel Canel has been cut. It looks like Maikel Canel has been cut.
Tiger throws a hook to the side of Canel's head but Canel sees it coming and ducks under it beautifully.
Canel closes this distance looking for a takedown but Tiger circles away.

Canel drives through with a takedown into guard.
Tiger utilising some decent striking defenses from the guard, preventing the ground and pound.
Tiger is trying to control the position from the bottom.
Canel seems content to control from guard here. He's going to have to remain active though if he doesn't want to get stood back up.
Tiger keeping moving, preventing Canel from controlling successfully.

That's one minute gone in the round.
Canel working some ground and pound from guard but it's not doing any damage.
Canel is sitting in guard, working some ground and pound.
Canel not doing a lot at the moment. He'll have to show some more aggression or the fight will get stood up.
The ref warns both fighters not to hold the cage as they work up against the meshing.
Canel throwing strikes but missing.
Tiger working the defensive guard well to avoid strikes from Canel.
We must be close to a standup if these guys don't pick up the pace.

That's two minutes gone in the round.
Well. There's a bit of a lull in the action here and the crowd are starting to get restless.
A big thud reverberates around the arena there as Canel accidentally thumps the mat. Hopefully he's not broken his hand.
Tiger working the defensive guard well to avoid strikes from Canel.

The ref stands the fighters back up due to a lack of activity.
Tiger getting the better of the striking in that exchange.
Canel shoots and misses
and Tiger counters with a stiff right hand.
Tiger throws a shot to the body.
Tiger throws a hook but Canel blocks it.
Nice sprawl there from Tiger as Canel shoots in.
Tiger quickly followed up with a counter body kick but doesn't connect.
Good exchange - Tiger coming out on top.
Tiger closes the distance and lands a vicious right hand that drops Canel! Tiger dives in looking to finish! Canel is still trying to defend himself but he's taking too many shots and the referee has no choice but to stop the fight!
Ladies and gentlemen, after 2:49 of round 1, we have a winner by way of TKO (Strikes). Lion Tiger!
A victorious Lion Tiger thanked his army of followers in his post fight interview, telling people to make sure they follow him on Twitter.
|
|
|
|
|
|
|
|
|
|
|
|
|
|
|
|
|
|
|
|
|
|
|
| S |
C
A |
G |
S |
C
B |
G |
|
S |
C |
G |
|
energy
A | B |
|
hype
A | B |
|
pop
A | B |
|
mgr
A | B |
|
FIGHT
RATING
38% |
|
|
|
|
|
|
|
Undercard bout
|
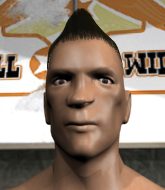
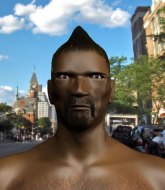
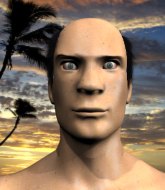
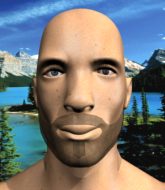
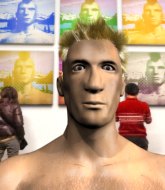
Coming up we have a lightweight MMA rules bout between Francois Oosthuizen (ranked 3363 p4p, 6270 weight class) and Piotr Przepiorka (ranked 389 p4p, 563 weight class). Przepiorka has chosen Kękę - Presja as his entrance music. Rumors backstage are that the fighters have been paid to keep it standing but we know that would never happen in MMA!
 |
|
 |
| 177 cm
19
166
4 - 0 - 0 |
|
175 cm
26
164
4 - 4 - 0 |
Good wrestling
Basic striking
Very quick |
|
Decent wrestler
Brawler
Knockout power |
|
| |
|
Ladies and gentlemen. This fight is 3 rounds, in the lightweight division.
Introducing the fighter to my left, fighting out of the red corner.
With a record of 4 - 0 - 0, fighting out of New York, Francois Oosthuizen !
And introducing the fighter to my right, fighting out of the blue corner.
With a record of 4 - 4 - 0, fighting out of Helsinki, Piotr Przepiorka!
The judges for this bout are Mauricio Rocha, Luis Engracia and Emerson Jorge.
The bell rings for round one and we are underway!
The bell rings for round one and we are underway!
Oosthuizen displays good takedown defense there as he swats away a double leg from Przepiorka.
Oosthuizen keeps the fight standing with a nice sprawl.
Nice cross by Oosthuizen .
Oosthuizen keeps the fight standing with a nice sprawl.
Francois Oosthuizen has stuffed three takedown attempts in the round now. That's going to take a lot out of Piotr Przepiorka.

Oosthuizen rushes Przepiorka and pushes him back against the cage in a clinch.
Oosthuizen lands a body shot in the clinch.
Oosthuizen has a couple of punches blocked by Przepiorka.
Przepiorka can't get the takedown.
We've had a slow start to the round here - hopefully the action picks up.
Oosthuizen lands with a short head shot on the inside.
Oosthuizen lands a right hand.
Oosthuizen goes for a body shot but it's blocked.
Oosthuizen has a couple of punches blocked by Przepiorka.
Oosthuizen misses with a hook from the clinch.
Przepiorka has clasped his hands together around Oosthuizen 's back... aaand, he's got a takedown into side control. Nicely done.
Fantastic stuff here - a very entertaining period of action, which has drawn cheers from the crowd.
Oosthuizen is working hard to escape and get back to his feet. After a battle for position, Przepiorka asserts his dominance and retains side control.
That's one minute gone in the round.
Przepiorka tries to score with some ground and pound. Oosthuizen controls his posture well this time though and the shots don't do any damage.
Przepiorka wants to control but Oosthuizen is keeping him busy.
Oosthuizen is working hard to escape and get back to his feet. After a battle for position, Przepiorka asserts his dominance and retains side control.
Przepiorka moving around in side mount but really he's just happy to control for now.
The fighters are pressed up against the cage, both looking to find a bit of space to work.
Przepiorka misses with a strike but at least he's keeping busy, looking to cause some damage - that will still help him when it comes to the judges scorecards.
That's two minutes gone in the round.
A lull in the action here being met with boos from the crowd.
Przepiorka happy to just control the position for now.
Oosthuizen wants to get back to his feet.
The referee decides to stand the fighters back up.
Przepiorka takes one to the chin there.
Oosthuizen scores with a jab. Przepiorka acknowledges it with a nod of the head.
Oosthuizen scores with a jab to the body.
Przepiorka shoots in but doesn't get the takedown
and Oosthuizen counters with a stiff right hand.
Przepiorka takes a jab on the nose. He smiles like he loves it and keeps coming.
Oosthuizen connects with a body shot.

That's three minutes gone in the round.
Oosthuizen jabs. That one connects to the head of his opponent.
Oosthuizen rushes Przepiorka and presses him up against the cage.
Oosthuizen definitely looks more muscular than last time we saw him fight.
Przepiorka blocking some punches.
A nice left hand lands by Oosthuizen .
A right hand to the body from Oosthuizen .
Przepiorka has Oosthuizen pressed up against the cage and is working for takedown. Oosthuizen manages to improve position though and keeps the fight standing.
Oosthuizen scores with a nice hook to the head.
Oosthuizen digs a right hand underneath Przepiorka's ribcage. Przepiorka let out a lung full of air as it connected.
Oosthuizen lands an uppercut.
Oosthuizen is defending well against a takedown attempt.
Przepiorka looks winded!
Oosthuizen lands with a short punch from the clinch.
A short left from Oosthuizen .
 Przepiorka is rocked! Przepiorka is rocked!
Oosthuizen cracks Przepiorka with a nice body shot.
Przepiorka is still on wobbly legs! Can Oosthuizen finish him?
This is a great period of action - very entertaining stuff!
Przepiorka is working on a leg, looking for a takedown but Oosthuizen is defending well.
Oosthuizen lands with a good tight uppercut to the head.
We've been informed that Przepiorka has been working hard on his conditioning in the buildup to the fight.
Oosthuizen scores with an uppercut up the middle.
Oosthuizen lands an uppercut in the clinch that drops Przepiorka to his knees! Oosthuizen keeps firing more shots against his stricken opponent and the referee jumps in to save him!
Ladies and gentlemen, after 3:55 of round 1, we have a winner by way of TKO (Strikes). Francois Oosthuizen !
|
|
|
|
|
|
|
|
|
|
|
|
|
|
|
|
|
|
|
|
|
|
|
| S |
C
A |
G |
S |
C
B |
G |
|
S |
C |
G |
|
energy
A | B |
|
hype
A | B |
|
pop
A | B |
|
mgr
A | B |
|
FIGHT
RATING
48% |
|
|
|
|
|
|
|
Undercard bout
|
Coming up we have a middleweight MMA rules bout between Jorge Galvao (ranked 3794 p4p, 5484 weight class) and Ralo Gracie (ranked 456 p4p, 572 weight class). Jorge Galvao had a look across the cage there at his opponent. He definitely means business
 |
|
 |
| 185 cm
28
196
4 - 3 - 0 |
|
185 cm
27
195
2 - 4 - 0 |
BJJ Brown Belt
Brawler
Experienced |
|
BJJ Brown Belt
Counter fighter
Knockout power |
|
| |
|
Ladies and gentlemen. This fight is 3 rounds, in the middleweight division.
Introducing the fighter to my left, fighting out of the red corner.
With a record of 4 - 3 - 0, fighting out of London, Jorge Galvao!
And introducing the fighter to my right, fighting out of the blue corner.
With a record of 2 - 4 - 0, fighting out of Las Vegas, Ralo Gracie!
The judges for this bout are Emerson Jorge, Edson Gomes and Leandro Rodrigues.
The bell rings for round one and we are underway!
The bell rings for round one and we are underway!
Galvao gets caught on his heels momentarily as he allows Gracie to score an easy takedown into full guard.
Galvao controls Gracie momentarily but Gracie frees himself.
Gracie advances position into side control!
Galvao seems a little lost for a moment, as Gracie dominates the positioning.
Gracie wants to lay and pray for a moment but Galvao keeps working.
We've had a slow start to the round here - hopefully the action picks up.
Gracie tries to move to mount but Galvao blocks the move with his legs.
That's one minute gone in the round.
Gracie wants to control but Galvao is keeping him busy.
Galvao can't do much from the bottom here.
Gracie wants to lay and pray for a moment but Galvao keeps working.
Galvao is looking to reverse the position.
Galvao manages to work his way to half guard, despite Gracie's best efforts.

Galvao actively working from the bottom here.
Gracie thows a huge punch but Galvao dodges it nicely.
Galvao is looking to get back to full guard here but Gracie has managed to pass to side control instead.
Gracie sitting in side control, looking to soften his opponent up with elbows and hammerfists but Galvao is avoiding damage well and looking to escape the position.
The fighters are pressed up against the cage, both looking to find a bit of space to work.
That's two minutes gone in the round.
Gracie misses with the ground and pound.
Gracie remains in side control and seems content to stay there. It's a versatile position from which he can work both strikes and submissions, whilst maintaining that control, so maybe he'll sit here for a while.
Galvao gets back to half guard.
The fighters are starting to get a bit slippery now, which will make submissions a bit more difficult.
Galvao wants to control but Gracie is keeping busy.
Gracie throwing punches and elbows but they're not doing any damage.
Galvao is looking to sinch up a guillotine here but Gracie pulls his head out easily.
That's three minutes gone in the round.
Gracie moves into full mount! Galvao won't be happy about that!
Gracie tries to control but Galvao wriggling away.
Galvao is working to get back to half guard.

Galvao tries to improve his position but Gracie has taken his back! Gracie has a choke - it's sunk in pretty tight... Will Galvao tap? No... maybe... yes! He's tapped! Gracie pushes Galvao away and gets up to celebrate with his corner!
Ladies and gentlemen, after 3:48 of round 1, we have a winner by way of Submission (RNC). Ralo Gracie!
|
|
|
|
|
|
|
|
|
|
|
|
|
|
|
|
|
|
|
|
|
|
|
| S |
C
A |
G |
S |
C
B |
G |
|
S |
C |
G |
|
energy
A | B |
|
hype
A | B |
|
pop
A | B |
|
mgr
A | B |
|
FIGHT
RATING
27% |
|
|
|
|
|
|
|
Undercard bout
|
Coming up we have a welterweight MMA rules bout between Gvido Linga (ranked 4045 p4p, 2816 weight class) and Rolando Marcellini (ranked 540 p4p, 406 weight class). Rolando Marcellini has the better chin. Will he look to stand and bang today?
 |
|
 |
| 198 cm
27
170
6 - 7 - 0 |
|
186 cm
26
179
3 - 0 - 0 |
BJJ Purple Belt
Brawler
KO power |
|
BJJ White Belt
Excellent MT
Good gas tank |
|
| |
|
Ladies and gentlemen. This fight is 3 rounds, in the welterweight division.
Introducing the fighter to my left, fighting out of the red corner.
With a record of 6 - 7 - 0, fighting out of Hilo, Gvido Linga!
And introducing the fighter to my right, fighting out of the blue corner.
With a record of 3 - 0 - 0, fighting out of London, Rolando Marcellini !
The judges for this bout are Mauricio Rocha, Leandro Rodrigues and Luis Engracia.
The bell rings for round one and we are underway!
The bell rings for round one and we are underway!
Marcellini stuffs the takedown attempt from Linga. Linga gets slowly back to his feet.
Marcellini misses with a hook. Linga ducked under it nicely.
Marcellini throws a poor cross that misses

and Linga counters with a takedown into side control.
Marcellini wants to get back to his feet but Linga is dominant here and he's now got Marcellini 's back!
Linga misses with an elbow to the head.
Linga keeps control of the position easily here as Marcellini tries to buck him off.
The fighters are pressed up against the cage, both looking to find a bit of space to work.
Marcellini tries to break free.
Marcellini fending off the submission attempt from Linga.
Wooooo! Give it up for these two warriors! They are putting on a show!
Marcellini staying busy and making it hard for Linga to control.
That's one minute gone in the round.
Marcellini trying to get back to his feet but Linga is in full control for now.
Marcellini is being controlled on the ground here - he must escape this position otherwise surely the end is near.
Linga looks to be in better condition than last time we saw him fight. Obviously he's been working hard on his cardio.
Linga controlling well, preventing Marcellini from escaping the position.
That's two minutes gone in the round.
A lull in the action here being met with boos from the crowd.
Marcellini is very frustrated here, being controlled quite effectively by Linga.
Linga working from the back looking to end the fight with a rear naked choke. Marcellini is doing well to defend. Linga seems to have got his hand under the chin though and he's sunk the choke in! Marcellini is forced to tap and this one is over!
Ladies and gentlemen, after 2:31 of round 1, we have a winner by way of Submission (RNC). Gvido Linga!
|
|
|
|
|
|
|
|
|
|
|
|
|
|
|
|
|
|
|
|
|
|
|
| S |
C
A |
G |
S |
C
B |
G |
|
S |
C |
G |
|
energy
A | B |
|
hype
A | B |
|
pop
A | B |
|
mgr
A | B |
|
FIGHT
RATING
41% |
|
|
|
|
|
|
|
Undercard bout
|
Coming up we have a super heavyweight MMA rules bout between James Frazier (ranked 2562 p4p, 7177 weight class) and Troy Orion (ranked 118 p4p, 215 weight class). James Frazier has the edge in experience - let's see if he can make that count tonight.
 |
|
 |
| 200 cm
26
300
5 - 0 - 0 |
|
203 cm
19
285
0 - 0 - 0 |
BJJ White Belt
Excellent MT
Granite chin |
|
BJJ Purple Belt
Brawler
Can Moonwalk |
|
| |
|
Ladies and gentlemen. This fight is 3 rounds, in the super heavyweight division.
Introducing the fighter to my left, fighting out of the red corner.
With a record of 5 - 0 - 0, fighting out of Montreal, James Frazier!
And introducing the fighter to my right, fighting out of the blue corner.
With a record of 0 - 0 - 0, fighting out of Amsterdam, Troy Orion!
The judges for this bout are Daniel Cesar, Emerson Jorge and Luis Engracia.
The bell rings for round one and we are underway!
The bell rings for round one and we are underway!
Frazier gets a clinch.
Frazier scores with a nice hook to the head.

Frazier escapes the clinch and we're back to striking.
Frazier has Orion up against the cage in a clinch.
Frazier presses Orion against the cage and delivers a mid-strength body shot.
Frazier tried to land a shot to the body but connects with Orion's elbow.
Frazier works on Orion's body with a couple of short punches.
Orion looks winded!
A nice left hand lands by Frazier.
Frazier misses with an elbow over the top.
A left hand lands to the body for Frazier.
We've had a slow start to the round here - hopefully the action picks up.
A right hook to the body lands for Frazier.
Frazier breaks the clinch and we return to the middle of the mat.
Frazier moves into the clinch.
Frazier lands punches inside but they're not really causing much damage.
That's one minute gone in the round.
Frazier breaks the clinch and we return to the middle of the mat.
Frazier instigates a clinch.
Frazier working on landing some head shots here - that one got through nicely.
Orion is rocked!
Frazier pushes off and circles away, back to the middle of the mat.
Orion is still on wobbly legs! Can Frazier finish him?
James Frazier is looking to keep the fight on the feet at all costs.
Frazier forces Orion back against the cage and clinches.
Frazier dips a shoulder and cracks Orion with a mighty uppercut! Orion falls back against the cage and Frazier unloads with a barrage of strikes! Orion is completely out with his eyes open, only supported by the cage! Save him ref! Eventually the ref decides to do his job and jumps in - Frazier screams abuse at the incompetent official before going over to celebrate with his corner. Brutal stuff!
Ladies and gentlemen, after 1:24 of round 1, we have a winner by way of TKO (Strikes). James Frazier!
|
|
|
|
|
|
|
|
|
|
|
|
|
|
|
|
|
|
|
|
|
|
|
| S |
C
A |
G |
S |
C
B |
G |
|
S |
C |
G |
|
energy
A | B |
|
hype
A | B |
|
pop
A | B |
|
mgr
A | B |
|
FIGHT
RATING
62% |
|
|
|
|
|
|
|
Undercard bout
|
Coming up we have a lightweight MMA rules bout between Rebel Smith (ranked 3678 p4p, 3367 weight class) and Wayne Hart (ranked 426 p4p, 390 weight class). Both fighters look fresh as a daisy as they make their way towards the cage.
 |
|
 |
| 175 cm
26
162
6 - 1 - 0 |
|
167 cm
26
167
6 - 2 - 0 |
BJJ White Belt
Excellent MT
Good chin |
|
Good wrestler
Basic striking
Granite chin |
|
| |
|
Ladies and gentlemen. This fight is 3 rounds, in the lightweight division.
Introducing the fighter to my left, fighting out of the red corner.
With a record of 6 - 1 - 0, fighting out of New York, Rebel Smith!
And introducing the fighter to my right, fighting out of the blue corner.
With a record of 6 - 2 - 0, fighting out of Las Vegas, Wayne Hart!
The judges for this bout are Seu Braga, Mauricio Rocha and Matheus Silva.
The bell rings for round one and we are underway!
The bell rings for round one and we are underway!
Hart on the wrong end of a nice jab.
Hart takes a solid shot to the body. That one hurt him but he's trying not to show it.
Hart shoots in for a double leg but Smith sprawls well. That's going to sap some energy.
Hart walks into a stiff left hand from Smith.
Smith scores with a crisp jab that stopped Hart in his tracks.
Smith's corner calls for a 1-2. Smith obliges with the 1 part as he scores the single shot and moves back out of range.
Hart shoots in looking for a double leg takedown. Smith defends it nicely.
Hart with poor footwork there. He got himself in a bit of a tangle, enabling Smith to score with a decent uppercut.
Hart looks shocked there as he takes a right hand to the temple.
The crowd are loving this. Great action here.
Smith dips to his left and cracks Hart with an uppercut!
Hart is rocked!
Smith drops Hart with a huge uppercut! Hart drops to the floor like a sack of potatoes. Smith is raining down punches and the ref stops the fight! This one is all over!
Ladies and gentlemen, after 0:42 of round 1, we have a winner by way of TKO (Strikes). Rebel Smith!
|
|
|
|
|
|
|
|
|
|
|
|
|
|
|
|
|
|
|
|
|
|
|
| S |
C
A |
G |
S |
C
B |
G |
|
S |
C |
G |
|
energy
A | B |
|
hype
A | B |
|
pop
A | B |
|
mgr
A | B |
|
FIGHT
RATING
100% |
|
|
|
|
|
|
|
Undercard bout
|
Coming up we have a welterweight MMA rules bout between Johnny Lewis (ranked 2142 p4p, 1916 weight class) and Armand Hammer (ranked 308 p4p, 280 weight class). Hammer comes into a darkened arena with his song building. Hammer Time kicks in, the lights come on and the crowd goes wild! What a showman! Both fighters really staring each other down here, as Armand Hammer enters the cage!
 |
|
 |
| 180 cm
27
170
5 - 2 - 0 |
|
185 cm
27
170
8 - 3 - 0 |
BJJ White Belt
Excellent MT
Cardio machine |
|
BJJ White Belt
Excellent MT
Good gas tank |
|
| |
|
Ladies and gentlemen. This fight is 3 rounds, in the welterweight division.
Introducing the fighter to my left, fighting out of the red corner.
With a record of 5 - 2 - 0, fighting out of London, Johnny Lewis!
And introducing the fighter to my right, fighting out of the blue corner.
With a record of 8 - 3 - 0, fighting out of New York, Armand Hammer!
The judges for this bout are Alexandre Firmino, Mauricio Rocha and Daniel Cesar.
The bell rings for round one and we are underway!
The bell rings for round one and we are underway!
Lewis takes a punch right to his stomach. That took the wind out of him momentarily.
Hammer just misses with a punch to the body.
Lewis throwing a counter right hand but Hammer manages to avoid it.
Hammer lunges in with an uppercut that skims his opponent's chin.
Johnny Lewis seems to be the more aggressive standup fighter in this bout.
Lewis connects with a lovely right hand, straight down the pipe.
It looks like Armand Hammer has been cut.
Lewis slips under a jab.
Lewis with a hook.
Lewis throws a hook to the side of Hammer's head but Hammer sees it coming and ducks under it beautifully.
Good standup being displayed there by Hammer as he connects with a hook.
 It looks like Johnny Lewis has been cut. It looks like Johnny Lewis has been cut.
Hammer has been spending a lot of time sparring his boxing in the run up to the fight, trying to sharpen up those hands and look for a knockout.
Wow, both these guys are really going for it!
Hammer lands a really nice looking cross but Lewis seems unphased.
Hammer uses some good footwork to avoid the body shot by Lewis.
Hammer ducks under a wild hook from Lewis.
This is a great period of action - very entertaining stuff!
Hammer misses the body punch
and Hammer takes a counter punch right on the button for his troubles.
Lewis gets in close and instigates a clinch.
Our sources have told us that Lewis has been working on his knees in the buildup to the fight.
Lewis struggles to land a body shot inside as Hammer controls his hands.
Lewis breaks from the clinch.
Hammer misses with a straight right.
Hammer punishes Lewis's body with a nice straight punch.
Lewis throws a lazy uppercut
and Hammer counters with a nice body shot.
Lewis misses with a straight right.
Lewis moves his head to the side to avoid a jab but walks straight into a cross.
Hammer fakes a head punch and goes low to the body. Nicely done.
Hammer throws a big shot that misses.
That's one minute gone in the round.
Hammer lands with a cross to side of his opponent's head.
A punch lands to the side of Lewis 's head but he takes it in his stride.
Hammer scores with the left hand. Lewis knows he should have avoided that one.
 Lewis is rocked! Lewis is rocked!
Hammer finds Lewis's off switch, with a big overhand right that connects perfectly to the side of the head! Lewis flops back against the cage, eyes gazing into the distance. Hammer lands an unnecessary shot before the referee has time to step in and end the fight. Brutal stuff but I'm sure Lewis will be OK.
Ladies and gentlemen, after 1:15 of round 1, we have a winner by way of KO (Punch). Armand Hammer!
Jumping up and down and very excited, Armand Hammer waved his t-shirt featuring Brooklyn Apothecary's logo in front of the cameras.
|
|
|
|
|
|
|
|
|
|
|
|
|
|
|
|
|
|
|
|
|
|
|
| S |
C
A |
G |
S |
C
B |
G |
|
S |
C |
G |
|
energy
A | B |
|
hype
A | B |
|
pop
A | B |
|
mgr
A | B |
|
FIGHT
RATING
95% |
|
|
|
|
|
|
|
Undercard bout
|
Coming up we have a welterweight MMA rules bout between Keisuke Matsuzaka (ranked 981 p4p, 999 weight class) and Ryo Hamada (ranked 153 p4p, 157 weight class). I don't know about you partner, but I'm pumped for this one!
 |
|
 |
| 179 cm
21
181
6 - 0 - 0 |
|
180 cm
21
178
6 - 1 - 0 |
Decent wrestler
Great elbows
KO power |
|
BJJ Brown Belt
Decent boxing
Granite chin |
|
| |
|
Ladies and gentlemen. This fight is 3 rounds, in the welterweight division.
Introducing the fighter to my left, fighting out of the red corner.
With a record of 6 - 0 - 0, fighting out of Montreal, Keisuke Matsuzaka!
And introducing the fighter to my right, fighting out of the blue corner.
With a record of 6 - 1 - 0, fighting out of Los Angeles, Ryo Hamada!
The judges for this bout are Matheus Silva, Alexandre Firmino and Edson Gomes.
The bell rings for round one and we are underway!
The bell rings for round one and we are underway!
Hamada throws a leg kick
and Hamada takes a counter punch right on the button for his troubles.
Hamada connects with a single shot there.
Matsuzaka lands a jab.
Matsuzaka looks to throw the jab but Hamada is out of range.
Hamada throws a sloppy head kick
and Hamada takes a counter punch right on the button for his troubles.
Hamada scores with a jab.
Left hook, right uppercut from Hamada.
Hamada with a poor takedown
letting Matsuzaka counter with a right hand.
We've seen a great period of action over the last minute or so - credit to both fighters for going all out!
Hamada throws a hook but Matsuzaka blocks it.
A quick step to the side and Matsuzaka tries to counter with a shot to the body but it doesn't connect.
Hamada throws a poor cross that misses
letting Matsuzaka counter with a right hand.
Hamada throws a head kick that misses and slips in the process. He scrambles back to his feet and the fighters circle.
Hamada misses with a jab and misses with a cross straight after too.
Hamada swings wildly with a couple of big hooks
and Matsuzaka connects with a straight left hand counter down the middle.
We've been told by Matsuzaka's head coaches at GWad's Playpen that he's been working on his takedown defense in preparation for this fight.
Hamada fakes a strike and closes the distance, dragging Matsuzaka to the ground. Hamada is now in Matsuzaka's guard.
Matsuzaka keeping moving, preventing Hamada from controlling successfully.
Hamada engaging in some classic timewasting tactics.
That's one minute gone in the round.
Matsuzaka looking to sweep here. No luck so far.
Hamada trying to control the position from guard on top but Matsuzaka is wriggling around, looking for whatever he can.
The fighters are pressed up against the cage, both looking to find a bit of space to work.
Hamada throws a big elbow that misses.
Hamada trying to control the position from guard on top but Matsuzaka is wriggling around, looking for whatever he can.
It looks like the ref is thinking about a standup.
The ref warns both fighters not to hold the cage as they work up against the meshing.
Hamada throwing strikes from guard but Matsuzaka blocks nicely.
The referee has decided to stand the fighters back up, so we'll restart on the feet.
That's two minutes gone in the round.
There's not a lot going on here and the crowd are letting the fighters know they're not willing to tolerate a lack of action.
Hamada throws a right hand that Matsuzaka ducks under and follows up with a left that Matsuzaka also avoids with ease.
Hamada misses the body punch
and Matsuzaka counters with a lovely straight right hand!
Hamada misses with a series of wild punches.
A jab lands there for Hamada.
Hamada throws a combination that misses
and Matsuzaka counters with a nice body shot.
Hamada just misses with a punch to the body.
Matsuzaka tests Hamada's chin there with a solid looking shot.
Matsuzaka with a hook.
Hamada misses the shot to the body.
Matsuzaka lands a right hook to the body.
Hamada throws a right hand that misses
and Hamada takes a counter punch right on the button for his troubles.
It looks like Ryo Hamada has been cut.
Matsuzaka throws a body shot but no joy.
That's three minutes gone in the round.
Hamada staying out of range there.
Matsuzaka swings and misses with a hook to the body.
Hamada changes levels and scores with a jab to the body.
Matsuzaka misses with a hook.
Hamada avoids the body shot from Matsuzaka.
Keisuke Matsuzaka is looking to keep the fight on the feet at all costs.
Hamada throws a body shot but no joy.
Matsuzaka looks to throw the jab but Hamada is out of range.
Nice jab there from Matsuzaka.
No luck with that takedown attempt from Hamada.
Hamada moves out of range of the strikes.
A head kick by Hamada misses
and Matsuzaka counters with a straight right hand.
Hamada dives in and grabs Matsuzaka's left leg, looking for a takedown. Matsuzaka pushes down on Hamada's head and hops out.
It looked like Matsuzaka wanted to counter with a hook but didn't fully commit.
Keisuke Matsuzaka has stuffed three takedown attempts in the round now. That's going to take a lot out of Ryo Hamada.
Hamada avoids the body shot from Matsuzaka.

That's four minutes gone in the round.
Hamada ducks down and throws a hook to the body but Matsuzaka moves away.
Matsuzaka scores with a hook to the body. Hamada takes a step back and tries to catch his breath.
Matsuzaka gets caught flat footed, as Hamada shoots in with a quick takedown into guard.
The crowd are loving this. Great action here.
Matsuzaka looking to hit a scissor sweep but Hamada is one step ahead there.
Matsuzaka keeping moving, preventing Hamada from controlling successfully.
Matsuzaka on his back here. We all know that wrestlers don't like being on their back so let's see if Matsuzaka tries to get out of the position.
And thats the end of the round the fighters go back to their corners.
That was a close round but I would say that Keisuke Matsuzaka will probably get the nod.
The cut man is working on Ryo Hamada's cut.
Well, the break between rounds is over. Let's get back to the scrappin!

Hamada closes the distance and gets a trip takedown into side control. Matsuzaka quickly recovers to half guard.
Matsuzaka is doing well to avoid being mounted. He's controlling the position at the moment.
Hamada working to pass to mount. He's got his hand pressing down on Matsuzaka's thigh. Matsuzaka counters though and makes it back to full guard.
Hamada throws a big right hand that misses.
We've had a slow start to the round here - hopefully the action picks up.
Matsuzaka has his hands on Hamada's head, controlling the position.
Matsuzaka keeping moving, preventing Hamada from controlling successfully.
That's one minute gone in the round.
Matsuzaka looking to hit a scissor sweep but Hamada is one step ahead there.
Matsuzaka pulls Hamada in close to his closed guard and prevents Hamada from doing any damage or advancing position.
Hamada is trying to work a guillotine from the top, or something like that? Don't know how he thinks he's going to get a finish from there.
Matsuzaka knows he needs to get back to his feet asap. He's simply no match for Hamada on the ground.
Matsuzaka pulls Hamada in close to his closed guard and prevents Hamada from doing any damage or advancing position.
The referee has decided to stand the fighters back up, so we'll restart on the feet.
That's two minutes gone in the round.
My god... these two guys really need to pick up the pace or everyone will leave to go get a beer.
Hamada showing good head movement there, avoiding the strikes from Matsuzaka.
Ryo Hamada is looking to throw some combinations by the looks of things.
Hamada takes a shot right to the bread basket.
Keisuke Matsuzaka is winning the standup battle so far.
Hamada misses with a jab, cross combination.
Hamada drops his hands momentarily and Matsuzaka takes advantage with a crisp shot to the head.
Matsuzaka throws a hook to the body but it doesn't connect.
Hamada fails with the takedown
and Matsuzaka counters with a straight right hand.
Matsuzaka lands a head shot.
Matsuzaka bobbing and weaving, closes the distance and lands a hook to the side of Hamada's head.
Matsuzaka connects with a crisp jab.
That's three minutes gone in the round.
Hamada lands a straight punch to the body, keeping Matsuzaka at a distance.
Matsuzaka ducks under a wild hook from Hamada.
Hamada shoots in for a takedown. "Ole!" shouts Matsuzaka as he jumps to the side.
Hamada scores with a nice one two combo and darts back out of range to avoid anything coming in the opposite direction.
Matsuzaka misses with a wild body shot.
Hamada throws a shot to the body.
Matsuzaka scores with a hook.
Hamada changes levels and drives through with a really nice takedown into side control. Matsuzaka looks really pissed at himself for not defending that better.
Hamada tries for a kimura but Matsuzaka is defending well.
Wooooo! Give it up for these two warriors! They are putting on a show!
Hamada goes for an armbar here - this could be all over! But no, Matsuzaka has escaped beautifully and is now on top in side control! Oh, that's unlucky for Hamada but great work by Matsuzaka.
That's four minutes gone in the round.
Hamada wants to control but Matsuzaka postures up.
Hamada gets one leg under and gets the fight to half guard.
Hamada wants to control but Matsuzaka is keeping busy.
Matsuzaka is looking to advance position but Hamada won't allow it.
Ryo Hamada has got the better of the ground game so far.
Hamada regains full guard. Nicely done.
Hamada looking for a guillotine here but Matsuzaka defends easily.
Matsuzaka won't allow Hamada to sweep him here.
And thats the end of the round the fighters go back to their corners.
A close second round but Ryo Hamada will probably get the nod - 10:9.
The cut man is working on Ryo Hamada's cut.
OK. That's time! The bell goes and we're back to the action. Let's get this one finished - here comes the final round!

Hamada throws a head kick that misses
and Matsuzaka counters with a left to the body.
Hamada swings away but doesn't land with a series of punches.
Hamada is throwing a lot of body shots here, looking to wear down Matsuzaka rather than just go for the knockout.
Hamada rushes in with a sloppy looking punch
and Matsuzaka counters with a nice body shot.
Matsuzaka fakes a head punch and goes low to the body. Nicely done.
Hamada looks for a takedown here. Will he get it? Matsuzaka is fending him off so far but Hamada persists. Nope, Matsuzaka circles away and we're back to standing.
Matsuzaka misses the jab.
Decent striking displayed by Hamada there.
Hamada takes a solid shot to the body. That one hurt him but he's trying not to show it.
Hamada displays some good footwork, moving neatly out of range as Matsuzaka throws out the jab.
Hamada moves away from the strike by Matsuzaka.
We've had a slow start to the round here - hopefully the action picks up.
Hamada will need to tighten up his combinations if he doesn't want to gas himself out, swinging at thin air.
Matsuzaka cracks Hamada with a good shot that sees him stumbling back into the cage.
Matsuzaka misses the jab.
That's one minute gone in the round.
Matsuzaka throws a body shot but no joy.
Matsuzaka throws a looping overhand right but Hamada ducks down to avoid it.
Matsuzaka cracks Hamada with a hook to the jaw. Both fighters smile at eachother and high-five before getting back down to business.
Hamada throws a right hand that Matsuzaka ducks under and follows up with a left that Matsuzaka also avoids with ease.
Hamada throws a hook to the body but it doesn't connect.
Hamada misses with a wild body shot.
Hamada misses with a takedown
and Matsuzaka counters nicely by changing levels and landing a hook to the body.
Hamada takes a big intake of breath there - he's definitely tired.
Hamada dives in for a single leg takedown but Matsuzaka sprawls and the fighters end up clinched against the cage.
Keisuke Matsuzaka has stuffed three takedown attempts in the round now. That's going to take a lot out of Ryo Hamada.
Hamada on the wrong end of a vicious looking body shot.
A slow jab from Matsuzaka misses its intended target.
Matsuzaka misses with a wild body shot.
Matsuzaka lands a jab to the nose.
That's two minutes gone in the round.
Matsuzaka moving in and out of range nicely, whilst landing the scoring shot.
Hamada's hands are dropping dangerously low here and Matsuzaka connects clean with a right hook that sends him down to one knee! Hamada scrambles back to his feet.
Hamada is rocked!
This is a great period of action - very entertaining stuff!
Matsuzaka closes the distance and lands a vicious right hand that drops Hamada! Matsuzaka dives in looking to finish! Hamada is still trying to defend himself but he's taking too many shots and the referee has no choice but to stop the fight!
Ladies and gentlemen, after 2:15 of round 3, we have a winner by way of TKO (Strikes). Keisuke Matsuzaka!
Keisuke Matsuzaka decided to hype himself up post fight. It was going well but he went on about it a bit too long and the crowd turned on him a little.
|
|
|
|
|
|
|
|
|
|
|
|
|
|
|
|
|
|
|
|
|
|
|
| S |
C
A |
G |
S |
C
B |
G |
|
S |
C |
G |
|
energy
A | B |
|
hype
A | B |
|
pop
A | B |
|
mgr
A | B |
|
FIGHT
RATING
63% |
|
|
|
|
|
|
|
Co-main event
|
Coming up we have a welterweight MMA rules bout between Samart Payakaroon (ranked 708 p4p, 744 weight class) and Conor Butcher (ranked 108 p4p, 116 weight class). Chooooooooon! I think Payakaroon might be my favorite fighter, now he's come out to ปากหมา (Dog Mouth). Butcher has chosen Eaten by Bloodbath as his entrance music. On his way into the cage it seems that Samart Payakaroon has been attacked by a crazed fan! It looks like it might have been the just bleed guy! Luckily Samart Payakaroon seems to be OK! I thought that lunatic was in prison!?
 |
|
 |
| 178 cm
21
170
8 - 0 - 0 |
|
173 cm
21
169
7 - 1 - 0 |
BJJ Purple Belt
Excellent MT
Cardio machine |
|
Good wrestler
Decent boxing
Granite chin |
|
| |
|
Ladies and gentlemen. This fight is 5 rounds, for the welterweight championship of the world!
Introducing the champion to my left, fighting out of the red corner.
With a record of 8 - 0 - 0, fighting out of Sydney, Samart Payakaroon!
And introducing the challenger to my right, fighting out of the blue corner.
With a record of 7 - 1 - 0, fighting out of London, Conor Butcher!
The judges for this bout are Felipe Paraventi, Mauricio Rocha and Seu Braga.
The bell rings for round one and we are underway!
The bell rings for round one and we are underway!
Butcher drives through with a takedown into Payakaroon's guard. Let's see what he can do from the top position.
Butcher working some strikes from top position.
Payakaroon has been talking about how he's improved his wrestling in the run up to the fight so let's see if that's enough to sway the balance.
Payakaroon wants to get back to his feet but Butcher is in a dominant position and won't allow it.
Butcher scores with a decent looking elbow strike.
Butcher trying to pass the guard but can't manage it just yet.
Butcher trying to control the position from guard on top but Payakaroon is wriggling around, looking for whatever he can.
Payakaroon looking to hit a scissor sweep but Butcher is one step ahead there.
Butcher wants to control from the top but Payakaroon keeps moving.
We've had a slow start to the round here - hopefully the action picks up.
Butcher working some ground and pound from guard but it's not doing any damage.
Payakaroon is looking to stand up but Butcher isn't so interested in that idea.
Payakaroon has a closed guard, preventing anything of note from happening. Perhaps he's looking to stall.
That's one minute gone in the round.
Butcher not doing a lot at the moment. He'll have to show some more aggression or the fight will get stood up.
Butcher working some ground and pound from guard but it's not doing any damage.
Butcher postures up to throw the ground and pound strikes but they don't connect.
Payakaroon wants to stand up but Butcher is controlling him.
Butcher postures up in Payakaroon's guard and throws a big left but Payakaroon blocks it.
Butcher looking to control the position here, rather than advance.
The referee decides to stand the fighters back up.
Butcher defending well as Payakaroon loads up on a big left hand.
Nice jab there from Butcher.
Butcher goes for a double leg but Payakaroon avoids the attempt and the two fighters end up clinched against the cage as Payakaroon continues to drive forward.
Butcher fails with a takedown attempt.
That's two minutes gone in the round.
Butcher shoots in with a lovely double leg takedown. Payakaroon manages to land in full guard to minimise the damage.

Payakaroon kicks Butcher off and gets to his feet.
Butcher shoots in for a takedown but Payakaroon shows good takedown defense there and keeps this one on the feet.
Payakaroon is looking to counter punch.
Samart Payakaroon has stuffed three takedown attempts in the round now. That's going to take a lot out of Conor Butcher.
Butcher shoots for a takedown but Payakaroon saw that one coming a mile off and avoided it easily.
Butcher looks for a takedown. He's got it. We're now in half guard.
This is a great period of action - very entertaining stuff!
Butcher is figuring out what he wants to do next.
Payakaroon wants to improve his position but Butcher is controlling well.
Butcher uses his free foot to push down on Payakaroon's thigh. Eventually he works his other foot free and he's advanced to mount - this is trouble for Payakaroon.
Butcher unloads with some shots from mount but Payakaroon bucks and avoids them well.
That's three minutes gone in the round.
The fighters are starting to perspire pretty heavily.
Payakaroon regains half guard.
Butcher thumps the canvas. Not on purpose obviously - he just missed Payakaroon's head.
Butcher slips a nice elbow through Payakaroon's hands, connecting with Payakaroon's forehead.
Butcher wants to control but Payakaroon is keeping him busy.
Payakaroon wants to improve his position but Butcher is controlling well.
Payakaroon trying to control here but he's found himself mounted! Oh no!
Butcher unloads with some shots from mount but Payakaroon bucks and avoids them well.
The ref warns both fighters not to hold the cage as they work up against the meshing.
Butcher working some short elbows here. He postures up to throw some more ground and pound but Payakaroon slips a leg through to get back to half guard. Nice work.
Payakaroon is trying to control but can't.
That's four minutes gone in the round.
Payakaroon wants to get back to his feet.
Butcher seems very keen to just sit and control from half guard but Payakaroon does not like that idea so much and is remaining active off his back.
Payakaroon is trying to maintain the position but Butcher is very close to passing his half guard.
Butcher is looking to take a break and control but Payakaroon is keeping him honest, looking to work from the bottom.
Butcher not throwing his punches with enough precision this time.
The fighters are pressed up against the cage, both looking to find a bit of space to work.
Butcher thows a wild elbow that connects with the canvas.
Butcher throwing punches and elbows but they're not doing any damage.
Butcher slips a nice elbow through Payakaroon's hands, connecting with Payakaroon's forehead.
Butcher missing with some ground and pound from the half guard.
Payakaroon keeping his head moving to avoid the ground and pound.
Butcher working the head and body with strikes.
And thats the end of the round the fighters go back to their corners.
Conor Butcher dominated that round.
That's time! Back to the action!
Butcher thows a left - swing and a miss!
Butcher shoots in looking for a takedown. Payakaroon tries to sprawl out of it but Butcher keeps driving through. The fighters are pinned against the cage. Payakaroon manages to get underhooks and after a bit of a struggle, circles away and we're back to standing.
Payakaroon smiles there as he lands a nice right hand right on the button.
Butcher looking to shoot here. He's gone for it and he's landed a takedown into side control! Oh, that's bad for Payakaroon!
Payakaroon is looking for a sweep.
We've had a slow start to the round here - hopefully the action picks up.
Payakaroon tries to escape but Butcher is in control.
Butcher with the ground and pound but Payakaroon regains half guard under the barage of strikes.
Payakaroon keeping his head moving to avoid the ground and pound.
That's one minute gone in the round.
Butcher wants to control but Payakaroon is keeping him busy.
Payakaroon blocking the ground and pound attempt from Butcher.
Payakaroon is not content to let Butcher control the position.
Butcher not throwing his punches with enough precision this time.
Payakaroon looks like he's trying to stand up.
Butcher scores with a couple of good hammerfists.
Payakaroon wants to get back to his feet.
Butcher lands with an elbow from half guard - that looked like it hurt.
Payakaroon keeping his head moving to avoid the ground and pound.
That's two minutes gone in the round.
Payakaroon is refusing to be controlled, as Butcher sits in half guard.
Well, if Butcher is going to just lie there, perhaps we should talk about what we're having for dinner tonight
I'm having a ham and pineapple pizza
Yum. Can't wait.
Butcher drops an elbow to the side of Payakaroon's head.
Nice strikes from Butcher there.
Butcher sitting in half guard, looking to land shots. Payakaroon defending well though.
Butcher thows a wild elbow that connects with the canvas.
Payakaroon wants to improve his position but Butcher is controlling well.
Butcher winds up and cracks Payakaroon with a swinging punch to the side of the head.
That's three minutes gone in the round.
Butcher not throwing his punches with enough precision this time.
Butcher wants to pass the guard but Payakaroon is defending well.
Payakaroon tries to roll over but Butcher keeps him under control.
Butcher is just content to waste time from the top position. Payakaroon takes advantage of the situation and regains full guard.
Butcher trying to control but Payakaroon is working from the bottom.
Butcher is working the ground and pound from guard. He might want to try advancing position though to get more of an impact.
Butcher works a leg free and moves into half guard.
Butcher missing with some ground and pound from the half guard.
Butcher trying to control the action but Payakaroon is working from the bottom.
That's four minutes gone in the round.
Butcher throws a big elbow that misses, also allowing Payakaroon to regain full guard.
Butcher postures up and lands a big shot to Payakaroon's brow.
Butcher is looking to work some ground and pound but Payakaroon has wrist control.
Butcher tries to free his leg and advance position but Payakaroon is retaining full guard.
Butcher working from the guard for now, landing some ground and pound.
Payakaroon keeping moving, preventing Butcher from controlling successfully.
Payakaroon can't keep his opponent in guard - Butcher advances to half guard, no doubt looking to mount.
Payakaroon has hold of Butcher's hands but Butcher slips his arm to the side and lands an elbow.
The crowd thankful this round is nearly over.
Butcher works his way into full mount!
Butcher raining down shots from the mount!
And thats the end of the round the fighters go back to their corners.
Conor Butcher showed his class in that round. I'd imagine he'll take it on all the scorecards.
That's the end of the interval. I'm sure that seemed a lot quicker than a minute for our two fighters! Back to the action.
A looping hook to the body misses from Butcher. Payakaroon does a little dance to reset his feet.
Butcher closes this distance looking for a takedown but Payakaroon circles away.
Butcher tries to clinch up
letting Payakaroon counter with a right hand.

Butcher closes the distance and clinches.
Payakaroon looks like he'd prefer to be striking at range right now.
Butcher misses with a punch to the body.
A short right hand to the side of the head by Payakaroon.
Payakaroon is fighting off a takedown attempt but Butcher is just too persistent for him and manages to trip Payakaroon to the mat. Payakaroon regains guard as soon as the fighters hit the mat.
Butcher wants to control from the top but Payakaroon keeps moving.
We've had a slow start to the round here - hopefully the action picks up.
Payakaroon is pulling down on Butcher's head. It's preventing any offense from Butcher, at least for the moment.
Payakaroon is working an open guard here, looking to improve his position. No doubt that will leave him open to counters but at least he's being more offensive.
That's one minute gone in the round.
Butcher wants to control from the top but Payakaroon keeps moving.
Payakaroon looking for a sweep. Not yet Payakaroon, not yet.
Butcher in full guard, throwing the ground and pound. No damage this time.
Butcher has been the more effective fighter overall so far.
Payakaroon keeping moving, preventing Butcher from controlling successfully.
The referee has stepped in and called for a break in the action. We'll restart on the feet.
Samart Payakaroon is looking to keep the fight on the feet at all costs.
Butcher tries for a takedown but Payakaroon sees it coming a mile off and avoids it easily.
Butcher tries to clinch up.
Butcher scores with a takedown into Payakaroon's guard.
Butcher wants to control from the top but Payakaroon keeps moving.
That's two minutes gone in the round.
Butcher cracks Payakaroon with a solid left hand.
Butcher lands a couple of decent looking shots.
Payakaroon looking to control.
Butcher missing there with some ground and pound from the guard.
Butcher trying to land body shots but he keeps hitting the mat.
Butcher has the superior BJJ but he's also working some ground strikes into his gameplan.
Butcher cracks Payakaroon with a solid left hand.
Butcher postures up to throw the ground and pound strikes but they don't connect.
Butcher throwing elbows and punches but not connecting, as Payakaroon works some decent striking defense from the bottom.
Butcher wants to control from the top but Payakaroon keeps moving.
Payakaroon preventing the ground and pound from doing any damage.
That's three minutes gone in the round.
Payakaroon utilising some decent striking defenses from the guard, preventing the ground and pound.
Butcher is looking to work some ground and pound but Payakaroon has wrist control.
Hammerfist, elbow! yells Butcher's corner. There ya go! There ya go!
Butcher looking to sit in guard and control but Payakaroon gets the butterfly guard and sweeps. He's now in the guard on the top.

Butcher looking to hit a scissor sweep but Payakaroon is one step ahead there.
Butcher lands a beautiful sweep and he's now moved into his opponent's guard.

Butcher sitting in guard, not really doing much.
Butcher forces his way into half guard.
That's four minutes gone in the round.
Butcher missing with some ground and pound from the half guard.
Butcher trying to pass the guard but Payakaroon defending well.
Payakaroon is staying active underneath Butcher, who seems content to just control the action from this position.
Payakaroon has no desire to be mounted, so is trying to control. Butcher is working away from the top position though.
Butcher throwing punches and elbows but they're not doing any damage.
The crowd thankful this round is nearly over.
Butcher thumps the canvas. Not on purpose obviously - he just missed Payakaroon's head.
Butcher thows a huge punch but Payakaroon dodges it nicely.
Butcher lands strikes from half guard.
And thats the end of the round the fighters go back to their corners.
Conor Butcher really dominated that round.
That's time! Back to the action!

Butcher closes the distance and clinches.
Butcher throws a punch but it's blocked by Payakaroon.
Butcher manages to pull guard. Let's see whether he can land a sub off his back.
Butcher wants to sweep but no luck.
Conor Butcher has got the better of the ground game so far.
Butcher has his foot on Payakaroon's thigh. He's trying to push off and get in position for a triangle, I think. Payakaroon works his way back into a safe position though.
Butcher tries to land a sweep but no joy.
Butcher is looking for a triangle but Payakaroon pushes his legs off easily.

Payakaroon decides he's had enough of playing guard and decides to stand. Come on Butcher, up you get!
We've had a slow start to the round here - hopefully the action picks up.
Payakaroon stuffs a takedown. It's all about dictating where the fight takes place and Payakaroon wants it to stay on the feet.
Payakaroon keeps the fight standing with a nice sprawl.
A jab lands there for Payakaroon.
That's one minute gone in the round.
Butcher blocks a head kick by Payakaroon.
A jab from Butcher misses.
Payakaroon throws a head kick but Butcher moves out of range.
Payakaroon misses the jab.
Butcher tries to clinch up but Payakaroon circles away and keeps his distance.
Butcher instigates a clinch.
Butcher working some nice short punches in the clinch.
Payakaroon wants to break free but Butcher has control.
Butcher gets control of Payakaroon's arms and successfully pulls guard. Butcher will no doubt be looking for submissions off his back.
Butcher wants to sweep here but Payakaroon controlling him for the moment.
Butcher wants to hit a sweep here but Payakaroon passes into full mount! Oh no, disaster for Butcher there!
Butcher can't escape the position.
That's two minutes gone in the round.
Butcher wants to control but Payakaroon is having none of it.
Butcher is working to get back to half guard.
Payakaroon fails to advance to Butcher's back.
Butcher can't escape the position.
That's three minutes gone in the round.
Butcher regains half guard.
Butcher wants to improve his position but Payakaroon is controlling well.
Butcher is pressing down on Payakaroon's left leg trying to get back to full guard. He's managed it.
Butcher has a closed guard, preventing Payakaroon from standing up.
Butcher is trying to control the position from the bottom.
That's four minutes gone in the round.
The crowd are getting on the fighters' backs, as the pace has dropped off in the last minute or so.
Butcher looking for a sweep. Not yet Butcher, not yet.
It looks like the ref is thinking about a standup.
Butcher lands a beautiful sweep and he's now moved into his opponent's guard.
Hammerfist, elbow! yells Butcher's corner. There ya go! There ya go!
The crowd thankful this round is nearly over.
Butcher looking to sit in guard and control but Payakaroon gets the butterfly guard and sweeps. He's now in the guard on the top.
Payakaroon won't allow Butcher to sweep him here.
And thats the end of the round the fighters go back to their corners.
A close fourth round but Conor Butcher will probably get the nod - 10:9.
That's the end of the interval. I'm sure that seemed a lot quicker than a minute for our two fighters! Back to the action. Ladies and gentlemen, this is the final round!

Butcher takes a push kick to the midsection and stumbles backwards.
Butcher fails with a rather predictable takedown attempt.
Payakaroon throws a head kick that connects with a bit of head and a bit of hand.
Payakaroon throws a body kick that sends a sickening thudding noise reverberating around the arena.
Payakaroon keeping a good distance there, avoiding the body shot.
Butcher slips a straight right by Payakaroon.
Payakaroon misses with a left hand
and Butcher counters with a nice shoot takedown that brings the fighters to the ground.
Butcher pushes down on Payakaroon's leg and manages to get into half guard.
Butcher looks towards his corner to check for any instructions. The corner give him nothing to work with, so he cracks Payakaroon with a short hammerfist. I guess that's as good as any advice he could get in this position.
Butcher tries to pass the half guard into mount. Payakaroon knows what he's doing though and prevents the attempt.
Payakaroon gets back to full guard.
That's one minute gone in the round.
Payakaroon wants to stand but Butcher is controlling the position.
Butcher scoring with punches to the head and body.
Butcher slips nicely into half guard.
Payakaroon blocking the ground and pound attempt from Butcher.
Butcher is looking to pass Payakaroon's guard but actually Payakaroon recovers to full guard.
Payakaroon wants to sweep but no luck.
That's two minutes gone in the round.
My god... these two guys really need to pick up the pace or everyone will leave to go get a beer.
Butcher advances position into side control!
The ground and pound from Butcher seems to be hitting the mat more than his opponent.
Payakaroon is working to avoid the ground and pound but Butcher connects with a decent elbow.
Butcher wants to control but Payakaroon is keeping him busy.
Butcher tries to score with some ground and pound. Payakaroon controls his posture well this time though and the shots don't do any damage.
Samart Payakaroon has stepped it up - he knows he needs a finish here!
Butcher lands some shots froms side control.
Payakaroon is putting a lot of effort into getting back to his feet here.
Butcher lands an elbow.
Butcher throws a strike aimed at the side of Payakaroon's head but Payakaroon avoids it well.
That's three minutes gone in the round.
Payakaroon tries to improve position but can't.
Payakaroon trying to remain calm as Butcher controls from the top position.
Payakaroon avoids any damage from the ground and pound of Butcher.
Butcher wants to control for a moment but Payakaroon uses the opportunity to move back to half guard.
Butcher missing with the ground and pound from half guard.
Conor Butcher is fighting for a decision - hopefully he's judged it right and he's actually winning the fight.
Butcher controlling the action here.
That's four minutes gone in the round.
The crowd are hurling abuse towards the fighters... You can hardly blame them though because there isn't a lot going on in the fight.
Butcher prevents Payakaroon from standing back up.
Payakaroon is looking to regain full guard. Not this time though.
Butcher perhaps working for something from half guard, or maybe not. It looks like he's just sitting there.
The referee has decided to stand the fighters back up, so we'll restart on the feet.
Butcher throws an ugly left hook that misses
and Payakaroon counters with a good, hard body kick but Butcher shrugs it off.
Payakaroon misses with a straight right.
Payakaroon swings and misses with a hook to the body.
The crowd thankful this round is nearly over.
A nice combination there by Payakaroon.
Samart Payakaroon is winning the standup battle so far.
Decent striking displayed by Payakaroon there.
Butcher drives through with a takedown into guard.
And that's the end of the fight!
I would just about give that final round to Conor Butcher.
I've got Butcher winning every round here. Surely the decision will go his way and he'll pick up a well deserved decision victory. Over to the ring announcer for the scorecards.
Ladies and gentlemen, after 5 rounds of action, we go to the scorecards for a decision.
Judge Felipe Paraventi scores the fight 45:50
Judge Mauricio Rocha scores the fight 45:50
Judge Seu Braga scores the fight 45:50
In favor of your winner, by unanimous decision... Conor Butcher!
Conor Butcher is the new welterweight champion!
A very excited looking Conor Butcher made sure he remembered to thank all the fans both in the arena and on the internet. He said all the coolest people spend all day on MMA websites, which got a big reaction.
|
|
|
|
|
|
|
|
|
|
|
|
|
|
|
|
|
|
|
|
|
|
|
| S |
C
A |
G |
S |
C
B |
G |
|
S |
C |
G |
|
energy
A | B |
|
hype
A | B |
|
pop
A | B |
|
mgr
A | B |
|
FIGHT
RATING
41% |
|
|
|
|
|
|
|
Main event
|
Coming up we have a middleweight MMA rules bout between Borris The Blade (ranked 794 p4p, 560 weight class) and Martin Alexander (ranked 113 p4p, 76 weight class). The Blade comes to the cage accompanied by Fucking in the Bushes. Alexander has chosen Hellraiser - Ozzy Osbourne as his entrance music, which hasn't gone down very well with the crowd. Borris The Blade has the better chin. Will he look to stand and bang today?
 |
|
 |
| 186 cm
27
190
10 - 1 - 0 |
|
186 cm
28
185
10 - 2 - 0 |
BJJ White Belt
Excellent boxer
Cardio machine |
|
Good wrestler
Excellent MT
Good gas tank |
|
| |
|
Ladies and gentlemen. This fight is 5 rounds, for the middleweight championship of the world!
Introducing the champion to my left, fighting out of the red corner.
With a record of 10 - 1 - 0, fighting out of New York, Borris The Blade!
And introducing the challenger to my right, fighting out of the blue corner.
With a record of 10 - 2 - 0, fighting out of Sydney, Martin Alexander!
The judges for this bout are Luis Engracia, Seu Braga and Mauricio Rocha.
The bell rings for round one and we are underway!
The bell rings for round one and we are underway!
The Blade avoids the body shot from Alexander.
The Blade misses the shot to the body.
Alexander misses with an uppercut. The Blade saw that one coming.
The Blade doesn't manage to clinch there - Alexander circles away.
Nice body punch from The Blade.
Alexander clinches.
The Blade misses with a body punch.
The Blade lands with a good tight uppercut to the head.
The Blade throws a punch but it's blocked by Alexander.
The Blade misses with a short punch on the inside.
Alexander misses with some punches.
The Blade blocks a punch to the side of the head.
Alexander pushes The Blade back against the cage and unloads with a body punch.
The Blade's head jolts backwards as he takes an uppercut right on the button!
Alexander misses with the head strike.
The Blade prevents a body shot from Alexander.
A head punch blocked on the inside by Alexander.
The Blade creates a bit of distance and throws an elbow that only just misses.
The Blade throws an elbow that misses.
The Blade misses with some punches.
Wooooo! Give it up for these two warriors! They are putting on a show!
The Blade's head jolts backwards as he takes an uppercut right on the button!
That's one minute gone in the round.
A head punch on the inside from The Blade fails to land.
Alexander has a couple of punches blocked by The Blade.
Alexander scores with a shoulder strike.
An uppercut on the inside fails to land for The Blade.
The Blade misses with a shot to the kidneys.
The Blade tries a body shot but Alexander blocks it.
The Blade lands a right uppercut that snaps the head of Alexander backwards.
Alexander blocking some punches.
Alexander throws a head punch that misses.
Alexander has been looking to improve his clinch game in recent weeks. The Blade seems to have the measure of him in the clinch so far, so let's see if Alexander can turn it around.
The Blade misses with a body punch.
The Blade misses with a short punch on the inside.
The Blade swings wildly with an uppercut but Alexander uses good head movement to avoid it.
Alexander digs a right hand into The Blade's ribs. Those have got to be taking their toll on The Blade's gas tank.
The Blade takes a shot to the head.
An uppercut on the inside fails to land for Alexander.
Alexander lands a nice uppercut.
Alexander swings away with an uppercut that misses.
Alexander dodges an elbow strike from The Blade.
Alexander blocking some punches.
Alexander avoids a wild elbow strike from The Blade.
That's two minutes gone in the round.
The Blade blocks an uppercut.
This is a great period of action - very entertaining stuff!
Alexander makes some space for himself and lands an uppercut.
The Blade working aggressively here.
Alexander lands with a short shot to the head.
A short body shot lands from Alexander as the two fighters clinch.
Alexander stays in close to his opponent and throws a right hand to the body.
Alexander lands with a short shot to the head.
The Blade misses with a body punch.
Nice body punch from The Blade.
The Blade misses with some punches.
The Blade lands punches inside but they're not really causing much damage.
The Blade misses with a short punch on the inside.
The Blade throws a head punch that misses.
Alexander dodges an elbow strike from The Blade.
Alexander scores with a nice hook to the head.
Alexander digs a right hand underneath The Blade's ribcage. The Blade let out a lung full of air as it connected.
The Blade doesn't land with the attempted body shot.
The Blade misses with a short punch on the inside.
The Blade blocks a punch to the side of the head.
Alexander misses with a short punch on the inside.
A nice left hand lands by Alexander.
That's three minutes gone in the round.
The Blade tries to land a shot to the body but it's blocked.
The Blade blocks an uppercut.
The Blade tries a shoulder strike but it doesn't do any damage.
The Blade tries a shoulder strike but it doesn't do any damage.
A nice left hand lands by Alexander.
The Blade tried to land a shot to the body but connects with Alexander's elbow.
The Blade prevents a body shot from Alexander.
A head punch blocked on the inside by The Blade.
Alexander lands a body punch.
Alexander lands a short shot on the inside that snaps the head of The Blade backwards.
A shot in the inside from Alexander.
A shot in the inside from Alexander.
Alexander works for underhooks and lands a body shot in the process.
The Blade is breathing heavily.
A right handed body shot lands from Alexander.
A short right hand to the side of the head by Alexander.
The Blade tries to work over Alexander's body with a swooping hook but it only glances the target.
The Blade working aggressively here.
Alexander working some nice short punches in the clinch.
The Blade is rocked!
The crowd cheering loudly, showing their appreciation for the quality fight we're seeing here.
Alexander gets through The Blade's defenses to land a nice punch to the side of the head.
Oh The Blade is still all over the place! His legs are completely gone! Will he be able to recover?!!
Alexander throws a big uppercut that drops The Blade! More strikes from Alexander and the referee jumps in to stop the fight! The Blade lies dazed against the cage as Alexander celebrates with his cornermen!
Ladies and gentlemen, after 4:59 of round 1, we have a winner by way of TKO (Strikes). Martin Alexander!
Martin Alexander is the new middleweight champion!
A victorious Martin Alexander thanked his army of followers in his post fight interview, telling people to make sure they follow him on Twitter.
|
|
|
|
|
|
|
|
|
|
|
|
|
|
|
|
|
|
|
|
|
|
|
| S |
C
A |
G |
S |
C
B |
G |
|
S |
C |
G |
|
energy
A | B |
|
hype
A | B |
|
pop
A | B |
|
mgr
A | B |
|
FIGHT
RATING
53% |
|
|
|
|
|
|
|
|
|
|
