 |
Trash Boys 1 PBP Commentary |
Undercard bout
|
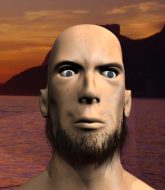
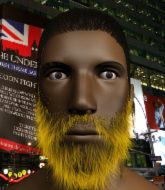
Coming up we have a light heavyweight MMA rules bout between Paul Costa (ranked 5128 p4p, 4944 weight class) and Buster Hymen (ranked 547 p4p, 532 weight class). We have two fighters making their debuts here, so let's see who comes out of this one with their first professional victory.
 |
|
 |
| 150 cm
25
215
0 - 0 - 0 |
|
193 cm
25
215
0 - 0 - 0 |
BJJ White Belt
Excellent boxer
Intelligent |
|
BJJ Blue Belt
Solid Muay Thai
Likes musicals |
|
| |
|
Ladies and gentlemen. This fight is 3 rounds, in the light heavyweight division.
Introducing the fighter to my left, fighting out of the red corner.
With a record of 0 - 0 - 0, fighting out of Hilo, Paul Costa !
And introducing the fighter to my right, fighting out of the blue corner.
With a record of 0 - 0 - 0, fighting out of Hilo, Buster Hymen !
The judges for this bout are Roger Salmon, Jeff Smith and Colin Fray.

The bell rings for round one and we are underway!
The bell rings for round one and we are underway!
Hymen tries to land with a swinging hook to the body but Costa was well out of range. Poor timing from Hymen .
Hymen stooping low to avoid any incoming strikes and then lunges in with an uppercut come cross that lands flush.
Hymen stuffs the takedown.

Costa gets tackled into the cage by Hymen . Hymen maintains the clinch.
Hymen lands a good knee to the midsection. Costa won't want to take too many of those.
Costa is looking to control Hymen 's arms but Hymen gets an underhook and turns him. Now Costa has his back to the cage.

Costa breaks the clinch.
Costa closes the distance and clinches up with Hymen , looking for a takedown. Costa pushes Hymen against the cage but Hymen circles to the side and manages to break the clinch.
Hymen tries to counter with a clinch but Costa shakes him off and moves away.
The fight stays on the outside here - Costa looks like he's thinking about clinching though.
We've had a slow start to the round here - hopefully the action picks up.

Hymen tries to keep at a distance but Costa has taken the fight into the clinch.
Costa goes for a takedown attempt but Hymen pushes him away and we're back to fighting at a distance.
That's three failed takedown attempts in the round for Paul Costa . That's going to take a lot out of him.
Costa scores with a sloppy punch to the body. Not much technique there but it did the business.

That's one minute gone in the round.
Hymen looks frustrated there after his takedown attempt is stuffed easily.
Hymen clinches.

Hymen breaks the clinch and we return to the middle of the mat.
Costa swings and misses with a hook to the body.
Costa throws a low kick but Hymen moves out of range easily.
Costa tries to clinch there but Hymen circles away.
And Hymen tries to counter it with a takedown but Costa pushes his down on his head and steps out.
Hymen clinches.
Hymen is looking for a takedown.
Costa looking to stall.

That's two minutes gone in the round.
Hymen escapes the clinch and we're back to striking.
Hymen blocks a head kick by Costa .
Costa displays good takedown defense there as he swats away a double leg from Hymen .
Hymen clinches.
Costa prevents a body shot from Hymen .
Hymen wants to take the fight to the mat but Costa manages to get underhooks and keep the fight in the clinch.
Hymen can't get the takedown.
Both guys are working to get underhooks.
Hymen is trying to pull guard but being pressed up against the cage enables Costa to keep the fight standing.
Costa tries to pull guard but Hymen holds him up against the cage and eventually Costa drops back down to his feet.

That's three minutes gone in the round.
Costa lands a nice elbow from the clinch.

Hymen wants the takedown. Costa is fighting it off but Hymen persists and manages to bring the fight to the ground, ending up in Costa 's guard against the cage.
Costa looking for a sweep. Not yet Costa , not yet.
Hymen is intent on slowing down the pace of the fight, simply looking to control.

Hymen gets to his feet. Costa looking to butt scoot but the ref puts an end to that. On your feet son!
Costa is breathing heavily.
Costa fails with the takedown.
Hymen scores a trip takedown into side control. Nice.

That's four minutes gone in the round.
Hymen is moving around in side control but his primary objective seems to be to maintain the position.
Hymen stands up and beckons Costa to his feet.
Hymen moves into range and clinches up with Costa .
Wooooo! Give it up for these two warriors! They are putting on a show!
Hymen misses with a shot to the kidneys.
A bit of stalling here from Hymen .
Hymen 's corner calls for him to break the clinch, which he does.
Hymen shoots in looking for a single leg takedown. Costa is trying to defend but Hymen finishes it well and ends up in half guard. Let's see if he can advance position further.
Costa tries to push off, looking to stand up, but Hymen manages to move to mount!
And thats the end of the round the fighters go back to their corners.
Buster Hymen dominated that round.
The minute break is over - no more time for sponges and pep talks - back to the action!

Hymen closes the distance and after a bit of a stuggle, scores a takedown into Costa 's guard.
Hymen looking to pass the guard.
Hymen is looking to work some ground and pound but Costa has wrist control.
Costa is trying to control the position from the bottom.
Costa is working an open guard so Hymen takes the opportunity to get back to his feet.
Paul Costa is looking to throw some combinations by the looks of things.
We've had a slow start to the round here - hopefully the action picks up.
Costa tries to shoot in for a takedown. He's got hold of a leg but Hymen swivels and escapes.
Hymen swings and misses with a hook to the body.
Both fighters are absolutely exhausted here.
Hymen takes the fight into the clinch.
Hymen breaks from the clinch.
That's one minute gone in the round.
Nice sprawl there from Hymen as Costa shoots in.
Costa gets caught napping as Hymen dives in and scores a takedown. Costa manages to retain guard.
Hymen is pushing down on Costa 's leg trying to pass to half guard. Costa is fighting to maintain full guard but Hymen has managed to sneak the leg through.
Hymen lands strikes from half guard.
Still in half guard, Hymen seems content to control.
Costa might be looking to lock onto one of his opponent's long limbs for a submission, whilst we're on the ground.
Hymen stands, ready to strike. The ref makes him back up and allows Costa to get to his feet.
Costa stuffs the takedown attempt from Hymen . Hymen gets slowly back to his feet.
Hymen shoots in for a takedown - he's clinched up with Costa but Costa pushes him off and we're back to square one.
That's two minutes gone in the round.
Hymen drives through with a takedown into guard.
The ref warns both fighters not to hold the cage as they work up against the meshing.
Hymen stands up from Costa 's guard - Hymen perhaps looking for a knockout.
Hymen feints and as Costa raises his hands in defense, Hymen changes levels and drives through with a takedown into guard.
Costa wants to get back to his feet but he's too absorbed in his own little project and Hymen manages to pass to side control.
Costa knows he needs to get back to his feet asap. He's simply no match for Hymen on the ground.
Fantastic stuff here - a very entertaining period of action, which has drawn cheers from the crowd.

Hymen not throwing his punches with enough precision this time.
Hymen scores with a couple of good hammerfists.
That's three minutes gone in the round.
Costa avoiding damage under a succession of punches from Hymen .
Hymen prevents Costa from standing back up.
Hymen thows a huge punch but Costa dodges it nicely.
Hymen decides to stand up and try his luck on the feet.
Hymen closes the distance and clinches up with Costa , looking for a takedown. Hymen pushes Costa against the cage but Costa circles to the side and manages to break the clinch.
Paul Costa has stuffed three takedown attempts in the round now. That's going to take a lot out of Buster Hymen .
Hymen lands with a slapping head kick.
Hymen closes the distance and scores a nice trip takedown into half guard. Costa did well to prevent Hymen getting side control.
Hymen passes to full mount!
The fighters are pressed up against the cage, both looking to find a bit of space to work.
Hymen controlling his opponent.
That's four minutes gone in the round.
Costa wants to improve position but instead he's given up his back.
Costa wants to escape the position.

Hymen is working for the choke. I would put my money on him to finish from this position. He's rolled onto his back and has dragged Costa with him. Costa is trying to defend but Hymen has an arm under the chin now! Costa grimaces and is forced to tap out!
Ladies and gentlemen, after 4:41 of round 2, we have a winner by way of Submission (RNC). Buster Hymen !
|
|
|
|
|
|
|
|
|
|
|
|
|
|
|
|
|
|
|
|
|
|
|
| S |
C
A |
G |
S |
C
B |
G |
|
S |
C |
G |
|
energy
A | B |
|
hype
A | B |
|
pop
A | B |
|
mgr
A | B |
|
FIGHT
RATING
49% |
|
|
|
|
|
|
|
Undercard bout
|
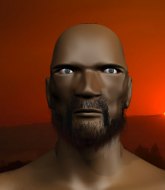
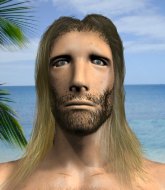
Coming up we have a featherweight MMA rules bout between Nadeem Andersen (ranked 5154 p4p, 4945 weight class) and Haywood Jablomi (ranked 434 p4p, 423 weight class). We have two fighters making their debuts here, so let's see who comes out of this one with their first professional victory.
 |
|
|
| 178 cm
22
155
0 - 0 - 0 |
|
171 cm
25
155
0 - 0 - 0 |
BJJ Blue Belt
Solid boxing
Granite chin |
|
Good wrestler
Brawler
Powerful |
|
| |
|
Ladies and gentlemen. This fight is 3 rounds, in the featherweight division.
Introducing the fighter to my left, fighting out of the red corner.
With a record of 0 - 0 - 0, fighting out of London, Nadeem Andersen!
And introducing the fighter to my right, fighting out of the blue corner.
With a record of 0 - 0 - 0, fighting out of Hilo, Haywood Jablomi!
The judges for this bout are Josh West, Chris Saunders and Micheangelo Fripello.
The bell rings for round one and we are underway!
The bell rings for round one and we are underway!
Jablomi fails with the takedown
and Andersen counters with a left and a right that stings Jablomi.
Jablomi shoots in with a lovely double leg takedown. Andersen manages to land in full guard to minimise the damage.
Jablomi stops Andersen from standing up.
Jablomi seems content to control from guard here. He's going to have to remain active though if he doesn't want to get stood back up.
Jablomi postures up in Andersen's guard and throws a big left but Andersen blocks it.
We've had a slow start to the round here - hopefully the action picks up.
Jablomi showing good wrestling skills to control the position.
Andersen keeping full guard, as Jablomi tries to pass.
That's one minute gone in the round.
Andersen wants to stand but Jablomi is controlling the position.
Jablomi loading up with the ground and pound but he's missing more than he's landing in this flurry.
We must be close to a standup if these guys don't pick up the pace.
Jablomi slows down the pace of the fight, as he sits in guard.

The referee decides to stand the fighters back up.
Jablomi gets his takedown attempt stuffed easily
and Andersen counters with a straight right hand.
Jablomi misses with a takedown attempt
and Andersen counters with a nice body shot.
Nadeem Andersen has stuffed three takedown attempts in the round now. That's going to take a lot out of Haywood Jablomi.
Jablomi closes the distance and clinches up with Andersen, looking for a takedown. Jablomi pushes Andersen against the cage but Andersen circles to the side and manages to break the clinch.
Jablomi shoots in for a takedown. "I don't think so" says Andersen as he avoids it easily.
A telegraphed takedown attempt from Jablomi is defended easily by Andersen.
That's two minutes gone in the round.
A really sloppy takedown attempt there from Jablomi.
Andersen has Jablomi up against the cage in a clinch.
Jablomi drops to a knee looking for a takedown but Andersen gets the underhooks and prevents it.
Jablomi goes for a takedown attempt but Andersen pushes him away and we're back to fighting at a distance.
Jablomi is looking to take this fight into the clinch.
That's three minutes gone in the round.
Jablomi has his takedown stuffed
and Andersen counters with a straight punch to the midsection.
Jablomi closes the distance and scores a nice trip takedown into half guard. Andersen did well to prevent Jablomi getting side control.
Andersen blocking the ground and pound attempt from Jablomi.
Andersen wants to get back to his feet.
Jablomi looks over to his corner - he wants some instructions but his corner are not responding.
Jablomi stops Andersen from getting back to his feet.

Andersen has one foot on Jablomi's thigh - he pushes off and manages to get back to his feet.
Jablomi bobs and weaves into range and then changes levels and scores with a nice takedown into side control.
That's four minutes gone in the round.
This has been an exciting period of action!
Jablomi throws an elbow but Andersen slips to the side and avoids it well.
Andersen wants to get back to his feet.
Jablomi in side control, throwing shots but Andersen defends.
Jablomi content to control the pace. The referee will try and keep them active though.
Let's hope that Jablomi has the urge to step up the pace any second now because for the last 15 or 20 seconds he's just been holding on tight.
The crowd thankful this round is nearly over.
Jablomi's corner are shouting for him to control the position and he seems happy to oblige.
And thats the end of the round the fighters go back to their corners.
Nadeem Andersen dominated that round.
OK. That's time! The bell goes and we're back to the action.
Jablomi scores with a nice takedown into half guard. Let's see what he's got on the ground.
Jablomi is controlling the pace.
Haywood Jablomi has got the better of the ground game so far.
Jablomi looks to score some points with some ground and pound.
We've had a slow start to the round here - hopefully the action picks up.
Jablomi looks over to his corner - he wants some instructions but his corner are not responding.
That's one minute gone in the round.
Andersen manages to escape and get back to his feet!
Andersen scores with the left hand. Jablomi knows he should have avoided that one.
Jablomi will have to do better than that with his takedown attempts.
No joy there for Andersen, who threw a few shots but didn't land.
Jablomi will have to do better than that with his takedown attempts.
Jablomi with a lazy takedown attempt
and Andersen counters with a lovely shot to the body.
Nadeem Andersen has stuffed three takedown attempts in the round now. That's going to take a lot out of Haywood Jablomi.
Jablomi doesn't succeed with the takedown
and Andersen counters with a left to the body.
Jablomi is breathing heavily.
Andersen lands a jab followed by a nice looking cross.
Haywood Jablomi seems to be the more aggressive standup fighter in this bout.
Jablomi dives in and grabs Andersen's left leg, looking for a takedown. Andersen pushes down on Jablomi's head and hops out.
Nice sprawl there from Andersen as Jablomi shoots in.
That's two minutes gone in the round.
This is a great period of action - very entertaining stuff!
Andersen moves into range and throws a combination. A nice jab followed by a hook to the body.
Andersen jabs. That one connects to the head of his opponent.
Jablomi gets a takedown into half guard.
Andersen makes some distance and scrambles quickly back to his feet. Nice work!
Andersen is really dominating this fight. Is there anything that Jablomi can do to turn this around?
Andersen digs a good body shot into Jablomi's ribs.
Jablomi on the wrong end of a decent looking cross there.
Andersen tries to clinch up.
Jablomi shoots in but no luck this time.
A little feinted left hand from Andersen on the counter but he doesn't commit to it.
That's three minutes gone in the round.
Jablomi shoots in for a takedown but Andersen shows good takedown defense there and keeps this one on the feet.
Jablomi looking for a takedown here - he's got it.
The fighters are working up against the cage. Andersen manages to wriggle his way back to his feet, so the fighters are now clinched against the cage.
Jablomi wants to take the fight to the mat but Andersen manages to get underhooks and keep the fight in the clinch.
Jablomi has Andersen pressed against the cage, preventing Andersen from circling away and getting back to striking at range.
Jablomi goes for a takedown in the clinch but Andersen prevents it.
Jablomi looking for a takedown.
Andersen has had enough of the clinch but Jablomi keeps him there for the moment.
Andersen tries to break free but Jablomi pushes him back against the cage.
Jablomi keeps control of Andersen as he tries to wriggle out of the double underhooks.
That's four minutes gone in the round.
Jablomi has a body lock and is looking for a takedown. Andersen is bouncing around trying to prevent the takedown and somehow he has indeed managed to stay on his feet.
Jablomi has dropped down and is looking to force the takedown but it's defended by Andersen after a bit of a struggle.
Jablomi is trying to work for a single leg takedown but Andersen pulls him back up using the underhooks.
Andersen gets double underhooks to prevent a takedown attempt from Jablomi.
Jablomi can't get the takedown.
Andersen gets underhooks to prevent Jablomi's takedown attempt.
Andersen wants to strike at distance but he can't break free of the clinch.
Andersen is trying to break the clinch but Jablomi is controlling him.
Andersen is looking to break free of the clinch but Jablomi has double underhooks.
Jablomi keeps control of Andersen as he tries to wriggle out of the double underhooks.
And thats the end of the round the fighters go back to their corners.
Nadeem Andersen dominated that second round.
The fighters get back to their feet, the hooter sounds and we're back to the action! Let's get this one finished - here comes the final round!

Jablomi closes the distance and takes a jab right on the nose as he does so.
Nadeem Andersen is looking to throw some combinations by the looks of things.
Andersen looks to land a combination. Jablomi sees it coming but can only parry a couple of the shots.
Jablomi closes the distance and clinches up with Andersen, looking for a takedown. Jablomi pushes Andersen against the cage but Andersen circles to the side and manages to break the clinch.
Andersen fakes a jab and then connects with a hook.
Horrible takedown attempt by Jablomi or perhaps it was just good defense by Andersen, which made it look bad.
Andersen scores with a reasonable looking shot to the body. Jablomi doesn't seem bothered though.
We've had a slow start to the round here - hopefully the action picks up.
Jablomi with a lazy takedown attempt
and Andersen counters with a one-two to the body.
Nadeem Andersen has stuffed three takedown attempts in the round now. That's going to take a lot out of Haywood Jablomi.
Andersen tries to close the distance and clinch up but Jablomi swats him away and circles back towards the center.
Jablomi drops down looking to force a counter takedown but Andersen defends it well.
Jablomi looks frustrated there after his takedown attempt is stuffed easily.
Jablomi takes a big intake of breath there - he's definitely tired.
That's one minute gone in the round.
Andersen tries to clinch but is not successful on this occasion.
Jablomi goes for a double leg but Andersen avoids the attempt and the two fighters end up clinched against the cage as Andersen continues to drive forward.
It looked like Andersen wanted to counter with a hook but didn't fully commit.
Andersen fakes a head punch and goes low to the body. Nicely done.
Andersen defends well against a solid takedown attempt from Jablomi.
Andersen feints a jab promting Jablomi to slip. Andersen then demonstrates his capabilities by jabbing again. Jablomi slips again and ducks right into an uppercut.
Jablomi takes a body punch but keeps moving.
Jablomi closes the distance and clinches up with Andersen, looking for a takedown. Jablomi pushes Andersen against the cage but Andersen circles to the side and manages to break the clinch.
Jablomi looks for a takedown here. Will he get it? Andersen is fending him off so far but Jablomi persists. Nope, Andersen circles away and we're back to standing.
Andersen cracks Jablomi with a hook to the jaw. Both fighters smile at eachother and high-five before getting back down to business.
Andersen lands a straight punch to the body, keeping Jablomi at a distance.
Andersen misses with the combination.
That's two minutes gone in the round.
Andersen lands a vicious shot with the stealth of a sniper and the strength of a viper. Are vipers that strong? I can think of lots of things that are stronger than a viper - not many rhyme with sniper though.
Andersen clinches.
This has been an exciting period of action!
Andersen wants to strike at distance but he can't break free of the clinch.
Jablomi is working for a takedown up against the cage. He can't get it on this occasion though.
Andersen is looking to break free of the clinch but Jablomi has double underhooks.
Andersen is trying to break the clinch but Jablomi has him pressed against the cage.
Andersen stops a takedown attempt from Jablomi.
Andersen breaks the clinch and we're back to striking at distance.
Andersen has Jablomi up against the cage in a clinch.
That's three minutes gone in the round.
Andersen wants to push off and get back to the center of the mat but Jablomi has him pressed against the cage.
Jablomi has dropped down and is looking to force the takedown but it's defended by Andersen after a bit of a struggle.
Andersen gets double underhooks to prevent a takedown attempt from Jablomi.
Andersen is trying to break the clinch but Jablomi has him pressed against the cage.
Jablomi keeps the fight in the clinch, despite Andersen's efforts to push away.
Andersen breaks the clinch and we're back to striking at distance.
Jablomi takes one on the button.
Jablomi misses with a takedown attempt - Andersen sprawls well and throws a nice strike on the way out which just misses.
That's four minutes gone in the round.
Andersen closes the distance and clinches.
Andersen wants to break the clinch but can't.
Andersen is pressed up against the cage. Jablomi has hold of a leg and is looking to drag Andersen down to the mat. Andersen avoids the attempt though and has circled away. We're back to striking at a distance.
Andersen cracks Jablomi with a nice right hand that draws applause from the crowd.
Andersen shuffles to his left behind two crisp jabs. Jablomi eats them both and turns towards Andersen to reposition himself and eats a stinging right hand-left hook combo.
Jablomi tries for a takedown but Andersen circles away easily
and Andersen counters with a two punch combo.
Andersen is looking to clinch.
Andersen gets in close and instigates a clinch.
Haywood Jablomi has stepped it up - he knows he needs a finish here!
Nadeem Andersen is fighting for a decision here - he's started to take the cautious approach.
Andersen is using his height advantage well here, landing a good percentage of his punches.
This is a great period of action - very entertaining stuff!
Jablomi misses with a punch to the body.
And that's the end of the fight!
Nadeem Andersen showed his dominance in that final round.
Well Andersen has outscored his opponent in every aspect of the fight today. Only a scarily incompetent judge or two will keep him from a well deserved win... Over to the ring announcer for the scorecards.
Ladies and gentlemen, after 3 rounds of action, we go to the scorecards for a decision.
Judge Josh West scores the fight 30:26
Judge Chris Saunders scores the fight 30:26
Judge Micheangelo Fripello scores the fight 30:26
In favor of your winner, by unanimous decision... Nadeem Andersen!
|
|
|
|
|
|
|
|
|
|
|
|
|
|
|
|
|
|
|
|
|
|
|
| S |
C
A |
G |
S |
C
B |
G |
|
S |
C |
G |
|
energy
A | B |
|
hype
A | B |
|
pop
A | B |
|
mgr
A | B |
|
FIGHT
RATING
45% |
|
|
|
|
|
|
|
Undercard bout
|
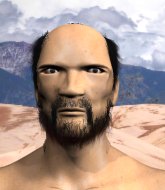
Coming up we have a featherweight MMA rules bout between De Fagut (ranked 4774 p4p, 2929 weight class) and Konor RatGregor (ranked 413 p4p, 293 weight class). Fagut's entrance music is coffin black guys. A fine choice. RatGregor has chosen Hypnotize Remix as his entrance music. De Fagut had real problems making weight for this fight. After initially coming in at 147.1lbs, he had two hours to make the official fight weight. He made it but it will have taken a lot out of him to cut those extra few pounds. We have two fighters making their debuts here, so let's see who comes out of this one with their first professional victory.
 |
|
 |
| 179 cm
24
155
0 - 0 - 0 |
|
175 cm
25
153
0 - 0 - 0 |
BJJ Purple Belt
Counter fighter
Granite chin |
|
BJJ Blue Belt
Good kicks
Determined |
|
| |
|
Ladies and gentlemen. This fight is 3 rounds, in the featherweight division.
Introducing the fighter to my left, fighting out of the red corner.
With a record of 0 - 0 - 0, fighting out of Hilo, De Fagut!
And introducing the fighter to my right, fighting out of the blue corner.
With a record of 0 - 0 - 0, fighting out of Hilo, Konor RatGregor!
The judges for this bout are Roger Salmon, Micheangelo Fripello and Jeff Smith.
The bell rings for round one and we are underway!
The bell rings for round one and we are underway!
RatGregor connects with a body shot.
Sloppy strikes from RatGregor. Those never looked like landing.
RatGregor moves into range and throws a lovely three punch combination.
Fagut closes this distance looking for a takedown but RatGregor circles away.
No luck for Fagut with that takedown attempt.
RatGregor unleashes a big counter combination but Fagut bobs and weaves and avoids any damage.
RatGregor lands with an overhand left.
Fagut stumbles momentarily as he takes a strong leg kick from RatGregor.
RatGregor pushes Fagut away with a front kick.
RatGregor throws a left and a right that both miss

and Fagut counters with a shoot takedown. RatGregor fights it but they end up in guard.
This is a great period of action - very entertaining stuff!
RatGregor keeping moving, preventing Fagut from controlling successfully.
That's one minute gone in the round.
RatGregor is trying to keep Fagut in close.
Fagut pressing down on his opponent's thigh, looking to pass guard. RatGregor is keeping the position for now.

Fagut is trying to work a guillotine from the top, or something like that? Don't know how he thinks he's going to get a finish from there.
RatGregor controls Fagut momentarily but Fagut frees himself.
Fagut stands up and looks to throw the legs aside to pass to side control. RatGregor swivels though and keeps the full guard.
The referee decides to stand the fighters back up.
That's two minutes gone in the round.
The crowd are hurling abuse towards the fighters... You can hardly blame them though because there isn't a lot going on in the fight.
A decent looking cross lands there for RatGregor.
Sloppy strikes from RatGregor. Those never looked like landing.
Fagut gets a takedown into half guard.
Fagut is looking for a kimura. It's going to be difficult to finish that from half guard though and RatGregor defends it well.
Fagut is breathing heavily.
Fagut slows the pace down in half guard.
RatGregor trying to control from the bottom.
That's three minutes gone in the round.
Fagut is trying a forearm choke
I don't think that's going to do much at this level of the game.
RatGregor trying to get back to full guard but Fagut takes advantage of the position and moves to full mount!
Fagut is in full mount, looking to secure a guillotine but RatGregor is surviving well by controlling Fagut's body position as best he can.
RatGregor is desperately trying to get back to half guard.
That's four minutes gone in the round.
RatGregor tries to buck Fagut off but he can't manage it.
Fagut working for a guillotine from mount but RatGregor is in no mood to give up.
Fagut working from mount. He moves in close and looks like he might be going for an arm triangle... He's hopped off to the side and he's transitioned into an Anaconda choke. RatGregor turning a nasty shade of purple. He's refusing to tap but he's gone! He's out! The ref rips Fagut off and cradles RatGregor's limp body as Fagut celebrates with his corner.
Ladies and gentlemen, after 4:37 of round 1, we have a winner by way of Submission (Anaconda Choke). De Fagut!
De Fagut spent the whole post fight interview bigging himself up. It didn't go down that well with the fans after a while as they thought it was a bit arrogant.
Konor RatGregor was interviewed post fight and said 'He's a mad rat terrorist and that's why he beat me'.
|
|
|
|
|
|
|
|
|
|
|
|
|
|
|
|
|
|
|
|
|
|
|
| S |
C
A |
G |
S |
C
B |
G |
|
S |
C |
G |
|
energy
A | B |
|
hype
A | B |
|
pop
A | B |
|
mgr
A | B |
|
FIGHT
RATING
35% |
|
|
|
|
|
|
|
Undercard bout
|
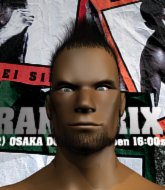
Coming up we have a light heavyweight MMA rules bout between Jack Lobos (ranked 4808 p4p, 4879 weight class) and Maurice Rue (ranked 521 p4p, 526 weight class). Lobos comes to the cage accompanied by D-Generation X. We have two fighters making their debuts here, so let's see who comes out of this one with their first professional victory.
 |
|
 |
| 189 cm
21
205
0 - 0 - 0 |
|
205 cm
25
215
0 - 0 - 0 |
BJJ Blue Belt
Basic striking
KO power |
|
Good takedowns
Counter fighter
Very confident |
|
| |
|
Ladies and gentlemen. This fight is 3 rounds, in the light heavyweight division.
Introducing the fighter to my left, fighting out of the red corner.
With a record of 0 - 0 - 0, fighting out of Hilo, Jack Lobos!
And introducing the fighter to my right, fighting out of the blue corner.
With a record of 0 - 0 - 0, fighting out of Hilo, Maurice Rue!
The judges for this bout are Chris Saunders, Roger Salmon and Ryoma Takatsuka.
The bell rings for round one and we are underway!
The bell rings for round one and we are underway!
Lobos throws a leg kick
and Rue counters with a nice double leg into guard.
Lobos not looking particularly offensive just at the moment.
Lobos might be looking to lock onto one of his opponent's long limbs for a submission, whilst we're on the ground.
Rue stands and throws Lobos's legs to the side, diving into side control.
Rue controls the position.
The ref warns both fighters not to hold the cage as they work up against the meshing.
Lobos is looking for a sweep.
Lobos knows he needs to get back to his feet asap. He's simply no match for Rue on the ground.
Rue has knee on belly and now moves to full mount! Trouble for Lobos!
Rue controlling from the full mount.
It looks like Rue might be adopting somewhat of a lay and pray gameplan here, which I'm sure won't go down too well with the paying fans in attendance... Or the ring announcers come to think of it.
Lobos really trying hard to get back to half guard here.
We've had a slow start to the round here - hopefully the action picks up.
Rue controlling the pace for now.
Lobos stops Rue from taking his back. Still, being mounted isn't any better.
That's one minute gone in the round.
Rue sitting in mount, just looking to control for the moment.
The fighters are pressed up against the cage, both looking to find a bit of space to work.
Lobos is trying to get back to his feet but can't.
Rue seems to be looking to move to his opponent's back but Lobos is holding on tight.
Lobos is working to get back to half guard.
Rue controlling from mount.
Rue is continuing to stall.
Rue is trying to take his opponent's back.
Rue trying to control but Lobos is having none of it.
Lobos has given up his back. Will we see Rue going for some submissions?
That's two minutes gone in the round.
Rue tries to get the hooks in deep but Lobos pushed the leg off.
Lobos fending off the submission attempt from Rue.
Rue controlling well, preventing Lobos from escaping the position.
Lobos is working hard here to advance position.
Rue is staying calm and holding on to the back position, whilst working on a rear naked choke. Lobos is defending well though. Rue let's go of the attempt for now.
Rue has the hooks in. Lobos is starting to panic. He's trying to push off one of the legs but he's left his neck open to attack. Rue passes his arm under Lobos's neck and tightens up a rear naked choke! This one is surely all over! Yes, Lobos taps!
Ladies and gentlemen, after 2:54 of round 1, we have a winner by way of Submission (RNC). Maurice Rue!
The defeated Jack Lobos had this to say: 'Sorry Mom'.
|
|
|
|
|
|
|
|
|
|
|
|
|
|
|
|
|
|
|
|
|
|
|
| S |
C
A |
G |
S |
C
B |
G |
|
S |
C |
G |
|
energy
A | B |
|
hype
A | B |
|
pop
A | B |
|
mgr
A | B |
|
FIGHT
RATING
42% |
|
|
|
|
|
|
|
Undercard bout
|
Coming up we have a lightweight MMA rules bout between Khalabib Emelianenko (ranked 4855 p4p, 3025 weight class) and Morgan Lima (ranked 474 p4p, 334 weight class). We have two fighters making their debuts here, so let's see who comes out of this one with their first professional victory.
 |
|
 |
| 180 cm
25
165
0 - 0 - 0 |
|
180 cm
18
155
0 - 0 - 0 |
Decent wrestler
Counter fighter
Self confident |
|
BJJ Blue Belt
Brawler
Intelligent |
|
| |
|
Ladies and gentlemen. This fight is 3 rounds, in the lightweight division.
Introducing the fighter to my left, fighting out of the red corner.
With a record of 0 - 0 - 0, fighting out of Hilo, Khalabib Emelianenko!
And introducing the fighter to my right, fighting out of the blue corner.
With a record of 0 - 0 - 0, fighting out of Hilo, Morgan Lima!
The judges for this bout are Colin Fray, Ryoma Takatsuka and Jeff Smith.
The bell rings for round one and we are underway!
The bell rings for round one and we are underway!
Lima throws a leg kick
and Emelianenko counters with a takedown into side control! That could mean trouble for Lima!
Lima tries to bench press Emelianenko off him but Emelianenko keeps the position.
The ref warns both fighters not to hold the cage as they work up against the meshing.
You can see the frustration on Lima's face as Emelianenko controls the position.
Lima is trying to get back to half guard.
Emelianenko is pausing for a moment. What's he doing? It looks like he's clearing his nose. Oh dude! He's shot a load of snot all down Lima's shoulder. That is not cool.
We've had a slow start to the round here - hopefully the action picks up.
Emelianenko passes to full mount! That's big trouble for Lima!
Emelianenko controlling from mount.
Emelianenko putting on the heat here with some good ground and pound!
That's one minute gone in the round.
Emelianenko tucks in and makes sure he doesn't lose the dominant position.
Lima gets back to half guard.
Emelianenko keeping composed on the top, looking to control the action.
Emelianenko is looking to pass the guard... He's managed it - he's now in full mount!
Emelianenko looking to control and managing it successfully.
That's two minutes gone in the round.
The crowd growing excited in anticipation of a finish here! Right on cue, Emelianenko cracks his opponent with a massive right hand that draws loud cheers!
Emelianenko controlling the pace for now.
Emelianenko has controlled the position for a good 20 seconds, which will no doubt be starting to frustrate his opponent.
The referee warns Lima that he has to improve his position here as he takes two more clean shots to the head.
Emelianenko controlling the position easily from mount.
Lima tries to hold on but Emelianenko postures up.
That's three minutes gone in the round.
Lima is in all sorts of trouble here.
Lima wants to control but Emelianenko is having none of it.
Emelianenko content just to control the position here.
Lima is desperately trying to improve his position but Emelianenko has a good base and remains in mount.
Emelianenko controlling the pace for now.
Emelianenko avoids the attempt from Lima to control.
That's four minutes gone in the round.
The crowd are starting to boo a lack of action.
Emelianenko controlling from mount.
Lima working to try and regain half guard.
Lima taking shots to the head.
Emelianenko lands a heavy elbow.
Emelianenko takes a little breather and maintains the position. The referee will be looking for him to stay active from such a dominant position though.
This is a sustained period of stalling by Emelianenko.
The crowd thankful this round is nearly over.
Emelianenko postures up and cracks his opponent a couple of times before moving back into close ground control. Lima looks a forlorn figure.
And thats the end of the round the fighters go back to their corners.
Khalabib Emelianenko dominated that round.
That's the end of the interval. I'm sure that seemed a lot quicker than a minute for our two fighters! Back to the action.
Lima shoots in for a takedown but doesn't get it.
Emelianenko half commits to a counter takedown before pushing away, out of range.
Lima is trying hard to land a takedown here. Emelianenko sprawls well and keeps this one on the feet.
Emelianenko drops down looking for a counter takedown but Lima sprawls and moves away.
Lima waving his hands out in front of him, looking to distract Emelianenko.
Emelianenko feinted with a counter takedown.
Lima throws a leg kick that is checked
and Emelianenko counters with a takedown into side control.
Lima is being controlled here.
Lima taking punishment in the form of punches.
Emelianenko has been looking to land a fair amount of strikes on the ground. He might be looking to soften his opponent up in order to work for a submission.
We've had a slow start to the round here - hopefully the action picks up.
Emelianenko remains in side control and seems content to stay there. It's a versatile position from which he can work both strikes and submissions, whilst maintaining that control, so maybe he'll sit here for a while.
Lima looks to move to half guard but instead Emelianenko has passed into mount! Damn!
That's one minute gone in the round.
Emelianenko looking to ground and pound his opponent to a finish here.
 Lima is rocked! Lima is rocked!
Emelianenko lands a big elbow.
Lima is still in real trouble! Can Emelianenko finish him?
Emelianenko controlling from the full mount.
The fighters are pressed up against the cage, both looking to find a bit of space to work.
A nice elbow there by Emelianenko.
Emelianenko takes a little breather and maintains the position. The referee will be looking for him to stay active from such a dominant position though.
Emelianenko postures up and throws a couple of big shots that have Lima in real trouble here! The ref calls for Lima to improve his position which he doesn't do, so the referee has no choice but to end the fight due to the strikes!
Ladies and gentlemen, after 1:47 of round 2, we have a winner by way of TKO (Strikes). Khalabib Emelianenko!
|
|
|
|
|
|
|
|
|
|
|
|
|
|
|
|
|
|
|
|
|
|
|
| S |
C
A |
G |
S |
C
B |
G |
|
S |
C |
G |
|
energy
A | B |
|
hype
A | B |
|
pop
A | B |
|
mgr
A | B |
|
FIGHT
RATING
38% |
|
|
|
|
|
|
|
Undercard bout
|
Coming up we have a middleweight MMA rules bout between Palestine Adosanya (ranked 4878 p4p, 4775 weight class) and Chyken Howse (ranked 548 p4p, 539 weight class). Howse has chosen kill yourself as his entrance music. We have two fighters making their debuts here, so let's see who comes out of this one with their first professional victory.
 |
|
 |
| 190 cm
25
195
0 - 0 - 0 |
|
187 cm
25
192
0 - 0 - 0 |
BJJ Blue Belt
Solid Muay Thai
KO power |
|
BJJ Blue Belt
Solid Muay Thai
Very confident |
|
| |
|
Ladies and gentlemen. This fight is 3 rounds, in the middleweight division.
Introducing the fighter to my left, fighting out of the red corner.
With a record of 0 - 0 - 0, fighting out of Hilo, Palestine Adosanya!
And introducing the fighter to my right, fighting out of the blue corner.
With a record of 0 - 0 - 0, fighting out of Hilo, Chyken Howse!
The judges for this bout are Jeff Smith, Chris Saunders and Micheangelo Fripello.
The bell rings for round one and we are underway!
The bell rings for round one and we are underway!
Adosanya takes a head kick and shrugs it off.
The fight moves into the clinch position.
Howse breaks the clinch.
Howse has taken the fight to the clinch.
Howse blocks a knee to the body. He'll have a nicely bruised forearm in the morning.
Howse is looking to break free of the clinch but Adosanya has double underhooks.
Howse working hard to break the clinch.
Howse escapes the clinch and we're back to striking.
Adosanya clinches with his opponent.
Howse is trying to break the clinch but Adosanya has him pressed against the cage.
We've had a slow start to the round here - hopefully the action picks up.
Howse's corner calls for him to break the clinch, which he does.
Howse scores with a nice one two combo and darts back out of range to avoid anything coming in the opposite direction.
Adosanya blocks a head kick by Howse.
Howse throws a sloppy head kick and Adosanya moves out of range easily.
Chyken Howse seems to be the more aggressive standup fighter in this bout.
That's one minute gone in the round.
Adosanya closes the distance and presses his opponent up against the cage.
Howse escapes the clinch and we're back to striking.
Adosanya clinches.
Howse avoiding damage as Adosanya throws knees to the body.
Adosanya landing some nice looking knees to the body.
Adosanya trying to land knees to the body.
Howse is trying to break the clinch but Adosanya is controlling him.
Howse manages to break the clinch.
Howse fails to land with a series of punches.
Adosanya was looking to counter that last move with a shot to the body but he didn't commit.
Howse misses with a half-hearted attempt at a head kick.
Adosanya closes the distance and clinches.
Howse wants to push off and get back to the center of the mat but Adosanya has him pressed against the cage.
That's two minutes gone in the round.
Adosanya holding his opponent close, against the cage.
Howse on the defensive, avoiding the knees to the body.
Howse being controlled against the cage.
Howse escapes the clinch and we're back to striking.
The fight moves into the clinch position.
Howse is trying to break the clinch but Adosanya is controlling him.
Adosanya tries to land a knee to the body but he is off balance and Howse avoids it.
Howse wants to strike at distance but he can't break free of the clinch.
A nice glancing elbow lands by Adosanya.
The fans in attendance giving it up for the two fighters, who have really let it all hang out in the last minute or so!
Howse is trying to break the clinch but Adosanya has him pressed against the cage.
Howse breaks the clinch and we're back to striking at distance.
Adosanya clinches up with Howse and pushes him back against the cage.
That's three minutes gone in the round.
A frustrated look appears on Howse's face as he tries to break the clinch.
Adosanya tries to land a shot to the body but it's blocked.
Adosanya tries to land knees in the clinch but Howse avoids the damage to the body.
Howse avoiding damage as Adosanya throws knees to the body.
With the fighters up against the cage, Adosanya throws an elbow but misses.
Adosanya dictating the pace here, as the fighters clinch against the cage.
Adosanya breaks the clinch.
Adosanya pushes Howse up against the cage in a clinch.
Howse is trying to push Adosanya away but Adosanya has him pressed against the cage, so he's going nowhere.
Howse letting Adosanya take a breather here.
Adosanya struggles to land a body shot inside as Howse controls his hands.
Adosanya unloads a knee to the mid-section. Howse lets out a prehistoric sounding urrrrgh.
Adosanya pushes off and circles away, back to the middle of the mat.
Howse throws a head kick that misses and slips in the process. He scrambles back to his feet and the fighters circle.
Howse looks winded!
That's four minutes gone in the round.
Adosanya has Howse up against the cage in a clinch.
Howse escapes the clinch and we're back to striking.
A low kick from Howse is predictable there
and Adosanya finishes the little exchange by landing a big kick to the body.
Howse rushes Adosanya and pushes him back against the cage in a clinch.
Adosanya escapes the clinch and we're back to striking.
Howse tries a switch kick but it misses it's target.
Adosanya clinches with his opponent.
The crowd are loving this. Great action here.
Howse escapes the clinch and we're back to striking.
Howse pulls out of a head kick attempt.
And thats the end of the round the fighters go back to their corners.
Palestine Adosanya dominated that round.
That's time! Back to the action!
Howse closes the distance and clinches.
Adosanya leaning his opponent against the cage.
Palestine Adosanya has scored more points in the clinch so far.
Stalling in the clinch from Adosanya.
Howse avoiding damage as Adosanya throws knees to the body.
Knees in the clinch landing for Adosanya.
Adosanya controlling the action here for a moment.
Howse pushes off and circles away, back to the middle of the mat.
We've had a slow start to the round here - hopefully the action picks up.
Howse attempts a low kick but it misses it's target.
As Howse looks to move away, Adosanya throws a big counter combo but Howse just gets out of the way.
Howse misses with a straight right.
Howse tries to keep at a distance but Adosanya has taken the fight into the clinch.
That's one minute gone in the round.
Howse escapes the clinch and we're back to striking.
Adosanya gets in close and instigates a clinch.
Howse breaks the clinch and we return to the middle of the mat.
Howse swinging wildly here.
Adosanya gets a clinch.
Howse breaks the clinch.
A slapping leg kick lands for Howse.
We are yet to see a takedown attempt from Howse in the fight. On paper you would think he is the more dominant ground fighter so let's see if these unusual tactics pay off.
Howse misses with a body kick.
That's two minutes gone in the round.
Howse tries to keep at a distance but Adosanya has taken the fight into the clinch.
Howse tries to break the clinch but Adosanya is controlling the position.
Howse tries to break the clinch but Adosanya is controlling the position.
Adosanya missing with knees to the body.
Howse is trying to break free.
Adosanya tries to work over Howse's body with a swooping hook but it only glances the target.
Howse can't break the clinch.
Adosanya keeps control of Howse as he tries to wriggle out of the double underhooks.
Adosanya creates a bit of distance and throws an elbow that only just misses.
A short body shot lands from Adosanya as the two fighters clinch.
Howse is trying to work out of this bad position, with his back against the cage.
Howse avoiding damage as Adosanya throws knees to the body.
Howse is looking to break free of the clinch but Adosanya has double underhooks.
Howse blocks a knee to the body. He'll have a nicely bruised forearm in the morning.
That's three minutes gone in the round.
Howse's corner calls for him to break the clinch, which he does.
Howse looking to land some kicks to the body here.
Howse is breathing heavily.
Adosanya clinches.
Adosanya escapes the clinch and we're back to striking.
Adosanya gets in close and instigates a clinch.
Adosanya keeps control of Howse as he tries to wriggle out of the double underhooks.
Adosanya's corner calls for him to break the clinch, which he does.
Adosanya clinches up with Howse and pushes him back against the cage.
Howse wants to break the clinch but can't.
Adosanya escapes the clinch and we're back to striking.
Adosanya darts in and clinches Howse up against the cage.
Howse breaks the clinch and we're back to striking at distance.
That's four minutes gone in the round.
Howse tries to keep at a distance but Adosanya has taken the fight into the clinch.
Howse wants to push off and get back to the center of the mat but Adosanya has him pressed against the cage.
Adosanya misses the knee to the body. Nice hip positioning from Howse.
Howse breaks from the clinch.
Adosanya moves into the clinch.
Howse escapes the clinch and we're back to striking.
We've seen a great period of action over the last minute or so - credit to both fighters for going all out!
Howse throws the kick towards the body but Adosanya avoids it.
It looked like Adosanya was trying to counter with a body shot coming off that last attack from Howse.
Adosanya moves into the clinch.
Adosanya is really dominating this fight. Is there anything that Howse can do to turn this around?
The crowd thankful this round is nearly over.
Howse is looking to break free of the clinch but Adosanya has double underhooks.
Howse wants to get back to striking at distance but Adosanya won't allow it.
Adosanya pushes off and circles away, back to the middle of the mat.
Howse is looking to clinch.
Adosanya went nuts there looking for a big combo counter but none of the flurry connected.
And thats the end of the round the fighters go back to their corners.
Palestine Adosanya dominated that second round.
The fighters' corners scream their final instructions, as the referee calls time. Here we go, back to the action! This is the final round!
Adosanya clinches up against the cage.
Howse has had enough of the clinch but Adosanya keeps him there for the moment.
Adosanya struggles to land a body shot inside as Howse controls his hands.
Howse breaks the clinch and we're back to striking at distance.
A head kick by Howse misses
and Adosanya counters with a three punch combo that has Howse backing up. Howse nods at Adosanya to acknowledge the strikes.
Adosanya gets a clinch.
Adosanya breaks the clinch.
Howse tries to bum rush Adosanya with a series of wild strikes but Adosanya uses good footwork to avoid the assault.
We've had a slow start to the round here - hopefully the action picks up.
Adosanya moves into the clinch.
Adosanya missing with knees to the body.
Howse breaks the clinch and we return to the middle of the mat.
Adosanya clinches up against the cage.
That's one minute gone in the round.
Adosanya misses the knee to the body. Nice hip positioning from Howse.
Howse tries to break the clinch but Adosanya is controlling the position.
Adosanya misses with some punches.
Adosanya breaks from the clinch.
Adosanya takes the fight into the clinch.
Adosanya escapes the clinch and we're back to striking.
Adosanya moves into the clinch.
Adosanya wants to stall.
Howse breaks the clinch and we return to the middle of the mat.
Howse takes the fight into the clinch.
Howse being controlled against the cage.
That's two minutes gone in the round.
Howse breaks the clinch.
A head kick by Howse misses
and Adosanya finishes the little exchange by landing a big kick to the body.
Howse tries a head kick but it misses.
Adosanya jinks towards his opponent looking like he wants to counter with a mid kick but doesn't commit.
Howse takes a big intake of breath there - he's definitely tired.
Adosanya clinches up against the cage.
Howse is trying to break the clinch but Adosanya has him pressed against the cage.
Howse breaks from the clinch.
Adosanya fakes with an overhand right and moves in to clinch with Howse, pushing him back against the cage.
Howse has had enough of the clinch and is looking to separate.
Howse is trying to break the clinch but Adosanya is controlling him.
Adosanya breaks the clinch.
That's three minutes gone in the round.
Adosanya moves into the clinch.
Howse working hard to break the clinch.
Adosanya missing with knees to the body.
Adosanya landing knees to the body. They look like they could hurt.
Adosanya prevents Howse from breaking the clinch.
Adosanya pushes off and circles away, back to the middle of the mat.
Adosanya fakes with an overhand right and moves in to clinch with Howse, pushing him back against the cage.
A left hand lands to the body for Adosanya.
Howse being controlled against the cage.
Adosanya controlling the action here for a moment.
Adosanya seems to have come into the fight with the intention of avoiding any damage in the clinch, rather than actually showing any aggression.
Adosanya tries to land knees in the clinch but Howse avoids the damage to the body.
That's four minutes gone in the round.
Adosanya lands a knee to the body.
Adosanya leaning his opponent against the cage.
Adosanya crunches a lovely knee into Howse's ribcage.
Adosanya unloads a knee to the mid-section. Howse lets out a prehistoric sounding urrrrgh.
Adosanya displaying some good clinch control by pressing Howse up against the cage.
Knees to the body from Adosanya.
Knees in the clinch landing for Adosanya.
The crowd are loving this. Great action here.
Adosanya putting his Muay Thai to good use. He has Howse in a tight clinch and is doing some damage with knees to the body.
Adosanya misses with a knee strike.
Adosanya tries to land a knee to the body but he is off balance and Howse avoids it.
Chyken Howse has stepped it up - he knows he needs a finish here!
Palestine Adosanya is fighting for a decision here - he's started to take the cautious approach.
Howse is trying to force a seperation but Adosanya has the dominant position.
And that's the end of the fight!
Palestine Adosanya showed his dominance in that final round.
Well I reckon that's a shut out for Adosanya, winning every round. Will the judges agree? They are the ones who matter, even if they are often depressingly incompetent. Over to the ring announcer for the scorecards.
Ladies and gentlemen, after 3 rounds of action, we go to the scorecards for a decision.
Judge Jeff Smith scores the fight 30:27
Judge Chris Saunders scores the fight 30:27
Judge Micheangelo Fripello scores the fight 30:27
In favor of your winner, by unanimous decision... Palestine Adosanya!
Chyken Howse spoke after the fight, saying 'Killing myself'.
|
|
|
|
|
|
|
|
|
|
|
|
|
|
|
|
|
|
|
|
|
|
|
| S |
C
A |
G |
S |
C
B |
G |
|
S |
C |
G |
|
energy
A | B |
|
hype
A | B |
|
pop
A | B |
|
mgr
A | B |
|
FIGHT
RATING
45% |
|
|
|
|
|
|
|
Co-main event
|
Coming up we have a light heavyweight MMA rules bout between Sick Guy (ranked 4807 p4p, 5207 weight class) and Jon Bones (ranked 519 p4p, 552 weight class). Guy comes to the cage accompanied by bitches aint shit. Bones has chosen I BEAT YO' ASS as his entrance music. We have two fighters making their debuts here, so let's see who comes out of this one with their first professional victory.
 |
|
 |
| 193 cm
22
205
0 - 0 - 0 |
|
193 cm
18
205
0 - 0 - 0 |
BJJ Blue Belt
Solid boxing
Self confident |
|
BJJ Blue Belt
Brawler
Granite chin |
|
| |
|
Ladies and gentlemen. This fight is 5 rounds, for the light heavyweight championship of the world!
Introducing the champion to my left, fighting out of the red corner.
With a record of 0 - 0 - 0, fighting out of Hilo, Sick Guy!
And introducing the challenger to my right, fighting out of the blue corner.
With a record of 0 - 0 - 0, fighting out of Hilo, Jon Bones!
The judges for this bout are Paul Gruel, Josh West and Jeff Smith.
The bell rings for round one and we are underway!
The bell rings for round one and we are underway!
Guy swinging wildly here.
Bones with poor footwork there. He got himself in a bit of a tangle, enabling Guy to score with a decent uppercut.
Bones closes the distance and pushes Guy back into the cage.
Bones tries to pull guard but Guy forces him back to his feet, against the cage.
Guy working hard to break the clinch.
Bones escapes the clinch and we're back to striking.
Guy moves into range and throws a combination. A nice jab followed by a hook to the body.
Horrible takedown attempt by Bones or perhaps it was just good defense by Guy, which made it look bad.
As Bones looks to move away, Guy throws a big counter combo but Bones just gets out of the way.
Guy's corner calls for a 1, 2 combination and Guy duly obliges.
Guy cracks Bones with a good jab.
Wooooo! Give it up for these two warriors! They are putting on a show!
A lazy left from Guy finds it's target.
Bones is rocked!
Guy steps into range and unloads a brutal right left combo! Bones is out on his feet! Guy sets himself and nearly takes Bones's head off with a straight right, sending him crashing to the mat! Wow, that was nasty... but awesome! Wooo!
Ladies and gentlemen, after 0:59 of round 1, we have a winner by way of KO (Strikes). Sick Guy!
Sick Guy is the new light heavyweight champion!
Sick Guy bigged himself up after the win. The crowd seemed to love it.
Jon Bones was interviewed post fight and said 'I was robbed, shit judging, Alex is a bummy bum.'.
|
|
|
|
|
|
|
|
|
|
|
|
|
|
|
|
|
|
|
|
|
|
|
| S |
C
A |
G |
S |
C
B |
G |
|
S |
C |
G |
|
energy
A | B |
|
hype
A | B |
|
pop
A | B |
|
mgr
A | B |
|
FIGHT
RATING
75% |
|
|
|
|
|
|
|
Main event
|
Coming up we have a heavyweight MMA rules bout between Bummy Bitch (ranked 2940 p4p, 4869 weight class) and Brick Lesnor (ranked 319 p4p, 460 weight class). Bitch comes to the cage accompanied by lamborghini. We have two fighters making their debuts here, so let's see who comes out of this one with their first professional victory.
 |
|
 |
| 225 cm
25
270
0 - 0 - 0 |
|
200 cm
25
264
0 - 0 - 0 |
Good wrestling
Brawler
Cuts easily |
|
Decent wrestler
Counter fighter
Inexperienced |
|
| |
|
Ladies and gentlemen. This fight is 5 rounds, for the heavyweight championship of the world!
Introducing the champion to my left, fighting out of the red corner.
With a record of 0 - 0 - 0, fighting out of Hilo, Bummy Bitch!
And introducing the challenger to my right, fighting out of the blue corner.
With a record of 0 - 0 - 0, fighting out of Hilo, Brick Lesnor!
The judges for this bout are Roger Salmon, Josh West and Colin Fray.
The bell rings for round one and we are underway!
The bell rings for round one and we are underway!
Lesnor fakes with an overhand right and moves in to clinch with Bitch, pushing him back against the cage.
Bitch on the defensive, avoiding the knees to the body.
Lesnor lands a knee to the body.
Lesnor scores with a hook to the body.
Bitch is breathing heavily.
Lesnor trying to land knees to the body.
Bitch managing to block the knees to the body from Lesnor.
Bitch blocks a knee to the body. He'll have a nicely bruised forearm in the morning.
Lesnor tries a knee to the head but he's missed.
Bitch managing to block the knees to the body from Lesnor.
Bitch really does look like a pencil wearing a pair of gloves. Let's hope he has a gameplan to suit that ridiculous body shape.
Lesnor stays in close to his opponent and throws a right hand to the body.
Lesnor trying to land knees to the body.
Lesnor lands a nice elbow.
 It looks like Bummy Bitch has been cut. It looks like Bummy Bitch has been cut.
Bitch avoiding damage as Lesnor throws knees to the body.
Lesnor lands a knee to the body.
Lesnor missing with knees to the body.
Lesnor throws a knee to the head but misses.
Bitch goes for a takedown in the clinch but Lesnor prevents it.
Lesnor is looking to score with knees to the body. Maybe he'll change it up and go body then head. Bitch is defending well for now.
A nice glancing elbow lands by Lesnor.
That's one minute gone in the round.
An uppercut to the body lands inside from Lesnor.
Bitch takes a knee to the side of the body.
Lesnor is leaning against Bitch and scores with a nice uppercut to the body.
Lesnor throws an elbow but it misses.
Lesnor lands a body shot.
Lesnor connects with a nasty looking knee right to Bitch's face.
Bummy Bitch's cut is getting worse.
Bitch on the defensive, avoiding the knees to the body.
Lesnor tries to land a knee to the body but he is off balance and Bitch avoids it.
Lesnor missing with knees to the body.
Bitch is trying to drag Lesnor to the mat but Lesnor just about manages to keep his footing. He used the cage to his advantage there.
Lesnor trying to land knees to the body.
Bitch on the defensive, avoiding the knees to the body.
With the two fighters working up against the cage, Lesnor just misses with a elbow thrown towards Bitch's brow.
Bitch is working for takedown but Lesnor is calmly controlling the position for now.
That's three failed takedown attempts in the round for Bummy Bitch. That's going to take a lot out of him.
Bitch wants a takedown but no success here.
That's two minutes gone in the round.
Bitch avoids a wild elbow strike from Lesnor.
Lesnor tries to land knees in the clinch but Bitch avoids the damage to the body.
Lesnor stops a takedown attempt from Bitch.
Lesnor digs a right hand into Bitch's ribs. Those have got to be taking their toll on Bitch's gas tank.
Lesnor missing with knees to the body.
Lesnor is pressed up against the cage. Bitch has hold of a leg and is looking to drag Lesnor down to the mat. Lesnor avoids the attempt though and has circled away. We're back to striking at a distance.
Lesnor closes the distance and clinches.
Bitch managing to block the knees to the body from Lesnor.
We've seen a great period of action over the last minute or so - credit to both fighters for going all out!
Lesnor is looking to score with knees to the body. Maybe he'll change it up and go body then head. Bitch is defending well for now.
Bitch on the defensive, avoiding the knees to the body.
Lesnor tries to land a knee to the body but he is off balance and Bitch avoids it.
Lesnor throws an elbow but it misses.
Bitch managing to block the knees to the body from Lesnor.
Lesnor missing with knees to the body.
Lesnor works for underhooks and lands a body shot in the process.
Bitch managing to block the knees to the body from Lesnor.
That's three minutes gone in the round.
Lesnor is defending well against a takedown attempt.
Kneeeeees! The crowd are calling for knees to the body. Lesnor obliges.
Lesnor is looking to score with knees to the body. Maybe he'll change it up and go body then head. Bitch is defending well for now.
Bitch is trying to drag Lesnor to the mat but Lesnor just about manages to keep his footing. He used the cage to his advantage there.
Lesnor is working Bitch over against the cage.
Lesnor tries to land a knee to the body but he is off balance and Bitch avoids it.
Lesnor is looking to score with knees to the body. Maybe he'll change it up and go body then head. Bitch is defending well for now.
Lesnor misses the knee to the body. Nice hip positioning from Bitch.
Bitch managing to block the knees to the body from Lesnor.
Lesnor misses with a punch on the inside.
Bitch is trying to work for a single leg takedown but Lesnor pulls him back up using the underhooks.
Bitch on the defensive, avoiding the knees to the body.
Bitch lands a takedown into guard.
Bitch looking to sit in guard and control but Lesnor gets the butterfly guard and sweeps. He's now in the guard on the top.

That's four minutes gone in the round.
There's a bit of a scramble here and now Bitch is on top in guard.
The crowd cheering loudly, showing their appreciation for the quality fight we're seeing here.
The fighters are going at a pretty good pace and they're both starting to sweat now.
Lesnor wants to stand and escape but Bitch is having none of it.
Bitch trying to land body shots but he keeps hitting the mat.
The fighters are pressed up against the cage, both looking to find a bit of space to work.
Bitch trying to pass the guard but can't manage it just yet.
Bitch seems content to control from guard here. He's going to have to remain active though if he doesn't want to get stood back up.
Bitch wants to control from the top but Lesnor keeps moving.
And thats the end of the round the fighters go back to their corners.
Brick Lesnor dominated that round.
The cut man is working on Bummy Bitch's cut.
That's time! Bitch's corner gives him a slap on the ass as he gets ready to fight.
Lesnor darts in and clinches Bitch up against the cage.
Bitch has a body lock and is looking for a takedown. Lesnor is bouncing around trying to prevent the takedown and somehow he has indeed managed to stay on his feet.
Bitch is looking for a takedown up against the cage. Lesnor gets underhooks though and prevents the takedown attempt.
Lesnor tries to land knees in the clinch but Bitch avoids the damage to the body.
Lesnor prevents a takedown attempt there.
That's three failed takedown attempts in the round for Bummy Bitch. That's going to take a lot out of him.
Bitch wants to take the fight to the mat but Lesnor manages to get underhooks and keep the fight in the clinch.
Lesnor landing knees to the body.
Lesnor has been the more effective fighter overall so far.
Lesnor lands an elbow inside.
Bitch blocks a knee to the body. He'll have a nicely bruised forearm in the morning.
We've had a slow start to the round here - hopefully the action picks up.
Bitch wants a takedown but no success here.
Lesnor lands a nice elbow from the clinch.
Lesnor landing knees to the body. They look like they could hurt.
Both fighters are absolutely exhausted here.
Lesnor tries to land knees in the clinch but Bitch avoids the damage to the body.
Lesnor misses the knee to the body. Nice hip positioning from Bitch.
That's one minute gone in the round.
Lesnor missing with knees to the body.
Lesnor digs a right hand underneath Bitch's ribcage. Bitch let out a lung full of air as it connected.
Lesnor is looking to score with knees to the body. Maybe he'll change it up and go body then head. Bitch is defending well for now.
Lesnor tries to land knees in the clinch but Bitch avoids the damage to the body.
Bitch avoids a wild elbow strike from Lesnor.
Lesnor misses the knee to the body. Nice hip positioning from Bitch.
Lesnor tries to land a knee to the body but he is off balance and Bitch avoids it.
Lesnor is pressed up against the cage. Bitch has hold of a leg and is looking to drag Lesnor down to the mat. Lesnor avoids the attempt though and has circled away. We're back to striking at a distance.
Lesnor gets in close and instigates a clinch.
Lesnor lands a shot to the body.
Lesnor looks to throw an elbow but misses.
Bitch managing to block the knees to the body from Lesnor.
Lesnor tries to land a knee to the body but he is off balance and Bitch avoids it.
Lesnor is looking to score with knees to the body. Maybe he'll change it up and go body then head. Bitch is defending well for now.
Lesnor trying to land knees to the body.
Bitch on the defensive, avoiding the knees to the body.
That's two minutes gone in the round.
Bitch wants a takedown.
A right handed body shot lands from Lesnor.
A short body shot lands from Lesnor as the two fighters clinch.
A right handed body shot lands from Lesnor.
Lesnor tries to land knees in the clinch but Bitch avoids the damage to the body.
Bitch drops down for a takedown but doesn't get it.
Lesnor lands a nice shot to the body.
Lesnor tries to land a knee to the body but he is off balance and Bitch avoids it.
Lesnor pushes Bitch back against the cage and lands a hook to the side of the head.
Fantastic stuff here - a very entertaining period of action, which has drawn cheers from the crowd.
Lesnor tries to land a knee to the body but he is off balance and Bitch avoids it.
Bitch has Lesnor pressed up against the cage. He's trying to work for a single leg takedown. Bitch pulls back from the cage and twists to the side, sending Lesnor tumbling to the mat - Bitch dives into Lesnor's guard.
Bitch throws a strike but Lesnor rolls with it and manages to sweep. Now he's in guard on top.
That's three minutes gone in the round.
Bitch is trying to control the position but Lesnor postures up.
Lesnor is looking to stand up but Bitch won't let him.
Bitch wants to stand up but Lesnor is controlling him.
Lesnor would like to get this fight back to the feet but can't get free from the closed guard.
Lesnor preventing the sweep.
That's four minutes gone in the round.
A lull in the action here being met with boos from the crowd.
Bitch is pulling down on Lesnor's head to control his posture.
The referee is pacing around the two fighters, thinking about a standup.
Bitch looking to control but Lesnor passes into half guard.
Bitch punching from the bottom.
Bitch tries to roll over but Lesnor keeps him under control.
The crowd thankful this round is nearly over.
Bitch is trying to control but Lesnor manages to pass to mount!
Bitch tries to reverse the position but Lesnor maintains control.
And thats the end of the round the fighters go back to their corners.
Brick Lesnor showed his class in that round. I'd imagine he'll take it on all the scorecards.
The cut man is working on Bummy Bitch's cut.
The fighters get back to their feet, the hooter sounds and we're back to the action!
Bitch has managed to clinch.
Lesnor lands a hook to the body. It's hard to tell if that hurt Bitch or not.
Lesnor tries to land a knee to the body but he is off balance and Bitch avoids it.
Lesnor is looking to score with knees to the body. Maybe he'll change it up and go body then head. Bitch is defending well for now.
Bitch managing to block the knees to the body from Lesnor.
Lesnor is looking to score with knees to the body. Maybe he'll change it up and go body then head. Bitch is defending well for now.
Lesnor missing with knees to the body.
Bitch is working on a leg, looking for a takedown but Lesnor is defending well.
Bitch on the defensive, avoiding the knees to the body.
Lesnor creates a bit of distance and throws an elbow that only just misses.
Lesnor tries to land a knee to the body but he is off balance and Bitch avoids it.
We've had a slow start to the round here - hopefully the action picks up.
Lesnor lands a nice uppercut.
Both fighters are breathing heavily.
Lesnor trying to land knees to the body.
Lesnor lands a nice looking hook to the body, against the cage.
Lesnor is looking to score with knees to the body. Maybe he'll change it up and go body then head. Bitch is defending well for now.
Bitch avoiding damage as Lesnor throws knees to the body.
That's one minute gone in the round.
Bitch tries for a takedown. No joy.
Lesnor lands on the inside with an uppercut.
Bitch blocks a knee to the body. He'll have a nicely bruised forearm in the morning.
Lesnor trying to land knees to the body.
Lesnor trying to land knees to the body.
Lesnor tries to land knees in the clinch but Bitch avoids the damage to the body.
Bitch gets a trip takedown into half guard.
Bitch will need to keep those long limbs tucked in whilst he's on the ground, to prevent any submissions.
Bitch sitting in half guard, looking to land shots. Lesnor defending well though.
Bitch not throwing his punches with enough precision this time.
Bitch wants to take a breather but Lesnor is having none of it.
Bitch seems to be looking for submissions.
Bummy Bitch overall seems to be getting the better of the ground position in the fight so far.
Bitch wants to lay and pray for a moment but Lesnor keeps working.
We get told so often about how wrestlers don't like to be on their backs. Let's see if Lesnor can do anything to dispel that myth.
That's two minutes gone in the round.
Bitch trying to pass the guard but Lesnor defending well.
Bitch with the ground and pound but Lesnor uses the opportunity to regain guard.
Bitch throws a strike but Lesnor rolls with it and manages to sweep. Now he's in guard on top.
Lesnor has decided he wants to stand but the closed guard of Bitch is proving hard to escape from.
Bitch is working an open guard here, looking to improve his position. No doubt that will leave him open to counters but at least he's being more offensive.
That's three minutes gone in the round.
Bitch not looking particularly offensive just at the moment.
Bitch looking to sweep here. No luck so far.
The referee has motioned to the fighters to stand back up.
Lesnor instigates a clinch.
Lesnor is looking to score with knees to the body. Maybe he'll change it up and go body then head. Bitch is defending well for now.
That's four minutes gone in the round.
Well. There's a bit of a lull in the action here and the crowd are starting to get restless.
Lesnor lands a nice elbow.
Lesnor misses the knee to the body. Nice hip positioning from Bitch.
Lesnor misses with a punch to the body.
Bitch turns his back and goes for a hip toss. It's a bit messy but it gets the job done and Bitch manages to end up in side control.
Bitch tries to advance to mount but can't.
The ground and pound from Bitch seems to be hitting the mat more than his opponent.
Bitch is looking to take a break and control but Lesnor is keeping him honest, looking to work from the bottom.
And thats the end of the round the fighters go back to their corners.
Brick Lesnor really dominated that round.
The cut man is working on Bummy Bitch's cut.
Well, the break between rounds is over. Let's get back to the scrappin!

Bitch misses with a head kick.
Lesnor has managed to clinch.
Bitch is working for a takedown up against the cage. He can't get it on this occasion though.
Bitch is working for a takedown up against the cage. He can't get it on this occasion though.
Bitch's head jolts backwards as he takes an uppercut right on the button!
Bitch blocks a knee to the body. He'll have a nicely bruised forearm in the morning.
A short body shot lands from Lesnor as the two fighters clinch.
Bitch avoiding damage as Lesnor throws knees to the body.
Nice body punch from Lesnor.
Bitch managing to block the knees to the body from Lesnor.
We've had a slow start to the round here - hopefully the action picks up.
Lesnor is working Bitch over against the cage.
Lesnor misses with an elbow strike.
It's got to the stage where if one of these guys blows hard enough, the other might fall over.
Lesnor is pressed up against the cage. Bitch has hold of a leg and is looking to drag Lesnor down to the mat. Lesnor avoids the attempt though and has circled away. We're back to striking at a distance.
That's three failed takedown attempts in the round for Bummy Bitch. That's going to take a lot out of him.
Lesnor has managed to clinch.
Lesnor digs a right hand into Bitch's ribs. Those have got to be taking their toll on Bitch's gas tank.
That's one minute gone in the round.
Bitch on the defensive, avoiding the knees to the body.
Lesnor lands an elbow inside.
Lesnor misses with an elbow over the top.
Bitch on the defensive, avoiding the knees to the body.
Lesnor trying to land knees to the body.
Bitch looking for a takedown.
Brick Lesnor seems to be working more effectively in the clinch in the fight so far.
Lesnor tries to land a knee to the body but he is off balance and Bitch avoids it.
Lesnor tries to land a knee to the body but he is off balance and Bitch avoids it.
Bitch on the defensive, avoiding the knees to the body.
Bitch on the defensive, avoiding the knees to the body.
Bitch has Lesnor pressed up against the cage and is working for takedown. Lesnor manages to improve position though and keeps the fight standing.
Lesnor missing with knees to the body.
Bitch has Lesnor pressed up against the cage. He's trying to work for a single leg takedown. Bitch pulls back from the cage and twists to the side, sending Lesnor tumbling to the mat - Bitch dives into Lesnor's guard.
Lesnor is looking to stand up but Bitch isn't so interested in that idea.
That's two minutes gone in the round.
Bitch throwing strikes from guard but Lesnor blocks nicely.
Bitch throws a strike but Lesnor rolls with it and manages to sweep. Now he's in guard on top.
Bitch escapes his hips to the side and looks to be working for an armbar. Lesnor gives him a little smile and shakes his head. No chance.
Bitch is working the butterfly guard. He manages to land a nice scissor sweep and is now in half guard on the top. Nice move.
That's three minutes gone in the round.
Bitch trying to pass the guard but Lesnor defending well.
Bitch is trying to work for a kimura but Lesnor is defending well.
Bitch throwing shots but they're hitting the canvas more than the man.
The ref warns both fighters not to hold the cage as they work up against the meshing.
Bitch is thinking about going for an arm triangle but he can't free his leg.
Lesnor regains full guard, whilst avoiding punches from Bitch.
That's four minutes gone in the round.
The crowd are getting on the fighters' backs, as the pace has dropped off in the last minute or so.
Bitch wants to control from the top but Lesnor keeps moving.
Lesnor working the defensive guard well to avoid strikes from Bitch.
Bitch wants to pass the guard but Lesnor is keeping the position.
The crowd thankful this round is nearly over.
Bitch throws an elbow that misses. Lesnor uses the momentum to reverse the position. He's now in Bitch's guard. Nice move by Lesnor!
And thats the end of the round the fighters go back to their corners.
Brick Lesnor dominated that fourth round.
The cut man is working on Bummy Bitch's cut.
That's the end of the round. The referee orders the cornermen out of the cage so we can get back down to business. This is the final round!

Bitch fails with a takedown attempt.
Lesnor gets in close and instigates a clinch.
Lesnor gets underhooks to prevent Bitch's takedown attempt.
Bitch can't get the takedown.
That's three failed takedown attempts in the round for Bummy Bitch. That's going to take a lot out of him.
Bitch is working on a leg, looking for a takedown but Lesnor is defending well.
Lesnor misses with an elbow over the top.
Kneeeeees! The crowd are calling for knees to the body. Lesnor obliges.
We've had a slow start to the round here - hopefully the action picks up.
Bitch managing to block the knees to the body from Lesnor.
Lesnor landing knees to the body. They look like they could hurt.
Lesnor lands a body shot.
Lesnor is looking to score with knees to the body. Maybe he'll change it up and go body then head. Bitch is defending well for now.
Both of our modern day gladiators look out of it here - a gruelling 5 rounds of action taking it's toll on them, no doubt.
Lesnor lands a nice elbow.
That's one minute gone in the round.
Lesnor lands an elbow inside.
Bitch is looking for a takedown up against the cage. Lesnor gets underhooks though and prevents the takedown attempt.
Kneeeeees! The crowd are calling for knees to the body. Lesnor obliges.
A nice glancing elbow lands by Lesnor.
Bitch managing to block the knees to the body from Lesnor.
Lesnor missing with knees to the body.
Lesnor tries to land knees in the clinch but Bitch avoids the damage to the body.
Lesnor tries to land a shot to the body but it's blocked.
Bitch managing to block the knees to the body from Lesnor.
Bitch is looking for a takedown up against the cage. Lesnor gets underhooks though and prevents the takedown attempt.
Bitch changes levels and goes for a takedown here. Lesnor fights it off and pushes away nicely.
Lesnor gets a clinch.
That's two minutes gone in the round.
Lesnor gets double underhooks to prevent a takedown attempt from Bitch.
Bitch tries to score a body lock takedown but Lesnor shows good agility there to stay on his feet.
Bitch on the defensive, avoiding the knees to the body.
Bitch avoiding damage as Lesnor throws knees to the body.
Bitch on the defensive, avoiding the knees to the body.
Bitch is trying to drag Lesnor to the mat but Lesnor just about manages to keep his footing. He used the cage to his advantage there.
Lesnor tries to land knees in the clinch but Bitch avoids the damage to the body.
Lesnor cracks Bitch with a nice body shot.
Lesnor misses the knee to the body. Nice hip positioning from Bitch.
Lesnor misses with a shot to the kidneys.
Bitch dodges an elbow strike from Lesnor.
Bitch goes for a takedown attempt but Lesnor pushes him away and we're back to fighting at a distance.
That's three minutes gone in the round.
Lesnor closes the distance and presses his opponent up against the cage.
Lesnor is looking to score with knees to the body. Maybe he'll change it up and go body then head. Bitch is defending well for now.
Lesnor tries to land a knee to the head but Bitch blocks with his arms.
Bitch tries for a takedown but Lesnor manages to get underhooks.
Lesnor tries to land a knee to the body but he is off balance and Bitch avoids it.
Lesnor is pressed up against the cage. Bitch has hold of a leg and is looking to drag Lesnor down to the mat. Lesnor avoids the attempt though and has circled away. We're back to striking at a distance.
Bummy Bitch is looking to throw some combinations by the looks of things.
Lesnor gets a clinch.
Lesnor misses with an elbow over the top.
Lesnor tries to land a knee to the body but he is off balance and Bitch avoids it.
Bitch drops to a knee looking for a takedown but Lesnor gets the underhooks and prevents it.
Bitch gets the body lock takedown. After a quick scramble, Lesnor regains guard.
That's four minutes gone in the round.
Bitch postures up in Lesnor's guard and throws a big left but Lesnor blocks it.
Bitch trying to move into half guard but instead Lesnor has managed to sweep!
Lesnor preventing the sweep.
Lesnor wants to stand but Bitch is controlling his posture from full guard.
Bitch kicks Lesnor off and gets to his feet.
Bummy Bitch has stepped it up - he knows he needs a finish here!
Brick Lesnor is fighting for a decision - hopefully he's judged it right and he's actually winning the fight.
The crowd are loving this. Great action here.
Bitch shoots in for a takedown but Lesnor shows good takedown defense there and keeps this one on the feet.
And that's the end of the fight!
Brick Lesnor comfortably won the final round on my scorecard.
I've got Lesnor winning every round here. Surely the decision will go his way and he'll pick up a well deserved decision victory. Over to the ring announcer for the scorecards.
Ladies and gentlemen, after 5 rounds of action, we go to the scorecards for a decision.
Judge Roger Salmon scores the fight 45:50
Judge Josh West scores the fight 45:50
Judge Colin Fray scores the fight 45:50
In favor of your winner, by unanimous decision... Brick Lesnor!
Brick Lesnor is the new heavyweight champion!
Bummy Bitch was interviewed post fight and said 'Gay ass mf coudlnt do that again '.
|
|
|
|
|
|
|
|
|
|
|
|
|
|
|
|
|
|
|
|
|
|
|
| S |
C
A |
G |
S |
C
B |
G |
|
S |
C |
G |
|
energy
A | B |
|
hype
A | B |
|
pop
A | B |
|
mgr
A | B |
|
FIGHT
RATING
44% |
|
|
|
|
|
|
|
|
|
|

