 |
WCF WNF 8: Senior vs Toshiyuki PBP Commentary |
Undercard bout
|
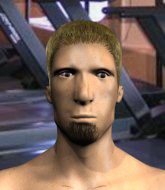
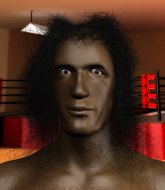
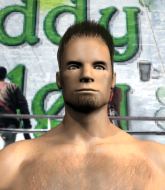
Coming up we have a light heavyweight MMA rules bout between Seamus Ohoulihan (ranked 2209 p4p, 24468 weight class) and Domaydo Cann (ranked 297 p4p, 683 weight class). Both fighters look pumped up here. Let's hope this is a good fight!
 |
|
 |
| 189 cm
20
210
5 - 0 - 0 |
|
185 cm
20
205
0 - 0 - 0 |
Good wrestling
Solid boxing
Cardio machine |
|
Good takedowns
Solid Muay Thai
Granite chin |
|
| |
|
Ladies and gentlemen. This fight is 3 rounds, in the light heavyweight division.
Introducing the fighter to my left, fighting out of the red corner.
With a record of 5 - 0 - 0, fighting out of Hilo, Seamus Ohoulihan!
And introducing the fighter to my right, fighting out of the blue corner.
With a record of 0 - 0 - 0, fighting out of Hilo, Domaydo Cann!
The judges for this bout are Donatello Bradman, Topper Green and Francis DeMontford.

The bell rings for round one and we are underway!
The bell rings for round one and we are underway!
Ohoulihan connects with a lovely right hand, straight down the pipe.
Ohoulihan shoots for a double leg takedown but Cann sprawls well. He's pushed Ohoulihan's face into the mat and manages to get back to his feet relatively easily.
Ohoulihan shoots in but no luck this time.
Ohoulihan shoots in for a takedown but doesn't get it.
That's three failed takedown attempts in the round for Seamus Ohoulihan. That's going to take a lot out of him.

Ohoulihan gets caught on his heels momentarily as he allows Cann to score an easy takedown into full guard.
Cann postures up in Ohoulihan's guard and throws a big left but Ohoulihan blocks it.
Ohoulihan looking to hit a scissor sweep but Cann is one step ahead there.
The ref warns both fighters not to hold the cage as they work up against the meshing.
There's a bit of a scramble here and now Ohoulihan is on top in guard.


Ohoulihan is trying to work a guillotine from the top, or something like that? Don't know how he thinks he's going to get a finish from there.
Ohoulihan is sitting in guard, working some ground and pound.

That's one minute gone in the round.
Ohoulihan with a flurry of punches that miss.
Cann throws a couple of shots from the bottom but they don't land.

Cann is looking for a guillotine. You can't force these things though and Ohoulihan defends well.
There's a bit of a scramble here and now Cann is on top in guard.

Ohoulihan throwing short punches from the bottom.
Ohoulihan throws a couple of heel strikes.
Cann would like to get this fight back to the feet but can't get free from the closed guard.
Ohoulihan throwing short punches from the bottom.
Ohoulihan lands a couple of decent looking body shots there.
Cann stands up out of Ohoulihan's guard for a moment - Ohoulihan manages to land a nice upkick.
Ohoulihan is working an open guard here, looking to improve his position. No doubt that will leave him open to counters but at least he's being more offensive.

That's two minutes gone in the round.

Cann gets to his feet. Ohoulihan looking to butt scoot but the ref puts an end to that. On your feet son!
Ohoulihan slaps away a takedown attempt from Cann, before circling back to the center of the mat.
Ohoulihan closes this distance looking for a takedown but Cann circles away.
Ohoulihan shoots in and drives through. Cann sprawls well.
Cann throws a looping left and ducks down for a takedown. He's got his arms around Ohoulihan's waist but Ohoulihan gets an underhook and avoids the takedown by throwing Cann off to one side.
Cann tries to clinch there but Ohoulihan circles away.
Cann tries to close the distance and clinch but Ohoulihan swats him to one side with an open hand palm strike and circles away.
As Cann backs away, Ohoulihan returns fire with a leg kick that just misses.
Ohoulihan gets caught on his heels momentarily as he allows Cann to score an easy takedown into full guard.
The crowd cheering loudly, showing their appreciation for the quality fight we're seeing here.
Cann avoids a guillotine attempt easily.
Cann throwing shots from guard but he's hitting more mat than opponent.

That's three minutes gone in the round.
Ohoulihan scores with a couple of body punches from the bottom.
Ohoulihan throws a couple of heel strikes.
Cann sitting in guard, not really doing much.
Ohoulihan seems to have improved his submission grappling technique since last time we saw him. Let's see if he can pull off a submission.
Cann wants to control from the top but Ohoulihan keeps moving.
Ohoulihan on his back here. We all know that wrestlers don't like being on their back so let's see if Ohoulihan tries to get out of the position.
Ohoulihan can't keep his opponent in guard - Cann advances to half guard, no doubt looking to mount.
Ohoulihan is looking to improve his position.

That's four minutes gone in the round.
A few boos can be heard. I'm sure they will multiply if the fighters don't pick up the pace.
Cann wants to pass to mount but Ohoulihan is defending the position.
Ohoulihan flails away from the bottom but he's not doing any damage.
Ohoulihan missing with punches from the bottom.
Ohoulihan is pressing down on Cann's left leg trying to get back to full guard. He's managed it.
Ohoulihan has his foot on Cann's thigh. He's trying to push off and get in position for a triangle, I think. Cann works his way back into a safe position though.
Ohoulihan thows some rabbit punches from the bottom but they don't do any damage.
Cann is just sitting in guard, looking to avoid any submissions.
The crowd thankful this round is nearly over.
Ohoulihan throws some sloppy strikes off his back.

The ref stands the fighters back up due to a lack of activity.
Cann shoots in looking for a takedown but Ohoulihan manages to keep the fight standing, pushing Cann's face into the canvas for good measure before circling away.
And thats the end of the round the fighters go back to their corners.
Domaydo Cann dominated that round.
That's time! Ohoulihan's corner gives him a slap on the ass as he gets ready to fight.


Ohoulihan shoots in from a long way out. He's driving through with the takedown attempt and he eventually gets it, landing in Cann's guard.
Ohoulihan trying to land body shots but he keeps hitting the mat.
Ohoulihan stops Cann from standing up.
Ohoulihan working from the guard for now, landing some ground and pound.
The fighters are pressed up against the cage, both looking to find a bit of space to work.
Ohoulihan with a nice head shot there.
Ohoulihan pressing down on his opponent's thigh, looking to pass guard. Cann is keeping the position for now.
Ohoulihan lands a nice shot whilst sitting in his opponent's guard.
Ohoulihan is working the ground and pound from guard. He might want to try advancing position though to get more of an impact.
Ohoulihan landing with the ground and pound.
Cann preventing the ground and pound from doing any damage.
We've had a slow start to the round here - hopefully the action picks up.
Ohoulihan postures up.
Ohoulihan makes a bit of distance and scores with some ground and pound, still in guard.
Seamus Ohoulihan overall seems to be getting the better of the ground position in the fight so far.
Ohoulihan throwing shots from guard but he's hitting more mat than opponent.
Cann has control of Ohoulihan's left arm, preventing Ohoulihan from doing any damage.
That's one minute gone in the round.
Ohoulihan wants to pass the guard but Cann is keeping the position.
Ohoulihan landing some decent shots from guard.
 Cann is rocked! Cann is rocked!
Ohoulihan arches his back and unloads with a massive left and a right! Cann's eyes roll back into his head, he's out cold! The ref dives in to stop the fight - wow, they were hard shots!
Ladies and gentlemen, after 1:37 of round 2, we have a winner by way of KO (Strikes). Seamus Ohoulihan!
Seamus Ohoulihan decided to thank the fans in attendance for making a great atmosphere. It seemed to go down pretty well.
|
|
|
|
|
|
|
|
|
|
|
|
|
|
|
|
|
|
|
|
|
|
|
| S |
C
A |
G |
S |
C
B |
G |
|
S |
C |
G |
|
energy
A | B |
|
hype
A | B |
|
pop
A | B |
|
mgr
A | B |
|
FIGHT
RATING
36% |
|
|
|
|
|
|
|
Undercard bout
|
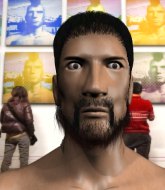
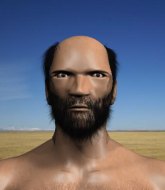
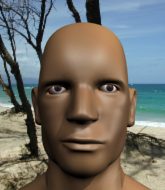
Coming up we have a featherweight MMA rules bout between Miko Haapala (ranked 5500 p4p, 24667 weight class) and Duffy Fulcher (ranked 452 p4p, 571 weight class). Haapala kept the crowd waiting but all that was forgotten when his ring entrance music started. The incomparable musical genius that is Jääkärimarssi. This should be fireworks!
 |
|
 |
| 160 cm
25
147
1 - 1 - 0 |
|
179 cm
20
150
3 - 10 - 0 |
Good takedowns
Basic striking
Granite chin |
|
Good takedowns
Counter fighter
Solid chin |
|
| |
|
Ladies and gentlemen. This fight is 3 rounds, in the featherweight division.
Introducing the fighter to my left, fighting out of the red corner.
With a record of 1 - 1 - 0, fighting out of Helsinki, Miko Haapala!
And introducing the fighter to my right, fighting out of the blue corner.
With a record of 3 - 10 - 0, fighting out of Sydney, Duffy Fulcher!
The judges for this bout are Donatello Bradman, Darius Henderson and Bruno Hogan.
The bell rings for round one and we are underway!
The bell rings for round one and we are underway!
Fulcher fails with an attempt to clinch.
Fulcher with a poor takedown
and Haapala counters with a nice shoot takedown that brings the fighters to the ground.
Haapala works over Fulcher with some ground and pound from guard.
Haapala slips effortlessly into side control - very nice.
Haapala is trying to land an Americana. He has the arm isolated but Fulcher is keeping cool and he's avoided the danger for now.
Fulcher striking from the bottom but nothing landed.
Fulcher prevents Haapala from improving position.
Fulcher is trying to improve his position.
Haapala working away diligently from side control. Landing strikes effectively there - that will score him some points on the judges scorecards.
Fulcher regains half guard.
Fulcher looking to work for a kimura from the bottom.
Haapala looks towards his corner to check for any instructions. The corner give him nothing to work with, so he cracks Fulcher with a short hammerfist. I guess that's as good as any advice he could get in this position.
Haapala is keeping good posture, landing some ground and pound.
That's one minute gone in the round.
Haapala landing with strikes to the body and head, softening up his opponent.
Fulcher looking to work for a kimura from the bottom.
Haapala prevents Fulcher from improving his position.
The fighters are pressed up against the cage, both looking to find a bit of space to work.
Haapala lands a big shot. The thud that echoes around the arena is like music to the fans' ears.
Haapala seems to be looking for submissions.
Fulcher is looking to improve his position.
Fulcher actively working from the bottom here.
Fulcher looks winded!
Haapala wants to work for an arm triangle but Fulcher is really keeping half guard well and defending the submission attempt.
Haapala lands strikes from half guard.
Haapala is keeping good posture, landing some ground and pound.
Ground and pound from Haapala.
Fulcher is rocked!
Haapala looks to score some points with some ground and pound.
Fulcher is still in real trouble! Can Haapala finish him?
That's two minutes gone in the round.
Fulcher actively working from the bottom here.
Haapala could do with losing a few pounds - he looks very soft around the mid section, to put it politely.
Haapala is working for a submission here. He's got hold of the far side arm and he's looking for a kimura. He's cranking on the arm and he's got it! Fulcher is tapping out! Ouch, that looked like it hurt!
Ladies and gentlemen, after 2:21 of round 1, we have a winner by way of Submission (Kimura). Miko Haapala!
Jumping up and down and very excited, Miko Haapala waved his t-shirt featuring Helsinki Xtreme Fightwear's logo in front of the cameras.
|
|
|
|
|
|
|
|
|
|
|
|
|
|
|
|
|
|
|
|
|
|
|
| S |
C
A |
G |
S |
C
B |
G |
|
S |
C |
G |
|
energy
A | B |
|
hype
A | B |
|
pop
A | B |
|
mgr
A | B |
|
FIGHT
RATING
54% |
|
|
|
|
|
|
|
Undercard bout
|
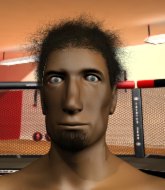
Coming up we have a lightweight MMA rules bout between Tom Trayans (ranked 4484 p4p, 6731 weight class) and Ting Wallawallabingbang (ranked 454 p4p, 565 weight class). Trayans comes to the cage accompanied by Non-Natty Anthem. The atmosphere really building for this one as we go over to our ring announcer for the fighter introductions!
 |
|
 |
| 175 cm
20
160
2 - 2 - 0 |
|
175 cm
23
155
1 - 1 - 0 |
BJJ Blue Belt
Solid Muay Thai
Very strong |
|
BJJ Blue Belt
Solid Muay Thai
Determined |
|
| |
|
Ladies and gentlemen. This fight is 3 rounds, in the lightweight division.
Introducing the fighter to my left, fighting out of the red corner.
With a record of 2 - 2 - 0, fighting out of Amsterdam, Tom Trayans!
And introducing the fighter to my right, fighting out of the blue corner.
With a record of 1 - 1 - 0, fighting out of St Petersburg, Ting Wallawallabingbang!
The judges for this bout are Bruno Hogan, Francis DeMontford and Darius Henderson.
The bell rings for round one and we are underway!
The bell rings for round one and we are underway!
Wallawallabingbang with a nice looking leg kick. You could hear that one land in a back row.
Wallawallabingbang throws a nice inside leg kick.
Trayans cracks Wallawallabingbang with a right hand to the side of the head.
Wallawallabingbang fakes with a right hand and throws a good leg kick, right into the thigh. That had to hurt Trayans.
Wallawallabingbang fails with an attempt to clinch.
Trayans throws a series of punches but Wallawallabingbang avoids them all with ease.
Trayans slips a jab and a cross from Wallawallabingbang.
A counter left hand to the body from Trayans misses its target.
Trayans misses with a wild combination.
Wallawallabingbang tries to clinch but Trayans moves out of range.

Wallawallabingbang drives through and clinches with Trayans against the cage.

Trayans's corner calls for him to break the clinch, which he does.
A head kick misses from Trayans.
Trayans misses with a series of wild punches.
This is a great period of action - very entertaining stuff!
Wallawallabingbang instigates a clinch.
Trayans working hard to break the clinch.
That's one minute gone in the round.
Trayans tries to break free but Wallawallabingbang pushes him back against the cage.
Trayans's corner calls for him to break the clinch, which he does.
Wallawallabingbang has Trayans up against the cage in a clinch.
Trayans avoiding damage as Wallawallabingbang throws knees to the body.
Trayans breaks from the clinch.
Trayans throws a leg kick but Wallawallabingbang checks it.
Wallawallabingbang thuds his shin into the meat of Trayans's side.
Trayans throws a head kick that misses and slips in the process. He scrambles back to his feet and the fighters circle.
Wallawallabingbang moves into the clinch.
Trayans wants to break free but Wallawallabingbang has control.
Trayans tries to break the clinch but Wallawallabingbang is controlling the position.
Trayans breaks the clinch.
Wallawallabingbang tried to score with a low kick but Trayans checks it.
Trayans lands a powerful looking uppercut that connected with his opponent's jaw.
Wallawallabingbang tries to clinch but Trayans moves out of range.
That's two minutes gone in the round.
Wallawallabingbang lands a leg kick that knocks Trayans off balance momentarily.
Trayans looks to be in better condition than last time we saw him fight. Obviously he's been working hard on his cardio.
Wallawallabingbang has closed the distance and engaged Trayans in a clinch.
Wallawallabingbang trying to land knees to the body.
Wallawallabingbang throws a vicious knee straight up the middle but Trayans blocks it with crossed arms.
This is a great period of action - very entertaining stuff!
Trayans avoiding damage as Wallawallabingbang throws knees to the body.
With the two fighters working up against the cage, Wallawallabingbang just misses with a elbow thrown towards Trayans's brow.
Wallawallabingbang gets an overhook and lands an elbow to the side of the head.
Wallawallabingbang gets an overhook and lands an elbow to the side of the head.
Trayans managing to block the knees to the body from Wallawallabingbang.
Trayans wants to strike at distance but he can't break free of the clinch.
Trayans manages to break the clinch.
Wallawallabingbang tries to clinch but is not successful on this occasion.
Wallawallabingbang just manages to avoid a counter high kick fromTrayans.
Wallawallabingbang fails in his attempt to clinch.
Trayans darts in and out, connecting with a jab.
Trayans slips in close and lands a nice hook before moving back out of range.
Wallawallabingbang tries to clinch but fails miserably
and Trayans counters with a nice low kick that buckles Wallawallabingbang's knee momentarily.
That's three minutes gone in the round.
Trayans looks to land a body kick but Wallawallabingbang moved away.
Wallawallabingbang tries to close the distance and clinch up against the cage but Trayans paws at him with a jab and circles away.
Wallawallabingbang tries to close the distance and clinch up but Trayans swats him away and circles back towards the center.
Wallawallabingbang wants to clinch up but Trayans keeps it at a distance.
Wallawallabingbang misses with a looping left.
Wallawallabingbang closes the distance and presses his opponent up against the cage.
Wallawallabingbang using the Thai clinch to land knees to the body.
Trayans pushes off and circles away, back to the middle of the mat.
Trayans throws a looping overhand right but Wallawallabingbang ducks down to avoid it.
Trayans throws a head kick that misses.
Wallawallabingbang pushes Trayans up against the cage in a clinch.
Trayans breaks the clinch and we return to the middle of the mat.
Wallawallabingbang tries to clinch but is not successful on this occasion.
Wallawallabingbang pivots as if he's going to throw a leg kick but stops half way.
That's four minutes gone in the round.
Wallawallabingbang takes a thudding leg kick, right into the meat of the thigh.
Trayans blocks a head kick by Wallawallabingbang.
Wallawallabingbang takes the fight into the clinch.
Trayans wants to get back to striking at distance but Wallawallabingbang won't allow it.
Wallawallabingbang lands an elbow inside that Trayans shrugs off.
The fans in attendance giving it up for the two fighters, who have really let it all hang out in the last minute or so!
Both guys are working to get underhooks.
Wallawallabingbang misses with a punch on the inside.
Wallawallabingbang pressing his opponent against the cage.
Trayans is trying to work out of this bad position, with his back against the cage.
Wallawallabingbang landing knees to the body.
The fighters are pressed against the cage, as the pace of the fight slows.
Trayans dodges an elbow strike from Wallawallabingbang.
And thats the end of the round the fighters go back to their corners.
A close round but Ting Wallawallabingbang will probably get the nod.
That's the end of the interval. I'm sure that seemed a lot quicker than a minute for our two fighters! Back to the action.
Wallawallabingbang closes the distance and clinches.
Wallawallabingbang trying to land knees to the body.
Ting Wallawallabingbang seems to be working more effectively in the clinch in the fight so far.
Trayans manages to break the clinch.
Trayans waving his hands out in front of him, looking to distract Wallawallabingbang.
Wallawallabingbang looked like he wanted to counter with a punch but didn't throw it.
Ting Wallawallabingbang seems to be the more aggressive standup fighter in this bout.
Wallawallabingbang showing good head movement there, avoiding the strikes from Trayans.
Wallawallabingbang fails with an attempt to clinch.
Wallawallabingbang fails in his attempt to clinch.
Wallawallabingbang has taken the fight to the clinch.
Trayans has had enough of the clinch but Wallawallabingbang keeps him there for the moment.
Trayans avoiding damage as Wallawallabingbang throws knees to the body.
We are yet to see a takedown attempt from Wallawallabingbang in the fight. On paper you would think he is the more dominant ground fighter so let's see if these unusual tactics pay off.
We've had a slow start to the round here - hopefully the action picks up.
Wallawallabingbang digs a right hand underneath Trayans's ribcage. Trayans let out a lung full of air as it connected.
Wallawallabingbang misses with a punch to the body.
Trayans blocks the elbow strike.
Wallawallabingbang has Trayans pressed against the cage, preventing Trayans from circling away and getting back to striking at range.
Wallawallabingbang misses the knee to the body. Nice hip positioning from Trayans.
That's one minute gone in the round.
Trayans breaks from the clinch.
Wallawallabingbang misses with a jab, cross combination.
Wallawallabingbang closes the distance and clinches.
Trayans blocks a body shot from Wallawallabingbang.
Nice body punch from Wallawallabingbang - that landed with a thud.
Trayans's corner calls for him to break the clinch, which he does.
Wallawallabingbang on the wrong end of an overhand right that came out of nowhere.
Trayans keeps his opponent at a distance with a nice jab.
Trayans is moving around nicely and scores here with a single head shot.
Wallawallabingbang is rocked!
Wallawallabingbang throws a lazy right hand but Trayans sees it coming a mile off and sidesteps it easily.
Wallawallabingbang is still on wobbly legs! Can Trayans finish him?
Trayans takes a step towards his opponent and connects with a left hand, before circling away.
Wallawallabingbang pushes Trayans up against the cage in a clinch.
Trayans tries to break free but Wallawallabingbang pushes him back against the cage.
Wallawallabingbang tries a body shot but Trayans blocks it.
Wallawallabingbang seems to have recovered his senses.
Trayans pushes off and circles away, back to the middle of the mat.
That's two minutes gone in the round.
Fantastic stuff here - a very entertaining period of action, which has drawn cheers from the crowd.
A lazy left from Trayans finds it's target.
Wallawallabingbang slips under a jab.
Trayans pivots, looking for a leg kick but Wallawallabingbang is out of range and Trayans settles back down.
Wallawallabingbang instigates a clinch.
Wallawallabingbang prevents Trayans from breaking the clinch.
Wallawallabingbang tries to land a knee to the body but he is off balance and Trayans avoids it.
Wallawallabingbang doesn't land with the attempted body shot.
Trayans pushes off and circles away, back to the middle of the mat.
Wallawallabingbang gets to the clinch - let's see what his plan is here.
Wallawallabingbang tries to land a knee to the head but misses.
Wallawallabingbang throws an elbow but it's blocked.
Trayans pushes off and circles away, back to the middle of the mat.
Trayans throws a head kick that misses and slips in the process. He scrambles back to his feet and the fighters circle.
Wallawallabingbang scores with a kick to the body.
Wallawallabingbang defending well as Trayans loads up on a big left hand.
As Trayans backs off Wallawallabingbang throws a huge counter combo but Trayans manages to avoid it all.
That's three minutes gone in the round.
The fight moves into the clinch position.
Wallawallabingbang lands a body shot in the clinch.
Trayans blocks a couple of punches on the inside.
A frustrated look appears on Trayans's face as he tries to break the clinch.
With the fighters up against the cage, Wallawallabingbang throws an elbow but misses.
Trayans is trying to work out of this bad position, with his back against the cage.
A bit of stalling here from Wallawallabingbang.
Wallawallabingbang keeps the fight in the clinch, despite Trayans's efforts to push away.
Trayans has had enough of the clinch and is looking to separate.
Knees to the body from Wallawallabingbang.
Both fighters are absolutely exhausted here.
Nice body punch from Wallawallabingbang.
Trayans takes a knee right on the jaw!
Wallawallabingbang lands a good knee to the midsection. Trayans won't want to take too many of those.
That's four minutes gone in the round.
Wallawallabingbang tries to land knees in the clinch but Trayans avoids the damage to the body.
Wallawallabingbang dictating the pace here, as the fighters clinch against the cage.
Wallawallabingbang throws a vicious knee straight up the middle but Trayans blocks it with crossed arms.
Trayans escapes the clinch and we're back to striking.
Wallawallabingbang pushes Trayans up against the cage in a clinch.
Trayans's corner calls for him to break the clinch, which he does.
A right-left combo lands from Trayans.
Fantastic stuff here - a very entertaining period of action, which has drawn cheers from the crowd.
Wallawallabingbang tries to clinch up against the cage, rushing in to close the distance. Trayans manages to break the clinch and circles back to the middle of the mat.
Wallawallabingbang is looking to take this fight into the clinch.
A head kick misses from Wallawallabingbang.
Wallawallabingbang moves in looking to clinch but Trayans pushes him off.
Trayans swung with a counter right hand that didn't connect.
Trayans pulls out of a head kick attempt.
And thats the end of the round the fighters go back to their corners.
A close second round but Ting Wallawallabingbang will probably get the nod - 10:9.
That's the end of the round. The referee orders the cornermen out of the cage so we can get back down to business. This is the final round!

Trayans swings for the body but Wallawallabingbang moves out of range.
Trayans lands with a right hand.
Wallawallabingbang drops his hands and takes a jab to the jaw for his troubles.
Wallawallabingbang throws a hook to the body but it doesn't connect.
Trayans circles away from the clinch attempt
and Trayans counters with a nice uppercut.
Tom Trayans is winning the standup battle so far.
Trayans throws a body kick that digs right into the meat.
Wallawallabingbang on the wrong end of a vicious looking body shot.
Wallawallabingbang takes the fight into the clinch.
We've had a slow start to the round here - hopefully the action picks up.
Trayans's corner calls for him to break the clinch, which he does.
Tom Trayans is looking to throw some combinations by the looks of things.
Some wild striking there from Trayans.
Wallawallabingbang wants to counter with a clinch but Trayans pushes him away.
Wallawallabingbang darts in and clinches Trayans up against the cage.
That's one minute gone in the round.
Trayans has had enough of the clinch but Wallawallabingbang keeps him there for the moment.
Wallawallabingbang is looking to score with knees to the body. Maybe he'll change it up and go body then head. Trayans is defending well for now.
Trayans is trying to break free.
Trayans tries to circle away but Wallawallabingbang has him pinned against the cage.
Wallawallabingbang throws an elbow but it misses.
With the two fighters working up against the cage, Wallawallabingbang just misses with a elbow thrown towards Trayans's brow.
Wallawallabingbang keeps the fight in the clinch, despite Trayans's efforts to push away.
The referee calls for Wallawallabingbang to work.
Trayans takes a knee to the side of the body.
Wallawallabingbang keeps the fight in the clinch, despite Trayans's efforts to push away.
Wallawallabingbang using the Thai clinch to land knees to the body.
That's two minutes gone in the round.
Wallawallabingbang pushes off and fires off an elbow that misses, before clinching up again, against the cage.
Trayans wants to push off and get back to the center of the mat but Wallawallabingbang has him pressed against the cage.
Wallawallabingbang lands a good knee to the midsection. Trayans won't want to take too many of those.
Wallawallabingbang throws a vicious knee straight up the middle but Trayans blocks it with crossed arms.
A battle for position here, against the cage.
Trayans blocks a knee to the body. He'll have a nicely bruised forearm in the morning.
Wallawallabingbang lands a nice elbow from the clinch.
Trayans wants to break free but Wallawallabingbang has control.
Trayans breaks the clinch and we return to the middle of the mat.
Wallawallabingbang closes the distance looking to clinch
and Trayans counters with a crisp hook to the side of the head.
Wallawallabingbang pulls out of a head kick attempt.
Wallawallabingbang moves into the clinch.
That's three minutes gone in the round.
Trayans takes a knee to the side of the body.
Wallawallabingbang creates a bit of distance and throws an elbow that only just misses.
Trayans wants to strike at distance but he can't break free of the clinch.
Trayans avoids the elbow strike from Wallawallabingbang, against the cage.
Wallawallabingbang is working hard here but doesn't seem to be able to control effectively, up against the cage.
Trayans blocks an elbow strike from Wallawallabingbang.
Trayans manages to break the clinch.
Trayans misses with a body shot. Nice footwork from Wallawallabingbang.
Wallawallabingbang moves into the clinch successfully.
Wallawallabingbang avoiding damage.
Wallawallabingbang missing with knees to the body.
Wallawallabingbang missing with knees to the body.
Wallawallabingbang is looking to score with knees to the body. Maybe he'll change it up and go body then head. Trayans is defending well for now.
Wallawallabingbang takes a big intake of breath there - he's definitely tired.
That's four minutes gone in the round.
Wallawallabingbang is trying to slow down the pace of the fight but Trayans is keeping busy.
Trayans breaks the clinch and we're back to striking at distance.
A bone on bone clash there as Wallawallabingbang blocks the leg kick.
Trayans rushes forward with a series of wild hooks but Wallawallabingbang moves out of range and avoids them all easily.
Trayans throws a good cross that connects.
Wallawallabingbang drives through and clinches with Trayans against the cage.
Trayans breaks the clinch and we're back to striking at distance.
Wallawallabingbang wants to clinch but Trayans slips to the side
and Trayans counters with a three punch combination, finished off with a leg kick. Nice work.
Tom Trayans has stepped it up - he knows he needs a finish here!
This has been an exciting period of action!
Wallawallabingbang throws a quick inside leg kick.
Wallawallabingbang tries to close the distance and clinch but Trayans swats him to one side with an open hand palm strike and circles away.
Trayans checks a leg kick.
Ting Wallawallabingbang is fighting for a decision - hopefully he's judged it right and he's actually winning the fight.
Wallawallabingbang is looking to take this fight into the clinch.
And that's the end of the fight!
I would just about give that final round to Ting Wallawallabingbang.
I've got Wallawallabingbang winning every round here. Surely the decision will go his way and he'll pick up a well deserved decision victory. Over to the ring announcer for the scorecards.
Ladies and gentlemen, after 3 rounds of action, we go to the scorecards for a decision.
Judge Bruno Hogan scores the fight 28:29
Judge Francis DeMontford scores the fight 27:30
Judge Darius Henderson scores the fight 28:30
In favor of your winner, by unanimous decision... Ting Wallawallabingbang!
Tom Trayans was interviewed post fight and said 'Back to the gym, gotta make more games #5%'.
|
|
|
|
|
|
|
|
|
|
|
|
|
|
|
|
|
|
|
|
|
|
|
| S |
C
A |
G |
S |
C
B |
G |
|
S |
C |
G |
|
energy
A | B |
|
hype
A | B |
|
pop
A | B |
|
mgr
A | B |
|
FIGHT
RATING
55% |
|
|
|
|
|
|
|
Undercard bout
|
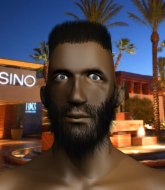
Coming up we have a welterweight MMA rules bout between Georg Weber (ranked 6945 p4p, 25335 weight class) and Chuck Lors (ranked 694 p4p, 742 weight class). Lors has chosen Enter Sandman as his entrance music. Chuck Lors has the better chin. Will he look to stand and bang today?
 |
|
 |
| 182 cm
21
178
2 - 2 - 0 |
|
180 cm
26
170
1 - 3 - 0 |
BJJ Blue Belt
Basic striking
Self confident |
|
Decent wrestler
Decent boxing
Intelligent |
|
| |
|
Ladies and gentlemen. This fight is 3 rounds, in the welterweight division.
Introducing the fighter to my left, fighting out of the red corner.
With a record of 2 - 2 - 0, fighting out of New York, Georg Weber!
And introducing the fighter to my right, fighting out of the blue corner.
With a record of 1 - 3 - 0, fighting out of Las Vegas, Chuck Lors!
The judges for this bout are Francis DeMontford, John Mangel and Ben Hemmingworth.
The bell rings for round one and we are underway!
The bell rings for round one and we are underway!
Weber lands a head kick!
Lors chopped to the floor by a nice leg kick but he springs right back up before Weber can pounce on him.
Left hook, right uppercut from Weber.
Weber swings away with a body shot that misses
and Lors connects with a straight left hand counter down the middle.
Weber takes one on the chin but seems OK.
 Weber is rocked! Weber is rocked!
Weber throws an off balance right hand
and Lors counters with a huge right that knocks Weber out cold! Lors is running around with a crazed look on his face - you can see how much that meant to him!
Ladies and gentlemen, after 0:20 of round 1, we have a winner by way of KO (Punch). Chuck Lors!
Chuck Lors decided to thank the fans in attendance for making a great atmosphere. It seemed to go down pretty well.
|
|
|
|
|
|
|
|
|
|
|
|
|
|
|
|
|
|
|
|
|
|
|
| S |
C
A |
G |
S |
C
B |
G |
|
S |
C |
G |
|
energy
A | B |
|
hype
A | B |
|
pop
A | B |
|
mgr
A | B |
|
FIGHT
RATING
100% |
|
|
|
|
|
|
|
Undercard bout
|
Coming up we have a lightweight MMA rules bout between Luciano Piccio (ranked 2951 p4p, 3097 weight class) and Togachi Nakamoto (ranked 327 p4p, 340 weight class). Luciano Piccio had a look across the cage there at his opponent. He definitely means business
 |
|
 |
| 177 cm
22
163
3 - 3 - 2 |
|
172 cm
20
162
1 - 2 - 0 |
Decent wrestler
Counter fighter
Granite chin |
|
BJJ White Belt
Excellent MT
Good gas tank |
|
| |
|
Ladies and gentlemen. This fight is 3 rounds, in the lightweight division.
Introducing the fighter to my left, fighting out of the red corner.
With a record of 3 - 3 - 2, fighting out of Hilo, Luciano Piccio!
And introducing the fighter to my right, fighting out of the blue corner.
With a record of 1 - 2 - 0, fighting out of St Petersburg, Togachi Nakamoto!
The judges for this bout are Bruno Hogan, Winston Howard and Damien Edna.
The bell rings for round one and we are underway!
The bell rings for round one and we are underway!
Nakamoto looking to land some kicks to the body here.
Nakamoto gets in close and instigates a clinch.
Nakamoto tries to throw a body punch but Piccio avoids it by throwing Nakamoto back against the cage.
Nakamoto tries to land a knee to the head but misses.
Piccio looking for a takedown.
Piccio drops down for a takedown but doesn't get it.
Piccio tightens his grip and picks Nakamoto up, before dumping him to the ground. Nakamoto manages to land in guard.
The fighters are pressed up against the cage, both looking to find a bit of space to work.
Piccio working some strikes from top position.
Piccio lands a couple of elbows.
We've had a slow start to the round here - hopefully the action picks up.
Piccio works over Nakamoto with some ground and pound from guard.
Piccio engaging in some classic timewasting tactics.
Nakamoto is looking to get back to his feet but can't, whilst Piccio is controlling him.
That's one minute gone in the round.
Nakamoto can't do much from the bottom at the moment, as Piccio controls the pace.
Piccio in full guard, throwing the ground and pound. No damage this time.
Piccio content to strike from guard, landing some decent shots.
Nakamoto looking to sweep using the butterfly guard but Piccio puts pay to that idea as he passes nicely into half guard.
Piccio stalling.
Piccio scores with a couple of good hammerfists.
Nakamoto has hold of Piccio's hands but Piccio slips his arm to the side and lands an elbow.
Piccio content to control rather than advance.
That's two minutes gone in the round.
Piccio's ground tactics aren't going to win him many fans. Let's hope he's got fireworks for us if he gets back to his feet because he's not doing much on the ground.
Nakamoto is looking to regain full guard. Not this time though.
Piccio lands a big shot. The thud that echoes around the arena is like music to the fans' ears.
Piccio has been looking to land a fair amount of strikes on the ground. He might be looking to soften his opponent up in order to work for a submission.
Piccio drops an elbow to the side of Nakamoto's head.
Piccio content to control rather than advance.
That's three minutes gone in the round.
The fighters are starting to perspire pretty heavily.
The two fighters exchange a few words. I couldn't hear what they were saying but maybe it's more fun if you make it up yourself. Piccio connects with a nice short shot to Nakamoto's temple.
Nice strikes from Piccio there.
Piccio working Nakamoto over with strikes.
Nice strikes from Piccio there.
Nakamoto tries to roll over but Piccio keeps him under control.
Piccio lands strikes from half guard.
That's four minutes gone in the round.
Piccio perhaps working for something from half guard, or maybe not. It looks like he's just sitting there.
Piccio definitely looks more muscular than last time we saw him fight.
Piccio lands a big shot. The thud that echoes around the arena is like music to the fans' ears.
Piccio takes advantage of the dominant position to land a couple of big hammer fists.
Piccio frees up his trapped foot and advances to mount.
Piccio landing strikes from the mount.
Nakamoto takes a big shot to the head but keeps on trying to improve his position.
We've seen a great period of action over the last minute or so - credit to both fighters for going all out!
Piccio is in the full mount, landing strikes.
Piccio controlling his opponent.
Piccio landing shots from mount.
Piccio is still in mount, landing shots to his trapped opponent. Nakamoto can't stay in a position like this for much longer.
A nice elbow there by Piccio.
And thats the end of the round the fighters go back to their corners.
Luciano Piccio dominated that round.
The minute break is over - no more time for sponges and pep talks - back to the action!
Nakamoto fakes and then throws a beautiful body shot. Piccio looks a bit winded and takes a step backwards to take a breath.
Nakamoto closes the distance and presses his opponent up against the cage.
Nakamoto trying to land knees to the body.
Piccio can't get the takedown.
Piccio is really dominating this fight. Is there anything that Nakamoto can do to turn this around?
Nakamoto with an attempt at a knee that misses.
Nakamoto landing knees to the body.
Nakamoto tries to land knees in the clinch but Piccio avoids the damage to the body.
Nakamoto using the Thai plumb to throw knees but Piccio has his back arched nicely, preventing the strike.
Nakamoto lands a knee to the body.
Nakamoto pushes off and fires off an elbow that misses, before clinching up again, against the cage.
We've had a slow start to the round here - hopefully the action picks up.
Nakamoto connects with a knee to the head.
Nakamoto stops a takedown attempt from Piccio.
Nakamoto is trying to wear down his opponent with knees to the body.
Nakamoto pushes off an throws an elbow but Piccio leans to the side and avoids it. We're back to clinching against the cage.
Nakamoto unloads a knee to the mid-section. Piccio lets out a prehistoric sounding urrrrgh.
Both fighters are absolutely exhausted here.
That's one minute gone in the round.
Nakamoto lands a knee to the head.
Nakamoto with the Thai clinch, lands a knee to the head.
Nakamoto with a knee to the head.
Nakamoto using the Thai clinch to land knees to the body.
Togachi Nakamoto seems to be working more effectively in the clinch in the fight so far.
Nakamoto with the Thai clinch, lands a knee to the head.
Nakamoto lands a knee to the head there! That was nasty!
Nakamoto putting his Muay Thai to good use. He has Piccio in a tight clinch and is doing some damage with knees to the body.
Nakamoto landing knees to the body.
The fans in attendance giving it up for the two fighters, who have really let it all hang out in the last minute or so!
Nice elbow from Nakamoto.
A nice left hand lands by Nakamoto.
Nakamoto lands a knee to the body.
Nakamoto prevents the takedown attempt.
That's three failed takedown attempts in the round for Luciano Piccio. That's going to take a lot out of him.
Nakamoto working Piccio over with knees to the body.
Nakamoto tries to land a knee to the head but Piccio blocks with his arms.
That's two minutes gone in the round.
Nakamoto tries to land a knee to the head but Piccio blocks with his arms.
Nakamoto utilising his Muay Thai to score with a knee to the body.
Nakamoto lands a knee to the body.
Nakamoto pushes off an throws an elbow but Piccio leans to the side and avoids it. We're back to clinching against the cage.
Nakamoto lands a knee to the head.
Nakamoto pushes Piccio back against the cage and lands a hook to the side of the head.
Nakamoto lands a nice elbow from the clinch.
Knees in the clinch landing for Nakamoto.
A quick uppercut on the inside from Nakamoto.
Piccio tries to take the fight to the ground by pulling guard but can't manage it.
Nakamoto lands with a right to the head.
Nakamoto connects with a knee to the head.
Nakamoto lands a knee to the head.
That's three minutes gone in the round.
Nakamoto digs a right hand underneath Piccio's ribcage. Piccio let out a lung full of air as it connected.
Nakamoto unloads a knee to the mid-section. Piccio lets out a prehistoric sounding urrrrgh.
Nakamoto lands a nice knee to the body.
Nakamoto pushes Piccio back against the cage and unloads with a body punch.
Nakamoto landing knees to the body. They look like they could hurt.
Piccio takes a knee to the side of the body.
Nakamoto putting his Muay Thai to good use. He has Piccio in a tight clinch and is doing some damage with knees to the body.
Nakamoto throws an elbow that misses.
Nakamoto misses with an elbow over the top.
Nakamoto using the Thai clinch to land knees to the body.
Nakamoto using the Thai clinch to land knees to the body.
Nakamoto lands a knee to the head.
This has been an exciting period of action!
Nakamoto creates a bit of space for himself and sneaks an elbow through Piccio's defenses.
Knees in the clinch landing for Nakamoto.
That's four minutes gone in the round.
Knees to the body from Nakamoto.
Piccio takes a knee to the side of the body.
Nakamoto works on Piccio's body with a couple of short punches.
A quick uppercut on the inside from Nakamoto.
Kneeeeees! The crowd are calling for knees to the body. Nakamoto obliges.
Nakamoto landing knees to the body.
Nakamoto lands a nice knee to the body.
Nakamoto lands an elbow inside that Piccio shrugs off.
Nakamoto utilising his Muay Thai to score with a knee to the body.
Nakamoto lands a knee to the head there! That was nasty!
The crowd applaud the fighters' efforts here as the round comes to an end.
Nakamoto with a knee to the head.
Piccio is rocked!
Nakamoto working the clinch nicely. Piccio is working for position but Nakamoto cracks him with a big knee to the head! Piccio crumples up against the cage and Nakamoto lands two more shots before the ref can save Piccio! This one is all over!
Ladies and gentlemen, after 4:55 of round 2, we have a winner by way of TKO (Knee & Punches). Togachi Nakamoto!
|
|
|
|
|
|
|
|
|
|
|
|
|
|
|
|
|
|
|
|
|
|
|
| S |
C
A |
G |
S |
C
B |
G |
|
S |
C |
G |
|
energy
A | B |
|
hype
A | B |
|
pop
A | B |
|
mgr
A | B |
|
FIGHT
RATING
67% |
|
|
|
|
|
|
|
Undercard bout
|
Coming up we have a lightweight MMA rules bout between Chandler Nelson (ranked 2114 p4p, 25695 weight class) and Tank Zone (ranked 244 p4p, 640 weight class). Both fighters look fresh as a daisy as they make their way towards the cage.
 |
|
 |
| 179 cm
25
163
6 - 5 - 0 |
|
180 cm
25
165
0 - 5 - 0 |
BJJ Blue Belt
Good knees
Experienced |
|
BJJ Blue Belt
Solid Muay Thai
Tends to cut |
|
| |
|
Ladies and gentlemen. This fight is 3 rounds, in the lightweight division.
Introducing the fighter to my left, fighting out of the red corner.
With a record of 6 - 5 - 0, fighting out of Hilo, Chandler Nelson!
And introducing the fighter to my right, fighting out of the blue corner.
With a record of 0 - 5 - 0, fighting out of Los Angeles, Tank Zone!
The judges for this bout are Ben Watson, Eliza Hachem and Donatello Bradman.
The bell rings for round one and we are underway!
The bell rings for round one and we are underway!
A telegraphed takedown attempt from Zone is defended easily by Nelson.
Nelson seems to be moving with more speed, compared to his last bout. He must have been working on that in the gym.
Zone tries to shoot in for a takedown. He's got hold of a leg but Nelson swivels and escapes.
Nelson tries a switch kick but it misses it's target.
Nelson throws a head kick that misses.
Zone dives in for a single leg takedown but Nelson sprawls and the fighters end up clinched against the cage.
Chandler Nelson has stuffed three takedown attempts in the round now. That's going to take a lot out of Tank Zone.
Zone takes a head kick and shrugs it off.
 It looks like Tank Zone has been cut. It looks like Tank Zone has been cut.
Zone looks to score with a combo but nothing lands.
Nelson throws a quick counter kick to the body but Zone avoids it.
We've had a slow start to the round here - hopefully the action picks up.
Zone goes for a double leg but Nelson avoids the attempt and the two fighters end up clinched against the cage as Nelson continues to drive forward.
Nelson defends well against a solid takedown attempt from Zone.
Zone looks to score with a combo but nothing lands.
Nelson with the inside leg kick.
Zone tries to close the distance and clinch but Nelson swats him to one side with an open hand palm strike and circles away.
That's one minute gone in the round.
Nelson pulls out of a head kick attempt.
Zone swings wildly with a couple of big hooks
and Nelson makes him pay by landing a nice hook to the body before moving out of range.
Zone takes a push kick to the midsection and stumbles backwards.
Nelson lands a head kick!
Tank Zone seems to be the more aggressive standup fighter in this bout.
Zone moves into range and clinches up with Nelson.
Nelson is trying to force a seperation but Zone has the dominant position.
Nelson breaks the clinch and we return to the middle of the mat.
Zone misses with a takedown
and Nelson counters with a series of strikes. Zone will be more careful next time no doubt.
Nelson throws a nice looking combination but Zone bobs and weaves to avoid any damage.
Nelson throws a body kick that digs right into the meat.
That's two minutes gone in the round.
Nelson shoots in looking for a double leg takedown. Zone defends it nicely.
We've seen a great period of action over the last minute or so - credit to both fighters for going all out!
Zone takes the fight into the clinch.
Zone jumps guard and drags Nelson to the mat. He's obviously going to be looking for submissions off his back.
Nelson sneaks a leg through and gets to half guard. That was like a knife through butter how easily he passed Zone's guard.
Zone controlling the leg, holding on to half guard.
Zone is looking to sinch up a guillotine here but Nelson pulls his head out easily.
That's three minutes gone in the round.
Well, if Nelson is going to just lie there, perhaps we should talk about what we're having for dinner tonight
I'm having a ham and pineapple pizza
Yum. Can't wait.
Nelson trying to control the action but Zone is working from the bottom.
Nelson is pressing down on Zone's thigh, looking to free his foot. Zone is holding on for now.
Zone is looking to regain full guard. Not this time though.
Nelson tries to stand but his arm is trapped.
That's four minutes gone in the round.
There's not a lot going on here and the crowd are letting the fighters know they're not willing to tolerate a lack of action.

Nelson decides to stand and escape the position.
Zone misses with a leg kick
and he gets countered with a snapping leg kick.
Nelson misses with a head kick.
Zone looked like he wanted to counter with a punch but didn't throw it.
Nelson pulls out of a head kick attempt.
A head kick misses from Nelson.
Nelson scores with a push kick.
Zone shoots in looking for a takedown. Nelson tries to sprawl out of it but Zone keeps driving through. The fighters are pinned against the cage. Nelson manages to get underhooks and after a bit of a struggle, circles away and we're back to standing.
And thats the end of the round the fighters go back to their corners.
Chandler Nelson dominated that round.
The cut man is working on Tank Zone's cut.
Well, the break between rounds is over. Let's get back to the scrappin!
Zone tries to clinch up but Nelson circles away and keeps his distance.
Nelson throws a quick inside leg kick.
Nelson wants to land a leg kick but Zone is out of range.
Nelson throws a nice outside leg kick.
Zone dives in and grabs Nelson's left leg, looking for a takedown. Nelson pushes down on Zone's head and hops out.
Zone closes the distance and clinches.
Zone gets the body lock takedown. After a quick scramble, Nelson regains guard.

Nelson has butterfly guard. He's looking to stand up here. He pushes Zone off him and springs to his feet nicely. The crowd applauds.
Chandler Nelson is winning the standup battle so far.
Zone shoots in but no luck this time.
The fans in attendance giving it up for the two fighters, who have really let it all hang out in the last minute or so!
Zone with a lazy takedown attempt
and Nelson counters with a one-two to the body.
Chandler Nelson has stuffed three takedown attempts in the round now. That's going to take a lot out of Tank Zone.
Nelson lands a jab followed by a nice looking cross.
Zone is breathing heavily.
Nelson circles away from the clinch attempt.
Zone tries to clinch up but Nelson circles away and keeps his distance.
That's one minute gone in the round.
Zone doesn't manage to clinch there - Nelson circles away.

Nelson drops Zone with a beautiful combination! Zone stares up at his opponent, who ushers him back to his feet - Nelson is looking for the KO!
Zone is rocked!
Nelson throws a powerful right kick. Zone tried to block low but the kick was high! Zone was taken right off of his feet! Nelson jumps in to finish the job and the ref tackles him! The fight is over!
Ladies and gentlemen, after 1:18 of round 2, we have a winner by way of KO (Head Kick). Chandler Nelson!
A very excited looking Chandler Nelson made sure he remembered to thank all the fans both in the arena and on the internet. He said all the coolest people spend all day on MMA websites, which got a big reaction.
|
|
|
|
|
|
|
|
|
|
|
|
|
|
|
|
|
|
|
|
|
|
|
| S |
C
A |
G |
S |
C
B |
G |
|
S |
C |
G |
|
energy
A | B |
|
hype
A | B |
|
pop
A | B |
|
mgr
A | B |
|
FIGHT
RATING
48% |
|
|
|
|
|
|
|
Undercard bout
|
Coming up we have a welterweight MMA rules bout between Shane Young (ranked 2569 p4p, 2822 weight class) and Carter Ortiz (ranked 350 p4p, 374 weight class). Chooooooooon! I think Young might be my favorite fighter, now he's come out to Billie Eilish - "Bad Guy" . Carter Ortiz will no doubt be looking to use his reach advantage to good effect.
 |
|
 |
| 178 cm
20
172
3 - 2 - 0 |
|
190 cm
25
170
2 - 0 - 0 |
Dangerous GnP
Brawler
Granite chin |
|
Good takedowns
Counter fighter
Determined |
|
| |
|
Ladies and gentlemen. This fight is 3 rounds, in the welterweight division.
Introducing the fighter to my left, fighting out of the red corner.
With a record of 3 - 2 - 0, fighting out of Las Vegas, Shane Young!
And introducing the fighter to my right, fighting out of the blue corner.
With a record of 2 - 0 - 0, fighting out of Los Angeles, Carter Ortiz!
The judges for this bout are Francis DeMontford, Damien Edna and Summer Carpenter.
The bell rings for round one and we are underway!
The bell rings for round one and we are underway!
Young shoots in for a takedown. "I don't think so" says Ortiz as he avoids it easily.
Young throws a poor cross that misses
and Ortiz counters with a nice shoot takedown that brings the fighters to the ground.
Ortiz tries to free his leg and advance position but Young is retaining full guard.
The ref warns both fighters not to hold the cage as they work up against the meshing.
Ortiz stands and throws Young's legs to the side, diving into side control.
Ortiz tries for an arm triangle. That looks pretty tight to me. Is this one over!?! Possibly, maybe, no Ortiz has let go of the choke. Obviously it wasn't as tight as we thought!
Ortiz tries for an arm triangle. That looks pretty tight to me. Is this one over!?! Possibly, maybe, no Ortiz has let go of the choke. Obviously it wasn't as tight as we thought!
Ortiz tries for a kimura but Young is defending well.
Young prevents Ortiz from moving into mount.
We've had a slow start to the round here - hopefully the action picks up.
Ortiz is looking to finish here, going for an Americana. Young knows the correct defense though, so he's OK.
Young is looking to reverse the position.
Ortiz is trying to land an Americana. He has the arm isolated but Young is keeping cool and he's avoided the danger for now.
Young tries to work a leg under to get back to half guard but Ortiz wriggles his own leg back out and remains in side control.
That's one minute gone in the round.
Ortiz tries for an arm triangle. That looks pretty tight to me. Is this one over!?! Possibly, maybe, no Ortiz has let go of the choke. Obviously it wasn't as tight as we thought!
Ortiz has an Americana. Young didn't react quickly enough there and he's in big trouble now! He tries to squirm out but is forced to tap! Ortiz is delighted and gyrates in front of the ring girls. They seem to like the attention - it'll be interesting to see if Ortiz hooks up with any of them at the after show party.
Ladies and gentlemen, after 1:29 of round 1, we have a winner by way of Submission (Americana). Carter Ortiz!
|
|
|
|
|
|
|
|
|
|
|
|
|
|
|
|
|
|
|
|
|
|
|
| S |
C
A |
G |
S |
C
B |
G |
|
S |
C |
G |
|
energy
A | B |
|
hype
A | B |
|
pop
A | B |
|
mgr
A | B |
|
FIGHT
RATING
55% |
|
|
|
|
|
|
|
Co-main event
|
Coming up we have a middleweight MMA rules bout between Reno Rocca (ranked 1781 p4p, 2571 weight class) and Kojura Nakagawa (ranked 234 p4p, 330 weight class). Chooooooooon! I think Rocca might be my favorite fighter, now he's come out to Avenues and Alleyways/Rancid. This should be fireworks!
 |
|
 |
| 178 cm
28
193
9 - 5 - 0 |
|
183 cm
20
193
3 - 4 - 0 |
BJJ Brown Belt
Solid boxing
Very quick |
|
BJJ Blue Belt
Decent boxing
Good gas tank |
|
| |
|
Ladies and gentlemen. This fight is 3 rounds, in the middleweight division.
Introducing the fighter to my left, fighting out of the red corner.
With a record of 9 - 5 - 0, fighting out of New York, Reno Rocca!
And introducing the fighter to my right, fighting out of the blue corner.
With a record of 3 - 4 - 0, fighting out of Tokyo, Kojura Nakagawa!
The judges for this bout are Francis DeMontford, Damien Edna and Hugh Johnson.
The bell rings for round one and we are underway!
The bell rings for round one and we are underway!
Rocca connects with a hook to the side of his opponent's head.
Nakagawa throws a right hand that misses
and Rocca counters with a nice double leg into guard.
Nakagawa is striking off his back. Rocca thinks nothing of it though and passes easily into half guard.
Rocca trying to control the action but Nakagawa is working from the bottom.
The fighters are pressed up against the cage, both looking to find a bit of space to work.
Nakagawa tries to strike from the bottom but it doesn't land.
Nakagawa really doesn't want to stay on the ground with Rocca. If he can't get it back to his feet, it's only a matter of time before he'll be tapping out.
Rocca working Nakagawa over with strikes.
Nakagawa tries to strike from the bottom but it doesn't land.
Nakagawa misses with some strikes from the bottom.
The ref warns both fighters not to hold the cage as they work up against the meshing.
Rocca seems to be taking a bit of a break to think of his next move. He lands a short punch in the meantime.
Rocca seems very keen to just sit and control from half guard but Nakagawa does not like that idea so much and is remaining active off his back.
Nakagawa is trying to get back to full guard.
Nakagawa moves his hips nicely and gets into full guard.
Rocca trying to control but Nakagawa is working from the bottom.
Rocca is going to have to think about doing something other than just controlling because Nakagawa is managing to avoid having the position dictated to him.
Rocca lands a couple of decent looking shots.
Nakagawa thows some rabbit punches from the bottom but they don't do any damage.
Rocca engaging in some classic timewasting tactics.
That's one minute gone in the round.
Rocca sneaks a leg through and gets to half guard. That was like a knife through butter how easily he passed Nakagawa's guard.
Rocca has been looking to land a fair amount of strikes on the ground. He might be looking to soften his opponent up in order to work for a submission.
Nakagawa tries to strike from the bottom but it doesn't land.
Rocca slips a nice elbow through Nakagawa's hands, connecting with Nakagawa's forehead.
Rocca works his foot free and advances to mount.
Rocca pushing the pace here, looking to move to his opponents back and work for a finish.
Nakagawa swinging wildly from the bottom but he's not landing.
Nakagawa throwing punches from his back but nothing is landing.
Nakagawa is desperately trying to improve his position but Rocca has a good base and remains in mount.
Rocca with a couple of short strikes.
Nakagawa throwing hammer fists to the chest of Rocca. What's that going to do exactly?
Rocca can't quite control the action as he would like just now, as Nakagawa is looking to escape.
Rocca lands a nice shot to the head.
Nakagawa tries to reverse the position but Rocca maintains control.
That's two minutes gone in the round.
Rocca has isolated one of Nakagawa's arms. Nakagawa looking to fight him off but Rocca twists into an armbar. It's tight... Will he tap?? YES, he's tapped! This one is all over!
Ladies and gentlemen, after 2:20 of round 1, we have a winner by way of Submission (Armbar). Reno Rocca!
Reno Rocca really struggled to get his t-shirt on before his hand was raised. Making sure that Threads of HARDCORE logo gets some air time is pretty tricky when you're all sweaty.
|
|
|
|
|
|
|
|
|
|
|
|
|
|
|
|
|
|
|
|
|
|
|
| S |
C
A |
G |
S |
C
B |
G |
|
S |
C |
G |
|
energy
A | B |
|
hype
A | B |
|
pop
A | B |
|
mgr
A | B |
|
FIGHT
RATING
52% |
|
|
|
|
|
|
|
Main event
|
Coming up we have a middleweight MMA rules bout between Joe Senior (ranked 2327 p4p, 2163 weight class) and Ikeda Toshiyuki (ranked 288 p4p, 277 weight class). Over to our ring announcer for the fighter introductions!
 |
|
 |
| 180 cm
26
194
3 - 1 - 0 |
|
182 cm
20
193
5 - 2 - 0 |
Good takedowns
Counter fighter
Self confident |
|
BJJ Brown Belt
Decent boxing
Good gas tank |
|
| |
|
Ladies and gentlemen. This fight is 3 rounds, in the middleweight division.
Introducing the fighter to my left, fighting out of the red corner.
With a record of 3 - 1 - 0, fighting out of St Petersburg, Joe Senior!
And introducing the fighter to my right, fighting out of the blue corner.
With a record of 5 - 2 - 0, fighting out of Las Vegas, Ikeda Toshiyuki!
The judges for this bout are Winston Howard, Hugh Johnson and Summer Carpenter.
The bell rings for round one and we are underway!
The bell rings for round one and we are underway!
Senior ducks under an overhand right and circles away with a smile on his face.
Toshiyuki lands a jab to the nose.
Senior shoots in from a long way out. He's driving through with the takedown attempt and he eventually gets it, landing in Toshiyuki's guard.
We could do with one of the fighters taking the initiative a bit more on the ground - they're both waiting to capitalize on a mistake.
Senior pressing down on his opponent's thigh, looking to pass guard. Toshiyuki is keeping the position for now.
Toshiyuki is throwing his legs up, looking for submissions. Senior is aware though and is defending well.
Senior wants to control from the top but Toshiyuki keeps moving.
Toshiyuki has been taking part in the yoga sessions down at Kalashnikov ELITE MMA Gym . Presumably he's going to look for a slick submission... Or maybe he's looking to avoid one.
Toshiyuki wants to control here, rather than go for any submissions from the bottom. At least for now.
Toshiyuki bucks up whilst keeping hold of a body lock, managing to reverse the position. Now he's in top in Senior's guard.
Senior working a defensive guard here.
Toshiyuki passes Senior's right leg, so he's now in half guard.
Senior wants to control but Toshiyuki is keeping busy and won't allow it.
That's one minute gone in the round.
Toshiyuki trying to control the pace.
Toshiyuki is looking for a kimura but he's never going to get it from there.
Senior tries to roll over but Toshiyuki keeps him under control.
Toshiyuki is thinking about going for an arm triangle but he can't free his leg.
Senior has no desire to be mounted, so is trying to control. Toshiyuki is working away from the top position though.
Senior actively working from the bottom here.
That's two minutes gone in the round.
The crowd are hurling abuse towards the fighters... You can hardly blame them though because there isn't a lot going on in the fight.
Toshiyuki seems content to maintain position for now, rather than mounting any offense.
Toshiyuki is trying for a guillotine from the top but the pressure isn't in the right place so Senior is just riding it out for now. Toshiyuki eventually gives up the hold.
Senior looks to be in better condition than last time we saw him fight. Obviously he's been working hard on his cardio.
Senior is pressing down on Toshiyuki's left leg trying to get back to full guard. He's managed it.
Senior keeping moving, preventing Toshiyuki from controlling successfully.
Toshiyuki avoids a guillotine attempt easily.
That's three minutes gone in the round.
Toshiyuki looking to pass the guard.
Senior wants to sweep but no luck.
The fighters are pressed up against the cage, both looking to find a bit of space to work.
Toshiyuki controls the pace of the fight for a moment.
Senior tries to land a sweep but no joy.
Senior can't keep his opponent in guard - Toshiyuki advances to half guard, no doubt looking to mount.
Senior looking for submissions off his back.
Toshiyuki is thinking about going for an arm triangle but he can't free his leg.
That's four minutes gone in the round.
The crowd are hurling abuse towards the fighters... You can hardly blame them though because there isn't a lot going on in the fight.
Toshiyuki is looking to take a break and control but Senior is keeping him honest, looking to work from the bottom.
Senior wants to improve his position but Toshiyuki is controlling well.
Senior is staying active underneath Toshiyuki, who seems content to just control the action from this position.
The ref warns both fighters not to hold the cage as they work up against the meshing.
Toshiyuki is trying to work for a kimura. This could be trouble! No, Senior has managed to free his arm - good work.
Toshiyuki is trying a forearm choke
I don't think that's going to do much at this level of the game.
Boooooooooooooooooooo!!! God, this has been a terrible round. Come on you two, sort yourselves out!
Toshiyuki wants to lay and pray for a moment but Senior keeps working.
And thats the end of the round the fighters go back to their corners.
Ikeda Toshiyuki dominated that round.
That's the end of the round. The referee orders the cornermen out of the cage so we can get back down to business.
Toshiyuki lands with a hook. Senior tried to avoid it but it clipped the top of his head.
Senior drives through with a really nice takedown into side control.
Toshiyuki tries to work a leg under to get back to half guard but Senior wriggles his own leg back out and remains in side control.
Senior is looking for a kimura. He might have it! No, Toshiyuki has escaped the position, nice work there.
Toshiyuki is not content to let Senior control the position.
Toshiyuki is looking for a sweep.
We've had a slow start to the round here - hopefully the action picks up.
Toshiyuki wants to control but Senior postures up.
Senior wants to lay and pray for a moment but Toshiyuki keeps working.
Toshiyuki gets one leg under and gets the fight to half guard.
That's one minute gone in the round.
Toshiyuki won't allow Senior to pass to mount.
Toshiyuki looking to work for a kimura from the bottom.
Toshiyuki is looking for a sweep. Senior is wise to his cunning plan and keeps the top position.
Toshiyuki is working for an escape here. He's hooked one of Senior's legs and he's managed to sneak out and take Senior's back!
Senior looking very determined here, making life difficult for Toshiyuki.
Toshiyuki might have to switch it up a bit here because his efforts to control Senior haven't been going to plan, at least at the current moment in time.
Senior tries to roll but Toshiyuki sticks to his back.
Senior defends a rear naked choke attempt by controlling one of Toshiyuki's arms.
That's two minutes gone in the round.
Senior is displaying good submission defense - not really looking in danger of submitting to the rear naked choke at the moment. That could change in an instant of course if Toshiyuki gets his way!
Ikeda Toshiyuki has got the better of the ground game so far.
Toshiyuki is looking for the choke from the back position but Senior is controlling his hands well.
Toshiyuki is looking to finish with some ground and pound!
Toshiyuki sinks in the hooks and is looking for the choke. He's got it! Senior taps out!
Ladies and gentlemen, after 2:55 of round 2, we have a winner by way of Submission (RNC). Ikeda Toshiyuki!
Ikeda Toshiyuki decided to thank the fans in attendance for making a great atmosphere. It seemed to go down pretty well.
|
|
|
|
|
|
|
|
|
|
|
|
|
|
|
|
|
|
|
|
|
|
|
| S |
C
A |
G |
S |
C
B |
G |
|
S |
C |
G |
|
energy
A | B |
|
hype
A | B |
|
pop
A | B |
|
mgr
A | B |
|
FIGHT
RATING
33% |
|
|
|
|
|
|
|
|
|
|
