 |
CMMA Adams Vs Oliveira PBP Commentary |
Undercard bout
|
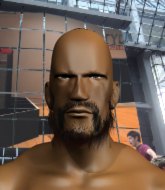
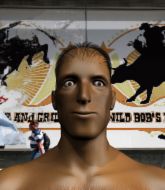
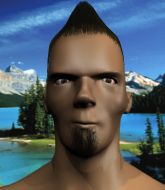
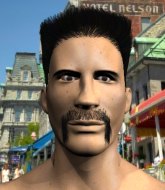
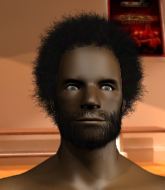
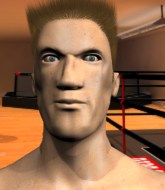
Coming up we have a super heavyweight MMA rules bout between Ahmad Gulyas (ranked 7181 p4p, 211 weight class) and Temujin Khan (ranked 7169 p4p, 210 weight class). Ahmad Gulyas has the edge in experience - let's see if he can make that count tonight.
 |
|
 |
| 221 cm
18
296 lbs
0 - 1 - 0 |
|
225 cm
18
300 lbs
0 - 1 - 0 |
BJJ White Belt
Solid boxing
Cuts easily |
|
BJJ White Belt
Excellent MT
Experienced |
|
| |
|
Ladies and gentlemen. This fight is 3 rounds, in the super heavyweight division.
Introducing the fighter to my left, fighting out of the red corner.
With a record of
0 - 1 - 0, fighting out of Montreal, Ahmad Gulyas!
And introducing the fighter to my right, fighting out of the blue corner.
With a record of
0 - 1 - 0, fighting out of London, Temujin Khan!
The judges for this bout are Frank Antenori, Don Winkell and .

The bell rings for round one and we are underway!
Khan throws a combination but comes up with nothing but fresh air.
Gulyas throws a hard body shot but it just misses.

Gulyas clinches up with Khan and pushes him back against the cage.

Gulyas escapes the clinch and we're back to striking.
Sloppy strikes from Gulyas. Those never looked like landing.
Khan throws a right hand that Gulyas ducks under and follows up with a left that Gulyas also avoids with ease.
We've been told by Gulyas's head coaches at Cozad MMA Montreal that he's been working on his takedown defense in preparation for this fight.
Gulyas moves into range and clinches up with Khan.
Gulyas is trying to break free.
Khan jumps guard but Gulyas turns him against the cage and keeps the fight standing.
Gulyas can't break the clinch.
We've had a slow start to the round here - hopefully the action picks up.
Gulyas tries to circle away but Khan has him pinned against the cage.
Khan has Gulyas pressed against the cage, preventing Gulyas from circling away and getting back to striking at range.
Gulyas has had enough of the clinch and is looking to separate.
Gulyas blocks a couple of punches on the inside.

That's one minute gone in the round.
Gulyas is trying to force a seperation but Khan has the dominant position.

Gulyas jumps into guard, dragging Khan to the mat.
Khan in full guard, throwing the ground and pound. No damage this time.

Gulyas working for a triangle but Khan defends it easily.
Gulyas is looking for a triangle but Khan pushes his legs off easily.
Khan sitting in guard here, content to control.

That's two minutes gone in the round.
Gulyas looking for submissions off his back, moving his hips, looking for an opening.
The fighters are pressed up against the cage, both looking to find a bit of space to work.
Khan looks winded!
Khan wants to control from the top but Gulyas keeps moving.
Gulyas is working for submissions here. He's thrown up his legs looking for a triangle but Khan frees his head nicely. Oh but Gulyas has switched to an armbar! Khan is tapping furiously! Lovely submission there!
Ladies and gentlemen, after 2:52 of round 1, we have a winner by way of Submission (Triangle Armbar). Ahmad Gulyas!
|
|
|
|
|
|
|
|
|
|
|
|
|
|
|
|
|
|
|
|
|
|
|
| S |
C
A |
G |
S |
C
B |
G |
|
S |
C |
G |
|
energy
A | B |
|
hype
A | B |
|
pop
A | B |
|
mgr
A | B |
|
FIGHT
RATING
32% |
|
|
|
|
|
|
|
Undercard bout
|
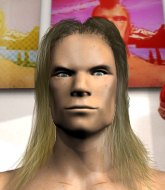
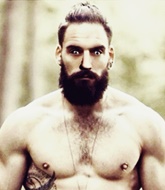
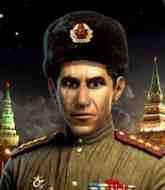
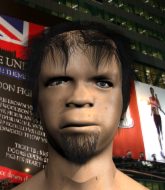
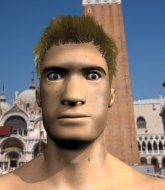
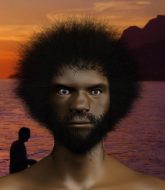
Coming up we have a light heavyweight MMA rules bout between Patrick Hoolahan (ranked 7487 p4p, 680 weight class) and Yohansson Buzacarini (ranked 7080 p4p, 657 weight class). Rumors backstage are that the fighters have been paid to keep it standing but we know that would never happen in MMA!
 |
|
 |
| 190 cm
18
206 lbs
1 - 2 - 0 |
|
185 cm
18
220 lbs
0 - 1 - 0 |
BJJ White Belt
Excellent boxer
Cuts easily |
|
BJJ White Belt
Excellent MT
Solid chin |
|
| |
|
Ladies and gentlemen. This fight is 3 rounds, in the light heavyweight division.
Introducing the fighter to my left, fighting out of the red corner.
With a record of
1 - 2 - 0, fighting out of Montreal, Patrick Hoolahan!
And introducing the fighter to my right, fighting out of the blue corner.
With a record of
0 - 1 - 0, fighting out of Los Angeles, Yohansson Buzacarini!
The judges for this bout are Timothy Bukovac, and Don Winkell.
The bell rings for round one and we are underway!
Jab, cross, leg kick. Nice combination by Hoolahan!
Hoolahan connects with a jab.

Buzacarini lands a big uppercut and Hoolahan crumbles to the floor! The ref thinks about stopping the fight but Hoolahan looks OK. Buzacarini waves Hoolahan back to his feet!

It looks like Patrick Hoolahan has been cut.
This is a great period of action - very entertaining stuff!
Buzacarini steps in with a hook that catches Hoolahan right on the chin and knocks him to the floor! Buzacarini follows him down with more strikes and that's all she wrote! Hoolahan looks absolutely devastated.
Ladies and gentlemen, after 0:12 of round 1, we have a winner by way of TKO (Strikes). Yohansson Buzacarini!
|
|
|
|
|
|
|
|
|
|
|
|
|
|
|
|
|
|
|
|
|
|
|
| S |
C
A |
G |
S |
C
B |
G |
|
S |
C |
G |
|
energy
A | B |
|
hype
A | B |
|
pop
A | B |
|
mgr
A | B |
|
FIGHT
RATING
100% |
|
|
|
|
|
|
|
Undercard bout
|
Coming up we have a welterweight MMA rules bout between Ricky LaFleur (ranked 7077 p4p, 644 weight class) and Zane Kreuger (ranked 6781 p4p, 626 weight class). Both these guys have really solid chins. Will we see a standup war or will they both decide that a knockout is unlikely and try to win the fight elsewhere?
 |
|
 |
| 183 cm
21
175 lbs
0 - 1 - 0 |
|
175 cm
18
178 lbs
0 - 1 - 0 |
BJJ Blue Belt
Basic striking
Good chin |
|
Good wrestler
Counter fighter
Granite chin |
|
| |
|
Ladies and gentlemen. This fight is 3 rounds, in the welterweight division.
Introducing the fighter to my left, fighting out of the red corner.
With a record of
0 - 1 - 0, fighting out of Montreal, Ricky LaFleur!
And introducing the fighter to my right, fighting out of the blue corner.
With a record of
0 - 1 - 0, fighting out of Amsterdam, Zane Kreuger!
The judges for this bout are Jack Bonds, and Frank Antenori.
The bell rings for round one and we are underway!
LaFleur blocks a jab.
LaFleur seems to be moving with more speed, compared to his last bout. He must have been working on that in the gym.
LaFleur tries a switch kick but it misses it's target.
Kreuger tries a counter takedown but it's more of a dummy move, and he uses it to push himself away.
LaFleur tries to clinch but Kreuger moves out of range.
LaFleur tries to close the distance and clinch up against the cage but Kreuger paws at him with a jab and circles away.
Kreuger tries a counter takedown but it's more of a dummy move, and he uses it to push himself away.
LaFleur tries to close the distance and clinch up but Kreuger swats him away and circles back towards the center.
Kreuger has done a lot of speed work in the buildup to this fight.
LaFleur ducks down and throws a hook to the body but Kreuger moves away.
Kreuger changes levels for a counter takedown but doesn't follow through with his attempt.
Kreuger dodges the punch combination from LaFleur.
LaFleur thuds a left hand into Kreuger's body.
Ricky LaFleur seems to be the more aggressive standup fighter in this bout.
We've had a slow start to the round here - hopefully the action picks up.
LaFleur fakes with the hands and throws a leg kick but Kreuger is out of range.
LaFleur throws a body punch but Kreuger moves out of range.
Kreuger moves out of range of the leg kick from LaFleur.
LaFleur throws a low kick but it's checked well by Kreuger.
And Kreuger tries to counter it with a takedown but LaFleur pushes his down on his head and steps out.
That's one minute gone in the round.
Kreuger throws an uppercut from half a mile away. LaFleur sees it coming and avoids it easily.
LaFleur attempts a counter takedown but Kreuger avoids it well and moves away.
LaFleur throws a sloppy head kick and Kreuger moves out of range easily.
LaFleur scores with a head kick. Kreuger tried to block it but didn't get his arm up in time.
Ricky LaFleur is looking to keep the fight on the feet at all costs.
Kreuger blocks the body kick.

Kreuger dives in and scores a takedown into LaFleur's guard.
The fighters are pressed up against the cage, both looking to find a bit of space to work.
Kreuger throws an elbow that misses. LaFleur uses the momentum to reverse the position. He's now in Kreuger's guard. Nice move by LaFleur!

Kreuger tries to land a sweep but no joy.
Kreuger really doesn't want to stay on the ground with LaFleur. If he can't get it back to his feet, it's only a matter of time before he'll be tapping out.
Kreuger controlling the position.
Kreuger has a closed guard, preventing LaFleur from standing up.
Kreuger is controlling LaFleur's posture.
The ref warns both fighters not to hold the cage as they work up against the meshing.
Kreuger looking to sweep here. No luck so far.
That's two minutes gone in the round.
Kreuger trying to strike from the bottom but really, it's not the best position to be doing that from!
LaFleur trying to control the position from guard on top but Kreuger is wriggling around, looking for whatever he can.
LaFleur trying to stand up but can't free himself from Kreuger's guard.
LaFleur trying to control the position from guard on top but Kreuger is wriggling around, looking for whatever he can.
Kreuger looking to hit a scissor sweep but LaFleur is one step ahead there.
LaFleur wants to stand but Kreuger is controlling his posture from full guard.

That's three minutes gone in the round.
LaFleur won't allow Kreuger to sweep him here.

The referee decides to stand the fighters back up.
Kreuger throws out a loose jab but LaFleur uses good head movement to avoid it.
LaFleur rushes Kreuger and pushes him back against the cage in a clinch.
LaFleur stalling in the clinch but Kreuger improves position.
LaFleur with an attempt at a knee that misses.
LaFleur working hard to break the clinch.
LaFleur working hard to break the clinch.
LaFleur misses with a knee to the head.
LaFleur lands a shoulder strike that jolts his opponent's head backwards.

That's four minutes gone in the round.
Kreuger managing to block the knees to the body from LaFleur.
LaFleur tries to break the clinch but Kreuger is controlling the position.
Kreuger has LaFleur pressed against the cage, preventing LaFleur from circling away and getting back to striking at range.
LaFleur prevents the takedown attempt.
Kreuger tries for a takedown. No joy.
Kreuger turns his back and goes for a hip toss. It's a bit messy but it gets the job done and Kreuger manages to end up in side control.
LaFleur taking a bit of punishment here - Kreuger scoring with strikes.
Kreuger working the ground and pound.
The crowd thankful this round is nearly over.
Kreuger creates a bit of distance and throws down some hard shots.
Kreuger lands a nice forearm strike.
This has been an exciting period of action!
Kreuger working the head with strikes.

LaFleur is rocked!
LaFleur is breathing heavily.
Kreuger cracks LaFleur with a big elbow. Oh, he's hurt! Kreuger immediately mounts and start dropping bombs! LaFleur is done! The referee jumps in and saves him from any more punishment - a quick and decisive finish by Kreuger!
Ladies and gentlemen, after 4:58 of round 1, we have a winner by way of TKO (Strikes). Zane Kreuger!
Zane Kreuger was full of energy after the big win and talked about how he thinks he can do big things in this sport. The crowd were appreciative of his determination to succeed.
|
|
|
|
|
|
|
|
|
|
|
|
|
|
|
|
|
|
|
|
|
|
|
| S |
C
A |
G |
S |
C
B |
G |
|
S |
C |
G |
|
energy
A | B |
|
hype
A | B |
|
pop
A | B |
|
mgr
A | B |
|
FIGHT
RATING
34% |
|
|
|
|
|
|
|
Undercard bout
|
Coming up we have a heavyweight MMA rules bout between Tommy Jonnes (ranked 5476 p4p, 456 weight class) and Andre Krimm (ranked 5850 p4p, 475 weight class). We have two fighters making their debuts here, so let's see who comes out of this one with their first professional victory.
 |
|
 |
| 215 cm
18
270 lbs
0 - 0 - 0 |
|
190 cm
18
260 lbs
0 - 0 - 0 |
BJJ White Belt
Excellent boxer
Granite chin |
|
BJJ Blue Belt
Counter fighter
Intelligent |
|
| |
|
Ladies and gentlemen. This fight is 3 rounds, in the heavyweight division.
Introducing the fighter to my left, fighting out of the red corner.
With a record of
0 - 0 - 0, fighting out of Amsterdam, Tommy Jonnes!
And introducing the fighter to my right, fighting out of the blue corner.
With a record of
0 - 0 - 0, fighting out of Helsinki, Andre Krimm!
The judges for this bout are Don Winkell, and Frank Antenori.
The bell rings for round one and we are underway!
Krimm misses with a wild body shot.
Jonnes connects with a looping right hand.
Tommy Jonnes seems to be the more aggressive standup fighter in this bout.
Jonnes takes a swing at Krimm's ribcage but misses.
Jonnes lands a powerful looking uppercut that connected with his opponent's jaw.
Krimm ducks right into an uppercut from Jonnes.
Krimm shoots in for a takedown but Jonnes shows good takedown defense.
It looked like Jonnes wanted to counter with a hook but didn't fully commit.
Jonnes scores with a nice strike.
Sloppy strikes from Jonnes. Those never looked like landing.
Krimm with the counter takedown but Jonnes avoids it easily.
Jonnes throws a couple of head shots and lands with the final one - a decent hook, which struck Krimm on the side of the head.
Jonnes scores with a sloppy right hand. Krimm should have avoided that one.
It's a brutal combination of punches from Jonnes! Krimm is backing up but he can't get away as Jonnes lands with one final shot to the jaw that drops Krimm and ends the fight. Great knockout.
Ladies and gentlemen, after 0:41 of round 1, we have a winner by way of TKO (Punches). Tommy Jonnes!
Tommy Jonnes tried to hype himself up post fight but didn't word it too well and it ended up with him sounding like a bit of a tool.
|
|
|
|
|
|
|
|
|
|
|
|
|
|
|
|
|
|
|
|
|
|
|
| S |
C
A |
G |
S |
C
B |
G |
|
S |
C |
G |
|
energy
A | B |
|
hype
A | B |
|
pop
A | B |
|
mgr
A | B |
|
FIGHT
RATING
99% |
|
|
|
|
|
|
|
Undercard bout
|
Coming up we have a featherweight MMA rules bout between Corey Trevors (ranked 5676 p4p, 436 weight class) and Ryan Kelly (ranked 6645 p4p, 484 weight class). Corey Trevors could well score a knockout today. He has the power to get to Ryan Kelly's chin.
 |
|
 |
| 175 cm
25
150 lbs
0 - 0 - 0 |
|
172 cm
25
147 lbs
1 - 2 - 0 |
BJJ Blue Belt
Solid boxing
Cuts easily |
|
BJJ White Belt
Good kicks
Very confident |
|
| |
|
Ladies and gentlemen. This fight is 3 rounds, in the featherweight division.
Introducing the fighter to my left, fighting out of the red corner.
With a record of
0 - 0 - 0, fighting out of Montreal, Corey Trevors!
And introducing the fighter to my right, fighting out of the blue corner.
With a record of
1 - 2 - 0, fighting out of London, Ryan Kelly!
The judges for this bout are , Don Winkell and Jack Bonds.
The bell rings for round one and we are underway!
Trevors staying out of range there.
Trevors digs a good body shot into Kelly's ribs.
Trevors throws a left and a right that both miss
and Kelly finishes the little exchange by landing a big kick to the body.
Trevors has taken the fight to the clinch.
Kelly tries to land knees in the clinch but Trevors avoids the damage to the body.
Kelly tries to land knees in the clinch but Trevors avoids the damage to the body.
Trevors goes for a body shot but it's blocked.
Trevors's corner calls for him to break the clinch, which he does.
Trevors throws a hard body shot but it just misses.
Kelly throws a right hand that Trevors ducks under and follows up with a left that Trevors also avoids with ease.
Kelly lands a powerful looking uppercut that connected with his opponent's jaw.
It looks like Corey Trevors has been cut.
Trevors is looking to clinch but Kelly is avoiding it.
Trevors tries to clinch up against the cage, rushing in to close the distance. Kelly manages to break the clinch and circles back to the middle of the mat.
Kelly with the counter takedown but Trevors avoids it easily.
Kelly shoots in for a takedown but Trevors shows good takedown defense.
Kelly fails to land the takedown.
That's one minute gone in the round.
Kelly changes levels and looks for a double leg takedown. Trevors tries to avoid it but Kelly manages to keep hold of a leg and drag Trevors to the ground. Trevors escapes though and pops straight back up to his feet.
Corey Trevors has stuffed three takedown attempts in the round now. That's going to take a lot out of Ryan Kelly.
Trevors attempts a low kick but it misses it's target.
Sloppy strikes from Trevors. Those never looked like landing.
Kelly fails with a rather predictable takedown attempt.
Trevors looks to score with a combo but nothing lands.
Trevors tries to clinch but is not successful on this occasion.
Trevors throws a leg kick that is checked
and Kelly counters with a takedown into side control.
Kelly wants to lay and pray for a moment but Trevors keeps working.
Trevors struggling a bit here.
That's two minutes gone in the round.
Kelly wants to lay and pray for a moment but Trevors keeps working.

Trevors bucks up and manages to escape back to his feet!
This has been an exciting period of action!
Trevors tries a switch kick but it misses it's target.
Trevors pivots, looking for a leg kick but Kelly is out of range and Trevors settles back down.
Kelly throws a right and a left that both miss.
Kelly tries to keep at a distance but Trevors has taken the fight into the clinch.
Kelly tries to jump guard but he falls flat on his backside. Trevors smiles and moves away.
Kelly tries to score a power double leg takedown but Trevors sees that one coming and sprawls well. That will dishearten Kelly somewhat.
That's three minutes gone in the round.
Kelly blocks a head kick by Trevors.
Kelly throws a head kick but Trevors moves out of range.
Trevors rushes Kelly and pushes him back against the cage in a clinch.
Kelly is working on a leg, looking for a takedown but Trevors is defending well.
Kelly prevents Trevors from breaking the clinch.
Kelly holding his opponent close, against the cage.
Kelly tries to pull guard but Trevors forces him back to his feet, against the cage.

Kelly escapes the clinch and we're back to striking.
Kelly shoots in for a takedown. He's persisting with it as Trevors sprawls well. Trevors wins this battle and keeps the fight standing. Kelly gets slowly back to his feet.
That's four minutes gone in the round.
Trevors clinches.
Kelly keeps the fight in the clinch, despite Trevors's efforts to push away.
Kelly jumps guard but Trevors stands there with Kelly around his waist. Kelly gives up and drops back to his feet. We remain in the clinch.
Kelly's corner calls for him to break the clinch, which he does.
Trevors tries to clinch up against the cage, rushing in to close the distance. Kelly manages to break the clinch and circles back to the middle of the mat.
Trevors displays good takedown defense there as he swats away a double leg from Kelly.
Trevors moves into the clinch.
Trevors manages to break the clinch.
And thats the end of the round the fighters go back to their corners.
Corey Trevors dominated that round.
The cut man is working on Corey Trevors's cut.
The corners get their ten second warning. Both fighters stand from their stools and stare eachother down, ready to get back to the action.

Kelly doesn't react quick enough there as he takes a shot to the body.
Kelly shoots in and bounces Trevors off the cage to secure the takedown into guard.
Trevors scrambles and gets back to his feet.
Kelly throws a quick inside leg kick.
Trevors is looking to clinch.
Kelly shoots in for a takedown but Trevors shows good takedown defense.
Kelly fakes a strike and closes the distance, dragging Trevors to the ground. Kelly is now in Trevors's guard.
This has been an exciting period of action!
Trevors pushes Kelly off and scrambles back to his feet.
Corey Trevors is winning the standup battle so far.
Trevors looks to score with a combo but nothing lands.
Kelly shoots in and gets a takedown into Trevors's guard.
Trevors manages to escape and get back to his feet.
That's one minute gone in the round.
Kelly swats away the attempt to clinch by Trevors.
Kelly shoots in but no luck this time.
Kelly misses with a head kick.
Trevors throws a series of punches but Kelly moves out of range.
Kelly misses with a takedown attempt - Trevors sprawls well and throws a nice strike on the way out which just misses.
Corey Trevors has stuffed three takedown attempts in the round now. That's going to take a lot out of Ryan Kelly.
Kelly is breathing heavily.
Kelly shoots in looking for a double leg takedown. Trevors defends it nicely.
Trevors just misses with a punch to the body.
Kelly wants to counter with a clinch but Trevors pushes him away.
Trevors tries to score with a leg kick but it misses it's target.
Kelly counters with a body kick.
Trevors tries to close the distance and clinch up against the cage but Kelly paws at him with a jab and circles away.
Corey Trevors is looking to keep the fight on the feet at all costs.
That's two minutes gone in the round.
Kelly on the wrong end of a nice low kick. He's acting like it's no big deal but he doesn't want to take many more of those.
Trevors swings away but doesn't land with a series of punches.
Kelly looks for a takedown here. Will he get it? Trevors is fending him off so far but Kelly persists. Nope, Trevors circles away and we're back to standing.
Kelly dives in and grabs Trevors's left leg, looking for a takedown. Trevors pushes down on Kelly's head and hops out.
Kelly shoots in and bounces Trevors off the cage to secure the takedown into guard.
Trevors manages to wriggle out and sneak his way back up to his feet, so the fighters are now clinched up against the cage.
We've seen a great period of action over the last minute or so - credit to both fighters for going all out!
Trevors tries to break the clinch but Kelly is controlling the position.
Kelly fails to pull guard.
Trevors breaks the clinch.

Kelly clinches.
That's three minutes gone in the round.
A battle for position here, against the cage.
Kelly tries to pull guard but Trevors won't allow it.
Kelly blocks a body shot from Trevors.
Trevors tries to break free but Kelly pushes him back against the cage.
Kelly jumps guard but Trevors stands there with Kelly around his waist. Kelly gives up and drops back to his feet. We remain in the clinch.
Kelly breaks from the clinch.
Trevors tries a switch kick but it misses it's target.
Corey Trevors is looking to throw some combinations by the looks of things.
Trevors tries to close the distance and clinch but Kelly swats him to one side with an open hand palm strike and circles away.
Trevors throws a combination but it was largely blocked by Kelly.
Trevors misses with a two punch combination.
Kelly tries to counter with a clinch but Trevors shakes him off and moves away.
Trevors misses with a double jab.
That's four minutes gone in the round.
A thudding body kick lands there by Kelly!
Corey Trevors seems to be the more aggressive standup fighter in this bout.
Kelly pushes Trevors up against the cage in a clinch.
Kelly jumps guard but his hands slip and he falls flat on his back. Well, he's made himself look a right mug there, as Trevors walks away with a smile on his face. Kelly gets slowly back to his feet and shakes his head.
Trevors swings away with a leg kick that misses.
Trevors sets himself, and Kelly steps forward looking for the clinch! Trevors avoids it this time.
A looping hook to the body misses from Kelly. Trevors does a little dance to reset his feet.
Kelly dives in and scores a takedown into Trevors's guard.
Trevors keeping moving, preventing Kelly from controlling successfully.
Kelly wants to pass the guard but Trevors is keeping the position.
And thats the end of the round the fighters go back to their corners.
Corey Trevors dominated that second round.
The cut man is working on Corey Trevors's cut.
That's time! Trevors's corner gives him a slap on the ass as he gets ready to fight. This is the final round!

Kelly avoids the head kick by Trevors.
Kelly slips a jab and a cross from Trevors.
Trevors throws a shot to the body.
Kelly moves into the clinch.
Kelly breaks the clinch and we return to the middle of the mat.
Trevors lands with a shot to the body.
Trevors throws a hook to the body but it doesn't connect.
Kelly has closed the distance and engaged Trevors in a clinch.
Kelly manages to break the clinch.
Kelly shoots in for a takedown but doesn't get it.
We've had a slow start to the round here - hopefully the action picks up.
Kelly circles away from the clinch attempt.
Kelly shoots in for a takedown - he's clinched up with Trevors but Trevors pushes him off and we're back to square one.
Kelly shoots in but Trevors avoids the takedown attempt easily.
Corey Trevors has stuffed three takedown attempts in the round now. That's going to take a lot out of Ryan Kelly.
Kelly takes a big intake of breath there - he's definitely tired.
That's one minute gone in the round.
Kelly closes the distance and clinches.
Trevors wants to strike at distance but he can't break free of the clinch.
Kelly manages to break the clinch.
Kelly wants to clinch up but Trevors keeps it at a distance.
Trevors showing good head movement there, avoiding the strikes from Kelly.
Trevors lands a two punch combo.
Trevors scores with a nice looking left hook and follows it up with an uppercut!
Kelly checks the leg kick nicely there.
Kelly tries to clinch up against the cage, rushing in to close the distance. Trevors manages to break the clinch and circles back to the middle of the mat.
That's two minutes gone in the round.
Kelly shoots in with a takedown attempt and he has Trevors pinned against the cage. Trevors gets the underhooks and manages to circle away.
Trevors fakes low and throws an overhand right that catches Kelly on the side of the head.
Kelly throws a head kick but Trevors moves out of range.
Trevors lands a jab, followed by a cross and another cross, as Kelly backs up against the cage.
This is a great period of action - very entertaining stuff!
Trevors tries to clinch but is not successful on this occasion.
Kelly changes levels for a counter takedown but doesn't follow through with his attempt.
Kelly throws an uppercut from half a mile away. Trevors sees it coming and avoids it easily.
Trevors is really dominating this fight. Is there anything that Kelly can do to turn this around?
Kelly fails miserably with a takedown attempt.
Kelly misses with a takedown attempt. He shot from a bit too far out.
That's three minutes gone in the round.
Kelly takes one to the side of the head.
Kelly doesn't manage to clinch there - Trevors circles away.
Trevors wants to clinch.
Trevors tries to clinch there but Kelly circles away.
Trevors tries to clinch up.
Kelly shoots for a double leg takedown but Trevors sprawls well. He's pushed Kelly's face into the mat and manages to get back to his feet relatively easily.
Kelly tries to keep at a distance but Trevors has taken the fight into the clinch.
Kelly managing to block the knees to the body from Trevors.
Kelly managing to block the knees to the body from Trevors.
That's four minutes gone in the round.
Kelly dictating the pace here, as the fighters clinch against the cage.
Corey Trevors has scored more points in the clinch so far.
Trevors is trying to break the clinch but Kelly is controlling him.
Kelly has Trevors pressed against the cage, preventing Trevors from circling away and getting back to striking at range.
Trevors struggles to land a body shot inside as Kelly controls his hands.
Trevors takes a shot to the head.
Corey Trevors is fighting for a decision here - he's started to take the cautious approach.
Trevors misses with a shot to the kidneys.
Trevors is looking to break free of the clinch but Kelly has double underhooks.
Trevors tries to break the clinch but Kelly is controlling the position.
Kelly manages to break the clinch.
Trevors stuffs a takedown. It's all about dictating where the fight takes place and Trevors wants it to stay on the feet.
Trevors throws a counter high kick but Kelly was just alert enough to avoid it.
Ryan Kelly has stepped it up - he knows he needs a finish here!
Kelly throws a head kick that connects with a bit of head and a bit of hand.
And that's the end of the fight!
Corey Trevors showed his dominance in that final round.
Well Trevors has outscored his opponent in every aspect of the fight today. Only a scarily incompetent judge or two will keep him from a well deserved win... Over to the ring announcer for the scorecards.
Ladies and gentlemen, after 3 rounds of action, we go to the scorecards for a decision.
Judge Percy O'Donnell scores the fight 30:27
Judge Don Winkell scores the fight 30:27
Judge Jack Bonds scores the fight 30:27
In favor of your winner, by unanimous decision... Corey Trevors!
|
|
|
|
|
|
|
|
|
|
|
|
|
|
|
|
|
|
|
|
|
|
|
| S |
C
A |
G |
S |
C
B |
G |
|
S |
C |
G |
|
energy
A | B |
|
hype
A | B |
|
pop
A | B |
|
mgr
A | B |
|
FIGHT
RATING
51% |
|
|
|
|
|
|
|
Undercard bout
|
Coming up we have a super heavyweight MMA rules bout between Roman Ship (ranked 5399 p4p, 183 weight class) and Koskisen Hanski (ranked 5253 p4p, 178 weight class). We have two fighters making their debuts here, so let's see who comes out of this one with their first professional victory.
 |
|
 |
| 205 cm
18
300 lbs
0 - 0 - 0 |
|
221 cm
18
300 lbs
0 - 0 - 0 |
BJJ Brown Belt
Basic striking
KO power |
|
BJJ Blue Belt
Counter fighter
Solid chin |
|
| |
|
Ladies and gentlemen. This fight is 3 rounds, in the super heavyweight division.
Introducing the fighter to my left, fighting out of the red corner.
With a record of
0 - 0 - 0, fighting out of Amsterdam, Roman Ship!
And introducing the fighter to my right, fighting out of the blue corner.
With a record of
0 - 0 - 0, fighting out of Helsinki, Koskisen Hanski!
The judges for this bout are Frank Antenori, Jack Bonds and Timothy Bukovac.
The bell rings for round one and we are underway!
Hanski lands a nice hook to Ship's body. Ship takes it in his stride and looks to land his own strikes.
Hanski slips a straight right by Ship.
Ship needs to keep his hands up - Hanski had a free shot at his head there.
It looks like Roman Ship has been cut.
Ship misses the body punch
enabling Hanski to counter with a crisp jab.
Hanski slips a jab from Ship.
A little jabbing left from Hanski on the counter but it doesn't find it's target.
Ship swings widly with a right hand
enabling Hanski to counter with a crisp jab.
Ship throws a right hand that misses
and Hanski makes him pay by landing a nice hook to the body before moving out of range.
Ship looks to score with a jab to the body but Hanski is just out of range.
We've had a slow start to the round here - hopefully the action picks up.
Ship swings widly with a right hand
and Hanski counters nicely by changing levels and landing a hook to the body.
Ship misses with a left hand
and Hanski counters with a crisp hook to the side of the head.
Ship shoots for a double leg takedown but Hanski sprawls well. He's pushed Ship's face into the mat and manages to get back to his feet relatively easily.
And an attempted straight right on the counter from Hanski! But no joy.
This is a great period of action - very entertaining stuff!
Ship misses with a hook
and Hanski cracks him with a counter punch right on the button.
That's one minute gone in the round.
Ship looking for a takedown here - he's got it.
Hanski is adopting a defensive guard.
Ship wants to control from the top but Hanski keeps moving.
Ship tries to free his leg and advance position but Hanski is retaining full guard.
Ship is working hard here to advance position.
Ship trying to control but Hanski is working from the bottom.
Ship trying to pass the guard but can't manage it just yet.
Hanski really doesn't want to stay on the ground with Ship. If he can't get it back to his feet, it's only a matter of time before he'll be tapping out.
That's two minutes gone in the round.
Hanski is pulling down on Ship's head. It's preventing any offense from Ship, at least for the moment.
We must be close to a standup if these guys don't pick up the pace.
Hanski keeping moving, preventing Ship from controlling successfully.
The referee decides to stand the fighters back up.
Ship fails with the takedown
letting Hanski counter with a right hand.
Ship shoots and misses
and Ship takes a counter punch right on the button for his troubles.
That's three failed takedown attempts in the round for Roman Ship. That's going to take a lot out of him.
Ship waving his hands out in front of him, looking to distract Hanski.
Hanski throws an overhand right that drops Ship like a sack of potatoes! Hanski dives in to finish the fight with more strikes and this one is all over!
Ladies and gentlemen, after 2:56 of round 1, we have a winner by way of TKO (Strikes). Koskisen Hanski!
|
|
|
|
|
|
|
|
|
|
|
|
|
|
|
|
|
|
|
|
|
|
|
| S |
C
A |
G |
S |
C
B |
G |
|
S |
C |
G |
|
energy
A | B |
|
hype
A | B |
|
pop
A | B |
|
mgr
A | B |
|
FIGHT
RATING
38% |
|
|
|
|
|
|
|
Undercard bout
|
Coming up we have a light heavyweight MMA rules bout between Dolph Mercury (ranked 4233 p4p, 508 weight class) and Ismo Kauha (ranked 3730 p4p, 471 weight class). Ismo Kauha has the better chin. Will he look to stand and bang today?
 |
|
 |
| 181 cm
25
220 lbs
2 - 1 - 0 |
|
184 cm
25
209 lbs
1 - 0 - 0 |
Decent wrestler
Solid boxing
Prefers standup |
|
BJJ White Belt
Excellent boxer
Heavy handed |
|
| |
|
Ladies and gentlemen. This fight is 3 rounds, in the light heavyweight division.
Introducing the fighter to my left, fighting out of the red corner.
With a record of
2 - 1 - 0, fighting out of London, Dolph Mercury!
And introducing the fighter to my right, fighting out of the blue corner.
With a record of
1 - 0 - 0, fighting out of Helsinki, Ismo Kauha!
The judges for this bout are Jack Bonds, Don Winkell and Frank Antenori.
The bell rings for round one and we are underway!
Kauha scores with a nice looking left hook and follows it up with an uppercut!
A combination from Kauha does no damage.
Mercury was looking to counter that move with a punch but didn't quite pull the trigger.
Kauha dips down and scores with a jab to the body.
A big left from Mercury misses.
Kauha unleashes a big counter combination but Mercury bobs and weaves and avoids any damage.
Kauha swings wildly with a couple of big hooks
and Mercury counters by moving into the clinch.
Mercury looks to throw an elbow but misses.
Kauha misses with a hook to the ribs.
Kauha pushes Mercury back against the cage and unloads with a body punch.
Kauha wants to push off and get back to the center of the mat but Mercury has him pressed against the cage.
Both guys are working to get underhooks.
We've had a slow start to the round here - hopefully the action picks up.
Kauha breaks from the clinch.
Kauha throws a monster uppercut resembling something out of street fighter but it doesn't land.
Kauha with a nice cross.
Kauha waving his hands out in front of him, looking to distract Mercury.
That's one minute gone in the round.
Mercury takes a jab on the nose there. A little bit of blood seems to be coming out. Hopefully that won't affect his breathing.
Mercury takes a big uppercut there. He seems a bit wobbly but no, he's OK.
Kauha loads up on a big right hand but Mercury slips the punch.
Mercury was looking to counter that move with a punch but didn't quite pull the trigger.
Kauha connects with a slap. Keep your fist closed son.
A left and a right from Kauha both land. Nice combination.
Mercury looks to land a left hand but Kauha moved out of range nicely.
Kauha looked like he wanted to counter with a punch but didn't throw it.
A big left from Mercury misses.
Kauha unleashes a big counter combination but Mercury bobs and weaves and avoids any damage.
A combination from Kauha does no damage.
As Kauha tries to get set, Mercury tries to push him back and clinch up but Kauha manages to avoid the attempt.
Kauha tries to clinch there but Mercury circles away.
Mercury tries to counter by clinching up but Kauha breaks away and moves out of range.
Kauha throws a series of punches but Mercury moves out of range.
Mercury seemed to be looking to counter by closing the distance.
Mercury moves out of range of the strikes.
That's two minutes gone in the round.
Kauha keeping his hands up high there, blocking the jab from Mercury.
Mercury throws a poor cross that misses
and Kauha counters with a crisp hook to the side of the head.
This has been an exciting period of action!
Kauha misses with a wild combination.
Mercury wants to take advantage of his opponent's missed offense by moving into the clinch.
Kauha smiles there as he lands a nice right hand right on the button.
Kauha scores with a jab. Mercury acknowledges it with a nod of the head.
Kauha misses with the combination.
Kauha tries to close the distance and clinch up but Mercury swats him away and circles back towards the center.
That's three minutes gone in the round.
Mercury gets cracked there but stands up to it.
Mercury throws a lazy uppercut
enabling Kauha to counter with a crisp jab.
Kauha swings widly with a right hand
and Mercury counters by moving into the clinch. Good anticipation by Mercury.
Mercury throws a nice elbow but it doesn't land.
A nice right hand lands inside from Kauha.
Kauha fails to land with a short punch on the inside.
We've been informed that Kauha has been working hard on his conditioning in the buildup to the fight.
Mercury lands a nice elbow from the clinch.
Mercury lands with a good tight uppercut to the head.
Kauha blocks a couple of punches on the inside.
Kauha tries a body shot but Mercury blocks it.
Kauha swings wildly with an uppercut but Mercury uses good head movement to avoid it.
Kauha blocks an elbow strike from Mercury.
A quick uppercut on the inside from Kauha.
Kauha lands with a right to the head.
That's four minutes gone in the round.
This has been an exciting period of action!
Mercury misses with an elbow strike.
Mercury content to slow the pace in the clinch.
Kauha misses with a hook from the clinch.
Mercury slowing the pace effectively.
Kauha throws a head punch that misses.
A head punch on the inside from Kauha fails to land.
Kauha doesn't land with the attempted body shot.
Some stalling of biblical proportions here from Kauha.
Some stalling of biblical proportions here from Mercury.
Kauha misses with some punches.
A nice left hand lands by Mercury.
Mercury avoiding damage.
Kauha lands an uppercut.
Kauha misses with the head strike.
Kauha can't find room to land a body shot as Mercury controls the action.
And thats the end of the round the fighters go back to their corners.
Ismo Kauha dominated that round.
The corners get their ten second warning. Both fighters stand from their stools and stare eachother down, ready to get back to the action.
Mercury misses with a lunging right hand
and Kauha counters with a good right hand that lands right on the jaw.
Nice defenses there by Kauha.
Kauha moves out of range as Mercury strikes.
A countering left hand to the body from Kauha misses.
Kauha might want to mix his strikes up a bit more. He's just going for head shots at the moment and that can become a bit predictable.
Mercury takes a solid shot to the body. That one hurt him but he's trying not to show it.
Kauha lands a body shot.
Kauha clobbers Mercury with an overhand right that has the crowd gasping. That made a horrendous noise.
Kauha fakes with an overhand right and moves in to clinch with Mercury, pushing him back against the cage.
We've had a slow start to the round here - hopefully the action picks up.
Kauha swings away with an uppercut that misses.
Come on Mercury - let's have some action - none of this stalling nonsense.
Mercury throws an elbow but it misses.
Kauha throws a punch but it's blocked by Mercury.
Kauha misses with a short punch on the inside.
That's one minute gone in the round.
Kauha misses with a punch to the body.
Mercury blocking some punches.
Kauha has been the more effective fighter overall so far.
Mercury's corner are urging him to control the action in the clinch for a moment, rather than mount any serious offense. I'm sure the crowd appreciate those instructions... not.
Mercury controlling the action here for a moment.
Kauha misses with the head strike.
Kauha is trying to push Mercury away but Mercury has him pressed against the cage, so he's going nowhere.
Kauha breaks the clinch and we're back to striking at distance.
Kauha throws a hook but Mercury blocks it.
Mercury swung with a counter right hand that didn't connect.
Kauha scores with a reasonable looking shot to the body. Mercury doesn't seem bothered though.
Kauha throws the left hand but Mercury avoids the punch easily.
That's two minutes gone in the round.
Mercury takes a shot right to the bread basket.
Kauha clinches up against the cage.
Mercury controlling the action here for a moment.
Kauha is trying to push Mercury away but Mercury has him pressed against the cage, so he's going nowhere.
Mercury stalling.
Mercury prevents Kauha from breaking the clinch.
Mercury gets through Kauha's defenses to land a nice punch to the side of the head.
Ismo Kauha seems to be working more effectively in the clinch in the fight so far.
Kauha fails to land with a short punch on the inside.
Kauha fails to land with a short punch on the inside.
Kauha swings wildly with an uppercut but Mercury uses good head movement to avoid it.
Mercury is clearly stalling here... Pick up the pace son.
That's three minutes gone in the round.
Kauha misses with a shot to the kidneys.
Kauha lands with a short head shot on the inside.
Mercury content to slow the pace in the clinch.
Mercury blocks a couple of punches on the inside.
Kauha pushes Mercury back against the cage and unloads with a body punch.
Kauha swings wildly with an uppercut but Mercury uses good head movement to avoid it.
Mercury misses with an elbow over the top.
Kauha tries to break free but Mercury pushes him back against the cage.
Both guys are working to get underhooks.
Kauha breaks from the clinch.
Ismo Kauha seems to be getting the better of the standup.
Kauha tries to clinch up.
Mercury on the wrong end of a decent looking cross there.
That's four minutes gone in the round.
Kauha throws a body punch but Mercury moves out of range.
Kauha waving his hands out in front of him, looking to distract Mercury.
Mercury tries to counter by clinching up but Kauha breaks away and moves out of range.
Kauha goes to the watering hole and comes back with a big thumbs up from the judges as he scores a three punch combo.
It looks like Dolph Mercury has been cut.
Kauha displays some good footwork, moving neatly out of range as Mercury throws out the jab.
Ismo Kauha seems to be the more aggressive standup fighter in this bout.
Kauha slips under a jab from Mercury.
Kauha is looking to clinch.
Kauha fakes high and swings low for a body shot but Mercury manages to avoid it.
An attempted straight right counter from Mercury misses the target.
Kauha fails to land with the punch combination there - jab, cross, hook, miss, miss, miss.
Kauha fakes and then throws a beautiful body shot. Mercury looks a bit winded and takes a step backwards to take a breath.
The crowd cheering loudly, showing their appreciation for the quality fight we're seeing here.
Kauha misses with a hook
and Kauha takes a counter punch right on the button for his troubles.
And thats the end of the round the fighters go back to their corners.
Ismo Kauha showed his class in that round. I'd imagine he'll take it on all the scorecards.
The cut man is working on Dolph Mercury's cut.
The minute break is over - no more time for sponges and pep talks - back to the action! Let's get this one finished - here comes the final round!
Kauha throws an overhand right that lands on Mercury's shoulder, as Mercury tries to avoid the shot.
Mercury slips under a jab.
Mercury avoids the clinch attempt nicely.
Kauha connects with a body shot.
Mercury displays some good footwork, moving neatly out of range as Kauha throws out the jab.
Mercury takes one on the chin but seems OK.
Mercury takes a hook to the side of the head. I wonder if that's got his ears ringing.
We've had a slow start to the round here - hopefully the action picks up.
Mercury misses with an uppercut. Kauha saw that one coming.
Kauha swings wildly with a couple of big hooks
and Mercury holds on and brings the fighters into a clinch.
Mercury's corner are urging him to control the action in the clinch for a moment, rather than mount any serious offense. I'm sure the crowd appreciate those instructions... not.
Both fighters working to control the clinch.
That's one minute gone in the round.
Kauha wants to get back to striking at distance but Mercury won't allow it.
Kauha misses with a body punch.
Mercury prevents a body shot from Kauha.
Mercury pushes off and fires off an elbow that misses, before clinching up again, against the cage.
Kauha misses with the head strike.
Kauha trying to control the position but instead, Mercury has worked for underhooks and has pushed Kauha into the cage.
Kauha avoids the elbow strike from Mercury, against the cage.
Kauha is trying to break free.
Kauha tried to land a shot to the body but connects with Mercury's elbow.
Mercury blocks a couple of punches on the inside.
Kauha swings wildly with an uppercut but Mercury uses good head movement to avoid it.
That's two minutes gone in the round.
Neither fighter has done anything of merit for a good minute or two here and the crowd are not happy about it.
Kauha tries a body shot but Mercury blocks it.
Kauha is trying to break the clinch but Mercury has him pressed against the cage.
Kauha tries a body shot but Mercury blocks it.
Kauha blocks an elbow strike from Mercury.
Kauha misses with a hook to the ribs.
Kauha working on landing some head shots here - that one got through nicely.
Kauha throws a punch but it's blocked by Mercury.
Kauha breaks the clinch.
Kauha tries to clinch up.
Kauha throws a right and a left that both miss.
Kauha dips down and scores with a jab to the body.
Kauha catches Mercury with a nice straight right. He seems pissed - ooooh, it's on now! On like donkey kong!
Kauha wings a very wild body shot but it does the job and lands to the midsection.
That's three minutes gone in the round.
Kauha fakes a head punch and goes low to the body. Nicely done.
Kauha lets the fists fly and connects with a left straight followed by a right hook.
Mercury takes a shot right to the bread basket.
Kauha misses with an uppercut.
Mercury is looking to counter the offense by Kauha and move into the clinch.
Mercury misses with a looping right.
Kauha throws a hook but Mercury blocks it.
A quick step to the side and Mercury tries to counter with a shot to the body but it doesn't connect.
Kauha just misses with a punch to the body.
Kauha misses with a jab, cross combination.
Kauha throws a lazy right hand but Mercury sees it coming a mile off and sidesteps it easily.
Kauha tries to bum rush Mercury with a series of wild strikes but Mercury uses good footwork to avoid the assault.
That's four minutes gone in the round.
Kauha misses with an uppercut
and Mercury moves into the clinch.
Ismo Kauha is fighting for a decision - hopefully he's judged it right and he's actually winning the fight.
Mercury blocks a couple of punches on the inside.
Kauha is trying to break the clinch but Mercury has him pressed against the cage.
Mercury throws a punch but it's blocked by Kauha.
Mercury stalling in the clinch.
Kauha throws a punch but it's blocked by Mercury.
Mercury leaning his opponent against the cage.
Mercury pushes off an throws an elbow but Kauha leans to the side and avoids it. We're back to clinching against the cage.
The crowd cheering loudly, showing their appreciation for the quality fight we're seeing here.
Kauha throws a punch but it's blocked by Mercury.
Dolph Mercury has stepped it up - he knows he needs a finish here!
Kauha misses with a punch on the inside.
And that's the end of the fight!
Ismo Kauha comfortably won the final round on my scorecard.
Well Kauha has outworked and out performed his opponent in all aspects of the game today. He was simply too good and the decision should be no more than a formality. Over to the ring announcer for the scorecards.
Ladies and gentlemen, after 3 rounds of action, we go to the scorecards for a decision.
Judge Jack Bonds scores the fight 27:30
Judge Don Winkell scores the fight 27:30
Judge Frank Antenori scores the fight 27:30
In favor of your winner, by unanimous decision... Ismo Kauha!
A relieved looking Ismo Kauha thanked the fans for their support and gave the usual line about them being amazing. They seemed to believe that he actually meant it.
|
|
|
|
|
|
|
|
|
|
|
|
|
|
|
|
|
|
|
|
|
|
|
| S |
C
A |
G |
S |
C
B |
G |
|
S |
C |
G |
|
energy
A | B |
|
hype
A | B |
|
pop
A | B |
|
mgr
A | B |
|
FIGHT
RATING
47% |
|
|
|
|
|
|
|
Co-main event
|
Coming up we have a light heavyweight MMA rules bout between Niall Dunne (ranked 3649 p4p, 464 weight class) and Alenxander Penn (ranked 3343 p4p, 435 weight class). Both fighters look fresh as a daisy as they make their way towards the cage.
 |
|
 |
| 183 cm
25
200 lbs
1 - 0 - 0 |
|
180 cm
25
214 lbs
1 - 0 - 0 |
BJJ Blue Belt
Excellent boxer
Cuts easily |
|
Decent wrestler
Basic striking
Solid chin |
|
| |
|
Ladies and gentlemen. This fight is 3 rounds, in the light heavyweight division.
Introducing the fighter to my left, fighting out of the red corner.
With a record of
1 - 0 - 0, fighting out of New York, Niall Dunne!
And introducing the fighter to my right, fighting out of the blue corner.
With a record of
1 - 0 - 0, fighting out of London, Alenxander Penn!
The judges for this bout are Timothy Bukovac, and Don Winkell.
The bell rings for round one and we are underway!
Decent striking displayed by Dunne there.
Penn shoots in with a lovely double leg takedown. Dunne manages to land in full guard to minimise the damage.
Dunne working the defensive guard well to avoid strikes from Penn.
Penn with a flurry of punches that miss.
Dunne wants to stand but Penn is controlling the position.
Penn makes a bit of distance and scores with some ground and pound, still in guard.
Penn stops Dunne from standing up.
The ref warns both fighters not to hold the cage as they work up against the meshing.
Penn in full guard, throwing the ground and pound. No damage this time.
We've had a slow start to the round here - hopefully the action picks up.
Penn is looking to work some ground and pound but Dunne has wrist control.
Dunne is trying to stand up but he's not managed so far.
Penn scores with a decent looking elbow strike.
That's one minute gone in the round.
Dunne utilising some decent striking defenses from the guard, preventing the ground and pound.
Penn throws a big elbow that misses.
Penn postures up to throw the ground and pound strikes but they don't connect.
Penn lands a couple of digs.
Penn throwing strikes but missing.
Penn won't allow Dunne to get back to his feet.
The referee has motioned to the fighters to stand back up. He just wasn't happy with the level of activity.
Dunne dips to his left and cracks Penn with an uppercut!
Dunne seems to be moving with more speed, compared to his last bout. He must have been working on that in the gym.
Penn drives through with a takedown into guard.
Dunne wants to get back to his feet but Penn is in a dominant position and won't allow it.
Dunne utilising some decent striking defenses from the guard, preventing the ground and pound.
That's two minutes gone in the round.
Penn in full guard, throwing the ground and pound. No damage this time.
Penn in full guard, throwing the ground and pound. No damage this time.
Penn missing there with some ground and pound from the guard.
Penn throwing shots from guard but he's hitting more mat than opponent.
Penn cracks Dunne with a solid left hand.
Dunne avoiding any damage from the ground and pound.
Dunne wants to stand but Penn is controlling the position.
The referee decides to stand the fighters back up.
Penn drops down and drives through with a powerful takedown into guard.
Penn distracts Dunne with his right hand and drops a big elbow with his other arm.
Penn throws an elbow that misses. Dunne uses the momentum to reverse the position. He's now in Penn's guard. Nice move by Dunne!
Fantastic stuff here - a very entertaining period of action, which has drawn cheers from the crowd.
Dunne is fighting to break Penn's control of his arms but Penn is doing a good job of controlling the position at the moment.
That's three minutes gone in the round.
Penn's corner are shouting for him to control the position and he seems happy to oblige.
Dunne stopping the sweep attempt from Penn.
That's four minutes gone in the round.
There's not a lot going on here and the crowd are letting the fighters know they're not willing to tolerate a lack of action.
Penn is pulling down on Dunne's head to control his posture.
Penn wants to sweep but no luck.
Penn looking to control the pace of the fight rather than finish it.
Boooooooooooooooooooo!!! God, this has been a terrible round. Come on you two, sort yourselves out!
The ref stands the fighters back up due to a lack of activity.
And thats the end of the round the fighters go back to their corners.
Alenxander Penn dominated that round.
OK. That's time! The bell goes and we're back to the action.
Penn fails with a takedown attempt.
Dunne defending well as Penn loads up on a big left hand.
Penn looks for a takedown here. Will he get it? Dunne is fending him off so far but Penn persists. Nope, Dunne circles away and we're back to standing.
Dunne uses good head movement to avoid the hook from Penn.
Dunne swings and misses with a hook to the body.
Dunne lands a nice hook to Penn's body. Penn takes it in his stride and looks to land his own strikes.
Dunne changes levels and scores with a jab to the body.
Penn looks for a takedown here. Will he get it? Dunne is fending him off so far but Penn persists. Nope, Dunne circles away and we're back to standing.
We've been informed that Penn has been working hard on his conditioning in the buildup to the fight.
Niall Dunne has stuffed three takedown attempts in the round now. That's going to take a lot out of Alenxander Penn.
Penn fails miserably with a takedown attempt.
We've had a slow start to the round here - hopefully the action picks up.
Dunne moves into range and connects with a jab.
Penn shoots in for a takedown. "I don't think so" says Dunne as he avoids it easily.
Dunne darts in and out, connecting with a jab.
That's one minute gone in the round.
Dunne lands a vicious shot with the stealth of a sniper and the strength of a viper. Are vipers that strong? I can think of lots of things that are stronger than a viper - not many rhyme with sniper though.
Dunne stalks Penn and leaps in with a furious combination of punches. Uppercuts and crosses smash into Penn's face. Penn staggers backwards, shaken.
Dunne connects with a body shot.
Dunne cracks a nice hook into Penn's ribs.
Dunne moving in and out of range nicely, whilst landing the scoring shot.
Dunne ducks low and lands a nice hook to the body of his opponent.
Dunne connects with a right hand. Penn shakes it off.
Penn shoots in but no luck this time.
Jab by Dunne.
Wooooo! Give it up for these two warriors! They are putting on a show!
Dunne bobbing and weaving, closes the distance and lands a hook to the side of Penn's head.
Penn decides to change it up a bit and drives through with a nice takedown into half guard.
Penn not throwing his punches with enough precision this time.
Dunne keeping his head moving to avoid the ground and pound.
Penn working the head and body with strikes.
The fighters are pressed up against the cage, both looking to find a bit of space to work.
That's two minutes gone in the round.
Penn thumps the canvas. Not on purpose obviously - he just missed Dunne's head.
Penn missing with the ground and pound from half guard.
Penn throwing shots but Dunne is blocking nicely.
Penn not throwing his punches with enough precision this time.
Dunne is really dominating this fight. Is there anything that Penn can do to turn this around?
Penn missing with the ground and pound from half guard.
Both fighters are absolutely exhausted here.
Penn wants to free his trapped foot but Dunne is holding on for dear life with his legs.
Penn working over Dunne with some ground and pound. Dunne looks like he wants out of this position, which is understandable.
Dunne manages to create a bit of space in order to work his way back to his feet. Penn keeps hold of his opponent and drives him back against the cage.
Penn goes for a takedown in the clinch but Dunne prevents it.
That's three minutes gone in the round.
Penn is trying to pull guard but Dunne turns him against the cage and we stay in the clinch.
Dunne struggles to land a body shot inside as Penn controls his hands.
Penn is trying to trip Dunne. He has hold of a leg but Dunne is hopping around, keeping his balance for the moment. Penn persists though and gets the takedown into guard.
Dunne has momentary wrist control but Penn slips an elbow through the middle.
Penn working in close now, lands a nice elbow to the side of Dunne's head.
A big thud reverberates around the arena there as Penn accidentally thumps the mat. Hopefully he's not broken his hand.
Penn is looking to work some ground and pound but Dunne has wrist control.
Penn throws a strike but Dunne rolls with it and manages to sweep. Now he's in guard on top.
Penn is avoiding any damage by keeping wrist control.
That's four minutes gone in the round.

Penn is active off his back here, looking for submissions.
Penn tries to land a sweep but no joy.
Dunne wants to get up but he can't break Penn's closed guard. He needs to be careful trying to break the legs open, as he's open to submissions here.
Alenxander Penn has got the better of the ground game so far.
Penn wants to sweep here but Dunne controlling him for the moment.
And thats the end of the round the fighters go back to their corners.
Niall Dunne dominated that second round.
OK. That's time! The bell goes and we're back to the action. This is the final round!
Nice takedown defense from Dunne. No joy for Penn on that attempt.
Dunne went nuts there looking for a big combo counter but none of the flurry connected.
Penn fails with the takedown
and Dunne counters with a quick right hand to the jaw.
Penn takes a punch right to his stomach. That took the wind out of him momentarily.
Dunne jabs at Penn's body.
A lazy left from Dunne finds it's target.
Penn shoots in looking for a takedown. Dunne tries to sprawl out of it but Penn keeps driving through. The fighters are pinned against the cage. Dunne manages to get underhooks and after a bit of a struggle, circles away and we're back to standing.
Niall Dunne has stuffed three takedown attempts in the round now. That's going to take a lot out of Alenxander Penn.
Nice sprawl there from Dunne as Penn shoots in.
We've had a slow start to the round here - hopefully the action picks up.
Penn takes one on the button.
Dunne throws a two punch combo that lands nicely.
Niall Dunne is winning the standup battle so far.
Penn takes a big intake of breath there - he's definitely tired.
Penn misses with a lunging right hand
and Penn takes a counter punch right on the button for his troubles.
Penn misses the jab.
Dunne throws a big counter combination but Penn scrambles out of danger and avoids any damage.
That's one minute gone in the round.
Dunne with a body punch. A glancing blow.
Penn closes the distance and clinches up with Dunne, looking for a takedown. Penn pushes Dunne against the cage but Dunne circles to the side and manages to break the clinch.
Dunne throws a shot to the body.
Dunne paws at his opponent with the jab and then lunges in with a straight, right on the button.
Dunne feints a straight left to the body, then turns around with a flashy move and hits Penns jaw with a dramatic spinning back fist!
Dunne fakes a head shot and lands one to the body.
Dunne misses with a jab and misses with a cross straight after too.
Dunne lands a vicious shot with the stealth of a sniper and the strength of a viper. Are vipers that strong? I can think of lots of things that are stronger than a viper - not many rhyme with sniper though.
Dunne scores with a sloppy right hand. Penn should have avoided that one.
Dunne comes forward and lands a shot to the body, then darts back out of range.
Dunne scores with a hook to the body. Penn takes a step back and tries to catch his breath.
This is a great period of action - very entertaining stuff!
Dunne lands with a good body shot.
Penn shoots in for a takedown. "Ole!" shouts Dunne as he jumps to the side.
That's two minutes gone in the round.
Dunne works Penn's body with a nice hook.
Dunne connects with a body shot.
Penn doesn't react quick enough there as he takes a shot to the body.
Dunne throws a shot to the body.
Dunne feints a straight left to the body, then turns around with a flashy move and hits Penns jaw with a dramatic spinning back fist!
Niall Dunne is looking to keep the fight on the feet at all costs.
Dunne lands a jab, followed by a cross and another cross, as Penn backs up against the cage.
Penn takes a jab on the nose. He smiles like he loves it and keeps coming.
Dunne cracks a nice hook into Penn's ribs.
Decent striking displayed by Dunne there.
Penn keeping a good distance there, avoiding the body shot.
Penn doesn't succeed with the takedown
and Dunne connects with a straight left hand counter down the middle.
That's three minutes gone in the round.
Penn is trying hard to land a takedown here. Dunne sprawls well and keeps this one on the feet.
Dunne swung with a counter punch to the body but it didn't connect.
Penn misses with a takedown attempt. He shot from a bit too far out.
A shot to the liver by Dunne. Beautiful body shot.
Dunne is looking to wear down Penn with body shots, infact he's throwing more body shots than head shots at the moment.
Dunne lands a jab to Penn's midsection.
Penn doesn't react quick enough there as he takes a shot to the body.
A right-left combo lands from Dunne.
Dunne scores with a hook to the body. Penn takes a step back and tries to catch his breath.
Dunne throws a nice hook to the body that draws an oooh from the crowd.
Dunne connects with a single shot there.
Penn will have to do better than that with his takedown attempts.
That's four minutes gone in the round.
Dunne lands a jab, followed by a cross and another cross, as Penn backs up against the cage.
The crowd are loving this. Great action here.
Penn needs to keep his hands up - Dunne had a free shot at his head there.
Dunne scores with a nice strike.
Penn doesn't react quick enough there as he takes a shot to the body.
Dunne stuns Penn with a nice body shot, before stepping back out of range.
Good standup being displayed there by Dunne as he connects with a hook.
Dunne lands a jab. Then a cross. Then finally a nice hook to the body. Good work there by Dunne.
Dunne getting the better of the striking in that exchange.
Dunne scores with a nice right hand.
Dunne comes forward and lands a shot to the body, then darts back out of range.
The crowd applaud the fighters' efforts here as the round comes to an end.
Dunne cracks a nice hook into Penn's ribs.
Dunne scores with a reasonable looking shot to the body. Penn doesn't seem bothered though.
Dunne lands a right hook to the body.
And that's the end of the fight!
Niall Dunne showed his dominance in that final round.
I think Dunne has won this one but let's see what the judges have to say. Over to the ring announcer for the scorecards.
Ladies and gentlemen, after 3 rounds of action, we go to the scorecards for a decision.
Judge Timothy Bukovac scores the fight 29:27
Judge Percy O'Donnell scores the fight 29:27
Judge Don Winkell scores the fight 29:27
In favor of your winner, by unanimous decision... Niall Dunne!
|
|
|
|
|
|
|
|
|
|
|
|
|
|
|
|
|
|
|
|
|
|
|
| S |
C
A |
G |
S |
C
B |
G |
|
S |
C |
G |
|
energy
A | B |
|
hype
A | B |
|
pop
A | B |
|
mgr
A | B |
|
FIGHT
RATING
54% |
|
|
|
|
|
|
|
Main event
|
Coming up we have a lightweight MMA rules bout between Jamal Adams (ranked 4203 p4p, 402 weight class) and Marlon Oliveira (ranked 1824 p4p, 218 weight class). I'm sure you'll be fascinated to know that I was talking to some pointless Z list celebrity before the fight and he thought that Marlon Oliveira was going to win. Let's see if he was right.
 |
|
 |
| 175 cm
25
165 lbs
1 - 0 - 0 |
|
175 cm
25
161 lbs
5 - 0 - 0 |
Good wrestling
Counter fighter
Hates pizza |
|
Good takedowns
Basic striking
Intelligent |
|
| |
|
Ladies and gentlemen. This fight is 3 rounds, in the lightweight division.
Introducing the fighter to my left, fighting out of the red corner.
With a record of
1 - 0 - 0, fighting out of New York, Jamal Adams!
And introducing the fighter to my right, fighting out of the blue corner.
With a record of
5 - 0 - 0, fighting out of Rio de Janeiro, Marlon Oliveira!
The judges for this bout are Timothy Bukovac, and Frank Antenori.
The bell rings for round one and we are underway!
Oliveira circles away from the clinch attempt.
Oliveira shoots for a double leg takedown but Adams sprawls well. He's pushed Oliveira's face into the mat and manages to get back to his feet relatively easily.
Oliveira tries for a takedown but Adams sees it coming a mile off and avoids it easily.
Oliveira misses with a takedown attempt - Adams sprawls well and throws a nice strike on the way out which just misses.
Jamal Adams has stuffed three takedown attempts in the round now. That's going to take a lot out of Marlon Oliveira.
Oliveira shoots in but no luck this time.
Nice defenses there by Adams.
Oliveira shoots for a double leg takedown but Adams sprawls well. He's pushed Oliveira's face into the mat and manages to get back to his feet relatively easily.
Adams slips a jab from Oliveira.
And Adams counters with a quick kick to the body but Oliveira blocks it.
Adams uses good head movement to avoid the hook from Oliveira.
Oliveira fails miserably with a takedown attempt.
We've had a slow start to the round here - hopefully the action picks up.
Oliveira tries to score a power double leg takedown but Adams sees that one coming and sprawls well. That will dishearten Oliveira somewhat.
Adams is trying to close the distance and clinch up, after that failed offence from Oliveira.
Oliveira closes this distance looking for a takedown but Adams circles away.
That's one minute gone in the round.
Adams instigates a clinch.
Oliveira avoiding damage.
Adams trying to control the position but instead, Oliveira has worked for underhooks and has pushed Adams into the cage.
Adams is looking to score with knees to the body. Maybe he'll change it up and go body then head. Oliveira is defending well for now.
Oliveira managing to block the knees to the body from Adams.
Oliveira has Adams pushed against the cage.
Adams tries to break the clinch but Oliveira is controlling the position.
I was talking to Adams's coach per-fight and he was telling me that they'd been working on the clinch in the runup to this fight.
Adams just leaning against Oliveira, taking a breather.
Adams misses the knee to the body. Nice hip positioning from Oliveira.
That's two minutes gone in the round.
Adams is looking to score with knees to the body. Maybe he'll change it up and go body then head. Oliveira is defending well for now.
Adams has dropped down and is looking to force the takedown but it's defended by Oliveira after a bit of a struggle.
Adams stalling in the clinch but Oliveira improves position.
Oliveira blocks a body shot from Adams.
Adams manages to get underhooks and slows down the pace for a moment.
Adams blocks a body shot from Oliveira.
Adams tries to land a knee to the body but he is off balance and Oliveira avoids it.
Oliveira prevents the takedown attempt.
Adams pushes off and circles away, back to the middle of the mat.
Adams misses with a head kick.
Oliveira moves into range and clinches up with Adams.
That's three minutes gone in the round.
Oliveira slowing the pace effectively.
A real battle for position is taking place between these two warriors.
With the fighters up against the cage, Adams throws an elbow but misses.
Adams has hold of a leg and is looking for a trip takedown. Oliveira avoids it nicely though and we remain in the clinch.
Oliveira dictating the pace here, as the fighters clinch against the cage.
Oliveira dictating the pace here, as the fighters clinch against the cage.
Oliveira managing to block the knees to the body from Adams.
Adams is looking for a takedown up against the cage. Oliveira gets underhooks though and prevents the takedown attempt.
Oliveira blocks a knee to the body. He'll have a nicely bruised forearm in the morning.
Oliveira wants a takedown but no success here.
Oliveira taking a break, stalling in the clinch.
That's four minutes gone in the round.
Oliveira misses with a punch to the body.
Adams is looking to score with knees to the body. Maybe he'll change it up and go body then head. Oliveira is defending well for now.
Adams trying to land knees to the body.
Oliveira managing to block the knees to the body from Adams.
Adams is looking to score with knees to the body. Maybe he'll change it up and go body then head. Oliveira is defending well for now.
Adams goes for a takedown in the clinch but Oliveira prevents it.
Adams stalling in the clinch but Oliveira improves position.
Adams lands a knee to the head there! That was nasty!
Boooooooooooooooooooo!!! God, this has been a terrible round. Come on you two, sort yourselves out!
Adams is looking to score with knees to the body. Maybe he'll change it up and go body then head. Oliveira is defending well for now.
Adams avoiding damage.
Adams trying to land knees to the body.
And thats the end of the round the fighters go back to their corners.
Jamal Adams dominated that round.
The fighters get back to their feet, the hooter sounds and we're back to the action!
Adams doesn't manage to clinch there - Oliveira circles away.
Oliveira moves out of range as Adams throws a body kick.
Oliveira looked like he wanted to counter with a punch but didn't throw it.
Adams will need to tighten up his combinations if he doesn't want to gas himself out, swinging at thin air.
Oliveira swats away the attempt to clinch by Adams.
Adams pivots as if he's going to throw a leg kick but stops half way.
Oliveira with the counter takedown but Adams avoids it easily.
Oliveira fakes an overhand right and shoots for a takedown. Adams sprawls well initially but Oliveira persists and gets the takedown into half guard.
Adams kicks Oliveira off and gets back to his feet.
Oliveira dives in for a single leg takedown but Adams sprawls and the fighters end up clinched against the cage.
Oliveira moves into the clinch.
The fans in attendance giving it up for the two fighters, who have really let it all hang out in the last minute or so!
Oliveira managing to block the knees to the body from Adams.
Adams tries to break free but Oliveira pushes him back against the cage.
Adams is working for a takedown up against the cage. He can't get it on this occasion though.
That's one minute gone in the round.
Oliveira will no doubt start fighting again in a minute but for now he's just having a little rest, leaning Adams up against the cage.
Adams trying to control the position but instead, Oliveira has worked for underhooks and has pushed Adams into the cage.
Adams has had enough of the clinch but Oliveira keeps him there for the moment.
Adams is really dominating this fight. Is there anything that Oliveira can do to turn this around?
Adams content to slow the pace in the clinch.
Oliveira blocks a knee to the body. He'll have a nicely bruised forearm in the morning.
Oliveira keeps the fight in the clinch, despite Adams's efforts to push away.
Adams tries to land a knee to the body but he is off balance and Oliveira avoids it.
Adams looking to slow down the pace here.
That's two minutes gone in the round.
A lull in the action here being met with boos from the crowd.
Adams drops down for a takedown but doesn't get it.
Jamal Adams has scored more points in the clinch so far.
Oliveira on the defensive, avoiding the knees to the body.
Oliveira stalling against the cage.
Adams tries a body shot but Oliveira blocks it.
The two fighters are working to gain dominance in the clinch.
Oliveira works for the underhooks and manages to get a trip takedown into guard.
Oliveira trying to control but Adams is working from the bottom.
The fighters are starting to get a bit slippery now, which will make submissions a bit more difficult.
That's three minutes gone in the round.
Oliveira throws a big elbow that misses.
Adams working the defensive guard well to avoid strikes from Oliveira.
Oliveira is looking to work some ground and pound but Adams has wrist control.
Oliveira postures up to throw the ground and pound strikes but they don't connect.
Adams has a loose triangle. He'll be looking to tighten that up but Oliveira can see exactly what he's planning and manages to posture up and free himself.
The ref warns both fighters not to hold the cage as they work up against the meshing.
Oliveira is working Adams over from the guard. He should look to pass the guard and do a little more damage with these strikes.
Oliveira has the superior BJJ but he's also working some ground strikes into his gameplan.
Adams looking for submissions off his back, moving his hips, looking for an opening.
Oliveira trying to control but Adams is working from the bottom.
That's four minutes gone in the round.
There's not a lot going on here and the crowd are letting the fighters know they're not willing to tolerate a lack of action.
Hammerfist, elbow! yells Oliveira's corner. There ya go! There ya go!
Adams working from the bottom, still in full guard. He's managed to get a loose triangle. Oliveira doesn't seem to be doing much to defend here, obviously he feels comfortable in the position. Oliveira manages to throw the legs off his shoulder and he's back into guard - no problem.
Oliveira lands a couple of digs.
Oliveira landing some decent shots from guard.
Oliveira with a nice head shot there.
The crowd thankful this round is nearly over.
Adams utilising some decent striking defenses from the guard, preventing the ground and pound.
Oliveira slips nicely into half guard, despite the strikes coming from Adams.
And thats the end of the round the fighters go back to their corners.
Marlon Oliveira showed his class in that round. I'd imagine he'll take it on all the scorecards.
That's the end of the round. The referee orders the cornermen out of the cage so we can get back down to business. Let's hear some noise people - this is the final round!
Oliveira fails with a rather predictable takedown attempt.
Oliveira has a takedown stuffed.
Oliveira shoots in but doesn't get the takedown
and Adams counters by moving into the clinch. Good anticipation by Adams.
Jamal Adams has stuffed three takedown attempts in the round now. That's going to take a lot out of Marlon Oliveira.
Oliveira has Adams pressed against the cage.
Both fighters working to control the clinch.
We've had a slow start to the round here - hopefully the action picks up.
Adams tries to land knees in the clinch but Oliveira avoids the damage to the body.
Oliveira has been looking to improve his clinch game in recent weeks. Adams seems to have the measure of him in the clinch so far, so let's see if Oliveira can turn it around.
Adams tries to land a knee to the body but he is off balance and Oliveira avoids it.
Adams is looking to score with knees to the body. Maybe he'll change it up and go body then head. Oliveira is defending well for now.
Oliveira is trying to trip Adams. He has hold of a leg but Adams is hopping around, keeping his balance for the moment. Oliveira persists though and gets the takedown into guard.
Adams wants to get back to his feet but he's too absorbed in his own little project and Oliveira manages to pass to side control.
That's one minute gone in the round.
Oliveira is taking a breather. Adams says something to him but it's hard to make out. Perhaps he's telling him to get on with it and actually do something.
Oliveira is looking for a kimura but Adams is holding onto that half guard position, so it's hard for Oliveira to get the leverage.
Oliveira maintaining the dominant position here and is working for a kimura. He's locked it up! Adams could be in real trouble here! He's trying to wriggle out but Oliveira has cracked it and Adams is screaming in pain - he's tapped out! Great finish by Oliveira!
Ladies and gentlemen, after 1:52 of round 3, we have a winner by way of Submission (Kimura). Marlon Oliveira!
Marlon Oliveira was full of energy after the big win and talked about how he thinks he can do big things in this sport. The crowd were appreciative of his determination to succeed.
|
|
|
|
|
|
|
|
|
|
|
|
|
|
|
|
|
|
|
|
|
|
|
| S |
C
A |
G |
S |
C
B |
G |
|
S |
C |
G |
|
energy
A | B |
|
hype
A | B |
|
pop
A | B |
|
mgr
A | B |
|
FIGHT
RATING
37% |
|
|
|
|
|
|
|
|
|
|

