 |
Madness Clown Chaos 15 PBP Commentary |
Undercard bout
|
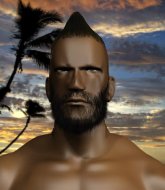
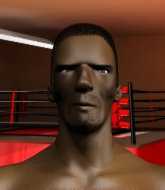
Coming up we have a welterweight MMA rules bout between Terry Manzsfield (ranked 24898 p4p, 601 weight class) and Tony Chapo (ranked 24956 p4p, 607 weight class). Chapo is bobbing his head along to his entrance song: We own it. Both fighters look fresh as a daisy as they make their way towards the cage.
 |
|
 |
| 183 cm
19
177 lbs
1 - 2 - 0 |
|
180 cm
20
180 lbs
2 - 3 - 0 |
BJJ Purple Belt
Solid boxing
Cuts easily |
|
BJJ White Belt
Decent boxing
Tends to cut |
|
| |
|
Ladies and gentlemen. This fight is 3 rounds, in the welterweight division.
Introducing the fighter to my left, fighting out of the red corner.
With a record of
1 - 2 - 0, fighting out of Sydney, Terry Manzsfield!
And introducing the fighter to my right, fighting out of the blue corner.
With a record of
2 - 3 - 0, fighting out of Sydney, Tony Chapo!
The judges for this bout are Bruno Lombardi, Steve Montenegro and Lou da Vinci.

The bell rings for round one and we are underway!
Manzsfield moves into range and connects with a jab.
Manzsfield misses with a body shot.
Chapo takes one on the chin but seems OK.
Manzsfield misses the jab.
Terry Manzsfield seems to be the more aggressive standup fighter in this bout.
Chapo throws the kick towards the body but Manzsfield avoids it.
Manzsfield fails to land with the punch combination there - jab, cross, hook, miss, miss, miss.
Chapo slips under a jab from Manzsfield.
Chapo lets it all go there with a big combo counter but none of the punches connected.
Manzsfield connects with a slap. Keep your fist closed son.
Chapo misses with a body shot. Nice footwork from Manzsfield.
Manzsfield fakes high and swings low for a body shot but Chapo manages to avoid it.
A cross from Manzsfield lands.
Chapo on the wrong end of a nice jab.
Chapo connects with a body shot that sends Manzsfield's belly button to the back.
The fans in attendance giving it up for the two fighters, who have really let it all hang out in the last minute or so!
Chapo fakes with the hands and throws a leg kick but Manzsfield is out of range.
Chapo motions for Manzsfield to come forward. Chapo throws a leg kick but it misses it's target.
Manzsfield showing good head movement there, avoiding the strikes from Chapo.
A punch combination from Manzsfield misses.
Manzsfield scores with a one two! Chapo had his feet all tangled up there and couldn't avoid the strikes.
Manzsfield looks to have improved his striking defense since last time we saw him fight.
Chapo throws a half hearted mid kick.
An attempted straight right counter from Manzsfield misses the target.
Manzsfield scores with a nice right hand.
Manzsfield tests Chapo's chin there with a solid looking shot.

That's one minute gone in the round.
Manzsfield misses with a hook.
Nice takedown defense from Chapo. No joy for Manzsfield on that attempt.
Manzsfield throws a combination that misses
and Chapo counters with a series of strikes. Manzsfield will be more careful next time no doubt.
Manzsfield misses with a double jab.
Despite the aggression on Chapo's face he doesn't fully commit to the counter.
Manzsfield is breathing heavily.
Chapo fakes high and swings low for a body shot but Manzsfield manages to avoid it.
Chapo fakes a head shot and lands one to the body.
Manzsfield avoids the body shot from Chapo.
This fight brought to you by 5M nutrition - it's mmmmm tasty. Nice jab by Manzsfield.
Manzsfield swings wildly with a couple of big hooks
and Chapo counters with a three punch combo that has Manzsfield backing up. Manzsfield nods at Chapo to acknowledge the strikes.
Chapo throws a head kick but Manzsfield moves out of range.
Wooooo! Give it up for these two warriors! They are putting on a show!
Chapo tries to bum rush Manzsfield with a series of wild strikes but Manzsfield uses good footwork to avoid the assault.
Chapo throws a body kick but he wasn't in range.
Manzsfield throws an uppercut from half a mile away. Chapo sees it coming and avoids it easily.
Chapo is throwing a lot of body shots here, looking to wear down Manzsfield rather than just go for the knockout.
Chapo throws a two punch combo that lands nicely.

It looks like Terry Manzsfield has been cut.
Wow, both these guys are really going for it!
Chapo takes an uppercut right on the jaw but it doesn't phase him.
Chapo cracks Manzsfield's jaw with two stiff jabs then ducks low and throws a soul-severing right uppercut to the mouth!! Manzsfield slumps to the ground with blood on his lips. The referee steps in before Chapo can do further damage! This one is done, son!
Ladies and gentlemen, after 1:55 of round 1, we have a winner by way of KO (Punch). Tony Chapo!
After winning the bout, Tony Chapo thanked all his fans and promised he'd do even better in his next fight. The crowd seemed to love his humility.
|
|
|
|
|
|
|
|
|
|
|
|
|
|
|
|
|
|
|
|
|
|
|
| S |
C
A |
G |
S |
C
B |
G |
|
S |
C |
G |
|
energy
A | B |
|
hype
A | B |
|
pop
A | B |
|
mgr
A | B |
|
FIGHT
RATING
82% |
|
|
|
|
|
|
|
Undercard bout
|
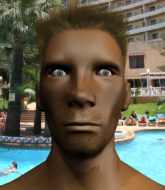
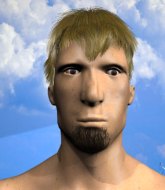
Coming up we have a heavyweight MMA rules bout between Mitch Rattlesnake (ranked 7128 p4p, 454 weight class) and Arveids Skabene (ranked 24586 p4p, 482 weight class). These two fighters really are very evenly matched on the feet - it will be fascinating to see who can assert themselves in that aspect of the fight.
 |
|
 |
| 200 cm
19
250 lbs
1 - 2 - 0 |
|
202 cm
23
260 lbs
3 - 3 - 0 |
BJJ White Belt
Solid boxing
Big right hand |
|
BJJ Blue Belt
Solid Muay Thai
Solid chin |
|
| |
|
Ladies and gentlemen. This fight is 3 rounds, in the heavyweight division.
Introducing the fighter to my left, fighting out of the red corner.
With a record of
1 - 2 - 0, fighting out of Montreal, Mitch Rattlesnake!
And introducing the fighter to my right, fighting out of the blue corner.
With a record of
3 - 3 - 0, fighting out of Amsterdam, Arveids Skabene!
The judges for this bout are Alyssa Summers, Steve Montenegro and John Roberts.
The bell rings for round one and we are underway!
Rattlesnake scores with a three punch combo!

It looks like Arveids Skabene has been cut.
Rattlesnake lands an overhand right.
Rattlesnake stuffs a takedown. It's all about dictating where the fight takes place and Rattlesnake wants it to stay on the feet.
Rattlesnake is looking for a counter combo.
Arveids Skabene seems to be the more aggressive standup fighter in this bout.
Skabene goes for a double leg but Rattlesnake avoids the attempt and the two fighters end up clinched against the cage as Rattlesnake continues to drive forward.
Rattlesnake looks to land a combination but Skabene avoids it well.
Rattlesnake circles and sees the opportunity to plant his feet and throw a really nice straight left hand that drops Skabene to the canvas! Skabene doesn't know where he is but he's trying to survive - Rattlesnake keeps piling on the pressure and forces the referee to step in! This one is aaaaaall over!
Ladies and gentlemen, after 0:18 of round 1, we have a winner by way of TKO (Strikes). Mitch Rattlesnake!
A very excited looking Mitch Rattlesnake made sure he remembered to thank all the fans both in the arena and on the internet. He said all the coolest people spend all day on MMA websites, which got a big reaction.
|
|
|
|
|
|
|
|
|
|
|
|
|
|
|
|
|
|
|
|
|
|
|
| S |
C
A |
G |
S |
C
B |
G |
|
S |
C |
G |
|
energy
A | B |
|
hype
A | B |
|
pop
A | B |
|
mgr
A | B |
|
FIGHT
RATING
100% |
|
|
|
|
|
|
|
Undercard bout
|
Coming up we have a middleweight MMA rules bout between Michael Max (ranked 24900 p4p, 571 weight class) and Paul Boxaaja (ranked 4935 p4p, 471 weight class). Michael Max has the edge in experience - let's see if he can make that count tonight.
 |
|
 |
| 225 cm
25
190 lbs
1 - 3 - 0 |
|
185 cm
18
190 lbs
0 - 0 - 0 |
BJJ Blue Belt
Solid Muay Thai
Self confident |
|
BJJ White Belt
Excellent MT
Granite chin |
|
| |
|
Ladies and gentlemen. This fight is 3 rounds, in the middleweight division.
Introducing the fighter to my left, fighting out of the red corner.
With a record of
1 - 3 - 0, fighting out of London, Michael Max!
And introducing the fighter to my right, fighting out of the blue corner.
With a record of
0 - 0 - 0, fighting out of London, Paul Boxaaja!
The judges for this bout are John Kavanagh, John Roberts and Franklyn Lucas.
The bell rings for round one and we are underway!
Boxaaja defends well against a solid takedown attempt from Max.
Boxaaja throws a predictable looking body shot
and Max counters with a nice kick to the body.
Max keeping a good distance there, avoiding the body shot.
Boxaaja throws an overhand right that lands on Max's shoulder, as Max tries to avoid the shot.
Boxaaja lands a head shot.

Max rushes Boxaaja and pushes him back against the cage in a clinch.
Max with an attempt at a knee that misses.

Max manages to break the clinch.
Boxaaja just misses with a punch to the body.
Max appears to be looking for a big counter.
Boxaaja lands a nice looking body shot.
We've had a slow start to the round here - hopefully the action picks up.
Boxaaja scores with a crisp jab that stopped Max in his tracks.
Boxaaja scores with a reasonable looking shot to the body. Max doesn't seem bothered though.
Donk. Boxaaja catches Max right on the button with a cross.
Boxaaja is throwing a lot of body shots here, looking to wear down Max rather than just go for the knockout.
This is a great period of action - very entertaining stuff!
Boxaaja fakes high and swings low for a body shot but Max manages to avoid it.
That's one minute gone in the round.
Boxaaja misses the jab.
Paul Boxaaja is looking to keep the fight on the feet at all costs.
Max takes one on the chin but keeps coming.

Max is rocked!
Max seems to be squinting his left eye. Perhaps he got a poke in that previous exchange. Boxaaja shows no mercy and swarms him with a barage of strikes! Max is backing up but Boxaaja catches him with a final right hook that drops him! Max covers up and the referee steps in to end the fight! Boxaaja Jumps to his feet and flashes his guns to the crowd. Oh yeah, baby! How'd you like them apples?!
Ladies and gentlemen, after 1:19 of round 1, we have a winner by way of TKO (Strikes). Paul Boxaaja!
|
|
|
|
|
|
|
|
|
|
|
|
|
|
|
|
|
|
|
|
|
|
|
| S |
C
A |
G |
S |
C
B |
G |
|
S |
C |
G |
|
energy
A | B |
|
hype
A | B |
|
pop
A | B |
|
mgr
A | B |
|
FIGHT
RATING
59% |
|
|
|
|
|
|
|
Undercard bout
|
Coming up we have a featherweight MMA rules bout between Jack Martins (ranked 7286 p4p, 466 weight class) and Maycon Ninja (ranked 4848 p4p, 394 weight class). Jack Martins has a significant reach advantage - let's see if he can make it count.
 |
|
 |
| 185 cm
26
147 lbs
1 - 3 - 0 |
|
171 cm
26
145 lbs
1 - 1 - 0 |
BJJ White Belt
Solid boxing
Very quick |
|
BJJ Purple Belt
Brawler
Solid chin |
|
| |
|
Ladies and gentlemen. This fight is 3 rounds, in the featherweight division.
Introducing the fighter to my left, fighting out of the red corner.
With a record of
1 - 3 - 0, fighting out of Las Vegas, Jack Martins!
And introducing the fighter to my right, fighting out of the blue corner.
With a record of
1 - 1 - 0, fighting out of Rio de Janeiro, Maycon Ninja!
The judges for this bout are Anthony Taglia, John Roberts and Dean Styles.
The bell rings for round one and we are underway!
An inside leg kick lands from Ninja.
Maycon Ninja seems to be the more aggressive standup fighter in this bout.
Martins throws out a powerful jab.
Martins listening to his corner there, landing a nice uppercut.
Martins lands with a cross.
Martins is using his reach advantage well here, landing the more effective single shots from range.
Ninja shoots in for a double leg but Martins sprawls well. That's going to sap some energy.
Martins swung with a counter right hand that didn't connect.
Ninja looks frustrated there after his takedown attempt is stuffed easily.
It looked like Martins was trying to counter with a body shot coming off that last attack from Ninja.
Ninja throws a body kick despite being completely out of range
enabling Martins to counter with a crisp jab.
Ninja gets his takedown attempt stuffed easily
and Martins counters with a left to the body.
Jack Martins has stuffed three takedown attempts in the round now. That's going to take a lot out of Maycon Ninja.
Ninja has his takedown stuffed
and Martins counters with a lovely shot to the body.
Ninja misses with a takedown attempt
and Martins cracks him with a counter punch right on the button.
Martins really does look like a pencil wearing a pair of gloves. Let's hope he has a gameplan to suit that ridiculous body shape.
That's one minute gone in the round.
Martins smiles there as he lands a nice right hand right on the button.
Martins scores with a jab to the head.
Martins lands a slapping body shot.
Martins throws a shot to the body.
Martins lands a right hook to the body.
Ninja throws a sloppy head kick
and Martins counters nicely by changing levels and landing a hook to the body.
Ninja takes a shot to the body in his stride.
Nice sprawl there from Martins as Ninja shoots in.
A little feinted left hand from Martins on the counter but he doesn't commit to it.
Boom, another hit is landed. "You're gunna get knocked out" taunts Martins, as that shot connected.
Martins stuffs a takedown. It's all about dictating where the fight takes place and Martins wants it to stay on the feet.
Martins was looking to counter that move with a punch but didn't quite pull the trigger.
The crowd are loving this. Great action here.
Ninja showing good head movement there, avoiding the strikes from Martins.
Martins looks to be in better condition than last time we saw him fight. Obviously he's been working hard on his cardio.

That's two minutes gone in the round.
Martins uses good footwork to get in and out and land a nice right hand before Ninja has time to react.
Ninja has his takedown stuffed
and Martins counters nicely by changing levels and landing a hook to the body.
Ninja gets his takedown attempt stuffed easily
and Martins counters with a nice uppercut.
Ninja takes an uppercut right on the jaw but it doesn't phase him.
Ninja has a takedown stuffed.
Martins is using his height advantage well here, landing a good percentage of his punches.
Ninja walks into a jab.

That's three minutes gone in the round.
Ninja gets his takedown attempt stuffed easily
and Martins counters with a crisp hook to the side of the head.
Martins connects with a single shot there.
Ninja on the wrong end of an overhand right that came out of nowhere.
Ninja misses with a takedown
enabling Martins to counter with a crisp jab.
Martins scores with a one two! Ninja had his feet all tangled up there and couldn't avoid the strikes.
Ninja is looking to clinch.
Ninja misses with a takedown attempt
and Ninja takes a counter punch right on the button for his troubles.
Martins with a body punch. A glancing blow.
Ninja with a poor takedown
and Martins counters with a nice uppercut.
Ninja looks winded!

That's four minutes gone in the round.
We've seen a great period of action over the last minute or so - credit to both fighters for going all out!
Martins changes levels and scores with a jab to the body.
Ninja drops his hands and takes a jab to the jaw for his troubles.
Martins lands with a nice body punch.
Martins comes forward and lands a shot to the body, then darts back out of range.
Martins throws a shot to the body.
Ninja takes a body punch but keeps moving.
Ninja ducks right into an uppercut from Martins.
Ninja misses with a takedown
enabling Martins to counter with a crisp jab.
Ninja throws a head kick but Martins moves out of range.
Martins connects with the punch.
And thats the end of the round the fighters go back to their corners.
Jack Martins dominated that round.
Well, the break between rounds is over. Let's get back to the scrappin!

Martins throws a series of strikes that have Ninja backpedaling.
Ninja takes a jab on the nose there. A little bit of blood seems to be coming out. Hopefully that won't affect his breathing.
Ninja shoots in but doesn't get the takedown
and Martins counters with a quick right hand to the jaw.
Martins takes a swing at Ninja's ribcage but misses.
Ninja doesn't succeed with the takedown
and Martins counters with a crisp hook to the side of the head.
Maycon Ninja is looking to throw some combinations by the looks of things.
Ninja misses with a takedown
and Martins connects with a straight left hand counter down the middle.
Jack Martins has stuffed three takedown attempts in the round now. That's going to take a lot out of Maycon Ninja.
We've had a slow start to the round here - hopefully the action picks up.
Martins connects with a body shot that sends Ninja's belly button to the back.
Ninja gets cracked there but stands up to it.
Martins catches Ninja with a nice straight right. He seems pissed - ooooh, it's on now! On like donkey kong!
That's one minute gone in the round.
Martins lands a nice shot to the body.
Ninja dodges the punch combination from Martins.
Ninja is looking for the big counter here.
Martins is really dominating this fight. Is there anything that Ninja can do to turn this around?
Martins scores with a sloppy punch to the body. Not much technique there but it did the business.
Martins scores with a nice head shot.
Good shot there by Martins.
Ninja shoots in but no luck this time.
Martins appears to be looking for a big counter.
Martins displaying good standup as he scores with a three punch combination.

Ninja is rocked!
Martins throws a monster overhand right that drops Ninja! Martins follows up with more strikes from mount and the fight is all over!
Ladies and gentlemen, after 2:57 of round 2, we have a winner by way of TKO (Strikes). Jack Martins!
An out of breath Jack Martins thanked his loyal fans in his post fight interview, giving them credit for his success over the course of his career.
|
|
|
|
|
|
|
|
|
|
|
|
|
|
|
|
|
|
|
|
|
|
|
| S |
C
A |
G |
S |
C
B |
G |
|
S |
C |
G |
|
energy
A | B |
|
hype
A | B |
|
pop
A | B |
|
mgr
A | B |
|
FIGHT
RATING
61% |
|
|
|
|
|
|
|
Undercard bout
|
Coming up we have a welterweight MMA rules bout between Simon Moleman (ranked 5696 p4p, 525 weight class) and Bartlomiej Burch (ranked 5069 p4p, 511 weight class). Simon Moleman had a look across the cage there at his opponent. He definitely means business
 |
|
 |
| 169 cm
19
166 lbs
2 - 3 - 0 |
|
196 cm
19
179 lbs
2 - 3 - 0 |
Good takedowns
Excellent MT
KO power |
|
BJJ White Belt
Brawler
Granite chin |
|
| |
|
Ladies and gentlemen. This fight is 3 rounds, in the welterweight division.
Introducing the fighter to my left, fighting out of the red corner.
With a record of
2 - 3 - 0, fighting out of London, Simon Moleman!
And introducing the fighter to my right, fighting out of the blue corner.
With a record of
2 - 3 - 0, fighting out of Las Vegas, Bartlomiej Burch!
The judges for this bout are Jonathan Paton, Eddie Farnsworth and Bruno Lombardi.
The bell rings for round one and we are underway!
Burch displaying good standup as he scores with a three punch combination.
It looks like Simon Moleman has been cut.
Burch looks more muscular than last time we saw him. He must have been on the weights.
Burch swats away the attempt to clinch by Moleman.
Burch goes for a spinning back kick but it misses.
Simon Moleman seems to be the more aggressive standup fighter in this bout.
Burch avoids the clinch attempt nicely.
Burch circles away from the clinch attempt.
Moleman tries to clinch up against the cage, rushing in to close the distance. Burch manages to break the clinch and circles back to the middle of the mat.
Moleman uses some good footwork to avoid the body shot by Burch.
A little feinted left hand from Moleman on the counter but he doesn't commit to it.
Moleman tries to clinch up.
Burch throws a couple of head shots and lands with the final one - a decent hook, which struck Moleman on the side of the head.
Burch throws a wild combination but nothing lands.
Burch throws a series of punches but Moleman moves out of range.
Moleman is looking to clinch but Burch is avoiding it.
Moleman wants to clinch.
Moleman lands with a straight right. Burch didn't see that one coming.
Nice straight punches there by Moleman. You know Roy Jones Jr respects the hands of Moleman.
Wooooo! Give it up for these two warriors! They are putting on a show!
Moleman is looking to take this fight into the clinch.
Moleman is looking to clinch but Burch is avoiding it.
That's one minute gone in the round.
Moleman avoids a punch combination nicely.
Moleman tries to clinch up but Burch circles away and keeps his distance.
Moleman catches Burch with a nice straight right. He seems pissed - ooooh, it's on now! On like donkey kong!
Burch avoids the clinch attempt nicely.
A chopping leg kick lands by Burch.
Moleman clinches up with Burch and pushes him back against the cage.
Burch letting Moleman take a breather here.
Moleman lands a shoulder strike.
A hook to the body from Moleman.
A shot in the inside from Moleman.
Moleman is looking to control Burch's arms but Burch gets an underhook and turns him. Now Moleman has his back to the cage.
Moleman working aggressively here.
Burch blocks an uppercut.
Burch looks like he'd prefer to be striking at range right now.
Moleman misses with a shot to the kidneys.
That's two minutes gone in the round.
Moleman taking a breather.
Moleman tries to stall but Burch uses the opportunity to gain a better position.
Burch wants to break free. God knows he wants to breaaaak freeee.
Moleman throws a punch but it's blocked by Burch.
Burch blocks a couple of punches on the inside.
Burch takes a shot to the head.
The crowd are loving this. Great action here.

Burch gets double underhooks and manages to take the fight to the ground.
Moleman trying to control the position.
Moleman looks to be in better condition than last time we saw him fight. Obviously he's been working hard on his cardio.
Burch looking to control the position here, rather than advance.
Moleman looking to sweep here. No luck so far.
That's three minutes gone in the round.
Moleman not looking particularly offensive just at the moment.
Burch lands a couple of digs.
Moleman trying to keep a closed guard but Burch is proving a slippery customer.
The referee is asking the fighters to pick up the pace.
Moleman being controlled here, momentarily.

The referee decides to stand the fighters back up.
Burch is a painfully thin specimen of a man. You do wonder whether a good body kick would snap him clean in two.
That's four minutes gone in the round.
There's not a lot going on here and the crowd are letting the fighters know they're not willing to tolerate a lack of action.
Moleman tries to clinch but Burch is having none of it.
Burch misses with a body kick.
Burch lands a two punch combo.
Burch takes a swing at Moleman's ribcage but misses.
Moleman swung with a counter right hand that didn't connect.
No joy there for Burch, who threw a few shots but didn't land.
Moleman tries to close the distance and clinch up but Burch swats him away and circles back towards the center.
Burch keeps the fight on the outside.
Burch throws a hook to the body but it doesn't connect.
Burch misses with a wild combination.
Burch misses with a jab and misses with a cross straight after too.
Moleman wants to clinch up but Burch keeps it at a distance.
Burch tries to score with a leg kick but it misses it's target.
Moleman seem to be loading up, looking for a big counter.
Moleman tries to clinch but is not successful on this occasion.
Moleman tries to close the distance and clinch but Burch swats him to one side with an open hand palm strike and circles away.
Burch unleashes a big counter combination but Moleman bobs and weaves and avoids any damage.
Moleman tries to clinch up against the cage, rushing in to close the distance. Burch manages to break the clinch and circles back to the middle of the mat.
No joy there for Burch, who threw a few shots but didn't land.
Moleman wants to clinch.
And thats the end of the round the fighters go back to their corners.
Bartlomiej Burch dominated that round.
The cut man is working on Simon Moleman's cut.
That's time! Moleman's corner gives him a slap on the ass as he gets ready to fight.
Burch circles away from the clinch attempt.
Moleman tries to clinch up but Burch circles away and keeps his distance.
Moleman fails with an attempt to clinch.
Moleman slips a jab and a cross from Burch.
Burch circles away from the clinch attempt.
Burch circles away from the clinch attempt.
Wow, both these guys are really going for it!
Burch throws a body punch but Moleman moves out of range.
Burch has been the more effective fighter overall so far.
Moleman fails to land with a series of punches.
Moleman tries to clinch but is not successful on this occasion.
The fight stays on the outside here - Moleman looks like he's thinking about clinching though.
Moleman tries to clinch but fails miserably
and Burch counters with a left to the body.
Burch throws out a leg kick but Moleman moves out of range and Burch only half commits.
Moleman moving in and out of range nicely, whilst landing the scoring shot.
We've had a slow start to the round here - hopefully the action picks up.
Some wild striking there from Burch.
Burch looking to throw a kick but he's pulled out of it.
Moleman looks to land a combination but Burch avoids it well.
Burch ducks low and lands a nice hook to the body of his opponent.
Moleman fails with an attempt to clinch.
Burch now looks to counter with a shot at the body.
Moleman tries to close the distance and clinch up against the cage but Burch paws at him with a jab and circles away.
That's one minute gone in the round.
Burch dips down and scores with a jab to the body.
Burch circles away from the clinch attempt.
Moleman blocks the body kick.
Burch keeps the fight on the outside.
Moleman tries to close the distance and clinch but Burch swats him to one side with an open hand palm strike and circles away.
Burch is throwing a lot of body shots here, looking to wear down Moleman rather than just go for the knockout.
Moleman moves in looking to clinch but Burch pushes him off.
Moleman slips a jab and a cross from Burch.
Moleman fails to land with the punch combination there - jab, cross, hook, miss, miss, miss.
Burch throws a jab to the body, straight down the pipe. Boom. That sent Moleman stumbling backwards but he manages to regain his composure quickly.
A nice combination there by Burch.
Moleman tries to close the distance and clinch up but Burch swats him away and circles back towards the center.
Burch is clearly trying to counter these attacks from Moleman with a body shot.
Moleman moves in looking to clinch but Burch pushes him off.
Moleman wants to clinch up but Burch keeps it at a distance.
Burch doesn't fully commit to the body shot counter.
Burch throws a series of punches but Moleman moves out of range.
Moleman swung with a counter right hand that didn't connect.
Bartlomiej Burch seems to be getting the better of the standup.
Moleman tries to clinch but is not successful on this occasion.
Moleman moves out of range of the body kick.
Moleman doesn't manage to clinch there - Burch circles away.
Fantastic stuff here - a very entertaining period of action, which has drawn cheers from the crowd.
Moleman tries to clinch but is not successful on this occasion.
Burch misses with a wild body shot.
That's two minutes gone in the round.
Moleman doesn't manage to clinch there - Burch circles away.
A punch combination from Burch misses.
Burch will need to tighten up his combinations if he doesn't want to gas himself out, swinging at thin air.
Moleman tries to clinch up but Burch circles away and keeps his distance.
Burch rushes forward with a series of wild hooks but Moleman moves out of range and avoids them all easily.
Moleman fails with an attempt to clinch.
Burch misses with a jab and misses with a cross straight after too.
Moleman is looking to clinch.
Burch looks to land a combination but Moleman avoids it well.
Moleman tries to clinch but Burch moves out of range.
Moleman tries to clinch up.
Burch keeps the fight on the outside.
Moleman wants to clinch.
Burch moving in and out of range nicely, whilst landing the scoring shot.
That's three minutes gone in the round.
Moleman wants to clinch up but Burch keeps it at a distance.
Burch looks to score with a combo but nothing lands.
Burch throws a series of punches but Moleman avoids them all with ease.
Moleman is looking to take this fight into the clinch.
Burch takes an uppercut right on the jaw but it doesn't phase him.
Burch lunges in with swinging rights and lefts but Moleman circles away quickly and effectively.
Moleman connects with a lovely jab that went straight through the gap between Burch's hands.
Moleman tries to clinch there but Burch circles away.
Moleman tries to clinch up against the cage, rushing in to close the distance. Burch manages to break the clinch and circles back to the middle of the mat.
Moleman wants to clinch.
Good shot there by Burch.
Burch throws a series of punches but Moleman moves out of range.
Moleman tries to close the distance and clinch but Burch swats him to one side with an open hand palm strike and circles away.
That's four minutes gone in the round.
Moleman fakes with an overhand right and moves in to clinch with Burch, pushing him back against the cage.
Burch blocks an uppercut.
Burch blocking some punches.
Wooooo! Give it up for these two warriors! They are putting on a show!
Burch blocks an uppercut.
Moleman misses with some punches.
Moleman is working Burch over against the cage.
A head punch blocked on the inside by Burch.
Moleman lands a short shot on the inside that snaps the head of Burch backwards.
A nice right hand lands inside from Moleman.
A short left from Moleman.
Burch prevents a body shot from Moleman.
Moleman working aggressively here.
Good anti-grappling being displayed by Burch as Moleman tries to tie him up.
Moleman tried to land a shot to the body but connects with Burch's elbow.
And thats the end of the round the fighters go back to their corners.
Bartlomiej Burch showed his class in that round. I'd imagine he'll take it on all the scorecards.
The cut man is working on Simon Moleman's cut.
That's time! Moleman's corner gives him a slap on the ass as he gets ready to fight. This is the final round!

Burch jabbing away but nothing is landing.
Moleman throws a nice hook to the body that draws an oooh from the crowd.
The fight stays on the outside here - Moleman looks like he's thinking about clinching though.
Burch throws a series of punches but Moleman avoids them all with ease.
Bartlomiej Burch is looking to throw some combinations by the looks of things.
A slow jab from Burch misses its intended target.
Moleman is looking to clinch.
Moleman misses with a jab, cross combination.
Moleman tries to clinch but is not successful on this occasion.
Moleman is looking to take this fight into the clinch.
Moleman tries to clinch but Burch moves out of range.
Burch is looking for the big counter here.
Moleman moves in looking to clinch but Burch pushes him off.
Moleman wants to clinch.
We've had a slow start to the round here - hopefully the action picks up.
Moleman wants to clinch up but Burch keeps it at a distance.
Burch closes the distance and lands a one-two.
Burch throws a wild combination but nothing lands.
Moleman wants to clinch.
That's one minute gone in the round.
Moleman wants to clinch.
Burch misses with a jab, cross combination.
Burch takes an uppercut right on the button but keeps his composure.
Moleman tries to clinch but Burch is having none of it.
Burch swings for the body but Moleman moves out of range.
Burch swats away the attempt to clinch by Moleman.
Moleman is looking to clinch but Burch is avoiding it.
Moleman tries to clinch but Burch is having none of it.
Moleman tries to clinch up against the cage, rushing in to close the distance. Burch manages to break the clinch and circles back to the middle of the mat.
Moleman tries to clinch up but Burch circles away and keeps his distance.
Moleman has managed to clinch.
Moleman misses with a hook to the ribs.
Moleman has a couple of punches blocked by Burch.
That's two minutes gone in the round.
Moleman misses with the head strike.
Burch wants to get back to striking at distance but Moleman won't allow it.
A head punch on the inside from Moleman fails to land.
Moleman misses with a shot to the kidneys.
Moleman lands a shoulder strike that jolts his opponent's head backwards.
A quick uppercut on the inside from Moleman.
Moleman swings wildly with an uppercut but Burch uses good head movement to avoid it.
Moleman tries to work over Burch's body with a swooping hook but it only glances the target.
Moleman misses with a short punch on the inside.
An uppercut on the inside fails to land for Moleman.
Burch blocking some punches.
We've seen a great period of action over the last minute or so - credit to both fighters for going all out!
Burch blocking some punches.
Moleman goes for a body shot but it's blocked.
That's three minutes gone in the round.
Burch working hard to break the clinch.
A short uppercut from Moleman.
Moleman swings away with an uppercut that misses.
Moleman is working Burch over against the cage.
Burch is trying to break the clinch but Moleman has him pressed against the cage.
Simon Moleman has stepped it up - he knows he needs a finish here!
Moleman struggles to land a body shot inside as Burch controls his hands.
Burch blocks a couple of punches on the inside.
Moleman misses with a short punch on the inside.
Both guys are working to get underhooks.
Moleman misses with a body punch.
Moleman lands a right uppercut that snaps the head of Burch backwards.
Moleman tries to land a shot to the body but it's blocked.
Burch wants to get back to striking at distance but Moleman won't allow it.
That's four minutes gone in the round.
A head punch on the inside from Moleman fails to land.
Moleman misses with a punch on the inside.
Moleman fails to land with a short punch on the inside.
Moleman has a couple of punches blocked by Burch.
Burch prevents a body shot from Moleman.
Burch is trying to push Moleman away but Moleman has him pressed against the cage, so he's going nowhere.
Moleman tries a shoulder strike but it doesn't do any damage.
Burch has had enough of the clinch and is looking to separate.
Burch is looking to break free of the clinch but Moleman has double underhooks.
Moleman lands with a light punch inside.
Burch has had enough of the clinch but Moleman keeps him there for the moment.
Moleman stalling against the cage.
Moleman misses with a punch on the inside.
And that's the end of the fight!
Simon Moleman showed his dominance in that final round.
I think Burch has won this one but let's see whether the judges agree with me. Over to the ring announcer for the scorecards.
Ladies and gentlemen, after 3 rounds of action, we go to the scorecards for a decision.
Judge Jonathan Paton scores the fight 28:29
Judge Eddie Farnsworth scores the fight 28:29
Judge Bruno Lombardi scores the fight 28:29
In favor of your winner, by unanimous decision... Bartlomiej Burch!
|
|
|
|
|
|
|
|
|
|
|
|
|
|
|
|
|
|
|
|
|
|
|
| S |
C
A |
G |
S |
C
B |
G |
|
S |
C |
G |
|
energy
A | B |
|
hype
A | B |
|
pop
A | B |
|
mgr
A | B |
|
FIGHT
RATING
52% |
|
|
|
|
|
|
|
Undercard bout
|
Coming up we have a heavyweight MMA rules bout between Bear Claw (ranked 3958 p4p, 347 weight class) and Sherlock Holmes (ranked 3593 p4p, 326 weight class). Both fighters look fresh as a daisy as they make their way towards the cage.
 |
|
 |
| 203 cm
26
267 lbs
3 - 3 - 0 |
|
190 cm
26
240 lbs
4 - 3 - 0 |
BJJ Blue Belt
Excellent MT
KO power |
|
BJJ Purple Belt
Basic striking
Solid chin |
|
| |
|
Ladies and gentlemen. This fight is 3 rounds, in the heavyweight division.
Introducing the fighter to my left, fighting out of the red corner.
With a record of
3 - 3 - 0, fighting out of Montreal, Bear Claw!
And introducing the fighter to my right, fighting out of the blue corner.
With a record of
4 - 3 - 0, fighting out of London, Sherlock Holmes!
The judges for this bout are Chad Campbell, Eddie Farnsworth and Columbo Gatti.
The bell rings for round one and we are underway!

Holmes clinches up with Claw and pushes him back against the cage.
A bit of stalling here from Claw.
Holmes takes an elbow to the forehead.
It looks like Sherlock Holmes has been cut.
Good anti-grappling being displayed by Holmes as Claw tries to tie him up.
Holmes slowing the pace effectively.
Holmes tries for a takedown but Claw manages to get underhooks.
Holmes takes an elbow to the forehead.
Claw putting his Muay Thai to good use. He has Holmes in a tight clinch and is doing some damage with knees to the body.
Holmes wants a takedown but no success here.
Holmes on the defensive, avoiding the knees to the body.
Claw lands a good knee to the midsection. Holmes won't want to take too many of those.
Holmes looks winded!
Holmes tries for a takedown but Claw manages to get underhooks.
Bear Claw has stuffed three takedown attempts in the round now. That's going to take a lot out of Sherlock Holmes.
Holmes stalling against the cage.
We've had a slow start to the round here - hopefully the action picks up.
Claw has Holmes pushed against the cage.
Claw lands a hook that snaps the head of Holmes backwards.
Holmes has double underhooks and is working for a body lock takedown. He's got it. The fighters land in half guard but Claw regains guard immediately.
Claw has improved his flexibility recently so we will have to see if he can use that to his advantage.
This has been an exciting period of action!
Claw wants to stand and escape but Holmes is having none of it.
The fighters are pressed up against the cage, both looking to find a bit of space to work.
That's one minute gone in the round.
Holmes is looking to work some ground and pound but Claw has wrist control.

Claw has his feet on Holmes's hips. He pushes off and gets to his feet. Nice work.
Claw moves into the clinch.
Holmes has Claw pressed up against the cage and is working for takedown. Claw manages to improve position though and keeps the fight standing.
Claw unloads a knee to the mid-section.
Claw pressing his opponent against the cage.
Holmes avoiding damage as Claw throws knees to the body.
Claw taking a breather.
Claw tries to land a knee to the body but he is off balance and Holmes avoids it.
Holmes avoids the elbow strike from Claw, against the cage.
Claw stops a takedown attempt from Holmes.
Claw tries a shoulder strike but it doesn't do any damage.
That's two minutes gone in the round.
Claw misses with a knee to the head.
Claw is defending well against a takedown attempt.
Claw stalling here - the referee won't stand for too much of that.
Claw leaning his opponent against the cage.
Claw is trying to stall.
Claw tries a body shot but Holmes blocks it.
Holmes is working for a takedown up against the cage. He can't get it on this occasion though.
Holmes blocks an elbow strike.
Holmes has dropped down and is looking to force the takedown but it's defended by Claw after a bit of a struggle.
Holmes tries for a takedown. No joy.
Holmes is trying to stall.
Claw tries a shoulder strike but it doesn't do any damage.
That's three minutes gone in the round.
Claw misses the knee to the body. Nice hip positioning from Holmes.
Holmes is trying to work for a single leg takedown but Claw pulls him back up using the underhooks.
Holmes is working for a takedown up against the cage. He can't get it on this occasion though.
Claw lands a knee to the head.
Holmes looking for a takedown.
Kneeeeees! The crowd are calling for knees to the body. Claw obliges.
Claw tries to land knees in the clinch but Holmes avoids the damage to the body.
Claw is looking to control Holmes's arms but Holmes gets an underhook and turns him. Now Claw has his back to the cage.
Claw doesn't land with the attempted body shot.
Claw tries to land a knee to the body but he is off balance and Holmes avoids it.
Holmes wants a takedown but no success here.
Claw lands a damaging elbow.
Holmes managing to block the knees to the body from Claw.
Holmes being controlled against the cage.
Good anti-grappling being displayed by Holmes as Claw tries to tie him up.
That's four minutes gone in the round.
Claw stalling in the clinch but Holmes improves position.
Claw taking a break, stalling in the clinch.
Holmes is clearly stalling here... Pick up the pace son.
Holmes has Claw pressed up against the cage and is working for takedown. Claw manages to improve position though and keeps the fight standing.
Claw tries to land a knee to the body but he is off balance and Holmes avoids it.
Holmes stalling.
Claw swings away with an uppercut that misses.
Claw lands a damaging elbow.
Holmes can't get the takedown.
A battle for position here, against the cage.
Both guys are working to get underhooks.
Good anti-grappling being displayed by Holmes as Claw tries to tie him up.
Claw can't seem to implement his control oriented gameplan at the moment. That's no bad thing of course, for those of us who want to see a good fight.
The ref breaks the fighters up, due to lack of action by Bear Claw.
Claw throws a quick inside leg kick.
And thats the end of the round the fighters go back to their corners.
Bear Claw dominated that round.
The cut man is working on Sherlock Holmes's cut.
The fighters get back to their feet, the hooter sounds and we're back to the action!
A punch combination from Claw misses.
Holmes clinches up with Claw and pushes him back against the cage.
A shot in the inside from Claw.
Both fighters working to control the clinch.
Holmes tries to score a body lock takedown but Claw shows good agility there to stay on his feet.
Claw misses with a shot to the kidneys.
Claw prevents the takedown attempt.
Claw misses with a body punch.
Claw trying to land knees to the body.
Holmes takes a knee to the side of the body.
Claw being controlled against the cage.
Claw using the Thai plumb to throw knees but Holmes has his back arched nicely, preventing the strike.
We've had a slow start to the round here - hopefully the action picks up.
Some stalling of biblical proportions here from Holmes.
Holmes wants a takedown.
Bear Claw has stuffed three takedown attempts in the round now. That's going to take a lot out of Sherlock Holmes.
Holmes is breathing heavily.
Claw misses with an elbow strike.
That's one minute gone in the round.
Claw scores with a knee to the head.
A real battle for position is taking place between these two warriors.
Holmes goes for a takedown in the clinch but Claw prevents it.
Claw is really dominating this fight. Is there anything that Holmes can do to turn this around?
Holmes looking to stall.
Claw prevents the takedown attempt.
Claw with an attempt at a knee that misses.
Claw's corner are urging him to control the action in the clinch for a moment, rather than mount any serious offense. I'm sure the crowd appreciate those instructions... not.
Claw prevents the takedown attempt.
Holmes has Claw pressed up against the cage and is working for takedown. Claw manages to improve position though and keeps the fight standing.
Holmes goes for a takedown in the clinch but Claw prevents it.
Claw misses with a knee strike.
Claw tries to land knees in the clinch but Holmes avoids the damage to the body.
That's two minutes gone in the round.
Holmes slowing the pace effectively.
Holmes wants a takedown.
Claw missing with knees to the body.
Claw unloads a knee to the mid-section. Holmes lets out a prehistoric sounding urrrrgh.
Holmes blocks a body shot from Claw.
Claw taking a breather.
Holmes looking for a takedown.
Nice elbow from Claw.
Holmes goes for a takedown attempt but Claw pushes him away and we're back to fighting at a distance.
Claw with a nice looking leg kick. You could hear that one land in a back row.
Holmes slips a jab and a cross from Claw.
Claw takes a swing at Holmes's ribcage but misses.
Claw forces Holmes back against the cage and clinches.
The crowd are loving this. Great action here.
Claw is working hard here but doesn't seem to be able to control effectively, up against the cage.
That's three minutes gone in the round.
Claw stalling against the cage.
Claw stalling in the clinch but Holmes improves position.
Claw lands a shoulder strike.
Claw gets underhooks to prevent Holmes's takedown attempt.
Holmes is working for a takedown up against the cage. He can't get it on this occasion though.
Holmes is working for takedown but Claw is calmly controlling the position for now.
Claw lands a glancing elbow in the clinch.
Good anti-grappling being displayed by Holmes as Claw tries to tie him up.
A right handed body shot lands from Claw.
A short uppercut from Claw.
Claw doesn't land with the attempted body shot.
Claw lands a glancing elbow in the clinch.
That has opened up Sherlock Holmes's cut even more.
Claw stops a takedown attempt from Holmes.
That's four minutes gone in the round.
Claw trying to stall but Holmes improves his position.
Claw stalling the fight.
Holmes blocking some punches.
A real battle for position is taking place between these two warriors.
Claw is stalling here.
The ref breaks the fighters up, due to lack of action by Bear Claw.
Holmes moves into the clinch successfully.
Holmes is working for takedown but Claw is calmly controlling the position for now.
Claw pressing his opponent against the cage.
Claw creates a bit of space for himself and sneaks an elbow through Holmes's defenses.
Claw unloads a knee to the mid-section. Holmes lets out a prehistoric sounding urrrrgh.
This has been an exciting period of action!
Holmes avoiding damage as Claw throws knees to the body.
Claw is trying to slow down the pace of the fight but Holmes is keeping busy.
Holmes on the defensive, avoiding the knees to the body.
And thats the end of the round the fighters go back to their corners.
Bear Claw dominated that second round.
The cut man is working on Sherlock Holmes's cut.
The fighters' corners scream their final instructions, as the referee calls time. Here we go, back to the action! This is the final round!
Holmes closes the distance and clinches.
Claw is trying to wear down his opponent with knees to the body.
Claw scores with an uppercut up the middle.
Holmes on the defensive, avoiding the knees to the body.
Holmes takes an elbow to the forehead.
Claw lands a nice knee to the body.
Claw tries to land knees in the clinch but Holmes avoids the damage to the body.
Holmes blocks a knee to the body. He'll have a nicely bruised forearm in the morning.
Claw is trying to wear down his opponent with knees to the body.
Claw is looking to score with knees to the body. Maybe he'll change it up and go body then head. Holmes is defending well for now.
Claw lands with a short shot to the head.
Claw softening up his opponent with strikes, against the cage.
Claw stalling in the clinch but Holmes improves position.
Claw tries a shoulder strike but it doesn't do any damage.
Bear Claw has scored more points in the clinch so far.
This has been an exciting period of action!
The referee is keeping an eye on Claw - much more stalling and he will separate the fighters.
Holmes takes a big intake of breath there - he's definitely tired.
Holmes is looking to take this one to the mat.
That's one minute gone in the round.
Claw trying to stall but Holmes improves his position.
Claw tries to land knees in the clinch but Holmes avoids the damage to the body.
Holmes avoiding damage as Claw throws knees to the body.
A battle for position here, against the cage.
Claw tries to land knees in the clinch but Holmes avoids the damage to the body.
Holmes goes for a takedown in the clinch but Claw prevents it.
Both fighters working to control the clinch.
The fighters are pressed against the cage, as the pace of the fight slows.
Claw landing knees to the body. They look like they could hurt.
Holmes drops down for a takedown but doesn't get it.
Bear Claw has stuffed three takedown attempts in the round now. That's going to take a lot out of Sherlock Holmes.
Claw trying to land knees to the body.
That's two minutes gone in the round.
With the fighters up against the cage, Claw throws an elbow but misses.
Holmes trying to stall but Claw improves his position.
Holmes has a body lock and is looking for a takedown. Claw is bouncing around trying to prevent the takedown and somehow he has indeed managed to stay on his feet.
Claw stops a takedown attempt from Holmes.
Holmes on the defensive, avoiding the knees to the body.
Claw is looking to score with knees to the body. Maybe he'll change it up and go body then head. Holmes is defending well for now.
Claw crunches a lovely knee into Holmes's ribcage.
Claw lands an elbow inside.
Claw controlling the action here for a moment.
Claw lands a nice uppercut.
Claw stalling in the clinch but Holmes improves position.
Claw digs a right hand underneath Holmes's ribcage. Holmes let out a lung full of air as it connected.
That's three minutes gone in the round.
Holmes blocks a punch to the side of the head.
Claw looking to slow down the pace here.
Holmes blocks a knee to the body. He'll have a nicely bruised forearm in the morning.
Holmes blocks a knee to the body. He'll have a nicely bruised forearm in the morning.
Kneeeeees! The crowd are calling for knees to the body. Claw obliges.
Claw working Holmes over with knees to the body.
Holmes avoiding damage as Claw throws knees to the body.
Claw lands a damaging elbow.
Claw looking to stall.
Holmes is working for takedown but Claw is calmly controlling the position for now.
Claw is stalling here.
Claw is looking to score with knees to the body. Maybe he'll change it up and go body then head. Holmes is defending well for now.
That's four minutes gone in the round.
Claw stalling against the cage.
The referee is keeping an eye on Holmes - much more stalling and he will separate the fighters.
Claw trying to land knees to the body.
Holmes blocks an elbow strike.
Holmes looking to slow down the pace here.
Claw tries a body shot but Holmes blocks it.
A real battle for position is taking place between these two warriors.
Claw tries to land knees in the clinch but Holmes avoids the damage to the body.
Holmes is working for a takedown up against the cage. He can't get it on this occasion though.
Claw stalling in the clinch but Holmes improves position.
Holmes goes for a takedown attempt but Claw pushes him away and we're back to fighting at a distance.
Sherlock Holmes has stepped it up - he knows he needs a finish here!
Bear Claw is fighting for a decision here - he's started to take the cautious approach.
Sherlock Holmes seems to be the more aggressive standup fighter in this bout.
Claw fakes the leg kick and cracks Holmes in the body.
And that's the end of the fight!
Bear Claw showed his dominance in that final round.
Well Claw has outscored his opponent in every aspect of the fight today. Only a scarily incompetent judge or two will keep him from a well deserved win... Over to the ring announcer for the scorecards.
Ladies and gentlemen, after 3 rounds of action, we go to the scorecards for a decision.
Judge Chad Campbell scores the fight 30:26
Judge Eddie Farnsworth scores the fight 30:26
Judge Columbo Gatti scores the fight 30:26
In favor of your winner, by unanimous decision... Bear Claw!
|
|
|
|
|
|
|
|
|
|
|
|
|
|
|
|
|
|
|
|
|
|
|
| S |
C
A |
G |
S |
C
B |
G |
|
S |
C |
G |
|
energy
A | B |
|
hype
A | B |
|
pop
A | B |
|
mgr
A | B |
|
FIGHT
RATING
44% |
|
|
|
|
|
|
|
Co-main event
|
Coming up we have a bantamweight MMA rules bout between Jon Bumperstein (ranked 2614 p4p, 153 weight class) and Qfc Tournament (ranked 3238 p4p, 183 weight class). Both fighter's entrance songs getting the crowd jumping here.
 |
|
 |
| 170 cm
26
135 lbs
4 - 1 - 0 |
|
225 cm
26
135 lbs
5 - 2 - 0 |
BJJ Purple Belt
Solid Muay Thai
Intelligent |
|
BJJ White Belt
Great elbows
Granite chin |
|
| |
|
Ladies and gentlemen. This fight is 3 rounds, in the bantamweight division.
Introducing the fighter to my left, fighting out of the red corner.
With a record of
4 - 1 - 0, fighting out of Montreal, Jon Bumperstein!
And introducing the fighter to my right, fighting out of the blue corner.
With a record of
5 - 2 - 0, fighting out of Sydney, Qfc Tournament!
The judges for this bout are Jorge Garcia, Columbo Gatti and Alyssa Summers.
The bell rings for round one and we are underway!
Tournament takes the fight into the clinch.
Bumperstein wants to break the clinch but can't.
Bumperstein takes an elbow to the forehead.
Nice elbow from Tournament.
Tournament lands an elbow that stopped Bumperstein in his tracks for a moment.
Tournament misses with an elbow over the top.
Tournament lands an elbow that stopped Bumperstein in his tracks for a moment.
With the fighters up against the cage, Tournament throws an elbow but misses.
Tournament lands an elbow just above Bumperstein 's eye.
Tournament lands a nice elbow.
Bumperstein working hard to break the clinch.
Bumperstein tries to take the fight to the ground by pulling guard but can't manage it.
Bumperstein looking for a takedown.
Bumperstein tries a shoulder strike but it doesn't do any damage.
Tournament lands an elbow just above Bumperstein 's eye.
Fantastic stuff here - a very entertaining period of action, which has drawn cheers from the crowd.
With the two fighters working up against the cage, Tournament just misses with a elbow thrown towards Bumperstein's brow.
Tournament gets an overhook and lands an elbow to the side of the head.
Bumperstein tries to pull guard but can't drag his opponent to the mat. Tournament just stands there and leans against the cage.
That's three failed takedown attempts in the round for Jon Bumperstein. That's going to take a lot out of him.

Bumperstein successfully pulls guard.
Tournament wants to stand and escape but instead Bumperstein has hit a sweep and he's now on top in guard.

We get told so often about how wrestlers don't like to be on their backs. Let's see if Tournament can do anything to dispel that myth.
Tournament wants to get back to his feet but he's too absorbed in his own little project and Bumperstein manages to pass to side control.
That's one minute gone in the round.

Bumperstein is working for submissions here but there's nothing on.
Tournament is staying active underneath Bumperstein, who seems content to just control the action from this position.
Bumperstein stops Tournament from getting back to his feet.
Bumperstein is trying a forearm choke
I don't think that's going to do much at this level of the game.
Tournament is a painfully thin specimen of a man. You do wonder whether a good body kick would snap him clean in two.
Bumperstein trying to control from half guard but Tournament is working away.
Bumperstein is trying to work for a kimura but Tournament is defending well.
Bumperstein seems very keen to just sit and control from half guard but Tournament does not like that idea so much and is remaining active off his back.
That's two minutes gone in the round.
Tournament is looking to escape.
The fighters are pressed up against the cage, both looking to find a bit of space to work.
Tournament is staying active underneath Bumperstein, who seems content to just control the action from this position.
Tournament wants to get back to his feet.
Bumperstein is trying to work for a kimura but Tournament is defending well.
Tournament is looking to get back to is feet but Bumperstein passes into side control.
Tournament is trying to stand back up. He's worked his way up against the cage but Bumperstein has just dragged him back down to the mat.
Tournament taking a bit of punishment here - Bumperstein scoring with strikes.
That's three minutes gone in the round.
Bumperstein throws a strike aimed at the side of Tournament's head but Tournament avoids it well.
Bumperstein takes a little break here. Tournament wants to take advantage but he is being controlled well.
Bumperstein wants to lay and pray for a moment but Tournament keeps working.
Bumperstein wants to work for a kimura but he's foiled early by Tournament, who protects the arm well.
Bumperstein wants to control but Tournament is keeping him busy.
Bumperstein tries for a kimura but Tournament is defending well.
Bumperstein working hard here to secure a kimura but he's not really in the right position for it.
That's four minutes gone in the round.
Bumperstein working hard here to secure a kimura but he's not really in the right position for it.
Tournament tries to escape but Bumperstein is in control.
Bumperstein tries for a kimura but Tournament is defending well.
Bumperstein is looking for a kimura. He might have it! No, Tournament has escaped the position, nice work there.
And thats the end of the round the fighters go back to their corners.
Jon Bumperstein dominated that round.
The fighters' corners scream their final instructions, as the referee calls time. Here we go, back to the action!
Bumperstein is looking to chop away at Tournament's legs.
Bumperstein misses with a half-hearted attempt at a head kick.
Tournament clinches with his opponent.
Bumperstein has Tournament pressed up against the cage and is working for takedown. Tournament manages to improve position though and keeps the fight standing.
Qfc Tournament seems to be working more effectively in the clinch in the fight so far.
Tournament pushes off and fires off an elbow that misses, before clinching up again, against the cage.
Bumperstein tries for a takedown. No joy.
Tournament throws an elbow but it's blocked.
Bumperstein is looking for a takedown.
That's three failed takedown attempts in the round for Jon Bumperstein. That's going to take a lot out of him.
Bumperstein blocks the elbow strike.
Bumperstein blocks an elbow strike.
With the two fighters working up against the cage, Tournament just misses with a elbow thrown towards Bumperstein's brow.
Bumperstein goes for a takedown in the clinch but Tournament prevents it.
Tournament throws an elbow but it's blocked.
We've had a slow start to the round here - hopefully the action picks up.
Tournament creates a bit of space for himself and sneaks an elbow through Bumperstein's defenses.
A frustrated look appears on Bumperstein's face as he tries to break the clinch.
Tournament prevents a takedown attempt there.
A nice glancing elbow lands by Tournament.
Tournament lands a nice elbow from the clinch.
Tournament lands a nice elbow from the clinch.
That's one minute gone in the round.
Bumperstein has dropped down and is looking to force the takedown but it's defended by Tournament after a bit of a struggle.
Tournament looks to throw an elbow but misses.
Bumperstein is working on a leg, looking for a takedown but Tournament is defending well.
Tournament lands an elbow just above Bumperstein 's eye.
Tournament throws a nice elbow but it doesn't land.
A nice glancing elbow lands by Tournament.
Bumperstein tries to work over Tournament's body with a swooping hook but it only glances the target.
Tournament lands an elbow inside.
Tournament lands an elbow inside that Bumperstein shrugs off.
Tournament is defending well against a takedown attempt.
Tournament lands a damaging elbow.
A nice glancing elbow lands by Tournament.
Tournament lands a glancing elbow in the clinch.
Tournament lands an elbow just above Bumperstein 's eye.
Wooooo! Give it up for these two warriors! They are putting on a show!
Bumperstein takes an elbow to the temple.
Tournament lands a damaging elbow.
Bumperstein is rocked!
Tournament creates a bit of space for himself and sneaks an elbow through Bumperstein's defenses.
Oh Bumperstein is still all over the place! His legs are completely gone! Will he be able to recover?!!
Tournament lands an elbow inside.
Bumperstein is working for takedown but Tournament is calmly controlling the position for now.
Tournament lands a nice elbow.
With the fighters up against the cage, Tournament throws an elbow but misses.
Tournament creates a bit of distance and throws an elbow that only just misses.
Bumperstein blocks an elbow strike.
That's two minutes gone in the round.
Tournament pushes off an throws an elbow but Bumperstein leans to the side and avoids it. We're back to clinching against the cage.
Bumperstein blocks an elbow strike.
Bumperstein is trying to break the clinch but Tournament is controlling him.
Tournament lands an elbow just above Bumperstein 's eye.
Bumperstein dodges an elbow strike from Tournament.
With the fighters up against the cage, Tournament throws an elbow but misses.
Tournament pushes off and fires off an elbow that misses, before clinching up again, against the cage.
Tournament lands a nice elbow.
Bumperstein dodges an elbow strike from Tournament.
Tournament creates a bit of distance and throws an elbow that only just misses.
Tournament pushes off and fires off an elbow that misses, before clinching up again, against the cage.
Tournament lands an elbow just above Bumperstein 's eye.
Nice elbow from Tournament.
Tournament creates a bit of distance and throws an elbow that only just misses.
Bumperstein avoids the elbow strike from Tournament, against the cage.
Tournament has been the more effective fighter overall so far.
Tournament keeps the fight in the clinch, despite Bumperstein's efforts to push away.
Tournament creates a bit of space for himself and sneaks an elbow through Bumperstein's defenses.
Bumperstein is trying to break free.
Tournament creates a bit of distance and throws an elbow that only just misses.
Tournament lands a glancing elbow in the clinch.
Bumperstein takes an elbow to the temple.
Tournament lands an elbow inside that Bumperstein shrugs off.
Tournament comes over the top with an elbow. That landed flush.
Bumperstein is working for takedown but Tournament is calmly controlling the position for now.
Bumperstein is working for takedown but Tournament is calmly controlling the position for now.
A nice glancing elbow lands by Tournament.
Tournament misses with an elbow over the top.
Bumperstein fails to pull the fight into his guard.
Tournament lands an elbow that stopped Bumperstein in his tracks for a moment.
Tournament misses with an elbow strike.
Tournament lands an elbow inside that Bumperstein shrugs off.
That's three minutes gone in the round.
Bumperstein tries to pull guard but Tournament won't allow it.
Tournament gets double underhooks to prevent a takedown attempt from Bumperstein.
Both fighters are absolutely exhausted here.
Clinched against the cage, Tournament lands a big elbow that drops Bumperstein! The ref dives in to save him from more shots - Bumperstein is complaining that he's OK but he was done.
Ladies and gentlemen, after 3:14 of round 2, we have a winner by way of TKO (Strikes). Qfc Tournament!
|
|
|
|
|
|
|
|
|
|
|
|
|
|
|
|
|
|
|
|
|
|
|
| S |
C
A |
G |
S |
C
B |
G |
|
S |
C |
G |
|
energy
A | B |
|
hype
A | B |
|
pop
A | B |
|
mgr
A | B |
|
FIGHT
RATING
61% |
|
|
|
|
|
|
|
Main event
|
Coming up we have a heavyweight MMA rules bout between Bruce Campbell (ranked 3036 p4p, 289 weight class) and Doctor Ochila (ranked 2439 p4p, 249 weight class). These two fighters really are very evenly matched on the feet - it will be fascinating to see who can assert themselves in that aspect of the fight.
 |
|
 |
| 187 cm
26
250 lbs
4 - 1 - 0 |
|
200 cm
20
265 lbs
3 - 3 - 0 |
BJJ Purple Belt
Solid boxing
Prefers standup |
|
BJJ Purple Belt
Excellent MT
Good gas tank |
|
| |
|
Ladies and gentlemen. This fight is 3 rounds, in the heavyweight division.
Introducing the fighter to my left, fighting out of the red corner.
With a record of
4 - 1 - 0, fighting out of New York, Bruce Campbell!
And introducing the fighter to my right, fighting out of the blue corner.
With a record of
3 - 3 - 0, fighting out of London, Doctor Ochila!
The judges for this bout are Columbo Gatti, Chad Campbell and Jorge Garcia.
The bell rings for round one and we are underway!
Ochila lands a leg kick that knocks Campbell off balance momentarily.
Campbell misses with a two punch combination.
Campbell misses with a lunging right hand

and Ochila counters with a nice right hand that sends Campbell toppling to the canvas! Campbell scrambles and gets back to his feet - can Ochila finish him?!
It looks like Bruce Campbell has been cut.
Campbell misses with a hook. Ochila ducked under it nicely.
Campbell swinging wildly here.
Fantastic stuff here - a very entertaining period of action, which has drawn cheers from the crowd.
Campbell swings wildly with a couple of big hooks
and Ochila counters with a huge right that knocks Campbell out cold! Ochila is running around with a crazed look on his face - you can see how much that meant to him!
Ladies and gentlemen, after 0:24 of round 1, we have a winner by way of KO (Punch). Doctor Ochila!
Doctor Ochila gave a mention to Sportivité in his post fight interview. That will please them (and hopefully generate some sales).
|
|
|
|
|
|
|
|
|
|
|
|
|
|
|
|
|
|
|
|
|
|
|
| S |
C
A |
G |
S |
C
B |
G |
|
S |
C |
G |
|
energy
A | B |
|
hype
A | B |
|
pop
A | B |
|
mgr
A | B |
|
FIGHT
RATING
100% |
|
|
|
|
|
|
|
|
|
|

