 |
The Island Season 9, 205 lbs, Round 4 PBP Commentary |
Undercard bout
|
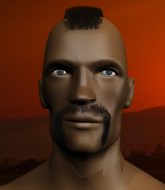
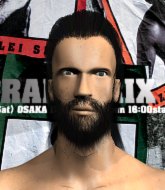
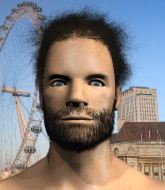
Coming up we have a light heavyweight MMA rules bout between Apolinario Mabini (ranked 626 p4p, 85 weight class) and Royce Gracie (ranked 107 p4p, 16 weight class). Mabini's entrance music is Noypi by Bamboo. A fine choice. Gracie is bobbing his head along to his entrance song: Olha a Explosão. Buckle up people - heeeeeeeeeere we go!
 |
|
 |
| 185 cm
26
210 lbs
9 - 3 - 0 |
|
179 cm
26
210 lbs
14 - 1 - 0 |
Good wrestling
Solid boxing
Cardio machine |
|
Powerful takedowns
Basic striking
Powerful |
|
| |
|
Ladies and gentlemen. This fight is 3 rounds, in the light heavyweight division.
Introducing the fighter to my left, fighting out of the red corner.
With a record of
9 - 3 - 0, fighting out of The Island, Apolinario Mabini!
And introducing the fighter to my right, fighting out of the blue corner.
With a record of
14 - 1 - 0, fighting out of The Island, Royce Gracie!
The judges for this bout are Peter Branson, Santiago Holmes and Daniel Franklin.

The bell rings for round one and we are underway!
The fighters circling - Mabini throws out the jab but it was never going to land.
A looping hook to the body misses from Mabini. Gracie does a little dance to reset his feet.

Mabini closes the distance and presses his opponent up against the cage.
Mabini lands a right uppercut that snaps the head of Gracie backwards.
Mabini doesn't land with the attempted body shot.
A right hook to the body lands for Mabini.
Mabini misses with some punches.
Mabini swings away with an uppercut that misses.
Mabini lands with a good tight uppercut to the head.
Mabini pushes Gracie back against the cage and unloads with a body punch.
A hook to the body from Mabini.
We've had a slow start to the round here - hopefully the action picks up.
Mabini lands an uppercut.
Mabini lands a body punch.
Gracie can't find room to land a body shot as Mabini controls the action.
Gracie tries to work over Mabini's body with a swooping hook but it only glances the target.
Mabini pushes Gracie back against the cage and unloads with a body punch.

That's one minute gone in the round.
Gracie's head jolts backwards as he takes an uppercut right on the button!
Gracie is trying to pull guard but Mabini has him pressed against the cage.
A shot in the inside from Mabini.
Mabini lands a left hand.
Gracie has a couple of punches blocked by Mabini.
Gracie tries to pull guard but Mabini won't allow it.
Gracie is trying to pull guard but Mabini turns him against the cage and we stay in the clinch.
Apolinario Mabini has stuffed three takedown attempts in the round now. That's going to take a lot out of Royce Gracie.
Gracie swings wildly with an uppercut but Mabini uses good head movement to avoid it.
Mabini throws a hook to the body. More of an arm punch but it's all scoring with the judges.
Gracie jumps guard but Mabini turns him against the cage and keeps the fight standing.
Mabini lands a shot to the body.
Mabini lands a body punch in the clinch.
Gracie looks winded!
A short left from Mabini.
A short right from Mabini on the inside.

That's two minutes gone in the round.
Mabini lands a right hand.
The crowd cheering loudly, showing their appreciation for the quality fight we're seeing here.
Good body shot from Mabini.
Mabini lands a right uppercut that snaps the head of Gracie backwards.
Gracie tries to jump guard but he falls flat on his backside. Mabini smiles and moves away.
Gracie walks into a jab.
Mabini pushes Gracie up against the cage in a clinch.
Mabini scores with a shot to the side of Gracie's head.
Mabini working on landing some head shots here - that one got through nicely.
A right hook to the body lands for Mabini.
Gracie's head jolts backwards as he takes an uppercut right on the button!
Still in the clinch, Mabini scores with a nice short uppercut.
Gracie misses with a hook from the clinch.
Gracie goes for a body shot but it's blocked.

That's three minutes gone in the round.
Mabini lands a right hand.
A short right hand to the side of the head by Mabini.
A short right hand to the side of the head by Mabini.
Mabini lands with a light punch inside.
A short uppercut from Mabini.
Mabini lands a shoulder strike that jolts his opponent's head backwards.
Mabini lands a nice looking hook to the body, against the cage.
Mabini lands a right hand that snaps the head of Gracie backwards.

Mabini pushes off and circles away, back to the middle of the mat.
Gracie tries to keep at a distance but Mabini has taken the fight into the clinch.
This is a great period of action - very entertaining stuff!
Mabini lands a nice shot to the body.
Gracie swings wildly with an uppercut but Mabini uses good head movement to avoid it.
Gracie doesn't land with the attempted body shot.

That's four minutes gone in the round.
Mabini blocks a couple of punches on the inside.
Mabini lands on the inside with an uppercut.
Mabini lands a left hand that snaps the head of Gracie backwards.
Gracie tries to stall but Mabini uses the opportunity to gain a better position.
Gracie's head jolts backwards as he takes an uppercut right on the button!
Gracie tries to pull guard but Mabini forces him back to his feet, against the cage.
Mabini digs a right hand into Gracie's ribs. Those have got to be taking their toll on Gracie's gas tank.
Mabini lands a hook that snaps the head of Gracie backwards.
Mabini working some nice short punches in the clinch.
Mabini lands on the inside with an uppercut.
Mabini works on Gracie's body with a couple of short punches.
Gracie tries to work over Mabini's body with a swooping hook but it only glances the target.
A shot in the inside from Mabini.
The crowd applaud the fighters' efforts here as the round comes to an end.
Mabini scores with a nice hook to the head.
Gracie is trying to pull guard but Mabini turns him against the cage and we stay in the clinch.
And thats the end of the round the fighters go back to their corners.
Apolinario Mabini dominated that round.
Well, the break between rounds is over. Let's get back to the scrappin!

Crack! Mabini connects with the perfect overhand right and Gracie falls face first to the canvas. Timbeeeeeeeer! Beautiful knockout for Mabini!
Ladies and gentlemen, after 0:05 of round 2, we have a winner by way of KO (Punch). Apolinario Mabini!
An out of breath Apolinario Mabini thanked his loyal fans in his post fight interview, giving them credit for his success over the course of his career.
|
|
|
|
|
|
|
|
|
|
|
|
|
|
|
|
|
|
|
|
|
|
|
| S |
C
A |
G |
S |
C
B |
G |
|
S |
C |
G |
|
energy
A | B |
|
hype
A | B |
|
pop
A | B |
|
mgr
A | B |
|
FIGHT
RATING
60% |
|
|
|
|
|
|
|
Undercard bout
|
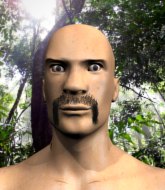
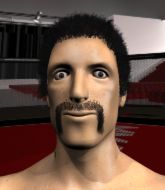
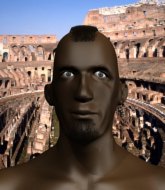
Coming up we have a light heavyweight MMA rules bout between Piet Smit (ranked 925 p4p, 117 weight class) and Eric Whitaker (ranked 887 p4p, 0 weight class). Smit comes to the cage accompanied by Baby Got Back. Eric Whitaker acknowledges the crowd's support as he enters the cage.
 |
|
 |
| 188 cm
27
210 lbs
11 - 6 - 0 |
|
185 cm
27
220 lbs
13 - 4 - 0 |
BJJ Brown Belt
Counter fighter
Cardio machine |
|
Good wrestler
Basic striking
Good gas tank |
|
| |
|
Ladies and gentlemen. This fight is 3 rounds, in the light heavyweight division.
Introducing the fighter to my left, fighting out of the red corner.
With a record of
11 - 6 - 0, fighting out of The Island, Piet Smit!
And introducing the fighter to my right, fighting out of the blue corner.
With a record of
13 - 4 - 0, fighting out of The Island, Eric Whitaker!
The judges for this bout are Sandra Marshall, Winston Alpacca and Dirk Anderson.
The bell rings for round one and we are underway!
Smit ducks under a wild hook from Whitaker.
Whitaker's coach down at ELITE Island Gym - 19 Elite Coaches was telling us pre-fight that they have been working on Whitaker's balance. Obviously they view that as a key factor in the outcome of this fight.
Whitaker throws a big shot that misses.
An attempted straight right counter from Smit misses the target.
A big right from Whitaker misses.
Smit avoids a lazy jab quite easily.
Whitaker just misses with a punch to the body.
Smit tries to clinch but Whitaker moves out of range.
Whitaker throws a hard body shot but it just misses.
Smit closes the distance and clinches.
Smit breaks the clinch and we return to the middle of the mat.
We've had a slow start to the round here - hopefully the action picks up.
Whitaker avoids the clinch attempt nicely.
Whitaker missing with a left hand there. Smit was out of range so wasted energy throwing that one.
Smit wants to clinch.
That's one minute gone in the round.
Whitaker connects with a body shot that sends Smit's belly button to the back.
Whitaker misses with a wild body shot.
Smit feinted there with a counter leg kick.
Smit takes a body punch but keeps moving.
Smit misses with a body kick.
Eric Whitaker seems to be the more aggressive standup fighter in this bout.
Smit fails with an attempt to clinch.
Whitaker throws out a counter right but Smit avoids it with no problem.
Smit uses some good footwork to avoid the body shot by Whitaker.
Whitaker throws a hard body shot but it just misses.
Whitaker avoids the clinch attempt nicely.
Whitaker is throwing a lot of body shots here, looking to wear down Smit rather than just go for the knockout.
Smit is looking to clinch.
That's two minutes gone in the round.
Smit shoots in looking for a double leg takedown. Whitaker defends it nicely.
Smit takes one to the side of the head.
Smit instigates a clinch.

Whitaker breaks the clinch and we're back to striking at distance.
Smit takes one on the button.
Donk. Whitaker catches Smit right on the button with a cross.
Whitaker rushes in with a sloppy looking punch
and Smit connects with a straight left hand counter down the middle.
Wooooo! Give it up for these two warriors! They are putting on a show!
Smit slips a jab from Whitaker.
That's three minutes gone in the round.
Whitaker tries to land with a swinging hook to the body but Smit was well out of range. Poor timing from Whitaker.
Whitaker lands a body shot.
Smit moves out of range of the strikes.
Whitaker throws a lazy uppercut
and Smit counters with a lovely straight right hand!
Whitaker throws a hook but Smit blocks it.
Smit is looking to take this fight into the clinch.
Whitaker throws an uppercut from half a mile away. Smit sees it coming and avoids it easily.
Smit is looking to clinch.
Whitaker looked like he wanted to counter with a punch but didn't throw it.
Whitaker misses the jab.
Smit half commits to a counter takedown before pushing away, out of range.
Whitaker throws an uppercut from half a mile away. Smit sees it coming and avoids it easily.
Smit avoids the body shot from Whitaker.
That's four minutes gone in the round.
Whitaker ducks down and throws a hook to the body but Smit moves away.
Smit tries to close the distance and clinch up but Whitaker swats him away and circles back towards the center.
Whitaker throws a monster uppercut resembling something out of street fighter but it doesn't land.
Smit tries to close the distance and clinch but Whitaker swats him to one side with an open hand palm strike and circles away.
Whitaker misses with a lunging right hand
and Smit counters into the clinch. Nicely done.
Whitaker working on landing some head shots here - that one got through nicely.
Whitaker escapes the clinch and we're back to striking.
Whitaker misses with an uppercut.
Whitaker lands a head shot.
This has been an exciting period of action!
Smit instigates a clinch.
Whitaker stops a takedown attempt from Smit.
Smit tries to take the fight to the ground by pulling guard but can't manage it.
And thats the end of the round the fighters go back to their corners.
Eric Whitaker dominated that round.
That's time! Back to the action!
Whitaker looks to throw the jab but Smit is out of range.
Whitaker misses the jab.
Smit swung with a counter right hand that didn't connect.
Whitaker throws the left hand but Smit avoids the punch easily.
Whitaker throws a body punch but Smit moves out of range.
Smit is looking to clinch but Whitaker is avoiding it.
And an attempted straight right on the counter from Whitaker! But no joy.
A telegraphed takedown attempt from Smit is defended easily by Whitaker.
We've had a slow start to the round here - hopefully the action picks up.
Smit is looking to clinch.
Smit doesn't react quick enough there as he takes a shot to the body.
Smit slips a jab from Whitaker.
Smit is looking to counter with head kicks.
Whitaker moves away from the strike by Smit.
That's one minute gone in the round.
Whitaker ducks down and throws a hook to the body but Smit moves away.
A swing and a miss from Whitaker.
Smit tries to close the distance and clinch up but Whitaker swats him away and circles back towards the center.
Smit is looking to clinch but Whitaker is avoiding it.
Whitaker loads up on a big right hand but Smit slips the punch.
Smit moves in looking to clinch but Whitaker pushes him off.
Eric Whitaker is looking to keep the fight on the feet at all costs.
Whitaker just misses with a punch to the body.
Whitaker throws a looping overhand right but Smit ducks down to avoid it.
Whitaker misses with a hook to the body
and Smit counters with a nice body shot.
Whitaker throws the left hand but Smit avoids the punch easily.
Smit tries to clinch up against the cage, rushing in to close the distance. Whitaker manages to break the clinch and circles back to the middle of the mat.
Smit slips a jab from Whitaker.
That's two minutes gone in the round.
Whitaker scores with a punch to the head.
Whitaker circles away from the clinch attempt.
Whitaker looks like he wants to counter punch here.
Whitaker swings and misses with a hook to the body.
The fight stays on the outside here - Smit looks like he's thinking about clinching though.
Smit tries to close the distance and clinch but Whitaker swats him to one side with an open hand palm strike and circles away.
Smit wants to clinch up but Whitaker keeps it at a distance.
Smit keeping a good distance there, avoiding the body shot.
Whitaker ducks down and throws a hook to the body.
Whitaker moving in and out of range nicely, whilst landing the scoring shot.
Smit on the wrong end of an overhand right that came out of nowhere.
That's three minutes gone in the round.
Whitaker misses with a body shot.
Smit quickly followed up with a counter body kick but doesn't connect.
Smit moves out of range as Whitaker strikes.
Whitaker lands with an overhand left.
Whitaker swings widly with a right hand
and Smit counters with a left to the body.
Whitaker throws a hook to the body but it doesn't connect.
Whitaker misses with a wild body shot.
Whitaker misses with an uppercut. Smit saw that one coming.
Smit was looking to counter that last move with a shot to the body but he didn't commit.
Whitaker misses with a straight left.
Smit blocks a jab.
Whitaker throws a hard body shot but it just misses.
An attempted straight right counter from Smit misses the target.
Whitaker swings and misses with a hook to the body.
Whitaker throws a nice looking combination but Smit bobs and weaves to avoid any damage.
That's four minutes gone in the round.
Smit wants to clinch.
Eric Whitaker seems to be getting the better of the standup.
Whitaker is the aggressor but that punch slipped nicely by Smit.
Smit has been working on his balance at , so perhaps that has help him stuff some of the takedown attempts by Whitaker.
Whitaker throws a hard body shot but it just misses.
Smit keeping his hands up high there, blocking the jab from Whitaker.
Smit appears to be looking for a counter punch to the body.
Whitaker throws a right hand that misses
letting Smit counter with a right hand.
Smit tries to close the distance and clinch up but Whitaker swats him away and circles back towards the center.
The crowd thankful this round is nearly over.
Whitaker misses with a looping right.
Smit slips under a jab.
Smit fails in his attempt to clinch.
And thats the end of the round the fighters go back to their corners.
Eric Whitaker showed his class in that round. I'd imagine he'll take it on all the scorecards.
The fighters get back to their feet, the hooter sounds and we're back to the action! So, we enter the final round. Let's see if either fighter can bring us a finish, or whether we're going to the judges scorecards.

Smit throws a sloppy head kick and Whitaker moves out of range easily.
Smit slips a jab from Whitaker.
An attempted straight right counter from Smit misses the target.
Whitaker swats away the attempt to clinch by Smit.
Whitaker throws a poor cross that misses
and Smit counters with a nice uppercut.
Whitaker misses the jab.
Sloppy strikes from Smit. Those never looked like landing.
Whitaker waving his hands out in front of him, looking to distract Smit.
We've had a slow start to the round here - hopefully the action picks up.
Whitaker jabbing away but nothing is landing.
Smit seem to be loading up, looking for a big counter.
Whitaker has been the more effective fighter overall so far.
Smit uses good head movement to avoid the hook from Whitaker.
A counter left hand to the body from Smit misses its target.
Whitaker swings and misses with a hook to the body.
Smit swung with a counter right hand that didn't connect.
Whitaker ducks down and throws a hook to the body but Smit moves away.
That's one minute gone in the round.
Whitaker misses the shot to the body.
Whitaker fakes high and swings low for a body shot but Smit manages to avoid it.
Smit avoids the body shot from Whitaker.
Smit looked to counter that last move with a leg kick but didn't pull the trigger.
Whitaker looks to land a right hand but Smit moved out of range.
Smit tries to clinch up.
Smit tries to close the distance and clinch up against the cage but Whitaker paws at him with a jab and circles away.
Whitaker doesn't fully commit to the body shot counter.
Whitaker throws an ugly left hook that misses
enabling Smit to counter with a crisp jab.
Whitaker waving his hands out in front of him, looking to distract Smit.
Whitaker looks to land a left hand but Smit moved out of range nicely.
Smit wants to clinch up but Whitaker keeps it at a distance.
Smit fails with an attempt to clinch.
That's two minutes gone in the round.
Whitaker swings for the body but Smit moves out of range.
Whitaker misses with a wild body shot.
A counter left hand to the body from Smit misses its target.
Smit tries to close the distance and clinch up against the cage but Whitaker paws at him with a jab and circles away.
Whitaker lands with a straight right. Smit didn't see that one coming.
Smit tries to close the distance and clinch up but Whitaker swats him away and circles back towards the center.
Whitaker looked like he wanted to counter with a punch but didn't throw it.
Whitaker circles away from the clinch attempt.
Smit tries a head kick but it misses.
Whitaker throws an overhand right that lands on Smit's shoulder, as Smit tries to avoid the shot.
Whitaker throws out a token jab with nothing on it.
Whitaker loads up on a big right hand but Smit slips the punch.
Smit displays some good footwork, moving neatly out of range as Whitaker throws out the jab.
Whitaker throws an off balance right hand
and Whitaker takes a counter punch right on the button for his troubles.
That's three minutes gone in the round.
Smit is looking to clinch but Whitaker is avoiding it.
Whitaker misses the shot to the body.
A counter left hand to the body from Smit misses its target.
Smit ducks under an overhand right and circles away with a smile on his face.
Smit throws a big counter combination but Whitaker scrambles out of danger and avoids any damage.
Smit avoids a lazy jab quite easily.
Smit tries to clinch up but Whitaker circles away and keeps his distance.
Whitaker misses with a looping right.
Smit tries to clinch but Whitaker is having none of it.
Whitaker throws out a loose jab but Smit uses good head movement to avoid it.
Whitaker throws a shot from downtown. Smit moves away and avoids it.
Smit throwing a counter right hand but Whitaker manages to avoid it.
Smit uses some good footwork to avoid the body shot by Whitaker.
Smit is looking to counter punch.
Whitaker's jab looks to have found its range, popping Smit under the eye.
Piet Smit has stepped it up - he knows he needs a finish here!
Eric Whitaker is fighting for a decision here - he's started to take the cautious approach.
That's four minutes gone in the round.
Whitaker misses with an uppercut. Smit saw that one coming.
Whitaker misses with a body shot. Nice footwork from Smit.
Whitaker throws a shot from downtown. Smit moves away and avoids it.
Whitaker throws a hook but Smit blocks it.
Smit swings away with a leg kick that misses.
Smit ducks under a wild hook from Whitaker.
Smit cracks Whitaker with a nice right hand that draws applause from the crowd.
Smit misses with a half-hearted attempt at a head kick.
The crowd thankful this round is nearly over.
Smit ducks under an overhand right and circles away with a smile on his face.
Whitaker thows a left - swing and a miss!
Smit is looking to counter with a shot to the body.
Smit tries to work over Whitaker's front leg with a kick but Whitaker checks it.
And that's the end of the fight!
Eric Whitaker comfortably won the final round on my scorecard.
I've got Whitaker winning every round here. Surely the decision will go his way and he'll pick up a well deserved decision victory. Over to the ring announcer for the scorecards.
Ladies and gentlemen, after 3 rounds of action, we go to the scorecards for a decision.
Judge Sandra Marshall scores the fight for Eric Whitaker!
Judge Winston Alpacca scores the fight for Eric Whitaker!
Judge Dirk Anderson scores the fight for Eric Whitaker!
Eric Whitaker wins by unanimous decision!
A relieved looking Eric Whitaker thanked the fans for their support and gave the usual line about them being amazing. They seemed to believe that he actually meant it.
The defeated Piet Smit had this to say: 'Winning is not everything, it is the only thing!'.
|
|
|
|
|
|
|
|
|
|
|
|
|
|
|
|
|
|
|
|
|
|
|
| S |
C
A |
G |
S |
C
B |
G |
|
S |
C |
G |
|
energy
A | B |
|
hype
A | B |
|
pop
A | B |
|
mgr
A | B |
|
FIGHT
RATING
41% |
|
|
|
|
|
|
|
Co-main event
|
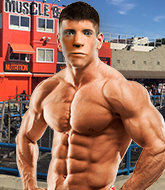
Coming up we have a light heavyweight MMA rules bout between Jambe De Bois (ranked 387 p4p, 0 weight class) and Mister Tea (ranked 196 p4p, 0 weight class). Mister Tea will no doubt be trying to keep this one on the feet, where he has a distinct advantage.
 |
|
 |
| 186 cm
27
205 lbs
11 - 3 - 0 |
|
185 cm
27
225 lbs
14 - 6 - 0 |
Good wrestling
Basic striking
Cardio machine |
|
BJJ Blue Belt
Excellent MT
Good gas tank |
|
| |
|
Ladies and gentlemen. This fight is 3 rounds, in the light heavyweight division.
Introducing the fighter to my left, fighting out of the red corner.
With a record of
11 - 3 - 0, fighting out of The Island, Jambe De Bois!
And introducing the fighter to my right, fighting out of the blue corner.
With a record of
14 - 6 - 0, fighting out of The Island, Mister Tea!
The judges for this bout are Michael Johnstone, Santiago Holmes and Winston Alpacca.
The bell rings for round one and we are underway!
De Bois throws a looping left and ducks down for a takedown. He's got his arms around Tea's waist but Tea gets an underhook and avoids the takedown by throwing De Bois off to one side.
De Bois defending well as Tea loads up on a big left hand.
Tea ducks under an overhand right and circles away with a smile on his face.
De Bois cracks Tea with a good shot that sees him stumbling back into the cage.
De Bois takes a swing at Tea's ribcage but misses.
De Bois seems to be moving with more speed, compared to his last bout. He must have been working on that in the gym.

De Bois scores with a nice takedown into half guard. Let's see what he's got on the ground.
De Bois throwing shots but Tea is blocking nicely.
De Bois missing with some ground and pound from the half guard.
De Bois passes into side control, despite Tea's attempt to control the position.
De Bois tries to score with some ground and pound. Tea controls his posture well this time though and the shots don't do any damage.
Sloppy strikes there by De Bois.
De Bois scores with a couple of short elbows.
Tea managing to avoid any damage from the strikes thrown by De Bois.
The ref warns both fighters not to hold the cage as they work up against the meshing.
Tea is looking for a sweep.
The fans in attendance giving it up for the two fighters, who have really let it all hang out in the last minute or so!
Tea keeps De Bois under control for a moment.
Tea is looking for a sweep.
That's one minute gone in the round.
De Bois in side control lands a decent elbow.
De Bois scores with punches from side control.
Tea looking for a sweep but De Bois has passed into full mount! Oh no!
De Bois scoring with some good ground and pound from mount here. Will he manage to finish Tea?
We get told so often about how wrestlers don't like to be on their backs. Let's see if Tea can do anything to dispel that myth.
De Bois lands a big shot there that rocks Tea but he's holding on and managing to survive for now.
Tea is writhing around trying to get back to his feet.
De Bois in mount throwing good strikes here, bouncing his opponent's head off the canvas.
Tea tries to hold on but De Bois pushes him away.
De Bois raining down hammerfists from mount.
Fantastic stuff here - a very entertaining period of action, which has drawn cheers from the crowd.
Tea tries to reverse the position but De Bois maintains control.
De Bois with good strikes from the mount here!
That's two minutes gone in the round.
De Bois raining down shots from the mount!
De Bois lands an elbow that was bordering on illegal but the referee lets it go with a warning.
Tea is writhing around trying to get back to his feet.
Tea is trying desperately to improve position.
De Bois can't quite control the action as he would like just now, as Tea is looking to escape.
De Bois lands a big shot there that rocks Tea but he's holding on and managing to survive for now.
Tea is working to get back to half guard.
De Bois landing strikes from the mount and Tea is in trouble!
Tea tries to reverse the position but De Bois maintains control.
Tea is bucking up trying to escape but De Bois cracks him with another couple of good strikes.
Tea can't escape the position.
De Bois scoring with some good ground and pound from mount here. Will he manage to finish Tea?
That's three minutes gone in the round.
Tea is wriggling around trying to escape.
De Bois has his opponent pinned against the cage, landing some nasty ground and pound that is really making a bit of a mess out of Tea's face.
Tea is writhing around trying to get back to his feet.
De Bois looking to ground and pound his opponent to a finish here.
Tea is writhing around trying to get back to his feet.
Tea might have to switch it up a bit here because his efforts to control De Bois haven't been going to plan, at least at the current moment in time.
De Bois looking to control but Tea is working nicely, looking to advance position himself.
Tea is bucking up trying to escape but De Bois cracks him with another couple of good strikes.
De Bois lands a big elbow.
De Bois wants to control the pace but Tea is squirming around nicely.
De Bois has been looking to land a fair amount of strikes on the ground. He might be looking to soften his opponent up in order to work for a submission.
De Bois punishing his opponent with strikes.
Tea slips a leg in and gets back to half guard.
We've seen a great period of action over the last minute or so - credit to both fighters for going all out!
De Bois winds up and cracks Tea with a swinging punch to the side of the head.
The fighters are pressed up against the cage, both looking to find a bit of space to work.
De Bois working the head and body with strikes.
That's four minutes gone in the round.
Tea is looking for a sweep. De Bois is wise to his cunning plan and keeps the top position.
De Bois lands strikes from half guard.
Tea is trying is best to control the position here.
Tea taking some punishment here, with De Bois in his half guard.
Tea is looking to control De Bois's leg but it's slowly edging free. Can Tea avoid being mounted?
Tea tries to get to full guard but De Bois has control of the leg.
Tea keeping his head moving to avoid the ground and pound.
De Bois looks over to his corner - he wants some instructions but his corner are not responding.
De Bois is nestled in close to Tea, controlling him well. He's worked in a nice elbow to the side of the head as well, for good measure.
De Bois seems very keen to just sit and control from half guard but Tea does not like that idea so much and is remaining active off his back.
De Bois is keeping good posture, landing some ground and pound.
The crowd applaud the fighters' efforts here as the round comes to an end.
De Bois scores with a couple of good hammerfists.
Tea blocking the ground and pound attempt from De Bois.
De Bois lands with an elbow from half guard - that looked like it hurt.
And thats the end of the round the fighters go back to their corners.
Jambe De Bois dominated that round.
Well, the break between rounds is over. Let's get back to the scrappin!
Tea looks to throw the jab but De Bois is out of range.
De Bois misses with a wild body shot.
De Bois slips a straight right by Tea.
Tea throws a hook but De Bois avoids it easily.
A swing and a miss from Tea.
Tea tries to close the distance and clinch up against the cage but De Bois paws at him with a jab and circles away.
Tea missing with a left hand there. De Bois was out of range so wasted energy throwing that one.
De Bois throws a jab but it's blocked by Tea.
Tea throws an overhand right that lands on De Bois's shoulder, as De Bois tries to avoid the shot.
De Bois shoots in and drives through. Tea sprawls well.
We've had a slow start to the round here - hopefully the action picks up.
Tea tries a low kick but De Bois avoids it.
A telegraphed takedown attempt from De Bois is defended easily by Tea.
That's one minute gone in the round.
De Bois connects with a jab.
Tea throws an uppercut from half a mile away. De Bois sees it coming and avoids it easily.
De Bois keeping his hands up high there, blocking the jab from Tea.
Tea takes one on the chin but keeps coming.
Tea lands with a straight right. De Bois didn't see that one coming.
Tea throws a right hand that De Bois ducks under and follows up with a left that De Bois also avoids with ease.
De Bois throws an ugly left hook that misses

and Tea counters by clinching up.
De Bois is trying to work for a single leg takedown but Tea pulls him back up using the underhooks.
That's three failed takedown attempts in the round for Jambe De Bois. That's going to take a lot out of him.
Tea with an attempt at a knee that misses.
De Bois has double underhooks and is working for a body lock takedown. He's got it. The fighters land in half guard but Tea regains guard immediately.
De Bois keeps in close for a moment and lands a decent shot to the side of Tea's head.
Fantastic stuff here - a very entertaining period of action, which has drawn cheers from the crowd.
Tea wants to stand but De Bois is controlling the position.
De Bois trying to control but Tea is working from the bottom.
That's two minutes gone in the round.
Tea looking to sweep using the butterfly guard but De Bois puts pay to that idea as he passes nicely into half guard.
Tea trying to control but De Bois postures up.
Nice strikes from De Bois there.
De Bois lands a big shot. The thud that echoes around the arena is like music to the fans' ears.
De Bois landing with strikes to the body and head, softening up his opponent.
Jambe De Bois overall seems to be getting the better of the ground position in the fight so far.
De Bois thumps the canvas. Not on purpose obviously - he just missed Tea's head.
De Bois is thwarting Tea's attempts to control the position.
De Bois missing with some ground and pound from the half guard.
De Bois landing with strikes to the body and head, softening up his opponent.
De Bois thows a wild elbow that connects with the canvas.
De Bois winds up and cracks Tea with a swinging punch to the side of the head.
Tea taking some punishment here, with De Bois in his half guard.
That's three minutes gone in the round.
Tea makes his way to full guard. A much better position for Tea.
De Bois is sitting in guard, working some ground and pound.
A big thud reverberates around the arena there as De Bois accidentally thumps the mat. Hopefully he's not broken his hand.
De Bois keeps in close for a moment and lands a decent shot to the side of Tea's head.
Tea wants to improve his position but instead De Bois has moved into half guard.
Tea has no desire to be mounted, so is trying to control. De Bois is working away from the top position though.
Tea wants to improve his position but De Bois is controlling well.
De Bois is trying to control the action in half guard but Tea is working away on the bottom, looking perhaps to get back to full guard.
De Bois passes into side control, despite Tea's attempt to control the position.
That's four minutes gone in the round.
The strikes coming from De Bois are missing the target in this wave of attacks.
De Bois lands a few punches from side control.
Tea on the wrong end of some ground and pound.
De Bois lands an elbow.

Tea is rocked!
De Bois cracks Tea with a big elbow.
Tea is still in real trouble! Can De Bois finish him?
Tea is trying to control De Bois's posture but De Bois avoids it.
Tea manages to work his way to half guard, despite De Bois's best efforts.
Tea seems to have recovered his senses.
Tea is looking for a sweep. De Bois is wise to his cunning plan and keeps the top position.
De Bois looking to pass the half guard. Not this time.
De Bois thows a wild elbow that connects with the canvas.
De Bois trying to control the action but Tea is working from the bottom.
The two fighters exchange a few words. I couldn't hear what they were saying but maybe it's more fun if you make it up yourself. De Bois connects with a nice short shot to Tea's temple.
And thats the end of the round the fighters go back to their corners.
Jambe De Bois dominated that second round.
OK. That's time! The bell goes and we're back to the action. The crowd applaud as we get ready to start the final round!
De Bois tests Tea's chin there with a solid looking shot.
De Bois scores with a hook.
De Bois shoots in for a takedown! He's got it and he's managed to land in side control! That's better than De Bois was expecting from the takedown attempt, I'm sure!
Tea avoids any damage from the ground and pound of De Bois.
Tea is working to avoid the ground and pound but De Bois connects with a decent elbow.
Tea is looking for a sweep.
Tea managing to avoid any damage from the strikes thrown by De Bois.
We've had a slow start to the round here - hopefully the action picks up.
Tea looking for a sweep but De Bois has passed into full mount! Oh no!
De Bois avoids the attempt from Tea to control.
Tea taking shots to the head.
That's one minute gone in the round.
De Bois working the ground and pound effectively.
De Bois softens up his opponent with a couple of shots there and then CRACK! One massive shot lands there and Tea is out cold! De Bois jumps to his feet and celebrates on the cage with the fans, who are, quite frankly, going absolutely mental!
Ladies and gentlemen, after 1:25 of round 3, we have a winner by way of TKO (Strikes). Jambe De Bois!
Jambe De Bois decided to go for the less than humble approach in his post fight interview, telling everyone how he is going to conquer the world. The crowd seemed to like it when really that sort of approach could have gone either way.
|
|
|
|
|
|
|
|
|
|
|
|
|
|
|
|
|
|
|
|
|
|
|
| S |
C
A |
G |
S |
C
B |
G |
|
S |
C |
G |
|
energy
A | B |
|
hype
A | B |
|
pop
A | B |
|
mgr
A | B |
|
FIGHT
RATING
69% |
|
|
|
|
|
|
|
Main event
|
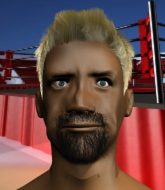
Coming up we have a light heavyweight MMA rules bout between Phil Coleman (ranked 99 p4p, 0 weight class) and Anthony Romeo (ranked 623 p4p, 84 weight class). Over to our ring announcer for the fighter introductions!
 |
|
 |
| 188 cm
27
223 lbs
13 - 2 - 0 |
|
184 cm
26
214 lbs
10 - 3 - 0 |
Good wrestling
Counter fighter
Cardio machine |
|
Good wrestler
Excellent boxer
Heavy handed |
|
| |
|
Ladies and gentlemen. This fight is 3 rounds, in the light heavyweight division.
Introducing the fighter to my left, fighting out of the red corner.
With a record of
13 - 2 - 0, fighting out of The Island, Phil Coleman!
And introducing the fighter to my right, fighting out of the blue corner.
With a record of
10 - 3 - 0, fighting out of The Island, Anthony Romeo!
The judges for this bout are Winston Alpacca, David Hoff and Santiago Holmes.
The bell rings for round one and we are underway!
Romeo connects with a lovely right hand, straight down the pipe.
Coleman uses some good footwork to avoid the body shot by Romeo.
Coleman changes levels looking for a counter takedown but doesn't commit.
Coleman scores with a sloppy punch to the body. Not much technique there but it did the business.
Coleman throws a hook but Romeo blocks it.
Coleman takes a hook to the side of the head. I wonder if that's got his ears ringing.
Romeo walks into a left hand.
Romeo throws a looping overhand right but Coleman ducks down to avoid it.
Coleman attempts a counter takedown but Romeo avoids it well and moves away.
Romeo throws a body punch but Coleman moves out of range.
Coleman with a body punch. A glancing blow.
Coleman changes levels and looks for a double leg takedown. Romeo tries to avoid it but Coleman manages to keep hold of a leg and drag Romeo to the ground. Romeo escapes though and pops straight back up to his feet.
Coleman keeping his hands up high there, blocking the jab from Romeo.
Coleman throws an uppercut from half a mile away. Romeo sees it coming and avoids it easily.
Romeo wings a very wild body shot but it does the job and lands to the midsection.
The fans in attendance giving it up for the two fighters, who have really let it all hang out in the last minute or so!
Romeo catches Coleman with a nice straight right. He seems pissed - ooooh, it's on now! On like donkey kong!
Coleman has been working on his balance at , so perhaps that has help him stuff some of the takedown attempts by Romeo.
Coleman throws a jab to the body, straight down the pipe. Boom. That sent Romeo stumbling backwards but he manages to regain his composure quickly.
That's one minute gone in the round.
Romeo ducks down and throws a hook to the body.
Romeo's jab looks to have found its range, popping Coleman under the eye.
Romeo misses the shot to the body.
Coleman staying out of range there.
Coleman appears to be looking for a counter takedown.
Romeo misses with a looping right.
Anthony Romeo is looking to keep the fight on the feet at all costs.
Coleman changes levels and scores with a jab to the body.
Romeo just misses with a punch to the body.
Coleman attempts a counter takedown but Romeo avoids it well and moves away.
Romeo works Coleman's body with a nice hook.
Coleman takes a shot right to the bread basket.
Romeo misses with a body shot. Nice footwork from Coleman.
Romeo throws a lazy uppercut
and Coleman counters with a nice double leg into side control. Romeo won't be happy with that.
We've seen a great period of action over the last minute or so - credit to both fighters for going all out!
Romeo on the wrong end of some ground and pound.
That's two minutes gone in the round.
Romeo is looking to regain half guard here but Coleman keeps moving and retains side control.
Coleman scores with a couple of nice shots to the head there. The referee takes a look at Romeo to see if he's OK.
You can see the frustration on Romeo's face, being in this tough position on the bottom.
Coleman has been looking to land a fair amount of strikes on the ground. He might be looking to soften his opponent up in order to work for a submission.
Coleman is pausing for a moment. What's he doing? It looks like he's clearing his nose. Oh dude! He's shot a load of snot all down Romeo's shoulder. That is not cool.
Romeo wants to control but Coleman postures up.
Coleman trying to control the action but Romeo is working from the bottom.
Coleman prevents Romeo from escaping the position.
The fighters are pressed up against the cage, both looking to find a bit of space to work.
That's three minutes gone in the round.
Coleman working the ground and pound from side control.
Coleman working the head and body with strikes.
Romeo takes a couple of big shots there - the referee warns him that he has to defend himself better.
Coleman lands a nice forearm strike.
Romeo taking a bit of punishment here - Coleman scoring with strikes.
Coleman cracks Romeo with a big elbow.
Romeo defending against the ground and pound.
Coleman in the domination position with Romeo hanging on.
Coleman tries to score with some ground and pound. Romeo controls his posture well this time though and the shots don't do any damage.
Coleman lands a knee to the body and a forearm to the face.
Coleman cracks Romeo with a big elbow.
Romeo can't do much from the bottom here.
Romeo told us pre-fight that he has been working on his escapes in training. Let's see if he can call on some of his new skills to get back to his feet.
That's four minutes gone in the round.
Coleman cracks Romeo with an elbow. That is naaassty.
Romeo is pushing Coleman's head away, looking to escape. Coleman manages to hold on to the position though.
Romeo really doesn't want to stay on the ground with Coleman. If he can't get it back to his feet, it's only a matter of time before he'll be tapping out.
Romeo parries the strikes from Coleman easily there. Coleman is wary of posturing up too much because it might enable Romeo to escape.
Coleman throws a strike aimed at the side of Romeo's head but Romeo avoids it well.
This is a great period of action - very entertaining stuff!
Romeo is trying to control Coleman's posture but Coleman avoids it.
Romeo taking a bit of punishment here - Coleman scoring with strikes.
Coleman controlling the position.
Romeo tries to buck Coleman off but Coleman is having none of it.
Coleman lands some shots froms side control.
And thats the end of the round the fighters go back to their corners.
Phil Coleman dominated that round.
Well, the break between rounds is over. Let's get back to the scrappin!
A jab lands there for Coleman.
Romeo ducks down and throws a hook to the body.
Anthony Romeo seems to be the more aggressive standup fighter in this bout.
Coleman uses decent footwork to sidestep a right hand from Romeo.
Coleman drops down looking for a counter takedown but Romeo sprawls and moves away.
Romeo throws an uppercut from half a mile away. Coleman sees it coming and avoids it easily.
Coleman defending well as Romeo loads up on a big left hand.
Coleman throws a hook to the body but it doesn't connect.
Coleman moves out of range of the strikes.
Romeo jabs Coleman to the body, keeping him at a distance.
Romeo swings wildly with a couple of big hooks
and Coleman counters with a single leg into guard. Romeo didn't expect that.

The fighters are working up against the cage. Romeo manages to wriggle his way back to his feet, so the fighters are now clinched against the cage.
The crowd cheering loudly, showing their appreciation for the quality fight we're seeing here.
An uppercut on the inside fails to land for Romeo.
Coleman escapes the clinch and we're back to striking.
Coleman uses good footwork to avoid the strikes from Romeo.
Coleman feinted with a counter takedown.
That's one minute gone in the round.
Romeo looks to score with a jab to the body but Coleman is just out of range.
A punch combination from Romeo misses.
Anthony Romeo seems to be getting the better of the standup.
Romeo thows a left - swing and a miss!
Coleman appears to be looking for a counter takedown.
A looping hook to the body misses from Coleman. Romeo does a little dance to reset his feet.
Coleman walks into a jab.

It looks like Phil Coleman has been cut.
Romeo bobs and weaves and unloads with a good uppercut.
A jab from Romeo misses.
Romeo lands a jab to the head.

Coleman is rocked!
Romeo misses with a two punch combination.
Oh Coleman is still all over the place! His legs are completely gone! Will he be able to recover?!!
Coleman pushing out the jab but it's not landing.
Coleman seems to have got his legs back now.
Romeo misses with an uppercut. Coleman saw that one coming.
Coleman attempts a counter takedown but Romeo avoids it well and moves away.
Romeo gets cracked there but stands up to it.
Coleman slips under a jab.
That's two minutes gone in the round.
Coleman misses with a lunging right hand
and Romeo counters with a shot to the ribs. That looked like it hurt.
The fans in attendance giving it up for the two fighters, who have really let it all hang out in the last minute or so!
Romeo misses with a left hand
and Coleman counters with a single leg into guard. Romeo didn't expect that.
Coleman slips nicely into half guard.
Coleman not landing any meaningful shots this time.
Romeo holds on for dear life, maintaining half guard for now.
Coleman slips a nice elbow through Romeo's hands, connecting with Romeo's forehead.
We get told so often about how wrestlers don't like to be on their backs. Let's see if Romeo can do anything to dispel that myth.
Romeo has no desire to be mounted, so is trying to control. Coleman is working away from the top position though.
Coleman takes advantage of the dominant position to land a couple of big hammer fists.
Coleman takes advantage of the dominant position to land a couple of big hammer fists.
Romeo trying to control from the bottom.
That's three minutes gone in the round.
Coleman missing with some ground and pound from the half guard.
Nice strikes from Coleman there.
Coleman drops an elbow to the side of Romeo's head.
Romeo is looking to improve his position.
Coleman working over Romeo with some ground and pound. Romeo looks like he wants out of this position, which is understandable.
Coleman scores with a couple of good hammerfists.
Romeo has no desire to be mounted, so is trying to control. Coleman is working away from the top position though.
Coleman is looking to take a break and control but Romeo is keeping him honest, looking to work from the bottom.
That's four minutes gone in the round.
Coleman is figuring out what he wants to do next.
Romeo trying to hold on to Coleman's head to control him but Coleman postures up.
Romeo avoiding damage under a succession of punches from Coleman.
Coleman wants to control but Romeo is keeping him busy.
Coleman missing with some ground and pound from the half guard.
The two fighters exchange a few words. I couldn't hear what they were saying but maybe it's more fun if you make it up yourself. Coleman connects with a nice short shot to Romeo's temple.
Coleman controlling the action here.
Coleman wants to pass the guard but Romeo is defending well.
And thats the end of the round the fighters go back to their corners.
A close second round but Anthony Romeo will probably get the nod - 10:9.
The cut man is working on Phil Coleman's cut.
The fighters' corners scream their final instructions, as the referee calls time. Here we go, back to the action! This is the final round!
Coleman looking to score a takedown here. Romeo is defending well but Coleman drives through and ends up in Romeo's guard.
Coleman trying to control the position from guard on top but Romeo is wriggling around, looking for whatever he can.
Coleman is working the ground and pound from guard. He might want to try advancing position though to get more of an impact.
Coleman chips away with some ground and pound.
Coleman scores with a decent looking elbow strike.
Coleman in full guard, throwing the ground and pound. No damage this time.
Romeo looking to control.
We've had a slow start to the round here - hopefully the action picks up.
Coleman throws an elbow that misses. Romeo uses the momentum to reverse the position. He's now in Coleman's guard. Nice move by Romeo!

Coleman looking for a sweep. Not yet Coleman, not yet.
Phil Coleman overall seems to be getting the better of the ground position in the fight so far.
Coleman keeping moving, preventing Romeo from controlling successfully.
That's one minute gone in the round.
Coleman is adopting a defensive guard.
Romeo controlling from the guard. I say controlling but really, he's stalling.
Coleman bucks up whilst keeping hold of a body lock, managing to reverse the position. Now he's in top in Romeo's guard.

Coleman is working Romeo over from the guard. He should look to pass the guard and do a little more damage with these strikes.
Romeo wants to stand but Coleman is controlling the position.
Romeo has momentary wrist control but Coleman slips an elbow through the middle.
That's two minutes gone in the round.
Coleman postures up to throw the ground and pound strikes but they don't connect.
Romeo is trying to keep Coleman in close.
Coleman landing with the ground and pound.
Coleman working some ground and pound from guard but it's not doing any damage.
Coleman is working Romeo over from the guard. He should look to pass the guard and do a little more damage with these strikes.
Coleman lands a couple of digs.
Coleman is stalling in the full guard.
Romeo pulls Coleman in to control the position.
That's three minutes gone in the round.
Romeo keeping moving, preventing Coleman from controlling successfully.
Coleman throws a big right hand that misses.
Coleman throws a strike but Romeo rolls with it and manages to sweep. Now he's in guard on top.
Coleman keeping moving, preventing Romeo from controlling successfully.
Coleman pulls Romeo in close to prevent any damage.
Coleman looking to hit a scissor sweep but Romeo is one step ahead there.
That's four minutes gone in the round.
There's not a lot going on here and the crowd are letting the fighters know they're not willing to tolerate a lack of action.
Romeo not doing a lot at the moment. He'll have to show some more aggression or the fight will get stood up.
Coleman not looking particularly offensive just at the moment.
The referee is pacing around the two fighters - he looks like he's thinking about a standup.
Coleman looking to hit a scissor sweep but Romeo is one step ahead there.

The referee has stepped in and called for a break in the action. We'll restart on the feet.
Coleman lands an overhand right.
Boooooooooooooooooooo!!! God, this has been a terrible round. Come on you two, sort yourselves out!
Romeo throws a body shot but no joy.
Anthony Romeo has stepped it up - he knows he needs a finish here!
Romeo throws a body shot but no joy.
And that's the end of the fight!
Phil Coleman showed his dominance in that final round.
I think Coleman has won this one but let's see what the judges have to say. Over to the ring announcer for the scorecards.
Ladies and gentlemen, after 3 rounds of action, we go to the scorecards for a decision.
Judge Winston Alpacca scores the fight for Phil Coleman!
Judge David Hoff scores the fight for Phil Coleman!
Judge Santiago Holmes scores the fight for Phil Coleman!
Phil Coleman wins by unanimous decision!
Phil Coleman decided to hype himself up post fight. It was going well but he went on about it a bit too long and the crowd turned on him a little.
|
|
|
|
|
|
|
|
|
|
|
|
|
|
|
|
|
|
|
|
|
|
|
| S |
C
A |
G |
S |
C
B |
G |
|
S |
C |
G |
|
energy
A | B |
|
hype
A | B |
|
pop
A | B |
|
mgr
A | B |
|
FIGHT
RATING
49% |
|
|
|
|
|
|
|
|
|
|

