 |
The Island Season 9, 265 lbs, Round 1 PBP Commentary |
Undercard bout
|
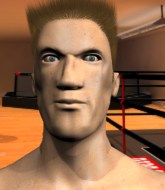
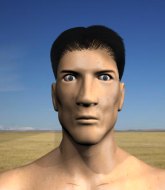
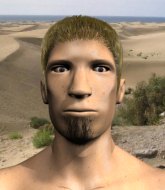
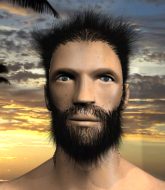
Coming up we have a heavyweight MMA rules bout between Amzi Morgan (ranked 5760 p4p, 426 weight class) and Downwith Drago (ranked 270 p4p, 0 weight class). This should be fireworks!
 |
|
 |
| 200 cm
25
255 lbs
4 - 1 - 0 |
|
180 cm
27
265 lbs
9 - 3 - 0 |
Decent wrestler
Solid Muay Thai
Very strong |
|
Good wrestler
Basic striking
Good gas tank |
|
| |
|
Ladies and gentlemen. This fight is 3 rounds, in the heavyweight division.
Introducing the fighter to my left, fighting out of the red corner.
With a record of
4 - 1 - 0, fighting out of The Island, Amzi Morgan!
And introducing the fighter to my right, fighting out of the blue corner.
With a record of
9 - 3 - 0, fighting out of The Island, Downwith Drago!
The judges for this bout are Bart Greer, Daniel Franklin and Dirk Anderson.

The bell rings for round one and we are underway!
Drago darts in looking for a takedown but Morgan gets double underhooks and turns Drago into the cage.
Morgan lunges at Drago with a hook that half lands and is half blocked by Drago's hand.

It looks like Downwith Drago has been cut.
Morgan tries to clinch but is not successful on this occasion.
Morgan doesn't manage to clinch there - Drago circles away.
Drago doesn't succeed with the takedown
enabling Morgan to counter with a crisp jab.

Drago shoots in looking for a single leg takedown. Morgan is trying to defend but Drago finishes it well and ends up in half guard. Let's see if he can advance position further.
Drago is trying to control. Morgan wants to improve his position but can't escape this time.
Morgan has hold of Drago's hands but Drago slips his arm to the side and lands an elbow.
Drago throwing shots but Morgan is blocking nicely.
Morgan on his back here. We all know that wrestlers don't like being on their back so let's see if Morgan tries to get out of the position.
Morgan tries to get to full guard but Drago has control of the leg.
Morgan is controlling Drago's trapped leg to prevent Drago from advancing to side control.
Drago working Morgan over with strikes.

That's one minute gone in the round.
Morgan is looking to improve his position.
Drago thumps the canvas. Not on purpose obviously - he just missed Morgan's head.
Drago thumps the canvas. Not on purpose obviously - he just missed Morgan's head.
Nice strikes from Drago there.
Drago sitting in half guard, looking to land shots. Morgan defending well though.
The ref warns both fighters not to hold the cage as they work up against the meshing.
Drago slips a nice elbow through Morgan's hands, connecting with Morgan's forehead.
Drago lands strikes from half guard.
Drago seems to be taking a bit of a break to think of his next move. He lands a short punch in the meantime.
Drago lands a big shot. The thud that echoes around the arena is like music to the fans' ears.
Morgan definitely looks more muscular than last time we saw him fight.
Drago landing with strikes to the body and head, softening up his opponent.
Drago thumps the canvas. Not on purpose obviously - he just missed Morgan's head.
Drago sitting in half guard here. He lands a big elbow that has hurt Morgan! Oh, Morgan is in big trouble! Drago lands more strikes and the ref dives in to save him! The fight is over!
Ladies and gentlemen, after 2:58 of round 1, we have a winner by way of KO (Strikes). Downwith Drago!
After the fight, Downwith Drago was humble in paying tribute to his opponent but made it clear he wants to go on to bigger and better things. It seemed to go down well with the crowd who cheered him loudly.
|
|
|
|
|
|
|
|
|
|
|
|
|
|
|
|
|
|
|
|
|
|
|
| S |
C
A |
G |
S |
C
B |
G |
|
S |
C |
G |
|
energy
A | B |
|
hype
A | B |
|
pop
A | B |
|
mgr
A | B |
|
FIGHT
RATING
55% |
|
|
|
|
|
|
|
Undercard bout
|
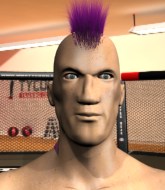
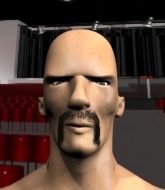
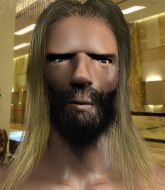
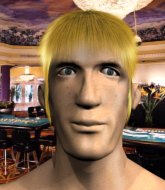
Coming up we have a heavyweight MMA rules bout between Do You Really Want To Hurt (ranked 1505 p4p, 0 weight class) and Kaz Fujita (ranked 3364 p4p, 0 weight class). Do You Really Want To Hurt has the better chin. Will he look to stand and bang today?
 |
|
 |
| 185 cm
27
285 lbs
10 - 6 - 0 |
|
180 cm
27
265 lbs
6 - 7 - 0 |
BJJ White Belt
Excellent boxer
Cardio machine |
|
BJJ Blue Belt
Counter fighter
Knockout power |
|
| |
|
Ladies and gentlemen. This fight is 3 rounds, in the heavyweight division.
Introducing the fighter to my left, fighting out of the red corner.
With a record of
10 - 6 - 0, fighting out of The Island, Do You Really Want To Hurt!
And introducing the fighter to my right, fighting out of the blue corner.
With a record of
6 - 7 - 0, fighting out of The Island, Kaz Fujita!
The judges for this bout are Bart Greer, Dirk Anderson and David Hoff.
The bell rings for round one and we are underway!

Fujita clinches.
You Really Want To Hurt blocks a couple of punches on the inside.
A head punch on the inside from Fujita fails to land.
Fujita working on landing some head shots here - that one got through nicely.
You Really Want To Hurt is stalling here.
You Really Want To Hurt lands a shoulder strike that jolts his opponent's head backwards.
Fujita goes for a body shot but it's blocked.
Fujita working aggressively here.
Fujita tries to work over You Really Want To Hurt's body with a swooping hook but it only glances the target.
You Really Want To Hurt lands a body punch - he's looking to wear down Fujita.
Fujita tries to land a shot to the body but it's blocked.
Fujita lands with a light punch inside.
You Really Want To Hurt has Fujita pressed against the cage.
We've had a slow start to the round here - hopefully the action picks up.
Fujita goes for a body shot but it's blocked.
Fujita tries a body shot but You Really Want To Hurt blocks it.
You Really Want To Hurt displaying some good clinch control by pressing Fujita up against the cage.
Fujita tried to land a shot to the body but connects with You Really Want To Hurt's elbow.
That's one minute gone in the round.
Fujita tries to work over You Really Want To Hurt's body with a swooping hook but it only glances the target.
Fujita throws a blind hook that connects with the side of You Really Want To Hurts head.
Fujita has a couple of punches blocked by You Really Want To Hurt.
A left hand lands to the body for Fujita.
Fujita presses You Really Want To Hurt against the cage and delivers a mid-strength body shot.
Fujita lands with a short shot to the head.
A short right hand to the side of the head by You Really Want To Hurt.
Fujita pushes You Really Want To Hurt back against the cage and unloads with a body punch.
You Really Want To Hurt is breathing heavily.
Fujita misses with a shot to the kidneys.
A shot in the inside from Fujita.
Fujita lands a left hand that snaps the head of You Really Want To Hurt backwards.
Fujita tries a body shot but You Really Want To Hurt blocks it.
Fujita misses with a punch to the body.
You Really Want To Hurt goes for a body shot but it's blocked.
Fujita misses with a punch on the inside.
Fujita tries a shoulder strike but it doesn't do any damage.
Fujita lands a nice shot to the body.
You Really Want To Hurt is working hard here but doesn't seem to be able to control effectively, up against the cage.

That's two minutes gone in the round.
Fujita working aggressively here.
Fujita tries a body shot but You Really Want To Hurt blocks it.
Fujita lands a hook to the body. It's hard to tell if that hurt You Really Want To Hurt or not.
This is a great period of action - very entertaining stuff!
Fujita lands a body shot in the clinch.
Fujita lands a hook to the side of the head.
A nice left hand lands by Fujita.
Fujita lands a right hand.
Fujita doesn't land with the attempted body shot.
Fujita tries to land a shot to the body but it's blocked.
You Really Want To Hurt misses with the head strike.
Fujita lands a shoulder strike.
Fujita tries to land a shot to the body but it's blocked.
Fujita tries a body shot but You Really Want To Hurt blocks it.
Fujita goes for a body shot but it's blocked.
Fujita throws a head punch that misses.
You Really Want To Hurt leaning against his opponent.
You Really Want To Hurt blocks a couple of punches on the inside.

That's three minutes gone in the round.
Fujita swings away with an uppercut that misses.
Fujita lands a body shot.
You Really Want To Hurt tries a body shot but Fujita blocks it.
A short right from Fujita.
Fujita has been looking to improve his clinch game in recent weeks. You Really Want To Hurt seems to have the measure of him in the clinch so far, so let's see if Fujita can turn it around.
You Really Want To Hurt avoiding damage.
Fujita lands a shoulder strike that jolts his opponent's head backwards.
You Really Want To Hurt misses with a hook to the ribs.
You Really Want To Hurt prevents a body shot from Fujita.
Fujita tries to land a shot to the body but it's blocked.
A hook to the body from Fujita.
You Really Want To Hurt avoiding damage.
Fujita misses with some punches.
Fujita lands with a short shot to the head.
Fujita blocks a body shot from You Really Want To Hurt.
A short right hand to the side of the head by Fujita.

That's four minutes gone in the round.
Fujita tries to work over You Really Want To Hurt's body with a swooping hook but it only glances the target.
You Really Want To Hurt effectively controlling the action here.
You Really Want To Hurt is trying to maintain a safe position but Fujita gets an underhook and turns You Really Want To Hurt into the cage.
A right hook to the body lands for Fujita.
You Really Want To Hurt trying to control the position but instead, Fujita has worked for underhooks and has pushed You Really Want To Hurt into the cage.
With the fighters clinched against the cage, Fujita creates a bit of distance for himself and scores with a nice uppercut.
You Really Want To Hurt has Fujita pushed against the cage.
Good body shot from Fujita.
The crowd are loving this. Great action here.
Fujita throws a head punch that misses.
Fujita tries a body shot but You Really Want To Hurt blocks it.
You Really Want To Hurt's head jolts backwards as he takes an uppercut right on the button!
Fujita throws a punch but it's blocked by You Really Want To Hurt.
You Really Want To Hurt lands a body punch in the clinch.
You Really Want To Hurt prevents a body shot from Fujita.
And thats the end of the round the fighters go back to their corners.
Kaz Fujita dominated that round.
That's time! Back to the action!

You Really Want To Hurt digs a good hook to Fujita's body.

You Really Want To Hurt closes the distance and clinches.
You Really Want To Hurt lands with a short punch from the clinch.
Fujita has a couple of punches blocked by You Really Want To Hurt.
Fujita misses with some punches.
Fujita can't find room to land a body shot as You Really Want To Hurt controls the action.
Fujita swings wildly with an uppercut but You Really Want To Hurt uses good head movement to avoid it.
A head punch blocked on the inside by You Really Want To Hurt.
You Really Want To Hurt lands a shot to the body.
You Really Want To Hurt displaying some good clinch control by pressing Fujita up against the cage.
We've had a slow start to the round here - hopefully the action picks up.
You Really Want To Hurt blocks a punch to the side of the head.
You Really Want To Hurt blocks a body shot from Fujita.
Fujita misses with a punch on the inside.
Fujita tries to land a shot to the body but it's blocked.
That's one minute gone in the round.
You Really Want To Hurt blocks a body shot from Fujita.
A short left from You Really Want To Hurt.
You Really Want To Hurt blocks an uppercut.
You Really Want To Hurt displaying some good clinch control by pressing Fujita up against the cage.
An uppercut to the body lands inside from Fujita.
A shot in the inside from You Really Want To Hurt.
You Really Want To Hurt scores with a shoulder strike.
Fujita tries to work over You Really Want To Hurt's body with a swooping hook but it only glances the target.
Both guys are working to get underhooks.
Fujita tries a shoulder strike but it doesn't do any damage.
Fujita has a couple of punches blocked by You Really Want To Hurt.
Fujita misses with a short punch on the inside.
A head punch on the inside from Fujita fails to land.
A head punch on the inside from Fujita fails to land.
Fujita misses with a hook from the clinch.
That's two minutes gone in the round.
Fujita goes for a body shot but it's blocked.
Fujita prevents a body shot from You Really Want To Hurt.
Fujita tried to land a shot to the body but connects with You Really Want To Hurt's elbow.
Fujita doesn't land with the attempted body shot.
Fujita tries a body shot but You Really Want To Hurt blocks it.
Fujita goes for a body shot but it's blocked.
Fujita misses with a punch on the inside.
You Really Want To Hurt stalls.
Fujita misses with a hook to the ribs.
Kaz Fujita seems to be working more effectively in the clinch in the fight so far.
Fujita tries to land a shot to the body but it's blocked.
Fujita tries to throw a body punch but You Really Want To Hurt avoids it by throwing Fujita back against the cage.
Fujita struggles to land a body shot inside as You Really Want To Hurt controls his hands.
A short uppercut from Fujita.
Fantastic stuff here - a very entertaining period of action, which has drawn cheers from the crowd.
Fujita tries to land a shot to the body but it's blocked.
Fujita struggles to land a body shot inside as You Really Want To Hurt controls his hands.
You Really Want To Hurt makes some space for himself and lands an uppercut.
That's three minutes gone in the round.
You Really Want To Hurt lands a hook to the side of the head.
It looks like Kaz Fujita has been cut.
Fujita lands a right hand.
Fujita has a couple of punches blocked by You Really Want To Hurt.
Fujita tries to work over You Really Want To Hurt's body with a swooping hook but it only glances the target.
Fujita tries to throw a body punch but You Really Want To Hurt avoids it by throwing Fujita back against the cage.
Fujita tries a shoulder strike but it doesn't do any damage.
Fujita misses with a body punch.
Fujita misses with a punch to the body.
Some stalling of biblical proportions here from You Really Want To Hurt.
Fujita tried to land a shot to the body but connects with You Really Want To Hurt's elbow.
Fujita scores with a nice hook to the head.
Fujita tries to work over You Really Want To Hurt's body with a swooping hook but it only glances the target.
You Really Want To Hurt lands a right hand that snaps the head of Fujita backwards.
A right hand to the body from Fujita.
Fujita tries to throw a body punch but You Really Want To Hurt avoids it by throwing Fujita back against the cage.
Fujita tries to land a shot to the body but it's blocked.
Fujita doesn't land with the attempted body shot.
That's four minutes gone in the round.
You Really Want To Hurt will no doubt start fighting again in a minute but for now he's just having a little rest, leaning Fujita up against the cage.
Fujita misses with a body punch.
Fujita fails to land with a short punch on the inside.
You Really Want To Hurt holding his opponent close, against the cage.
Fujita has been the more effective fighter overall so far.
Fujita tried to land a shot to the body but connects with You Really Want To Hurt's elbow.
Fujita fails to land with a short punch on the inside.
You Really Want To Hurt lands a hook to the body. It's hard to tell if that hurt Fujita or not.
Fujita throws a head punch that misses.
Fujita fails to land with a short punch on the inside.
Fujita struggles to land a body shot inside as You Really Want To Hurt controls his hands.
You Really Want To Hurt scores with a shoulder strike.
The fans in attendance giving it up for the two fighters, who have really let it all hang out in the last minute or so!
Fujita struggles to land a body shot inside as You Really Want To Hurt controls his hands.
Fujita tries to work over You Really Want To Hurt's body with a swooping hook but it only glances the target.
You Really Want To Hurt lands with a right to the head.
And thats the end of the round the fighters go back to their corners.
A close second round but Kaz Fujita will probably get the nod - 10:9.
The cut man is working on Kaz Fujita's cut.
That's time! You Really Want To Hurt's corner gives him a slap on the ass as he gets ready to fight. This is the final round!

You Really Want To Hurt connects with a lovely jab that went straight through the gap between Fujita's hands.
You Really Want To Hurt throws a nice hook to the body that draws an oooh from the crowd.
A decent looking cross lands there for You Really Want To Hurt.
You Really Want To Hurt misses with an uppercut
and Fujita counters with a good right hand that lands right on the jaw.

It looks like Do You Really Want To Hurt has been cut.
Fujita tries to clinch up against the cage, rushing in to close the distance. You Really Want To Hurt manages to break the clinch and circles back to the middle of the mat.
You Really Want To Hurt ducks low and lands a nice hook to the body of his opponent.
You Really Want To Hurt has Fujita up against the cage in a clinch.
We've had a slow start to the round here - hopefully the action picks up.
Fujita stays in close to his opponent and throws a right hand to the body.
Fujita misses with the head strike.
Fujita tries to work over You Really Want To Hurt's body with a swooping hook but it only glances the target.
Fujita misses with a short punch on the inside.
That's one minute gone in the round.
Fujita tries a body shot but You Really Want To Hurt blocks it.
A head punch blocked on the inside by You Really Want To Hurt.
Fujita tries to throw a body punch but You Really Want To Hurt avoids it by throwing Fujita back against the cage.
A head punch blocked on the inside by You Really Want To Hurt.
Fujita goes for a body shot but it's blocked.
You Really Want To Hurt blocks a body shot from Fujita.
Fujita swings wildly with an uppercut but You Really Want To Hurt uses good head movement to avoid it.
You Really Want To Hurt blocks a body shot from Fujita.
You Really Want To Hurt lands a left hand.
Fujita misses with a hook to the ribs.
Fujita tried to land a shot to the body but connects with You Really Want To Hurt's elbow.
Both fighters working to control the clinch.
You Really Want To Hurt stalling against the cage.
You Really Want To Hurt wants to stall.
Fujita misses with the head strike.
That's two minutes gone in the round.
You Really Want To Hurt taking a breather.
Fujita misses with a punch on the inside.
Fujita has a couple of punches blocked by You Really Want To Hurt.
A head punch blocked on the inside by You Really Want To Hurt.
Fujita swings wildly with an uppercut but You Really Want To Hurt uses good head movement to avoid it.
Fujita digs a right hand underneath You Really Want To Hurt's ribcage. You Really Want To Hurt let out a lung full of air as it connected.
Fujita lands a nice shot to the body.
Both fighters are breathing heavily.
Fujita misses with a punch on the inside.
Fujita tries a shoulder strike but it doesn't do any damage.
Fujita digs a right hand into You Really Want To Hurt's ribs. Those have got to be taking their toll on You Really Want To Hurt's gas tank.
Fujita throws a head punch that misses.
Fujita working on landing some head shots here - that one got through nicely.
Fujita misses with a punch on the inside.
Fujita tries a body shot but You Really Want To Hurt blocks it.
That's three minutes gone in the round.
Fujita lands a shoulder strike that jolts his opponent's head backwards.
Fujita doesn't land with the attempted body shot.
You Really Want To Hurt tries to stall but Fujita uses the opportunity to gain a better position.
With the fighters clinched against the cage, Fujita creates a bit of distance for himself and scores with a nice uppercut.
Fujita throws a hook to the body. More of an arm punch but it's all scoring with the judges.
Fujita throws a head punch that misses.
Fujita doesn't land with the attempted body shot.
Fujita lands a body punch in the clinch.
A hook to the body from Fujita.
Fujita lands an uppercut.
Fujita tries to throw a body punch but You Really Want To Hurt avoids it by throwing Fujita back against the cage.
Fujita lands a hook that snaps the head of You Really Want To Hurt backwards.
Fujita tried to land a shot to the body but connects with You Really Want To Hurt's elbow.
Fujita throws a punch but it's blocked by You Really Want To Hurt.
You Really Want To Hurt is looking to control Fujita's arms but Fujita gets an underhook and turns him. Now You Really Want To Hurt has his back to the cage.
Fujita has a couple of punches blocked by You Really Want To Hurt.
Both guys are working to get underhooks.
That's four minutes gone in the round.
Fujita misses with a short punch on the inside.
Fujita misses with a short punch on the inside.
A quick uppercut on the inside from You Really Want To Hurt.
You Really Want To Hurt cracks Fujita with a nice body shot.
Fujita lands a body punch.
Fujita misses with a hook from the clinch.
The crowd cheering loudly, showing their appreciation for the quality fight we're seeing here.
Fujita struggles to land a body shot inside as You Really Want To Hurt controls his hands.
Fujita working some nice short punches in the clinch.
Fujita scores with an uppercut up the middle.
Fujita can't find room to land a body shot as You Really Want To Hurt controls the action.
You Really Want To Hurt misses with a hook to the ribs.
Fujita throws a head punch that misses.
Fujita doesn't land with the attempted body shot.
Fujita fails to land with a short punch on the inside.
Do You Really Want To Hurt has stepped it up - he knows he needs a finish here!
You Really Want To Hurt blocks a body shot from Fujita.
You Really Want To Hurt misses with a shot to the kidneys.
And that's the end of the fight!
Kaz Fujita comfortably won the final round on my scorecard.
I've got Fujita winning every round here. Surely the decision will go his way and he'll pick up a well deserved decision victory. Over to the ring announcer for the scorecards.
Ladies and gentlemen, after 3 rounds of action, we go to the scorecards for a decision.
Judge Bart Greer scores the fight for Kaz Fujita!
Judge Dirk Anderson scores the fight for Kaz Fujita!
Judge David Hoff scores the fight for Kaz Fujita!
Kaz Fujita wins by unanimous decision!
|
|
|
|
|
|
|
|
|
|
|
|
|
|
|
|
|
|
|
|
|
|
|
| S |
C
A |
G |
S |
C
B |
G |
|
S |
C |
G |
|
energy
A | B |
|
hype
A | B |
|
pop
A | B |
|
mgr
A | B |
|
FIGHT
RATING
51% |
|
|
|
|
|
|
|
Undercard bout
|
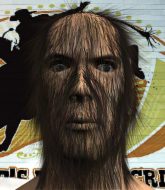
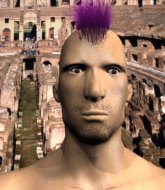
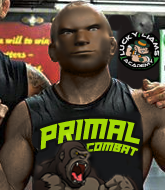
Coming up we have a heavyweight MMA rules bout between Shasta Magoo (ranked 4290 p4p, 348 weight class) and Turd McPherson (ranked 582 p4p, 0 weight class). Magoo comes to the cage accompanied by Walk all over you. Turd McPherson will no doubt be looking to use his reach advantage to good effect.
 |
|
 |
| 185 cm
25
250 lbs
2 - 0 - 0 |
|
225 cm
27
292 lbs
10 - 4 - 0 |
Decent wrestler
Brawler
Granite chin |
|
Good wrestler
Basic striking
Good gas tank |
|
| |
|
Ladies and gentlemen. This fight is 3 rounds, in the heavyweight division.
Introducing the fighter to my left, fighting out of the red corner.
With a record of
2 - 0 - 0, fighting out of The Island, Shasta Magoo !
And introducing the fighter to my right, fighting out of the blue corner.
With a record of
10 - 4 - 0, fighting out of The Island, Turd McPherson!
The judges for this bout are Michael Johnstone, Peter Branson and Santiago Holmes.
The bell rings for round one and we are underway!
Magoo lunges in with swinging rights and lefts but McPherson circles away quickly and effectively.
Magoo scores with a jab to the body.
Magoo throws a low kick, looking for McPherson's leg but McPherson calmly moves out of range.
McPherson is definitely looking for the counter takedowns here.
McPherson drops down and drives through with a powerful takedown into guard.
Magoo is looking to stand back up but McPherson counters by passing into half guard. Oops... bit sloppy there by Magoo .
Magoo definitely looks more muscular than last time we saw him fight.

McPherson working over Magoo with some ground and pound. Magoo looks like he wants out of this position, which is understandable.
The referee calls for the fighters to work.
Magoo is looking to escape.
Magoo on the receiving end of some nice ground and pound.
McPherson thows a huge punch but Magoo dodges it nicely.
McPherson is working hard to pass the guard. He's done it - he's now in full mount! Trouble for Magoo !
Magoo knows he needs to get back to his feet asap. He's simply no match for McPherson on the ground.
This has been an exciting period of action!
McPherson looking to control and managing it successfully.
McPherson has the superior BJJ but he's also working some ground strikes into his gameplan.
McPherson lands a big elbow.
McPherson landing strikes from the mount.
Magoo might be looking to lock onto one of his opponent's long limbs for a submission, whilst we're on the ground.
That's one minute gone in the round.
McPherson unloading with bombs!
McPherson landing shots from mount.

Magoo is rocked!
McPherson softens up his opponent with a couple of shots there and then CRACK! One massive shot lands there and Magoo is out cold! McPherson jumps to his feet and celebrates on the cage with the fans, who are, quite frankly, going absolutely mental!
Ladies and gentlemen, after 1:30 of round 1, we have a winner by way of TKO (Strikes). Turd McPherson!
A very excited looking Turd McPherson made sure he remembered to thank all the fans both in the arena and on the internet. He said all the coolest people spend all day on MMA websites, which got a big reaction.
The defeated Shasta Magoo had this to say: 'If i learned one lesson in life its that Life always offers you a second chance, its called tomorrow so with this in mind always remember that if you cant remember my name, just say "chocolate" and i will turn around.'.
|
|
|
|
|
|
|
|
|
|
|
|
|
|
|
|
|
|
|
|
|
|
|
| S |
C
A |
G |
S |
C
B |
G |
|
S |
C |
G |
|
energy
A | B |
|
hype
A | B |
|
pop
A | B |
|
mgr
A | B |
|
FIGHT
RATING
80% |
|
|
|
|
|
|
|
Undercard bout
|
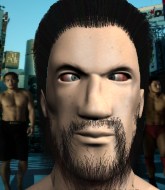
Coming up we have a heavyweight MMA rules bout between Bryan Mayhem (ranked 300 p4p, 0 weight class) and Conor McGregor (ranked 5010 p4p, 0 weight class). Conor McGregor has the better chin. Will he look to stand and bang today?
 |
|
 |
| 175 cm
20
243 lbs
9 - 3 - 0 |
|
225 cm
25
280 lbs
1 - 0 - 0 |
Good wrestling
Brawler
Cardio machine |
|
Decent wrestler
Brawler
Very confident |
|
| |
|
Ladies and gentlemen. This fight is 3 rounds, in the heavyweight division.
Introducing the fighter to my left, fighting out of the red corner.
With a record of
9 - 3 - 0, fighting out of The Island, Bryan Mayhem!
And introducing the fighter to my right, fighting out of the blue corner.
With a record of
1 - 0 - 0, fighting out of The Island, Conor McGregor!
The judges for this bout are Peter Branson, Winston Alpacca and Santiago Holmes.
The bell rings for round one and we are underway!
McGregor misses with a takedown attempt

and Mayhem counters with a crisp right hand that drops McGregor! Mayhem lets McGregor back up to his feet, looking for a finish!
It looks like Conor McGregor has been cut.
McGregor darts in and lands a nice takedown into half guard.
We could do with one of the fighters taking the initiative a bit more on the ground - they're both waiting to capitalize on a mistake.
Wooooo! Give it up for these two warriors! They are putting on a show!
McGregor sitting in half guard, looking to land shots. Mayhem defending well though.
Mayhem on his back here. We all know that wrestlers don't like being on their back so let's see if Mayhem tries to get out of the position.

McGregor is working for a kimura but Mayhem is defending it quite comfortably.
McGregor wants to pass to mount but Mayhem is defending the position.
Mayhem trying to control here.
That's one minute gone in the round.
McGregor is looking to take a break and control but Mayhem is keeping him honest, looking to work from the bottom.
McGregor content to sit in half guard and control for a moment.
Mayhem blocking the ground and pound attempt from McGregor.
We may be looking at a referee standup if the pace doesn't pick up soon.
McGregor trying to control from Mayhem's half guard. Mayhem has other ideas though and has regained full guard.
McGregor controls the pace of the fight for a moment.
That's two minutes gone in the round.
The crowd are showing their displeasure at the lack of action as loud boos ring out around the arena.

The referee has motioned to the fighters to stand back up. He just wasn't happy with the level of activity.
McGregor changes levels and looks for a double leg takedown. Mayhem tries to avoid it but McGregor manages to keep hold of a leg and drag Mayhem to the ground. Mayhem escapes though and pops straight back up to his feet.
Mayhem throws a hook to the side of McGregor's head but McGregor sees it coming and ducks under it beautifully.
McGregor gets his takedown attempt stuffed easily
and Mayhem counters with a beautiful right hand that knocks McGregor out cold! What a finish! Mayhem is going crazy, running around the mat, summersaulting off the corner posts and screaming into the cameras. Something tells me he's pretty happy!
Ladies and gentlemen, after 2:23 of round 1, we have a winner by way of KO (Punch). Bryan Mayhem!
A relieved looking Bryan Mayhem thanked the fans for their support and gave the usual line about them being amazing. They seemed to believe that he actually meant it.
|
|
|
|
|
|
|
|
|
|
|
|
|
|
|
|
|
|
|
|
|
|
|
| S |
C
A |
G |
S |
C
B |
G |
|
S |
C |
G |
|
energy
A | B |
|
hype
A | B |
|
pop
A | B |
|
mgr
A | B |
|
FIGHT
RATING
40% |
|
|
|
|
|
|
|
Undercard bout
|
Coming up we have a heavyweight MMA rules bout between Kylo Jahr (ranked 4713 p4p, 0 weight class) and Tyson James (ranked 333 p4p, 0 weight class). Over to our ring announcer for the fighter introductions!
 |
|
 |
| 189 cm
26
280 lbs
1 - 2 - 0 |
|
185 cm
27
265 lbs
10 - 3 - 0 |
Good takedowns
Basic striking
Very quick |
|
Good wrestler
Basic striking
Good gas tank |
|
| |
|
Ladies and gentlemen. This fight is 3 rounds, in the heavyweight division.
Introducing the fighter to my left, fighting out of the red corner.
With a record of
1 - 2 - 0, fighting out of The Island, Kylo Jahr!
And introducing the fighter to my right, fighting out of the blue corner.
With a record of
10 - 3 - 0, fighting out of The Island, Tyson James!
The judges for this bout are Peter Branson, Daniel Franklin and Winston Alpacca.
The bell rings for round one and we are underway!
James fails with a takedown attempt.
James fakes high and shoots in for a takedown but Jahr avoids it really well and circles away.
An attempted straight right counter from Jahr misses the target.
James dives in and grabs Jahr's left leg, looking for a takedown. Jahr pushes down on James's head and hops out.
Kylo Jahr has stuffed three takedown attempts in the round now. That's going to take a lot out of Tyson James.

Jahr changes levels and drives through with a really nice takedown into side control. James looks really pissed at himself for not defending that better.

Jahr thinks about going for a far side armbar but bails out and retains the dominant position instead.
Jahr tries for an arm triangle. That looks pretty tight to me. Is this one over!?! Possibly, maybe, no Jahr has let go of the choke. Obviously it wasn't as tight as we thought!
James really doesn't want to stay on the ground with Jahr. If he can't get it back to his feet, it's only a matter of time before he'll be tapping out.
Jahr goes for an armbar! This could be all over! Wait, no, James rolls with the submission and now he's on top in Jahr's guard! Nice work there by James!
Jahr wants to sweep but no luck.
James postures up and lands some nice ground and pound.
That's one minute gone in the round.
James lands a couple of decent looking shots.
James engaging in some classic timewasting tactics.
James throws a strike but Jahr rolls with it and manages to sweep. Now he's in guard on top.
Jahr wants to control from the top but James keeps moving.
Jahr preventing the sweep.
Jahr advances position into side control!
Jahr wants to control but James is keeping him busy.
James is trying to get back to half guard.
That's two minutes gone in the round.
Jahr has an Americana. James didn't react quickly enough there and he's in big trouble now! He tries to squirm out but is forced to tap! Jahr is delighted and gyrates in front of the ring girls. They seem to like the attention - it'll be interesting to see if Jahr hooks up with any of them at the after show party.
Ladies and gentlemen, after 2:23 of round 1, we have a winner by way of Submission (Americana). Kylo Jahr!
Kylo Jahr was full of energy after the big win and talked about how he thinks he can do big things in this sport. The crowd were appreciative of his determination to succeed.
|
|
|
|
|
|
|
|
|
|
|
|
|
|
|
|
|
|
|
|
|
|
|
| S |
C
A |
G |
S |
C
B |
G |
|
S |
C |
G |
|
energy
A | B |
|
hype
A | B |
|
pop
A | B |
|
mgr
A | B |
|
FIGHT
RATING
43% |
|
|
|
|
|
|
|
Undercard bout
|
Coming up we have a heavyweight MMA rules bout between Oroku Saku (ranked 547 p4p, 0 weight class) and Rick Laws (ranked 3558 p4p, 0 weight class). Over to our ring announcer for the fighter introductions!
 |
|
 |
| 200 cm
27
245 lbs
7 - 3 - 0 |
|
192 cm
27
220 lbs
5 - 6 - 0 |
Decent wrestler
Great elbows
Cardio machine |
|
Good wrestler
Good elbows
Powerful |
|
| |
|
Ladies and gentlemen. This fight is 3 rounds, in the heavyweight division.
Introducing the fighter to my left, fighting out of the red corner.
With a record of
7 - 3 - 0, fighting out of The Island, Oroku Saku!
And introducing the fighter to my right, fighting out of the blue corner.
With a record of
5 - 6 - 0, fighting out of The Island, Rick Laws!
The judges for this bout are David Hoff, Santiago Holmes and Bart Greer.
The bell rings for round one and we are underway!
Saku lands with a nice body kick.
Laws misses with a takedown attempt. He shot from a bit too far out.
Saku tries to counter by moving into the clinch but Laws manages to circle out of the way.
Saku rushes Laws and pushes him back against the cage in a clinch.
Knees in the clinch landing for Saku.
Saku is clearly stalling here... Pick up the pace son.
Saku landing knees to the head.
It looks like Rick Laws has been cut.
A knee to the head by Saku.
Laws managing to block the knees to the body from Saku.
We've had a slow start to the round here - hopefully the action picks up.
Saku lands an elbow inside.
A knee to the head by Saku.
Saku will no doubt start fighting again in a minute but for now he's just having a little rest, leaning Laws up against the cage.
This has been an exciting period of action!
Saku tries to land a knee to the body but he is off balance and Laws avoids it.
That's one minute gone in the round.
Saku throws an elbow that misses.
Saku misses with a short punch on the inside.
Laws takes a knee to the side of the body.
Laws looks winded!
Saku's corner are urging him to control the action in the clinch for a moment, rather than mount any serious offense. I'm sure the crowd appreciate those instructions... not.
Saku lands a nice knee to the body.
Saku unloads a knee to the mid-section.
Saku trying to land knees to the body.
Saku lands an elbow inside that Laws shrugs off.
Saku misses with a punch on the inside.
A nice glancing elbow lands by Saku.
That's two minutes gone in the round.
Saku utilising his Muay Thai to score with a knee to the body.
Saku lands a damaging elbow.
Saku landing some nice looking knees to the body.
The fans in attendance giving it up for the two fighters, who have really let it all hang out in the last minute or so!
Saku tries to land a knee to the head but misses.
Saku has been talking about how he's improved his wrestling in the run up to the fight so let's see if that's enough to sway the balance.
Saku is trying to wear down his opponent with knees to the body.
Saku lands a knee to the head there! That was nasty!
Saku misses with a knee to the head.
Saku trying to land knees to the body.
Knees to the body from Saku.
Laws blocks a body shot from Saku.
Saku with the Thai clinch, lands a knee to the head.
Saku tries to land a knee to the body but he is off balance and Laws avoids it.
That's three minutes gone in the round.
Laws on the defensive, avoiding the knees to the body.
Saku trying to land knees to the body.
Saku is looking to score with knees to the body. Maybe he'll change it up and go body then head. Laws is defending well for now.
Laws managing to block the knees to the body from Saku.
Saku tries a body shot but Laws blocks it.
With the fighters clinched against the cage, Saku creates a bit of distance for himself and scores with a nice uppercut.
Laws managing to block the knees to the body from Saku.
Saku lands an elbow inside.
Saku is looking to score with knees to the body. Maybe he'll change it up and go body then head. Laws is defending well for now.
Saku lands an elbow that stopped Laws in his tracks for a moment.
Saku lands a damaging elbow.
Saku is looking to score with knees to the body. Maybe he'll change it up and go body then head. Laws is defending well for now.
Laws blocks an elbow strike from Saku.
That's four minutes gone in the round.
Saku landing knees to the body.
Saku lands an elbow that stopped Laws in his tracks for a moment.
Saku lands a nice elbow.

Laws is rocked!
The crowd are loving this. Great action here.
Saku lands a nice elbow from the clinch.
Laws is still on wobbly legs! Can Saku finish him?
Saku unloads with a big right hand that wobbles Laws! He's leaning against the cage trying to keep his feet but Saku is unloading with more strikes now! Laws drops to his knees and the referee stops the fight for a TKO!
Ladies and gentlemen, after 4:26 of round 1, we have a winner by way of TKO (Strikes). Oroku Saku!
After winning the bout, Oroku Saku thanked all his fans and promised he'd do even better in his next fight. The crowd seemed to love his humility.
|
|
|
|
|
|
|
|
|
|
|
|
|
|
|
|
|
|
|
|
|
|
|
| S |
C
A |
G |
S |
C
B |
G |
|
S |
C |
G |
|
energy
A | B |
|
hype
A | B |
|
pop
A | B |
|
mgr
A | B |
|
FIGHT
RATING
49% |
|
|
|
|
|
|
|
Co-main event
|
Coming up we have a heavyweight MMA rules bout between Karol Rasputin (ranked 2334 p4p, 0 weight class) and Bailey Blue (ranked 2051 p4p, 0 weight class). Both fighters look fresh as a daisy as they make their way towards the cage.
 |
|
 |
| 194 cm
20
257 lbs
3 - 1 - 0 |
|
178 cm
27
238 lbs
6 - 6 - 0 |
Powerful takedowns
Brawler
Very quick |
|
Good wrestler
Decent boxing
Good gas tank |
|
| |
|
Ladies and gentlemen. This fight is 3 rounds, in the heavyweight division.
Introducing the fighter to my left, fighting out of the red corner.
With a record of
3 - 1 - 0, fighting out of The Island, Karol Rasputin!
And introducing the fighter to my right, fighting out of the blue corner.
With a record of
6 - 6 - 0, fighting out of The Island, Bailey Blue!
The judges for this bout are Michael Johnstone, Sandra Marshall and Santiago Holmes.
The bell rings for round one and we are underway!
Rasputin on the wrong end of an overhand right that came out of nowhere.
Rasputin fakes high and shoots in for a takedown but Blue avoids it really well and circles away.
Blue drops down looking to force a counter takedown but Rasputin defends it well.
Rasputin tries to move into range but Blue moves to the side and lands with a nice right hand.
Blue lands a lovely overhand right.
Rasputin takes a big uppercut there. He seems a bit wobbly but no, he's OK.
Rasputin shoots for a takedown but Blue saw that one coming a mile off and avoided it easily.
Rasputin changes levels and looks for a double leg takedown. Blue tries to avoid it but Rasputin manages to keep hold of a leg and drag Blue to the ground. Blue escapes though and pops straight back up to his feet.
That's three failed takedown attempts in the round for Karol Rasputin. That's going to take a lot out of him.
Rasputin tries to score a power double leg takedown but Blue sees that one coming and sprawls well. That will dishearten Rasputin somewhat.
Rasputin looks to have improved his striking defense since last time we saw him fight.
Rasputin blocks a leg kick.
Good standup being displayed there by Blue as he connects with a hook.
Blue is looking for a takedown here. He's shot in and has managed to get it, finishing up in Rasputin's half guard.
The crowd cheering loudly, showing their appreciation for the quality fight we're seeing here.
Blue throwing punches and elbows but they're not doing any damage.
Blue sitting in half guard, looking to land shots. Rasputin defending well though.
Rasputin keeping his head moving to avoid the ground and pound.
Rasputin blocking the ground and pound attempt from Blue.
That's one minute gone in the round.
Rasputin avoiding damage under a succession of punches from Blue.
Rasputin blocking the ground and pound attempt from Blue.
Blue missing with some ground and pound from the half guard.
Blue is scoring with some nice ground and pound from the dominant position.
Blue not throwing his punches with enough precision this time.
Rasputin avoiding damage under a succession of punches from Blue.
The fighters are pressed up against the cage, both looking to find a bit of space to work.
Blue working over Rasputin with some ground and pound. Rasputin looks like he wants out of this position, which is understandable.
Blue working over Rasputin with some ground and pound. Rasputin looks like he wants out of this position, which is understandable.
Blue throwing shots but Rasputin is blocking nicely.
Rasputin regains full guard. Nicely done.
Blue loading up with the ground and pound but he's missing more than he's landing in this flurry.
The ref warns both fighters not to hold the cage as they work up against the meshing.
Blue trying to pass the guard. He's being very persistent here but Rasputin manages to land a sweep and now he's on top!
Rasputin throwing strikes from guard but Blue blocks nicely.
That's two minutes gone in the round.
Blue pulls Rasputin in close to prevent any damage.
Blue is continuing to stall.
Blue keeping moving, preventing Rasputin from controlling successfully.
Blue working the defensive guard well to avoid strikes from Rasputin.
Blue wants to sweep here but Rasputin controlling him for the moment.
Blue utilising some decent striking defenses from the guard, preventing the ground and pound.
Rasputin chips away with some ground and pound.
Blue has control of Rasputin's left arm, preventing Rasputin from doing any damage.
Let's hope that Blue has the urge to step up the pace any second now because for the last 15 or 20 seconds he's just been holding on tight.
We're seeing a lot of stalling here from Blue.
Hammerfist, elbow! yells Rasputin's corner. There ya go! There ya go!
That's three minutes gone in the round.
Rasputin throwing elbows and punches but not connecting, as Blue works some decent striking defense from the bottom.
Blue looking to sweep here. No luck so far.
Blue is still trying to improve position.
Rasputin cracks Blue with a solid left hand.
Blue controlling Rasputin's posture.
Rasputin content to stall in guard here.
Blue managing to control the position.
Blue keeping moving, preventing Rasputin from controlling successfully.
Rasputin has been looking to land a fair amount of strikes on the ground. He might be looking to soften his opponent up in order to work for a submission.
Blue has a closed guard, preventing anything of note from happening. Perhaps he's looking to stall.
Rasputin loading up with the ground and pound but he's missing more than he's landing in this flurry.
Blue seems keen to control rather than go for a submission, at least for now.
That's four minutes gone in the round.
The crowd are starting to boo a lack of action.
Yet more stalling tactics from Blue.
There's a bit of a scramble here and now Blue is on top in guard.

Blue won't allow Rasputin to sweep him here.
Blue must be cautious of submissions here, given that his opponent has the superior Jiu Jitsu.
Blue throwing strikes from guard but Rasputin blocks nicely.
Blue trying to land body shots but he keeps hitting the mat.
Blue throws an elbow that misses. Rasputin uses the momentum to reverse the position. He's now in Blue's guard. Nice move by Rasputin!
Blue looking to hit a scissor sweep but Rasputin is one step ahead there.
A real slowdown in the pace of the fight for a moment, as Blue holds on and takes a little breather.
Rasputin lands a couple of digs.
Rasputin trying to control but Blue is working from the bottom.
And thats the end of the round the fighters go back to their corners.
Bailey Blue dominated that round.
The referee calls time. The cornermen exit stage left and we're back to business.
Blue jabs Rasputin right on the nose. Rasputin blinks but takes it well.
Rasputin looks for a takedown but Blue sprawls well.
Rasputin tries to drive through with a takedown attempt but Blue defends well and Rasputin ends up having to push Blue into the cage where they will battle it out in the clinch.
Rasputin misses with a takedown attempt - Blue sprawls well and throws a nice strike on the way out which just misses.
Blue feints the counter takedown.
That's three failed takedown attempts in the round for Karol Rasputin. That's going to take a lot out of him.
Rasputin shoots in for a takedown but Blue shows good takedown defense there and keeps this one on the feet.
A really sloppy takedown attempt there from Rasputin.
Rasputin shoots in looking for a takedown but Blue manages to keep the fight standing, pushing Rasputin's face into the canvas for good measure before circling away.
Blue has been working his punching technique in the buildup to the fight and it appears to be paying off.
Rasputin moves out of range of the body kick from Blue.
Blue scores with a jab to the head.
Rasputin tries to score a power double leg takedown but Blue sees that one coming and sprawls well. That will dishearten Rasputin somewhat.
Both fighters are absolutely exhausted here.
We've had a slow start to the round here - hopefully the action picks up.
Rasputin on the wrong end of a vicious looking body shot.
Blue shoots in for a takedown and gets it. Let's see what he's got on the mat.
Blue trying to control the position from guard on top but Rasputin is wriggling around, looking for whatever he can.
That's one minute gone in the round.
Blue scoring with punches to the head and body.
Blue tries to free his leg and advance position but Rasputin is retaining full guard.
Blue sitting in guard, not really doing much.
Blue wants to control from the top but Rasputin keeps moving.
Blue loading up with the ground and pound but he's missing more than he's landing in this flurry.
Rasputin will need to keep those long limbs tucked in whilst he's on the ground, to prevent any submissions.
Blue scores with a decent looking elbow strike.
A big thud reverberates around the arena there as Blue accidentally thumps the mat. Hopefully he's not broken his hand.
Blue works over Rasputin with some ground and pound from guard.
Rasputin keeping moving, preventing Blue from controlling successfully.
Blue working in close now, lands a nice elbow to the side of Rasputin's head.
That's two minutes gone in the round.
The crowd are getting on the fighters' backs, as the pace has dropped off in the last minute or so.
Hammerfist, elbow! yells Blue's corner. There ya go! There ya go!
Bailey Blue has got the better of the ground game so far.
Blue chips away with some ground and pound.
Blue landing with the ground and pound.
Rasputin is rocked!
Blue arches his back and unloads with a massive left and a right! Rasputin's eyes roll back into his head, he's out cold! The ref dives in to stop the fight - wow, they were hard shots!
Ladies and gentlemen, after 2:40 of round 2, we have a winner by way of KO (Strikes). Bailey Blue!
|
|
|
|
|
|
|
|
|
|
|
|
|
|
|
|
|
|
|
|
|
|
|
| S |
C
A |
G |
S |
C
B |
G |
|
S |
C |
G |
|
energy
A | B |
|
hype
A | B |
|
pop
A | B |
|
mgr
A | B |
|
FIGHT
RATING
39% |
|
|
|
|
|
|
|
Main event
|
Coming up we have a heavyweight MMA rules bout between Kyle Cobra (ranked 105 p4p, 0 weight class) and Diogo Bustamante (ranked 6106 p4p, 0 weight class). Both these guys have really solid chins. Will we see a standup war or will they both decide that a knockout is unlikely and try to win the fight elsewhere?
 |
|
 |
| 195 cm
27
270 lbs
12 - 3 - 0 |
|
194 cm
27
244 lbs
2 - 2 - 0 |
Good wrestling
Basic striking
KO power |
|
BJJ White Belt
Excellent MT
Granite chin |
|
| |
|
Ladies and gentlemen. This fight is 3 rounds, in the heavyweight division.
Introducing the fighter to my left, fighting out of the red corner.
With a record of
12 - 3 - 0, fighting out of The Island, Kyle Cobra!
And introducing the fighter to my right, fighting out of the blue corner.
With a record of
2 - 2 - 0, fighting out of The Island, Diogo Bustamante!
The judges for this bout are Winston Alpacca, Michael Johnstone and Bart Greer.
The bell rings for round one and we are underway!
Cobra shoots in and scores a nice double leg takedown into half guard.
Bustamante is trying to defend against the ground and pound but Cobra scores with a couple of nice shots.
Bustamante pushes Cobra off looking to stand but Cobra dives back in and keeps control.
Cobra performing his best blanket impression for a moment.
Cobra prevents Bustamante from standing back up.
The referee walks around the fighters to get a better view of the action. Cobra lands a nice short elbow.
Cobra lands with a punch from half guard.
Cobra slows the pace down in half guard.
Bustamante is trying to stand.
Cobra working over Bustamante with some ground and pound. Bustamante looks like he wants out of this position, which is understandable.
Cobra is nestled in close to Bustamante, controlling him well. He's worked in a nice elbow to the side of the head as well, for good measure.
We get told so often about how wrestlers don't like to be on their backs. Let's see if Bustamante can do anything to dispel that myth.
Cobra moves nicely into side control.
Bustamante being controlled for a moment.
Wooooo! Give it up for these two warriors! They are putting on a show!
Cobra lands some shots froms side control.
Bustamante really doesn't want to stay on the ground with Cobra. If he can't get it back to his feet, it's only a matter of time before he'll be tapping out.
That's one minute gone in the round.
Bustamante is trying to stand back up. He's worked his way up against the cage but Cobra has just dragged him back down to the mat.
Cobra controlling the position from side mount.
Cobra cracks Bustamante with a big elbow.
Cobra wants to lay and pray for a moment but Bustamante keeps working.
Bustamante is not in a great position here, taking some shots.
Bustamante takes an elbow right on the bridge of the nose and winces in pain.
Bustamante gives up the full mount - oops, sloppy defensive grappling there!
The fighters are starting to perspire pretty heavily.
Bustamante is trying to get to the cage to help him get back to his feet.
Cobra raining down shots from the mount!
Bustamante is trying to escape but when you're mounted that's not too easy.
Cobra has been looking to land a fair amount of strikes on the ground. He might be looking to soften his opponent up in order to work for a submission.
Cobra working away from the top, dropping strikes.
That's two minutes gone in the round.
Cobra cracks Bustamante with a nasty head shot there - the crowd let out an audible gasp there, as the noise reverberated around the arena.
This is a great period of action - very entertaining stuff!
Cobra in mount throwing good strikes here, bouncing his opponent's head off the canvas.
Bustamante is trying to stand up.
Cobra landing strikes, looking to finish!
Cobra scores with a couple of good head shots there.
Bustamante is rocked!
The ref warns both fighters not to hold the cage as they work up against the meshing.
Cobra connects with a bit shot that sees Bustamante covering up! More strikes from Cobra and the referee jumps in to stop the fight! Cobra is our winner by TKO!
Ladies and gentlemen, after 2:33 of round 1, we have a winner by way of TKO (Strikes). Kyle Cobra!
After winning the bout, Kyle Cobra thanked all his fans and promised he'd do even better in his next fight. The crowd seemed to love his humility.
|
|
|
|
|
|
|
|
|
|
|
|
|
|
|
|
|
|
|
|
|
|
|
| S |
C
A |
G |
S |
C
B |
G |
|
S |
C |
G |
|
energy
A | B |
|
hype
A | B |
|
pop
A | B |
|
mgr
A | B |
|
FIGHT
RATING
65% |
|
|
|
|
|
|
|
|
|
|

