 |
IVT 14 PBP Commentary |
Undercard bout
|
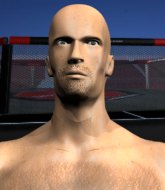
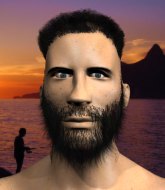
Coming up we have a light heavyweight MMA rules bout between Rafik Arfah (ranked 24829 p4p, 559 weight class) and Mario Gallo (ranked 2861 p4p, 340 weight class). Mario Gallo told me before the fight that he's been watching a lot of DVDs so let's see if that helps him in this one! I can't wait to find out!
 |
|
 |
| 150 cm
18
205 lbs
0 - 7 - 0 |
|
180 cm
26
202 lbs
2 - 1 - 0 |
BJJ Brown Belt
Basic striking
Experienced |
|
Good wrestler
Decent boxing
Heavy handed |
|
| |
|
Ladies and gentlemen. This fight is 3 rounds, in the light heavyweight division.
Introducing the fighter to my left, fighting out of the red corner.
With a record of
0 - 7 - 0, fighting out of The Island, Rafik Arfah!
And introducing the fighter to my right, fighting out of the blue corner.
With a record of
2 - 1 - 0, fighting out of The Island, Mario Gallo!
The judges for this bout are Dirk Anderson, Bart Greer and Sandra Marshall.

The bell rings for round one and we are underway!
Arfah thows a left - swing and a miss!
Gallo moves away from the strike by Arfah.
Gallo punishes Arfah's body with a nice straight punch.
Arfah misses with a hook
and Gallo connects with a straight left hand counter down the middle.
Arfah misses with a hook. Gallo ducked under it nicely.
Mario Gallo seems to be the more aggressive standup fighter in this bout.
Arfah looks to land a left hand but Gallo moved out of range nicely.
Arfah takes a body punch that cleary hurt but he's trying not to show any weakness.
Gallo cracks Arfah with a good jab.
Gallo lands a body shot.
Arfah really is a fat lump.
A shot to the liver by Gallo. Beautiful body shot.
Arfah is breathing heavily.
Gallo lands a nice hook to Arfah's body. Arfah takes it in his stride and looks to land his own strikes.
Gallo ducks down and throws a hook to the body.
Gallo looks more muscular than last time we saw him. He must have been on the weights.
The crowd cheering loudly, showing their appreciation for the quality fight we're seeing here.
Gallo throws a jab to the body, straight down the pipe. Boom. That sent Arfah stumbling backwards but he manages to regain his composure quickly.

Gallo drops Arfah with a hook right on the temple. He thinks about going to the ground but Arfah looks back up at him and smiles so Gallo waves him back to his feet - he obviously thinks he can knock him out after that shot landed.
Gallo ducks low and lands a nice hook to the body of his opponent.
Gallo is throwing a lot of body shots here, looking to wear down Arfah rather than just go for the knockout.
Arfah takes a punch right to his stomach. That took the wind out of him momentarily.
Gallo digs a good body shot into Arfah's ribs.

That's one minute gone in the round.
Arfah takes a shot to the body in his stride.
Gallo cracks a nice hook into Arfah's ribs.
Gallo scores with a nice head shot.

Arfah is rocked!
Gallo connects with a body shot.
Oh Arfah is still all over the place! His legs are completely gone! Will he be able to recover?!!
Arfah takes a shot to the body in his stride.
Gallo lands a right hook to the body.
Gallo cracks Arfah with a left hook right on the temple and Arfah goes down! He's out! Referee! Stop the fight! Gallo lands a few more punches before the dopey ref steps in - hopefully Arfah is OK!
Ladies and gentlemen, after 1:25 of round 1, we have a winner by way of KO (Punch). Mario Gallo!
After winning the bout, Mario Gallo thanked all his fans and promised he'd do even better in his next fight. The crowd seemed to love his humility.
|
|
|
|
|
|
|
|
|
|
|
|
|
|
|
|
|
|
|
|
|
|
|
| S |
C
A |
G |
S |
C
B |
G |
|
S |
C |
G |
|
energy
A | B |
|
hype
A | B |
|
pop
A | B |
|
mgr
A | B |
|
FIGHT
RATING
97% |
|
|
|
|
|
|
|
Undercard bout
|
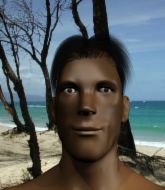
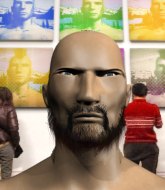
Coming up we have a super heavyweight MMA rules bout between Lurch Addams (ranked 3863 p4p, 171 weight class) and Strike Zombie (ranked 6297 p4p, 219 weight class). Lurch Addams is staring across the cage at his opponent, tweaking his nipples... Tweaking his own nipples that is.
 |
|
 |
| 225 cm
20
280 lbs
1 - 0 - 1 |
|
225 cm
19
300 lbs
3 - 4 - 0 |
BJJ Blue Belt
Solid Muay Thai
Granite chin |
|
BJJ Purple Belt
Brawler
Determined |
|
| |
|
Ladies and gentlemen. This fight is 3 rounds, in the super heavyweight division.
Introducing the fighter to my left, fighting out of the red corner.
With a record of
1 - 0 - 1, fighting out of The Island, Lurch Addams!
And introducing the fighter to my right, fighting out of the blue corner.
With a record of
3 - 4 - 0, fighting out of The Island, Strike Zombie !
The judges for this bout are Santiago Holmes, Peter Branson and Sandra Marshall.
The bell rings for round one and we are underway!
Zombie shoots in with a takedown attempt and he has Addams pinned against the cage. Addams gets the underhooks and manages to circle away.
Zombie shoots in for a takedown - he's clinched up with Addams but Addams pushes him off and we're back to square one.
Addams fires out a quick counter leg kick but Zombie just manages to avoid it.

Zombie moves into the clinch.
Addams connects with a knee to the head.

It looks like Strike Zombie has been cut.
We've had a slow start to the round here - hopefully the action picks up.
Addams lands a knee to the body.
Zombie looks winded!

Addams breaks the clinch and we return to the middle of the mat.
Addams moves into range and lands a nice leg kick.
Addams thuds his shin into the meat of Zombie 's side.
Addams lands with an uppercut that bounces Zombie off the cage and back into range.
Strike Zombie seems to be the more aggressive standup fighter in this bout.
That's one minute gone in the round.

Addams gets a clinch.
Addams crunches a lovely knee into Zombie 's ribcage.
The fighters are pressed against the cage, as the pace of the fight slows.
Addams utilising his Muay Thai to score with a knee to the body.
Addams connects with a knee to the head.
Zombie takes a knee right on the jaw!
Addams's corner are urging him to control the action in the clinch for a moment, rather than mount any serious offense. I'm sure the crowd appreciate those instructions... not.
Addams landing knees to the body. They look like they could hurt.
Addams landing knees to the body.
Addams scores with a knee to the head.
The crowd cheering loudly, showing their appreciation for the quality fight we're seeing here.
Addams lands a knee to the body.

That's two minutes gone in the round.
Zombie takes a knee to the side of the body.
Stalling in the clinch from Addams.
Nice elbow from Addams.
Addams is trying to wear down his opponent with knees to the body.
Knees in the clinch landing for Addams.
Addams lands a nice knee to the body.
Nice elbow from Addams.
Addams taking a break, stalling in the clinch.
Addams lands an elbow that stopped Zombie in his tracks for a moment.
Addams is clearly stalling here... Pick up the pace son.
Knees in the clinch landing for Addams.
Addams connects with a knee to the head.
Addams lands a knee to the body.
Addams really does look like a pencil wearing a pair of gloves. Let's hope he has a gameplan to suit that ridiculous body shape.
Zombie takes a knee to the side of the body.
Addams effectively controlling the action here.

That's three minutes gone in the round.
Addams landing knees to the body.
Addams connects with a knee to the head.

Zombie is rocked!
Addams using the Thai clinch to land knees to the body.
Zombie is still on wobbly legs! Can Addams finish him?
Addams comes over the top with an elbow. That landed flush.

Addams wants the takedown. Zombie is fighting it off but Addams persists and manages to bring the fight to the ground, ending up in Zombie 's guard against the cage.
The ref warns both fighters not to hold the cage as they work up against the meshing.
Addams is pushing down on Zombie 's leg trying to pass to half guard. Zombie is fighting to maintain full guard but Addams has managed to sneak the leg through.
Addams has improved his flexibility recently so we will have to see if he can use that to his advantage.
Addams looks to score some points with some ground and pound.
Addams slows the pace down in half guard.
Addams has controlled the position for a good 20 seconds, which will no doubt be starting to frustrate his opponent.
Addams knows he needs to get back to his feet asap. He's simply no match for Zombie on the ground.
Addams wants to advance to full mount but Zombie doesn't think that's going to happen and regains full guard instead.
Zombie seems to have recovered his senses.

That's four minutes gone in the round.
Addams slows down the pace of the fight for a moment. He'll need to remain active if he doesn't want to see the fight stood back up.
Addams lands a couple of decent looking shots.
The crowd are loving this. Great action here.
Addams looking to control the position here, rather than advance.
Addams trying to control but Zombie is working from the bottom.
Addams trying to pass the guard but can't manage it just yet.
Addams trying to control the position from guard on top but Zombie is wriggling around, looking for whatever he can.
And thats the end of the round the fighters go back to their corners.
Lurch Addams dominated that round.
The cut man is working on Strike Zombie 's cut.
Well, the break between rounds is over. Let's get back to the scrappin!

Addams gets to the clinch - let's see what his plan is here.
We've been informed that Zombie has been working hard on his conditioning in the buildup to the fight.
Addams escapes the clinch and we're back to striking.
Zombie closes the distance but Addams moves to the side
and Addams counters with a low kick, right behind Zombie 's knee.
Addams keeps the fight standing with a nice sprawl.
An attempted straight right counter from Addams misses the target.
Addams darts in and clinches Zombie up against the cage.
We've had a slow start to the round here - hopefully the action picks up.
Addams lands a knee to the body.
Addams working Zombie over with knees to the body.
Addams manages to get underhooks and slows down the pace for a moment.
Zombie is breathing heavily.
That's one minute gone in the round.
Addams gets an overhook and lands an elbow to the side of the head.
Zombie takes a knee right on the jaw!
Zombie takes an elbow to the forehead.
Addams lands an elbow inside that Zombie shrugs off.
That has opened up Strike Zombie 's cut even more.
Addams is really dominating this fight. Is there anything that Zombie can do to turn this around?

Addams lands a big knee from the Thai clinch and Zombie goes down hard! The ref takes a good look at him but he's still defending himself. Addams in side control.
We've seen a great period of action over the last minute or so - credit to both fighters for going all out!
Addams is staying tight to Zombie 's torso, preventing him from escaping.
Addams's ground tactics aren't going to win him many fans. Let's hope he's got fireworks for us if he gets back to his feet because he's not doing much on the ground.
That's two minutes gone in the round.
Addams wants to stand but Zombie has his arm trapped.
Addams taking a breather here.
Addams misses with an attempted head punch from side control.
Addams is pausing for a moment. What's he doing? It looks like he's clearing his nose. Oh dude! He's shot a load of snot all down Zombie 's shoulder. That is not cool.
Addams tries to advance to mount but can't.
Addams is looking to take a break and control but Zombie is keeping him honest, looking to work from the bottom.
That's three minutes gone in the round.
Addams controls the position.
Addams has knee on belly and moves into mount.
Addams throws some wild stikes that Zombie manages to avoid easily.
Addams landing strikes from the mount and Zombie is in trouble!
Zombie is squirming around, avoiding Addams's attempts to control the action.
Addams controlling the position easily from mount.
Addams looking to finish with strikes here!
That's four minutes gone in the round.
Addams controlling his opponent.
Addams looking to control but Zombie is working nicely, looking to advance position himself.
Lurch Addams overall seems to be getting the better of the ground position in the fight so far.
Addams lands an elbow that was bordering on illegal but the referee lets it go with a warning.
Addams sitting in mount, just looking to control for the moment.
Addams looking to ground and pound his opponent to a finish here.
Addams controlling from the full mount.

Addams working to secure an arm triangle but it's not happening for him just yet.
And thats the end of the round the fighters go back to their corners.
Lurch Addams dominated that second round.
The cut man is working on Strike Zombie 's cut.
That's time! Addams's corner gives him a slap on the ass as he gets ready to fight. This is the final round!

Addams moves into range and clinches up with Zombie .
Addams lands an elbow just above Zombie 's eye.
Zombie gets double underhooks to prevent a takedown attempt from Addams.
Addams has dropped down and is working for a takedown. Zombie is trying to keep an underhook but Addams manages to get the takedown into half guard.
Addams trying to control the pace.
Addams is trying to work for a kimura but Zombie is defending well.
We've had a slow start to the round here - hopefully the action picks up.
Zombie wants to control the action here but instead Addams manages to pass to full mount!
That's one minute gone in the round.
Addams prevents Zombie from getting the reversal.
Addams controlling from mount.
The fighters are pressed up against the cage, both looking to find a bit of space to work.
Poor strikes thrown by Addams there. More accuracy and less frantic strikes would help!
Addams misses with a series of strikes from mount. He'll no doubt be working on his ground and pound when he gets back to the gym.
Addams throwing shots from mount but they're not landing.
Addams looking to ground and pound his opponent to a finish here.
Addams trying to control but Zombie is having none of it.
Addams sitting in mount, just looking to control for the moment.
Addams trying to control but Zombie is having none of it.
That's two minutes gone in the round.
Addams controlling from the full mount.
Addams punching from mount but Zombie doing a good job of avoiding damage.
Addams controlling from mount.
Zombie is in a horrible position here, under a barrage of strikes, he's managing to avoid any damage.
Addams working the ground and pound effectively.
Zombie is wriggling around trying to escape.
That's three minutes gone in the round.
Addams trying to control but he's not successful this time.
Addams tucks in and makes sure he doesn't lose the dominant position.
Addams landing strikes from the mount.
Addams working Zombie over with strikes here.
Addams controlling his opponent.
Addams wants to control but instead Zombie manages to regain half guard.
That's four minutes gone in the round.
The two fighters exchange a few words. I couldn't hear what they were saying but maybe it's more fun if you make it up yourself. Addams connects with a nice short shot to Zombie 's temple.
Addams stalling.
Zombie is looking to improve his position.
Addams trying to pass the guard but Zombie defending well.
Addams passes the half guard and he's now in mount! Big trouble for Zombie !
The crowd thankful this round is nearly over.
Addams tucks in and makes sure he doesn't lose the dominant position.
And that's the end of the fight!
Lurch Addams showed his dominance in that final round.
Well Addams has outscored his opponent in every aspect of the fight today. Only a scarily incompetent judge or two will keep him from a well deserved win... Over to the ring announcer for the scorecards.
Ladies and gentlemen, after 3 rounds of action, we go to the scorecards for a decision.
Judge Santiago Holmes scores the fight 30:25
Judge Peter Branson scores the fight 30:25
Judge Sandra Marshall scores the fight 30:25
In favor of your winner, by unanimous decision... Lurch Addams!
A very excited looking Lurch Addams made sure he remembered to thank all the fans both in the arena and on the internet. He said all the coolest people spend all day on MMA websites, which got a big reaction.
|
|
|
|
|
|
|
|
|
|
|
|
|
|
|
|
|
|
|
|
|
|
|
| S |
C
A |
G |
S |
C
B |
G |
|
S |
C |
G |
|
energy
A | B |
|
hype
A | B |
|
pop
A | B |
|
mgr
A | B |
|
FIGHT
RATING
47% |
|
|
|
|
|
|
|
Undercard bout
|
Coming up we have a featherweight MMA rules bout between Dinny Keogh (ranked 24659 p4p, 454 weight class) and Naga Mo (ranked 3700 p4p, 338 weight class). Over to our ring announcer for the fighter introductions!
 |
|
 |
| 173 cm
19
140 lbs
0 - 3 - 0 |
|
180 cm
25
155 lbs
2 - 2 - 0 |
BJJ White Belt
Excellent boxer
Prefers standup |
|
BJJ White Belt
Excellent boxer
Heavy handed |
|
| |
|
Ladies and gentlemen. This fight is 3 rounds, in the featherweight division.
Introducing the fighter to my left, fighting out of the red corner.
With a record of
0 - 3 - 0, fighting out of The Island, Dinny Keogh!
And introducing the fighter to my right, fighting out of the blue corner.
With a record of
2 - 2 - 0, fighting out of The Island, Naga Mo!
The judges for this bout are Sandra Marshall, David Hoff and Winston Alpacca.
The bell rings for round one and we are underway!
Keogh throws a poor cross that misses
and Mo counters with a good right hand that lands right on the jaw.
Mo misses with a jab, cross combination.
Mo throws a right hand that Keogh ducks under and follows up with a left that Keogh also avoids with ease.
Keogh throws an uppercut from half a mile away. Mo sees it coming and avoids it easily.
Keogh ducks low and lands a nice hook to the body of his opponent.
Good standup being displayed there by Keogh as he connects with a hook.
Keogh misses with a body shot.
Mo moves away from the strike by Keogh.
Keogh dodges the punch combination from Mo.
Mo throws a body punch but Keogh moves out of range.
Keogh lands a beauty of a right hand that gets the crowd cheering.
Mo is pinned up against the cage taking some big shots here. The referee is looking closely deciding whether he should stop the fight.
Fantastic stuff here - a very entertaining period of action, which has drawn cheers from the crowd.
Keogh misses with a straight left.
Mo drops his hands and takes a jab to the jaw for his troubles.
Mo's corner calls for a 1-2. Mo obliges with the 1 part as he scores the single shot and moves back out of range.
That's one minute gone in the round.
Keogh lands a nice shot to the body.
Mo misses with a few strikes there.
Mo avoids the body shot from Keogh.
Keogh dips to his left and cracks Mo with an uppercut!
Mo misses with the combination.
Mo displays some good footwork, moving neatly out of range as Keogh throws out the jab.
Keogh fakes a head shot and lands one to the body.
Keogh lands with a shot to the body.
Mo on the wrong end of a nice hook.
Mo throws the left hand but Keogh avoids the punch easily.
Mo doesn't react quick enough there as he takes a shot to the body.
Keogh steps to the side to avoid the strikes from Mo.
Mo moves away from the strike by Keogh.
The fans in attendance giving it up for the two fighters, who have really let it all hang out in the last minute or so!
Keogh takes a step towards his opponent and connects with a left hand, before circling away.
That's two minutes gone in the round.
Mo lands a powerful looking uppercut that connected with his opponent's jaw.
Keogh is rocked!
Keogh misses with a straight right.
Oh Keogh is still all over the place! His legs are completely gone! Will he be able to recover?!!
Keogh throws a right hand that misses
and Mo counters with a left right combination that sends Keogh crashing to the mat - Mo wastes no time in diving on top of him and pounding Keogh out for a TKO! Devastating finish!
Ladies and gentlemen, after 2:15 of round 1, we have a winner by way of TKO (Strikes). Naga Mo!
|
|
|
|
|
|
|
|
|
|
|
|
|
|
|
|
|
|
|
|
|
|
|
| S |
C
A |
G |
S |
C
B |
G |
|
S |
C |
G |
|
energy
A | B |
|
hype
A | B |
|
pop
A | B |
|
mgr
A | B |
|
FIGHT
RATING
55% |
|
|
|
|
|
|
|
Undercard bout
|
|
|
|
Undercard bout
|
Coming up we have a super heavyweight MMA rules bout between David Motts (ranked 3979 p4p, 178 weight class) and Leonardo Saggioro (ranked 2330 p4p, 52 weight class). Over to our ring announcer for the fighter introductions!
 |
|
 |
| 185 cm
26
290 lbs
1 - 0 - 0 |
|
188 cm
27
240 lbs
4 - 5 - 0 |
Good wrestling
Basic striking
Very quick |
|
Good wrestler
Brawler
Good gas tank |
|
| |
|
Ladies and gentlemen. This fight is 3 rounds, in the super heavyweight division.
Introducing the fighter to my left, fighting out of the red corner.
With a record of
1 - 0 - 0, fighting out of The Island, David Motts!
And introducing the fighter to my right, fighting out of the blue corner.
With a record of
4 - 5 - 0, fighting out of The Island, Leonardo Saggioro!
The judges for this bout are Peter Branson, Santiago Holmes and Sandra Marshall.
The bell rings for round one and we are underway!

Saggioro shoots in from a long way out. He's driving through with the takedown attempt and he eventually gets it, landing in Motts's guard.
We could do with one of the fighters taking the initiative a bit more on the ground - they're both waiting to capitalize on a mistake.
Saggioro stands up and looks to throw the legs aside to pass to side control. Motts swivels though and keeps the full guard.
Saggioro controls the pace of the fight for a moment.
Motts has his foot on Saggioro's thigh. He's trying to push off and get in position for a triangle, I think. Saggioro works his way back into a safe position though.
Motts pulls Saggioro in close to prevent any damage.
Motts controls Saggioro momentarily but Saggioro frees himself.
Motts keeping moving, preventing Saggioro from controlling successfully.
Motts is trying to control the position but Saggioro postures up.
We've had a slow start to the round here - hopefully the action picks up.
Saggioro trying to control but Motts is working from the bottom.
Motts looking to sweep here. No luck so far.
Saggioro wants to control from the top but Motts keeps moving.
Motts could do with losing a few pounds - he looks very soft around the mid section, to put it politely.
Saggioro sitting in guard here, content to control.
That's one minute gone in the round.

The referee decides to stand the fighters back up.
Saggioro shoots in looking for a takedown but Motts manages to keep the fight standing, pushing Saggioro's face into the canvas for good measure before circling away.
Motts throws a series of strikes that have Saggioro backpedaling.
Motts definitely looks more muscular than last time we saw him fight.
Saggioro gets caught on his heels momentarily as he allows Motts to score an easy takedown into full guard.
The fighters are pressed up against the cage, both looking to find a bit of space to work.
Motts wants to control from the top but Saggioro keeps moving.
Saggioro tries to land a sweep but no joy.
Motts trying to control the position from guard on top but Saggioro is wriggling around, looking for whatever he can.
Saggioro can't keep his opponent in guard - Motts advances to half guard, no doubt looking to mount.

Saggioro actively working from the bottom here.
That's two minutes gone in the round.
Saggioro wants to get back to full guard.
Saggioro looks more muscular than last time we saw him. He must have been on the weights.
Saggioro is persisting with the attempt to improve his position.
Motts is looking to pass the guard... He's managed it - he's now in full mount!
Motts looking to control but Saggioro is working nicely, looking to advance position himself.
Motts controlling from the full mount.
The crowd cheering loudly, showing their appreciation for the quality fight we're seeing here.
Motts looking to secure an arm triangle but Saggioro defends it well.
That's three minutes gone in the round.
Saggioro slips a leg in and gets back to half guard.
Saggioro trying to hold on to Motts's head to control him but Motts postures up.
Saggioro tries to regain full guard. Instead though, Motts has advanced to mount. Uh oh.
Saggioro regains half guard.
Saggioro looking to force a kimura from the bottom here. He's concentrating on that move too much though and Motts pushes past his half guard into mount!
Saggioro is desperately trying to get back to half guard.
Motts looking to control but Saggioro is working nicely, looking to advance position himself.
The ref warns both fighters not to hold the cage as they work up against the meshing.
That's four minutes gone in the round.
Motts goes for an armbar but he's fallen flat on his backside there and now Saggioro is on top in guard.
Saggioro trying to control the position from guard on top but Motts is wriggling around, looking for whatever he can.
Saggioro might have to switch it up a bit here because his efforts to control Motts haven't been going to plan, at least at the current moment in time.
Motts throwing his legs up looking for a triangle.
Motts trying to control the position.
The crowd thankful this round is nearly over.
Motts seems keen to control Saggioro's posture.
And thats the end of the round the fighters go back to their corners.
David Motts dominated that round.
That's time! Motts's corner gives him a slap on the ass as he gets ready to fight.
Nice sprawl there from Motts as Saggioro shoots in.
Motts closes the distance and clinches up with Saggioro, looking for a takedown. Motts pushes Saggioro against the cage but Saggioro circles to the side and manages to break the clinch.
Motts lands a slapping body shot.
Saggioro dives in and grabs Motts's left leg, looking for a takedown. Motts pushes down on Saggioro's head and hops out.
Saggioro stuffs the takedown attempt from Motts. Motts gets slowly back to his feet.
Saggioro gets a double leg takedown into Motts's guard.
Saggioro wants to pass the guard but Motts is keeping the position.
Motts wants to sweep but no luck.
We've had a slow start to the round here - hopefully the action picks up.
Motts keeping moving, preventing Saggioro from controlling successfully.
Motts working away from the bottom but not quite defensive enough there because Saggioro has passed into half guard!
Saggioro trying to mount his opponent but Motts defends it.
That's one minute gone in the round.
Saggioro prevents Motts from improving his position.
Motts is not content to let Saggioro control the position.
Motts tries to roll over but Saggioro keeps him under control.
Motts has his hands clasped together around Saggioro's back. He's all about the action.
Saggioro wants to pass to mount but Motts is defending the position.
Saggioro wants to take a breather but Motts is having none of it.
Motts is looking to regain full guard. Not this time though.
That's two minutes gone in the round.
The crowd are hurling abuse towards the fighters... You can hardly blame them though because there isn't a lot going on in the fight.
Saggioro is working for a submission of some sort.
Saggioro sitting and controlling from the half guard.
Motts is looking to regain full guard. Not this time though.
Saggioro seems very keen to just sit and control from half guard but Motts does not like that idea so much and is remaining active off his back.
Motts is trying to control but can't.
The referee decides to stand the fighters back up.
Motts misses with a takedown attempt - Saggioro sprawls well and throws a nice strike on the way out which just misses.
That's three failed takedown attempts in the round for David Motts. That's going to take a lot out of him.
That's three minutes gone in the round.
Motts leaves Saggioro with his face pressed against the mat as he sprawls beautifully, defending against a solid takedown attempt.
Saggioro shoots in for a double leg but Motts sprawls well. That's going to sap some energy.
Motts works Saggioro's body with a nice hook.
Motts changes levels and drives through with a really nice takedown into side control. Saggioro looks really pissed at himself for not defending that better.
Motts wants to work for a kimura but he's foiled early by Saggioro, who protects the arm well.
Saggioro tries to work a leg under to get back to half guard but Motts wriggles his own leg back out and remains in side control.
Motts is trying to land an Americana. He has the arm isolated but Saggioro is keeping cool and he's avoided the danger for now.
That's four minutes gone in the round.
Saggioro is looking for a sweep.
Saggioro gets back to half guard.
Motts prevents Saggioro from improving his position.
Motts is keen to just control but Saggioro is a slippery customer.
Saggioro looking for submissions from an awkward position here.
Saggioro wants to improve his position but Motts is controlling well.
The crowd thankful this round is nearly over.
Motts perhaps working for something from half guard, or maybe not. It looks like he's just sitting there.
And thats the end of the round the fighters go back to their corners.
That was a close second round but I would say that David Motts will probably get the nod.
That's time! Motts's corner gives him a slap on the ass as he gets ready to fight. This is the final round!
Motts gets a double leg takedown into Saggioro's guard.
Saggioro wants to sweep here but Motts controlling him for the moment.
Saggioro working from the bottom, still in full guard. He's managed to get a loose triangle. Motts doesn't seem to be doing much to defend here, obviously he feels comfortable in the position. Motts manages to throw the legs off his shoulder and he's back into guard - no problem.
Motts slips effortlessly into side control - very nice.
Saggioro is positioning himself to get back to half guard.
We've had a slow start to the round here - hopefully the action picks up.
Saggioro keeps trying to improve his position.
Motts has knee on belly and now moves to full mount! Trouble for Saggioro!
That's one minute gone in the round.
Motts trying to control but he's not successful this time.
Motts is looking to work his way around to Saggioro's back. He needs to be careful though, as he's in danger of losing this dominant position.
Saggioro tries to get back to half guard but can't.
Motts mounts Saggioro! Really nice guard pass there!
Saggioro is wriggling around trying to escape.
Motts looking to control but Saggioro is working nicely, looking to advance position himself.
Motts wants to take Saggioro's back but he can't do it this time.
Motts trying to control but Saggioro is having none of it.
Motts working for a guillotine from mount but Saggioro is in no mood to give up.
That's two minutes gone in the round.
Motts takes Saggioro's back.
Saggioro tries to escape the position.
Motts has the hooks in and he's looking for a rear naked choke here. Saggioro is defending well but eventually Motts manages to get an arm under the chin and he's locked on the RNC! Saggioro has no choice but to tap now! He does! This one is all over!
Ladies and gentlemen, after 2:53 of round 3, we have a winner by way of Submission (RNC). David Motts!
A very excited looking David Motts made sure he remembered to thank all the fans both in the arena and on the internet. He said all the coolest people spend all day on MMA websites, which got a big reaction.
|
|
|
|
|
|
|
|
|
|
|
|
|
|
|
|
|
|
|
|
|
|
|
| S |
C
A |
G |
S |
C
B |
G |
|
S |
C |
G |
|
energy
A | B |
|
hype
A | B |
|
pop
A | B |
|
mgr
A | B |
|
FIGHT
RATING
40% |
|
|
|
|
|
|
|
Undercard bout
|
Coming up we have a welterweight MMA rules bout between Eterie Sferrazza (ranked 4679 p4p, 446 weight class) and Frank McMillian (ranked 7473 p4p, 518 weight class). The fight MMA fans around the world have waited their entire lives for!
 |
|
 |
| 172 cm
25
174 lbs
1 - 1 - 0 |
|
168 cm
19
175 lbs
0 - 5 - 0 |
BJJ White Belt
Lethal high kicks
Very quick |
|
BJJ White Belt
Excellent boxer
Heavy handed |
|
| |
|
Ladies and gentlemen. This fight is 3 rounds, in the welterweight division.
Introducing the fighter to my left, fighting out of the red corner.
With a record of
1 - 1 - 0, fighting out of The Island, Eterie Sferrazza!
And introducing the fighter to my right, fighting out of the blue corner.
With a record of
0 - 5 - 0, fighting out of The Island, Frank McMillian!
The judges for this bout are Winston Alpacca, Bart Greer and Sandra Marshall.
The bell rings for round one and we are underway!
McMillian misses the jab.
Sferrazza tries to counter by moving into the clinch but McMillian manages to circle out of the way.
Sferrazza has been working on his boxing with his coaches at Buoy Training in the buildup to the fight.
McMillian takes a really solid shot there but just smiles back and shrugs his shoulders.
Nice jab there from Sferrazza.
McMillian fakes high and swings low for a body shot but Sferrazza manages to avoid it.
A chopping leg kick lands by Sferrazza.
Donk. Sferrazza catches McMillian right on the button with a cross.
It looks like Frank McMillian has been cut.
Sferrazza explodes with a nice body kick and back out of range. Nice work.
McMillian throws a lazy right hand but Sferrazza sees it coming a mile off and sidesteps it easily.
McMillian swings for the body but Sferrazza moves out of range.
McMillian swings and misses with a hook to the body.
We've been informed that McMillian has been sparring a lot of Muay Thai in the buildup to this fight so let's see if that has an impact on the result.
Sferrazza throws a leg kick which misses McMillian's front leg but catches the back leg as McMillian tries to avoid it.
McMillian throws the left hand but Sferrazza avoids the punch easily.
A good leg kick by Sferrazza.
McMillian misses with a body shot. Nice footwork from Sferrazza.
This is a great period of action - very entertaining stuff!
Sferrazza slips under a jab from McMillian.
Sferrazza getting the better of the striking in that exchange.
Sferrazza throws a shot from downtown. McMillian moves away and avoids it.
McMillian pushing out the jab but it's not landing.
McMillian misses with a hook. Sferrazza ducked under it nicely.
McMillian throws a poor cross that misses
and Sferrazza counters with a nice low kick that buckles McMillian's knee momentarily.
McMillian with a body punch. A glancing blow.
That's one minute gone in the round.
A slow jab from McMillian misses its intended target.
McMillian walks forward, straight into a front kick from Sferrazza.
McMillian misses with a looping right.
Sferrazza is looking to counter with a shot to the body.
McMillian throws out a loose jab but Sferrazza uses good head movement to avoid it.
McMillian misses with a straight left.
McMillian throws the left hand but Sferrazza avoids the punch easily.
McMillian takes a shot to the body in his stride.
McMillian on the wrong end of an overhand right that came out of nowhere.
Sferrazza cracks McMillian with a hook to the jaw. Both fighters smile at eachother and high-five before getting back down to business.
McMillian is rocked!
Sferrazza displays some good footwork, moving neatly out of range as McMillian throws out the jab.
McMillian is still on wobbly legs! Can Sferrazza finish him?
McMillian misses with a hook to the body
and Sferrazza counters with a leg kick.
McMillian looks up at the clock. Bad move! Sferrazza lands a right hand from hell, dropping McMillian. Sferrazza pounces and finishes the fight with a flurry of punches and elbows.
Ladies and gentlemen, after 1:35 of round 1, we have a winner by way of TKO (Strikes). Eterie Sferrazza!
Eterie Sferrazza decided to thank the fans in attendance for making a great atmosphere. It seemed to go down pretty well.
|
|
|
|
|
|
|
|
|
|
|
|
|
|
|
|
|
|
|
|
|
|
|
| S |
C
A |
G |
S |
C
B |
G |
|
S |
C |
G |
|
energy
A | B |
|
hype
A | B |
|
pop
A | B |
|
mgr
A | B |
|
FIGHT
RATING
73% |
|
|
|
|
|
|
|
Undercard bout
|
Coming up we have a super heavyweight MMA rules bout between Tohit Tohurt (ranked 1736 p4p, 82 weight class) and Ezekiel Oleynik (ranked 2908 p4p, 71 weight class). Both fighters look fresh as a daisy as they make their way towards the cage.
 |
|
 |
| 225 cm
27
300 lbs
4 - 3 - 0 |
|
192 cm
26
260 lbs
4 - 3 - 0 |
Decent wrestler
Excellent MT
Very strong |
|
Good takedowns
Basic striking
Good gas tank |
|
| |
|
Ladies and gentlemen. This fight is 3 rounds, in the super heavyweight division.
Introducing the fighter to my left, fighting out of the red corner.
With a record of
4 - 3 - 0, fighting out of The Island, Tohit Tohurt!
And introducing the fighter to my right, fighting out of the blue corner.
With a record of
4 - 3 - 0, fighting out of The Island, Ezekiel Oleynik!
The judges for this bout are Winston Alpacca, Sandra Marshall and David Hoff.
The bell rings for round one and we are underway!
Tohurt thuds his shin into the meat of Oleynik's side.
That's a knee to de groin and it's over and out! Oleynik crumples to the ground after an illegal strike from Tohurt - the referee stops the clock and Oleynik gets 5 minutes to recover from that one. "I'm sorry" says Tohurt. Oleynik manages to get back to his feet and the fight resumes.
Oleynik looks winded!
Tohurt throws an overhand right that drops Oleynik like a sack of potatoes! Tohurt dives in to finish the fight with more strikes and this one is all over!
Ladies and gentlemen, after 0:09 of round 1, we have a winner by way of TKO (Strikes). Tohit Tohurt!
|
|
|
|
|
|
|
|
|
|
|
|
|
|
|
|
|
|
|
|
|
|
|
| S |
C
A |
G |
S |
C
B |
G |
|
S |
C |
G |
|
energy
A | B |
|
hype
A | B |
|
pop
A | B |
|
mgr
A | B |
|
FIGHT
RATING
100% |
|
|
|
|
|
|
|
Co-main event
|
Coming up we have a featherweight MMA rules bout between Luc Bittencourt (ranked 1616 p4p, 179 weight class) and Arnao Vanegas (ranked 3100 p4p, 301 weight class). Over to our ring announcer for the fighter introductions!
 |
|
 |
| 167 cm
27
155 lbs
5 - 0 - 0 |
|
169 cm
18
144 lbs
2 - 1 - 0 |
Powerful takedowns
Basic striking
Very quick |
|
BJJ White Belt
Excellent boxer
Determined |
|
| |
|
Ladies and gentlemen. This fight is 3 rounds, in the featherweight division.
Introducing the fighter to my left, fighting out of the red corner.
With a record of
5 - 0 - 0, fighting out of The Island, Luc Bittencourt!
And introducing the fighter to my right, fighting out of the blue corner.
With a record of
2 - 1 - 0, fighting out of The Island, Arnao Vanegas!
The judges for this bout are Dirk Anderson, Bart Greer and Peter Branson.
The bell rings for round one and we are underway!
Bittencourt shoots in and gets a takedown into half guard. Bittencourt showed some decent athleticism there.
Bittencourt not doing much here.
The ref warns both fighters not to hold the cage as they work up against the meshing.
Bittencourt seems to be working for a kimura but Vanegas defends the submission attempt.
We've had a slow start to the round here - hopefully the action picks up.
Bittencourt frees up his trapped foot and advances to mount.
Vanegas defends a decent attempt at a guillotine from Bittencourt.
That's one minute gone in the round.
Bittencourt mounts Vanegas! Really nice guard pass there!
Vanegas defends a decent attempt at a guillotine from Bittencourt.
Bittencourt takes Vanegas's back.
Vanegas looks more muscular than last time we saw him. He must have been on the weights.
A bit of a pause in the action here. Bittencourt controlling the positon.
The fighters are pressed up against the cage, both looking to find a bit of space to work.
Bittencourt is working for the choke. It looks like he might have got it... has he...? Yes! Vanegas is tapping out! This one is all over!
Ladies and gentlemen, after 1:58 of round 1, we have a winner by way of Submission (RNC). Luc Bittencourt!
A very excited looking Luc Bittencourt rambled incoherently for about 5 minutes post fight about how awesome he is. It was kinda funny for a while but then everyone got annoyed.
|
|
|
|
|
|
|
|
|
|
|
|
|
|
|
|
|
|
|
|
|
|
|
| S |
C
A |
G |
S |
C
B |
G |
|
S |
C |
G |
|
energy
A | B |
|
hype
A | B |
|
pop
A | B |
|
mgr
A | B |
|
FIGHT
RATING
52% |
|
|
|
|
|
|
|
Main event
|
Coming up we have a super heavyweight MMA rules bout between Black Caesar (ranked 819 p4p, 37 weight class) and Rodolfo Moraes (ranked 1995 p4p, 89 weight class). These two fighters really are very evenly matched on the feet - it will be fascinating to see who can assert themselves in that aspect of the fight.
 |
|
 |
| 186 cm
20
279 lbs
7 - 1 - 0 |
|
184 cm
26
300 lbs
3 - 2 - 0 |
Good wrestling
Brawler
Cardio machine |
|
Good wrestler
Basic striking
Experienced |
|
| |
|
Ladies and gentlemen. This fight is 5 rounds, for the super heavyweight championship of the world!
Introducing the champion to my left, fighting out of the red corner.
With a record of
7 - 1 - 0, fighting out of The Island, Black Caesar!
And introducing the challenger to my right, fighting out of the blue corner.
With a record of
3 - 2 - 0, fighting out of The Island, Rodolfo Moraes!
The judges for this bout are David Hoff, Bart Greer and Winston Alpacca.
The bell rings for round one and we are underway!
Caesar steps to the side to avoid the strikes from Moraes.
Caesar gets caught on his heels momentarily as he allows Moraes to score an easy takedown into full guard.
Caesar trying to keep a closed guard but Moraes is proving a slippery customer.
Caesar looking for a guillotine here but Moraes defends easily.
Caesar has improved his flexibility recently so we will have to see if he can use that to his advantage.
Caesar manages to sweep nicely, so he's now on top. Moraes manages to get himself to full guard.

Moraes trying to control the position.
Moraes should think about turning a few of those tyres round his middle into muscle if he wants people to take him seriously as an athlete.
We've had a slow start to the round here - hopefully the action picks up.
Caesar pressing down on his opponent's thigh, looking to pass guard. Moraes is keeping the position for now.
Moraes wants to sweep but no luck.
That's one minute gone in the round.
Moraes keeping moving, preventing Caesar from controlling successfully.
Moraes manages to sweep nicely, so he's now on top. Caesar manages to get himself to full guard.

Moraes sneaks a leg through and gets to half guard. That was like a knife through butter how easily he passed Caesar's guard.
The ref warns both fighters not to hold the cage as they work up against the meshing.
Caesar looking for submissions off his back.
Moraes is working for submissions here but there's nothing on.
Moraes tries to pass the half guard into mount. Caesar knows what he's doing though and prevents the attempt.
Caesar is looking for a sweep. Moraes is wise to his cunning plan and keeps the top position.
Moraes is working for submissions here but there's nothing on.
Moraes trying to control the action but Caesar is working from the bottom.
That's two minutes gone in the round.
Caesar wants to get back to full guard.
Caesar gets back to full guard.
Moraes stands up and looks to throw the legs aside to pass to side control. Caesar swivels though and keeps the full guard.
Caesar looking for submissions off his back, moving his hips, looking for an opening.
There's a bit of a scramble here and now Caesar is on top in guard.
Caesar wants to control from the top but Moraes keeps moving.
Moraes looking to sweep here. No luck so far.
That's three minutes gone in the round.
Moraes has his foot on Caesar's thigh. He's trying to push off and get in position for a triangle, I think. Caesar works his way back into a safe position though.
Caesar trying to control but Moraes is working from the bottom.
Moraes had isolated an arm as going for a kimura. Caesar defends it easily.
Caesar is taking a break and basically stalling. The referee will not allow him to do that for long.
Moraes bucks up whilst keeping hold of a body lock, managing to reverse the position. Now he's in top in Caesar's guard.
Caesar not looking particularly offensive just at the moment.
That's four minutes gone in the round.
Caesar escapes his hips to the side and looks to be working for an armbar. Moraes gives him a little smile and shakes his head. No chance.
Caesar is looking for a guillotine. You can't force these things though and Moraes defends well.
Caesar looking for submissions off his back, moving his hips, looking for an opening.
Moraes sitting in guard here, content to control.
Moraes wants to pass the guard but Caesar is keeping the position.
The crowd thankful this round is nearly over.
Caesar is working an open guard here, looking to improve his position. No doubt that will leave him open to counters but at least he's being more offensive.
Caesar looking for submissions from the bottom here. Moving his hips around, possibly looking for an armbar.
And thats the end of the round the fighters go back to their corners.
A close round but Rodolfo Moraes will probably get the nod.
That's the end of the round. The referee orders the cornermen out of the cage so we can get back down to business.
Moraes keeps the fight on the outside.
Caesar closes the distance and presses his opponent up against the cage.
Caesar drags the fight down to the ground.
Moraes is holding a leg here, probably looking for an ankle lock - he drops back and goes for it! Caesar is in trouble! Is it all over??? No! Caesar has escaped and now he's on top!
Caesar is looking to pass into half guard but Moraes pushes him away with his feet and jumps on top - now Moraes is in guard.
Moraes wants to pass the guard but Caesar is keeping the position.
My spies in Buoy Training inform me that Moraes has been getting involved in the gym's BJJ sparring sessions. Let's see whether that pays dividends!
Moraes wants to control from the top but Caesar keeps moving.
We've had a slow start to the round here - hopefully the action picks up.
Caesar had isolated an arm as going for a kimura. Moraes defends it easily.
Caesar looking for a guillotine here but Moraes defends easily.
We're hearing some news coming in from back stage. It's official - Moraes has eaten all the pies!
That's one minute gone in the round.
Moraes trying to control but Caesar is working from the bottom.
Moraes looking to pass the guard.
Caesar throwing his legs up looking for a triangle.
Moraes sneaks a leg through and gets to half guard. That was like a knife through butter how easily he passed Caesar's guard.
Caesar moves his hips nicely and gets into full guard.
Caesar is active off his back here, looking for submissions.
Moraes trying to move into half guard but instead Caesar has managed to sweep!
That's two minutes gone in the round.
Caesar controlling from the top position.
Caesar pressing down on his opponent's thigh, looking to pass guard. Moraes is keeping the position for now.
Moraes looking for subs off his back but Caesar has passed one foot through into half guard.
Caesar is looking for a kimura but Moraes is holding onto that half guard position, so it's hard for Caesar to get the leverage.
Moraes trying to hold on to Caesar's head to control him but Caesar postures up.
That's three minutes gone in the round.
Moraes wants to improve his position but Caesar is controlling well.
Caesar tries to pass to full mount but Moraes defends it.
Moraes wants to get back to full guard.
Moraes trying to get back to full guard but Caesar takes advantage of the position and moves to full mount!
Caesar tucks in and makes sure he doesn't lose the dominant position.
Moraes is in all sorts of trouble here.
Caesar has hold of Moraes's left arm, perhaps looking for a submission. The two fighters tussle over control of the isolated limb and Moraes manages to get his arm back to his side and away from danger.
Moraes wants to hold on but Caesar pushes him away.
That's four minutes gone in the round.
Moraes is squirming around, avoiding Caesar's attempts to control the action.
Moraes is working to get back to half guard.
The fighters are pressed up against the cage, both looking to find a bit of space to work.
Moraes sneaks a leg under to get to half guard.
Caesar is controlling the pace.
The crowd thankful this round is nearly over.
And thats the end of the round the fighters go back to their corners.
Black Caesar dominated that second round.
Well, the break between rounds is over. Let's get back to the scrappin!
Moraes looking to shoot here. He's gone for it and he's landed a takedown into side control! Oh, that's bad for Caesar!
Moraes is working for what looks like an arm triangle here. Caesar is trying to escape and Moraes transitions quickly into an armbar! He's slapped it on tight and Caesar is forced to tap! Nice work there by Moraes! Very nice indeed!
Ladies and gentlemen, after 0:29 of round 3, we have a winner by way of Submission (Armbar). Rodolfo Moraes!
Rodolfo Moraes is the new super heavyweight champion!
Rodolfo Moraes seemed lost for words in his post fight interview but he remembered to thank his fans and directed everyone to his website.
|
|
|
|
|
|
|
|
|
|
|
|
|
|
|
|
|
|
|
|
|
|
|
| S |
C
A |
G |
S |
C
B |
G |
|
S |
C |
G |
|
energy
A | B |
|
hype
A | B |
|
pop
A | B |
|
mgr
A | B |
|
FIGHT
RATING
29% |
|
|
|
|
|
|
|
|
|
|
