 |
IFA : 21-02-19 PBP Commentary |
Undercard bout
|
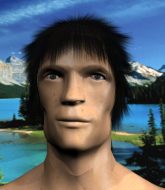
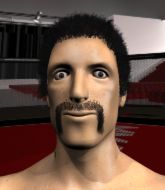
Coming up we have a light heavyweight MMA rules bout between Jango Fett (ranked 4142 p4p, 475 weight class) and Drax Tauro (ranked 4871 p4p, 509 weight class). On his way into the cage it seems that Jango Fett has been attacked by a crazed fan! It looks like it might have been the just bleed guy! Luckily Jango Fett seems to be OK! I thought that lunatic was in prison!?
 |
|
 |
| 190 cm
26
215 lbs
1 - 2 - 0 |
|
185 cm
26
205 lbs
2 - 3 - 0 |
BJJ Purple Belt
Solid Muay Thai
Very strong |
|
BJJ White Belt
Excellent boxer
Powerful |
|
| |
|
Ladies and gentlemen. This fight is 3 rounds, in the light heavyweight division.
Introducing the fighter to my left, fighting out of the red corner.
With a record of
1 - 2 - 0, fighting out of The Island, Jango Fett!
And introducing the fighter to my right, fighting out of the blue corner.
With a record of
2 - 3 - 0, fighting out of The Island, Drax Tauro !
The judges for this bout are Winston Alpacca, Daniel Franklin and David Hoff.

The bell rings for round one and we are underway!
Tauro misses with a few strikes there.
Tauro rushes in with a sloppy looking punch
and Fett counters with a left to the body.
Tauro tests Fett's chin there with a solid looking shot.
Fett feints a straight left to the body, then turns around with a flashy move and hits Tauro s jaw with a dramatic spinning back fist!
A swing and a miss from Tauro .
Fett definitely looks more muscular than last time we saw him fight.
Tauro pushing out the jab but it's not landing.
Fett waving his hands out in front of him, looking to distract Tauro .
A jab from Tauro misses.
Nice cross by Tauro .
A big left from Tauro misses.
We've had a slow start to the round here - hopefully the action picks up.
Fett takes a shot right to the bread basket.
Tauro throws out a token jab with nothing on it.
Tauro swings and misses with a hook to the body.
Fett tries to close the distance and clinch up against the cage but Tauro paws at him with a jab and circles away.

That's one minute gone in the round.
Tauro lands a two punch combo.
Tauro throws a hook to the body but it doesn't connect.
Tauro throws a jab, cross combination which is slipped
and Fett counters with a straight right hand.
Tauro misses with a wild body shot.
Tauro swings and misses with a hook to the body.
It looked like Fett wanted to counter with a hook but didn't fully commit.
Fett ducks under an overhand right and circles away with a smile on his face.
Tauro throws the left hand but Fett avoids the punch easily.
Tauro misses with a looping left.
Tauro connects with a crisp jab.
Tauro works his jab well there, keeping his opponent at a distance.
Tauro moves out of range of the strikes.
Tauro misses with a few strikes there.
Fett slips a jab from Tauro .
Nice defenses there by Fett.
Fett looks to score with a jab to the body but Tauro is just out of range.
Tauro is definitely looking for the counter takedowns here.

That's two minutes gone in the round.
Fantastic stuff here - a very entertaining period of action, which has drawn cheers from the crowd.
Fett wants to clinch up but Tauro keeps it at a distance.
Jab from Fett.
Fett lands a jab. Then a cross. Then finally a nice hook to the body. Good work there by Fett.
Fett tries to close the distance and clinch up but Tauro swats him away and circles back towards the center.
Tauro thuds a left hand into Fett's body.
Tauro ducks down and throws a hook to the body.
Tauro misses with a hook
and Fett counters with a lovely straight right hand!
Fett misses the jab.
Tauro scores with a body shot.
Tauro missing with a left hand there. Fett was out of range so wasted energy throwing that one.
Tauro misses with a straight right.
Tauro thows a left - swing and a miss!
Drax Tauro seems to be the more aggressive standup fighter in this bout.
Tauro is the aggressor but that punch slipped nicely by Fett.
Tauro throws a hard body shot but it just misses.

That's three minutes gone in the round.
Tauro throws a monster uppercut resembling something out of street fighter but it doesn't land.
The fighters circle momentarily. Fett darts into range and connects with a nice straight punch.
Tauro circles away from the clinch attempt.
Fett avoids a lazy jab quite easily.
Tauro throws a hard body shot but it just misses.
Tauro misses with a hook.
Tauro takes an uppercut right on the jaw but it doesn't phase him.
Nice defenses there by Fett.
Fett ducks under a wild hook from Tauro .
Fett comes forward and lands a shot to the body, then darts back out of range.
Tauro pushing out the jab but it's not landing.
A looping hook to the body misses from Tauro . Fett does a little dance to reset his feet.
Fett defending well as Tauro loads up on a big left hand.
Tauro waving his hands out in front of him, looking to distract Fett.

That's four minutes gone in the round.
Fett changes levels and scores with a jab to the body.
Tauro throws a lazy uppercut

and Fett counters by moving into the clinch. Good anticipation by Fett.
With the fighters up against the cage, Fett throws an elbow but misses.
Tauro doesn't land with the attempted body shot.
Fett misses with the head strike.
The fans in attendance giving it up for the two fighters, who have really let it all hang out in the last minute or so!
Tauro swings wildly with an uppercut but Fett uses good head movement to avoid it.
Tauro tries to work over Fett's body with a swooping hook but it only glances the target.
Fett tried to land a shot to the body but connects with Tauro 's elbow.
Knees in the clinch landing for Fett.
Nice elbow from Fett.
Tauro is looking to control Fett's arms but Fett gets an underhook and turns him. Now Tauro has his back to the cage.
Tauro takes a knee right on the jaw!
Fett tries to land a knee to the body but he is off balance and Tauro avoids it.
Tauro content to slow the pace in the clinch.
Fett tried to land a shot to the body but connects with Tauro 's elbow.
Fett misses with a hook to the ribs.
Tauro goes for a body shot but it's blocked.
And thats the end of the round the fighters go back to their corners.
A close round but Drax Tauro will probably get the nod.
The referee calls time. The cornermen exit stage left and we're back to business.

Fett uses some good footwork to avoid the body shot by Tauro .
Tauro tries to land with a swinging hook to the body but Fett was well out of range. Poor timing from Tauro .
Fett throws an ugly left hook that misses
and Tauro counters with a lovely straight right hand!
Tauro looks to land a right hand but Fett moved out of range.
Fett throwing a counter right hand but Tauro manages to avoid it.
Tauro misses with a left hand
and Fett counters with a three punch combination, finished off with a leg kick. Nice work.
Fett uses some good footwork to avoid the body shot by Tauro .
Tauro bobs and weaves well there to avoid the strikes.
Good exchange - Fett coming out on top.
Fett dips down and scores with a jab to the body.
Fett digs a good body shot into Tauro 's ribs.
Tauro keeps the fight on the outside.
Tauro throws a jab to the body, straight down the pipe. Boom. That sent Fett stumbling backwards but he manages to regain his composure quickly.
Tauro misses with a looping left.
Tauro ducks down and throws a hook to the body but Fett moves away.
That's one minute gone in the round.
Fett ducks low and lands a nice hook to the body of his opponent.
Tauro misses with a hook.
Tauro looks to land a right hand but Fett moved out of range.
A slow jab from Tauro misses its intended target.
Fett tests Tauro 's chin there with a solid looking shot.
Fett clinches with his opponent.
Tauro tries to stall but Fett uses the opportunity to gain a better position.
A hook to the body from Fett.
Fett is pushing Tauro up against the cage, for a bit of lean and pray action. Action being used the in the loosest possible sense of the word.
Fett misses with a body punch.
Tauro working hard to break the clinch.
Fett tries a knee to the head but he's missed.
Tauro digs a right hand into Fett's ribs. Those have got to be taking their toll on Fett's gas tank.
Fett softening up his opponent with strikes, against the cage.
That's two minutes gone in the round.
Tauro trying to stall but Fett improves his position.
Fett trying to land knees to the body.
Fett tries to land a knee to the body but he is off balance and Tauro avoids it.
Tauro blocks a body shot from Fett.
Fett trying to stall but Tauro improves his position.
Tauro avoids a wild elbow strike from Fett.
Tauro doesn't land with the attempted body shot.
Fett throws an elbow but it misses.
Tauro lands a body shot in the clinch.
Tauro misses with a hook to the ribs.
Fett tries to land a shot to the body but it's blocked.
Fett missing with knees to the body.
Wooooo! Give it up for these two warriors! They are putting on a show!
Fett tries to land a shot to the body but it's blocked.
Tauro misses with a hook to the ribs.
Fett scores with a hook to the body.
Tauro doesn't land with the attempted body shot.
Fett throws a punch but it's blocked by Tauro .
Fett avoiding damage.
That's three minutes gone in the round.
A head punch blocked on the inside by Fett.
Fett misses with a knee to the head.
Tauro tries a body shot but Fett blocks it.
Tauro goes for a body shot but it's blocked.
Fett throws a vicious knee straight up the middle but Tauro blocks it with crossed arms.
Fett trying to land knees to the body.
Tauro avoids a wild elbow strike from Fett.
Tauro dictating the pace here, as the fighters clinch against the cage.
Tauro is clearly stalling here... Pick up the pace son.
Jango Fett has scored more points in the clinch so far.
Tauro struggles to land a body shot inside as Fett controls his hands.
Fett tries to land a knee to the body but he is off balance and Tauro avoids it.
Tauro blocks an uppercut.
Tauro prevents a body shot from Fett.
Tauro trying to stall but Fett improves his position.
That's four minutes gone in the round.
A right hook to the body lands for Fett.
Fett misses with a body punch.
Tauro throws a head punch that misses.
Fett tries to land a shot to the body but it's blocked.
Tauro is working hard here but doesn't seem to be able to control effectively, up against the cage.
Fett throws an elbow that misses.
Tauro tries to circle away but Fett has him pinned against the cage.
Fett blocking some punches.
Tauro avoiding damage as Fett throws knees to the body.
An uppercut on the inside fails to land for Tauro .
Fett lands a glancing elbow in the clinch.

It looks like Drax Tauro has been cut.
Fett tries to throw a body punch but Tauro avoids it by throwing Fett back against the cage.
Fett tries to land knees in the clinch but Tauro avoids the damage to the body.
Tauro lands a body punch - he's looking to wear down Fett.
A short right from Tauro on the inside.
Tauro lands a body shot.
Tauro lands a shot to the body.
And thats the end of the round the fighters go back to their corners.
Jango Fett dominated that second round.
The cut man is working on Drax Tauro 's cut.
The minute break is over - no more time for sponges and pep talks - back to the action! This is the final round!

Fett scores with the left hand. Tauro knows he should have avoided that one.
Fett tries to clinch up
and Tauro counters with a straight right hand.
Drax Tauro seems to be getting the better of the standup.
Fett throws out a token jab with nothing on it.
Fett moves out of range of the strikes.
Fett uses some good footwork to avoid the body shot by Tauro .
Fett slips a jab from Tauro .
Fett is trying to close the distance and clinch up, after that failed offence from Tauro .
Fett takes a shot right to the liver - Bas would have been proud of that punch.
We've had a slow start to the round here - hopefully the action picks up.
Tauro ducks under an overhand right and circles away with a smile on his face.
A looping hook to the body misses from Tauro . Fett does a little dance to reset his feet.
Fett takes a body punch that cleary hurt but he's trying not to show any weakness.
Fett lands a slapping body shot.
That's one minute gone in the round.
Tauro moves out of range as Fett strikes.
Fett connects with a looping right hand.
Fett tries to clinch up against the cage, rushing in to close the distance. Tauro manages to break the clinch and circles back to the middle of the mat.
Fett uses decent footwork to sidestep a right hand from Tauro .
Tauro connects nicely with a jab. Noted by the judges no doubt.
Tauro takes a punch right to his stomach. That took the wind out of him momentarily.
Fett uses some good footwork to avoid the body shot by Tauro .
The fight stays on the outside here - Fett looks like he's thinking about clinching though.
Fett lands a slapping body shot.
Fett tries to clinch but is not successful on this occasion.
Tauro scores with a nice strike.
That's two minutes gone in the round.
Tauro misses with a body shot.
Fett throwing a counter right hand but Tauro manages to avoid it.
Sloppy strikes from Tauro . Those never looked like landing.
Fett staying out of range there.
Fett wants to clinch.
Tauro with a nice cross.
Tauro throws a hard body shot but it just misses.
The crowd are loving this. Great action here.
Tauro takes a shot to the eye socket. That's gotta hurt.
Tauro is the aggressor but that punch slipped nicely by Fett.
Tauro uses good footwork to avoid the strikes from Fett.
That's three minutes gone in the round.
Tauro ducks down and throws a hook to the body but Fett moves away.
Tauro throws a lazy right hand but Fett sees it coming a mile off and sidesteps it easily.
Tauro moves into range and connects with a jab.
A jab from Tauro misses.
An attempted straight right counter from Fett misses the target.
Tauro looks to land a right hand but Fett moved out of range.
Fett misses the shot to the body.
Tauro feints the counter takedown.
Tauro uses good footwork to avoid the strikes from Fett.
Tauro misses with a hook. Fett ducked under it nicely.
Tauro throws a body punch but Fett moves out of range.
A left lands for Fett.
A shot to the liver by Fett. Beautiful body shot.
Fett tries to clinch up but Tauro circles away and keeps his distance.
Fett doesn't react quick enough there as he takes a shot to the body.
That's four minutes gone in the round.
Fett is looking to clinch.
Tauro swings away with a counter right hand but no contact made.
Fett lands a glancing blow to the side of Tauro 's head.
Tauro misses with a looping right.
Fett digs a good body shot into Tauro 's ribs.
Tauro misses with a looping right.
This is a great period of action - very entertaining stuff!
Fett moves out of range as Tauro strikes.
Fett is looking to counter the offense by Tauro and move into the clinch.
A big right from Tauro misses.
Tauro misses with a double jab.
Fett lands with a good body shot.
Fett just misses with a punch to the body.
Tauro misses with a series of wild punches.
Tauro throws a predictable looking body shot
and Fett cracks him with a counter punch right on the button.
And that's the end of the fight!
Drax Tauro comfortably won the final round on my scorecard.
I think Tauro has won this one but let's see whether the judges agree with me. Over to the ring announcer for the scorecards.
Ladies and gentlemen, after 3 rounds of action, we go to the scorecards for a decision.
Judge Winston Alpacca scores the fight 28:29
Judge Daniel Franklin scores the fight 28:29
Judge David Hoff scores the fight 28:29
In favor of your winner, by unanimous decision... Drax Tauro !
|
|
|
|
|
|
|
|
|
|
|
|
|
|
|
|
|
|
|
|
|
|
|
| S |
C
A |
G |
S |
C
B |
G |
|
S |
C |
G |
|
energy
A | B |
|
hype
A | B |
|
pop
A | B |
|
mgr
A | B |
|
FIGHT
RATING
55% |
|
|
|
|
|
|
|
Undercard bout
|
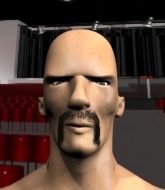
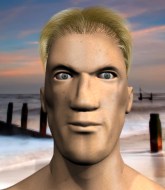
Coming up we have a middleweight MMA rules bout between John Edmonds (ranked 3747 p4p, 405 weight class) and Doppo Orochi (ranked 4010 p4p, 422 weight class). Chooooooooon! I think Edmonds might be my favorite fighter, now he's come out to Frankie Smith - Double Dutch Bus. Orochi has chosen RISE - I Prevail as his entrance music. John Edmonds has the edge in experience - let's see if he can make that count tonight.
 |
|
 |
| 185 cm
19
190 lbs
5 - 2 - 0 |
|
185 cm
26
195 lbs
1 - 1 - 0 |
Decent wrestler
Counter fighter
KO power |
|
BJJ White Belt
Excellent boxer
Good gas tank |
|
| |
|
Ladies and gentlemen. This fight is 3 rounds, in the middleweight division.
Introducing the fighter to my left, fighting out of the red corner.
With a record of
5 - 2 - 0, fighting out of The Island, John Edmonds!
And introducing the fighter to my right, fighting out of the blue corner.
With a record of
1 - 1 - 0, fighting out of The Island, Doppo Orochi!
The judges for this bout are Michael Johnstone, Daniel Franklin and Dirk Anderson.
The bell rings for round one and we are underway!
Orochi lands a body shot.
Orochi wants to clinch up but Edmonds keeps it at a distance.
Edmonds swings for the body but Orochi moves out of range.
Orochi tries to clinch but Edmonds moves out of range.
Edmonds motions for Orochi to come forward. Edmonds throws a leg kick but it misses it's target.
Orochi is the aggressor but that punch slipped nicely by Edmonds.

Orochi lands a big right hand that sends Edmonds crashing to the mat! Orochi stays standing though and waves Edmonds back to his feet!
Fantastic stuff here - a very entertaining period of action, which has drawn cheers from the crowd.
Orochi ducks down and throws a big overhand right - it lands flush on the jaw, knocking Edmonds out cold! The fight is over!
Ladies and gentlemen, after 0:27 of round 1, we have a winner by way of KO (Punch). Doppo Orochi!
Doppo Orochi bigged himself up after the win. The crowd seemed to love it.
|
|
|
|
|
|
|
|
|
|
|
|
|
|
|
|
|
|
|
|
|
|
|
| S |
C
A |
G |
S |
C
B |
G |
|
S |
C |
G |
|
energy
A | B |
|
hype
A | B |
|
pop
A | B |
|
mgr
A | B |
|
FIGHT
RATING
100% |
|
|
|
|
|
|
|
Undercard bout
|
Coming up we have a heavyweight MMA rules bout between Green Bastard (ranked 7333 p4p, 487 weight class) and White Death (ranked 6011 p4p, 459 weight class). On his way into the cage it seems that Green Bastard has been attacked by a crazed fan! It looks like it might have been the just bleed guy! Luckily Green Bastard seems to be OK! I thought that lunatic was in prison!?
 |
|
 |
| 190 cm
21
275 lbs
1 - 2 - 0 |
|
190 cm
26
265 lbs
2 - 5 - 0 |
BJJ Blue Belt
Solid boxing
Cardio machine |
|
BJJ Blue Belt
Excellent MT
Knockout power |
|
| |
|
Ladies and gentlemen. This fight is 3 rounds, in the heavyweight division.
Introducing the fighter to my left, fighting out of the red corner.
With a record of
1 - 2 - 0, fighting out of The Island, Green Bastard!
And introducing the fighter to my right, fighting out of the blue corner.
With a record of
2 - 5 - 0, fighting out of The Island, White Death!
The judges for this bout are Sandra Marshall, Bart Greer and Dirk Anderson.
The bell rings for round one and we are underway!
Good exchange - Death coming out on top.
Death slips a straight right by Bastard.
We can't be sure of the tactics at this early stage but we have heard that Death has been working on his takedowns a lot in the buildup to the fight and we can only assume he's going to look to take this to the mat.
Bastard misses with a right hand
letting Death counter with a right hand.
Bastard swings widly with a right hand
letting Death counter with a right hand.
Bastard misses the jab.
Death ducks under an overhand right and circles away with a smile on his face.
Death lands with a shot to the body.
Death connects nicely with a jab. Noted by the judges no doubt.
Bastard definitely looks more muscular than last time we saw him fight.
Bastard looks to score with a jab to the body but Death is just out of range.
Bastard wings a very wild body shot but it does the job and lands to the midsection.
Bastard misses with a looping left.
Bastard scores with a shot to the body.
Fantastic stuff here - a very entertaining period of action, which has drawn cheers from the crowd.
Bastard misses with a wild combination.
Bastard jabs Death to the body, keeping him at a distance.
Bastard tries to bum rush Death with a series of wild strikes but Death uses good footwork to avoid the assault.
That's one minute gone in the round.
Bastard defending well as Death loads up on a big left hand.
Death moves out of range of the strikes.
Bastard lands three nice shots there - that looked like it hurt!
It looks like White Death has been cut.
Bastard lands a jab to Death's midsection.
Death looks winded!
Bastard ducks low and lands a nice hook to the body of his opponent.
Bastard misses with a straight right.
Bastard lands an uppercut out of nowhere! Death falls backwards - clearly groggy! Bastard dives in and finishes the fight with more strikes for a TKO finish!
Ladies and gentlemen, after 1:34 of round 1, we have a winner by way of TKO (Strikes). Green Bastard!
Green Bastard thanked the fans post fight for their support.
|
|
|
|
|
|
|
|
|
|
|
|
|
|
|
|
|
|
|
|
|
|
|
| S |
C
A |
G |
S |
C
B |
G |
|
S |
C |
G |
|
energy
A | B |
|
hype
A | B |
|
pop
A | B |
|
mgr
A | B |
|
FIGHT
RATING
68% |
|
|
|
|
|
|
|
Undercard bout
|
Coming up we have a heavyweight MMA rules bout between Oroku Saku (ranked 3194 p4p, 326 weight class) and Rick Laws (ranked 6427 p4p, 473 weight class). Rick Laws has the better chin. Will he look to stand and bang today?
 |
|
 |
| 200 cm
26
245 lbs
2 - 1 - 0 |
|
192 cm
26
220 lbs
3 - 4 - 0 |
BJJ White Belt
Great elbows
Very quick |
|
Good wrestler
Good elbows
Powerful |
|
| |
|
Ladies and gentlemen. This fight is 3 rounds, in the heavyweight division.
Introducing the fighter to my left, fighting out of the red corner.
With a record of
2 - 1 - 0, fighting out of The Island, Oroku Saku!
And introducing the fighter to my right, fighting out of the blue corner.
With a record of
3 - 4 - 0, fighting out of The Island, Rick Laws!
The judges for this bout are Daniel Franklin, Winston Alpacca and Santiago Holmes.
The bell rings for round one and we are underway!
A chopping leg kick lands by Saku.
Saku fakes the leg kick and cracks Laws in the body.
Laws on the receiving end of a decent leg kick there by Saku. Saku obviously looking to wear him down.
Laws fakes high and shoots in for a takedown but Saku avoids it really well and circles away.
Horrible takedown attempt by Laws or perhaps it was just good defense by Saku, which made it look bad.
Laws shoots in but no luck this time.
Oroku Saku has stuffed three takedown attempts in the round now. That's going to take a lot out of Rick Laws.
Saku chopping away at his opponent's legs.
Saku is looking to slow Laws down with leg kicks.
Laws shoots in looking for a double leg takedown. Saku defends it nicely.
We've had a slow start to the round here - hopefully the action picks up.
A telegraphed takedown attempt from Laws is defended easily by Saku.
Saku feinted there with a counter leg kick.
Saku turns his hip over beautifully as he lands a nice leg kick.
That's one minute gone in the round.
Saku scores with a leg kick.
Saku tries to clinch there but Laws circles away.
Laws throws a looping left and ducks down for a takedown. He's got his arms around Saku's waist but Saku gets an underhook and avoids the takedown by throwing Laws off to one side.
Saku appeared to be looking to counter that last move with a leg kick.
Rick Laws seems to be the more aggressive standup fighter in this bout.
Saku connects with a solid leg kick.
Saku throws a leg kick which misses Laws's front leg but catches the back leg as Laws tries to avoid it.
Laws takes a push kick to the midsection and stumbles backwards.
Laws has his front leg slapped to the side - a nice low kick landing there from Saku.
Saku definitely looks more muscular than last time we saw him fight.
Saku scores with a slapping inside leg kick.
Saku thumps Laws with a low kick.
Laws gets his takedown attempt stuffed easily
and Saku counters with a crisp hook to the side of the head.
Laws misses with a takedown
and Saku counters into the clinch. Nicely done.
Saku lands an elbow inside.
That's two minutes gone in the round.
Saku scores a nice knee to the body.
Laws looks winded!
This is a great period of action - very entertaining stuff!
Saku lands an elbow inside.
It looks like Rick Laws has been cut.
Saku tries a knee to the head but Laws blocks it.
Saku misses with a knee to the head.
Laws blocks a knee to the body. He'll have a nicely bruised forearm in the morning.
Laws's leg has a nasty welt from taking a succession of leg kicks. That must be slowing him down.
Stalling in the clinch from Saku.
Saku gets an overhook and lands an elbow to the side of the head.
Saku lands an elbow that stopped Laws in his tracks for a moment.
Laws dodges an elbow strike from Saku.
Saku is pressed up against the cage. Laws has hold of a leg and is looking to drag Saku down to the mat. Saku avoids the attempt though and has circled away. We're back to striking at a distance.
Saku moves into range and lands a nice leg kick.
Saku moves into range and clinches up with Laws.
Laws on the defensive, avoiding the knees to the body.
Saku tries to land knees in the clinch but Laws avoids the damage to the body.
That's three minutes gone in the round.
Saku lands an elbow inside.
Saku misses the knee to the body. Nice hip positioning from Laws.
Laws blocks a knee to the body. He'll have a nicely bruised forearm in the morning.
With the two fighters working up against the cage, Saku just misses with a elbow thrown towards Laws's brow.
Saku landing knees to the body.
Saku lands a knee to the body.
Saku landing knees to the body. They look like they could hurt.
Saku utilising his Muay Thai to score with a knee to the body.
Laws on the defensive, avoiding the knees to the body.
Saku stalling in the clinch.
A nice glancing elbow lands by Saku.
Saku gets underhooks to prevent Laws's takedown attempt.
That's four minutes gone in the round.
Saku lands a nice elbow.
Saku can't find room to land a body shot as Laws controls the action.
Saku lands a knee to the body.
Wooooo! Give it up for these two warriors! They are putting on a show!
Saku lands a glancing elbow in the clinch.
Saku lands an elbow just above Laws 's eye.
Saku lands an elbow inside that Laws shrugs off.
Saku missing with knees to the body.
Laws managing to block the knees to the body from Saku.
Saku lands an elbow inside that Laws shrugs off.
A knee to the head by Saku.

Laws is rocked!
Clinched against the cage, Saku lands a big elbow that drops Laws! The ref dives in to save him from more shots - Laws is complaining that he's OK but he was done.
Ladies and gentlemen, after 4:58 of round 1, we have a winner by way of TKO (Strikes). Oroku Saku!
After winning the bout, Oroku Saku thanked all his fans and promised he'd do even better in his next fight. The crowd seemed to love his humility.
|
|
|
|
|
|
|
|
|
|
|
|
|
|
|
|
|
|
|
|
|
|
|
| S |
C
A |
G |
S |
C
B |
G |
|
S |
C |
G |
|
energy
A | B |
|
hype
A | B |
|
pop
A | B |
|
mgr
A | B |
|
FIGHT
RATING
50% |
|
|
|
|
|
|
|
Undercard bout
|
Coming up we have a heavyweight MMA rules bout between Island Boy (ranked 1747 p4p, 213 weight class) and Brevan Mink (ranked 3848 p4p, 360 weight class). Brevan Mink has the better chin. Will he look to stand and bang today?
 |
|
 |
| 190 cm
26
275 lbs
3 - 0 - 0 |
|
200 cm
26
275 lbs
2 - 3 - 0 |
BJJ Blue Belt
Excellent MT
Cardio machine |
|
BJJ White Belt
Excellent boxer
Granite chin |
|
| |
|
Ladies and gentlemen. This fight is 3 rounds, in the heavyweight division.
Introducing the fighter to my left, fighting out of the red corner.
With a record of
3 - 0 - 0, fighting out of The Island, Island Boy!
And introducing the fighter to my right, fighting out of the blue corner.
With a record of
2 - 3 - 0, fighting out of The Island, Brevan Mink!
The judges for this bout are Winston Alpacca, Santiago Holmes and Peter Branson.
The bell rings for round one and we are underway!
Mink throws out a loose jab but Boy uses good head movement to avoid it.
Boy swings for the body but Mink moves out of range.
Mink lands a really nice looking cross but Boy seems unphased.
Mink uses decent footwork to sidestep a right hand from Boy.
A big right from Mink misses.
Boy staying out of range there.
Mink defending well as Boy loads up on a big left hand.
Boy lands with a straight right. Mink didn't see that one coming.
It looks like Brevan Mink has been cut.
Mink throws an off balance right hand
and Mink takes a counter punch right on the button for his troubles.
Mink ducks down and throws a hook to the body but Boy moves away.
Boy uses some good footwork to avoid the body shot by Mink.
Mink misses with a hook. Boy ducked under it nicely.
Boy thinks about countering with a body kick.
Boy throws a low kick but it's checked well by Mink.
This fight brought to you by 5M nutrition - it's mmmmm tasty. Nice jab by Mink.
Boy connects with an inside leg kick.
Mink tries to bum rush Boy with a series of wild strikes but Boy uses good footwork to avoid the assault.
We've seen a great period of action over the last minute or so - credit to both fighters for going all out!
Boy takes a swing at Mink's ribcage but misses.
Boy uses good head movement to avoid the hook from Mink.
A telegraphed right hand from Mink misses the target.
Boy has been working on his boxing with his coaches at Temp Spar Gym in the buildup to the fight.
That's one minute gone in the round.
Boy takes the fight into the clinch.
Mink tries to work over Boy's body with a swooping hook but it only glances the target.
Boy lands a left hand.
Boy lands with a short punch from the clinch.
Mink goes for a body shot but it's blocked.
Boy lands a left hand that snaps the head of Mink backwards.
Mink tries to stall but Boy uses the opportunity to gain a better position.
Mink is trying to slow down the pace in the clinch, to catch his breath.
Mink tries to throw a body punch but Boy avoids it by throwing Mink back against the cage.
Boy blocks a body shot from Mink.

Boy ties up his opponent against the cage and manages to drag the fight down to the ground. Boy no doubt will be looking to work submissions from his guard.

Mink has a momentary lapse of concentration, allowing Boy to throw up a leg and lock on what appears to be a pretty tight triangle! Mink is fighting it off but it's all too little too late - Boy pulls down on the head and he's put Mink to sleep! This one is all over!
Ladies and gentlemen, after 1:56 of round 1, we have a winner by way of Submission (Triangle). Island Boy!
A relieved looking Island Boy thanked the fans for their support and gave the usual line about them being amazing. They seemed to believe that he actually meant it.
|
|
|
|
|
|
|
|
|
|
|
|
|
|
|
|
|
|
|
|
|
|
|
| S |
C
A |
G |
S |
C
B |
G |
|
S |
C |
G |
|
energy
A | B |
|
hype
A | B |
|
pop
A | B |
|
mgr
A | B |
|
FIGHT
RATING
63% |
|
|
|
|
|
|
|
Undercard bout
|
Coming up we have a light heavyweight MMA rules bout between Jambe De Bois (ranked 1996 p4p, 283 weight class) and Splinter Yoshi (ranked 2391 p4p, 324 weight class). There are an array of beautiful celebrities at ringside tonight! I wonder if any of them paid for their tickets.
 |
|
 |
| 186 cm
26
205 lbs
4 - 1 - 0 |
|
190 cm
26
220 lbs
3 - 1 - 0 |
Good wrestling
Brawler
Cardio machine |
|
BJJ Blue Belt
Solid Muay Thai
Granite chin |
|
| |
|
Ladies and gentlemen. This fight is 3 rounds, in the light heavyweight division.
Introducing the fighter to my left, fighting out of the red corner.
With a record of
4 - 1 - 0, fighting out of The Island, Jambe De Bois!
And introducing the fighter to my right, fighting out of the blue corner.
With a record of
3 - 1 - 0, fighting out of The Island, Splinter Yoshi!
The judges for this bout are Bart Greer, David Hoff and Daniel Franklin.
The bell rings for round one and we are underway!
A nice inside leg kick there by Yoshi. That's going to slow De Bois down.
Yoshi looks more muscular than last time we saw him. He must have been on the weights.
De Bois swats away the attempt to clinch by Yoshi.
Yoshi goes for a spinning back kick but it misses.
A solid leg kick lands there for Yoshi.
De Bois jabbing away but nothing is landing.
Yoshi tries to sprawl but De Bois drives through with a takedown into half guard.
De Bois is trying to control. Yoshi wants to improve his position but can't escape this time.

Yoshi looking to work for a kimura from the bottom.
Yoshi on the receiving end of some nice ground and pound.
We've had a slow start to the round here - hopefully the action picks up.
De Bois is trying to control the action in half guard but Yoshi is working away on the bottom, looking perhaps to get back to full guard.
De Bois sitting and controlling from the half guard.
De Bois drops an elbow to the side of Yoshi's head.
That's one minute gone in the round.
De Bois sitting in half guard, looking to land shots. Yoshi defending well though.
Yoshi trying to control but De Bois postures up.
De Bois keeping composed on the top, looking to control the action.
De Bois definitely looks more muscular than last time we saw him fight.
De Bois lands with a punch from half guard.
De Bois working Yoshi over with strikes.
De Bois throwing shots but Yoshi is blocking nicely.
De Bois drops an elbow to the side of Yoshi's head.
De Bois thows a wild elbow that connects with the canvas.
De Bois thows a huge punch but Yoshi dodges it nicely.
Still in half guard, De Bois seems content to control.
That's two minutes gone in the round.
Yoshi keeping his head moving to avoid the ground and pound.
The ref warns both fighters not to hold the cage as they work up against the meshing.
De Bois is trying to control. Yoshi wants to improve his position but can't escape this time.
De Bois throwing shots but Yoshi is blocking nicely.
Yoshi makes his way to full guard. A much better position for Yoshi.
A big thud reverberates around the arena there as De Bois accidentally thumps the mat. Hopefully he's not broken his hand.
De Bois content to strike from guard, landing some decent shots.
De Bois showing good wrestling skills to control the position.
De Bois got a little sloppy there for a moment and Yoshi has worked his way into a loose triangle - can he finish it?! No, De Bois has managed to get both his arms back between Yoshi's legs - danger averted.
That's three minutes gone in the round.
Yoshi throws his legs up looking for a submission but De Bois uses it to pass to side control.
Yoshi manages to get back to half guard.
Yoshi has hold of De Bois's hands but De Bois slips his arm to the side and lands an elbow.
The two fighters exchange a few words. I couldn't hear what they were saying but maybe it's more fun if you make it up yourself. De Bois connects with a nice short shot to Yoshi's temple.
De Bois working Yoshi over with strikes.
De Bois looks to score some points with some ground and pound.
De Bois seems content to maintain position for now, rather than mounting any offense.
Yoshi is refusing to be controlled, as De Bois sits in half guard.
That's four minutes gone in the round.
Ground and pound from De Bois.
De Bois looks towards his corner to check for any instructions. The corner give him nothing to work with, so he cracks Yoshi with a short hammerfist. I guess that's as good as any advice he could get in this position.
Yoshi has no desire to be mounted, so is trying to control. De Bois is working away from the top position though.
De Bois lands with an elbow from half guard - that looked like it hurt.
Yoshi looking for submissions off his back.
The crowd thankful this round is nearly over.
De Bois lands with a punch from half guard.
And thats the end of the round the fighters go back to their corners.
Jambe De Bois dominated that round.
OK. That's time! The bell goes and we're back to the action.
De Bois throws a big shot that misses.
Yoshi throws a sloppy head kick and De Bois moves out of range easily.
Yoshi dances in quickly and lands a nice inside leg kick on De Bois. That did some damage!
De Bois shoots in looking for a takedown. Yoshi tries to sprawl out of it but De Bois keeps driving through. The fighters are pinned against the cage. Yoshi manages to get underhooks and after a bit of a struggle, circles away and we're back to standing.
Yoshi was about to counter that last move with a leg kick but changes his mind.
Yoshi slips under a jab.
De Bois misses with a takedown attempt

and Yoshi holds on and brings the fighters into a clinch.
Yoshi tries to land knees in the clinch but De Bois avoids the damage to the body.
De Bois lands a left hand that snaps the head of Yoshi backwards.
We've had a slow start to the round here - hopefully the action picks up.
A short right hand to the side of the head by De Bois.
De Bois working aggressively here.
De Bois on the defensive, avoiding the knees to the body.

Yoshi breaks from the clinch.
De Bois throws a lazy right hand but Yoshi sees it coming a mile off and sidesteps it easily.
Yoshi throws a leg kick which misses De Bois's front leg but catches the back leg as De Bois tries to avoid it.
That's one minute gone in the round.
A big left from De Bois misses.
Yoshi fails with an attempt to clinch.
De Bois takes a push kick to the midsection and stumbles backwards.
De Bois is really dominating this fight. Is there anything that Yoshi can do to turn this around?
De Bois blocks the body kick.
Yoshi fakes a jab and scores with a low kick.
De Bois throws a monster uppercut resembling something out of street fighter but it doesn't land.
De Bois punishes Yoshi's body with a nice straight punch.
Nice defenses there by Yoshi.
De Bois swings and misses with a hook to the body.
A big left from De Bois misses.
Yoshi misses with a body kick.
Splinter Yoshi seems to be getting the better of the standup.
De Bois will have to do better than that with his takedown attempts.
That's three failed takedown attempts in the round for Jambe De Bois. That's going to take a lot out of him.
That's two minutes gone in the round.
De Bois throws a loose over hand right and dives in with a double leg takedown. Yoshi tries to sprawl but it's too late and the fighters hit the mat. De Bois is in Yoshi's guard.
Yoshi keeping moving, preventing De Bois from controlling successfully.
Yoshi is looking for a triangle but De Bois pushes his legs off easily.
The fighters are pressed up against the cage, both looking to find a bit of space to work.
De Bois wants to control from the top but Yoshi keeps moving.
De Bois lands a nice shot whilst sitting in his opponent's guard.
The crowd are loving this. Great action here.
De Bois is looking to work some ground and pound but Yoshi has wrist control.
Yoshi is looking for a triangle here but De Bois uses the submission attempt to pass into side control.
That's three minutes gone in the round.
De Bois scores with punches from side control.
De Bois cracks Yoshi with a big right hand but Yoshi just smiles back at him and invites him to have another go.
Yoshi is not content to let De Bois control the position.
Yoshi gets back to half guard.
De Bois drops an elbow to the side of Yoshi's head.
Yoshi wants to control but De Bois is keeping busy.
De Bois is controlling the pace.
That's four minutes gone in the round.
De Bois slips a nice elbow through Yoshi's hands, connecting with Yoshi's forehead.
De Bois throwing shots but they're hitting the canvas more than the man.
Yoshi is looking for a sweep. De Bois is wise to his cunning plan and keeps the top position.
Yoshi blocking the ground and pound attempt from De Bois.
De Bois is scoring with some nice ground and pound from the dominant position.
De Bois wants to pass the guard but Yoshi is defending well.
And thats the end of the round the fighters go back to their corners.
Jambe De Bois dominated that second round.
That's time! De Bois's corner gives him a slap on the ass as he gets ready to fight. This is the final round!
Yoshi displays some good footwork, moving neatly out of range as De Bois throws out the jab.
De Bois misses the jab.
Yoshi misses with a kick to the body.
De Bois throws the left hand but Yoshi avoids the punch easily.
Yoshi throws a body kick but he wasn't in range.
De Bois misses with a body shot
and he gets countered with a snapping leg kick.
De Bois throws a monster uppercut resembling something out of street fighter but it doesn't land.
De Bois misses with a straight left.
De Bois swings and misses with a hook to the body.
We've had a slow start to the round here - hopefully the action picks up.
De Bois misses with an uppercut. Yoshi saw that one coming.
Yoshi moves out of range as De Bois strikes.
Yoshi tries to score with a low kick but De Bois moves his leg out of the way.
Yoshi fakes a jab and scores with a low kick.
That's one minute gone in the round.
De Bois changes levels and scores with a jab to the body.
De Bois misses with a two punch combination.
De Bois rushes forward with a series of wild hooks but Yoshi moves out of range and avoids them all easily.
De Bois thows a left - swing and a miss!
Yoshi was about to counter that last move with a leg kick but changes his mind.
De Bois fails with the takedown
and Yoshi counters with a thumping low kick.
Yoshi buckles his opponent's knee momentarily with a nice leg kick.
De Bois checks a low kick from Yoshi.
De Bois drops down looking for a counter takedown but Yoshi sprawls and moves away.
Yoshi misses with a low kick.
Yoshi throws a leg kick but he was too far away and it doesn't land.
Yoshi displays good takedown defense there as he swats away a double leg from De Bois.
Splinter Yoshi has stepped it up - he knows he needs a finish here!
That's two minutes gone in the round.
Yoshi throws a quick inside leg kick.
Nice defenses there by Yoshi.
Splinter Yoshi is looking to keep the fight on the feet at all costs.
De Bois swings widly with a right hand
and Yoshi counters with an inside leg kick.
De Bois throws a body punch but Yoshi moves out of range.
Yoshi shapes like he's going to throw a leg kick but settles back down.
De Bois changes levels looking for a counter takedown but doesn't commit.
Good leg kick by Yoshi there. It's the ones that make that thud noise that hurt and that was an almighty thud.
De Bois misses the jab.
Yoshi throws a nice outside leg kick.
The fans in attendance giving it up for the two fighters, who have really let it all hang out in the last minute or so!
De Bois lands with a right hand.
Yoshi misses with a low kick as De Bois jumps back.
That's three minutes gone in the round.
De Bois takes a step back and watches a body kick go sailing past his mid section.
Yoshi throws a body kick but he wasn't in range.
De Bois moves into the clinch.
De Bois is looking for a takedown.
That's three failed takedown attempts in the round for Jambe De Bois. That's going to take a lot out of him.
De Bois looking for a takedown.
Yoshi breaks the clinch and we're back to striking at distance.
De Bois is the aggressor but that punch slipped nicely by Yoshi.
A telegraphed right hand from De Bois misses the target.
Yoshi tries a switch kick but it misses it's target.
De Bois was looking to counter that move with a punch but didn't quite pull the trigger.
De Bois connects with a crisp jab.
Yoshi pivots, looking for a leg kick but De Bois is out of range and Yoshi settles back down.
Yoshi throws a leg kick that is checked
and De Bois counters with a nice shoot takedown that brings the fighters to the ground.
De Bois is in close to Yoshi's body, working some short punches and elbows.
That's four minutes gone in the round.
De Bois throwing shots from guard but he's hitting more mat than opponent.
De Bois looking to pass the guard.
De Bois throws an elbow that misses. Yoshi uses the momentum to reverse the position. He's now in De Bois's guard. Nice move by Yoshi!

This has been an exciting period of action!
Yoshi sneaks a leg through and gets to half guard. That was like a knife through butter how easily he passed De Bois's guard.
De Bois keeps control of the position for the meantime.
And that's the end of the fight!
That was a close round. You could make an argument for either fighter but I would give it to Jambe De Bois.
Well I reckon that's a shut out for De Bois, winning every round. Will the judges agree? They are the ones who matter, even if they are often depressingly incompetent. Over to the ring announcer for the scorecards.
Ladies and gentlemen, after 3 rounds of action, we go to the scorecards for a decision.
Judge Bart Greer scores the fight 30:27
Judge David Hoff scores the fight 30:27
Judge Daniel Franklin scores the fight 30:27
In favor of your winner, by unanimous decision... Jambe De Bois!
A relieved looking Jambe De Bois thanked the fans for their support and gave the usual line about them being amazing. They seemed to believe that he actually meant it.
|
|
|
|
|
|
|
|
|
|
|
|
|
|
|
|
|
|
|
|
|
|
|
| S |
C
A |
G |
S |
C
B |
G |
|
S |
C |
G |
|
energy
A | B |
|
hype
A | B |
|
pop
A | B |
|
mgr
A | B |
|
FIGHT
RATING
39% |
|
|
|
|
|
|
|
Undercard bout
|
Coming up we have a light heavyweight MMA rules bout between JT Smith (ranked 4000 p4p, 467 weight class) and Eric Whitaker (ranked 991 p4p, 157 weight class). Smith comes to the cage accompanied by Im your boogie man. Both fighters really staring each other down here, as Eric Whitaker enters the cage!
 |
|
 |
| 185 cm
25
218 lbs
3 - 4 - 0 |
|
185 cm
26
220 lbs
7 - 1 - 0 |
Good wrestling
Basic striking
Experienced |
|
Good wrestler
Brawler
Powerful |
|
| |
|
Ladies and gentlemen. This fight is 3 rounds, in the light heavyweight division.
Introducing the fighter to my left, fighting out of the red corner.
With a record of
3 - 4 - 0, fighting out of The Island, JT Smith!
And introducing the fighter to my right, fighting out of the blue corner.
With a record of
7 - 1 - 0, fighting out of The Island, Eric Whitaker!
The judges for this bout are Michael Johnstone, Sandra Marshall and David Hoff.
The bell rings for round one and we are underway!
No luck for Smith with that takedown attempt.
Smith uses some good footwork to avoid the body shot by Whitaker.
Smith takes an uppercut right on the jaw but it doesn't phase him.
Wow, both these guys are really going for it!
Whitaker's corner calls for a 1-2. Whitaker obliges with the 1 part as he scores the single shot and moves back out of range.
Smith keeping a good distance there, avoiding the body shot.
Smith manages to get an easy takedown there - catching Whitaker on his heels. He'll look to pass Whitaker's guard now, I'm sure.
Smith preventing the sweep.
Whitaker throwing strikes off his back to little effect.
Smith won't allow Whitaker to sweep him here.
Smith is trying to work a guillotine from the top, or something like that? Don't know how he thinks he's going to get a finish from there.
Smith trying to control the position from guard on top but Whitaker is wriggling around, looking for whatever he can.
Whitaker wants to sweep but no luck.
Smith wants to control from the top but Whitaker keeps moving.
Smith lands a nice shot whilst sitting in his opponent's guard.
The ref warns both fighters not to hold the cage as they work up against the meshing.
Whitaker tries to land a sweep but no joy.
That's one minute gone in the round.
A big thud reverberates around the arena there as Smith accidentally thumps the mat. Hopefully he's not broken his hand.
Whitaker keeping moving, preventing Smith from controlling successfully.
Whitaker looks more muscular than last time we saw him. He must have been on the weights.
Whitaker is working an open guard here, looking to improve his position. No doubt that will leave him open to counters but at least he's being more offensive.
Whitaker is persisting with the attempt to improve his position.
Smith is in close to Whitaker's body, working some short punches and elbows.
Smith drops back, looking for a kneebar! Whitaker looks panicked! The fighters roll across the mat, one looking to finish, one looking to escape. Whitaker looks to have wriggled free... Yes, he's got his leg free and he's dived into side control! Good work there from Whitaker!
Whitaker tries to cartwheel into mount but he doesn't manage it.
Whitaker throws a knee to the body but it doesn't do much damage.
Whitaker cracks Smith with a big elbow.
Whitaker looking to punish the body of his opponent here but Smith is avoiding damage well.
Whitaker fails to land a wild elbow strike.
Whitaker controlling the position.
That's two minutes gone in the round.
You can see the frustration on Smith's face, being in this tough position on the bottom.
Smith is looking for a sweep.
The fighters are pressed up against the cage, both looking to find a bit of space to work.
Whitaker trying to control the position but Smith is working away.
Smith is looking to regain half guard here but Whitaker keeps moving and retains side control.
Smith is working hard here to advance position.
Smith has been looking to land a fair amount of strikes on the ground. He might be looking to soften his opponent up in order to work for a submission.
Whitaker works a knee to the body and follows up with a nice elbow to the head.
Smith can't do much from the bottom here.
Whitaker throws a strike aimed at the side of Smith's head but Smith avoids it well.
Whitaker in side control, throwing shots but Smith defends.
Smith tries to bench press Whitaker off him but Whitaker keeps the position.
That's three minutes gone in the round.
You can see the frustration on Smith's face, being in this tough position on the bottom.
Whitaker sitting in side control, looking to soften his opponent up with elbows and hammerfists but Smith is avoiding damage well and looking to escape the position.
Smith sneaks a leg under to get back to half guard.
Whitaker tries to pass the half guard into mount. Smith knows what he's doing though and prevents the attempt.
Whitaker thows a wild elbow that connects with the canvas.
Whitaker thumps the canvas. Not on purpose obviously - he just missed Smith's head.
Smith is looking to control Whitaker's leg but it's slowly edging free. Can Smith avoid being mounted?
Smith keeps control of the position for the meantime.
Whitaker thows a wild elbow that connects with the canvas.
Smith wants to get back to full guard.
Whitaker trying to control from half guard but Smith is working away.
Ground and pound from Whitaker.
That's four minutes gone in the round.
Whitaker not landing any meaningful shots this time.
Whitaker lands with a punch from half guard.
Whitaker scoring with strikes to the body and head.
Smith has no desire to be mounted, so is trying to control. Whitaker is working away from the top position though.
Smith taking some punishment here, with Whitaker in his half guard.
Smith is positioning himself well to prevent Whitaker advancing to mount.
Smith is looking to improve his position.
Whitaker is nestled in close to Smith, controlling him well. He's worked in a nice elbow to the side of the head as well, for good measure.
Both fighters have adopted an aggressive gameplan on the ground!
Smith trying to control from the bottom.
Smith tries to get to full guard but Whitaker has control of the leg.
Whitaker is trying to control the action in half guard but Smith is working away on the bottom, looking perhaps to get back to full guard.
Whitaker thumps the canvas. Not on purpose obviously - he just missed Smith's head.
Smith is looking for a sweep. Whitaker is wise to his cunning plan and keeps the top position.
And thats the end of the round the fighters go back to their corners.
Eric Whitaker dominated that round.
Well, the break between rounds is over. Let's get back to the scrappin!
A jab from Whitaker does it's job there.
Smith fails to land the takedown.
Smith looks to have improved his striking defense since last time we saw him fight.
Smith shoots in looking for a double leg takedown. Whitaker defends it nicely.
Whitaker now looks to counter with a shot at the body.
Whitaker cracks Smith with a big right hand that sends him to the floor! Smith looks wobbly but he's sprung back up to his feet straight away
can Whitaker finish him?

Smith is rocked!
Whitaker looks to land a left hand but Smith moved out of range nicely.
Oh Smith is still all over the place! His legs are completely gone! Will he be able to recover?!!
Whitaker just misses with a punch to the body.
Smith fails with the takedown
and Whitaker counters with a nice uppercut.
That's three failed takedown attempts in the round for JT Smith. That's going to take a lot out of him.
This has been an exciting period of action!
Whitaker ducks down and throws a hook to the body but Smith moves away.
Smith decides to change it up a bit and drives through with a nice takedown into half guard.
The fighters are battling for position here. Whitaker manages to regain full guard. Nice work.
Smith stopping the sweep attempt from Whitaker.
Smith seems to have got his legs back now.
Whitaker is working from a closed guard but he's struggling to control his opponent.
Whitaker looking to sweep here. No luck so far.
That's one minute gone in the round.
Smith thinks about going for a leg but decides against it, in order to maintain the position.
Whitaker controls Smith momentarily but Smith frees himself.
Smith postures up and scores with a shot to the body and a follow up elbow to the head.
Whitaker has been the more effective fighter overall so far.
Smith drops back looking for a leg! Whitaker is in trouble here! The fighters roll with the hold and Whitaker manages to kick Smith off! Smith jumps back into Whitaker's guard.
Smith trying to land body shots but he keeps hitting the mat.
Whitaker trying to control the position.
Whitaker manages to sweep nicely, so he's now on top. Smith manages to get himself to full guard.
Whitaker with a flurry of punches that miss.
That's two minutes gone in the round.
Smith seems keen to control rather than go for a submission, at least for now.
Smith is trying to control the position but Whitaker postures up.
Smith is pulling down on Whitaker's head. It's preventing any offense from Whitaker, at least for the moment.
Smith is working an open guard here, looking to improve his position. No doubt that will leave him open to counters but at least he's being more offensive.
Smith is trying to control the position but Whitaker postures up.
Whitaker cracks Smith with a solid left hand.
Whitaker with a flurry of punches that miss.
Smith controls Whitaker momentarily but Whitaker frees himself.
Whitaker works over Smith with some ground and pound from guard.
Hammerfist, elbow! yells Whitaker's corner. There ya go! There ya go!
Smith working the defensive guard well to avoid strikes from Whitaker.
That's three minutes gone in the round.
Smith looking to control.
Smith pulls Whitaker in close to prevent any damage.
Smith looking to sweep here. No luck so far.
Whitaker being controlled here momentarily.
Whitaker is looking to work some ground and pound but Smith has wrist control.
Smith not looking particularly offensive just at the moment.
Whitaker passes into half guard.
Smith desperately trying to maintain half guard.
Smith has no desire to be mounted, so is trying to control. Whitaker is working away from the top position though.
That's four minutes gone in the round.
The crowd are showing their displeasure at the lack of action as loud boos ring out around the arena.
Smith slips a foot under and gets full guard. Nice work.
Smith is working the butterfly guard. He manages to land a nice scissor sweep and is now in half guard on the top. Nice move.

Whitaker is looking to improve his position.
Whitaker gets back to full guard.
Smith lands a couple of digs.
Smith won't allow Whitaker to sweep him here.
Whitaker lands a beautiful sweep and he's now moved into his opponent's guard.
Whitaker trying to control but Smith is working from the bottom.
Smith pulls Whitaker in close to his closed guard and prevents Whitaker from doing any damage or advancing position.
And thats the end of the round the fighters go back to their corners.
Eric Whitaker showed his class in that round. I'd imagine he'll take it on all the scorecards.
The referee calls time. The cornermen exit stage left and we're back to business. This is the final round!
Smith changes levels and looks for a double leg takedown. Whitaker tries to avoid it but Smith manages to keep hold of a leg and drag Whitaker to the ground. Whitaker escapes though and pops straight back up to his feet.
Smith fails with the takedown
and Whitaker connects with a straight left hand counter down the middle.
Whitaker displays good takedown defense there as he swats away a double leg from Smith.
That's three failed takedown attempts in the round for JT Smith. That's going to take a lot out of him.
Smith tries a low kick but Whitaker avoids it.
Smith shoots in but doesn't get the takedown
letting Whitaker counter with a right hand.
A jab from Whitaker misses.
Eric Whitaker seems to be getting the better of the standup.
Nice body punch from Whitaker.
Smith avoids the body shot from Whitaker.
Smith slips under a jab.
Smith gets cracked there but stands up to it.
We've had a slow start to the round here - hopefully the action picks up.
Whitaker misses with a looping right.
Smith tries to close the distance and clinch but Whitaker swats him to one side with an open hand palm strike and circles away.
Whitaker lands with a shot to the body.
Smith is trying hard to land a takedown here. Whitaker sprawls well and keeps this one on the feet.
Both fighters are breathing heavily.
Smith takes a shot to the body in his stride.
That's one minute gone in the round.
A really sloppy takedown attempt there from Smith.
Nice defenses there by Smith.
Whitaker lands a big uppercut and Smith crumbles to the floor! The ref thinks about stopping the fight but Smith looks OK. Whitaker waves Smith back to his feet!
Whitaker tries to land with a swinging hook to the body but Smith was well out of range. Poor timing from Whitaker.
Whitaker throws a combination but comes up with nothing but fresh air.
Nice takedown defense from Whitaker. No joy for Smith on that attempt.
Whitaker throws a hook to the body but it doesn't connect.
Whitaker drops Smith with a huge uppercut! Smith drops to the floor like a sack of potatoes. Whitaker is raining down punches and the ref stops the fight! This one is all over!
Ladies and gentlemen, after 1:34 of round 3, we have a winner by way of TKO (Strikes). Eric Whitaker!
A victorious Eric Whitaker thanked his army of followers in his post fight interview, telling people to make sure they follow him on Twitter.
|
|
|
|
|
|
|
|
|
|
|
|
|
|
|
|
|
|
|
|
|
|
|
| S |
C
A |
G |
S |
C
B |
G |
|
S |
C |
G |
|
energy
A | B |
|
hype
A | B |
|
pop
A | B |
|
mgr
A | B |
|
FIGHT
RATING
56% |
|
|
|
|
|
|
|
Co-main event
|
Coming up we have a heavyweight MMA rules bout between Turd McPherson (ranked 1167 p4p, 153 weight class) and Do You Really Want To Hurt (ranked 415 p4p, 59 weight class). Both fighter's entrance songs getting the crowd jumping here.
 |
|
 |
| 225 cm
26
292 lbs
6 - 1 - 0 |
|
185 cm
26
285 lbs
8 - 2 - 0 |
Good wrestling
Basic striking
Cardio machine |
|
BJJ White Belt
Excellent boxer
Good gas tank |
|
| |
|
Ladies and gentlemen. This fight is 5 rounds, for the heavyweight championship of the world!
Introducing the champion to my left, fighting out of the red corner.
With a record of
6 - 1 - 0, fighting out of The Island, Turd McPherson!
And introducing the challenger to my right, fighting out of the blue corner.
With a record of
8 - 2 - 0, fighting out of The Island, Do You Really Want To Hurt!
The judges for this bout are Michael Johnstone, Dirk Anderson and Bart Greer.
The bell rings for round one and we are underway!
You Really Want To Hurt has closed the distance and engaged McPherson in a clinch.
McPherson tries to pull guard but can't drag his opponent to the mat. You Really Want To Hurt just stands there and leans against the cage.
The referee calls for You Really Want To Hurt to work.
You Really Want To Hurt blocks a body shot from McPherson.
You Really Want To Hurt lands a shot to the body.
McPherson throws a punch but it's blocked by You Really Want To Hurt.
You Really Want To Hurt's coach down at ELITE Island Gym - 19 Elite Coaches was telling us pre-fight that they have been working on You Really Want To Hurt's balance. Obviously they view that as a key factor in the outcome of this fight.
McPherson looks like he'd prefer to be striking at range right now.
You Really Want To Hurt manages to get underhooks and slows down the pace for a moment.
McPherson drops down for a takedown but doesn't get it.
You Really Want To Hurt has McPherson pressed against the cage.
We've had a slow start to the round here - hopefully the action picks up.
You Really Want To Hurt stalling the fight.
You Really Want To Hurt slowing the pace effectively.
The crowd are getting on You Really Want To Hurt's back here. They're not happy about his lack of aggression in the clinch.
You Really Want To Hurt works on McPherson's body with a couple of short punches.
That's one minute gone in the round.
McPherson misses the knee to the body. Nice hip positioning from You Really Want To Hurt.
You Really Want To Hurt works for underhooks and lands a body shot in the process.
You Really Want To Hurt cracks McPherson with a nice body shot.
You Really Want To Hurt controlling the action here for a moment.
You Really Want To Hurt digs a right hand underneath McPherson's ribcage. McPherson let out a lung full of air as it connected.
McPherson letting You Really Want To Hurt take a breather here.
You Really Want To Hurt has McPherson pushed against the cage.
The ref breaks the fighters up, due to lack of action by Do You Really Want To Hurt.
You Really Want To Hurt connects with a body shot that sends McPherson's belly button to the back.
Nice uppercut lands for You Really Want To Hurt. That snapped McPherson's head back.
Turd McPherson seems to be the more aggressive standup fighter in this bout.
McPherson takes a jab right on the kisser.
McPherson definitely looks more muscular than last time we saw him fight.
McPherson misses with a half-hearted attempt at a head kick.
You Really Want To Hurt tries to clinch but is not successful on this occasion.
That's two minutes gone in the round.
McPherson goes for a double leg but You Really Want To Hurt avoids the attempt and the two fighters end up clinched against the cage as You Really Want To Hurt continues to drive forward.
McPherson sets himself, and You Really Want To Hurt steps forward looking for the clinch! McPherson avoids it this time.
That's three failed takedown attempts in the round for Turd McPherson. That's going to take a lot out of him.
McPherson shoots in looking for a takedown but You Really Want To Hurt manages to keep the fight standing, pushing McPherson's face into the canvas for good measure before circling away.
You Really Want To Hurt uses good footwork to get in and out and land a nice right hand before McPherson has time to react.
You Really Want To Hurt lands a big uppercut and McPherson crumbles to the floor! The ref thinks about stopping the fight but McPherson looks OK. You Really Want To Hurt waves McPherson back to his feet!
The fans in attendance giving it up for the two fighters, who have really let it all hang out in the last minute or so!
McPherson throws a body punch but You Really Want To Hurt moves out of range.
You Really Want To Hurt tries to counter with a clinch but McPherson shakes him off and moves away.
Do You Really Want To Hurt is looking to keep the fight on the feet at all costs.
McPherson tries a switch kick but it misses it's target.
You Really Want To Hurt comes forward and lands a shot to the body, then darts back out of range.
McPherson is breathing heavily.
McPherson is aggressively charging in as You Really Want To Hurt backs up avoiding any damage. You Really Want To Hurt tosses out a jab and McPherson runs right into it face first! McPherson is out cold! You Really Want To Hurt dropped down on all fours and is barking in McPherson's face like a pit bull in celebration until the ref was finally able to pull him away!
Ladies and gentlemen, after 2:31 of round 1, we have a winner by way of KO (Punch). Do You Really Want To Hurt! Do You Really Want To Hurt retains his heavyweight title!
Do You Really Want To Hurt seemed lost for words in his post fight interview but he remembered to thank his fans and directed everyone to his website.
|
|
|
|
|
|
|
|
|
|
|
|
|
|
|
|
|
|
|
|
|
|
|
| S |
C
A |
G |
S |
C
B |
G |
|
S |
C |
G |
|
energy
A | B |
|
hype
A | B |
|
pop
A | B |
|
mgr
A | B |
|
FIGHT
RATING
45% |
|
|
|
|
|
|
|
Main event
|
Coming up we have a middleweight MMA rules bout between Luther Jackson (ranked 303 p4p, 40 weight class) and Donato Di Niccolo Di Betto Bardi (ranked 2640 p4p, 312 weight class). Both fighters look fresh as a daisy as they make their way towards the cage.
 |
|
 |
| 185 cm
26
197 lbs
10 - 0 - 0 |
|
190 cm
26
190 lbs
2 - 1 - 0 |
Good wrestling
Basic striking
Very strong |
|
BJJ Blue Belt
Lethal high kicks
Granite chin |
|
| |
|
Ladies and gentlemen. This fight is 5 rounds, for the middleweight championship of the world!
Introducing the champion to my left, fighting out of the red corner.
With a record of
10 - 0 - 0, fighting out of The Island, Luther Jackson!
And introducing the challenger to my right, fighting out of the blue corner.
With a record of
2 - 1 - 0, fighting out of The Island, Donato Di Niccolo Di Betto Bardi!
The judges for this bout are Michael Johnstone, Bart Greer and Santiago Holmes.
The bell rings for round one and we are underway!
Jackson circles away from the clinch attempt.
Jackson misses with a takedown attempt - Di Betto Bardi sprawls well and throws a nice strike on the way out which just misses.
Di Betto Bardi counters with a body kick.
Jackson listening to his corner there, landing a nice uppercut.
Jackson shoots in for a double leg but Di Betto Bardi sprawls well. That's going to sap some energy.
Di Betto Bardi scoring well with a low kick there.
Jackson gets his takedown attempt stuffed easily
and he gets countered with a snapping leg kick.
That's three failed takedown attempts in the round for Luther Jackson. That's going to take a lot out of him.
Di Betto Bardi buckles his opponent's knee momentarily with a nice leg kick.
Jackson fails with the takedown
and Di Betto Bardi counters with a body kick.
Di Betto Bardi lands a leg kick and bounces back out of range.
We've had a slow start to the round here - hopefully the action picks up.
Jackson closes the distance, clinches up and gets a nice trip takedown into side control. Very smooth.
Wooooo! Give it up for these two warriors! They are putting on a show!
Di Betto Bardi holds on to Jackson's head and controls the position momentarily.
Di Betto Bardi gives up the full mount - oops, sloppy defensive grappling there!
Di Betto Bardi is in all sorts of trouble here.
That's one minute gone in the round.
Di Betto Bardi tries to lock up and control but Jackson gives him a forearm to the face and pushes him away.
Jackson looking to ground and pound but Di Betto Bardi is blocking nicely.
Jackson definitely looks more muscular than last time we saw him fight.
Jackson has been looking to land a fair amount of strikes on the ground. He might be looking to soften his opponent up in order to work for a submission.
Jackson throws an elbow from mount that misses. Lucky escape for Di Betto Bardi because Jackson loaded up on that one.
Jackson prevents Di Betto Bardi from getting the reversal.
Jackson misses with a head shot.
Di Betto Bardi is in all sorts of trouble here.
Jackson can't quite control the action as he would like just now, as Di Betto Bardi is looking to escape.
Jackson avoids the attempt from Di Betto Bardi to control.
Di Betto Bardi avoids a series of strikes thrown by Jackson.
Jackson avoids the attempt from Di Betto Bardi to control.
Jackson dominating with strikes here.
That's two minutes gone in the round.
Jackson looking for a guillotine from mount but Di Betto Bardi is having none of it.
Di Betto Bardi taking shots to the head.
Di Betto Bardi wants to control but Jackson is having none of it.
Di Betto Bardi is squirming around, avoiding Jackson's attempts to control the action.
Jackson lands with some vicious ground and pound - can Di Betto Bardi hang on?
The crowd are loving this. Great action here.
Jackson in mount throwing good strikes here, bouncing his opponent's head off the canvas.
Jackson wants to take Di Betto Bardi's back but he can't do it this time.
Di Betto Bardi tries to hold on but Jackson pushes him away.
Di Betto Bardi working to try and regain half guard.
Jackson lands with some vicious ground and pound - can Di Betto Bardi hang on?
The ref warns both fighters not to hold the cage as they work up against the meshing.
The fighters are starting to get a bit slippery now, which will make submissions a bit more difficult.
Di Betto Bardi wriggling around on the bottom manages to avoid the strikes thrown by Jackson.
Jackson looking for an armbar but decides to keep the dominant position instead.
That's three minutes gone in the round.
Jackson is giving the impression that he's looking to ground and pound but he switches suddenly into a beautiful far side armbar! Di Betto Bardi is forced to tap! Great finish!
Ladies and gentlemen, after 3:25 of round 1, we have a winner by way of Submission (Armbar). Luther Jackson!
Luther Jackson retains his middleweight title!
Luther Jackson thanked the fans post fight for their support.
|
|
|
|
|
|
|
|
|
|
|
|
|
|
|
|
|
|
|
|
|
|
|
| S |
C
A |
G |
S |
C
B |
G |
|
S |
C |
G |
|
energy
A | B |
|
hype
A | B |
|
pop
A | B |
|
mgr
A | B |
|
FIGHT
RATING
48% |
|
|
|
|
|
|
|
|
|
|
