 |
GLFC 18: Out With a Bang PBP Commentary |
Undercard bout
|
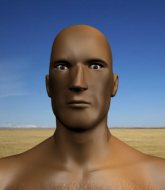
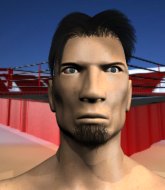
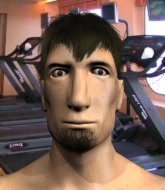
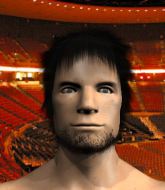
Coming up we have a welterweight MMA rules bout between Winston Cooper (ranked 6689 p4p, 535 weight class) and Marcus Harris (ranked 7119 p4p, 544 weight class). Fingers crossed for an exciting fight - I'm sure both fighters are looking for a nice under the table bonus!
 |
|
 |
| 175 cm
21
152 lbs
1 - 2 - 0 |
|
175 cm
23
165 lbs
2 - 1 - 0 |
BJJ Blue Belt
Great elbows
Good chin |
|
BJJ Blue Belt
Counter fighter
Determined |
|
| |
|
Ladies and gentlemen. This fight is 3 rounds, in the welterweight division.
Introducing the fighter to my left, fighting out of the red corner.
With a record of
1 - 2 - 0, fighting out of Las Vegas, Winston Cooper!
And introducing the fighter to my right, fighting out of the blue corner.
With a record of
2 - 1 - 0, fighting out of New York, Marcus Harris!
The judges for this bout are Franklyn Lucas, Anthony Taglia and Chad Campbell.

The bell rings for round one and we are underway!

Cooper instigates a clinch.
Harris looking for a takedown.
Harris takes an elbow to the temple.
Cooper lands an elbow just above Harris 's eye.
Cooper misses with a hook to the ribs.
Harris takes an elbow to the forehead.

It looks like Marcus Harris has been cut.
Cooper throws a blind hook that connects with the side of Harriss head.
Harris jumps guard but Cooper turns him against the cage and keeps the fight standing.
Nice elbow from Cooper.
A head punch on the inside from Cooper fails to land.
Harris tries to pull guard but can't drag his opponent to the mat. Cooper just stands there and leans against the cage.
Winston Cooper has stuffed three takedown attempts in the round now. That's going to take a lot out of Marcus Harris.
Cooper has Harris pressed against the cage.
Cooper misses with a body punch.
Harris jumps guard but Cooper stands there with Harris around his waist. Harris gives up and drops back to his feet. We remain in the clinch.
Cooper lands a glancing elbow in the clinch.
Harris jumps guard but Cooper turns him against the cage and keeps the fight standing.

That's one minute gone in the round.
Harris is looking to take this one to the mat.
Harris wants a takedown.
Cooper has a couple of punches blocked by Harris.
Cooper throws a blind hook that connects with the side of Harriss head.
Cooper is pressed up against the cage. Harris has hold of a leg and is looking to drag Cooper down to the mat. Cooper avoids the attempt though and has circled away. We're back to striking at a distance.
Cooper wants to clinch up but Harris keeps it at a distance.
Cooper clinches.
Cooper lands a shoulder strike.
Cooper lands an elbow inside.
Cooper lands a glancing elbow in the clinch.
Harris prevents a body shot from Cooper.
Cooper misses with a hook to the ribs.
Cooper comes over the top with an elbow. That landed flush.
Cooper trying to stall but Harris improves his position.
Cooper taking a breather.
Cooper gets double underhooks to prevent a takedown attempt from Harris.

That's two minutes gone in the round.
Cooper misses with a body punch.
Cooper gets an overhook and lands an elbow to the side of the head.
Cooper stops a takedown attempt from Harris.
We've seen a great period of action over the last minute or so - credit to both fighters for going all out!
Cooper lands an elbow that stopped Harris in his tracks for a moment.
Harris prevents a body shot from Cooper.
Harris goes for a takedown in the clinch but Cooper prevents it.
Cooper stalls.
Cooper lands a nice elbow from the clinch.
Cooper lands an elbow inside.
Cooper prevents a takedown attempt there.
Cooper lands with a light punch inside.

That's three minutes gone in the round.
Cooper lands an elbow inside.
Cooper swings wildly with an uppercut but Harris uses good head movement to avoid it.
Harris tries to pull guard but can't drag his opponent to the mat. Cooper just stands there and leans against the cage.
Harris has dropped down and is looking to force the takedown but it's defended by Cooper after a bit of a struggle.
Cooper lands a glancing elbow in the clinch.
Cooper stops a takedown attempt from Harris.
Harris looks winded!
Cooper content to slow the pace in the clinch.
Cooper misses with a punch to the body.
Cooper misses with a shot to the kidneys.

Harris drags the fight down to the ground.
Harris keeping moving, preventing Cooper from controlling successfully.
Cooper pressing down on his opponent's thigh, looking to pass guard. Harris is keeping the position for now.

Harris looking for subs off his back but Cooper has passed one foot through into half guard.

That's four minutes gone in the round.

Cooper is working for a kimura but Harris is defending it quite comfortably.
The fighters are starting to perspire pretty heavily.
Cooper looking for a kimura but he'll have to free his other leg if he wants to finish that. Perhaps he's just using it as a distraction technique.
Cooper is trying for a kimura here. Harris looks like he's in a lot of pain... and he's tapping out! Cooper wins by kimura!
Ladies and gentlemen, after 4:57 of round 1, we have a winner by way of Submission (Kimura). Winston Cooper!
Winston Cooper spent the whole post fight interview bigging himself up. It didn't go down that well with the fans after a while as they thought it was a bit arrogant.
|
|
|
|
|
|
|
|
|
|
|
|
|
|
|
|
|
|
|
|
|
|
|
| S |
C
A |
G |
S |
C
B |
G |
|
S |
C |
G |
|
energy
A | B |
|
hype
A | B |
|
pop
A | B |
|
mgr
A | B |
|
FIGHT
RATING
43% |
|
|
|
|
|
|
|
Undercard bout
|
|
|
|
Undercard bout
|
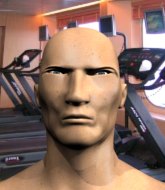
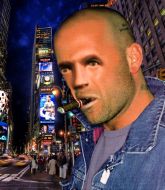
Coming up we have a heavyweight MMA rules bout between Shazaam McDaniels (ranked 7076 p4p, 492 weight class) and Prince Almighty Great No Mercy (ranked 4261 p4p, 415 weight class). McDaniels's ring entrance music is that housewives' favourite, Mama I'm a Criminal. Shazaam McDaniels has the edge in experience - let's see if he can make that count tonight.
 |
|
 |
| 190 cm
18
240 lbs
0 - 1 - 0 |
|
194 cm
25
215 lbs
1 - 0 - 0 |
BJJ White Belt
Excellent boxer
Big right hand |
|
Good wrestler
Brawler
Granite chin |
|
| |
|
Ladies and gentlemen. This fight is 5 rounds, in the heavyweight division.
Introducing the fighter to my left, fighting out of the red corner.
With a record of
0 - 1 - 0, fighting out of Sydney, Shazaam McDaniels!
And introducing the fighter to my right, fighting out of the blue corner.
With a record of
1 - 0 - 0, fighting out of London, Prince Almighty Great No Mercy !
The judges for this bout are Dean Styles, Reed Andrews and Chad Campbell.
The bell rings for round one and we are underway!

No Mercy clinches with his opponent.
No Mercy has hold of a leg and is looking for a trip takedown. McDaniels avoids it nicely though and we remain in the clinch.
No Mercy has McDaniels pressed up against the cage and is working for takedown. McDaniels manages to improve position though and keeps the fight standing.
No Mercy is looking for a takedown up against the cage. McDaniels gets underhooks though and prevents the takedown attempt.
Shazaam McDaniels has stuffed three takedown attempts in the round now. That's going to take a lot out of Prince Almighty Great No Mercy .
No Mercy tries to score a body lock takedown but McDaniels shows good agility there to stay on his feet.

McDaniels breaks from the clinch.
No Mercy has managed to clinch.
No Mercy looking for a takedown.
No Mercy wants a takedown but no success here.
No Mercy goes for a takedown in the clinch but McDaniels prevents it.
No Mercy has hold of one of McDaniels's legs. McDaniels is fighting the takedown attempt but No Mercy gets the trip and lands the takedown into guard.
A big thud reverberates around the arena there as No Mercy accidentally thumps the mat. Hopefully he's not broken his hand.
McDaniels wants to stand up but No Mercy is controlling him.
McDaniels trying desperately to get back to his feet here but he's not having any joy at all. He's going to tire himself out if he's not careful.
No Mercy scoring with punches to the head and body.
McDaniels wants to stand up but No Mercy is controlling him.
No Mercy scores with a decent looking elbow strike.
That's one minute gone in the round.
No Mercy makes a bit of distance and scores with some ground and pound, still in guard.
McDaniels wants to get back to his feet but he's too absorbed in his own little project and No Mercy manages to pass to side control.
No Mercy looks to score some points with some ground and pound.
No Mercy is just sitting in half guard, waiting for something to happen.
No Mercy looks to score some points with some ground and pound.
No Mercy looks to score some points with some ground and pound.
No Mercy prevents McDaniels from standing back up.
McDaniels knows he needs to get back to his feet asap. He's simply no match for No Mercy on the ground.
No Mercy working the head and body with strikes.
No Mercy is nestled in close to McDaniels, controlling him well. He's worked in a nice elbow to the side of the head as well, for good measure.
McDaniels taking some punishment here, with No Mercy in his half guard.
The referee walks around the fighters to get a better view of the action. No Mercy lands a nice short elbow.
No Mercy looks to score some points with some ground and pound.
No Mercy drops an elbow to the side of McDaniels's head.
McDaniels is trying to stand.
No Mercy is scoring with some nice ground and pound from the dominant position.
That's two minutes gone in the round.
No Mercy takes advantage of the dominant position to land a couple of big hammer fists.
The crowd cheering loudly, showing their appreciation for the quality fight we're seeing here.
No Mercy is nestled in close to McDaniels, controlling him well. He's worked in a nice elbow to the side of the head as well, for good measure.
No Mercy working McDaniels over with strikes.

McDaniels is rocked!
McDaniels is looking to get back to is feet but No Mercy passes into side control.
Oh McDaniels is still in real trouble! Will he be able to recover?!!
No Mercy lands a strong strike to the head of McDaniels. That's dazed him! No Mercy looking to finish here. McDaniels is waving his arms around trying to block but he's hurt badly - No Mercy lands more strikes and the referee steps in to end the fight!
Ladies and gentlemen, after 2:35 of round 1, we have a winner by way of TKO (Strikes). Prince Almighty Great No Mercy !
|
|
|
|
|
|
|
|
|
|
|
|
|
|
|
|
|
|
|
|
|
|
|
| S |
C
A |
G |
S |
C
B |
G |
|
S |
C |
G |
|
energy
A | B |
|
hype
A | B |
|
pop
A | B |
|
mgr
A | B |
|
FIGHT
RATING
50% |
|
|
|
|
|
|
|
Undercard bout
|
Coming up we have a welterweight MMA rules bout between Ronaldo Do Nascimento (ranked 4541 p4p, 446 weight class) and Wesley Williams (ranked 5820 p4p, 501 weight class). Wesley Williams will no doubt be trying to keep this one on the feet, where he has a distinct advantage.
 |
|
 |
| 170 cm
25
162 lbs
1 - 0 - 0 |
|
170 cm
25
155 lbs
0 - 0 - 0 |
Good wrestling
Counter fighter
Very strong |
|
BJJ White Belt
Decent boxing
Tends to cut |
|
| |
|
Ladies and gentlemen. This fight is 3 rounds, in the welterweight division.
Introducing the fighter to my left, fighting out of the red corner.
With a record of
1 - 0 - 0, fighting out of Rio de Janeiro, Ronaldo Do Nascimento!
And introducing the fighter to my right, fighting out of the blue corner.
With a record of
0 - 0 - 0, fighting out of New York, Wesley Williams!
The judges for this bout are Reed Andrews, Chad Campbell and Russell Pearce.
The bell rings for round one and we are underway!
Nice sprawl there from Do Nascimento as Williams shoots in.
Williams is looking to clinch.
Do Nascimento tries to counter by clinching up but Williams breaks away and moves out of range.
Williams tries to close the distance and clinch but Do Nascimento swats him to one side with an open hand palm strike and circles away.
Do Nascimento is trying to close the distance and clinch up, after that failed offence from Williams.

Do Nascimento shoots in for a takedown and gets it. Let's see what he's got on the mat.
Do Nascimento not doing a lot at the moment. He'll have to show some more aggression or the fight will get stood up.
We get told so often about how wrestlers don't like to be on their backs. Let's see if Williams can do anything to dispel that myth.
Do Nascimento has controlled the position for a good 20 seconds, which will no doubt be starting to frustrate his opponent.
We've had a slow start to the round here - hopefully the action picks up.
Williams working a defensive guard here.
Williams had isolated an arm as going for a kimura. Do Nascimento defends it easily.
That's one minute gone in the round.
Do Nascimento seems content to control from guard here. He's going to have to remain active though if he doesn't want to get stood back up.

The ref stands the fighters back up due to a lack of activity.
Williams looks for a takedown here. Will he get it? Do Nascimento is fending him off so far but Williams persists. Nope, Do Nascimento circles away and we're back to standing.
Do Nascimento is trying to close the distance and clinch up, after that failed offence from Williams.
Williams looking to throw a kick but he's pulled out of it.
Do Nascimento attempts a counter takedown but Williams avoids it well and moves away.
Williams tries for a takedown but Do Nascimento circles away easily
and Do Nascimento counters by moving into the clinch. Good anticipation by Do Nascimento.
Ronaldo Do Nascimento has stuffed three takedown attempts in the round now. That's going to take a lot out of Wesley Williams.
Williams is trying to break the clinch but Do Nascimento has him pressed against the cage.
That's two minutes gone in the round.
The crowd are showing their displeasure at the lack of action as loud boos ring out around the arena.
Both guys are working to get underhooks.
Do Nascimento struggles to land a body shot inside as Williams controls his hands.
Do Nascimento turns his hips and lands a very nice judo throw into side control!
Do Nascimento taking a breather here.
Williams is looking to reverse the position.
A bit of a lull in the action. I'm sure it will pick up again soon... even if the ref has to physically pick them up and put them back on their feet.
The ref warns both fighters not to hold the cage as they work up against the meshing.
Do Nascimento tries to move into full mount but can't pass Williams's legs.
Williams wants to control but Do Nascimento postures up.
Do Nascimento takes a little break here. Williams wants to take advantage but he is being controlled well.
That's three minutes gone in the round.
Williams struggling a bit here.
Williams tries to work a leg under to get back to half guard but Do Nascimento wriggles his own leg back out and remains in side control.
Do Nascimento is moving around in side control but his primary objective seems to be to maintain the position.
The fighters are pressed up against the cage, both looking to find a bit of space to work.
The referee wants the fighters to be more active or he's going to reset them on the feet.
That's four minutes gone in the round.
A lull in the action here being met with boos from the crowd.
Williams is looking for a sweep.
Williams is still trying to improve position.
Do Nascimento is pausing for a moment. What's he doing? It looks like he's clearing his nose. Oh dude! He's shot a load of snot all down Williams's shoulder. That is not cool.
The referee has stepped in and called for a break in the action. We'll restart on the feet.
Boooooooooooooooooooo!!! God, this has been a terrible round. Come on you two, sort yourselves out!
Williams has his takedown stuffed
and Do Nascimento decides to take the opportunity to score a takedown. He's landed in Williams's guard.
Do Nascimento is standing up over Williams. Williams looks to escape but Do Nascimento dives into side control.
And thats the end of the round the fighters go back to their corners.
Ronaldo Do Nascimento dominated that round.
OK. That's time! The bell goes and we're back to the action.

Williams closes the distance and clinches up with Do Nascimento, looking for a takedown. Williams pushes Do Nascimento against the cage but Do Nascimento circles to the side and manages to break the clinch.
Williams throws a body kick, spinning off balance
and Do Nascimento counters with a takedown into side control! That could mean trouble for Williams!
Williams is trying to get back to half guard.
Williams gives up the full mount - oops, sloppy defensive grappling there!
Do Nascimento is really dominating this fight. Is there anything that Williams can do to turn this around?
Williams is in all sorts of trouble here.
Do Nascimento controlling the position easily from mount.
That's one minute gone in the round.
Williams tries to hold on but Do Nascimento pushes him away.
Do Nascimento content just to control the position here.
Williams really trying hard to get back to half guard here.
Do Nascimento controlling the position easily from mount.
Williams tries to hold on but Do Nascimento postures up.
Do Nascimento controlling from the full mount.
That's two minutes gone in the round.
The crowd are hurling abuse towards the fighters... You can hardly blame them though because there isn't a lot going on in the fight.
Williams tries to reverse the position but Do Nascimento maintains control.
Do Nascimento looking to control and managing it successfully.
Do Nascimento seems to have a rather negative gameplan on the ground. He seems keen to just score the takedown and hold down Williams for as long as he can get away with.
That's three minutes gone in the round.
Williams is working to get back to half guard.
Do Nascimento takes a little breather and maintains the position. The referee will be looking for him to stay active from such a dominant position though.
Williams tries to get back to half guard but can't.
Do Nascimento is giving the impression that he's looking to ground and pound but he switches suddenly into a beautiful far side armbar! Williams is forced to tap! Great finish!
Ladies and gentlemen, after 4:55 of round 2, we have a winner by way of Submission (Armbar). Ronaldo Do Nascimento!
|
|
|
|
|
|
|
|
|
|
|
|
|
|
|
|
|
|
|
|
|
|
|
| S |
C
A |
G |
S |
C
B |
G |
|
S |
C |
G |
|
energy
A | B |
|
hype
A | B |
|
pop
A | B |
|
mgr
A | B |
|
FIGHT
RATING
31% |
|
|
|
|
|
|
|
Undercard bout
|
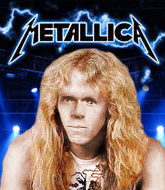
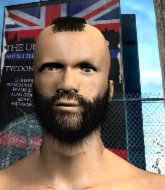
Coming up we have a heavyweight MMA rules bout between Daddy Almighty Great No Mercy (ranked 6232 p4p, 473 weight class) and Jaymz Hetfield (ranked 6028 p4p, 467 weight class). Hetfield has chosen Metallica - Fight Fire with Fire as his entrance music, which hasn't gone down very well with the crowd. I can't wait for this one - let's get the fighter introductions out of the way and get this one started!
|
|
 |
| 194 cm
25
215 lbs
0 - 0 - 0 |
|
190 cm
26
220 lbs
6 - 4 - 0 |
Good wrestling
Brawler
Likes comics |
|
Good wrestler
Basic striking
Knockout power |
|
| |
|
Ladies and gentlemen. This fight is 3 rounds, in the heavyweight division.
Introducing the fighter to my left, fighting out of the red corner.
With a record of
0 - 0 - 0, fighting out of London, Daddy Almighty Great No Mercy !
And introducing the fighter to my right, fighting out of the blue corner.
With a record of
6 - 4 - 0, fighting out of New York, Jaymz Hetfield!
The judges for this bout are John Kavanagh, Jonathan Paton and Columbo Gatti.
The bell rings for round one and we are underway!
No Mercy throws a head kick that misses and slips in the process. He scrambles back to his feet and the fighters circle.
Hetfield only half commits to the counter leg kick.
Hetfield moves into the clinch.
No Mercy dodges an elbow strike from Hetfield.
Hetfield prevents the takedown attempt.
No Mercy dodges an elbow strike from Hetfield.
No Mercy wants to take the fight to the mat but Hetfield manages to get underhooks and keep the fight in the clinch.
Hetfield throws an elbow but it's blocked.

Hetfield breaks the clinch.
The fight stays on the outside here - Hetfield looks like he's thinking about clinching though.
Hetfield looking to take his opponent's legs away with the low kicks.
No Mercy darts in and clinches Hetfield up against the cage.
We've had a slow start to the round here - hopefully the action picks up.
Hetfield breaks the clinch and we return to the middle of the mat.
No Mercy changes levels and looks for a double leg takedown. Hetfield tries to avoid it but No Mercy manages to keep hold of a leg and drag Hetfield to the ground. Hetfield escapes though and pops straight back up to his feet.
That's three failed takedown attempts in the round for Daddy Almighty Great No Mercy . That's going to take a lot out of him.
No Mercy throws a head kick that misses
and Hetfield counters with a good, hard body kick but No Mercy shrugs it off.
Hetfield tries to close the distance and clinch but No Mercy swats him to one side with an open hand palm strike and circles away.
No Mercy seem to be loading up, looking for a big counter.
Hetfield moves into the clinch.
Hetfield's corner calls for him to break the clinch, which he does.
That's one minute gone in the round.
No Mercy 's hands are dropping dangerously low here and Hetfield connects clean with a right hook that sends him down to one knee! No Mercy scrambles back to his feet.
Hetfield closes the distance and pushes No Mercy back into the cage.
No Mercy looking for a takedown.
Hetfield prevents a body shot from No Mercy .
Nice elbow from Hetfield.
No Mercy breaks from the clinch.
Jaymz Hetfield seems to be the more aggressive standup fighter in this bout.
Hetfield wants to clinch.
Hetfield tries to clinch but No Mercy moves out of range.
No Mercy scores with a takedown into Hetfield's guard.

The fighters are working up against the cage. Hetfield manages to wriggle his way back to his feet, so the fighters are now clinched against the cage.
The crowd are loving this. Great action here.
A nice glancing elbow lands by Hetfield.
No Mercy managing to block the knees to the body from Hetfield.
Hetfield breaks the clinch and we return to the middle of the mat.
Hetfield tries to keep at a distance but No Mercy has taken the fight into the clinch.
That's two minutes gone in the round.
Hetfield putting his Muay Thai to good use. He has No Mercy in a tight clinch and is doing some damage with knees to the body.
No Mercy dodges an elbow strike from Hetfield.
No Mercy has Hetfield pressed up against the cage and is working for takedown. Hetfield manages to improve position though and keeps the fight standing.
Hetfield breaks the clinch and we're back to striking at distance.
Hetfield looking to throw a kick but he's pulled out of it.
Hetfield is looking to clinch but No Mercy is avoiding it.
A good leg kick by Hetfield.
Hetfield instigates a clinch.
With the fighters up against the cage, Hetfield throws an elbow but misses.
Hetfield lands an elbow just above No Mercy 's eye.
Hetfield breaks the clinch and we're back to striking at distance.
No Mercy moves into range and clinches up with Hetfield.
No Mercy jumps guard but Hetfield turns him against the cage and keeps the fight standing.
No Mercy successfully pulls guard.
Hetfield looking to pass the guard.
No Mercy is trying to stand up but he's not managed so far.
Hetfield must be cautious of submissions here, given that his opponent has the superior Jiu Jitsu.
That's three minutes gone in the round.
Hetfield wanted to stand there but No Mercy had control of the position.

Hetfield gets to his feet and steps away from his opponent.
Hetfield lands a leg kick and bounces back out of range.
Hetfield tries to clinch there but No Mercy circles away.
No Mercy fails to land the takedown.
Hetfield closes the distance and presses his opponent up against the cage.
Hetfield pushes off and circles away, back to the middle of the mat.
No Mercy has his front leg slapped to the side - a nice low kick landing there from Hetfield.
Hetfield lands with a nice low kick. That'll leave a bruise.
The fight moves into the clinch position.
No Mercy has Hetfield pressed against the cage, preventing Hetfield from circling away and getting back to striking at range.
That's four minutes gone in the round.
No Mercy pushes off and circles away, back to the middle of the mat.
A head kick misses from No Mercy .
The fight moves into the clinch position.
No Mercy misses the knee to the body. Nice hip positioning from Hetfield.
No Mercy is trying to maintain a safe position but Hetfield gets an underhook and turns No Mercy into the cage.
No Mercy blocks an elbow strike from Hetfield.
With the fighters up against the cage, Hetfield throws an elbow but misses.
No Mercy takes an elbow to the forehead.
The fans in attendance giving it up for the two fighters, who have really let it all hang out in the last minute or so!
Hetfield is looking to score with knees to the body. Maybe he'll change it up and go body then head. No Mercy is defending well for now.
Come on Hetfield - let's have some action - none of this stalling nonsense.
Hetfield throws an elbow that misses.
Hetfield tries to land knees in the clinch but No Mercy avoids the damage to the body.
Hetfield being controlled against the cage.
And thats the end of the round the fighters go back to their corners.
Jaymz Hetfield dominated that round.
The fighters get back to their feet, the hooter sounds and we're back to the action!
No Mercy swats away the attempt to clinch by Hetfield.
No Mercy is trying to close the distance and clinch up, after that failed offence from Hetfield.
No Mercy looking to shoot here. He's gone for it and he's landed a takedown into side control! Oh, that's bad for Hetfield!
The fighters are starting to perspire pretty heavily.
Hetfield tries to wriggle free to get back to his feet but he's given up his back! Oops.
The ref warns both fighters not to hold the cage as they work up against the meshing.
Hetfield tries to roll but No Mercy sticks to his back.
Hetfield is still trying to improve position.
No Mercy is working for a rear naked choke. Hetfield is not defending it well and No Mercy has tightened it up quickly! This could be all over! Hetfield refuses to tap and goes to sleep, forcing the referee to intervene. A little trickle of blood came out of Hetfield's nose as his head slumped to the floor. That is naaaasty!
Ladies and gentlemen, after 0:57 of round 2, we have a winner by way of Submission (RNC). Daddy Almighty Great No Mercy !
|
|
|
|
|
|
|
|
|
|
|
|
|
|
|
|
|
|
|
|
|
|
|
| S |
C
A |
G |
S |
C
B |
G |
|
S |
C |
G |
|
energy
A | B |
|
hype
A | B |
|
pop
A | B |
|
mgr
A | B |
|
FIGHT
RATING
55% |
|
|
|
|
|
|
|
Undercard bout
|
Coming up we have a welterweight MMA rules bout between Dub Kong (ranked 5888 p4p, 504 weight class) and Aegon Targaryen (ranked 4021 p4p, 418 weight class). Targaryen is bouncing up and down as he enters the arena, backed by Game of Thrones Theme Song. I don't know about you partner, but I'm pumped for this one!
 |
|
 |
| 175 cm
26
155 lbs
2 - 3 - 0 |
|
190 cm
26
182 lbs
4 - 2 - 0 |
BJJ White Belt
Excellent boxer
Granite chin |
|
Decent wrestler
Solid Muay Thai
Granite chin |
|
| |
|
Ladies and gentlemen. This fight is 3 rounds, in the welterweight division.
Introducing the fighter to my left, fighting out of the red corner.
With a record of
2 - 3 - 0, fighting out of Hilo, Dub Kong!
And introducing the fighter to my right, fighting out of the blue corner.
With a record of
4 - 2 - 0, fighting out of New York, Aegon Targaryen!
The judges for this bout are Anthony Taglia, Chad Campbell and Columbo Gatti.
The bell rings for round one and we are underway!
Targaryen slips under a jab.
Kong swinging wildly here.
Kong misses the shot to the body.
Kong throws a wild combination but nothing lands.
Kong throws a sloppy body shot
and Targaryen counters with a kick to the head that grazes his opponent. Kong is lucky that one didn't land flush.
Kong has a nice red mark on his side after a thudding body kick by Targaryen.
Kong has closed the distance and engaged Targaryen in a clinch.
Kong lands a body punch in the clinch.
A short right from Kong.
Targaryen works on Kong's body with a couple of short punches.
Kong manages to get underhooks and slows down the pace for a moment.
Targaryen lands a hook to the body. It's hard to tell if that hurt Kong or not.
Targaryen working aggressively here.
Targaryen misses with a hook to the ribs.
Nice body punch from Targaryen.
That's one minute gone in the round.
Kong is trying to push Targaryen away but Targaryen has him pressed against the cage, so he's going nowhere.
Targaryen has a couple of punches blocked by Kong.
Targaryen stays in close to his opponent and throws a right hand to the body.
Targaryen tries to throw a body punch but Kong avoids it by throwing Targaryen back against the cage.
Kong avoiding damage.
Targaryen tries a body shot but Kong blocks it.
Targaryen misses with a punch to the body.
Kong goes for a body shot but it's blocked.
Targaryen lands a body shot in the clinch.
Targaryen swings wildly with an uppercut but Kong uses good head movement to avoid it.
Kong blocks a couple of punches on the inside.
Targaryen doesn't land with the attempted body shot.
A head punch on the inside from Targaryen fails to land.
Targaryen working aggressively here.
Kong blocks a body shot from Targaryen.
Targaryen lands a body shot.
Targaryen misses with a shot to the kidneys.
Kong wants to break free but Targaryen has control.
That's two minutes gone in the round.
Kong blocking some punches.
Kong lands a body punch in the clinch.
Targaryen tries to work over Kong's body with a swooping hook but it only glances the target.
Kong lands a hook to the body. It's hard to tell if that hurt Targaryen or not.
Kong misses with a hook to the ribs.
Targaryen swings wildly with an uppercut but Kong uses good head movement to avoid it.
Targaryen misses with a punch on the inside.
Targaryen misses with a shot to the kidneys.
Kong tries a body shot but Targaryen blocks it.
Targaryen tries a body shot but Kong blocks it.
Kong digs a right hand into Targaryen's ribs. Those have got to be taking their toll on Targaryen's gas tank.
Targaryen can't find room to land a body shot as Kong controls the action.
Targaryen misses with a shot to the kidneys.
A left hand lands to the body for Kong.
Kong stalling in the clinch but Targaryen improves position.
Targaryen misses with a body punch.
Targaryen struggles to land a body shot inside as Kong controls his hands.
Kong tries to land a shot to the body but it's blocked.
Kong tries to circle away but Targaryen has him pinned against the cage.
That's three minutes gone in the round.
Targaryen misses with a punch to the body.
Kong works for underhooks and lands a body shot in the process.
Targaryen prevents Kong from breaking the clinch.
Kong lands a shot to the body.
Targaryen looks winded!
Kong tried to land a shot to the body but connects with Targaryen's elbow.
Targaryen tried to land a shot to the body but connects with Kong's elbow.
Targaryen throws a head punch that misses.
Kong lands a hook that snaps the head of Targaryen backwards.
Targaryen tries a body shot but Kong blocks it.
Kong wants to break the clinch but can't.
Kong's corner are urging him to control the action in the clinch for a moment, rather than mount any serious offense. I'm sure the crowd appreciate those instructions... not.
Targaryen tries to work over Kong's body with a swooping hook but it only glances the target.
Targaryen tries to land a shot to the body but it's blocked.
Kong wants to break the clinch but can't.
Kong doesn't land with the attempted body shot.
Targaryen goes for a body shot but it's blocked.
Targaryen working aggressively here.
That's four minutes gone in the round.
Targaryen doesn't land with the attempted body shot.
Targaryen throws a punch but it's blocked by Kong.
Kong tries to circle away but Targaryen has him pinned against the cage.
Kong lands with a quick shot inside that doesn't really do much damage.
Both fighters working to control the clinch.
Kong blocks an uppercut.
Kong is trying to break the clinch but Targaryen is controlling him.
A short body shot lands from Kong as the two fighters clinch.
A right handed body shot lands from Kong.
Kong lands a body shot.
Targaryen tried to land a shot to the body but connects with Kong's elbow.
Kong misses with a punch to the body.
Kong prevents a body shot from Targaryen.
Targaryen working aggressively here.
A short body shot lands from Kong as the two fighters clinch.
An uppercut on the inside fails to land for Targaryen.
Kong tries to stall but Targaryen uses the opportunity to gain a better position.
Kong blocks a punch to the side of the head.
Kong is trying to push Targaryen away but Targaryen has him pressed against the cage, so he's going nowhere.
Kong scores with a shot to the side of Targaryen's head.
And thats the end of the round the fighters go back to their corners.
That was a close round but I would say that Dub Kong will probably get the nod.
The referee calls time. The cornermen exit stage left and we're back to business.
A punch combination from Kong misses.
Targaryen showing good head movement there, avoiding the strikes from Kong.
Kong lunges in with swinging rights and lefts but Targaryen circles away quickly and effectively.
Nice body kick there by Targaryen.
Dub Kong seems to be the more aggressive standup fighter in this bout.
Kong scores with a jab.
Kong smiles there as he lands a nice right hand right on the button.
Kong loads up on a big right hand but Targaryen slips the punch.
Dub Kong is looking to throw some combinations by the looks of things.
Kong clinches up with Targaryen and pushes him back against the cage.
We've had a slow start to the round here - hopefully the action picks up.
Targaryen tries a body shot but Kong blocks it.
Targaryen works on Kong's body with a couple of short punches.
With the fighters clinched against the cage, Kong creates a bit of distance for himself and scores with a nice uppercut.
Targaryen keeps the fight in the clinch, despite Kong's efforts to push away.
Kong blocking some punches.
That's one minute gone in the round.
Kong throws a hook to the body. More of an arm punch but it's all scoring with the judges.
Kong wants to break free. God knows he wants to breaaaak freeee.
Kong is really dominating this fight. Is there anything that Targaryen can do to turn this around?
Targaryen tries to work over Kong's body with a swooping hook but it only glances the target.
Kong digs a right hand underneath Targaryen's ribcage. Targaryen let out a lung full of air as it connected.
It really doesn't seem like the step up in weight is hurting Kong here at all. He's more than holding his own against the bigger man.
Targaryen doesn't land with the attempted body shot.
Kong is trying to break the clinch but Targaryen has him pressed against the cage.
Targaryen misses with a body punch.
Kong leaning his opponent against the cage.
Kong wants to break free. God knows he wants to breaaaak freeee.
Targaryen working aggressively here.
Targaryen presses Kong against the cage and delivers a mid-strength body shot.
Kong wants to break free. God knows he wants to breaaaak freeee.
Kong goes for a body shot but it's blocked.
Kong blocking some punches.
Targaryen working aggressively here.
Kong digs a right hand into Targaryen's ribs. Those have got to be taking their toll on Targaryen's gas tank.
Targaryen tries a body shot but Kong blocks it.
That's two minutes gone in the round.
Targaryen tries to work over Kong's body with a swooping hook but it only glances the target.
Targaryen lands a hook to the side of the head.
A nice left hand lands by Targaryen.
Kong has had enough of the clinch and is looking to separate.
Targaryen tries to land a shot to the body but it's blocked.
Kong dictating the pace here, as the fighters clinch against the cage.
Targaryen doesn't land with the attempted body shot.
Kong prevents a body shot from Targaryen.
Kong lands a hook that snaps the head of Targaryen backwards.
Targaryen throws a head punch that misses.
Kong tries a body shot but Targaryen blocks it.
Kong doesn't land with the attempted body shot.
Targaryen misses with a body punch.
Kong cracks Targaryen with a nice body shot.
Targaryen is breathing heavily.
Kong wants to break free. God knows he wants to breaaaak freeee.
A short body shot lands from Targaryen as the two fighters clinch.
Targaryen can't find room to land a body shot as Kong controls the action.
This has been an exciting period of action!
Kong looking to slow down the pace here.
Dub Kong has scored more points in the clinch so far.
That's three minutes gone in the round.
Targaryen tries a body shot but Kong blocks it.
Targaryen doesn't land with the attempted body shot.
Kong holding his opponent close, against the cage.
Kong lands a body shot.
Targaryen misses with a short punch on the inside.
Targaryen tries to throw a body punch but Kong avoids it by throwing Targaryen back against the cage.
Kong blocking some punches.
Targaryen working aggressively here.
Kong throws a hook to the body. More of an arm punch but it's all scoring with the judges.
Targaryen can't find room to land a body shot as Kong controls the action.
A head punch on the inside from Targaryen fails to land.
Nice body punch from Kong - that landed with a thud.
Targaryen tried to land a shot to the body but connects with Kong's elbow.
Kong is trying to push Targaryen away but Targaryen has him pressed against the cage, so he's going nowhere.
Kong lands a right hand.
Kong pressing his opponent against the cage.
Targaryen throws a punch but it's blocked by Kong.
That's four minutes gone in the round.
Targaryen can't find room to land a body shot as Kong controls the action.
Kong is trying to break the clinch but Targaryen is controlling him.
Kong blocks a couple of punches on the inside.
Kong blocking some punches.
Kong can't break the clinch.
Targaryen has a couple of punches blocked by Kong.
Targaryen misses with a body punch.
Kong tries to break the clinch but Targaryen is controlling the position.
Kong working some nice short punches in the clinch.
A frustrated look appears on Kong's face as he tries to break the clinch.
Come on Kong - let's have some action - none of this stalling nonsense.
Targaryen throws a head punch that misses.
Kong lands a shoulder strike.
Targaryen tries to throw a body punch but Kong avoids it by throwing Targaryen back against the cage.
Kong is trying to break the clinch but Targaryen has him pressed against the cage.
Targaryen prevents a body shot from Kong.
And thats the end of the round the fighters go back to their corners.
Dub Kong dominated that second round.
That's time! Back to the action! This is the final round!

Kong moves into range and throws a combination. A nice jab followed by a hook to the body.
Kong swings away with a body shot that misses
and Targaryen counters with a nice uppercut.
Kong throws a hard body shot but it just misses.
Kong misses with a hook. Targaryen ducked under it nicely.
Kong throws a body punch but Targaryen moves out of range.
Kong rushes Targaryen and presses him up against the cage.
Targaryen misses with a shot to the kidneys.
A real battle for position is taking place between these two warriors.
Kong can't find room to land a body shot as Targaryen controls the action.
Targaryen tries a shoulder strike but it doesn't do any damage.
We've had a slow start to the round here - hopefully the action picks up.
Targaryen misses with some punches.
Targaryen goes for a body shot but it's blocked.
Targaryen lands a nice shot to the body.
Targaryen has Kong pressed against the cage, preventing Kong from circling away and getting back to striking at range.
A right hook to the body lands for Kong.
Kong prevents a body shot from Targaryen.
That's one minute gone in the round.
Kong tries to break the clinch but Targaryen is controlling the position.
A short right hand to the side of the head by Targaryen.
Targaryen doesn't land with the attempted body shot.
Kong misses with a shot to the kidneys.
Kong wants to break free. God knows he wants to breaaaak freeee.
Targaryen struggles to land a body shot inside as Kong controls his hands.
Kong doesn't land with the attempted body shot.
Kong lands a body punch.
Kong working on landing some head shots here - that one got through nicely.
Kong is trying to maintain a safe position but Targaryen gets an underhook and turns Kong into the cage.
Kong doesn't land with the attempted body shot.
Stalling in the clinch from Kong.
Targaryen prevents a body shot from Kong.
Targaryen lands a left hand that snaps the head of Kong backwards.
Targaryen tried to land a shot to the body but connects with Kong's elbow.
Targaryen tries to land a shot to the body but it's blocked.
Targaryen tries to work over Kong's body with a swooping hook but it only glances the target.
Targaryen prevents a body shot from Kong.
Targaryen misses with a body punch.
Aegon Targaryen has stepped it up - he knows he needs a finish here!
That's two minutes gone in the round.
Targaryen tries to work over Kong's body with a swooping hook but it only glances the target.
Targaryen has Kong pressed against the cage, preventing Kong from circling away and getting back to striking at range.
Targaryen struggles to land a body shot inside as Kong controls his hands.
A body shot lands from Kong.
Targaryen takes a big intake of breath there - he's definitely tired.
Kong misses with a body punch.
Kong is trying to work out of this bad position, with his back against the cage.
Nice body punch from Kong - that landed with a thud.
Kong wants to get back to striking at distance but Targaryen won't allow it.
Kong scores with a shot to the side of Targaryen's head.
Kong lands a nice shot to the body.
Kong lands with a good tight uppercut to the head.
The fighters are pressed against the cage, as the pace of the fight slows.
The crowd cheering loudly, showing their appreciation for the quality fight we're seeing here.
Targaryen doesn't land with the attempted body shot.
Kong is working hard here but doesn't seem to be able to control effectively, up against the cage.
A right handed body shot lands from Kong.
That's three minutes gone in the round.
Targaryen has Kong pressed against the cage, preventing Kong from circling away and getting back to striking at range.
Kong is trying to force a seperation but Targaryen has the dominant position.
Targaryen misses with a punch to the body.
Kong tries to work over Targaryen's body with a swooping hook but it only glances the target.
Kong digs a right hand into Targaryen's ribs. Those have got to be taking their toll on Targaryen's gas tank.
Kong digs a right hand into Targaryen's ribs. Those have got to be taking their toll on Targaryen's gas tank.
Targaryen keeps the fight in the clinch, despite Kong's efforts to push away.
Kong tries to break free but Targaryen pushes him back against the cage.
Kong misses with a shot to the kidneys.
Kong effectively controlling the action here.
Targaryen tries to throw a body punch but Kong avoids it by throwing Targaryen back against the cage.
Kong lands a nice looking hook to the body, against the cage.
Targaryen misses with a hook to the ribs.
Kong is pushing Targaryen up against the cage, for a bit of lean and pray action. Action being used the in the loosest possible sense of the word.
Targaryen can't find room to land a body shot as Kong controls the action.
That's four minutes gone in the round.
Kong presses Targaryen against the cage and delivers a mid-strength body shot.
Kong is trying to push Targaryen away but Targaryen has him pressed against the cage, so he's going nowhere.
Kong wants to strike at distance but he can't break free of the clinch.
Kong is trying to break the clinch but Targaryen is controlling him.
Kong lands a body punch in the clinch.
Nice body punch from Kong - that landed with a thud.
A right handed body shot lands from Kong.
Kong lands a hook that snaps the head of Targaryen backwards.
Kong tries to break free but Targaryen pushes him back against the cage.
Kong digs a right hand into Targaryen's ribs. Those have got to be taking their toll on Targaryen's gas tank.
Kong has had enough of the clinch and is looking to separate.
A hook to the body from Kong.
Dub Kong is fighting for a decision here - he's started to take the cautious approach.
Kong stalling in the clinch.
Kong throws a hook to the body. More of an arm punch but it's all scoring with the judges.
An uppercut on the inside fails to land for Targaryen.
Targaryen misses with a hook from the clinch.
Kong digs a right hand into Targaryen's ribs. Those have got to be taking their toll on Targaryen's gas tank.
And that's the end of the fight!
Dub Kong showed his dominance in that final round.
Well Kong has outscored his opponent in every aspect of the fight today. Only a scarily incompetent judge or two will keep him from a well deserved win... Over to the ring announcer for the scorecards.
Ladies and gentlemen, after 3 rounds of action, we go to the scorecards for a decision.
Judge Anthony Taglia scores the fight 30:27
Judge Chad Campbell scores the fight 30:27
Judge Columbo Gatti scores the fight 30:27
In favor of your winner, by unanimous decision... Dub Kong!
Dub Kong gave a mention to King Nutrition in his post fight interview. That will please them (and hopefully generate some sales).
|
|
|
|
|
|
|
|
|
|
|
|
|
|
|
|
|
|
|
|
|
|
|
| S |
C
A |
G |
S |
C
B |
G |
|
S |
C |
G |
|
energy
A | B |
|
hype
A | B |
|
pop
A | B |
|
mgr
A | B |
|
FIGHT
RATING
43% |
|
|
|
|
|
|
|
Undercard bout
|
Coming up we have a welterweight MMA rules bout between Post Op Tranny (ranked 4385 p4p, 436 weight class) and Samuel Westcliff (ranked 3414 p4p, 373 weight class). Post Op Tranny had a look across the cage there at his opponent. He definitely means business
 |
|
 |
| 185 cm
25
182 lbs
4 - 1 - 0 |
|
185 cm
25
180 lbs
1 - 0 - 0 |
Good wrestling
Basic striking
Self confident |
|
BJJ White Belt
Excellent boxer
Determined |
|
| |
|
Ladies and gentlemen. This fight is 5 rounds, in the welterweight division.
Introducing the fighter to my left, fighting out of the red corner.
With a record of
4 - 1 - 0, fighting out of New York, Post Op Tranny!
And introducing the fighter to my right, fighting out of the blue corner.
With a record of
1 - 0 - 0, fighting out of New York, Samuel Westcliff!
The judges for this bout are Lou da Vinci, Alyssa Summers and Eddie Farnsworth.
The bell rings for round one and we are underway!
Tranny closes the distance and clinches.
Tranny wants to take the fight to the mat but Westcliff manages to get underhooks and keep the fight in the clinch.
Tranny goes for a takedown attempt but Westcliff pushes him away and we're back to fighting at a distance.
Westcliff lands a body shot.
Tranny fails with the takedown.
That's three failed takedown attempts in the round for Post Op Tranny. That's going to take a lot out of him.
Tranny shoots in looking for a takedown. Westcliff tries to sprawl out of it but Tranny keeps driving through. The fighters are pinned against the cage. Westcliff manages to get underhooks and after a bit of a struggle, circles away and we're back to standing.
Tranny moves into the clinch.
Westcliff lands with a short shot to the head.
Tranny is working for a takedown up against the cage. He can't get it on this occasion though.
Tranny drops to a knee looking for a takedown but Westcliff gets the underhooks and prevents it.
We've had a slow start to the round here - hopefully the action picks up.
Westcliff breaks the clinch.
Tranny shakes his hands off, looking to compose himself, but takes a jab to the jaw whilst he does it.

Westcliff lands a left and a right that send Tranny crashing to the mat, dazed. Westcliff thinks about following him to the mat but decides to wave him back up to his feet!
We've seen a great period of action over the last minute or so - credit to both fighters for going all out!
Westcliff throws a looping overhand right but Tranny ducks down to avoid it.
Tranny looks shocked there as he takes a right hand to the temple.
Tranny is rocked!
That's one minute gone in the round.
Westcliff feints a kick and comes over the top with a right hand, followed by a left hook - both land, sending Tranny crashing to the mat! This one is all over!
Ladies and gentlemen, after 1:06 of round 1, we have a winner by way of KO (Punches). Samuel Westcliff!
Samuel Westcliff seemed lost for words in his post fight interview but he remembered to thank his fans and directed everyone to his website.
|
|
|
|
|
|
|
|
|
|
|
|
|
|
|
|
|
|
|
|
|
|
|
| S |
C
A |
G |
S |
C
B |
G |
|
S |
C |
G |
|
energy
A | B |
|
hype
A | B |
|
pop
A | B |
|
mgr
A | B |
|
FIGHT
RATING
84% |
|
|
|
|
|
|
|
Undercard bout
|
Coming up we have a heavyweight MMA rules bout between Marshall Teach (ranked 3227 p4p, 330 weight class) and Abdulrashid Sadulaev (ranked 4467 p4p, 422 weight class). Sadulaev has chosen Russian National Anthem as his entrance music. Marshall Teach is staring across the cage at his opponent, tweaking his nipples... Tweaking his own nipples that is.
 |
|
 |
| 178 cm
26
200 lbs
6 - 2 - 0 |
|
181 cm
25
190 lbs
4 - 2 - 0 |
BJJ Blue Belt
Counter fighter
Experienced |
|
Good wrestler
Counter fighter
Solid chin |
|
| |
|
Ladies and gentlemen. This fight is 5 rounds, for the heavyweight championship of the world!
Introducing the champion to my left, fighting out of the red corner.
With a record of
6 - 2 - 0, fighting out of Rio de Janeiro, Marshall Teach!
And introducing the challenger to my right, fighting out of the blue corner.
With a record of
4 - 2 - 0, fighting out of Los Angeles, Abdulrashid Sadulaev!
The judges for this bout are Bruno Lombardi, Reed Andrews and Alyssa Summers.
The bell rings for round one and we are underway!
Sadulaev shoots in for a takedown. "Ole!" shouts Teach as he jumps to the side.
Teach was looking to counter that move with a punch but didn't quite pull the trigger.
Sadulaev tries to clinch but Teach is having none of it.
Sadulaev tries to clinch but Teach moves out of range.
Teach half commits to a counter takedown before pushing away, out of range.
Sadulaev shoots in looking for a takedown. Teach tries to sprawl out of it but Sadulaev keeps driving through. The fighters are pinned against the cage. Teach manages to get underhooks and after a bit of a struggle, circles away and we're back to standing.
Teach seem to be loading up, looking for a big counter.
That's one minute gone in the round.
We've had a slow start to the round here - hopefully the action picks up.
Sadulaev tries for a takedown but Teach circles away easily
and Teach counters with a straight right hand.
Marshall Teach has stuffed three takedown attempts in the round now. That's going to take a lot out of Abdulrashid Sadulaev.
Sadulaev shoots in for a double leg but Teach sprawls well. That's going to sap some energy.
Teach appears to be looking for a counter takedown.
Sadulaev tries to clinch
and Teach counters with a three punch combo that has Sadulaev backing up. Sadulaev nods at Teach to acknowledge the strikes.
Sadulaev clinches up against the cage.
Teach tries to work over Sadulaev's body with a swooping hook but it only glances the target.
Teach tries a shoulder strike but it doesn't do any damage.
A short right from Teach on the inside.
A head punch on the inside from Teach fails to land.
Sadulaev has clasped his hands together around Teach's back... aaand, he's got a takedown into side control. Nicely done.
The crowd are loving this. Great action here.
Teach is trying to control Sadulaev's posture but Sadulaev avoids it.
That's two minutes gone in the round.
Teach is trying to get back to half guard.
Teach gets one leg under and gets the fight to half guard.
Sadulaev working the head and body with strikes.
Teach has no desire to be mounted, so is trying to control. Sadulaev is working away from the top position though.
Sadulaev tries to pass the half guard into mount. Teach knows what he's doing though and prevents the attempt.
Teach gets back to full guard.
That's three minutes gone in the round.
Teach controlling Sadulaev's posture.
Teach looking to control.
Teach keeping moving, preventing Sadulaev from controlling successfully.
Sadulaev preventing the sweep.
Sadulaev really doesn't want to stay on the ground with Teach. If he can't get it back to his feet, it's only a matter of time before he'll be tapping out.
Sadulaev is just sitting in guard, looking to avoid any submissions.
Sadulaev trying to control the position from guard on top but Teach is wriggling around, looking for whatever he can.
Teach looking for a sweep. Not yet Teach, not yet.
Sadulaev throwing shots from guard but he's hitting more mat than opponent.
The referee looks like he's ready to step in and stand the fighters back up.
Teach is looking for a guillotine. You can't force these things though and Sadulaev defends well.
That's four minutes gone in the round.
A lull in the action here being met with boos from the crowd.
Sadulaev sitting in guard doing not very much at all here. Teach doesn't need a second invitation though! He's locked up a guillotine and he's squeezing tight! That is tiiiiiiiiight! Sadulaev paying the price for stalling here - he's pushing hard on the arm trying to free himself but it's no use! He's tapped! WOW, quick submission from Teach - great work!
Ladies and gentlemen, after 4:19 of round 1, we have a winner by way of Submission (Guillotine). Marshall Teach!
Marshall Teach is the new heavyweight champion!
Marshall Teach decided to call for a title shot in his post fight interview, which was very strange given the fact this fight was for a title and he's already the champion. I guess that's what getting punched in the head does for you.
Abdulrashid Sadulaev was interviewed post fight and said '*Some Russian bullshit*'.
|
|
|
|
|
|
|
|
|
|
|
|
|
|
|
|
|
|
|
|
|
|
|
| S |
C
A |
G |
S |
C
B |
G |
|
S |
C |
G |
|
energy
A | B |
|
hype
A | B |
|
pop
A | B |
|
mgr
A | B |
|
FIGHT
RATING
27% |
|
|
|
|
|
|
|
Co-main event
|
Coming up we have a bantamweight MMA rules bout between Santiago Gracie (ranked 2568 p4p, 117 weight class) and Master Yoda (ranked 3936 p4p, 167 weight class). Yoda has chosen Seagulls as his entrance music, which hasn't gone down very well with the crowd. Master Yoda has the better chin. Will he look to stand and bang today?
 |
|
 |
| 168 cm
26
146 lbs
7 - 1 - 0 |
|
165 cm
25
140 lbs
1 - 0 - 0 |
BJJ Purple Belt
Basic striking
KO power |
|
BJJ White Belt
Excellent boxer
Determined |
|
| |
|
Ladies and gentlemen. This fight is 5 rounds, for the bantamweight championship of the world!
Introducing the champion to my left, fighting out of the red corner.
With a record of
7 - 1 - 0, fighting out of New York, Santiago Gracie!
And introducing the challenger to my right, fighting out of the blue corner.
With a record of
1 - 0 - 0, fighting out of Sydney, Master Yoda!
The judges for this bout are Lou da Vinci, Franklyn Lucas and Russell Pearce.
The bell rings for round one and we are underway!
Boom, another hit is landed. "You're gunna get knocked out" taunts Yoda, as that shot connected.
Yoda throws a lazy body kick
and Gracie counters with a nice shoot takedown that brings the fighters to the ground.
Gracie passes easily into side control. Nice work.
Gracie is working for what looks like an arm triangle here. Yoda is trying to escape and Gracie transitions quickly into an armbar! He's slapped it on tight and Yoda is forced to tap! Nice work there by Gracie! Very nice indeed!
Ladies and gentlemen, after 0:26 of round 1, we have a winner by way of Submission (Armbar). Santiago Gracie!
Santiago Gracie retains his bantamweight title!
A victorious Santiago Gracie thanked his army of followers in his post fight interview, telling people to make sure they follow him on Twitter.
Master Yoda spoke after the fight, saying 'Good blow this is.'.
|
|
|
|
|
|
|
|
|
|
|
|
|
|
|
|
|
|
|
|
|
|
|
| S |
C
A |
G |
S |
C
B |
G |
|
S |
C |
G |
|
energy
A | B |
|
hype
A | B |
|
pop
A | B |
|
mgr
A | B |
|
FIGHT
RATING
100% |
|
|
|
|
|
|
|
Main event
|
Coming up we have a welterweight MMA rules bout between Butch Coolidge (ranked 1598 p4p, 185 weight class) and Jungle Prince (ranked 4089 p4p, 422 weight class). Coolidge comes into the arena with twenty one pilots - Stressed Out blaring out of the sound system. Over to our ring announcer for the fighter introductions!
 |
|
 |
| 184 cm
26
180 lbs
9 - 2 - 0 |
|
175 cm
26
175 lbs
12 - 3 - 0 |
BJJ Blue Belt
Brawler
Good chin |
|
Good wrestler
Solid Muay Thai
Heavy handed |
|
| |
|
Ladies and gentlemen. This fight is 5 rounds, for the welterweight championship of the world!
Introducing the champion to my left, fighting out of the red corner.
With a record of
9 - 2 - 0, fighting out of New York, Butch Coolidge!
And introducing the challenger to my right, fighting out of the blue corner.
With a record of
12 - 3 - 0, fighting out of Los Angeles, Jungle Prince!
The judges for this bout are Steve Montenegro, Eddie Farnsworth and David Schapiro.
The bell rings for round one and we are underway!
A big left from Coolidge misses.
Prince clinches up with Coolidge and pushes him back against the cage.
Prince jumps guard but his hands slip and he falls flat on his back. Well, he's made himself look a right mug there, as Coolidge walks away with a smile on his face. Prince gets slowly back to his feet and shakes his head.
Coolidge connects with a looping right hand.
Coolidge staying out of range there.
Coolidge tried to score with a low kick but Prince checks it.
Jab, jab by Coolidge - just one landing.
Coolidge thows a left - swing and a miss!
Prince ducks under a wild hook from Coolidge.
Prince tries to close the distance and clinch up against the cage but Coolidge paws at him with a jab and circles away.
Prince wants to clinch
and Coolidge counters with a good right hand that lands right on the jaw.
We've had a slow start to the round here - hopefully the action picks up.
Coolidge works over Prince's head and body with a nice combination.
Prince moves forwards but Coolidge connects with a nice, crisp jab.
The crowd are loving this. Great action here.
Coolidge tests Prince's chin there with a solid looking shot.
Prince throws an uppercut from half a mile away. Coolidge sees it coming and avoids it easily.
Prince throws a lazy right hand but Coolidge sees it coming a mile off and sidesteps it easily.
The fight stays on the outside here - Prince looks like he's thinking about clinching though.
That's one minute gone in the round.
Prince connects with a crisp jab.
Coolidge is using his height advantage well here, landing a good percentage of his punches.
A jab from Coolidge misses.
Coolidge throws an uppercut from half a mile away. Prince sees it coming and avoids it easily.
Coolidge lands a nice shot that snaps Prince's head back.
Butch Coolidge seems to be the more aggressive standup fighter in this bout.
Coolidge avoids the clinch attempt nicely.
Coolidge just misses with a punch to the body.
Prince looks like he wants to counter punch here.
Prince has his head slapped from side to side by a 3 punch combination. That must have hurt him.
Prince misses with a straight left.
Prince avoids the body shot from Coolidge.
Prince raises up his leg as if looking to counter with a high kick.
Prince looks to throw the jab but Coolidge is out of range.
Prince throws a hook but Coolidge blocks it.
Prince throws a hook but Coolidge avoids it easily.
Coolidge is really head hunting here, hardly looking to strike to the body at all.
Coolidge throws a hook but Prince blocks it.
Prince gets cracked with a nice right hand there by Coolidge.
Fantastic stuff here - a very entertaining period of action, which has drawn cheers from the crowd.
Coolidge connects with a slap. Keep your fist closed son.
That's two minutes gone in the round.
A swing and a miss from Coolidge.
Coolidge is really peppering his opponent's head with punches.
Prince throws an overhand right that lands on Coolidge's shoulder, as Coolidge tries to avoid the shot.
Prince gets to the clinch - let's see what his plan is here.
Coolidge wants to strike at distance but he can't break free of the clinch.
Coolidge wants to break free but Prince has control.
Coolidge breaks the clinch and we're back to striking at distance.
Coolidge uses good head movement to avoid the hook from Prince.
Prince moves into the clinch.
Coolidge wants to break the clinch but can't.
Prince's corner calls for him to break the clinch, which he does.
Coolidge scores with a jab to the jaw.
Coolidge misses the shot to the body.
Coolidge scores with the left hand. Prince knows he should have avoided that one.
Coolidge missing with a left hand there. Prince was out of range so wasted energy throwing that one.
An inside leg kick from Coolidge misses.
Prince tries a quick counter leg kick but Coolidge is wise to it.
A telegraphed right hand from Coolidge misses the target.
That's three minutes gone in the round.
Coolidge displays some good footwork, moving neatly out of range as Prince throws out the jab.
Coolidge was looking to counter that move with a punch but didn't quite pull the trigger.
Coolidge lands the left hand.
Coolidge takes a swing at Prince's ribcage but misses.
A big right from Prince misses.
Coolidge tries to keep at a distance but Prince has taken the fight into the clinch.
Coolidge wants to strike at distance but he can't break free of the clinch.
Prince breaks from the clinch.
Prince closes the distance and takes a jab right on the nose as he does so.
Coolidge thows a left - swing and a miss!
Coolidge throws a looping overhand right but Prince ducks down to avoid it.
Prince displays some good footwork, moving neatly out of range as Coolidge throws out the jab.
Coolidge slips a straight right by Prince.
Coolidge misses with an uppercut.
Coolidge pushing out the jab but it's not landing.
Coolidge swings wildly with a right hand that was never going to find it's target.
That's four minutes gone in the round.
Coolidge lands a jab to the nose.
Coolidge lands with a good body shot.
Coolidge throws out a loose jab but Prince uses good head movement to avoid it.
Fantastic stuff here - a very entertaining period of action, which has drawn cheers from the crowd.
Prince moves in looking to clinch but Coolidge pushes him off.
Coolidge takes one on the chin but keeps coming.

It looks like Butch Coolidge has been cut.
Prince misses with an uppercut.
Prince slips a straight right by Coolidge.
Prince misses with a looping right.
Prince throws a head kick but Coolidge moves out of range.
Coolidge works the jab nicely.
Prince takes the fight into the clinch.
Prince lands a shoulder strike that jolts his opponent's head backwards.
Coolidge breaks the clinch and we're back to striking at distance.
The crowd applaud the fighters' efforts here as the round comes to an end.
Prince tries to clinch but Coolidge moves out of range.
Prince defending well as Coolidge loads up on a big left hand.
And thats the end of the round the fighters go back to their corners.
Butch Coolidge dominated that round.
The cut man is working on Butch Coolidge's cut.
That's the end of the round. The referee orders the cornermen out of the cage so we can get back down to business.
Prince takes a big uppercut there. He seems a bit wobbly but no, he's OK.
Prince uses good footwork to avoid the strikes from Coolidge.
Prince moves in looking to clinch but Coolidge pushes him off.
Coolidge is really dominating this fight. Is there anything that Prince can do to turn this around?
Prince moves forwards but Coolidge connects with a nice, crisp jab.
Prince staying out of range there.
Coolidge blocks a head kick by Prince.
Prince drops his hands momentarily and Coolidge takes advantage with a crisp shot to the head.
Coolidge misses with an uppercut
and Coolidge takes a counter punch right on the button for his troubles.
Prince gets to the clinch - let's see what his plan is here.
A frustrated look appears on Coolidge's face as he tries to break the clinch.
Prince gets through Coolidge's defenses to land a nice punch to the side of the head.
A short uppercut from Prince.
Coolidge misses with some punches.
This has been an exciting period of action!
Coolidge tries to break free but Prince pushes him back against the cage.
Prince breaks from the clinch.
Coolidge ducks under an overhand right and circles away with a smile on his face.
That's one minute gone in the round.
Coolidge takes a step towards his opponent and connects with a left hand, before circling away.
Coolidge cracks Prince with an open hand slap.
Prince showing good head movement there, avoiding the strikes from Coolidge.
Prince takes a big uppercut there. He seems a bit wobbly but no, he's OK.
Coolidge throws a hook but Prince avoids it easily.
Prince darts in and clinches Coolidge up against the cage.
Coolidge takes a shot to the head.
Coolidge has had enough of the clinch but Prince keeps him there for the moment.
Good anti-grappling being displayed by Prince as Coolidge tries to tie him up.
Coolidge is trying to push Prince away but Prince has him pressed against the cage, so he's going nowhere.
Prince lands a nice uppercut.
Prince breaks the clinch and we return to the middle of the mat.
Prince takes a step back and watches a body kick go sailing past his mid section.
That's two minutes gone in the round.
Nice uppercut lands for Coolidge. That snapped Prince's head back.
Prince tries to close the distance and clinch but Coolidge swats him to one side with an open hand palm strike and circles away.
The crowd are loving this. Great action here.
A swing and a miss from Coolidge.
Coolidge looks to throw the jab but Prince is out of range.
Coolidge scores with a nice head shot.
Coolidge moves out of range as Prince strikes.
Prince tries to clinch up but Coolidge circles away and keeps his distance.
Coolidge throws a jab but it's blocked by Prince.
Coolidge misses with a left hand
and Prince counters with a stiff right hand.
Prince closes the distance but Coolidge moves to the side
letting Coolidge counter with a right hand.
Prince throws a head kick but Coolidge moves out of range.
Coolidge was looking to counter that move with a punch but didn't quite pull the trigger.
Coolidge uses good footwork to get in and out, landing a nice hook.
Prince defending well as Coolidge loads up on a big left hand.
Coolidge scores with a jab to the head.
Prince avoids the body shot from Coolidge.
That's three minutes gone in the round.
Prince throws a lazy right hand but Coolidge sees it coming a mile off and sidesteps it easily.
Prince jabbing away but nothing is landing.
Coolidge fakes a head punch and goes low to the body. Nicely done.
Coolidge misses with an uppercut. Prince saw that one coming.
Coolidge swings and misses with a hook to the body.
Prince tries to clinch up against the cage, rushing in to close the distance. Coolidge manages to break the clinch and circles back to the middle of the mat.
Prince takes the fight into the clinch.
Coolidge is trying to break free.
Coolidge is looking to break free of the clinch but Prince has double underhooks.
Prince is really struggling to land any decent head shots against his taller opponent.
A real battle for position is taking place between these two warriors.
Coolidge misses with a shot to the kidneys.
Prince keeps the fight in the clinch, despite Coolidge's efforts to push away.
Coolidge is trying to force a seperation but Prince has the dominant position.
Prince escapes the clinch and we're back to striking.
That's four minutes gone in the round.
Prince swings widly with a right hand
and Prince takes a counter punch right on the button for his troubles.
Prince fakes with an overhand right and moves in to clinch with Coolidge, pushing him back against the cage.
Prince prevents Coolidge from breaking the clinch.
A nice left hand lands by Prince.
Prince has Coolidge pressed against the cage, preventing Coolidge from circling away and getting back to striking at range.
Coolidge tries to circle away but Prince has him pinned against the cage.
Prince throws a nice elbow but it doesn't land.
Prince pulls guard.

Prince is working an open guard so Coolidge takes the opportunity to get back to his feet.
Coolidge motions for Prince to come forward. Coolidge throws a leg kick but it misses it's target.
This has been an exciting period of action!
Good work by Prince as he checks the leg kick.
Coolidge throws a hook to the side of Prince's head but Prince sees it coming and ducks under it beautifully.
No joy there for Coolidge, who threw a few shots but didn't land.
Prince closes the distance and clinches.
Coolidge wants to break free but Prince has control.
And thats the end of the round the fighters go back to their corners.
That was a close second round but I would say that Butch Coolidge will probably get the nod.
The cut man is working on Butch Coolidge's cut.
That's the end of the round. The referee orders the cornermen out of the cage so we can get back down to business.
Prince clinches with his opponent.
Coolidge looks like he'd prefer to be striking at range right now.
Coolidge wants to break free but Prince has control.
Prince breaks the clinch and we're back to striking at distance.
Prince slips under a jab.
Prince doesn't fully commit to the body shot counter.
Prince moves out of range of the strikes.
Coolidge misses with an uppercut.
Coolidge loads up on a big right hand but Prince slips the punch.
And Prince responds with a good body kick, but Coolidge manages to step out the way in time.
Prince has closed the distance and engaged Coolidge in a clinch.
Prince fails to pull guard.
Jungle Prince seems to be working more effectively in the clinch in the fight so far.
Coolidge breaks the clinch and we return to the middle of the mat.
We've had a slow start to the round here - hopefully the action picks up.
Coolidge misses with a looping right.
Prince has a pretty nasty looking mouse under his right eye.
Prince doesn't manage to clinch there - Coolidge circles away.
Prince tries to clinch there but Coolidge circles away.
Coolidge throws an overhand right that lands on Prince's shoulder, as Prince tries to avoid the shot.
Prince displays some good footwork, moving neatly out of range as Coolidge throws out the jab.
It seemed like Prince was going to counter with the hook but didn't fully commit to it.
That's one minute gone in the round.
Coolidge cracks a nice hook into Prince's ribs.
Coolidge misses with a hook.
Prince keeping a good distance there, avoiding the body shot.
Prince slips under a jab.
Coolidge misses with a hook.
Prince looks shocked there as he takes a right hand to the temple.
Prince uses decent footwork to sidestep a right hand from Coolidge.
Coolidge dips to his left and cracks Prince with an uppercut!
A swing and a miss from Coolidge.
Coolidge dips to his left and cracks Prince with an uppercut!
Prince fails to land with the punch combination there - jab, cross, hook, miss, miss, miss.
Prince moves into the clinch.
A shot in the inside from Prince.
Coolidge manages to break the clinch.
Prince looks shocked there as he takes a right hand to the temple.
Wooooo! Give it up for these two warriors! They are putting on a show!
Coolidge keeps the fight on the outside.
That's two minutes gone in the round.
Coolidge jabs. That one connects to the head of his opponent.
Prince tries to bum rush Coolidge with a series of wild strikes but Coolidge uses good footwork to avoid the assault.
Coolidge misses with a shot to the body
and Prince counters with a lovely straight right hand!
Prince misses with a hook.
Coolidge slips under a jab.
A little feinted left hand from Coolidge on the counter but he doesn't commit to it.
Prince throws a wild body kick that Coolidge sees coming a mile off.
Coolidge was looking to counter that move with a punch but didn't quite pull the trigger.
Coolidge keeps the fight on the outside.
Prince throws a lazy right hand but Coolidge sees it coming a mile off and sidesteps it easily.
Coolidge bobs and weaves well there to avoid the strikes.
Coolidge tries to keep at a distance but Prince has taken the fight into the clinch.
Prince tries to pull guard but can't drag his opponent to the mat. Coolidge just stands there and leans against the cage.
Coolidge has had enough of the clinch and is looking to separate.
Prince lands a nice elbow.
Coolidge is trying to work out of this bad position, with his back against the cage.
That's three minutes gone in the round.
Coolidge wants to break the clinch but can't.
Coolidge is looking to break free of the clinch but Prince has double underhooks.
Prince tries to jump guard but he falls flat on his backside. Coolidge smiles and moves away.
Butch Coolidge has stuffed three takedown attempts in the round now. That's going to take a lot out of Jungle Prince.
Coolidge connects with a jab.
Coolidge slips a straight right by Prince.
Prince throws a head kick but Coolidge moves out of range.
Coolidge tests Prince's chin there with a solid looking shot.
Prince throws a low kick but Coolidge moves out of range easily.
Prince clinches up with Coolidge and pushes him back against the cage.
Prince escapes the clinch and we're back to striking.
Prince clinches up with Coolidge and pushes him back against the cage.
Coolidge tries to circle away but Prince has him pinned against the cage.
That's four minutes gone in the round.
Prince drops down looking for an ankle pick but Coolidge pulls his leg out and moves away.
Coolidge swings away with a leg kick that misses.
Prince looked like he wanted to counter with a punch but didn't throw it.
Prince misses with a looping left.
An attempted straight right counter from Coolidge misses the target.
Prince slips a straight right by Coolidge.
Coolidge misses with a body shot. Nice footwork from Prince.
Prince avoids a punch combination nicely.
Prince tries to clinch
letting Coolidge counter with a right hand.
Prince needs to keep his hands up - Coolidge had a free shot at his head there.
Wooooo! Give it up for these two warriors! They are putting on a show!
Prince clinches up against the cage.
Prince escapes the clinch and we're back to striking.
Coolidge lands a powerful looking uppercut that connected with his opponent's jaw.
Prince shapes like he's going to throw a leg kick but settles back down.
Coolidge was looking to counter that move with a punch but didn't quite pull the trigger.
Coolidge misses with a hook.
Coolidge swings wildly with a hook that is half blocked by Prince.
And thats the end of the round the fighters go back to their corners.
That was a close round but Butch Coolidge did the better work so I'd imagine he'll take it.
The cut man is working on Butch Coolidge's cut.
That's the end of the round. The referee orders the cornermen out of the cage so we can get back down to business.

Prince just misses with a punch to the body.
Coolidge swung with a counter punch to the body but it didn't connect.
Coolidge throws a lazy right hand but Prince sees it coming a mile off and sidesteps it easily.
Coolidge tries to keep at a distance but Prince has taken the fight into the clinch.
Prince prevents Coolidge from breaking the clinch.
Coolidge tries to circle away but Prince has him pinned against the cage.
Coolidge blocks an elbow strike.
Coolidge escapes the clinch and we're back to striking.
Prince takes the fight into the clinch.
Coolidge is trying to break the clinch but Prince has him pressed against the cage.
We've had a slow start to the round here - hopefully the action picks up.
Coolidge is trying to break the clinch but Prince is controlling him.
Prince escapes the clinch and we're back to striking.
Coolidge scores with a sloppy right hand. Prince should have avoided that one.
Coolidge uses decent footwork to sidestep a right hand from Prince.
That's one minute gone in the round.
Prince moves into the clinch.
Prince manages to break the clinch.
Coolidge misses with a body shot.
Coolidge sets himself, and Prince steps forward looking for the clinch! Coolidge avoids it this time.
The fight moves into the clinch position.
Prince tries to pull guard but Coolidge forces him back to his feet, against the cage.
Coolidge breaks the clinch.
Prince has Coolidge up against the cage in a clinch.
Prince breaks the clinch and we return to the middle of the mat.
Coolidge misses with a double jab.
Coolidge slips under a jab.
Prince has closed the distance and engaged Coolidge in a clinch.
Coolidge throws a head punch that misses.
Coolidge looks like he'd prefer to be striking at range right now.
That's two minutes gone in the round.
Coolidge is trying to force a seperation but Prince has the dominant position.
Coolidge is trying to force a seperation but Prince has the dominant position.
Prince lands with a short head shot on the inside.
A short left from Prince.
Coolidge is trying to break the clinch but Prince is controlling him.
Prince lands an elbow that stopped Coolidge in his tracks for a moment.
The crowd are loving this. Great action here.
Prince pulls Coolidge into guard.
Coolidge decides to stand up and beckons his opponent to follow.
Coolidge tests Prince's chin there with a solid looking shot.
Coolidge avoids the clinch attempt nicely.
Coolidge misses with a looping left.
A jab lands there for Coolidge.
Prince misses with an uppercut. Coolidge saw that one coming.
Prince uses good head movement to avoid the hook from Coolidge.
That's three minutes gone in the round.
Coolidge throws the left hand but Prince avoids the punch easily.
Prince moves into the clinch.
Prince lands a left hand that snaps the head of Coolidge backwards.
Prince breaks from the clinch.
Coolidge scores with a hook to the body. Prince takes a step back and tries to catch his breath.
Prince moves into range and clinches up with Coolidge.
Coolidge is looking to break free of the clinch but Prince has double underhooks.
Coolidge is trying to break the clinch but Prince is controlling him.
Coolidge wants to break the clinch but can't.
Prince is trying to pull guard but Coolidge turns him against the cage and we stay in the clinch.
Prince lands with a good tight uppercut to the head.
Coolidge wants to get back to striking at distance but Prince won't allow it.
Coolidge is trying to work out of this bad position, with his back against the cage.
Coolidge tries to circle away but Prince has him pinned against the cage.
That's four minutes gone in the round.
Prince scores with a hook to the body.
It's got to the stage where if one of these guys blows hard enough, the other might fall over.
Coolidge is trying to break the clinch but Prince is controlling him.
Prince keeps the fight in the clinch, despite Coolidge's efforts to push away.
Coolidge manages to break the clinch.
Prince cracks Coolidge with a big right hand that sends him crashing to the floor. Prince has the opportunity to follow him to the ground but instead he's beckoning Coolidge to stand back up!
This has been an exciting period of action!
Prince ducks down into range and throws a picture perfect right hook that connects with Coolidge's jaw. Coolidge's eyes stare off into space as he falls to the mat, out cold! Prince does the decent thing and steps back, rather than landing any shots to his unconscious opponent.
Ladies and gentlemen, after 4:33 of round 4, we have a winner by way of KO (Punch). Jungle Prince!
Jungle Prince is the new welterweight champion!
A relieved looking Jungle Prince thanked the fans for their support and gave the usual line about them being amazing. They seemed to believe that he actually meant it.
|
|
|
|
|
|
|
|
|
|
|
|
|
|
|
|
|
|
|
|
|
|
|
| S |
C
A |
G |
S |
C
B |
G |
|
S |
C |
G |
|
energy
A | B |
|
hype
A | B |
|
pop
A | B |
|
mgr
A | B |
|
FIGHT
RATING
73% |
|
|
|
|
|
|
|
|
|
|
