 |
QFC Tournament 894 Round 1 PBP Commentary |
Undercard bout
|
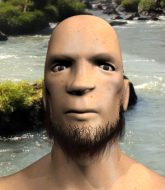
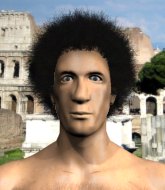
Coming up we have a bantamweight MMA rules bout between Ernest Muller (ranked 5200 p4p, 0 weight class) and Bryson Murdock (ranked 5185 p4p, 0 weight class). We have two fighters making their debuts here, so let's see who comes out of this one with their first professional victory.
 |
|
 |
| 150 cm
25
130 lbs
0 - 0 - 0 |
|
165 cm
25
143 lbs
0 - 0 - 0 |
BJJ White Belt
Excellent boxer
Very strong |
|
BJJ Blue Belt
Decent boxing
Granite chin |
|
| |
|
Ladies and gentlemen. This fight is 3 rounds, in the bantamweight division.
Introducing the fighter to my left, fighting out of the red corner.
With a record of
0 - 0 - 0, fighting out of Hilo, Ernest Muller!
And introducing the fighter to my right, fighting out of the blue corner.
With a record of
0 - 0 - 0, fighting out of Hilo, Bryson Murdock!
The judges for this bout are Ryoma Takatsuka, Paul Gruel and Roger Salmon.

The bell rings for round one and we are underway!
Muller shoots in but no luck this time.
Muller shoots for a takedown but Murdock saw that one coming a mile off and avoided it easily.
Muller shoots in for a takedown but doesn't get it.
That's three failed takedown attempts in the round for Ernest Muller. That's going to take a lot out of him.
Muller avoids the body shot from Murdock.
Murdock throws a head kick that misses.
Muller changes levels looking for a counter takedown but doesn't commit.

Murdock closes the distance and clinches.
Muller tries to pull guard but Murdock holds him up against the cage and eventually Muller drops back down to his feet.
Muller jumps guard but his hands slip and he falls flat on his back. Well, he's made himself look a right mug there, as Murdock walks away with a smile on his face. Muller gets slowly back to his feet and shakes his head.
Murdock shoots in and drives through. Muller sprawls well.
We've had a slow start to the round here - hopefully the action picks up.
Muller fails to land the takedown.
Murdock lands with a cross to side of his opponent's head.
Murdock tries to shoot in for a takedown. He's got hold of a leg but Muller swivels and escapes.

That's one minute gone in the round.
Murdock shoots for a double leg takedown but Muller sprawls well. He's pushed Murdock's face into the mat and manages to get back to his feet relatively easily.
Muller doesn't manage to clinch there - Murdock circles away.
Muller shoots in for a takedown - he's clinched up with Murdock but Murdock pushes him off and we're back to square one.
Murdock gets his takedown attempt stuffed easily

and Muller counters into the clinch. Nicely done.
Muller pressing his opponent against the cage.
Muller jumps guard but Murdock turns him against the cage and keeps the fight standing.
Muller tries to pull guard but can't drag his opponent to the mat. Murdock just stands there and leans against the cage.

Muller escapes the clinch and we're back to striking.
Muller clinches up against the cage.

That's two minutes gone in the round.
Murdock drops to a knee looking for a takedown but Muller gets the underhooks and prevents it.
Muller jumps guard but Murdock stands there with Muller around his waist. Muller gives up and drops back to his feet. We remain in the clinch.
The referee is keeping an eye on Muller - much more stalling and he will separate the fighters.

Murdock jumps into guard, dragging Muller to the mat.
We could do with one of the fighters taking the initiative a bit more on the ground - they're both waiting to capitalize on a mistake.
Muller throws a big elbow that misses.
Muller in full guard, throwing the ground and pound. No damage this time.
Muller postures up.

Murdock had isolated an arm as going for a kimura. Muller defends it easily.

That's three minutes gone in the round.
Murdock trying to keep a closed guard but Muller is proving a slippery customer.
Murdock is working an open guard here, looking to improve his position. No doubt that will leave him open to counters but at least he's being more offensive.
We may be looking at a referee standup if the pace doesn't pick up soon.
Murdock bucks up whilst keeping hold of a body lock, managing to reverse the position. Now he's in top in Muller's guard.

Murdock throws a big right hand that misses.

Muller is working an open guard so Murdock takes the opportunity to get back to his feet.

That's four minutes gone in the round.
Murdock fails with the takedown.
Murdock darts in looking for a takedown but Muller gets double underhooks and turns Murdock into the cage.
Murdock pulls out of a head kick attempt.
Muller throws a body punch but Murdock moves out of range.
Muller shoots in for a takedown but Murdock shows good takedown defense.
Murdock only half commits to the counter leg kick.
Murdock dives in for a single leg takedown but Muller sprawls and the fighters end up clinched against the cage.
Murdock misses with a takedown attempt. He shot from a bit too far out.
Murdock looks winded!
Muller has closed the distance and engaged Murdock in a clinch.
The crowd thankful this round is nearly over.
Muller tries for a takedown. No joy.
Murdock blocks a knee to the body. He'll have a nicely bruised forearm in the morning.
And thats the end of the round the fighters go back to their corners.
A close round but Bryson Murdock will probably get the nod.
That's the end of the round. The referee orders the cornermen out of the cage so we can get back down to business.

Murdock shoots in for a double leg but Muller sprawls well. That's going to sap some energy.
Muller takes a swing at Murdock's ribcage but misses.
Muller gets his takedown attempt stuffed easily
and Murdock counters with a nice body shot.
Muller fails in his attempt to clinch.
Muller rushes Murdock and presses him up against the cage.
Murdock tries to pull guard but Muller forces him back to his feet, against the cage.
Muller manages to get underhooks and slows down the pace for a moment.
Murdock has Muller pressed up against the cage and is working for takedown. Muller manages to improve position though and keeps the fight standing.
Ernest Muller has stuffed three takedown attempts in the round now. That's going to take a lot out of Bryson Murdock.
We've had a slow start to the round here - hopefully the action picks up.
Murdock tries to pull guard but Muller holds him up against the cage and eventually Murdock drops back down to his feet.
Murdock wants to break free. God knows he wants to breaaaak freeee.
That's one minute gone in the round.
Muller breaks the clinch.
Murdock is looking to take this fight into the clinch.
Muller displays good takedown defense there as he swats away a double leg from Murdock.
A leg kick checked by Muller.
Muller shoots in but no luck this time.
Murdock misses with a half-hearted attempt at a head kick.
The fighters are starting to get sweaty, which will make takedowns a bit more tricky.
Murdock pushes forward with a 1-2 combination that forces Muller back to the cage. Murdock follows up with a solid lead hook to the liver.
Murdock takes a step back and watches a body kick go sailing past his mid section.
Bryson Murdock seems to be getting the better of the standup.
Murdock tries a switch kick but it misses it's target.
Muller throws a big counter combination but Murdock scrambles out of danger and avoids any damage.
Murdock is breathing heavily.
Muller tries to score with a low kick but Murdock moves his leg out of the way.
Murdock tries to bum rush Muller with a series of wild strikes but Muller uses good footwork to avoid the assault.
That's two minutes gone in the round.
Muller changes levels and looks for a double leg takedown. Murdock tries to avoid it but Muller manages to keep hold of a leg and drag Murdock to the ground. Murdock escapes though and pops straight back up to his feet.
Muller tries to clinch up but Murdock circles away and keeps his distance.
Nice sprawl there from Murdock as Muller shoots in.
Murdock darts in and clinches Muller up against the cage.
Murdock gets underhooks to prevent Muller's takedown attempt.
Muller can't get the takedown.
Murdock tries to pull guard but Muller won't allow it.
Murdock being controlled against the cage.
Muller is trying to pull guard but Murdock turns him against the cage and we stay in the clinch.
Murdock blocking some punches.
That's three minutes gone in the round.
Muller fails to pull the fight into his guard.
A head punch on the inside from Murdock fails to land.
Muller is trying to drag Murdock to the mat but Murdock just about manages to keep his footing. He used the cage to his advantage there.
Murdock content to slow the pace in the clinch.
Muller tries for a takedown but Murdock manages to get underhooks.
Murdock jumps guard.
Murdock has been the more effective fighter overall so far.
Murdock keeping full guard, as Muller tries to pass.
Murdock trying to keep a closed guard but Muller is proving a slippery customer.
Muller has to be careful here, sitting in the guard of a superior BJJ player.
That's four minutes gone in the round.
Murdock keeping moving, preventing Muller from controlling successfully.
Muller content to stall in guard here.
Muller trying to land body shots but he keeps hitting the mat.
The ref warns both fighters not to hold the cage as they work up against the meshing.
Murdock preventing the ground and pound from doing any damage.
Boooooooooooooooooooo!!! God, this has been a terrible round. Come on you two, sort yourselves out!
Muller content to stall in guard here.
Murdock keeping moving, preventing Muller from controlling successfully.

The referee has stepped in and called for a break in the action. We'll restart on the feet.
And thats the end of the round the fighters go back to their corners.
Bryson Murdock showed his class in that round. I'd imagine he'll take it on all the scorecards.
The fighters' corners scream their final instructions, as the referee calls time. Here we go, back to the action! This is the final round!

Murdock tries to score a power double leg takedown but Muller sees that one coming and sprawls well. That will dishearten Murdock somewhat.
Muller moves into the clinch successfully.
Murdock is working on a leg, looking for a takedown but Muller is defending well.
Murdock lands with a short punch from the clinch.
Murdock is looking to break free of the clinch but Muller has double underhooks.
We've had a slow start to the round here - hopefully the action picks up.
Muller breaks the clinch and we're back to striking at distance.
No luck for Muller with that takedown attempt.
Murdock has Muller up against the cage in a clinch.
That's one minute gone in the round.
Murdock successfully pulls guard.
Murdock is pulling down on Muller's head to control his posture.
Muller seems content to control from guard here. He's going to have to remain active though if he doesn't want to get stood back up.
Murdock is working the butterfly guard. He manages to land a nice scissor sweep and is now in half guard on the top. Nice move.
Murdock looks over to his corner - he wants some instructions but his corner are not responding.
That's two minutes gone in the round.
Muller is not content to let Murdock control the position.
Muller knows he needs to get back to his feet asap. He's simply no match for Murdock on the ground.
Muller is looking to get back to full guard here but Murdock has managed to pass to side control instead.
Muller tries to strike but it doesn't land.
Muller parries the strikes from Murdock easily there. Murdock is wary of posturing up too much because it might enable Muller to escape.
Murdock decides to take the fight back to the feet.
Muller throws a looping left and ducks down for a takedown. He's got his arms around Murdock's waist but Murdock gets an underhook and avoids the takedown by throwing Muller off to one side.
Muller forces Murdock back against the cage and clinches.
Muller prevents the takedown attempt.
Ernest Muller has stuffed three takedown attempts in the round now. That's going to take a lot out of Bryson Murdock.
That's three minutes gone in the round.
Murdock is looking to break free of the clinch but Muller has double underhooks.
Murdock can't break the clinch.
Muller wants a takedown but no success here.
Muller jumps guard but Murdock stands there with Muller around his waist. Muller gives up and drops back to his feet. We remain in the clinch.
Murdock is trying to pull guard but being pressed up against the cage enables Muller to keep the fight standing.
Murdock gets underhooks to prevent Muller's takedown attempt.
Muller fails to pull guard.
Both guys are working to get underhooks.
Muller is defending well against a takedown attempt.
Murdock gets underhooks to prevent Muller's takedown attempt.
Muller stalling here - the referee won't stand for too much of that.
That's four minutes gone in the round.
The crowd are showing their displeasure at the lack of action as loud boos ring out around the arena.
Murdock jumps guard but Muller turns him against the cage and keeps the fight standing.
Muller tries to pull guard but Murdock holds him up against the cage and eventually Muller drops back down to his feet.
Murdock drops down for a takedown but doesn't get it.
Muller pushes off and fires off an elbow that misses, before clinching up again, against the cage.
Muller tries to jump guard but he falls flat on his backside. Murdock smiles and moves away.
Boooooooooooooooooooo!!! God, this has been a terrible round. Come on you two, sort yourselves out!
Murdock fails with a takedown attempt.
Ernest Muller has stepped it up - he knows he needs a finish here!
Bryson Murdock is fighting for a decision here - he's started to take the cautious approach.
Murdock takes a big intake of breath there - he's definitely tired.
Muller throws a head kick that misses.
A countering left hand to the body from Murdock misses.
And that's the end of the fight!
Bryson Murdock comfortably won the final round on my scorecard.
I've got Murdock winning every round here. Surely the decision will go his way and he'll pick up a well deserved decision victory. Over to the ring announcer for the scorecards.
Ladies and gentlemen, after 3 rounds of action, we go to the scorecards for a decision.
Judge Ryoma Takatsuka scores the fight for Bryson Murdock!
Judge Paul Gruel scores the fight for Bryson Murdock!
Judge Roger Salmon scores the fight for Bryson Murdock!
Bryson Murdock wins by unanimous decision!
|
|
|
|
|
|
|
|
|
|
|
|
|
|
|
|
|
|
|
|
|
|
|
| S |
C
A |
G |
S |
C
B |
G |
|
S |
C |
G |
|
energy
A | B |
|
hype
A | B |
|
pop
A | B |
|
mgr
A | B |
|
FIGHT
RATING
30% |
|
|
|
|
|
|
|
Undercard bout
|
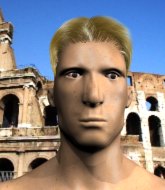
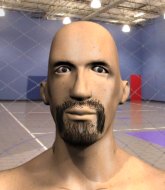
Coming up we have a bantamweight MMA rules bout between Mark Silverman (ranked 5214 p4p, 0 weight class) and Spike Anderson (ranked 5186 p4p, 0 weight class). We have two fighters making their debuts here, so let's see who comes out of this one with their first professional victory.
 |
|
 |
| 150 cm
25
130 lbs
0 - 0 - 0 |
|
160 cm
25
135 lbs
0 - 0 - 0 |
BJJ White Belt
Excellent boxer
Very strong |
|
BJJ Blue Belt
Decent boxing
Solid chin |
|
| |
|
Ladies and gentlemen. This fight is 3 rounds, in the bantamweight division.
Introducing the fighter to my left, fighting out of the red corner.
With a record of
0 - 0 - 0, fighting out of Hilo, Mark Silverman!
And introducing the fighter to my right, fighting out of the blue corner.
With a record of
0 - 0 - 0, fighting out of Hilo, Spike Anderson!
The judges for this bout are Ryoma Takatsuka, Josh West and Chris Saunders.
The bell rings for round one and we are underway!
Anderson moves into the clinch successfully.
Silverman escapes the clinch and we're back to striking.
Silverman throws a head kick that misses and slips in the process. He scrambles back to his feet and the fighters circle.
Anderson drops down looking to force a counter takedown but Silverman defends it well.
The fight moves into the clinch position.
Silverman wants to take the fight to the mat but Anderson manages to get underhooks and keep the fight in the clinch.
Anderson tries to pull guard but Silverman holds him up against the cage and eventually Anderson drops back down to his feet.

Anderson pushes off and circles away, back to the middle of the mat.
Silverman tries to clinch but Anderson moves out of range.
A telegraphed takedown attempt from Silverman is defended easily by Anderson.
We've had a slow start to the round here - hopefully the action picks up.
Anderson instigates a clinch.
That's one minute gone in the round.
Silverman leaning his opponent against the cage.
Anderson stalls.
Silverman escapes the clinch and we're back to striking.
Silverman shoots in looking for a takedown. Anderson tries to sprawl out of it but Silverman keeps driving through. The fighters are pinned against the cage. Anderson manages to get underhooks and after a bit of a struggle, circles away and we're back to standing.
That's three failed takedown attempts in the round for Mark Silverman. That's going to take a lot out of him.
Silverman shoots in for a takedown. He's persisting with it as Anderson sprawls well. Anderson wins this battle and keeps the fight standing. Silverman gets slowly back to his feet.
Anderson lands with a nice combination. Silverman backs away looking to recover.
That's two minutes gone in the round.
Silverman motions for Anderson to come forward. Silverman throws a leg kick but it misses it's target.
Anderson stuffs a takedown. It's all about dictating where the fight takes place and Anderson wants it to stay on the feet.
Anderson moves into range and clinches up with Silverman.
Anderson looking to throw knees to the head but Silverman is blocking nicely.
Anderson successfully pulls guard.
Silverman content to stall in guard here.
Anderson is throwing his legs up, looking for submissions. Silverman is aware though and is defending well.
Silverman wants to pass the guard but Anderson is keeping the position.
Silverman has to be careful here, sitting in the guard of a superior BJJ player.

Anderson uses the cage to get back to his feet.
That's three minutes gone in the round.
Silverman fakes high and shoots in for a takedown but Anderson avoids it really well and circles away.
Anderson closes this distance looking for a takedown but Silverman circles away.
Anderson shoots in and drives through. Silverman sprawls well.
Silverman shoots in for a takedown. "Ole!" shouts Anderson as he jumps to the side.
Anderson closes the distance and clinches up with Silverman, looking for a takedown. Anderson pushes Silverman against the cage but Silverman circles to the side and manages to break the clinch.
Silverman looks frustrated there after his takedown attempt is stuffed easily.
Silverman shoots in looking for a double leg takedown. Anderson defends it nicely.
A little jabbing left from Anderson on the counter but it doesn't find it's target.
That's four minutes gone in the round.
Silverman tries to clinch up but Anderson circles away and keeps his distance.
Anderson shoots in for a takedown but doesn't get it.
A punch lands to the side of Silverman 's head but he takes it in his stride.
Anderson dives in for a single leg takedown but Silverman sprawls and the fighters end up clinched against the cage.
Silverman shoots in for a takedown. "Ole!" shouts Anderson as he jumps to the side.
Anderson instigates a clinch.
The crowd thankful this round is nearly over.
Silverman has dropped down and is looking to force the takedown but it's defended by Anderson after a bit of a struggle.
Silverman avoiding damage as Anderson throws knees to the body.
Anderson is trying to work out of this bad position, with his back against the cage.
Silverman is defending well against a takedown attempt.
And thats the end of the round the fighters go back to their corners.
Spike Anderson dominated that round.
The fighters' corners scream their final instructions, as the referee calls time. Here we go, back to the action!
Anderson closes the distance and clinches.
Anderson decides to pull guard.

Silverman is holding a leg here, probably looking for an ankle lock - he drops back and goes for it! Anderson is in trouble! Is it all over??? No! Anderson has escaped and now he's on top!
Anderson being controlled here momentarily.
Silverman working for submissions but it's allowed Anderson to get to half guard.
Anderson has been the more effective fighter overall so far.
We've had a slow start to the round here - hopefully the action picks up.
Silverman trying to hold on to Anderson's head to control him but Anderson postures up.
The ref warns both fighters not to hold the cage as they work up against the meshing.
That's one minute gone in the round.
Silverman looking for submissions from an awkward position here.
The fighters are pressed up against the cage, both looking to find a bit of space to work.
Silverman actively working from the bottom here.
Anderson looks over to his corner - he wants some instructions but his corner are not responding.
Silverman keeping control of the position.
That's two minutes gone in the round.
The crowd are starting to boo a lack of action.
Silverman punching from the bottom.
Silverman is looking to improve his position.
Anderson trying to control from half guard but Silverman is working away.
Silverman is looking to improve his position.
The referee calls for the fighters to work.
The referee has motioned to the fighters to stand back up. He just wasn't happy with the level of activity.
That's three minutes gone in the round.
Anderson shoots in looking for a takedown. Silverman tries to sprawl out of it but Anderson keeps driving through. The fighters are pinned against the cage. Silverman manages to get underhooks and after a bit of a struggle, circles away and we're back to standing.
Mark Silverman is looking to throw some combinations by the looks of things.
Silverman rushes Anderson and presses him up against the cage.
Silverman fails to pull the fight into his guard.
Anderson drops to a knee looking for a takedown but Silverman gets the underhooks and prevents it.
Silverman looks to throw an elbow but misses.
That's four minutes gone in the round.
A few boos can be heard. I'm sure they will multiply if the fighters don't pick up the pace.
Silverman tries to pull guard but can't drag his opponent to the mat. Anderson just stands there and leans against the cage.
Anderson is looking for a takedown up against the cage. Silverman gets underhooks though and prevents the takedown attempt.
Mark Silverman has stuffed three takedown attempts in the round now. That's going to take a lot out of Spike Anderson.
Silverman gets double underhooks to prevent a takedown attempt from Anderson.
Anderson jumps guard but Silverman turns him against the cage and keeps the fight standing.
Silverman is working for a takedown up against the cage. He can't get it on this occasion though.
Anderson looks like he'd prefer to be striking at range right now.
Anderson jumps guard but Silverman turns him against the cage and keeps the fight standing.

Silverman jumps guard and drags Anderson to the mat. He's obviously going to be looking for submissions off his back.
Boooooooooooooooooooo!!! God, this has been a terrible round. Come on you two, sort yourselves out!
Silverman keeping moving, preventing Anderson from controlling successfully.
Silverman looking to hit a scissor sweep but Anderson is one step ahead there.
And thats the end of the round the fighters go back to their corners.
A close second round but Spike Anderson will probably get the nod - 10:9.
The fighters get back to their feet, the hooter sounds and we're back to the action! This is the final round!
Silverman looks for a takedown but Anderson sprawls well.
Anderson now looks to counter with a shot at the body.
Silverman tries to shoot in for a takedown. He's got hold of a leg but Anderson swivels and escapes.
Anderson swats away the attempt to clinch by Silverman.
Sloppy strikes from Silverman. Those never looked like landing.
Silverman wants to clinch up but Anderson keeps it at a distance.
Silverman tries to clinch but is not successful on this occasion.
Silverman tries for a takedown but Anderson sees it coming a mile off and avoids it easily.
That's three failed takedown attempts in the round for Mark Silverman. That's going to take a lot out of him.
We've had a slow start to the round here - hopefully the action picks up.
Silverman shoots in with a takedown attempt and he has Anderson pinned against the cage. Anderson gets the underhooks and manages to circle away.
Anderson scores with a jab to the body.
That's one minute gone in the round.
Anderson fails with the takedown.
Anderson closes the distance and clinches.
Silverman is trying to work for a single leg takedown but Anderson pulls him back up using the underhooks.
Anderson drags the fight down to the ground.
Silverman controlling from the top position.
Anderson tries to strike from the bottom.
That's two minutes gone in the round.
Anderson has butterfly guard. He's looking to stand up here. He pushes Silverman off him and springs to his feet nicely. The crowd applauds.
Anderson dives in for a single leg takedown but Silverman sprawls and the fighters end up clinched against the cage.
Silverman fails in his attempt to clinch.
Silverman shoots in looking for a takedown but Anderson manages to keep the fight standing, pushing Silverman's face into the canvas for good measure before circling away.
Silverman avoids the clinch attempt nicely.
Silverman stuffs the takedown.
Silverman tries to clinch but Anderson moves out of range.
Silverman misses with a body shot. Nice footwork from Anderson.
Silverman dives in for a single leg takedown but Anderson sprawls and the fighters end up clinched against the cage.
Anderson throws a head kick that misses and slips in the process. He scrambles back to his feet and the fighters circle.
Silverman fails in his attempt to clinch.
Horrible takedown attempt by Anderson or perhaps it was just good defense by Silverman, which made it look bad.
As Anderson looks to move away, Silverman throws a big counter combo but Anderson just gets out of the way.
That's three minutes gone in the round.
Silverman has a takedown stuffed.
Silverman looks for a takedown but Anderson sprawls well.
Silverman wants to clinch up but Anderson keeps it at a distance.
Anderson dodges the punch combination from Silverman.
Anderson scores with a three punch combo!
Anderson tries a switch kick but it misses it's target.
Sloppy strikes from Silverman. Those never looked like landing.
That's four minutes gone in the round.
Anderson gets to the clinch - let's see what his plan is here.
Silverman escapes the clinch and we're back to striking.
Silverman dives in for a single leg takedown but Anderson sprawls and the fighters end up clinched against the cage.
Silverman closes the distance and pushes Anderson back into the cage.
Silverman prevents Anderson from breaking the clinch.
Silverman escapes the clinch and we're back to striking.
Silverman moves into the clinch successfully.
Anderson pulls guard.
Wooooo! Give it up for these two warriors! They are putting on a show!
Silverman postures up to throw the ground and pound strikes but they don't connect.
Anderson is working the butterfly guard. He manages to land a nice scissor sweep and is now in half guard on the top. Nice move.
Mark Silverman has stepped it up - he knows he needs a finish here!
Spike Anderson is fighting for a decision here - he's started to take the cautious approach.
Silverman missing with punches from the bottom.
And that's the end of the fight!
Spike Anderson comfortably won the final round on my scorecard.
Well Anderson has outworked and out performed his opponent in all aspects of the game today. He was simply too good and the decision should be no more than a formality. Over to the ring announcer for the scorecards.
Ladies and gentlemen, after 3 rounds of action, we go to the scorecards for a decision.
Judge Ryoma Takatsuka scores the fight for Spike Anderson!
Judge Josh West scores the fight for Spike Anderson!
Judge Chris Saunders scores the fight for Spike Anderson!
Spike Anderson wins by unanimous decision!
|
|
|
|
|
|
|
|
|
|
|
|
|
|
|
|
|
|
|
|
|
|
|
| S |
C
A |
G |
S |
C
B |
G |
|
S |
C |
G |
|
energy
A | B |
|
hype
A | B |
|
pop
A | B |
|
mgr
A | B |
|
FIGHT
RATING
34% |
|
|
|
|
|
|
|
Undercard bout
|
|
|
|
Undercard bout
|
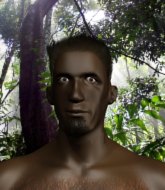
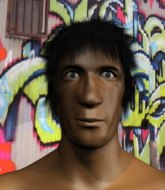
Coming up we have a bantamweight MMA rules bout between Dave Tyler (ranked 5184 p4p, 0 weight class) and Drake Bell (ranked 5188 p4p, 0 weight class). We have two fighters making their debuts here, so let's see who comes out of this one with their first professional victory.
 |
|
 |
| 170 cm
25
141 lbs
0 - 0 - 0 |
|
167 cm
25
141 lbs
0 - 0 - 0 |
Decent wrestler
Brawler
Self confident |
|
BJJ Blue Belt
Solid Muay Thai
Inexperienced |
|
| |
|
Ladies and gentlemen. This fight is 3 rounds, in the bantamweight division.
Introducing the fighter to my left, fighting out of the red corner.
With a record of
0 - 0 - 0, fighting out of Hilo, Dave Tyler!
And introducing the fighter to my right, fighting out of the blue corner.
With a record of
0 - 0 - 0, fighting out of Hilo, Drake Bell!
The judges for this bout are Josh West, Chris Saunders and Micheangelo Fripello.
The bell rings for round one and we are underway!
Tyler shoots in from a long way out. He's driving through with the takedown attempt and he eventually gets it, landing in Bell's guard.
Tyler would like to get this fight back to the feet but can't get free from the closed guard.
Tyler passes Bell's left leg - he's now in half guard.
Bell kicks Tyler off and gets back to his feet.
Tyler clinches up with Bell and pushes him back against the cage.
Tyler gets underhooks to prevent Bell's takedown attempt.
Bell tries to take the fight to the ground by pulling guard but can't manage it.
Bell tries to pull guard but can't drag his opponent to the mat. Tyler just stands there and leans against the cage.
Dave Tyler has stuffed three takedown attempts in the round now. That's going to take a lot out of Drake Bell.
Tyler has managed to pull guard. Let's see whether he can work an aggressive guard. It will also be interesting to see what tactics Bell uses from the top position.
Bell trying to control the position from guard on top but Tyler is wriggling around, looking for whatever he can.
Bell postures up as if he's going to throw some strikes but drops back for an ankle! Tyler is in big trouble! He looks ready to tap! But no, he's escaped and dives on top of Bell, into his guard.

The fighters are pressed up against the cage, both looking to find a bit of space to work.
That's one minute gone in the round.
Bell trying to keep a closed guard but Tyler is proving a slippery customer.
Tyler not doing a lot at the moment. He'll have to show some more aggression or the fight will get stood up.
Tyler postures up and scores with a shot to the body and a follow up elbow to the head.
Bell is doing well to control the posture of his opponent and prevent any damage.
Tyler showing good wrestling skills to control the position.
That's two minutes gone in the round.
The crowd are getting on the fighters' backs, as the pace has dropped off in the last minute or so.
Bell working for submissions but it's allowed Tyler to get to half guard.
Tyler takes a deep breath and rests his weight momentarily on top of his opponent, to control the position.
Bell taking some punishment here, with Tyler in his half guard.
Tyler tries to pass to full mount but Bell defends it.
That's three minutes gone in the round.
Tyler working the head and body with strikes.
Nice strikes from Tyler there.
Bell has a hand on Tyler's thigh, trying to get back to full guard. Tyler takes advantage of the position though and mounts him!
Tyler looking to control and managing it successfully.
Tyler lands with some strikes.
Tyler controlling the position easily from mount.
Bell reaches up and holds on to Tyler to control the position.
That's four minutes gone in the round.
Tyler tucks in and makes sure he doesn't lose the dominant position.
Tyler putting on the heat here with some good ground and pound!

Bell is rocked!
Bell takes a big shot to the dome and his eyes have rolled back in his head! Tyler's killer instinct has kicked in as he finishes the fight with more strikes. Impressive finish.
Ladies and gentlemen, after 4:57 of round 1, we have a winner by way of TKO (Strikes). Dave Tyler!
|
|
|
|
|
|
|
|
|
|
|
|
|
|
|
|
|
|
|
|
|
|
|
| S |
C
A |
G |
S |
C
B |
G |
|
S |
C |
G |
|
energy
A | B |
|
hype
A | B |
|
pop
A | B |
|
mgr
A | B |
|
FIGHT
RATING
31% |
|
|
|
|
|
|
|
Undercard bout
|
|
|
|
Undercard bout
|
Coming up we have a bantamweight MMA rules bout between Little Chungus (ranked 5174 p4p, 0 weight class) and Todd Rodd (ranked 5168 p4p, 0 weight class). We have two fighters making their debuts here, so let's see who comes out of this one with their first professional victory.
 |
|
 |
| 170 cm
24
135 lbs
0 - 0 - 0 |
|
172 cm
25
140 lbs
0 - 0 - 0 |
BJJ Blue Belt
Solid Muay Thai
Cuts easily |
|
Good wrestler
Basic striking
Heavy handed |
|
| |
|
Ladies and gentlemen. This fight is 3 rounds, in the bantamweight division.
Introducing the fighter to my left, fighting out of the red corner.
With a record of
0 - 0 - 0, fighting out of Hilo, Little Chungus!
And introducing the fighter to my right, fighting out of the blue corner.
With a record of
0 - 0 - 0, fighting out of Hilo, Todd Rodd!
The judges for this bout are Paul Gruel, Colin Fray and Chris Saunders.
The bell rings for round one and we are underway!
Chungus gets cracked there but stands up to it.
Chungus bobbing and weaving, closes the distance and lands a hook to the side of Rodd's head.
Chungus misses with a takedown attempt - Rodd sprawls well and throws a nice strike on the way out which just misses.
Chungus wants to clinch up but Rodd keeps it at a distance.
Chungus throws a monster uppercut resembling something out of street fighter but it doesn't land.
Rodd lands the left hand.
Rodd lands a nice looking body shot.
Chungus has Rodd up against the cage in a clinch.
A real battle for position is taking place between these two warriors.
Rodd lands a right uppercut that snaps the head of Chungus backwards.

Chungus is rocked!
An uppercut to the body lands inside from Rodd.
Rodd working on landing some head shots here - that one got through nicely.
Oh Chungus is still all over the place! His legs are completely gone! Will he be able to recover?!!
The crowd cheering loudly, showing their appreciation for the quality fight we're seeing here.
Rodd lands an uppercut.
Chungus jumps guard but Rodd stands there with Chungus around his waist. Chungus gives up and drops back to his feet. We remain in the clinch.
Rodd has Chungus pressed against the cage, preventing Chungus from circling away and getting back to striking at range.
Chungus is breathing heavily.
A right hook to the body lands for Rodd.
Rodd lands punches inside but they're not really causing much damage.
Rodd unloads with a big right hand that wobbles Chungus! He's leaning against the cage trying to keep his feet but Rodd is unloading with more strikes now! Chungus drops to his knees and the referee stops the fight for a TKO!
Ladies and gentlemen, after 1:56 of round 1, we have a winner by way of TKO (Strikes). Todd Rodd!
A pretty intense looking Todd Rodd took the opportunity post-fight to ask for a shot at the title.
|
|
|
|
|
|
|
|
|
|
|
|
|
|
|
|
|
|
|
|
|
|
|
| S |
C
A |
G |
S |
C
B |
G |
|
S |
C |
G |
|
energy
A | B |
|
hype
A | B |
|
pop
A | B |
|
mgr
A | B |
|
FIGHT
RATING
80% |
|
|
|
|
|
|
|
Co-main event
|
|
|
|
Main event
|
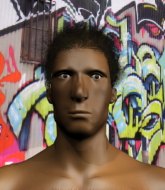
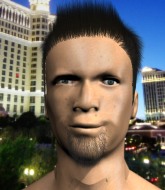
Coming up we have a bantamweight MMA rules bout between John Warren (ranked 5215 p4p, 0 weight class) and Mark Furgeson (ranked 5179 p4p, 0 weight class). We have two fighters making their debuts here, so let's see who comes out of this one with their first professional victory.
 |
|
 |
| 150 cm
25
130 lbs
0 - 0 - 0 |
|
155 cm
25
135 lbs
0 - 0 - 0 |
BJJ White Belt
Excellent boxer
Very strong |
|
BJJ White Belt
Excellent MT
Determined |
|
| |
|
Ladies and gentlemen. This fight is 3 rounds, in the bantamweight division.
Introducing the fighter to my left, fighting out of the red corner.
With a record of
0 - 0 - 0, fighting out of Hilo, John Warren!
And introducing the fighter to my right, fighting out of the blue corner.
With a record of
0 - 0 - 0, fighting out of Hilo, Mark Furgeson!
The judges for this bout are Micheangelo Fripello, Chris Saunders and Jeff Smith.
The bell rings for round one and we are underway!
Warren doesn't succeed with the takedown
and Furgeson counters into the clinch. Nicely done.
Warren stalling in the clinch.
A head punch on the inside from Furgeson fails to land.
Furgeson misses with a punch on the inside.
Furgeson tries to throw a body punch but Warren avoids it by throwing Furgeson back against the cage.
Furgeson tries a body shot but Warren blocks it.
Warren manages to pull guard. Let's see whether he can land a sub off his back.
Warren controlling Furgeson's posture.
Furgeson would like to get this fight back to the feet but can't get free from the closed guard.
We've had a slow start to the round here - hopefully the action picks up.
The ref warns both fighters not to hold the cage as they work up against the meshing.
That's one minute gone in the round.
Furgeson is using up a lot of energy trying to get back to his feet. Perhaps he should improve his position first.
Warren pulls Furgeson in close to prevent any damage.
The referee has decided to stand the fighters back up, so we'll restart on the feet.
Warren has managed to clinch.
A head punch blocked on the inside by Warren.
Warren blocks an uppercut.
Furgeson lands a shoulder strike.
Furgeson tries to work over Warren's body with a swooping hook but it only glances the target.
Furgeson tries to work over Warren's body with a swooping hook but it only glances the target.
Warren gets control of Furgeson's arms and successfully pulls guard. Warren will no doubt be looking for submissions off his back.
Furgeson would like to get this fight back to the feet but can't get free from the closed guard.
That's two minutes gone in the round.
Warren pulls Furgeson in to control the position.
Furgeson would like to get this fight back to the feet but can't get free from the closed guard.
Warren on his back here. We all know that wrestlers don't like being on their back so let's see if Warren tries to get out of the position.
Warren trying to strike off his back.
Warren is avoiding any damage by keeping wrist control.
Warren working for a triangle but Furgeson defends it easily.
Furgeson tries to stand but Warren is controlling from the bottom.
We must be close to a standup if these guys don't pick up the pace.
Warren looking for a sweep. Not yet Warren, not yet.
Warren has control of Furgeson's left arm, preventing Furgeson from doing any damage.
The ref stands the fighters back up due to a lack of activity.
Warren shoots in for a double leg but Furgeson sprawls well. That's going to sap some energy.
That's three minutes gone in the round.
Warren gets in close and instigates a clinch.
Warren blocking some punches.
A short uppercut from Furgeson.
A nice left hand lands by Furgeson.
Furgeson misses with a hook from the clinch.
Furgeson fails to land with a short punch on the inside.
Warren wants to get back to striking at distance but Furgeson won't allow it.
Warren jumps guard.
Warren escapes his hips to the side and looks to be working for an armbar. Furgeson gives him a little smile and shakes his head. No chance.
There's a bit of a scramble here and now Warren is on top in guard.
Warren prevents Furgeson from getting back to his feet.
That's four minutes gone in the round.
Warren trying to control but Furgeson is working from the bottom.
Warren stops Furgeson from standing up.
Warren controls from within his opponent's guard.
Warren throwing strikes but missing.
Warren wants to control from the top but Furgeson keeps moving.
Furgeson is trying to stand up but he's not managed so far.
Boooooooooooooooooooo!!! God, this has been a terrible round. Come on you two, sort yourselves out!
Warren throwing elbows and punches but not connecting, as Furgeson works some decent striking defense from the bottom.
Furgeson is trying to stand up but he's not managed so far.
Warren controlling from the top position.
The referee has motioned to the fighters to stand back up. He just wasn't happy with the level of activity.
And thats the end of the round the fighters go back to their corners.
That was a close round but I would say that John Warren will probably get the nod.
The referee calls time. The cornermen exit stage left and we're back to business.
Warren darts in and clinches Furgeson up against the cage.
Warren blocks a couple of punches on the inside.
Furgeson keeps control of Warren as he tries to wriggle out of the double underhooks.
Furgeson goes for a body shot but it's blocked.
Furgeson makes some space for himself and lands an uppercut.
Furgeson tries to throw a body punch but Warren avoids it by throwing Furgeson back against the cage.
An uppercut on the inside fails to land for Furgeson.
Warren working hard to break the clinch.
Furgeson misses with a hook from the clinch.
We've had a slow start to the round here - hopefully the action picks up.
A head punch blocked on the inside by Warren.
Warren tries to pull guard but Furgeson holds him up against the cage and eventually Warren drops back down to his feet.
Furgeson tried to land a shot to the body but connects with Warren's elbow.
Furgeson should think about turning a few of those tyres round his middle into muscle if he wants people to take him seriously as an athlete.
Furgeson blocks an elbow strike from Warren.
Furgeson stops a takedown attempt from Warren.
That's one minute gone in the round.
Furgeson can't find room to land a body shot as Warren controls the action.
Warren trying to stall but Furgeson improves his position.
Warren blocks a punch to the side of the head.
Furgeson misses with a punch on the inside.
Warren blocking some punches.
Warren blocks a body shot from Furgeson.
Furgeson fails to land with a short punch on the inside.
Furgeson misses with the head strike.
Furgeson tries to throw a body punch but Warren avoids it by throwing Furgeson back against the cage.
Warren has Furgeson pressed up against the cage and is working for takedown. Furgeson manages to improve position though and keeps the fight standing.
That's three failed takedown attempts in the round for John Warren. That's going to take a lot out of him.
Furgeson throws a hook to the body. More of an arm punch but it's all scoring with the judges.
Warren tries to break the clinch but Furgeson is controlling the position.
Warren has a body lock and is looking for a takedown. Furgeson is bouncing around trying to prevent the takedown and somehow he has indeed managed to stay on his feet.
Furgeson tried to land a shot to the body but connects with Warren's elbow.
Mark Furgeson seems to be working more effectively in the clinch in the fight so far.
Warren misses with a knee to the head.
Furgeson misses with a body punch.
Warren blocks a punch to the side of the head.
A right hook to the body lands for Furgeson.
That's two minutes gone in the round.
Warren is trying to work for a single leg takedown but Furgeson pulls him back up using the underhooks.
Furgeson lands a hook that snaps the head of Warren backwards.
Furgeson lands a nice uppercut.
Furgeson swings away with an uppercut that misses.
Furgeson has a couple of punches blocked by Warren.
Furgeson stops a takedown attempt from Warren.
Furgeson misses with a punch on the inside.
Warren is trying to drag Furgeson to the mat but Furgeson just about manages to keep his footing. He used the cage to his advantage there.
Furgeson misses with a shot to the kidneys.
Furgeson lands with a short punch from the clinch.
Furgeson tries to work over Warren's body with a swooping hook but it only glances the target.
Warren is trying to work for a single leg takedown but Furgeson pulls him back up using the underhooks.
Furgeson swings away with an uppercut that misses.
A quick uppercut on the inside from Furgeson.
Fantastic stuff here - a very entertaining period of action, which has drawn cheers from the crowd.
Warren drops down looking for an ankle pick but Furgeson pulls his leg out and moves away.
That's three minutes gone in the round.
Warren misses with a takedown attempt
and Furgeson counters into the clinch. Nicely done.
Warren blocks a punch to the side of the head.
Warren blocking some punches.
Furgeson scores with a hook to the body.
Warren manages to get underhooks and slows down the pace for a moment.
Furgeson tried to land a shot to the body but connects with Warren's elbow.
Warren jumps guard but his hands slip and he falls flat on his back. Well, he's made himself look a right mug there, as Furgeson walks away with a smile on his face. Warren gets slowly back to his feet and shakes his head.
Warren pulls out of a head kick attempt.
Warren fails with the takedown.
Furgeson scores with the left hand. Warren knows he should have avoided that one.
That's four minutes gone in the round.
Warren fails to land the takedown.
Warren shoots in for a takedown. "I don't think so" says Furgeson as he avoids it easily.
Warren walks into a jab.
Warren takes a big uppercut there. He seems a bit wobbly but no, he's OK.
Warren ducks right into an uppercut from Furgeson.
A head kick by Warren misses
and Furgeson counters with a stiff right hand.
Warren rushes Furgeson and presses him up against the cage.
Wooooo! Give it up for these two warriors! They are putting on a show!
A body shot lands from Furgeson.
Furgeson lands a body shot.
Furgeson misses with a shot to the kidneys.
Furgeson tries a shoulder strike but it doesn't do any damage.
Warren gets control of Furgeson's arms and successfully pulls guard. Warren will no doubt be looking for submissions off his back.
And thats the end of the round the fighters go back to their corners.
Mark Furgeson showed his class in that round. I'd imagine he'll take it on all the scorecards.
That's the end of the interval. I'm sure that seemed a lot quicker than a minute for our two fighters! Back to the action. This is the final round!
Furgeson cracks a nice hook into Warren's ribs.
Nice sprawl there from Furgeson as Warren shoots in.
John Warren is looking to throw some combinations by the looks of things.
Furgeson stuffs the takedown.
A little jabbing left from Furgeson on the counter but it doesn't find it's target.
Warren fails with the takedown
and Furgeson counters with a shot to the ribs. That looked like it hurt.
That's three failed takedown attempts in the round for John Warren. That's going to take a lot out of him.
Warren misses with a combination
and Furgeson counters into the clinch. Nicely done.
Warren jumps guard but Furgeson stands there with Warren around his waist. Warren gives up and drops back to his feet. We remain in the clinch.
We've had a slow start to the round here - hopefully the action picks up.
A head punch blocked on the inside by Warren.
A right hook to the body lands for Furgeson.
Warren's head jolts backwards as he takes an uppercut right on the button!
Warren is working for takedown but Furgeson is calmly controlling the position for now.
Warren blocks a punch to the side of the head.
That's one minute gone in the round.
Furgeson tries a body shot but Warren blocks it.
Furgeson misses with a punch to the body.
A quick uppercut on the inside from Furgeson.
Furgeson lands a body punch in the clinch.
Furgeson lands a shoulder strike.
Furgeson prevents the takedown attempt.
Warren jumps guard but his hands slip and he falls flat on his back. Well, he's made himself look a right mug there, as Furgeson walks away with a smile on his face. Warren gets slowly back to his feet and shakes his head.
Mark Furgeson is looking to keep the fight on the feet at all costs.
Warren looks for a takedown but Furgeson sprawls well.
Warren doesn't succeed with the takedown
and Furgeson counters with a nice body shot.
A leg kick checked by Furgeson.
Warren misses with a leg kick
and Furgeson counters with a nice uppercut.
Furgeson fakes low and throws an overhand right that catches Warren on the side of the head.
That's two minutes gone in the round.
Warren has his takedown stuffed
and Furgeson counters with a quick right hand to the jaw.
Warren shakes his hands off, looking to compose himself, but takes a jab to the jaw whilst he does it.
Furgeson leaves Warren with his face pressed against the mat as he sprawls beautifully, defending against a solid takedown attempt.
Furgeson throws out a counter right but Warren avoids it with no problem.
Warren walks straight into a jab right on the nose. That one stung - he's blinking and trying to clear his head.
Furgeson has been the more effective fighter overall so far.
This is a great period of action - very entertaining stuff!
Warren clinches.
Furgeson fails to land with a short punch on the inside.
Furgeson tries a body shot but Warren blocks it.
Warren is looking to control Furgeson's arms but Furgeson gets an underhook and turns him. Now Warren has his back to the cage.
Furgeson lands a body punch - he's looking to wear down Warren.
That's three minutes gone in the round.
Warren gets control of Furgeson's arms and successfully pulls guard. Warren will no doubt be looking for submissions off his back.
Furgeson is looking to stand up but Warren won't let him.
Warren looking to hit a scissor sweep but Furgeson is one step ahead there.
Furgeson has decided he wants to stand but the closed guard of Warren is proving hard to escape from.
That's four minutes gone in the round.
The crowd are showing their displeasure at the lack of action as loud boos ring out around the arena.
The referee has stepped in and called for a break in the action. We'll restart on the feet.
Warren tries for a takedown but Furgeson circles away easily
and Furgeson counters with a good right hand that lands right on the jaw.
A combination from Warren does no damage.
The fight moves into the clinch position.
Furgeson goes for a body shot but it's blocked.
Warren tries to score a body lock takedown but Furgeson shows good agility there to stay on his feet.
Furgeson can't find room to land a body shot as Warren controls the action.
The crowd thankful this round is nearly over.
Furgeson prevents Warren from breaking the clinch.
Warren can't break the clinch.
Furgeson misses with a body punch.
John Warren has stepped it up - he knows he needs a finish here!
Mark Furgeson is fighting for a decision here - he's started to take the cautious approach.
Furgeson misses with a punch to the body.
And that's the end of the fight!
Mark Furgeson comfortably won the final round on my scorecard.
I think Furgeson has won this one but let's see whether the judges agree with me. Over to the ring announcer for the scorecards.
Ladies and gentlemen, after 3 rounds of action, we go to the scorecards for a decision.
Judge Micheangelo Fripello scores the fight for Mark Furgeson!
Judge Chris Saunders scores the fight for Mark Furgeson!
Judge Jeff Smith scores the fight for Mark Furgeson!
Mark Furgeson wins by unanimous decision!
|
|
|
|
|
|
|
|
|
|
|
|
|
|
|
|
|
|
|
|
|
|
|
| S |
C
A |
G |
S |
C
B |
G |
|
S |
C |
G |
|
energy
A | B |
|
hype
A | B |
|
pop
A | B |
|
mgr
A | B |
|
FIGHT
RATING
37% |
|
|
|
|
|
|
|
|
|
|
