 |
GLFC 10: No way out PBP Commentary |
Undercard bout
|
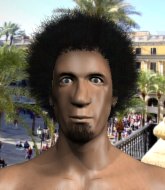
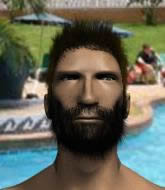
Coming up we have a heavyweight MMA rules bout between Nick Sabo (ranked 25316 p4p, 577 weight class) and Marshall Teach (ranked 5656 p4p, 461 weight class). The key to victory for Nick Sabo has got to be keeping the fight on the feet.
 |
|
 |
| 201 cm
24
205 lbs
0 - 3 - 0 |
|
178 cm
25
200 lbs
1 - 1 - 0 |
BJJ White Belt
Solid boxing
KO power |
|
BJJ Blue Belt
Counter fighter
Enjoys gardening |
|
| |
|
Ladies and gentlemen. This fight is 3 rounds, in the heavyweight division.
Introducing the fighter to my left, fighting out of the red corner.
With a record of
0 - 3 - 0, fighting out of Sydney, Nick Sabo!
And introducing the fighter to my right, fighting out of the blue corner.
With a record of
1 - 1 - 0, fighting out of Rio de Janeiro, Marshall Teach!
The judges for this bout are Jorge Garcia, Jonathan Paton and David Schapiro.

The bell rings for round one and we are underway!
Sabo scores with a nice strike.
Sabo throws a sloppy head kick and Teach moves out of range easily.
Teach tries to counter with a clinch but Sabo shakes him off and moves away.
Sabo throws a head kick that misses and slips in the process. He scrambles back to his feet and the fighters circle.
Sabo throws a head kick that misses.
Sabo sets himself, and Teach steps forward looking for the clinch! Sabo avoids it this time.
A really sloppy takedown attempt there from Teach.

Teach instigates a clinch.

Teach has Sabo pressed up against the cage. He's trying to work for a single leg takedown. Teach pulls back from the cage and twists to the side, sending Sabo tumbling to the mat - Teach dives into Sabo's guard.
We've had a slow start to the round here - hopefully the action picks up.
Teach is stalling in the full guard.
Teach lands a nice shot whilst sitting in his opponent's guard.

That's one minute gone in the round.
Teach's corner is telling him to maintain position.
Sabo is looking to stand up but Teach isn't so interested in that idea.
Teach is intent on slowing down the pace of the fight, simply looking to control.
Sabo wants to get back to his feet but he's too absorbed in his own little project and Teach manages to pass to side control.
Teach is nestled in close to Sabo, controlling him well. He's worked in a nice elbow to the side of the head as well, for good measure.
Teach prevents Sabo from standing back up.

That's two minutes gone in the round.
A lull in the action here being met with boos from the crowd.
Neither fighter is being very active at the moment, with Teach in particular looking to stall.
Sabo is looking to escape.
Teach looks over to his corner - he wants some instructions but his corner are not responding.
Teach scores with a couple of good hammerfists.
Sabo is trying to defend against the ground and pound but Teach scores with a couple of nice shots.
Teach wants to pass to mount but Sabo is defending the position.

Sabo has one foot on Teach's thigh - he pushes off and manages to get back to his feet.

That's three minutes gone in the round.
Teach shoots in with a takedown attempt and he has Sabo pinned against the cage. Sabo gets the underhooks and manages to circle away.
Teach tries to bum rush Sabo with a series of wild strikes but Sabo uses good footwork to avoid the assault.
Teach tries to clinch but is not successful on this occasion.
Teach takes a hook to the side of the head. I wonder if that's got his ears ringing.
Teach avoids the head kick by Sabo.
Sabo scores with a jab to the body.
Nick Sabo seems to be the more aggressive standup fighter in this bout.
A head kick from Sabo lands but Teach takes it in his stride.
Teach throws an uppercut from half a mile away. Sabo sees it coming and avoids it easily.

That's four minutes gone in the round.
Sabo circles away from the clinch attempt
and Teach takes a counter punch right on the button for his troubles.
Teach fails miserably with a takedown attempt.
Nick Sabo has stuffed three takedown attempts in the round now. That's going to take a lot out of Marshall Teach.
Sabo scores with a punch to the head.
The crowd thankful this round is nearly over.
Sabo tries a head kick but it misses.
Teach closes the distance and gets a trip takedown into side control. Sabo quickly recovers to half guard.
Sabo is looking to get back to is feet but Teach passes into side control.
And thats the end of the round the fighters go back to their corners.
That was a close round but I would say that Nick Sabo will probably get the nod.
The fighters' corners scream their final instructions, as the referee calls time. Here we go, back to the action!

Sabo dodges the punch combination from Teach.
It looked like Sabo wanted to counter with a hook but didn't fully commit.
Sabo darts in and out, connecting with a jab.
Sabo lands a head kick. Teach smiles back at him and beckons him forward.
Nick Sabo is winning the standup battle so far.
Sabo lands a head kick!
Sabo is really dominating this fight. Is there anything that Teach can do to turn this around?
Sabo tries a head kick but it misses.
Teach tries to counter by closing the distance.
We've had a slow start to the round here - hopefully the action picks up.
Sabo throws a head kick but Teach moves out of range.
Sabo throws a lazy head kick
and Teach counters with a single leg into guard. Sabo didn't expect that.
We've seen a great period of action over the last minute or so - credit to both fighters for going all out!
Teach slows down the pace of the fight, as he sits in guard.
The ref warns both fighters not to hold the cage as they work up against the meshing.
That's one minute gone in the round.
Teach's corner are shouting for him to control the position and he seems happy to oblige.
Teach has the superior BJJ but he's also working some ground strikes into his gameplan.
Teach stops Sabo from standing up.
Teach stands up and looks to throw the legs aside to pass to side control. Sabo swivels though and keeps the full guard.
Teach stops Sabo from standing up.

The referee has motioned to the fighters to stand back up. He just wasn't happy with the level of activity.
Sabo avoids a lazy jab quite easily.
As Teach looks to move away, Sabo throws a big counter combo but Teach just gets out of the way.
Sabo throws a combination that misses
and Teach decides to take the opportunity to score a takedown. He's landed in Sabo's guard.
Both fighters are absolutely exhausted here.
That's two minutes gone in the round.
Sabo is wriggling around but Teach manages to pass to half guard.
Teach works his way into full mount!
Sabo is trying to stand up.
Teach lands a shot to the body, followed up by a shot to the exposed head of his trapped opponent.
The fighters are pressed up against the cage, both looking to find a bit of space to work.
Teach cracks Sabo with a nasty head shot there - the crowd let out an audible gasp there, as the noise reverberated around the arena.
Teach is landing with some decent strikes but Sabo is trying to advance his position so the referee is letting the fight continue.
The fans in attendance giving it up for the two fighters, who have really let it all hang out in the last minute or so!
Teach lands a couple of nice shots there from mount.

Sabo is rocked!

Teach is working close to his opponent, looking to work a submission by the looks of things. Oh, he's managed to get a guillotine from mount as his opponent reached up! That looks tiiiiight! Will he tap? YES, he's tapped! Impressive submission by Teach!
Ladies and gentlemen, after 3:56 of round 2, we have a winner by way of Submission (Guillotine). Marshall Teach!
A very excited looking Marshall Teach made sure he remembered to thank all the fans both in the arena and on the internet. He said all the coolest people spend all day on MMA websites, which got a big reaction.
|
|
|
|
|
|
|
|
|
|
|
|
|
|
|
|
|
|
|
|
|
|
|
| S |
C
A |
G |
S |
C
B |
G |
|
S |
C |
G |
|
energy
A | B |
|
hype
A | B |
|
pop
A | B |
|
mgr
A | B |
|
FIGHT
RATING
46% |
|
|
|
|
|
|
|
Undercard bout
|
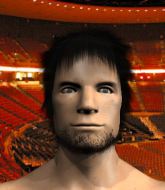
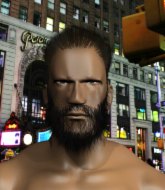
Coming up we have a bantamweight MMA rules bout between Santiago Gracie (ranked 2873 p4p, 151 weight class) and Daniel Subicic (ranked 7237 p4p, 248 weight class). The key to victory for Santiago Gracie has got to be keeping the fight on the feet.
 |
|
 |
| 168 cm
25
146 lbs
4 - 1 - 0 |
|
170 cm
22
145 lbs
4 - 1 - 0 |
BJJ Purple Belt
Basic striking
KO power |
|
Good takedowns
Basic striking
Solid chin |
|
| |
|
Ladies and gentlemen. This fight is 5 rounds, for the bantamweight championship of the world!
Introducing the champion to my left, fighting out of the red corner.
With a record of
4 - 1 - 0, fighting out of New York, Santiago Gracie!
And introducing the challenger to my right, fighting out of the blue corner.
With a record of
4 - 1 - 0, fighting out of Tokyo, Daniel Subicic!
The judges for this bout are Jorge Garcia, Bruno Lombardi and Jonathan Paton.
The bell rings for round one and we are underway!
A really sloppy takedown attempt there from Gracie.
Gracie shoots in but no luck this time.
Gracie throws a leg kick
and Subicic counters with a takedown into side control.
Gracie regains half guard.
Subicic looks over to his corner - he wants some instructions but his corner are not responding.
Subicic really doesn't want to stay on the ground with Gracie. If he can't get it back to his feet, it's only a matter of time before he'll be tapping out.

Gracie looking for submissions off his back.
Gracie wants to get back to full guard.
Gracie is looking to sinch up a guillotine here but Subicic pulls his head out easily.
Subicic is looking for an arm triangle, whilst trying to pass to side control. Gracie doesn't seem that keen to cooperate though. No luck this time Subicic.
We've had a slow start to the round here - hopefully the action picks up.
Gracie actively working from the bottom here.
Gracie is defending against the submission attempts here by Subicic.
That's one minute gone in the round.
Gracie is trying to defend against the ground and pound but Subicic scores with a couple of nice shots.
Gracie regains full guard. Nicely done.
Subicic chips away with some ground and pound.
The ref warns both fighters not to hold the cage as they work up against the meshing.

Subicic gets to his feet. Gracie looking to butt scoot but the ref puts an end to that. On your feet son!
Gracie gets caught on his heels momentarily as he allows Subicic to score an easy takedown into full guard.
The fighters are pressed up against the cage, both looking to find a bit of space to work.
Subicic is sitting in guard, working some ground and pound.
Subicic got a little sloppy there for a moment and Gracie has worked his way into a loose triangle - can he finish it?! No, Subicic has managed to get both his arms back between Gracie's legs - danger averted.
Gracie is working actively off his back, looking to secure an arm or perhaps work for a triangle.
Subicic trying to control but Gracie is working from the bottom.
That's two minutes gone in the round.
Subicic is working Gracie over from the guard. He should look to pass the guard and do a little more damage with these strikes.
Gracie is active off his back here, looking for submissions.
Subicic makes a bit of distance and scores with some ground and pound, still in guard.
Subicic tries to free his leg and advance position but Gracie is retaining full guard.
Subicic drops back for a leg! It's a sloppy attempt though and Subicic jumps back into guard quickly, to retain the dominant position.
Fantastic stuff here - a very entertaining period of action, which has drawn cheers from the crowd.
Subicic is trying to tuck his arms in to keep them safe but Gracie has managed to isolate one of them and has got a loose triangle. Subicic is looking to defend but Gracie has done well to lock his legs together - this could be big trouble for Subicic! Gracie pulls down on the head and a little smile comes across his face - he knows he's got it. Yep, Subicic taps out and this one is all over!
Ladies and gentlemen, after 2:45 of round 1, we have a winner by way of Submission (Triangle). Santiago Gracie!
Santiago Gracie retains his bantamweight title!
A very excited looking Santiago Gracie made sure he remembered to thank all the fans both in the arena and on the internet. He said all the coolest people spend all day on MMA websites, which got a big reaction.
|
|
|
|
|
|
|
|
|
|
|
|
|
|
|
|
|
|
|
|
|
|
|
| S |
C
A |
G |
S |
C
B |
G |
|
S |
C |
G |
|
energy
A | B |
|
hype
A | B |
|
pop
A | B |
|
mgr
A | B |
|
FIGHT
RATING
41% |
|
|
|
|
|
|
|
Undercard bout
|
Coming up we have a heavyweight MMA rules bout between Randall Benson (ranked 3906 p4p, 355 weight class) and Reilly OReilly (ranked 6148 p4p, 471 weight class). The fight MMA fans around the world have waited their entire lives for!
 |
|
 |
| 206 cm
25
285 lbs
4 - 1 - 0 |
|
188 cm
20
265 lbs
3 - 2 - 0 |
Decent wrestler
Brawler
Good chin |
|
BJJ Blue Belt
Brawler
Tends to cut |
|
| |
|
Ladies and gentlemen. This fight is 5 rounds, in the heavyweight division.
Introducing the fighter to my left, fighting out of the red corner.
With a record of
4 - 1 - 0, fighting out of Montreal, Randall Benson!
And introducing the fighter to my right, fighting out of the blue corner.
With a record of
3 - 2 - 0, fighting out of Montreal, Reilly OReilly!
The judges for this bout are Steve Montenegro, John Kavanagh and David Schapiro.
The bell rings for round one and we are underway!
OReilly tries to drive through with a takedown attempt but Benson defends well and OReilly ends up having to push Benson into the cage where they will battle it out in the clinch.
A thudding body kick lands there by OReilly!
OReilly shoots in and bounces Benson off the cage to secure the takedown into guard.
Benson manages to escape and get back to his feet.

Benson closes the distance and presses his opponent up against the cage.
Benson gets underhooks to prevent OReilly's takedown attempt.
OReilly has hold of a leg and is looking for a trip takedown. Benson avoids it nicely though and we remain in the clinch.
Randall Benson has stuffed three takedown attempts in the round now. That's going to take a lot out of Reilly OReilly.

Benson gets a trip takedown into half guard.
Wooooo! Give it up for these two warriors! They are putting on a show!
Benson throwing punches and elbows but they're not doing any damage.
Benson not landing any meaningful shots this time.
Benson knows he needs to get back to his feet asap. He's simply no match for OReilly on the ground.
Benson looks towards his corner to check for any instructions. The corner give him nothing to work with, so he cracks OReilly with a short hammerfist. I guess that's as good as any advice he could get in this position.

It looks like Reilly OReilly has been cut.
OReilly should think about turning a few of those tyres round his middle into muscle if he wants people to take him seriously as an athlete.
Benson missing with some ground and pound from the half guard.
OReilly keeping his head moving to avoid the ground and pound.
That's one minute gone in the round.
Benson missing with some ground and pound from the half guard.
OReilly is looking to improve his position.
Benson scores with a couple of good hammerfists.
OReilly avoiding damage under a succession of punches from Benson.
Benson is nestled in close to OReilly, controlling him well. He's worked in a nice elbow to the side of the head as well, for good measure.
Reilly OReilly's cut is absolute horrible now. This looks like something out of a horror film with blood covering both fighters.
The referee calls the doctor in to look at Reilly OReilly's cut. Oh no, the doctor has called an end to the bout!
Ladies and gentlemen, after 1:43 of round 1, we have a winner by way of TKO (Cut). Randall Benson!
|
|
|
|
|
|
|
|
|
|
|
|
|
|
|
|
|
|
|
|
|
|
|
| S |
C
A |
G |
S |
C
B |
G |
|
S |
C |
G |
|
energy
A | B |
|
hype
A | B |
|
pop
A | B |
|
mgr
A | B |
|
FIGHT
RATING
36% |
|
|
|
|
|
|
|
Co-main event
|
Coming up we have a welterweight MMA rules bout between Butch Coolidge (ranked 3965 p4p, 395 weight class) and Ben Turk (ranked 5062 p4p, 468 weight class). Coolidge comes to the cage accompanied by twenty one pilots - Stressed Out. Butch Coolidge has the edge in experience - let's see if he can make that count tonight.
 |
|
 |
| 184 cm
25
180 lbs
4 - 2 - 0 |
|
177 cm
24
154 lbs
3 - 0 - 0 |
BJJ Blue Belt
Brawler
Good chin |
|
Good takedowns
Counter fighter
Can Moonwalk |
|
| |
|
Ladies and gentlemen. This fight is 3 rounds, in the welterweight division.
Introducing the fighter to my left, fighting out of the red corner.
With a record of
4 - 2 - 0, fighting out of New York, Butch Coolidge!
And introducing the fighter to my right, fighting out of the blue corner.
With a record of
3 - 0 - 0, fighting out of New York, Ben Turk!
The judges for this bout are Anthony Taglia, Franklyn Lucas and Jorge Garcia.
The bell rings for round one and we are underway!
Coolidge sizes up Turk with a pawing jab and scores with a straight right down the middle.
Coolidge throws out a powerful jab.
Turk uses good head movement to avoid the hook from Coolidge.
Coolidge scores with a jab to the jaw of his opponent.
Turk steps to the side to avoid the strikes from Coolidge.
Turk fails with the takedown.
Coolidge lands a leg kick. The shin dug right into the meat of the thigh.
Coolidge missing with a left hand there. Turk was out of range so wasted energy throwing that one.
Turk slips a straight right by Coolidge.
Turk tries a quick counter leg kick but Coolidge is wise to it.
Coolidge throws a one two combo.
The crowd are loving this. Great action here.
A slow jab from Coolidge misses its intended target.
Turk slips under a jab from Coolidge.
The sound of bone on bone echoes around the arena as Turk checks a leg kick.
Turk shoots in looking for a double leg takedown. Coolidge defends it nicely.
Coolidge is looking to counter punch.
That's one minute gone in the round.
Coolidge fakes low and throws an overhand right that catches Turk on the side of the head.
Coolidge misses with an uppercut. Turk saw that one coming.
Coolidge throws a hook but Turk avoids it easily.
Turk shoots in and bounces Coolidge off the cage to secure the takedown into guard.
Coolidge manages to escape and get back to his feet.
A big left from Coolidge misses.
Despite the aggression on Turk's face he doesn't fully commit to the counter.
Nice uppercut there from Coolidge.
Butch Coolidge seems to be the more aggressive standup fighter in this bout.
Coolidge throws a hook but Turk avoids it easily.
Coolidge missing with a left hand there. Turk was out of range so wasted energy throwing that one.
Coolidge backing away here, and Turk unleashes a leg kick that just misses.
That's two minutes gone in the round.
This has been an exciting period of action!
Coolidge throws a lazy right hand but Turk sees it coming a mile off and sidesteps it easily.
Turk with the counter takedown but Coolidge avoids it easily.
Turk fails to land the takedown.
Butch Coolidge has stuffed three takedown attempts in the round now. That's going to take a lot out of Ben Turk.
Coolidge throws a lazy uppercut
and Turk counters with a takedown into side control.
Coolidge tries to work a leg under to get back to half guard but Turk wriggles his own leg back out and remains in side control.
Coolidge wants to get back to his feet but Turk drags him back down.
Coolidge is looking for a sweep.
Turk working the ground and pound from side control.
Turk looking for an arm triangle but it's way too loose to do anything.
Coolidge is trying to get back to half guard.
Turk wants to lay and pray for a moment but Coolidge keeps working.
The fighters are pressed up against the cage, both looking to find a bit of space to work.
That's three minutes gone in the round.
Coolidge is trying to improve his position.
Coolidge is trying to buck Turk off.
Coolidge tries to improve position but can't.
Coolidge is looking to work his way out of this bad position but Turk is controlling him well.
Turk decides to stand back up.
Turk is pinned up against the cage taking some big shots here. The referee is looking closely deciding whether he should stop the fight.
Coolidge thows a leg kick but Turk checks it
and Turk decides to take the opportunity to score a takedown. He's landed in Coolidge's guard.
Coolidge keeping moving, preventing Turk from controlling successfully.
Turk working some ground and pound from guard but it's not doing any damage.
That's four minutes gone in the round.
Coolidge is working an open guard here, looking to improve his position. No doubt that will leave him open to counters but at least he's being more offensive.
Turk is in close to Coolidge's body, working some short punches and elbows.
Turk sitting in guard, not really doing much.
The fighters are starting to perspire pretty heavily.
Coolidge is adopting a defensive guard.
Coolidge keeping moving, preventing Turk from controlling successfully.
Turk preventing the sweep.
Turk with a couple of shots to the head there. Not particularly brutal.
Turk postures up and lands a big shot to Coolidge's brow.
Coolidge keeping moving, preventing Turk from controlling successfully.
And thats the end of the round the fighters go back to their corners.
Butch Coolidge dominated that round.
The fighters get back to their feet, the hooter sounds and we're back to the action!
A telegraphed takedown attempt from Turk is defended easily by Coolidge.
It looked like Coolidge wanted to counter with a hook but didn't fully commit.
A left lands for Coolidge.
Coolidge throws a big shot that misses.
Coolidge misses with a body shot.
Turk shoots in for a takedown - he's clinched up with Coolidge but Coolidge pushes him off and we're back to square one.
A little feinted left hand from Coolidge on the counter but he doesn't commit to it.
We've had a slow start to the round here - hopefully the action picks up.
Nice body punch from Coolidge.
A swing and a miss from Coolidge.
Turk avoids a lazy jab quite easily.
That's one minute gone in the round.
Coolidge keeps the fight standing with a nice sprawl.
Butch Coolidge has stuffed three takedown attempts in the round now. That's going to take a lot out of Ben Turk.
Coolidge throws a hook but Turk blocks it.
Turk throws a loose over hand right and dives in with a double leg takedown. Coolidge tries to sprawl but it's too late and the fighters hit the mat. Turk is in Coolidge's guard.
Coolidge has his feet on Turk's hips. He pushes off and gets to his feet. Nice work.
The fighters circling - Coolidge throws out the jab but it was never going to land.
Turk ducks under a wild hook from Coolidge.
Turk staying out of range there.
Coolidge missing with a left hand there. Turk was out of range so wasted energy throwing that one.
A slow jab from Coolidge misses its intended target.
Coolidge throws a right hand that misses
and Turk counters with a nice double leg into guard.
Wooooo! Give it up for these two warriors! They are putting on a show!
Turk trying to control but Coolidge is working from the bottom.
Turk is in close to Coolidge's body, working some short punches and elbows.
That's two minutes gone in the round.
Coolidge pushes Turk off and scrambles back to his feet.
Coolidge throws a jab but it's blocked by Turk.
Turk uses good footwork to avoid the strikes from Coolidge.
Turk throws out a counter right but Coolidge avoids it with no problem.
Turk staying out of range there.
Coolidge misses with a left hand
and Turk counters with a nice double leg into side control. Coolidge won't be happy with that.
Coolidge wants to get back to his feet but Turk is dominant here and he's now got Coolidge's back!
Coolidge is displaying good submission defense - not really looking in danger of submitting to the rear naked choke at the moment. That could change in an instant of course if Turk gets his way!
Coolidge wants to control his opponent's hands but Turk gets his hands free.
Coolidge wants to get back to his feet.
Turk is remaining active here, looking for the choke. The more discerning members of the crowd will appreciate his efforts.
Turk is breathing heavily.
That's three minutes gone in the round.
Coolidge is trying to stand back up.
Turk is looking to finish the fight by rear naked choke. Coolidge knows exactly what he's got planned though, so he's defending well. Maybe a few strikes would soften Coolidge for a finish.
Coolidge trying to get back to his feet but Turk is in full control for now.
Coolidge needs to remain patient if he's going to get out of this sticky situation.
Coolidge is trying to remain composed but Turk is hammering down strikes to the side of his head.
Coolidge manages to escape to his feet.
That's four minutes gone in the round.
Coolidge scores with a big left there. The judges will like that one.
A big right from Coolidge misses.
Turk shoots in and drives through. Coolidge sprawls well.
Coolidge lands a nice looking body shot.
Turk uses good head movement to avoid the hook from Coolidge.
A countering left hand to the body from Turk misses.
Coolidge jabbing away but nothing is landing.
Coolidge lands with a good body shot.
Wooooo! Give it up for these two warriors! They are putting on a show!
Coolidge misses with an uppercut
and Turk counters with a shoot takedown into half guard.
Coolidge kicks off Turk and gets to his feet.
Coolidge connects with a looping right hand.
A telegraphed right hand from Coolidge misses the target.
Coolidge throws an overhand right that lands on Turk's shoulder, as Turk tries to avoid the shot.
And thats the end of the round the fighters go back to their corners.
Butch Coolidge dominated that second round.
Well, the break between rounds is over. Let's get back to the scrappin! This is the final round!

Good work by Turk as he checks the leg kick.
Turk shoots in looking for a takedown. Coolidge tries to sprawl out of it but Turk keeps driving through. The fighters are pinned against the cage. Coolidge manages to get underhooks and after a bit of a struggle, circles away and we're back to standing.
Turk throws a looping left and ducks down for a takedown. He's got his arms around Coolidge's waist but Coolidge gets an underhook and avoids the takedown by throwing Turk off to one side.
Coolidge tries to score with a low kick but Turk moves his leg out of the way.
And Turk tries to counter it with a takedown but Coolidge pushes his down on his head and steps out.
Coolidge throws a jab but it's blocked by Turk.
Coolidge throws a monster uppercut resembling something out of street fighter but it doesn't land.
Coolidge loads up on a big right hand but Turk slips the punch.
We've had a slow start to the round here - hopefully the action picks up.
Turk ducks under an overhand right and circles away with a smile on his face.
Ben Turk is looking to throw some combinations by the looks of things.
Turk keeping his hands up high there, blocking the jab from Coolidge.
Butch Coolidge is winning the standup battle so far.
Turk ducks under a wild hook from Coolidge.
A swing and a miss from Coolidge.
That's one minute gone in the round.
Coolidge misses with an uppercut.
Turk throws a loose over hand right and dives in with a double leg takedown. Coolidge tries to sprawl but it's too late and the fighters hit the mat. Turk is in Coolidge's guard.
Coolidge has his feet on Turk's hips. He pushes off and gets to his feet. Nice work.
Some wild striking there from Coolidge.
Both fighters are breathing heavily.
Coolidge swings wildly with a right hand that was never going to find it's target.
Coolidge misses with an uppercut. Turk saw that one coming.
Turk tries to clinch up but Coolidge circles away and keeps his distance.
Coolidge swings wildly with a right hand that was never going to find it's target.
A low kick from Coolidge is predictable there
and Turk counters with a nice uppercut.
A telegraphed right hand from Coolidge misses the target.
This is a great period of action - very entertaining stuff!
Coolidge listening to his corner there, landing a nice uppercut.
That's two minutes gone in the round.
Coolidge looks to throw the jab but Turk is out of range.
Turk drops down looking to force a counter takedown but Coolidge defends it well.
Left hook, right uppercut from Coolidge.
Butch Coolidge is looking to keep the fight on the feet at all costs.
Turk shoots for a takedown but Coolidge saw that one coming a mile off and avoided it easily.
Butch Coolidge has stuffed three takedown attempts in the round now. That's going to take a lot out of Ben Turk.
Coolidge displays good takedown defense there as he swats away a double leg from Turk.
Coolidge is really dominating this fight. Is there anything that Turk can do to turn this around?
Turk slips under a jab from Coolidge.
Turk drops down looking to force a counter takedown but Coolidge defends it well.
Coolidge swings away but doesn't land with a series of punches.
Turk fails with the takedown.
Coolidge lands with a nice body punch.
Turk checks a leg kick.
Turk is definitely looking for the counter takedowns here.
That's three minutes gone in the round.
Turk drives through with a takedown into Coolidge's guard. Let's see what he can do from the top position.
Coolidge has scooted to the edge of the canvas and used the cage to get back to his feet. Turk has stuck on his opponent and is forcing him back against the cage.
Turk tries to jump guard but he falls flat on his backside. Coolidge smiles and moves away.
Coolidge throws an overhand right that lands on Turk's shoulder, as Turk tries to avoid the shot.
Coolidge misses with a hook.
Coolidge pushing out the jab but it's not landing.
Turk throws a counter combo.
Butch Coolidge is fighting for a decision here - he's started to take the cautious approach.
Coolidge misses with a hook.
Turk takes a shot to the eye socket. That's gotta hurt.
Turk slips under a jab from Coolidge.
Turk takes one on the button.
The fans in attendance giving it up for the two fighters, who have really let it all hang out in the last minute or so!
Coolidge cracks Turk with a right hand to the side of the head.
Turk closes the distance, clinches up and gets a nice trip takedown into side control. Very smooth.
That's four minutes gone in the round.
Turk tries for a kimura but Coolidge is defending well.
Turk is looking to finish here, going for an Americana. Coolidge knows the correct defense though, so he's OK.
The ref warns both fighters not to hold the cage as they work up against the meshing.
Coolidge is working hard to escape and get back to his feet. After a battle for position, Turk asserts his dominance and retains side control.
Turk wants to work for a kimura but he's foiled early by Coolidge, who protects the arm well.
Coolidge is trying to stand back up. He's worked his way up against the cage but Turk has just dragged him back down to the mat.
And that's the end of the fight!
Butch Coolidge showed his dominance in that final round.
Well I reckon that's a shut out for Coolidge, winning every round. Will the judges agree? They are the ones who matter, even if they are often depressingly incompetent. Over to the ring announcer for the scorecards.
Ladies and gentlemen, after 3 rounds of action, we go to the scorecards for a decision.
Judge Anthony Taglia scores the fight 30:27
Judge Franklyn Lucas scores the fight 30:27
Judge Jorge Garcia scores the fight 30:27
In favor of your winner, by unanimous decision... Butch Coolidge!
Our winner, Butch Coolidge, made sure he spent some time buttering up the crowd during his post fight interview, which will no doubt bring him a few more fans.
|
|
|
|
|
|
|
|
|
|
|
|
|
|
|
|
|
|
|
|
|
|
|
| S |
C
A |
G |
S |
C
B |
G |
|
S |
C |
G |
|
energy
A | B |
|
hype
A | B |
|
pop
A | B |
|
mgr
A | B |
|
FIGHT
RATING
62% |
|
|
|
|
|
|
|
Main event
|
Coming up we have a bantamweight MMA rules bout between Louis Enzo (ranked 6322 p4p, 235 weight class) and Jack Reacher (ranked 25361 p4p, 269 weight class). Both these guys have really solid chins. Will we see a standup war or will they both decide that a knockout is unlikely and try to win the fight elsewhere?
 |
|
 |
| 160 cm
25
145 lbs
0 - 0 - 0 |
|
163 cm
25
140 lbs
0 - 3 - 0 |
Good wrestling
Great elbows
Good chin |
|
BJJ White Belt
Excellent MT
Solid chin |
|
| |
|
Ladies and gentlemen. This fight is 3 rounds, in the bantamweight division.
Introducing the fighter to my left, fighting out of the red corner.
With a record of
0 - 0 - 0, fighting out of New York, Louis Enzo!
And introducing the fighter to my right, fighting out of the blue corner.
With a record of
0 - 3 - 0, fighting out of New York, Jack Reacher!
The judges for this bout are Chad Campbell, Anthony Taglia and Jonathan Paton.
The bell rings for round one and we are underway!
Enzo works over Reacher's head and body with a nice combination.
Enzo shoots for a double leg takedown but Reacher sprawls well. He's pushed Enzo's face into the mat and manages to get back to his feet relatively easily.
Reacher fails with an attempt to clinch.
Reacher throws an uppercut from half a mile away. Enzo sees it coming and avoids it easily.
Enzo closes the distance and clinches.
Reacher gets underhooks to prevent Enzo's takedown attempt.
Reacher scores with a shot to the side of Enzo's head.
Enzo manages to get underhooks and slows down the pace for a moment.
Enzo blocks a couple of punches on the inside.
We've had a slow start to the round here - hopefully the action picks up.

Enzo manages to break the clinch.
Enzo drives through with a takedown into guard.
The ref warns both fighters not to hold the cage as they work up against the meshing.
That's one minute gone in the round.
Enzo preventing the sweep.
Enzo postures up and scores with a shot to the body and a follow up elbow to the head.
Enzo showing good wrestling skills to control the position.
The fighters are pressed up against the cage, both looking to find a bit of space to work.
Reacher has a closed guard, preventing Enzo from standing up.
Enzo sitting in guard, not really doing much.
Enzo drops back, looking for a kneebar! Reacher looks panicked! The fighters roll across the mat, one looking to finish, one looking to escape. Reacher looks to have wriggled free... Yes, he's got his leg free and he's dived into side control! Good work there from Reacher!

That's two minutes gone in the round.
Enzo holding on.
Reacher wants to control but Enzo is keeping him busy.
Enzo tries to work a leg under to get back to half guard but Reacher wriggles his own leg back out and remains in side control.
You can see the frustration on Enzo's face, being in this tough position on the bottom.
That's three minutes gone in the round.
Enzo manages to get back to half guard.
Reacher wants to free his trapped foot but Enzo is holding on for dear life with his legs.
Enzo is looking to regain full guard. Not this time though.
Enzo is looking to control Reacher's leg but it's slowly edging free. Can Enzo avoid being mounted?
Enzo has one foot on Reacher's thigh - he pushes off and manages to get back to his feet.
That's four minutes gone in the round.
Enzo fakes with an overhand right and moves in to clinch with Reacher, pushing him back against the cage.
Enzo breaks the clinch and we return to the middle of the mat.
Enzo rushes Reacher and presses him up against the cage.
Enzo decides to pull guard.
Reacher trying to control the position from guard on top but Enzo is wriggling around, looking for whatever he can.
Enzo is controlling Reacher's posture.
The crowd thankful this round is nearly over.
And thats the end of the round the fighters go back to their corners.
Louis Enzo dominated that round.
The corners get their ten second warning. Both fighters stand from their stools and stare eachother down, ready to get back to the action.
Enzo misses with a few strikes there.
Louis Enzo is looking to throw some combinations by the looks of things.
Reacher swings for the body but Enzo moves out of range.
A telegraphed right hand from Reacher misses the target.
Enzo misses with a head kick.
Reacher tries to counter with a clinch but Enzo shakes him off and moves away.
Enzo with a poor takedown
and Enzo takes a counter punch right on the button for his troubles.
Reacher stuffs a takedown. It's all about dictating where the fight takes place and Reacher wants it to stay on the feet.
Reacher looked like he wanted to counter with a punch but didn't throw it.
Enzo moves away from the strike by Reacher.
Enzo has managed to clinch.
We've had a slow start to the round here - hopefully the action picks up.
Enzo tries to pull guard but Reacher won't allow it.
That's three failed takedown attempts in the round for Louis Enzo. That's going to take a lot out of him.
A short body shot lands from Reacher as the two fighters clinch.
Reacher trying to stall but Enzo improves his position.
That's one minute gone in the round.
Reacher gets double underhooks to prevent a takedown attempt from Enzo.
The fighters are starting to perspire pretty heavily.
Reacher gets double underhooks to prevent a takedown attempt from Enzo.
Enzo missing with knees to the body.
Reacher is pressed up against the cage. Enzo has hold of a leg and is looking to drag Reacher down to the mat. Reacher avoids the attempt though and has circled away. We're back to striking at a distance.
Enzo rushes Reacher and pushes him back against the cage in a clinch.
Enzo tries to pull guard but Reacher forces him back to his feet, against the cage.
Reacher wants to stall.
Reacher looking to stall.
That's two minutes gone in the round.
The crowd are starting to boo a lack of action.
Good anti-grappling being displayed by Enzo as Reacher tries to tie him up.
Enzo tries to take the fight to the ground by pulling guard but can't manage it.
Enzo tries to take the fight to the ground by pulling guard but can't manage it.
Enzo changes levels and goes for a takedown here. Reacher fights it off and pushes away nicely.
Enzo tries for a takedown but Reacher circles away easily
enabling Reacher to counter with a crisp jab.
Enzo shoots for a double leg takedown but Reacher sprawls well. He's pushed Enzo's face into the mat and manages to get back to his feet relatively easily.
Reacher let fly with a counter punch to the body but it didn't land.
Enzo tries to drive through with a takedown attempt but Reacher defends well and Enzo ends up having to push Reacher into the cage where they will battle it out in the clinch.
Reacher lets it all go there with a big combo counter but none of the punches connected.
Both fighters are absolutely exhausted here.
That's three minutes gone in the round.
Reacher works Enzo's body with a nice hook.
Reacher slaps away a takedown attempt from Enzo, before circling back to the center of the mat.
A nice side step and Reacher releases a counter shot to the body, but it doesn't find it's home.
Enzo uses good head movement to avoid the hook from Reacher.
Reacher lands with a shot to the body.
Enzo with a poor takedown
and Reacher counters with a crisp hook to the side of the head.
Enzo circles away from the clinch attempt.
Enzo tries for a takedown but Reacher circles away easily
and Reacher counters with a nice uppercut.
Reacher jabs. That one connects to the head of his opponent.
That's four minutes gone in the round.
A jab from Reacher misses.
Enzo keeping a good distance there, avoiding the body shot.
Enzo misses with the body kick
and Reacher counters with a straight right hand.
Reacher scores with a jab to the body.
Enzo shoots in looking for a takedown but Reacher manages to keep the fight standing, pushing Enzo's face into the canvas for good measure before circling away.
The fans in attendance giving it up for the two fighters, who have really let it all hang out in the last minute or so!
Reacher scores with a jab. Enzo acknowledges it with a nod of the head.
Enzo wants to clinch up but Reacher keeps it at a distance.
Reacher is clearly trying to counter these attacks from Enzo with a body shot.
Reacher throws an uppercut from half a mile away. Enzo sees it coming and avoids it easily.
Enzo throws a big counter combination but Reacher scrambles out of danger and avoids any damage.
Jack Reacher is looking to keep the fight on the feet at all costs.
The crowd thankful this round is nearly over.
Reacher throws a hook to the body but it doesn't connect.
Reacher gets tackled into the cage by Enzo. Enzo maintains the clinch.
Enzo breaks the clinch and we return to the middle of the mat.
And thats the end of the round the fighters go back to their corners.
Jack Reacher showed his class in that round. I'd imagine he'll take it on all the scorecards.
The fighters get back to their feet, the hooter sounds and we're back to the action! This is the final round!
Enzo goes for a double leg but Reacher avoids the attempt and the two fighters end up clinched against the cage as Reacher continues to drive forward.
Reacher now looks to counter with a shot at the body.
Reacher ducks low and lands a nice hook to the body of his opponent.
Enzo throws a body kick that misses.
Enzo slips under a jab from Reacher.
Enzo fails with the takedown
and Reacher counters with a straight right hand.
Enzo has his takedown stuffed
and Reacher counters with a lovely straight right hand!
That's three failed takedown attempts in the round for Louis Enzo. That's going to take a lot out of him.
We've had a slow start to the round here - hopefully the action picks up.
Enzo slips a straight right by Reacher.
Reacher takes a swing at Enzo's ribcage but misses.
Enzo shoots for a double leg takedown but Reacher sprawls well. He's pushed Enzo's face into the mat and manages to get back to his feet relatively easily.
Both fighters are breathing heavily.
That's one minute gone in the round.
Reacher changes levels and scores with a jab to the body.
Enzo looks to clinch
and Reacher counters with a lovely straight right hand!
Enzo fails with a takedown attempt from distance.
Reacher defends well against a solid takedown attempt from Enzo.
Reacher scores with a reasonable looking shot to the body. Enzo doesn't seem bothered though.
Reacher scores with a big left there. The judges will like that one.
Reacher fakes and then throws a beautiful body shot. Enzo looks a bit winded and takes a step backwards to take a breath.
Enzo tries to clinch but Reacher moves away
and Reacher counters with a straight punch to the midsection.
Enzo throws a body kick despite being completely out of range
and Enzo takes a counter punch right on the button for his troubles.
Reacher tries to close the distance and clinch but Enzo swats him to one side with an open hand palm strike and circles away.
That's two minutes gone in the round.
Reacher thows a left - swing and a miss!
Reacher misses with an uppercut.
Reacher swings wildly with a right hand that was never going to find it's target.
The fans in attendance giving it up for the two fighters, who have really let it all hang out in the last minute or so!
Reacher throws an uppercut from half a mile away. Enzo sees it coming and avoids it easily.
Enzo takes a swing at Reacher's ribcage but misses.
Enzo uses decent footwork to sidestep a right hand from Reacher.
Jack Reacher seems to be getting the better of the standup.
Enzo misses with a takedown
and Reacher counters with a stiff right hand.
Reacher avoids the body shot from Enzo.
Enzo throws a hook to the body but it doesn't connect.
Reacher is clearly trying to counter these attacks from Enzo with a body shot.
That's three minutes gone in the round.
Reacher fakes low and throws an overhand right that catches Enzo on the side of the head.
Reacher throws an overhand right that lands on Enzo's shoulder, as Enzo tries to avoid the shot.
Enzo uses decent footwork to sidestep a right hand from Reacher.
Reacher scores with a crisp jab that stopped Enzo in his tracks.
Enzo ducks right into an uppercut from Reacher.
A left lands for Reacher.
Reacher throws a looping overhand right but Enzo ducks down to avoid it.
Enzo is trying hard to land a takedown here. Reacher sprawls well and keeps this one on the feet.
Reacher is clearly trying to counter these attacks from Enzo with a body shot.
Enzo with a poor takedown
enabling Reacher to counter with a crisp jab.
Enzo fails to land the takedown.
That's four minutes gone in the round.
Reacher scores with a jab to the jaw of his opponent.
Reacher throws a lazy right hand but Enzo sees it coming a mile off and sidesteps it easily.
Enzo tries for a takedown but Reacher circles away easily
and Reacher counters with a nice uppercut.
This is a great period of action - very entertaining stuff!
Reacher stuffs the takedown attempt from Enzo. Enzo gets slowly back to his feet.
A looping hook to the body misses from Reacher. Enzo does a little dance to reset his feet.
Reacher is looking to take this fight into the clinch.
And that's the end of the fight!
Jack Reacher comfortably won the final round on my scorecard.
I think Reacher has won this one but let's see whether the judges agree with me. Over to the ring announcer for the scorecards.
Ladies and gentlemen, after 3 rounds of action, we go to the scorecards for a decision.
Judge Chad Campbell scores the fight 27:29
Judge Anthony Taglia scores the fight 27:29
Judge Jonathan Paton scores the fight 27:29
In favor of your winner, by unanimous decision... Jack Reacher!
|
|
|
|
|
|
|
|
|
|
|
|
|
|
|
|
|
|
|
|
|
|
|
| S |
C
A |
G |
S |
C
B |
G |
|
S |
C |
G |
|
energy
A | B |
|
hype
A | B |
|
pop
A | B |
|
mgr
A | B |
|
FIGHT
RATING
38% |
|
|
|
|
|
|
|
|
|
|
