 |
DKCW 1 PBP Commentary |
Undercard bout
|
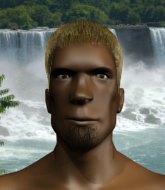
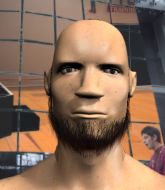
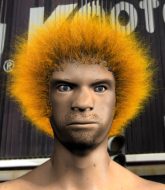
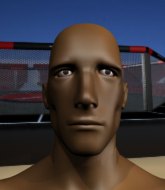
Coming up we have a heavyweight MMA rules bout between Justin Sider (ranked 6001 p4p, 460 weight class) and Arminia Bielefeld (ranked 6641 p4p, 493 weight class). The fight MMA fans around the world have waited their entire lives for!
 |
|
 |
| 205 cm
27
250 lbs
2 - 2 - 0 |
|
200 cm
19
240 lbs
0 - 0 - 0 |
Decent wrestler
Solid boxing
Big right hand |
|
BJJ Purple Belt
Brawler
Inexperienced |
|
| |
|
Ladies and gentlemen. This fight is 3 rounds, in the heavyweight division.
Introducing the fighter to my left, fighting out of the red corner.
With a record of
2 - 2 - 0, fighting out of London, Justin Sider!
And introducing the fighter to my right, fighting out of the blue corner.
With a record of
0 - 0 - 0, fighting out of Sydney, Arminia Bielefeld !
The judges for this bout are Frank Dennis, George Francis and Daniel Franklin.

The bell rings for round one and we are underway!
Bielefeld wants to clinch
and Sider counters with a lovely straight right hand!
Bielefeld looks to clinch
and Sider counters nicely by changing levels and landing a hook to the body.
Bielefeld tries to grapple but his opponent circles
and Sider counters with a right hand to the body.
Bielefeld misses with a takedown attempt
and Sider counters with a nice uppercut.
Bielefeld shoots in but doesn't get the takedown
and Sider counters with a stiff right hand.
Bielefeld is looking to take this fight into the clinch.
Sider appears to be looking for a big counter.
We've had a slow start to the round here - hopefully the action picks up.
Bielefeld tries to clinch
and Sider counters with a crisp hook to the side of the head.
Bielefeld moves to clinch but Sider breaks away
and Sider counters with a right hand to the body.
Bielefeld moves to clinch but Sider breaks away
and Sider makes him pay by landing a nice hook to the body before moving out of range.

That's one minute gone in the round.
Bielefeld doesn't succeed with the takedown
and Sider counters with a shot to the ribs. That looked like it hurt.
Justin Sider has stuffed three takedown attempts in the round now. That's going to take a lot out of Arminia Bielefeld .
Bielefeld wants to clinch
and Sider counters with a stiff right hand.
Bielefeld doesn't manage to clinch there - Sider circles away.
Bielefeld wants to clinch up but Sider keeps it at a distance.
Good exchange - Sider coming out on top.
Bielefeld uses some good footwork to avoid the body shot by Sider.
Bielefeld doesn't succeed with the takedown
letting Sider counter with a right hand.
Bielefeld closes the distance but Sider moves to the side
and Sider counters with a quick right hand to the jaw.
Sider getting the better of the striking in that exchange.

Bielefeld fakes with an overhand right and moves in to clinch with Sider, pushing him back against the cage.
Bielefeld missing with knees to the body.

Sider breaks the clinch.

That's two minutes gone in the round.
Bielefeld shoots and misses
and Sider counters with a left to the body.
The crowd cheering loudly, showing their appreciation for the quality fight we're seeing here.
Bielefeld tries to clinch
and Sider counters with a straight punch to the midsection.
Sider closes the distance and lands a one-two.
Sider circles away from the clinch attempt
and Sider makes him pay by landing a nice hook to the body before moving out of range.
Bielefeld with a poor takedown
and Sider counters with a lovely shot to the body.
Bielefeld looks winded!
Sider scores with a reasonable looking shot to the body. Bielefeld doesn't seem bothered though.
Bielefeld takes a shot right to the liver - Bas would have been proud of that punch.
Sider works Bielefeld 's body with a nice hook.
Bielefeld wants to clinch but Sider slips to the side
and Sider counters with a straight punch to the midsection.
Sider darts in and out, connecting with a jab.
Sider getting the better of the striking in that exchange.
Bielefeld looks to clinch
and Sider connects with a straight left hand counter down the middle.
Nice body punch from Sider.

That's three minutes gone in the round.
Sider circles away from the clinch attempt
and Sider counters with a nice uppercut.
Bielefeld with a poor takedown

and Sider counters with a crisp one two that drops Bielefeld ! Sider thinks about following him to the mat for a moment but instead steps back and waves Bielefeld to his feet! Bielefeld is in big trouble!

Bielefeld is rocked!
Bielefeld wants to clinch
enabling Sider to counter with a crisp jab.
Bielefeld is still on wobbly legs! Can Sider finish him?
Bielefeld with a poor takedown
and Sider counters nicely by changing levels and landing a hook to the body.
Sider lands a jab to Bielefeld 's midsection.
Sider is looking to wear down Bielefeld with body shots, infact he's throwing more body shots than head shots at the moment.
Bielefeld takes a shot right to the liver - Bas would have been proud of that punch.
Sider scores with a jab to the body.
Bielefeld seems to have recovered his senses.
This is a great period of action - very entertaining stuff!
A left and a right from Sider both land. Nice combination.
BOOM! Sider lands a beautiful left hook that drops Bielefeld . Bielefeld tries to recover but Sider is having none of it, landing more punishing shots from mount. One final crushing shot and Bielefeld lies motionless on the canvas. The fight is over!
Ladies and gentlemen, after 3:43 of round 1, we have a winner by way of TKO (Strikes). Justin Sider!
|
|
|
|
|
|
|
|
|
|
|
|
|
|
|
|
|
|
|
|
|
|
|
| S |
C
A |
G |
S |
C
B |
G |
|
S |
C |
G |
|
energy
A | B |
|
hype
A | B |
|
pop
A | B |
|
mgr
A | B |
|
FIGHT
RATING
64% |
|
|
|
|
|
|
|
Undercard bout
|
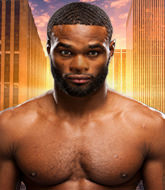
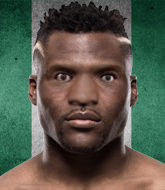
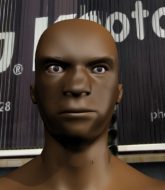
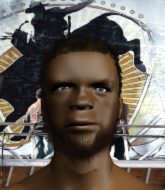
Coming up we have a lightweight MMA rules bout between Forrest Boyer (ranked 24400 p4p, 614 weight class) and Thomas Maeda (ranked 2649 p4p, 282 weight class). Over to our ring announcer for the fighter introductions!
 |
|
 |
| 179 cm
19
163 lbs
0 - 2 - 0 |
|
169 cm
21
164 lbs
8 - 1 - 0 |
BJJ White Belt
Solid boxing
Good chin |
|
BJJ Brown Belt
Basic striking
Knockout power |
|
| |
|
Ladies and gentlemen. This fight is 3 rounds, in the lightweight division.
Introducing the fighter to my left, fighting out of the red corner.
With a record of
0 - 2 - 0, fighting out of Los Angeles, Forrest Boyer!
And introducing the fighter to my right, fighting out of the blue corner.
With a record of
8 - 1 - 0, fighting out of Las Vegas, Thomas Maeda!
The judges for this bout are Stewart Dunkirk, Chris Downing and George Francis.
The bell rings for round one and we are underway!
Boyer works Maeda's body with a nice hook.
Boyer scores with a one two! Maeda had his feet all tangled up there and couldn't avoid the strikes.
Maeda dives in for a single leg takedown but Boyer sprawls and the fighters end up clinched against the cage.
Sloppy strikes from Boyer. Those never looked like landing.
Boyer throws a series of strikes that have Maeda backpedaling.
Boyer moves into range and throws a combination. A nice jab followed by a hook to the body.
Boyer definitely looks more muscular than last time we saw him fight.
Boyer misses with a few strikes there.
Maeda steps in looking to clinch after the strikes miss from Boyer.
We've seen a great period of action over the last minute or so - credit to both fighters for going all out!
Maeda fails to land the takedown.
Nice takedown defense from Boyer. No joy for Maeda on that attempt.
Forrest Boyer has stuffed three takedown attempts in the round now. That's going to take a lot out of Thomas Maeda.
Boyer throws a one two combo.
Maeda darts in trying to clinch
and Boyer counters with a left and a right that stings Maeda.
Boyer swats away the attempt to clinch by Maeda.
Boyer avoids the clinch attempt nicely.
Boyer feinted with a counter takedown.
Maeda fails with the takedown.
Boyer drops down looking for a counter takedown but Maeda sprawls and moves away.
Boyer works over Maeda's head and body with a nice combination.
That's one minute gone in the round.
A punch combination from Boyer misses.
Maeda avoids a punch combination nicely.
A punch combination from Boyer misses.
Boyer stuffs a takedown. It's all about dictating where the fight takes place and Boyer wants it to stay on the feet.
Boyer tries to counter with a takedown but Maeda is quick to defend against it.
Boyer misses with a few strikes there.
Boyer scores with a nice one two combo and darts back out of range to avoid anything coming in the opposite direction.

Maeda drives through with a takedown into guard.
Boyer on his back here. We all know that wrestlers don't like being on their back so let's see if Boyer tries to get out of the position.
Maeda looking to pass the guard.
Boyer is trying to stand up but he's not managed so far.
Maeda working some ground and pound from guard but it's not doing any damage.
Maeda distracts Boyer with his right hand and drops a big elbow with his other arm.

Maeda is trying to work a guillotine from the top, or something like that? Don't know how he thinks he's going to get a finish from there.
The ref warns both fighters not to hold the cage as they work up against the meshing.
We've seen a great period of action over the last minute or so - credit to both fighters for going all out!
Boyer trying to keep a closed guard but Maeda is proving a slippery customer.
Maeda drops back looking for a leg! Boyer is in trouble here! The fighters roll with the hold and Boyer manages to kick Maeda off! Maeda jumps back into Boyer's guard.
That's two minutes gone in the round.
Maeda throwing shots from guard but he's hitting more mat than opponent.
Maeda throwing strikes but missing.
Maeda has the superior BJJ but he's also working some ground strikes into his gameplan.
Boyer is working from a closed guard but he's struggling to control his opponent.
Maeda drops back for a leg! It's a sloppy attempt though and Maeda jumps back into guard quickly, to retain the dominant position.
Maeda connects with a couple of short punches.
Maeda is trying to work a guillotine from the top, or something like that? Don't know how he thinks he's going to get a finish from there.
Boyer is working from a closed guard but he's struggling to control his opponent.
Maeda with a flurry of punches that miss.
Maeda trying to control but Boyer is working from the bottom.
That's three minutes gone in the round.
Maeda missing there with some ground and pound from the guard.
Maeda is trying to work a guillotine from the top, or something like that? Don't know how he thinks he's going to get a finish from there.
Maeda stops Boyer from standing up.
Maeda is trying to work a guillotine from the top, or something like that? Don't know how he thinks he's going to get a finish from there.
Maeda is working the ground and pound from guard. He might want to try advancing position though to get more of an impact.
Maeda postures up and lands a big shot to Boyer's brow.
Maeda is trying to work a guillotine from the top, or something like that? Don't know how he thinks he's going to get a finish from there.
Boyer keeping moving, preventing Maeda from controlling successfully.
Boyer controls Maeda momentarily but Maeda frees himself.
Maeda is working the ground and pound from guard. He might want to try advancing position though to get more of an impact.

That's four minutes gone in the round.
Maeda stops Boyer from standing up.
Maeda throwing elbows and punches but not connecting, as Boyer works some decent striking defense from the bottom.
Maeda preventing the sweep.
Maeda prevents Boyer from getting back to his feet.
The fighters are pressed up against the cage, both looking to find a bit of space to work.
Maeda drops back for a leg! It's a sloppy attempt though and Maeda jumps back into guard quickly, to retain the dominant position.
A big thud reverberates around the arena there as Maeda accidentally thumps the mat. Hopefully he's not broken his hand.
Maeda content to strike from guard, landing some decent shots.
Maeda postures up.
Maeda is trying to work a guillotine from the top, or something like that? Don't know how he thinks he's going to get a finish from there.
Boyer wants to stand but Maeda is controlling the position.
Boyer keeping moving, preventing Maeda from controlling successfully.
Boyer is looking to get back to his feet but can't, whilst Maeda is controlling him.
And thats the end of the round the fighters go back to their corners.
Forrest Boyer dominated that round.
Well, the break between rounds is over. Let's get back to the scrappin!

Maeda shoots in with a takedown attempt and he has Boyer pinned against the cage. Boyer gets the underhooks and manages to circle away.
Maeda tries to clinch up but Boyer circles away and keeps his distance.
Maeda throws a looping left and ducks down for a takedown. He's got his arms around Boyer's waist but Boyer gets an underhook and avoids the takedown by throwing Maeda off to one side.
A nice leg kick lands there from Boyer.
Boyer connects with a body shot that sends Maeda's belly button to the back.
Wow, both these guys are really going for it!
Maeda fails with an attempt to clinch.
Maeda slips a jab and a cross from Boyer.
Boyer looking to take his opponent's legs away with the low kicks.
Boyer swinging wildly here.
Thomas Maeda seems to be the more aggressive standup fighter in this bout.
Maeda shoots in for a double leg but Boyer sprawls well. That's going to sap some energy.
Forrest Boyer has stuffed three takedown attempts in the round now. That's going to take a lot out of Thomas Maeda.
We've had a slow start to the round here - hopefully the action picks up.
Boyer misses with a double jab.
Boyer stalks Maeda and leaps in with a furious combination of punches. Uppercuts and crosses smash into Maeda's face. Maeda staggers backwards, shaken.
Maeda tries to clinch up.
Left hook, right uppercut from Boyer.
This is a great period of action - very entertaining stuff!
Boyer lets the fists fly and connects with a left straight followed by a right hook.
Maeda shoots in for a takedown but Boyer shows good takedown defense.
That's one minute gone in the round.
Boyer gets caught napping as Maeda dives in and scores a takedown. Boyer manages to retain guard.
Boyer seems keen to control rather than go for a submission, at least for now.
Thomas Maeda has got the better of the ground game so far.
Maeda lands a couple of digs.
Maeda throwing elbows and punches but not connecting, as Boyer works some decent striking defense from the bottom.
Maeda is holding a leg here, probably looking for an ankle lock - he drops back and goes for it! Boyer is in trouble! Is it all over??? No! Boyer has escaped and now he's on top!

Boyer wants to get up but he can't break Maeda's closed guard. He needs to be careful trying to break the legs open, as he's open to submissions here.
Maeda working for a triangle but Boyer defends it easily.
Boyer wanted to stand there but Maeda had control of the position.
Maeda throwing his legs up looking for a triangle.
Boyer wants to stand and escape but instead Maeda has hit a sweep and he's now on top in guard.

That's two minutes gone in the round.
This is a great period of action - very entertaining stuff!
Maeda is looking to work some ground and pound but Boyer has wrist control.
Boyer is looking to get back to his feet but can't, whilst Maeda is controlling him.
Boyer keeping moving, preventing Maeda from controlling successfully.
Maeda lands a couple of decent looking shots.
Boyer keeping full guard, as Maeda tries to pass.
Maeda trying to control the position from guard on top but Boyer is wriggling around, looking for whatever he can.
Maeda is trying to work a guillotine from the top, or something like that? Don't know how he thinks he's going to get a finish from there.
Maeda trying to pass the guard but can't manage it just yet.
Both fighters have adopted an aggressive gameplan on the ground!
That's three minutes gone in the round.
Boyer wants to stand up but Maeda is controlling him.
Maeda in full guard, throwing the ground and pound. No damage this time.

Boyer has butterfly guard. He's looking to stand up here. He pushes Maeda off him and springs to his feet nicely. The crowd applauds.
Boyer throws a wild combination but nothing lands.
Maeda shoots in but Boyer avoids the takedown attempt easily.
A really sloppy takedown attempt there from Maeda.
Boyer seemed to be looking to counter by closing the distance.
Maeda is pinned up against the cage taking some big shots here. The referee is looking closely deciding whether he should stop the fight.
Boyer throws a combination but comes up with nothing but fresh air.
Left hook, right uppercut from Boyer.
Boyer is working the combinations to good effect here.
Boyer stuffs the takedown attempt from Maeda. Maeda gets slowly back to his feet.
Boyer half commits to a counter takedown before pushing away, out of range.
Forrest Boyer is looking to throw some combinations by the looks of things.
That's four minutes gone in the round.
Boyer misses with a body kick.
Maeda shoots in for a takedown but doesn't get it.
The crowd are loving this. Great action here.
Maeda has his takedown stuffed
and Maeda takes a counter punch right on the button for his troubles.
Maeda fails to land the takedown.
Boyer throws a series of punches but Maeda avoids them all with ease.
Boyer misses with the combination.
Boyer misses with a two punch combination.
Maeda throws the overhand right but ducks down into a quick takedown attempt. Boyer was covering up waiting for the punch and Maeda finishes the takedown easily into guard.
Maeda wants to control from the top but Boyer keeps moving.
Maeda thinks about going for a leg but decides against it, in order to maintain the position.
Maeda wants to control from the top but Boyer keeps moving.
And thats the end of the round the fighters go back to their corners.
Forrest Boyer dominated that second round.
OK. That's time! The bell goes and we're back to the action. This is the final round!

No luck with that takedown attempt from Maeda.
Maeda dives in and grabs Boyer's left leg, looking for a takedown. Boyer pushes down on Maeda's head and hops out.
A punch combination from Boyer misses.
A telegraphed takedown attempt from Maeda is defended easily by Boyer.
Forrest Boyer has stuffed three takedown attempts in the round now. That's going to take a lot out of Thomas Maeda.
Boyer changes levels and scores with a jab to the body.
No luck with that takedown attempt from Maeda.
We've had a slow start to the round here - hopefully the action picks up.
Maeda shoots in for a takedown but Boyer shows good takedown defense there and keeps this one on the feet.
Maeda fails with a takedown attempt from distance.
Maeda closes this distance looking for a takedown but Boyer circles away.
Maeda avoids a punch combination nicely.
Maeda takes a big intake of breath there - he's definitely tired.
Boyer stuffs the takedown.
That's one minute gone in the round.
Boyer misses with a wild combination.
Boyer displaying good standup as he scores with a three punch combination.
Maeda looks for a takedown here. Will he get it? Boyer is fending him off so far but Maeda persists. Nope, Boyer circles away and we're back to standing.
A solid leg kick lands there for Boyer.
Boyer swinging wildly here.
Maeda fails with a takedown attempt.
Boyer tries to bum rush Maeda with a series of wild strikes but Maeda uses good footwork to avoid the assault.
Boyer's corner calls for a 1, 2 combination and Boyer duly obliges.
Maeda looks for a takedown here. Will he get it? Boyer is fending him off so far but Maeda persists. Nope, Boyer circles away and we're back to standing.
Maeda showing good head movement there, avoiding the strikes from Boyer.
Maeda misses with a takedown attempt - Boyer sprawls well and throws a nice strike on the way out which just misses.
Boyer seemed to be looking to counter by closing the distance.
The crowd cheering loudly, showing their appreciation for the quality fight we're seeing here.
Maeda closes the distance and presses his opponent up against the cage.
That's two minutes gone in the round.
Boyer escapes the clinch and we're back to striking.
Boyer looks to land a combination but Maeda avoids it well.
Boyer scores with a nice looking left hook and follows it up with an uppercut!
Boyer misses with a two punch combination.
Maeda darts in looking for a takedown but Boyer gets double underhooks and turns Maeda into the cage.
Boyer half commits to a counter takedown before pushing away, out of range.
Boyer rushes forward with a series of wild hooks but Maeda moves out of range and avoids them all easily.
Boyer is really dominating this fight. Is there anything that Maeda can do to turn this around?
Maeda avoids a punch combination nicely.
Boyer looks to score with a combo but nothing lands.
A punch combination from Boyer misses.
Boyer scores with a one two! Maeda had his feet all tangled up there and couldn't avoid the strikes.
Boyer misses with a jab, cross combination.
Maeda doesn't manage to clinch there - Boyer circles away.
Maeda looks to score with a jab to the body but Boyer is just out of range.
Maeda fakes high and shoots in for a takedown but Boyer avoids it really well and circles away.
That's three minutes gone in the round.
Maeda shoots in and gets a takedown into Boyer's guard.
Boyer has managed to wall walk up one of the corner posts to get back to his feet. Maeda is pushing him up against the cage, looking to control the position.
Boyer pushes off and circles away, back to the middle of the mat.
No luck for Maeda with that takedown attempt.
Maeda will have to do better than that with his takedown attempts.
Maeda tries to drive through with a takedown attempt but Boyer defends well and Maeda ends up having to push Boyer into the cage where they will battle it out in the clinch.
Forrest Boyer is winning the standup battle so far.
Boyer throws a right and a left that Maeda avoids nicely.
Nice sprawl there from Boyer as Maeda shoots in.
No joy there for Boyer, who threw a few shots but didn't land.
We've seen a great period of action over the last minute or so - credit to both fighters for going all out!
Maeda shoots for a takedown but Boyer saw that one coming a mile off and avoided it easily.
Boyer defends well against a solid takedown attempt from Maeda.
Boyer throws a right hand that Maeda ducks under and follows up with a left that Maeda also avoids with ease.
That's four minutes gone in the round.
Boyer misses with a two punch combination.
Forrest Boyer is looking to keep the fight on the feet at all costs.
Boyer stuffs the takedown.
Thomas Maeda has stepped it up - he knows he needs a finish here!
Maeda shoots in for a takedown but Boyer shows good takedown defense there and keeps this one on the feet.
Boyer throws a right and a left that Maeda avoids nicely.
Boyer swings away but doesn't land with a series of punches.
Boyer misses with a few strikes there.
Boyer leaves Maeda with his face pressed against the mat as he sprawls beautifully, defending against a solid takedown attempt.
Danga de danga de dang - Boyer scores with a four punch combination!
Maeda slips a jab and a cross from Boyer.
Maeda goes for a double leg but Boyer avoids the attempt and the two fighters end up clinched against the cage as Boyer continues to drive forward.
Maeda throws a hook to the body but it doesn't connect.
Maeda looks to score with a jab to the body but Boyer is just out of range.
Maeda throws a hard body shot but it just misses.
Boyer changes levels looking for a counter takedown but doesn't commit.
Forrest Boyer is fighting for a decision here - he's started to take the cautious approach.
Boyer throws a two punch combo that lands nicely.
And that's the end of the fight!
Forrest Boyer showed his dominance in that final round.
Well I reckon that's a shut out for Boyer, winning every round. Will the judges agree? They are the ones who matter, even if they are often depressingly incompetent. Over to the ring announcer for the scorecards.
Ladies and gentlemen, after 3 rounds of action, we go to the scorecards for a decision.
Judge Stewart Dunkirk scores the fight 30:27
Judge Chris Downing scores the fight 30:27
Judge George Francis scores the fight 30:27
In favor of your winner, by unanimous decision... Forrest Boyer!
|
|
|
|
|
|
|
|
|
|
|
|
|
|
|
|
|
|
|
|
|
|
|
| S |
C
A |
G |
S |
C
B |
G |
|
S |
C |
G |
|
energy
A | B |
|
hype
A | B |
|
pop
A | B |
|
mgr
A | B |
|
FIGHT
RATING
67% |
|
|
|
|
|
|
|
Undercard bout
|
Coming up we have a featherweight MMA rules bout between Joe Jennings (ranked 3677 p4p, 302 weight class) and Marcelo Costa De Andrade (ranked 4757 p4p, 351 weight class). Both fighters really staring each other down here, as Marcelo Costa De Andrade enters the cage!
 |
|
 |
| 176 cm
19
145 lbs
3 - 2 - 0 |
|
175 cm
19
150 lbs
2 - 1 - 0 |
BJJ Purple Belt
Counter fighter
Very strong |
|
BJJ White Belt
Excellent MT
Good gas tank |
|
| |
|
Ladies and gentlemen. This fight is 3 rounds, in the featherweight division.
Introducing the fighter to my left, fighting out of the red corner.
With a record of
3 - 2 - 0, fighting out of Hilo, Joe Jennings!
And introducing the fighter to my right, fighting out of the blue corner.
With a record of
2 - 1 - 0, fighting out of Helsinki, Marcelo Costa De Andrade!
The judges for this bout are Stewart Dunkirk, Tiny Johnson and Alan Glass.
The bell rings for round one and we are underway!
De Andrade looks to score with a combo but nothing lands.
Jennings looked to counter that last move with a leg kick but didn't pull the trigger.
A jab from De Andrade does it's job there.
De Andrade throws a series of strikes that have Jennings backpedaling.

It looks like Joe Jennings has been cut.
De Andrade lands with a good body shot.

Jennings has managed to clinch.
De Andrade working some nice short punches in the clinch.

Jennings ties up his opponent against the cage and manages to drag the fight down to the ground. Jennings no doubt will be looking to work submissions from his guard.
Jennings wants to sweep here but De Andrade controlling him for the moment.
Jennings is working hard here to advance position.
Jennings seems to have improved his submission grappling technique since last time we saw him. Let's see if he can pull off a submission.

Jennings had isolated an arm as going for a kimura. De Andrade defends it easily.
That's one minute gone in the round.
De Andrade won't allow Jennings to sweep him here.
Jennings looking to control.
Jennings had isolated an arm as going for a kimura. De Andrade defends it easily.
De Andrade has decided he wants to stand but the closed guard of Jennings is proving hard to escape from.
De Andrade really doesn't want to stay on the ground with Jennings. If he can't get it back to his feet, it's only a matter of time before he'll be tapping out.
Jennings looking for submissions from the bottom here. Moving his hips around, possibly looking for an armbar.
Jennings bucks up whilst keeping hold of a body lock, managing to reverse the position. Now he's in top in De Andrade's guard.
That's two minutes gone in the round.
Jennings drops back for a leg! It's a sloppy attempt though and Jennings jumps back into guard quickly, to retain the dominant position.
Jennings stops De Andrade from standing up.
Jennings forces his way into half guard.
Jennings is trying to control. De Andrade wants to improve his position but can't escape this time.
Neither fighter is being very active at the moment, with Jennings in particular looking to stall.
Jennings wants to pass the guard but De Andrade is defending well.
Jennings trying to control from half guard but De Andrade is working away.
That's three minutes gone in the round.
De Andrade pushes Jennings off looking to stand but Jennings dives back in and keeps control.
Jennings seems content to maintain position for now, rather than mounting any offense.
Jennings frees up his trapped foot and advances to mount.
Jennings wants to control the pace but De Andrade is squirming around nicely.
That's four minutes gone in the round.
The crowd are hurling abuse towards the fighters... You can hardly blame them though because there isn't a lot going on in the fight.
Jennings controlling the position easily from mount.
Jennings wants to control the pace but De Andrade is squirming around nicely.
Jennings looking to secure an arm triangle but De Andrade defends it well.
Jennings jumps to side control looking for an arm triangle but De Andrade manages to avoid the submission attempt.
The crowd thankful this round is nearly over.
Jennings taking a breather here.
And thats the end of the round the fighters go back to their corners.
Joe Jennings dominated that round.
The cut man is working on Joe Jennings's cut.
That's the end of the round. The referee orders the cornermen out of the cage so we can get back down to business.
De Andrade lands a jab followed by a nice looking cross.
Jennings moves into the clinch successfully.
A short right hand to the side of the head by De Andrade.
De Andrade working aggressively here.
De Andrade misses with a body punch.
Jennings taking a breather.
We've had a slow start to the round here - hopefully the action picks up.
Jennings blocks a couple of punches on the inside.
Jennings gets control of De Andrade's arms and successfully pulls guard. Jennings will no doubt be looking for submissions off his back.
Jennings is looking for a guillotine. You can't force these things though and De Andrade defends well.
Jennings controls De Andrade momentarily but De Andrade frees himself.
That's one minute gone in the round.
Jennings manages to sweep nicely, so he's now on top. De Andrade manages to get himself to full guard.
Jennings is trying to work a guillotine from the top, or something like that? Don't know how he thinks he's going to get a finish from there.
Jennings slips nicely into half guard.
Jennings is keen to just control but De Andrade is a slippery customer.
That's two minutes gone in the round.
Jennings is figuring out what he wants to do next.
Jennings passes to side control.
The fighters are pressed up against the cage, both looking to find a bit of space to work.
Jennings thinks about going for a far side armbar but bails out and retains the dominant position instead.
Jennings is looking for a kimura. He might have it! No, De Andrade has escaped the position, nice work there.
Jennings swings around for an armbar but De Andrade sees it coming a mile off and turns beautifully into Jennings's guard.
That's three minutes gone in the round.
Jennings looking for submissions from the bottom here. Moving his hips around, possibly looking for an armbar.
Jennings working from the bottom, still in full guard. He's managed to get a loose triangle. De Andrade doesn't seem to be doing much to defend here, obviously he feels comfortable in the position. De Andrade manages to throw the legs off his shoulder and he's back into guard - no problem.
De Andrade wants to stand up, so he's looking to wriggle free of Jennings's closed guard. He's half up but Jennings has locked on to an arm! Uh oh! Jennings pivots and extends the arm, De Andrade falls face first to the mat and taps??... does he?? YES! He's tapping! Excellent counter grappling there by Jennings! Well done that man!
Ladies and gentlemen, after 3:39 of round 2, we have a winner by way of Submission (Armbar). Joe Jennings!
|
|
|
|
|
|
|
|
|
|
|
|
|
|
|
|
|
|
|
|
|
|
|
| S |
C
A |
G |
S |
C
B |
G |
|
S |
C |
G |
|
energy
A | B |
|
hype
A | B |
|
pop
A | B |
|
mgr
A | B |
|
FIGHT
RATING
38% |
|
|
|
|
|
|
|
Undercard bout
|
Coming up we have a welterweight MMA rules bout between Prince Vaughn (ranked 8294 p4p, 592 weight class) and Tyrell Williams (ranked 8389 p4p, 596 weight class). Both fighters really staring each other down here, as Tyrell Williams enters the cage!
 |
|
 |
| 178 cm
19
185 lbs
2 - 2 - 0 |
|
182 cm
20
176 lbs
0 - 1 - 0 |
BJJ Blue Belt
Excellent MT
Big right hand |
|
BJJ Blue Belt
Lethal high kicks
Good gas tank |
|
| |
|
Ladies and gentlemen. This fight is 3 rounds, in the welterweight division.
Introducing the fighter to my left, fighting out of the red corner.
With a record of
2 - 2 - 0, fighting out of Las Vegas, Prince Vaughn!
And introducing the fighter to my right, fighting out of the blue corner.
With a record of
0 - 1 - 0, fighting out of Las Vegas, Tyrell Williams!
The judges for this bout are Frank Dennis, Gwen Towbar and Alan Glass.
The bell rings for round one and we are underway!
Vaughn loads up on a big right hand but Williams slips the punch.
Williams ducks under an overhand right and circles away with a smile on his face.
Williams let fly with a counter punch to the body but it didn't land.
A swing and a miss from Vaughn.
Vaughn throws an overhand right that lands on Williams's shoulder, as Williams tries to avoid the shot.
Vaughn fakes a head punch and goes low to the body. Nicely done.
Vaughn misses with a hook.
Williams looks like he wants to counter punch here.
Williams ducks down and throws a hook to the body but Vaughn moves away.
Vaughn scores with a hook.
Vaughn misses with a hook. Williams ducked under it nicely.
We've had a slow start to the round here - hopefully the action picks up.
A shot to the liver by Williams. Beautiful body shot.
Williams slips a straight right by Vaughn.
Williams swings away with a counter right hand but no contact made.
Williams jabs Vaughn right on the nose. Vaughn blinks but takes it well.
It looks like Prince Vaughn has been cut.
Williams moves away from the strike by Vaughn.
That's one minute gone in the round.
Williams connects with a leg kick. He turned his hip over nicely there.

Williams cracks Vaughn with a big right hand that sends him to the floor! Vaughn looks wobbly but he's sprung back up to his feet straight away
can Williams finish him?

Vaughn is rocked!
Williams ducks down and throws a big overhand right - it lands flush on the jaw, knocking Vaughn out cold! The fight is over!
Ladies and gentlemen, after 1:16 of round 1, we have a winner by way of KO (Punch). Tyrell Williams!
|
|
|
|
|
|
|
|
|
|
|
|
|
|
|
|
|
|
|
|
|
|
|
| S |
C
A |
G |
S |
C
B |
G |
|
S |
C |
G |
|
energy
A | B |
|
hype
A | B |
|
pop
A | B |
|
mgr
A | B |
|
FIGHT
RATING
76% |
|
|
|
|
|
|
|
Undercard bout
|
Coming up we have a light heavyweight MMA rules bout between Desmond Okafor (ranked 3131 p4p, 416 weight class) and Hiroaki Hidaka (ranked 4446 p4p, 558 weight class). Both these guys have solid standup skills and neither is particularly fantastic on the ground, so let's hope for a nice standup war!
 |
|
 |
| 202 cm
20
215 lbs
2 - 1 - 0 |
|
187 cm
20
209 lbs
3 - 2 - 0 |
BJJ Blue Belt
Excellent MT
Granite chin |
|
BJJ White Belt
Good kicks
Granite chin |
|
| |
|
Ladies and gentlemen. This fight is 3 rounds, in the light heavyweight division.
Introducing the fighter to my left, fighting out of the red corner.
With a record of
2 - 1 - 0, fighting out of Las Vegas, Desmond Okafor!
And introducing the fighter to my right, fighting out of the blue corner.
With a record of
3 - 2 - 0, fighting out of Tokyo, Hiroaki Hidaka!
The judges for this bout are Wesley Smith, George Francis and Daniel Franklin.
The bell rings for round one and we are underway!
Okafor tries to land a leg kick but Hidaka saw it coming and moves away.
Okafor defending well as Hidaka loads up on a big left hand.
Hiroaki Hidaka seems to be the more aggressive standup fighter in this bout.
Hidaka lands with a shot to the body.
Good standup being displayed there by Okafor as he connects with a hook.
Okafor connects with a good right hand that stumbles Hidaka. Hidaka circles away out of range and recomposes himself.
Hidaka throws an overhand right that lands on Okafor's shoulder, as Okafor tries to avoid the shot.
Hidaka throws a lazy head kick
and Okafor counters with a body kick.
Okafor throws a head kick but Hidaka moves out of range.
Hidaka looks to throw a body kick
and Okafor counters with a leg kick.
Okafor avoids a kick to the body.
Okafor throws a big counter combination but Hidaka scrambles out of danger and avoids any damage.
Hidaka throws a hook to the body but it doesn't connect.
Okafor avoids a lazy jab quite easily.
Hidaka throws a body kick that sends a sickening thudding noise reverberating around the arena.
This is a great period of action - very entertaining stuff!
Okafor with a jab.

It looks like Hiroaki Hidaka has been cut.
Hidaka throws a wild body kick that Okafor sees coming a mile off.
Well, he's not going to score with shots like that. A lazy body kick attempt from Hidaka.
That's one minute gone in the round.
Hidaka throws a body kick but he was well out of range there.
Okafor comes forward and lands a shot to the body, then darts back out of range.
Okafor uses decent footwork to sidestep a right hand from Hidaka.
A jab from Okafor finds it's way through Hidaka's defenses.
Okafor steps to his left, right into the path of a big body kick from Hidaka. That one must have hurt.
Okafor looks to have improved his striking defense since last time we saw him fight.
Hidaka misses with the body kick
enabling Okafor to counter with a crisp jab.
Hidaka lands a kick to the ribs of his opponent. Nice work there - in and out in a flash.
Okafor chopping away at his opponent's legs.
Hidaka has a nice red mark on his side after a thudding body kick by Okafor.
A big right from Hidaka misses.
Hidaka explodes with a nice body kick and back out of range. Nice work.
We've seen a great period of action over the last minute or so - credit to both fighters for going all out!
Hidaka lands with a shot to the body.
Okafor walks into a jab.
Okafor blocks a low kick nicely.
That's two minutes gone in the round.
Hidaka misses with a kick to the body
and Okafor counters with a left and a right that stings Hidaka.
A looping hook to the body misses from Hidaka. Okafor does a little dance to reset his feet.
Hidaka throws a right hand that misses
and Okafor counters with a crisp hook to the side of the head.
Okafor lands with a slapping head kick.
Okafor tries to land with a swinging hook to the body but Hidaka was well out of range. Poor timing from Okafor.
Hidaka throws out a counter right but Okafor avoids it with no problem.
Okafor moves out of range of the body kick.
A telegraphed right hand from Hidaka misses the target.
Okafor throws a half hearted mid kick.
Hidaka scores with a push kick.
Hidaka misses with a straight right.
Hidaka loads up on a big right hand but Okafor slips the punch.
Hidaka is really struggling to land any decent head shots against his taller opponent.
Okafor takes a nasty kick to the mid section... That should keep him thinking. Does he try and block and risk a head kick landing?
Hidaka tries to land a front kick but Okafor steps back. That was a bit too telegraphed.
Hidaka tries a switch kick but it misses it's target.
That's three minutes gone in the round.
Hidaka misses with an uppercut. Okafor saw that one coming.
Hidaka swings widly with a right hand
and Okafor counters with a body kick.
Okafor delivers a nice body kick.
Okafor delivers a nice body kick.
Hidaka cracks Okafor with a good jab.
Okafor keeps Hidaka at a distance using the push kick.
Hidaka looks winded!
Okafor dances in quickly and lands a nice inside leg kick on Hidaka. That did some damage!
Hidaka swings widly with a right hand
and Okafor finishes the little exchange by landing a big kick to the body.
Okafor misses with a half-hearted attempt at a head kick.
Okafor scores with a hook.
Okafor keeping at a good range here, avoiding a leg kick.
A nice inside leg kick there by Okafor. That's going to slow Hidaka down.
The crowd are loving this. Great action here.
Okafor slips a jab from Hidaka.
That's four minutes gone in the round.
Hidaka throws a lazy uppercut
and Okafor counters with a leg kick.
Hidaka throws a hook to the body but it doesn't connect.
Okafor is using his height advantage well here, landing a good percentage of his punches.
Okafor on the wrong end of an overhand right that came out of nowhere.
Okafor scores with a nice strike.
Hidaka takes a kick to the body and keeps moving.
Hidaka takes a push kick to the midsection and stumbles backwards.
Okafor lands a right hook to the body.
Hidaka moves forwards but Okafor connects with a nice, crisp jab.
Okafor throws a jab to the body, straight down the pipe. Boom. That sent Hidaka stumbling backwards but he manages to regain his composure quickly.
Okafor ducks low and lands a nice hook to the body of his opponent.
Okafor stooping low to avoid any incoming strikes and then lunges in with an uppercut come cross that lands flush.
That has opened up Hiroaki Hidaka's cut even more.
The crowd applaud the fighters' efforts here as the round comes to an end.
Okafor buckles his opponent's knee momentarily with a nice leg kick.
Okafor lands a leg kick. The shin dug right into the meat of the thigh.
Hidaka has his front leg slapped to the side - a nice low kick landing there from Okafor.
And thats the end of the round the fighters go back to their corners.
Desmond Okafor dominated that round.
The cut man is working on Hiroaki Hidaka's cut.
The referee calls time. The cornermen exit stage left and we're back to business.
Okafor steps to the side to avoid the strikes from Hidaka.
Hiroaki Hidaka has stepped it up - he knows he needs a finish here!
Okafor lands with a thumping leg kick.
Hidaka misses with a kick to the body.
Hidaka throws a lazy body kick
and Okafor counters with a lovely shot to the body.
Hidaka has developed a nice purple lump on his ribcage, as a result of some heavy body kicks from Okafor.
A shot to the body from Hidaka misses
and Okafor counters with a nice low kick that buckles Hidaka's knee momentarily.
Hidaka gets cracked there but stands up to it.
Okafor throws a nice outside leg kick.
A big right from Hidaka misses.
Okafor moves out of range as Hidaka strikes.
An attempted straight right counter from Okafor misses the target.
Hidaka takes one on the button.
We've had a slow start to the round here - hopefully the action picks up.
Hidaka avoids the body shot from Okafor.
Okafor buckles his opponent's knee momentarily with a nice leg kick.
Hidaka throws a body kick but he wasn't in range.
Desmond Okafor is winning the standup battle so far.
Ooooh, nice body kick lands from Okafor. Hidaka shrugs it off though.
The fans in attendance giving it up for the two fighters, who have really let it all hang out in the last minute or so!
Hidaka misses with a head kick.
Hidaka is breathing heavily.
That's one minute gone in the round.
Hidaka fakes high and swings low for a body shot but Okafor manages to avoid it.
Hidaka throws a predictable looking body shot
and Okafor counters with a nice jab to the body that keeps Hidaka thinking.
Okafor connects with a solid leg kick.
Okafor is using his reach advantage well here, landing the more effective single shots from range.
Okafor throws a quick inside leg kick.
Okafor lands a slapping body shot.
Hidaka swings widly with a right hand
and Okafor cracks him with a counter punch right on the button.
Okafor throws a leg kick which misses Hidaka's front leg but catches the back leg as Hidaka tries to avoid it.
Hidaka's hands are dropping dangerously low here and Okafor connects clean with a right hook that sends him down to one knee! Hidaka scrambles back to his feet.
A head kick by Hidaka misses
and Okafor counters with a solid body kick.
Okafor is really dominating this fight. Is there anything that Hidaka can do to turn this around?
Hidaka throws a head kick that misses and slips in the process. He scrambles back to his feet and the fighters circle.
Okafor feinted there with a counter leg kick.
Okafor turns his hip over beautifully as he lands a nice leg kick.
Okafor darts in and out, connecting with a jab.
We've seen a great period of action over the last minute or so - credit to both fighters for going all out!
Okafor fakes with a right hand and throws a good leg kick, right into the thigh. That had to hurt Hidaka.
That's two minutes gone in the round.
Okafor swings wildly with a hook that is half blocked by Hidaka.
Okafor avoids the body shot from Hidaka.
Hidaka's leg has a nasty welt from taking a succession of leg kicks. That must be slowing him down.
Okafor connects with a solid leg kick.
Okafor thuds his right hand into Hidaka's forehead from close range. That could be painful for both fighters.
A solid body kick from Okafor.
Hidaka on the wrong end of a vicious looking body shot.
Okafor lands a right hook to the body.
Okafor lands a nice leg kick that just misses Hidaka's sensitive parts.
Hidaka steps to his left, right into the path of a big body kick from Okafor. That one must have hurt.
Thud! ouch! good body kick from Okafor - that will leave a mark!
Okafor punishes Hidaka's body with a nice straight punch.
Okafor plants his feet and lands a nice head kick!
The cut above Hiroaki Hidaka's eye is starting to cause him problems now.
Okafor jabs at Hidaka's body.
Hidaka on the wrong end of a kick to the body.
That's three minutes gone in the round.
Okafor connects with a solid leg kick.
Nice shot lands for Hidaka.
Okafor scores with the left hand. Hidaka knows he should have avoided that one.
Hidaka takes a nice looking leg kick right on the meat of his thigh there.
Okafor scores with a jab.
Hiroaki Hidaka's cut is absolute horrible now. This looks like something out of a horror film with blood covering both fighters.
A nice combination there by Okafor.
Hidaka is rocked!
Okafor tests Hidaka's chin there with a solid looking shot.
Hidaka is still on wobbly legs! Can Okafor finish him?
The referee calls the doctor in to look at Hiroaki Hidaka's cut. Oh no, the doctor has called an end to the bout!
Ladies and gentlemen, after 3:41 of round 2, we have a winner by way of TKO (Cut). Desmond Okafor!
Desmond Okafor tried to hype himself up post fight but didn't word it too well and it ended up with him sounding like a bit of a tool.
|
|
|
|
|
|
|
|
|
|
|
|
|
|
|
|
|
|
|
|
|
|
|
| S |
C
A |
G |
S |
C
B |
G |
|
S |
C |
G |
|
energy
A | B |
|
hype
A | B |
|
pop
A | B |
|
mgr
A | B |
|
FIGHT
RATING
65% |
|
|
|
|
|
|
|
Undercard bout
|
Coming up we have a light heavyweight MMA rules bout between Mikhail Popkov (ranked 2751 p4p, 378 weight class) and Milson Bow (ranked 3617 p4p, 469 weight class). Fingers crossed for an exciting fight - I'm sure both fighters are looking for a nice under the table bonus!
 |
|
 |
| 200 cm
19
210 lbs
3 - 0 - 0 |
|
188 cm
20
205 lbs
4 - 0 - 0 |
BJJ Blue Belt
Excellent MT
Very quick |
|
Good wrestler
Brawler
Powerful |
|
| |
|
Ladies and gentlemen. This fight is 3 rounds, in the light heavyweight division.
Introducing the fighter to my left, fighting out of the red corner.
With a record of
3 - 0 - 0, fighting out of Helsinki, Mikhail Popkov!
And introducing the fighter to my right, fighting out of the blue corner.
With a record of
4 - 0 - 0, fighting out of New York, Milson Bow!
The judges for this bout are Frank Dennis, Daniel Franklin and Wesley Smith.
The bell rings for round one and we are underway!
Bow lands with a nice body punch.
Bow clinches with his opponent.
Bow cracks Popkov with a nice body shot.
Popkov lands with a light punch inside.
Popkov scores with a shoulder strike.
It looks like Milson Bow has been cut.
Bow misses with a short punch on the inside.
Popkov lands with a short head shot on the inside.
Popkov's corner calls for him to break the clinch, which he does.
Bow closes the distance and clinches.
Bow misses with a short punch on the inside.
Popkov tries to land a shot to the body but it's blocked.
Popkov wants to break the clinch but can't.
Popkov doesn't land with the attempted body shot.
Bow lands a hook that snaps the head of Popkov backwards.
Bow lands a right uppercut that snaps the head of Popkov backwards.
This is a great period of action - very entertaining stuff!
An uppercut to the body lands inside from Popkov.
Popkov doesn't land with the attempted body shot.
Bow misses with a body punch.
Bow blocks a punch to the side of the head.
Bow throws a punch but it's blocked by Popkov.
Bow fails to land with a short punch on the inside.
Bow misses with some punches.
That's one minute gone in the round.
Popkov tries a shoulder strike but it doesn't do any damage.
Popkov lands on the inside with an uppercut.
Bow swings wildly with an uppercut but Popkov uses good head movement to avoid it.
Popkov lands with a left to the head.
Bow lands a short shot on the inside that snaps the head of Popkov backwards.
Popkov tries to land a shot to the body but it's blocked.
Popkov tries a body shot but Bow blocks it.
Bow lands a left hand that snaps the head of Popkov backwards.
Bow has a couple of punches blocked by Popkov.
Bow misses with the head strike.
Popkov blocks a couple of punches on the inside.
Bow's coach down at Big Price MMA was telling us pre-fight that they have been working on Bow's balance. Obviously they view that as a key factor in the outcome of this fight.
With the fighters clinched against the cage, Bow creates a bit of distance for himself and scores with a nice uppercut.
Popkov tries to break the clinch but Bow is controlling the position.
A short right from Popkov.
Bow fails to land with a short punch on the inside.
Bow misses with a punch on the inside.
Popkov lands with a short punch from the clinch.
This is a great period of action - very entertaining stuff!
Bow presses Popkov against the cage and delivers a mid-strength body shot.
Popkov wants to strike at distance but he can't break free of the clinch.
That's two minutes gone in the round.
Bow working some nice short punches in the clinch.
Popkov tries a body shot but Bow blocks it.
Bow misses with a punch on the inside.
A nice left hand lands by Bow.
Bow working some nice short punches in the clinch.
Popkov misses with a hook to the ribs.
Bow misses with the head strike.
Popkov lands with a short shot to the head.
Bow lands with a quick shot inside that doesn't really do much damage.
Popkov prevents a body shot from Bow.
Popkov scores with an uppercut up the middle.
A short left from Bow.
Bow lands a hook to the side of the head.
Popkov blocks a couple of punches on the inside.
Bow is working Popkov over against the cage.
Bow swings away with an uppercut that misses.
Popkov misses with a body punch.
Popkov breaks the clinch and we're back to striking at distance.
Popkov throws a series of strikes that have Bow backpedaling.
That's three minutes gone in the round.
Bow moves into the clinch successfully.
A right handed body shot lands from Popkov.
A short right from Popkov.
Popkov doesn't land with the attempted body shot.
Bow cracks Popkov with a nice body shot.
Bow lands a nice uppercut.
Bow swings wildly with an uppercut but Popkov uses good head movement to avoid it.
Bow lands with a good tight uppercut to the head.
Popkov tried to land a shot to the body but connects with Bow's elbow.
Popkov misses with a shot to the kidneys.
A short right hand to the side of the head by Popkov.
Popkov blocks an uppercut.
Bow misses with the head strike.
Bow tries a shoulder strike but it doesn't do any damage.
Bow prevents a body shot from Popkov.
Popkov misses with a punch to the body.
Bow misses with a punch to the body.
Popkov struggles to land a body shot inside as Bow controls his hands.
That's four minutes gone in the round.
Popkov blocking some punches.
A short right from Popkov on the inside.
The fans in attendance giving it up for the two fighters, who have really let it all hang out in the last minute or so!
Bow working aggressively here.
A nice right hand lands inside from Bow.
Bow lands a nice uppercut.
Popkov's corner calls for him to break the clinch, which he does.
Bow wants to clinch
and Popkov counters with a crisp one two that drops Bow! Popkov thinks about following him to the mat for a moment but instead steps back and waves Bow to his feet! Bow is in big trouble!
Bow is rocked!
Bow has closed the distance and engaged Popkov in a clinch.
Popkov blocks a couple of punches on the inside.
Popkov misses with a shot to the kidneys.
Popkov lands with a right to the head.
Bow throws a head punch that misses.
Bow lands with a short shot to the head.
The crowd applaud the fighters' efforts here as the round comes to an end.
Bow lands a right hand that snaps the head of Popkov backwards.
Bow misses with a hook to the ribs.
Popkov makes some space for himself and lands an uppercut.
Bow working on landing some head shots here - that one got through nicely.
Popkov scores with a hook to the body.
And thats the end of the round the fighters go back to their corners.
Milson Bow dominated that round.
The cut man is working on Milson Bow's cut.
OK. That's time! The bell goes and we're back to the action.
Bow tries to clinch but fails miserably
and Popkov counters with a crisp right hand that drops Bow! Popkov lets Bow back up to his feet, looking for a finish!
Bow tries to clinch up
and Popkov counters with a nice uppercut.
Bow is still on wobbly legs! Can Popkov finish him?
Bow tries to clinch up
and Popkov counters with a crisp right that sends Bow to the canvas! Popkov follows up with punches from the mount and this one is all over!
Ladies and gentlemen, after 0:22 of round 2, we have a winner by way of TKO (Strikes). Mikhail Popkov!
|
|
|
|
|
|
|
|
|
|
|
|
|
|
|
|
|
|
|
|
|
|
|
| S |
C
A |
G |
S |
C
B |
G |
|
S |
C |
G |
|
energy
A | B |
|
hype
A | B |
|
pop
A | B |
|
mgr
A | B |
|
FIGHT
RATING
73% |
|
|
|
|
|
|
|
Undercard bout
|
Coming up we have a lightweight MMA rules bout between Lamont Banner (ranked 4068 p4p, 392 weight class) and Buakaw Banchamek (ranked 3524 p4p, 356 weight class). These two fighters really are very evenly matched on the feet - it will be fascinating to see who can assert themselves in that aspect of the fight.
 |
|
 |
| 171 cm
19
160 lbs
3 - 1 - 0 |
|
174 cm
26
158 lbs
3 - 1 - 0 |
BJJ Blue Belt
Excellent MT
Cardio machine |
|
BJJ Blue Belt
Excellent MT
Intelligent |
|
| |
|
Ladies and gentlemen. This fight is 3 rounds, in the lightweight division.
Introducing the fighter to my left, fighting out of the red corner.
With a record of
3 - 1 - 0, fighting out of New York, Lamont Banner !
And introducing the fighter to my right, fighting out of the blue corner.
With a record of
3 - 1 - 0, fighting out of Sydney, Buakaw Banchamek!
The judges for this bout are Robert Twigg, Wesley Smith and Gwen Towbar.
The bell rings for round one and we are underway!
Banner throws an uppercut from half a mile away. Banchamek sees it coming and avoids it easily.
Banchamek tries to clinch up.
Banchamek fails in his attempt to clinch.
Banchamek has been working on his striking defense in training and it's paying off as Banner is landing a low percentage of strikes.
Banchamek throws a head kick but Banner moves out of range.
Banchamek fails in his attempt to clinch.
Banchamek takes a jab on the nose there. A little bit of blood seems to be coming out. Hopefully that won't affect his breathing.
Banchamek throws a right hand that misses
and Banner counters with a quick right hand to the jaw.
Banner connects with the punch.
It looks like Buakaw Banchamek has been cut.
Banner looks to score with a combo but nothing lands.
Banner cracks Banchamek with a nice right hand that draws applause from the crowd.
Banchamek is rocked!
Banner batters Banchamek with a massive right followed by a huge left! Banchamek is out on his feet looking like a zombie as Banner lands a final crushing right hand to drop Banchamek to the mat with a gruesome thud! Banner is running around like a mad man after that fight and for good reason!
Ladies and gentlemen, after 0:34 of round 1, we have a winner by way of KO (Strikes). Lamont Banner !
A relieved looking Lamont Banner thanked the fans for their support and gave the usual line about them being amazing. They seemed to believe that he actually meant it.
|
|
|
|
|
|
|
|
|
|
|
|
|
|
|
|
|
|
|
|
|
|
|
| S |
C
A |
G |
S |
C
B |
G |
|
S |
C |
G |
|
energy
A | B |
|
hype
A | B |
|
pop
A | B |
|
mgr
A | B |
|
FIGHT
RATING
100% |
|
|
|
|
|
|
|
Undercard bout
|
Coming up we have a middleweight MMA rules bout between Moe Lester (ranked 1117 p4p, 141 weight class) and Buddy Barnett (ranked 1364 p4p, 173 weight class). Barnett has chosen Move as his entrance music. Over to our ring announcer for the fighter introductions!
|
|
 |
| 190 cm
26
195 lbs
5 - 1 - 0 |
|
175 cm
20
185 lbs
6 - 1 - 0 |
BJJ White Belt
Excellent MT
Granite chin |
|
Good wrestler
Basic striking
Good gas tank |
|
| |
|
Ladies and gentlemen. This fight is 5 rounds, for the middleweight championship of the world!
Introducing the champion to my left, fighting out of the red corner.
With a record of
5 - 1 - 0, fighting out of Montreal, Moe Lester!
And introducing the challenger to my right, fighting out of the blue corner.
With a record of
6 - 1 - 0, fighting out of New York, Buddy Barnett!
The judges for this bout are Alan Glass, Cecil Peabody and Robert Twigg.
The bell rings for round one and we are underway!
Barnett missing with a left hand there. Lester was out of range so wasted energy throwing that one.
Lester fails to land with a series of punches.
Barnett darts in and clinches Lester up against the cage.
Barnett manages to pull guard.
Barnett is working for submissions here. He's thrown up his legs looking for a triangle but Lester frees his head nicely. Oh but Barnett has switched to an armbar! Lester is tapping furiously! Lovely submission there!
Ladies and gentlemen, after 0:29 of round 1, we have a winner by way of Submission (Triangle Armbar). Buddy Barnett!
Buddy Barnett is the new middleweight champion!
Buddy Barnett seemed lost for words in his post fight interview but he remembered to thank his fans and directed everyone to his website.
|
|
|
|
|
|
|
|
|
|
|
|
|
|
|
|
|
|
|
|
|
|
|
| S |
C
A |
G |
S |
C
B |
G |
|
S |
C |
G |
|
energy
A | B |
|
hype
A | B |
|
pop
A | B |
|
mgr
A | B |
|
FIGHT
RATING
100% |
|
|
|
|
|
|
|
Co-main event
|
Coming up we have a lightweight MMA rules bout between Mister Happy (ranked 1637 p4p, 193 weight class) and Alex Valentine (ranked 2575 p4p, 277 weight class). Valentine has chosen Bloodborne OST - Gehrman, The First Hunter as his entrance music, which hasn't gone down very well with the crowd. Fingers crossed for an exciting fight - I'm sure both fighters are looking for a nice under the table bonus!
 |
|
 |
| 175 cm
26
165 lbs
3 - 0 - 0 |
|
176 cm
20
155 lbs
4 - 0 - 0 |
BJJ Blue Belt
Excellent MT
Very strong |
|
Good takedowns
Basic striking
Tends to cut |
|
| |
|
Ladies and gentlemen. This fight is 5 rounds, for the lightweight championship of the world!
Introducing the champion to my left, fighting out of the red corner.
With a record of
3 - 0 - 0, fighting out of London, Mister Happy!
And introducing the challenger to my right, fighting out of the blue corner.
With a record of
4 - 0 - 0, fighting out of London, Alex Valentine!
The judges for this bout are Stewart Dunkirk, Gwen Towbar and George Francis.
The bell rings for round one and we are underway!
Valentine throws a looping overhand right but Happy ducks down to avoid it.
Valentine scores with a punch to the gut of his opponent.
Valentine tries for a takedown but Happy circles away easily
and Happy counters with a low kick, right behind Valentine 's knee.
Happy lands with a cross.
Valentine closes this distance looking for a takedown but Happy circles away.
Happy scores with a big left there. The judges will like that one.
Happy looks to have improved his striking defense since last time we saw him fight.
Happy misses with a low kick.
Valentine shoots in from a long way out. He's driving through with the takedown attempt and he eventually gets it, landing in Happy's guard.
Valentine passes Happy's left leg - he's now in half guard.
Valentine stalling away here and it's allowed Happy to slip out his trapped foot and regain full guard.
Valentine tries to free his leg and advance position but Happy is retaining full guard.
Happy knows he needs to get back to his feet asap. He's simply no match for Valentine on the ground.
The fans in attendance giving it up for the two fighters, who have really let it all hang out in the last minute or so!
Valentine won't allow Happy to get back to his feet.
That's one minute gone in the round.
Valentine pushing down on Happy's thigh, trying to pass to half guard. He's managed it... Nice work.
Valentine is looking for a kimura here.
Valentine looks over to his corner - he wants some instructions but his corner are not responding.
Valentine is working for submissions here but there's nothing on.
Valentine is trying for a guillotine from the top but the pressure isn't in the right place so Happy is just riding it out for now. Valentine eventually gives up the hold.
That's two minutes gone in the round.
Valentine works his way into full mount!
Valentine working for a guillotine from mount but Happy is in no mood to give up.
Happy is controlling an arm, preventing Valentine from taking his back. Although keeping him in mount is no better to be honest.
Happy is squirming around, avoiding Valentine's attempts to control the action.
That's three minutes gone in the round.
Valentine goes for an armbar but he's fallen flat on his backside there and now Happy is on top in guard.
Valentine looking to sweep here. No luck so far.
The fighters are starting to perspire pretty heavily.
Happy is sitting in close to Valentine's body. Valentine has gone for a guillotine from the bottom. Oh damn, that looks pretty tight! Happy is panicking - it looks like this one could be all over! Yes, Happy is tapping! That was a very nice submission by Valentine.
Ladies and gentlemen, after 3:48 of round 1, we have a winner by way of Submission (Guillotine). Alex Valentine!
Alex Valentine is the new lightweight champion!
An out of breath Alex Valentine thanked his loyal fans in his post fight interview, giving them credit for his success over the course of his career.
|
|
|
|
|
|
|
|
|
|
|
|
|
|
|
|
|
|
|
|
|
|
|
| S |
C
A |
G |
S |
C
B |
G |
|
S |
C |
G |
|
energy
A | B |
|
hype
A | B |
|
pop
A | B |
|
mgr
A | B |
|
FIGHT
RATING
32% |
|
|
|
|
|
|
|
Main event
|
Coming up we have a bantamweight MMA rules bout between Total Bastard (ranked 1449 p4p, 60 weight class) and Damien Alvarez (ranked 2558 p4p, 122 weight class). Alvarez has chosen Big Pun: Off Wit His Head as his entrance music, which hasn't gone down very well with the crowd. These two fighters really are very evenly matched on the feet - it will be fascinating to see who can assert themselves in that aspect of the fight.
 |
|
 |
| 168 cm
20
137 lbs
5 - 0 - 0 |
|
173 cm
20
148 lbs
8 - 3 - 0 |
BJJ Blue Belt
Excellent MT
Cardio machine |
|
Good wrestler
Decent boxing
Granite chin |
|
| |
|
Ladies and gentlemen. This fight is 5 rounds, for the bantamweight championship of the world!
Introducing the champion to my left, fighting out of the red corner.
With a record of
5 - 0 - 0, fighting out of Las Vegas, Total Bastard!
And introducing the challenger to my right, fighting out of the blue corner.
With a record of
8 - 3 - 0, fighting out of Los Angeles, Damien Alvarez!
The judges for this bout are Robert Twigg, Frank Dennis and Cecil Peabody.
The bell rings for round one and we are underway!
Alvarez throws a looping left and ducks down for a takedown. He's got his arms around Bastard's waist but Bastard gets an underhook and avoids the takedown by throwing Alvarez off to one side.
Alvarez fails to land the takedown.
Bastard swung with a counter right hand that didn't connect.
The fighters circle momentarily. Alvarez darts into range and connects with a nice straight punch.
Bastard leaves Alvarez with his face pressed against the mat as he sprawls beautifully, defending against a solid takedown attempt.
Total Bastard has stuffed three takedown attempts in the round now. That's going to take a lot out of Damien Alvarez.
Bastard scores with a jab. Alvarez acknowledges it with a nod of the head.
We've had a slow start to the round here - hopefully the action picks up.
Alvarez closes the distance and clinches up with Bastard, looking for a takedown. Alvarez pushes Bastard against the cage but Bastard circles to the side and manages to break the clinch.
Bastard swung with a counter punch to the body but it didn't connect.
A telegraphed takedown attempt from Alvarez is defended easily by Bastard.
Bastard is looking to counter punch.
Total Bastard is looking to keep the fight on the feet at all costs.
That's one minute gone in the round.
Alvarez shoots in looking for a double leg takedown. Bastard defends it nicely.
Bastard swung with a counter punch to the body but it didn't connect.
Alvarez shoots in for a takedown - he's clinched up with Bastard but Bastard pushes him off and we're back to square one.
Alvarez fails with a takedown attempt.
Bastard was looking to counter that last move with a shot to the body but he didn't commit.
Bastard throws a body punch but Alvarez moves out of range.
Alvarez steps in looking to clinch after the strikes miss from Bastard.
Alvarez throws a looping left and ducks down for a takedown. He's got his arms around Bastard's waist but Bastard gets an underhook and avoids the takedown by throwing Alvarez off to one side.
It looked like Bastard wanted to counter with a hook but didn't fully commit.
A telegraphed right hand from Bastard misses the target.
Alvarez shoots in but no luck this time.
Alvarez looks more muscular than last time we saw him. He must have been on the weights.
That's two minutes gone in the round.
Alvarez dives in and grabs Bastard's left leg, looking for a takedown. Bastard pushes down on Alvarez's head and hops out.
Bastard lands with a straight right. Alvarez didn't see that one coming.
Bastard has been talking about how he's improved his wrestling in the run up to the fight so let's see if that's enough to sway the balance.
Alvarez scores with a jab to the jaw of his opponent.
Alvarez fails with a takedown attempt from distance.
It looked like Bastard wanted to counter with a hook but didn't fully commit.
Alvarez shoots in for a takedown - he's clinched up with Bastard but Bastard pushes him off and we're back to square one.
Alvarez looks frustrated there after his takedown attempt is stuffed easily.
Bastard throwing a counter right hand but Alvarez manages to avoid it.
Alvarez blocks a jab.
Bastard with a nice cross.
It looks like Damien Alvarez has been cut.
Alvarez shoots for a double leg takedown but Bastard sprawls well. He's pushed Alvarez's face into the mat and manages to get back to his feet relatively easily.
Bastard swung with a counter right hand that didn't connect.
That's three minutes gone in the round.
Alvarez fails with a takedown attempt.
Alvarez changes levels and looks for a double leg takedown. Bastard tries to avoid it but Alvarez manages to keep hold of a leg and drag Bastard to the ground. Bastard escapes though and pops straight back up to his feet.
Bastard appears to be looking for a counter punch to the body.
Bastard fakes a head punch and goes low to the body. Nicely done.
Alvarez shoots in for a takedown. He's persisting with it as Bastard sprawls well. Bastard wins this battle and keeps the fight standing. Alvarez gets slowly back to his feet.
Alvarez looks winded!
Alvarez has a takedown stuffed.
No luck for Alvarez with that takedown attempt.
A little feinted left hand from Bastard on the counter but he doesn't commit to it.
That's four minutes gone in the round.
Bastard cracks Alvarez with a big right hand that sends him to the floor! Alvarez looks wobbly but he's sprung back up to his feet straight away
can Bastard finish him?
Fantastic stuff here - a very entertaining period of action, which has drawn cheers from the crowd.
Alvarez shoots in for a takedown but Bastard shows good takedown defense.
Bastard was looking to counter that last move with a shot to the body but he didn't commit.
Alvarez looks for a takedown here. Will he get it? Bastard is fending him off so far but Alvarez persists. Nope, Bastard circles away and we're back to standing.
Alvarez throws a looping left and ducks down for a takedown. He's got his arms around Bastard's waist but Bastard gets an underhook and avoids the takedown by throwing Alvarez off to one side.
Bastard is looking to counter punch.
Bastard lands a nice shot to the body.
Alvarez is trying hard to land a takedown here. Bastard sprawls well and keeps this one on the feet.
It looked like Bastard wanted to counter with a hook but didn't fully commit.
Bastard scores with a reasonable looking shot to the body. Alvarez doesn't seem bothered though.
Alvarez takes a body punch that cleary hurt but he's trying not to show any weakness.
Bastard lands a slapping body shot.
Bastard ducks down and throws a hook to the body but Alvarez moves away.
And thats the end of the round the fighters go back to their corners.
Total Bastard dominated that round.
The cut man is working on Damien Alvarez's cut.
Well, the break between rounds is over. Let's get back to the scrappin!
Bastard lands an overhand right.
Alvarez looks to score with a jab to the body but Bastard is just out of range.
Alvarez with a poor takedown
and Bastard counters with a big right hand! Oh Alvarez is in trouble here! Bastard follows up with more strikes and that's it! The ref has stopped it!
Ladies and gentlemen, after 0:16 of round 2, we have a winner by way of TKO (Strikes). Total Bastard!
Total Bastard retains his bantamweight title!
An out of breath Total Bastard thanked his loyal fans in his post fight interview, giving them credit for his success over the course of his career.
In defeat, Damien Alvarez stepped up to the mic, saying 'He was just better than me tonight. I'm gonna watch some film and analyze what went wrong. Props to him. I'll be back'.
|
|
|
|
|
|
|
|
|
|
|
|
|
|
|
|
|
|
|
|
|
|
|
| S |
C
A |
G |
S |
C
B |
G |
|
S |
C |
G |
|
energy
A | B |
|
hype
A | B |
|
pop
A | B |
|
mgr
A | B |
|
FIGHT
RATING
37% |
|
|
|
|
|
|
|
|
|
|
