 |
QFC Tournament 836 Round 2 PBP Commentary |
Undercard bout
|
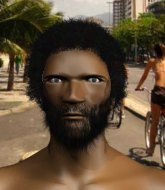
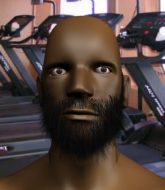
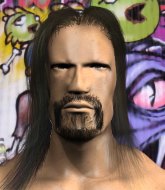
Coming up we have a welterweight MMA rules bout between Trent Jenkins (ranked 5732 p4p, 0 weight class) and John Calvin (ranked 6186 p4p, 603 weight class). The crowd giving both fighters a great reception on their way into the arena. That's good to see.
 |
|
 |
| 178 cm
25
179 lbs
1 - 0 - 0 |
|
165 cm
25
170 lbs
1 - 0 - 0 |
Good takedowns
Counter fighter
Very quick |
|
BJJ Purple Belt
Basic striking
Intelligent |
|
| |
|
Ladies and gentlemen. This fight is 3 rounds, in the welterweight division.
Introducing the fighter to my left, fighting out of the red corner.
With a record of
1 - 0 - 0, fighting out of New York, Trent Jenkins!
And introducing the fighter to my right, fighting out of the blue corner.
With a record of
1 - 0 - 0, fighting out of New York, John Calvin!
The judges for this bout are Anthony Taglia, Reed Andrews and John Kavanagh.

The bell rings for round one and we are underway!
Calvin misses with a low kick.
Jenkins missing with a left hand there. Calvin was out of range so wasted energy throwing that one.

Jenkins gets in close and instigates a clinch.

Calvin is fighting off a takedown attempt but Jenkins is just too persistent for him and manages to trip Calvin to the mat. Calvin regains guard as soon as the fighters hit the mat.

Calvin is looking for a triangle here but Jenkins uses the submission attempt to pass into side control.
Calvin is sneaking out the side here. He's bucked Jenkins off and has taken his back!
The ref warns both fighters not to hold the cage as they work up against the meshing.
Jenkins wants to escape the position.
Calvin is persistently looking for the submission but Jenkins is defending it well.
Jenkins looks to control his opponent's hands but he's not mananging it at the moment.
Calvin scores with strikes from the back.
Calvin should think about turning a few of those tyres round his middle into muscle if he wants people to take him seriously as an athlete.

That's one minute gone in the round.
Calvin loading up with punches from the back mount - how long can Jenkins hold on?
Calvin keeps control of the position as Jenkins tries to break free.
Calvin lands shots from the back.
Calvin trying to control.
You can see the frustration on Jenkins's face
He knows he is in trouble unless he improves his position sooner rather than later.
The fighters are pressed up against the cage, both looking to find a bit of space to work.
Calvin is punishing Jenkins with strikes - can he finish him?!
Calvin is punishing Jenkins with some ground and pound.
Calvin punches Jenkins on the ear.
Jenkins breaks Calvin's hooks off and manages to turn into his guard.
Calvin looking for submissions off his back, moving his hips, looking for an opening.

That's two minutes gone in the round.
Jenkins lands a couple of elbows.
The crowd are loving this. Great action here.
Jenkins passes Calvin's left leg - he's now in half guard.
Jenkins winds up and cracks Calvin with a swinging punch to the side of the head.
Jenkins not landing any meaningful shots this time.
Calvin works his way to full guard. Good work.
Calvin working a defensive guard here.
Jenkins stands up over Calvin, holding his feet. He dives back in and lands a decent shot to the head.

That's three minutes gone in the round.
Jenkins trying to control the position from guard on top but Calvin is wriggling around, looking for whatever he can.
Calvin looking for a guillotine here but Jenkins defends easily.
Jenkins works over Calvin with some ground and pound from guard.
Jenkins wants to pass the guard but Calvin is keeping the position.
Jenkins wants to control from the top but Calvin keeps moving.

That's four minutes gone in the round.
A few boos can be heard. I'm sure they will multiply if the fighters don't pick up the pace.
Jenkins engaging in some classic timewasting tactics.
Jenkins postures up to throw the ground and pound strikes but they don't connect.
Calvin looks to be working for a triangle here. Oh, it looks like he might have it! Jenkins has picked Calvin up and slammed him! Calvin can't keep hold of the triangle and Jenkins manages to pass to side control!
Jenkins tries to advance to mount but Calvin denies him.
Jenkins is looking to take a break and control but Calvin is keeping him honest, looking to work from the bottom.
And thats the end of the round the fighters go back to their corners.
That was a close round but I would say that Trent Jenkins will probably get the nod.
That's the end of the round. The referee orders the cornermen out of the cage so we can get back down to business.

Jenkins has closed the distance and engaged Calvin in a clinch.
Calvin avoiding damage as Jenkins throws knees to the body.
Both fighters working to control the clinch.
Calvin stalling the fight.
Jenkins looks to throw an elbow but misses.
Calvin wants to break free but Jenkins has control.

Jenkins pushes off and circles away, back to the middle of the mat.
Calvin avoids the body shot from Jenkins.
Jenkins blocks a leg kick.
John Calvin seems to be the more aggressive standup fighter in this bout.
Jenkins fails to land with the punch combination there - jab, cross, hook, miss, miss, miss.
We've had a slow start to the round here - hopefully the action picks up.
Jenkins throws a hook to the body but it doesn't connect.

Calvin bobs and weaves into range and then changes levels and scores with a nice takedown into side control.
Calvin tries to score with some ground and pound. Jenkins controls his posture well this time though and the shots don't do any damage.
Calvin has the superior BJJ but he's also working some ground strikes into his gameplan.
Calvin throws a strike aimed at the side of Jenkins's head but Jenkins avoids it well.
That's one minute gone in the round.
Jenkins takes an elbow right on the bridge of the nose and winces in pain.
Jenkins takes an elbow right on the bridge of the nose and winces in pain.
Jenkins tries to work a leg under to get back to half guard but Calvin wriggles his own leg back out and remains in side control.
Calvin misses with an attempted head punch from side control.
Calvin connects with a decent looking elbow from side control that caused Jenkins some visible discomfort.
Calvin wants to control but Jenkins is keeping him busy.
Jenkins is looking to regain half guard here but Calvin keeps moving and retains side control.
Calvin working the body and head with strikes.
Calvin tries for a kimura. Not really close to a finish though.
Jenkins is moving his hips around well on the bottom and has managed to get back to half guard.
That's two minutes gone in the round.
Jenkins wants to control but Calvin is keeping busy and won't allow it.
Calvin is trying to work for a kimura. This could be trouble! No, Jenkins has managed to free his arm - good work.
Well, if Calvin is going to just lie there, perhaps we should talk about what we're having for dinner tonight
I'm having a ham and pineapple pizza
Yum. Can't wait.
Jenkins is trying to control but can't.
Calvin thows a huge punch but Jenkins dodges it nicely.
Calvin seems to be taking a bit of a break to think of his next move. He lands a short punch in the meantime.
Calvin wants to lay and pray for a moment but Jenkins keeps working.
Jenkins is looking to regain full guard. Not this time though.
That's three minutes gone in the round.
Jenkins is staying active underneath Calvin, who seems content to just control the action from this position.
Calvin is sneakily working for an arm triangle but Jenkins sees it coming and defends easily.
Jenkins tries to roll over but Calvin keeps him under control.
Calvin is just content to waste time from the top position. Jenkins takes advantage of the situation and regains full guard.
Calvin with a flurry of punches that miss.
Calvin scoring with some ground and pound.
Jenkins looking for a sweep. Not yet Jenkins, not yet.
Jenkins is working hard here to advance position.
Calvin drops back, looking for a kneebar! Jenkins looks panicked! The fighters roll across the mat, one looking to finish, one looking to escape. Jenkins looks to have wriggled free... Yes, he's got his leg free and he's dived into side control! Good work there from Jenkins!

Jenkins working away diligently from side control. Landing strikes effectively there - that will score him some points on the judges scorecards.
That's four minutes gone in the round.
Jenkins landing with strikes to the head and body from side control.
Calvin gets back to half guard.
Calvin has hold of a guillotine but he's not going to be able to crank on it really with only half guard, so it's no trouble for Jenkins. Oh but Calvin has got full guard now! Oh boy! This one could be over very soon! Jenkins goes limp - he's gone! Calvin jumps up and celebrates with the crowd - fantastic submission finish!
Ladies and gentlemen, after 4:48 of round 2, we have a winner by way of Submission (Guillotine). John Calvin!
John Calvin spent the whole post fight interview bigging himself up. It didn't go down that well with the fans after a while as they thought it was a bit arrogant.
|
|
|
|
|
|
|
|
|
|
|
|
|
|
|
|
|
|
|
|
|
|
|
| S |
C
A |
G |
S |
C
B |
G |
|
S |
C |
G |
|
energy
A | B |
|
hype
A | B |
|
pop
A | B |
|
mgr
A | B |
|
FIGHT
RATING
42% |
|
|
|
|
|
|
|
Undercard bout
|
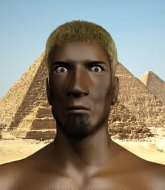
Coming up we have a welterweight MMA rules bout between Py Dyddy (ranked 5670 p4p, 0 weight class) and John Billy Dooley (ranked 5709 p4p, 0 weight class). Over to our ring announcer for the fighter introductions!
 |
|
 |
| 170 cm
25
175 lbs
1 - 0 - 0 |
|
182 cm
25
170 lbs
1 - 0 - 0 |
Good takedowns
Basic striking
Big heart |
|
Decent wrestler
Good elbows
Intelligent |
|
| |
|
Ladies and gentlemen. This fight is 3 rounds, in the welterweight division.
Introducing the fighter to my left, fighting out of the red corner.
With a record of
1 - 0 - 0, fighting out of New York, Py Dyddy!
And introducing the fighter to my right, fighting out of the blue corner.
With a record of
1 - 0 - 0, fighting out of New York, John Billy Dooley!
The judges for this bout are John Kavanagh, Eddie Farnsworth and Anthony Taglia.
The bell rings for round one and we are underway!
Dyddy misses with a jab, cross combination.
Dyddy throws a shot from downtown. Dooley moves away and avoids it.
Dooley misses with a takedown attempt
and Dyddy counters with a shoot takedown into half guard.
The two fighters exchange a few words. I couldn't hear what they were saying but maybe it's more fun if you make it up yourself. Dyddy connects with a nice short shot to Dooley's temple.
Dyddy slows the pace down in half guard.
Dyddy trying to control from half guard but Dooley is working away.
Dyddy looks to score some points with some ground and pound.
Dooley really doesn't want to stay on the ground with Dyddy. If he can't get it back to his feet, it's only a matter of time before he'll be tapping out.
We've had a slow start to the round here - hopefully the action picks up.
Dooley is trying to stand back up but Dyddy is controlling him
Dooley is looking to get back to full guard here but Dyddy has managed to pass to side control instead.
The ref warns both fighters not to hold the cage as they work up against the meshing.
Dyddy working the head with strikes.
That's one minute gone in the round.
Dooley is working to avoid the ground and pound but Dyddy connects with a decent elbow.
Dyddy cracks Dooley with an elbow. That is naaassty.
Dyddy is chipping away with strikes.
Dooley can't do much from the bottom here.
Dyddy has been looking to land a fair amount of strikes on the ground. He might be looking to soften his opponent up in order to work for a submission.
We get told so often about how wrestlers don't like to be on their backs. Let's see if Dooley can do anything to dispel that myth.
Dyddy trying to control the position but Dooley is working away.
Dyddy working the body and head with strikes.
Dooley tries to bench press Dyddy off him but Dyddy keeps the position.
Dyddy in side control lands a decent elbow.
The fighters are pressed up against the cage, both looking to find a bit of space to work.
That's two minutes gone in the round.
Dooley struggling a bit here.
Dyddy passes to full mount! That's big trouble for Dooley!
Dooley is in a horrible position here. Dyddy smacks him with another shot as he tries to escape the position.
Dyddy postures up and cracks his opponent a couple of times before moving back into close ground control. Dooley looks a forlorn figure.
Dyddy connects with a couple of good shots from mount.
This is a great period of action - very entertaining stuff!
Dyddy scoring with strikes but Dooley is staying in there.
Dyddy wants to control the pace but Dooley is squirming around nicely.
Dyddy landing strikes from the mount.
That's three minutes gone in the round.
Dooley tries to lock up and control but Dyddy gives him a forearm to the face and pushes him away.
Dyddy controlling the position easily from mount.
Dyddy lands with some strikes.
Dyddy with shots to the head and body - Dooley looks very uncomfortable down there.
Dyddy with good strikes from the mount here!
Dyddy lands a couple of nice shots there from mount.
Dyddy lands a shot to the body, followed up by a shot to the exposed head of his trapped opponent.

Dooley is rocked!
Dyddy drops a big elbow. That's hurt Dooley! More shots from Dyddy and the ref steps in! The fight is over!
Ladies and gentlemen, after 4:58 of round 1, we have a winner by way of TKO (Strikes). Py Dyddy!
|
|
|
|
|
|
|
|
|
|
|
|
|
|
|
|
|
|
|
|
|
|
|
| S |
C
A |
G |
S |
C
B |
G |
|
S |
C |
G |
|
energy
A | B |
|
hype
A | B |
|
pop
A | B |
|
mgr
A | B |
|
FIGHT
RATING
47% |
|
|
|
|
|
|
|
Co-main event
|
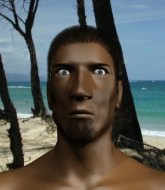
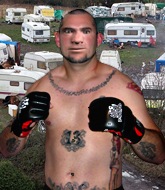
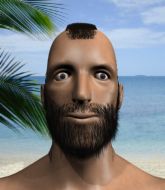
Coming up we have a welterweight MMA rules bout between Hardnose Hatcher (ranked 5685 p4p, 0 weight class) and Tom Dover (ranked 5518 p4p, 0 weight class). The key to victory for Hardnose Hatcher has got to be keeping the fight on the feet.
 |
|
 |
| 175 cm
25
173 lbs
1 - 0 - 0 |
|
165 cm
25
170 lbs
1 - 0 - 0 |
Good takedowns
Counter fighter
Very quick |
|
Good wrestler
Basic striking
Granite chin |
|
| |
|
Ladies and gentlemen. This fight is 3 rounds, in the welterweight division.
Introducing the fighter to my left, fighting out of the red corner.
With a record of
1 - 0 - 0, fighting out of New York, Hardnose Hatcher!
And introducing the fighter to my right, fighting out of the blue corner.
With a record of
1 - 0 - 0, fighting out of New York, Tom Dover!
The judges for this bout are John Kavanagh, Alyssa Summers and Chad Campbell.
The bell rings for round one and we are underway!
Dover closes this distance looking for a takedown but Hatcher circles away.
Dover avoids a lazy jab quite easily.
Hatcher throws a front kick aimed at Dover's knee but Dover avoids it well.
Dover keeping his hands up high there, blocking the jab from Hatcher.
Dover looked like he wanted to counter with a punch but didn't throw it.
Dover avoids the body shot from Hatcher.
Hatcher shoots for a takedown but Dover saw that one coming a mile off and avoided it easily.
Dover looking to shoot here. He's gone for it and he's landed a takedown into side control! Oh, that's bad for Hatcher!
Hatcher tries to get back to half guard but can't.
We've had a slow start to the round here - hopefully the action picks up.
Dover lands an elbow.
That's one minute gone in the round.
Dover working the ground and pound but Hatcher is defending the strikes.
Dover scores with a couple of nice shots to the head there. The referee takes a look at Hatcher to see if he's OK.
Dover connects with a decent looking elbow from side control that caused Hatcher some visible discomfort.
Dover looks up at the clock and then as Hatcher takes his cue and looks up at the clock too, Dover smacks him right in the chops with a big elbow! How rude!
Dover wants to control for a moment but Hatcher uses the opportunity to move back to half guard.
Dover not throwing his punches with enough precision this time.
Hatcher tries to get to full guard but Dover has control of the leg.
Dover working the head and body with strikes.
Dover prevents Hatcher from improving his position.
That's two minutes gone in the round.
Hatcher is trying to maintain the position but Dover is very close to passing his half guard.
Hatcher tries to roll over but Dover keeps him under control.
Dover is thwarting Hatcher's attempts to control the position.
Dover working over Hatcher with some ground and pound. Hatcher looks like he wants out of this position, which is understandable.
The fighters are starting to get a bit slippery now, which will make submissions a bit more difficult.
Dover perhaps working for something from half guard, or maybe not. It looks like he's just sitting there.
Hatcher keeping his head moving to avoid the ground and pound.
Dover prevents Hatcher from improving his position.
That's three minutes gone in the round.
Dover slips a nice elbow through Hatcher's hands, connecting with Hatcher's forehead.
Hatcher moves his hips nicely and gets into full guard.
Dover with a couple of shots to the head there. Not particularly brutal.
Dover scores with a decent looking elbow strike.
Dover sitting in guard here, content to control.
Dover scores with a decent looking elbow strike.
Hatcher is working the butterfly guard. He manages to land a nice scissor sweep and is now in half guard on the top. Nice move.
Hatcher sitting in half guard, looking to land shots. Dover defending well though.
We get told so often about how wrestlers don't like to be on their backs. Let's see if Dover can do anything to dispel that myth.
Dover keeping control of the position.
That's four minutes gone in the round.
Dover is looking for a sweep. Hatcher is wise to his cunning plan and keeps the top position.
Hatcher thows a wild elbow that connects with the canvas.
Dover makes his way to full guard. A much better position for Dover.
Dover is trying to control the position from the bottom.
Dover is working an open guard here, looking to improve his position. No doubt that will leave him open to counters but at least he's being more offensive.
The crowd thankful this round is nearly over.
A real slowdown in the pace of the fight for a moment, as Dover holds on and takes a little breather.
Hatcher stopping the sweep attempt from Dover.
And thats the end of the round the fighters go back to their corners.
Tom Dover dominated that round.
The corners get their ten second warning. Both fighters stand from their stools and stare eachother down, ready to get back to the action.
Dover ducks under a wild hook from Hatcher.
Hatcher blocks a jab.
Dover gets tackled into the cage by Hatcher. Hatcher maintains the clinch.
Hatcher is looking to take this one to the mat.
Hatcher breaks the clinch and we're back to striking at distance.
Hatcher missing with a left hand there. Dover was out of range so wasted energy throwing that one.
Hatcher fails with a takedown attempt from distance.
Dover throws a poor cross that misses
and Hatcher counters into the clinch. Nicely done.
Dover tries a body shot but Hatcher blocks it.
We've had a slow start to the round here - hopefully the action picks up.
Both guys are working to get underhooks.
Hatcher breaks the clinch and we're back to striking at distance.
Dover misses with a straight right.
Hatcher closes the distance and looks for a trip takedown... aaaand he's got it - Hatcher lands in his opponent's guard.
Dover wants to sweep but no luck.
The fighters are pressed up against the cage, both looking to find a bit of space to work.
That's one minute gone in the round.
Dover bucks up whilst keeping hold of a body lock, managing to reverse the position. Now he's in top in Hatcher's guard.

Hatcher wants to hit a switch here but Dover passes into full mount! Oh no, disaster for Hatcher there!
Hatcher is wriggling around trying to escape.
Dover is in the full mount, landing strikes.
Dover is still in mount, landing shots to his trapped opponent. Hatcher can't stay in a position like this for much longer.
Hatcher throwing punches from his back but nothing is landing.
Dover goes for an armbar but Hatcher turns quickly into his guard - lovely anticipation from Hatcher.
Hatcher postures up and lands a big shot to Dover's brow.
That's two minutes gone in the round.
Dover trying to control the position here.
Dover looking for submissions from the bottom but instead Hatcher passes into side control.
Dover is positioning himself to get back to half guard.
We've seen a great period of action over the last minute or so - credit to both fighters for going all out!
Hatcher is looking to take a break and control but Dover is keeping him honest, looking to work from the bottom.
That's three minutes gone in the round.
Dover gets one leg under and gets the fight to half guard.
Hatcher has freed up his trapped foot and advances to mount.
Dover tries to get back to half guard but can't.
Hatcher can't quite control the action as he would like just now, as Dover is looking to escape.
That's four minutes gone in the round.
Hatcher fakes a shot to the body and cracks his opponent in the head. Nice ground and pound there!
Dover tries to hold on but Hatcher postures up.
Dover tries to get back to half guard but can't.
Dover in a bad spot here, taking shots to the head.
Dover working to try and regain half guard.
Tom Dover has got the better of the ground game so far.
Hatcher raining down shots from the mount!
The referee warns Dover that he has to improve his position here as he takes two more clean shots to the head.
And thats the end of the round the fighters go back to their corners.
Hardnose Hatcher dominated that second round.
That's the end of the round. The referee orders the cornermen out of the cage so we can get back down to business. This is the final round!

Dover slaps away a takedown attempt from Hatcher, before circling back to the center of the mat.

It looks like Tom Dover has been cut.
Hatcher steps to the side to avoid the strikes from Dover.
Hatcher moves away from the strike by Dover.
Hatcher rushes Dover and presses him up against the cage.
Hatcher manages to break the clinch.
Hatcher misses with a takedown attempt - Dover sprawls well and throws a nice strike on the way out which just misses.
A slow jab from Dover misses its intended target.
We've had a slow start to the round here - hopefully the action picks up.
Dover misses with an uppercut.
Dover darts in looking for a takedown but Hatcher gets double underhooks and turns Dover into the cage.
Dover swings wildly with a right hand that was never going to find it's target.
Hatcher waving his hands out in front of him, looking to distract Dover.
That's one minute gone in the round.
Hatcher throws out a loose jab but Dover uses good head movement to avoid it.
A slow jab from Dover misses its intended target.
The fighters circling - Dover throws out the jab but it was never going to land.
Dover shoots in for a takedown but doesn't get it.
Dover swings wildly with a right hand that was never going to find it's target.
Dover misses with a left hand
and Hatcher moves into the clinch.
Hatcher wants to take the fight to the mat but Dover manages to get underhooks and keep the fight in the clinch.
That's three failed takedown attempts in the round for Hardnose Hatcher. That's going to take a lot out of him.
Dover misses with a hook to the ribs.
Dover trying to stall but Hatcher improves his position.
Dover pulls guard successfully.
The ref warns both fighters not to hold the cage as they work up against the meshing.
Dover looks to be working for a triangle here. Oh, it looks like he might have it! Hatcher has picked Dover up and slammed him! Dover can't keep hold of the triangle and Hatcher manages to pass to side control!
Hatcher wants to control but Dover is keeping him busy.
That's two minutes gone in the round.
Dover is looking for a sweep.
Hatcher wants to control but Dover is keeping him busy.
Hatcher fails to land a wild elbow strike.
Dover tries to work a leg under to get back to half guard but Hatcher wriggles his own leg back out and remains in side control.
Hatcher working away.
Hatcher scoring with punches and elbows.
Dover tries to get back to half guard but can't.
Dover sneaks back into half guard.
That's three minutes gone in the round.
Dover is not content to let Hatcher control the position.
Hatcher throwing shots but they're hitting the canvas more than the man.
Dover is looking for a sweep. Hatcher is wise to his cunning plan and keeps the top position.
Hatcher throws a big elbow that misses, also allowing Dover to regain full guard.
Hatcher is looking to work some ground and pound but Dover has wrist control.
A real slowdown in the pace of the fight for a moment, as Dover holds on and takes a little breather.
Dover had isolated an arm as going for a kimura. Hatcher defends it easily.
That's four minutes gone in the round.
The crowd are hurling abuse towards the fighters... You can hardly blame them though because there isn't a lot going on in the fight.
Dover looking for a sweep. Not yet Dover, not yet.

The ref stands the fighters back up due to a lack of activity.
Hatcher tries to clinch but is not successful on this occasion.
Hatcher just misses with a punch to the body.
Dover gets the takedown into side control.
Hatcher dodges the ground and pound from Dover.
Dover scoring with punches and elbows.
The crowd thankful this round is nearly over.
Dover wants to control for a moment but Hatcher uses the opportunity to move back to half guard.
Dover lands with an elbow from half guard - that looked like it hurt.
And that's the end of the fight!
Tom Dover comfortably won the final round on my scorecard.
I think Dover has won this one but let's see whether the judges agree with me. Over to the ring announcer for the scorecards.
Ladies and gentlemen, after 3 rounds of action, we go to the scorecards for a decision.
Judge John Kavanagh scores the fight for Tom Dover!
Judge Alyssa Summers scores the fight for Tom Dover!
Judge Chad Campbell scores the fight for Tom Dover!
Tom Dover wins by unanimous decision!
|
|
|
|
|
|
|
|
|
|
|
|
|
|
|
|
|
|
|
|
|
|
|
| S |
C
A |
G |
S |
C
B |
G |
|
S |
C |
G |
|
energy
A | B |
|
hype
A | B |
|
pop
A | B |
|
mgr
A | B |
|
FIGHT
RATING
38% |
|
|
|
|
|
|
|
Main event
|
Coming up we have a welterweight MMA rules bout between Jeremy Bink (ranked 5745 p4p, 0 weight class) and Talmadge Kendelwort (ranked 5678 p4p, 0 weight class). Jeremy Bink has the better chin. Will he look to stand and bang today?
 |
|
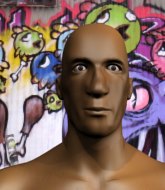 |
| 175 cm
25
170 lbs
1 - 0 - 0 |
|
177 cm
25
176 lbs
1 - 0 - 0 |
Good takedowns
Basic striking
Very quick |
|
Good takedowns
Basic striking
Experienced |
|
| |
|
Ladies and gentlemen. This fight is 3 rounds, in the welterweight division.
Introducing the fighter to my left, fighting out of the red corner.
With a record of
1 - 0 - 0, fighting out of New York, Jeremy Bink!
And introducing the fighter to my right, fighting out of the blue corner.
With a record of
1 - 0 - 0, fighting out of New York, Talmadge Kendelwort!
The judges for this bout are Alyssa Summers, Bruno Lombardi and David Schapiro.
The bell rings for round one and we are underway!
Kendelwort throws a shot from downtown. Bink moves away and avoids it.
Bink thows a leg kick but Kendelwort checks it
and Kendelwort counters with a shoot takedown into half guard.
The fighters are pressed up against the cage, both looking to find a bit of space to work.

Bink looking to work for a kimura from the bottom.
Bink wants to control but Kendelwort is keeping busy and won't allow it.
The referee walks around the fighters to get a better view of the action. Kendelwort lands a nice short elbow.
Bink trying to hold on to Kendelwort's head to control him but Kendelwort postures up.
We've had a slow start to the round here - hopefully the action picks up.
The referee walks around the fighters to get a better view of the action. Kendelwort lands a nice short elbow.
Bink is looking to regain full guard. Not this time though.
Kendelwort passes into side control, despite Bink's attempt to control the position.
Kendelwort really doesn't want to stay on the ground with Bink. If he can't get it back to his feet, it's only a matter of time before he'll be tapping out.
That's one minute gone in the round.
Kendelwort wants to lay and pray for a moment but Bink keeps working.
Kendelwort tries to land with some ground and pound but misses.
Bink is looking to regain half guard here but Kendelwort keeps moving and retains side control.
Kendelwort postures up a little and throws a couple of hammerfists but they don't connect properly.
Bink struggling a bit here.
Kendelwort works a knee to the body and follows up with a nice elbow to the head.
Bink is trying to improve his position.
That's two minutes gone in the round.
Bink is sneaking out the side here. He's bucked Kendelwort off and has taken his back!
Kendelwort trying to control the hands but Bink won't let him.
The ref warns both fighters not to hold the cage as they work up against the meshing.
The fighters are starting to perspire pretty heavily.
Kendelwort rolls, trying to escape but Bink keeps control of the position.
The referee is taking a good look at Kendelwort as he is on the wrong end of some big shots from Bink!
Bink gets his hands free as Kendelwort looks to control.
You can see the frustration on Kendelwort's face
He knows he is in trouble unless he improves his position sooner rather than later.
Kendelwort turns into Bink and is now in his guard.
Bink working a defensive guard here.
This has been an exciting period of action!
Bink pulls Kendelwort in to control the position.
That's three minutes gone in the round.
Kendelwort is intent on slowing down the pace of the fight, simply looking to control.
Kendelwort with a flurry of punches that miss.
Kendelwort trying to control but Bink is working from the bottom.
There's a bit of a scramble here and now Bink is on top in guard.
Bink stopping the sweep attempt from Kendelwort.
Bink trying to control the position from guard on top but Kendelwort is wriggling around, looking for whatever he can.
Bink preventing the sweep.
That's four minutes gone in the round.
Well. There's a bit of a lull in the action here and the crowd are starting to get restless.
Bink looking to pass the guard.
Kendelwort keeping moving, preventing Bink from controlling successfully.
Kendelwort controls Bink momentarily but Bink frees himself.
Bink looking to sit in guard and control but Kendelwort gets the butterfly guard and sweeps. He's now in the guard on the top.
Bink looking to sweep here. No luck so far.
Bink wants to control here, rather than go for any submissions from the bottom. At least for now.
The crowd thankful this round is nearly over.
Kendelwort looking to pass the guard.
Kendelwort scoring with punches to the head and body.
And thats the end of the round the fighters go back to their corners.
Talmadge Kendelwort dominated that round.
That's the end of the round. The referee orders the cornermen out of the cage so we can get back down to business.
Kendelwort uses decent footwork to sidestep a right hand from Bink.
Nice sprawl there from Bink as Kendelwort shoots in.
Bink loads up on a big right hand but Kendelwort slips the punch.
Kendelwort shoots in looking for a double leg takedown. Bink defends it nicely.
Bink swings and misses with a hook to the body.
Kendelwort keeping a good distance there, avoiding the body shot.
Nice sprawl there from Bink as Kendelwort shoots in.
Jeremy Bink has stuffed three takedown attempts in the round now. That's going to take a lot out of Talmadge Kendelwort.
Bink misses with a low kick.
We've had a slow start to the round here - hopefully the action picks up.
Kendelwort shoots in for a takedown but Bink shows good takedown defense.
Kendelwort keeping his hands up high there, blocking the jab from Bink.
Kendelwort throws a looping left and ducks down for a takedown. He's got his arms around Bink's waist but Bink gets an underhook and avoids the takedown by throwing Kendelwort off to one side.
Kendelwort fails with a takedown attempt from distance.
That's one minute gone in the round.
Kendelwort closes the distance and after a bit of a stuggle, scores a takedown into Bink's guard.
Kendelwort is breathing heavily.
Bink looking to control.
Bink has control of Kendelwort's left arm, preventing Kendelwort from doing any damage.
Bink looking for submissions off his back, moving his hips, looking for an opening.
Bink is trying to control the position but Kendelwort postures up.
Bink is looking for a guillotine. You can't force these things though and Kendelwort defends well.
Kendelwort landing some decent shots from guard.
Bink wants to sweep but no luck.
That's two minutes gone in the round.
Bink is working actively off his back, looking to secure an arm or perhaps work for a triangle.
Bink manages to sweep nicely, so he's now on top. Kendelwort manages to get himself to full guard.
The crowd are loving this. Great action here.
Bink postures up to throw the ground and pound strikes but they don't connect.
Bink lands a couple of elbows.
Kendelwort lands a beautiful sweep and he's now moved into his opponent's guard.
Bink has a loose triangle. He'll be looking to tighten that up but Kendelwort can see exactly what he's planning and manages to posture up and free himself.
That's three minutes gone in the round.
Bink looking for submissions from the bottom here. Moving his hips around, possibly looking for an armbar.
Bink has thrown up a leg looking for a triangle. Kendelwort doesn't defend quickly enough and Bink has managed to lock this one up! Can Kendelwort escape?! NO! He's tapping out! Damn, that was a quick submission - congrats to Bink on a fantastic submission victory.
Ladies and gentlemen, after 3:35 of round 2, we have a winner by way of Submission (Triangle). Jeremy Bink!
|
|
|
|
|
|
|
|
|
|
|
|
|
|
|
|
|
|
|
|
|
|
|
| S |
C
A |
G |
S |
C
B |
G |
|
S |
C |
G |
|
energy
A | B |
|
hype
A | B |
|
pop
A | B |
|
mgr
A | B |
|
FIGHT
RATING
39% |
|
|
|
|
|
|
|
|
|
|

