 |
RISE 19 - Alison vs Faze PBP Commentary |
Undercard bout
|
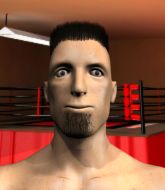
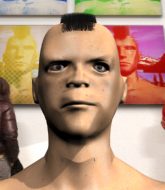
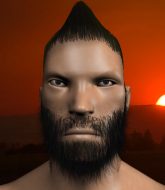
Coming up we have a light heavyweight MMA rules bout between Big Boi (ranked 7641 p4p, 728 weight class) and Herbal The Leaf (ranked 7552 p4p, 722 weight class). Herbal The Leaf has the better chin. Will he look to stand and bang today?
 |
|
 |
| 190 cm
18
210 lbs
0 - 0 - 0 |
|
178 cm
18
200 lbs
2 - 0 - 0 |
BJJ White Belt
Excellent MT
Big heart |
|
BJJ Blue Belt
Basic striking
Very confident |
|
| |
|
Ladies and gentlemen. This fight is 3 rounds, in the light heavyweight division.
Introducing the fighter to my left, fighting out of the red corner.
With a record of
0 - 0 - 0, fighting out of Los Angeles, Big Boi!
And introducing the fighter to my right, fighting out of the blue corner.
With a record of
2 - 0 - 0, fighting out of Los Angeles, Herbal The Leaf!
The judges for this bout are Frank Antenori, Timothy Bukovac and Don Winkell.

The bell rings for round one and we are underway!
A jab lands there for Boi.
Boi lands a body shot.

The Leaf scores with a takedown into Boi's guard.
The Leaf with a nice head shot there.
The Leaf is in close to Boi's body, working some short punches and elbows.
The fighters are pressed up against the cage, both looking to find a bit of space to work.
The Leaf throwing strikes but missing.
The Leaf landing with the ground and pound.
The Leaf postures up to throw the ground and pound strikes but they don't connect.
Boi is working from a closed guard but he's struggling to control his opponent.
Hammerfist, elbow! yells The Leaf's corner. There ya go! There ya go!
The Leaf working in close now, lands a nice elbow to the side of Boi's head.
Hammerfist, elbow! yells The Leaf's corner. There ya go! There ya go!
Boi knows he needs to get back to his feet asap. He's simply no match for The Leaf on the ground.
This has been an exciting period of action!
The Leaf lands a couple of elbows.
The Leaf scores with a decent looking elbow strike.
The Leaf lands a couple of elbows.

Boi is rocked!
Boi controls The Leaf momentarily but The Leaf frees himself.
Oh Boi is still in real trouble! Will he be able to recover?!!

That's one minute gone in the round.
The Leaf lands a nice shot whilst sitting in his opponent's guard.
The Leaf makes a bit of distance and scores with some ground and pound, still in guard.
The Leaf is working Boi over from the guard. He should look to pass the guard and do a little more damage with these strikes.
The Leaf arches his back and unloads with a massive left and a right! Boi's eyes roll back into his head, he's out cold! The ref dives in to stop the fight - wow, they were hard shots!
Ladies and gentlemen, after 1:36 of round 1, we have a winner by way of KO (Strikes). Herbal The Leaf!
|
|
|
|
|
|
|
|
|
|
|
|
|
|
|
|
|
|
|
|
|
|
|
| S |
C
A |
G |
S |
C
B |
G |
|
S |
C |
G |
|
energy
A | B |
|
hype
A | B |
|
pop
A | B |
|
mgr
A | B |
|
FIGHT
RATING
70% |
|
|
|
|
|
|
|
Undercard bout
|
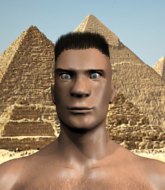
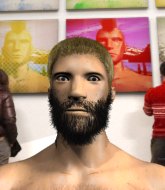
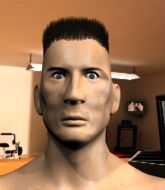
Coming up we have a light heavyweight MMA rules bout between Manolito Punyos (ranked 6957 p4p, 693 weight class) and Pedro Changgg (ranked 25532 p4p, 829 weight class). Buckle up people - heeeeeeeeeere we go!
 |
|
 |
| 180 cm
26
205 lbs
3 - 3 - 0 |
|
185 cm
26
217 lbs
0 - 2 - 0 |
BJJ Blue Belt
Solid boxing
Granite chin |
|
BJJ White Belt
Dangerous knees
Tends to cut |
|
| |
|
Ladies and gentlemen. This fight is 3 rounds, in the light heavyweight division.
Introducing the fighter to my left, fighting out of the red corner.
With a record of
3 - 3 - 0, fighting out of Helsinki, Manolito Punyos!
And introducing the fighter to my right, fighting out of the blue corner.
With a record of
0 - 2 - 0, fighting out of St Petersburg, Pedro Changgg!
The judges for this bout are Timothy Bukovac, and Frank Antenori.
The bell rings for round one and we are underway!
Punyos scores with a jab to the body.
Punyos tests Changgg's chin there with a solid looking shot.

It looks like Pedro Changgg has been cut.
A punch combination from Changgg misses.
Changgg avoids the head kick by Punyos.

Punyos lands a left and a right that send Changgg crashing to the mat, dazed. Punyos thinks about following him to the mat but decides to wave him back up to his feet!
Fantastic stuff here - a very entertaining period of action, which has drawn cheers from the crowd.
Punyos throws a leg kick
and Changgg counters with a good low kick that Punyos was not able to check.
Punyos darts in and lands a big hook, right on the button! Changgg's legs crumble underneath him as he falls to the canvas! The ref tackles Punyos before he gets to land any more shots to his stricken foe.
Ladies and gentlemen, after 0:25 of round 1, we have a winner by way of KO (Punch). Manolito Punyos!
|
|
|
|
|
|
|
|
|
|
|
|
|
|
|
|
|
|
|
|
|
|
|
| S |
C
A |
G |
S |
C
B |
G |
|
S |
C |
G |
|
energy
A | B |
|
hype
A | B |
|
pop
A | B |
|
mgr
A | B |
|
FIGHT
RATING
100% |
|
|
|
|
|
|
|
Undercard bout
|
|
|
|
Undercard bout
|
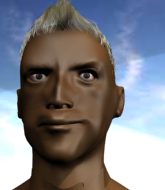
Coming up we have a lightweight MMA rules bout between Pyrrhus Nikos (ranked 2682 p4p, 296 weight class) and Nick Morris (ranked 4332 p4p, 446 weight class). Nikos comes to the cage accompanied by Holding Out For a Hero. Nick Morris has the eye of the tiger tonight.
 |
|
 |
| 175 cm
25
155 lbs
4 - 0 - 0 |
|
178 cm
19
163 lbs
1 - 1 - 0 |
Good takedowns
Brawler
Good chin |
|
BJJ Blue Belt
Excellent MT
Heavy handed |
|
| |
|
Ladies and gentlemen. This fight is 3 rounds, in the lightweight division.
Introducing the fighter to my left, fighting out of the red corner.
With a record of
4 - 0 - 0, fighting out of New York, Pyrrhus Nikos!
And introducing the fighter to my right, fighting out of the blue corner.
With a record of
1 - 1 - 0, fighting out of Montreal, Nick Morris!
The judges for this bout are Jack Bonds, Don Winkell and .
The bell rings for round one and we are underway!
Nikos darts in looking for a takedown but Morris gets double underhooks and turns Nikos into the cage.
Nikos takes a shot right to the liver - Bas would have been proud of that punch.
Morris showing good head movement there, avoiding the strikes from Nikos.
Morris staying out of range there.
This fight brought to you by 5M nutrition - it's mmmmm tasty. Nice jab by Morris.
Morris scores with a jab to the jaw of his opponent.
Nikos throws a hook to the body but it doesn't connect.
Morris scores with a jab.
Nikos gets his head snapped back by a nice shot there.
Morris fakes low and throws an overhand right that catches Nikos on the side of the head.
Nikos is rocked!
The crowd cheering loudly, showing their appreciation for the quality fight we're seeing here.
Morris lands a leg kick. The shin dug right into the meat of the thigh.
Nikos takes a solid shot to the body. That one hurt him but he's trying not to show it.
A looping hook to the body misses from Nikos. Morris does a little dance to reset his feet.
Nikos shoots in looking for a takedown but Morris manages to keep the fight standing, pushing Nikos's face into the canvas for good measure before circling away.
Morris works Nikos's body with a nice hook.
That's one minute gone in the round.
Nikos takes an uppercut right on the button but keeps his composure.
Oh Nikos is still all over the place! His legs are completely gone! Will he be able to recover?!!
Morris steps in with a hook that catches Nikos right on the chin and knocks him to the floor! Morris follows him down with more strikes and that's all she wrote! Nikos looks absolutely devastated.
Ladies and gentlemen, after 1:10 of round 1, we have a winner by way of TKO (Strikes). Nick Morris!
After the fight, Nick Morris was humble in paying tribute to his opponent but made it clear he wants to go on to bigger and better things. It seemed to go down well with the crowd who cheered him loudly.
|
|
|
|
|
|
|
|
|
|
|
|
|
|
|
|
|
|
|
|
|
|
|
| S |
C
A |
G |
S |
C
B |
G |
|
S |
C |
G |
|
energy
A | B |
|
hype
A | B |
|
pop
A | B |
|
mgr
A | B |
|
FIGHT
RATING
76% |
|
|
|
|
|
|
|
Undercard bout
|
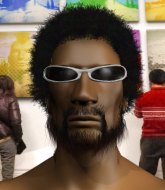
Coming up we have a welterweight MMA rules bout between Jhin Markell (ranked 3299 p4p, 379 weight class) and Wade Rogers (ranked 4129 p4p, 461 weight class). The key to victory for Jhin Markell has got to be keeping the fight on the feet.
 |
|
 |
| 182 cm
26
182 lbs
4 - 1 - 0 |
|
175 cm
25
170 lbs
3 - 1 - 0 |
Good takedowns
Basic striking
Big heart |
|
Powerful takedowns
Basic striking
Powerful |
|
| |
|
Ladies and gentlemen. This fight is 3 rounds, in the welterweight division.
Introducing the fighter to my left, fighting out of the red corner.
With a record of
4 - 1 - 0, fighting out of New York, Jhin Markell!
And introducing the fighter to my right, fighting out of the blue corner.
With a record of
3 - 1 - 0, fighting out of Sydney, Wade Rogers!
The judges for this bout are Frank Antenori, Jack Bonds and .
The bell rings for round one and we are underway!
Rogers shoots for a double leg takedown but Markell sprawls well. He's pushed Rogers's face into the mat and manages to get back to his feet relatively easily.
Markell stuffs the takedown.
As Rogers tries to get set, Markell tries to push him back and clinch up but Rogers manages to avoid the attempt.
Markell throws a body shot but no joy.

Markell gets in close and instigates a clinch.
Markell working aggressively here.
Rogers has picked Markell up - he's going for a ride! Rogers dumps his opponent to the mat with a thud and settles into half guard.
Markell avoiding damage under a succession of punches from Rogers.
Markell is looking to regain full guard. Not this time though.
Markell is working hard here to advance position.
Markell is trying to control but can't.
We've had a slow start to the round here - hopefully the action picks up.
Markell has hold of Rogers's hands but Rogers slips his arm to the side and lands an elbow.
The fighters are pressed up against the cage, both looking to find a bit of space to work.
Markell wants to improve his position but Rogers is controlling well.
Markell has no desire to be mounted, so is trying to control. Rogers is working away from the top position though.
The ref warns both fighters not to hold the cage as they work up against the meshing.
Rogers lands strikes from half guard.
That's one minute gone in the round.
Markell is looking to improve his position.
Rogers working some ground and pound from close in. He's looking to maintain this position and strike for a while by the looks of things... although he'll probably advance to full mount in a minute now I've said that.
Markell is looking to regain full guard. Not this time though.
Markell works his way to full guard. Good work.
Rogers scoring with some ground and pound.
Rogers controlling from the top position.
Markell trying to control the position.

Rogers got a little sloppy there for a moment and Markell has worked his way into a loose triangle - can he finish it?! No, Rogers has managed to get both his arms back between Markell's legs - danger averted.
Rogers trying to control the position from guard on top but Markell is wriggling around, looking for whatever he can.
Rogers connects with a couple of short punches.
Markell looking to hit a scissor sweep but Rogers is one step ahead there.
Rogers landing some decent shots from guard.

That's two minutes gone in the round.
Rogers stopping the sweep attempt from Markell.
Rogers got a little sloppy there for a moment and Markell has worked his way into a loose triangle - can he finish it?! No, Rogers has managed to get both his arms back between Markell's legs - danger averted.
Rogers with a flurry of punches that miss.
Rogers postures up.
Rogers working from the guard for now, landing some ground and pound.
Rogers controlling from the top position.
Rogers keeps in close for a moment and lands a decent shot to the side of Markell's head.
Markell looks to be in better condition than last time we saw him fight. Obviously he's been working hard on his cardio.
Rogers working from the guard for now, landing some ground and pound.
Rogers content to strike from guard, landing some decent shots.
Rogers postures up and lands a big shot to Markell's brow.
The crowd cheering loudly, showing their appreciation for the quality fight we're seeing here.
Rogers content to strike from guard, landing some decent shots.
Rogers lands a couple of elbows.
Markell controls Rogers momentarily but Rogers frees himself.

That's three minutes gone in the round.
Markell throws a couple of shots from the bottom but they don't land.
Rogers wants to control from the top but Markell keeps moving.
Rogers lands a couple of digs.
Rogers lands a nice shot whilst sitting in his opponent's guard.
Rogers with a nice head shot there.
Rogers trying to control but Markell is working from the bottom.
Markell wants to sweep here but Rogers controlling him for the moment.
Rogers distracts Markell with his right hand and drops a big elbow with his other arm.
Rogers passes easily into side control. Nice work.
Markell is working to avoid the ground and pound but Rogers connects with a decent elbow.
Markell is looking for a sweep.
My spies in Doherty's Gym inform me that Rogers has been getting involved in the gym's BJJ sparring sessions. Let's see whether that pays dividends!
Rogers grinds an elbow into Markell's temple.

That's four minutes gone in the round.
Rogers cracks Markell with a big elbow.
Markell is rocked!
Rogers is working Markell over with some ground and pound from side control.
Oh Markell is still in real trouble! Will he be able to recover?!!
Rogers working the head with strikes.
Markell is looking to regain half guard here but Rogers keeps moving and retains side control.
Wooooo! Give it up for these two warriors! They are putting on a show!
Markell seems to have got his legs back now.
Rogers cracks Markell with an elbow. That is naaassty.
Markell is looking to reverse the position.
Rogers creates a bit of distance and throws down some hard shots.
Rogers working the head and body with strikes.
Markell can't do much from the bottom here.
Rogers wants to control but Markell is keeping him busy.
Markell is looking to regain half guard here but Rogers keeps moving and retains side control.
Markell sneaks back into half guard.
And thats the end of the round the fighters go back to their corners.
Wade Rogers dominated that round.
That's time! Back to the action!

Markell staying out of range there.
Markell closes the distance and presses his opponent up against the cage.
Rogers goes for a takedown attempt but Markell pushes him away and we're back to fighting at a distance.

Markell shoots in with a lovely double leg takedown. Rogers manages to land in full guard to minimise the damage.
Markell wants to control from the top but Rogers keeps moving.

Rogers has his foot on Markell's thigh. He's trying to push off and get in position for a triangle, I think. Markell works his way back into a safe position though.
Rogers keeping moving, preventing Markell from controlling successfully.
Markell pushing down on Rogers's thigh, trying to pass to half guard. He's managed it... Nice work.
We've had a slow start to the round here - hopefully the action picks up.
Rogers is looking to regain full guard. Not this time though.
Markell wants to lay and pray for a moment but Rogers keeps working.
Rogers is looking to escape.
That's one minute gone in the round.
Markell passes the guard and advances to mount!
Rogers regains half guard.
Rogers is looking to sinch up a guillotine here but Markell pulls his head out easily.
Rogers wants to get back to his feet.
Markell is trying to control the action in half guard but Rogers is working away on the bottom, looking perhaps to get back to full guard.
Markell is nestled in close to Rogers, controlling him well. He's worked in a nice elbow to the side of the head as well, for good measure.
Markell seems to be working for a kimura but Rogers defends the submission attempt.
Rogers is trying to get back to full guard.
That's two minutes gone in the round.
Markell throwing punches and elbows but they're not doing any damage.
Markell is working for a submission here. He's got hold of the far side arm and he's looking for a kimura. He's cranking on the arm and he's got it! Rogers is tapping out! Ouch, that looked like it hurt!
Ladies and gentlemen, after 2:27 of round 2, we have a winner by way of Submission (Kimura). Jhin Markell!
Jhin Markell made sure to mention his sponsor, Pit Bull Development in his post fight interview.
|
|
|
|
|
|
|
|
|
|
|
|
|
|
|
|
|
|
|
|
|
|
|
| S |
C
A |
G |
S |
C
B |
G |
|
S |
C |
G |
|
energy
A | B |
|
hype
A | B |
|
pop
A | B |
|
mgr
A | B |
|
FIGHT
RATING
45% |
|
|
|
|
|
|
|
Undercard bout
|
Coming up we have a featherweight MMA rules bout between Never TryTo (ranked 9275 p4p, 489 weight class) and Zardu Hasselfrau (ranked 9411 p4p, 493 weight class). Hasselfrau has chosen Guardians Inferno as his entrance music. Over to our ring announcer for the fighter introductions!
 |
|
 |
| 180 cm
19
140 lbs
3 - 1 - 0 |
|
171 cm
19
152 lbs
1 - 2 - 0 |
BJJ Blue Belt
Basic striking
Likes comics |
|
BJJ Blue Belt
Solid Muay Thai
Granite chin |
|
| |
|
Ladies and gentlemen. This fight is 3 rounds, in the featherweight division.
Introducing the fighter to my left, fighting out of the red corner.
With a record of
3 - 1 - 0, fighting out of Tokyo, Never TryTo!
And introducing the fighter to my right, fighting out of the blue corner.
With a record of
1 - 2 - 0, fighting out of Los Angeles, Zardu Hasselfrau!
The judges for this bout are Don Winkell, Frank Antenori and Timothy Bukovac.
The bell rings for round one and we are underway!
TryTo tries for a takedown but Hasselfrau sees it coming a mile off and avoids it easily.
Hasselfrau tries to counter with a clinch but TryTo shakes him off and moves away.
TryTo gets a takedown into half guard.

Hasselfrau has managed to escape just enough to sneak back to his feet but TryTo is on him like a limpet, forcing Hasselfrau back against the cage.
TryTo is working for takedown but Hasselfrau is calmly controlling the position for now.
Hasselfrau lands a damaging elbow.
Hasselfrau pushes off and fires off an elbow that misses, before clinching up again, against the cage.
TryTo really does look like a pencil wearing a pair of gloves. Let's hope he has a gameplan to suit that ridiculous body shape.
A nice glancing elbow lands by Hasselfrau.
The crowd are loving this. Great action here.
TryTo has hold of a leg and is looking for a trip takedown. Hasselfrau avoids it nicely though and we remain in the clinch.
That's three failed takedown attempts in the round for Never TryTo. That's going to take a lot out of him.
Hasselfrau unloads a knee to the mid-section. TryTo lets out a prehistoric sounding urrrrgh.
Hasselfrau lands a glancing elbow in the clinch.
Kneeeeees! The crowd are calling for knees to the body. Hasselfrau obliges.
A nice glancing elbow lands by Hasselfrau.
That's one minute gone in the round.
Hasselfrau lands an elbow just above TryTo 's eye.
TryTo is rocked!
Hasselfrau with the Thai clinch. He's looking to land a big knee but he's not managed it this time.
Hasselfrau lands an elbow that stopped TryTo in his tracks for a moment.
Hasselfrau misses with a knee to the head.
Hasselfrau misses with a knee to the head.
Hasselfrau lands an elbow just above TryTo 's eye.
Oh TryTo is still all over the place! His legs are completely gone! Will he be able to recover?!!
Hasselfrau connects with a knee to the head.
Hasselfrau creates a bit of space for himself and sneaks an elbow through TryTo's defenses.
Nice elbow from Hasselfrau.
Hasselfrau looks to throw an elbow but misses.
Hasselfrau working TryTo over with knees to the body.
Hasselfrau looking to throw knees to the head but TryTo is blocking nicely.
Fantastic stuff here - a very entertaining period of action, which has drawn cheers from the crowd.
Hasselfrau lands a nice elbow from the clinch.
Hasselfrau lands a nice elbow.
Hasselfrau looking to throw knees to the head but TryTo is blocking nicely.
Hasselfrau's coach down at Croque Mitaine Gym was telling us pre-fight that they have been working on Hasselfrau's balance. Obviously they view that as a key factor in the outcome of this fight.
That's two minutes gone in the round.
Hasselfrau lands a knee to the head.
Hasselfrau looks to throw an elbow but misses.
Hasselfrau creates a bit of space for himself and sneaks an elbow through TryTo's defenses.
Hasselfrau connects with a nasty looking knee right to TryTo's face.
Hasselfrau misses with a knee strike.
Hasselfrau tries to land a knee to the head but misses.
Hasselfrau lands a damaging elbow.
Hasselfrau is looking to score with knees to the body. Maybe he'll change it up and go body then head. TryTo is defending well for now.
Hasselfrau with an attempt at a knee that misses.
Hasselfrau throws a vicious knee straight up the middle but TryTo blocks it with crossed arms.
Hasselfrau prevents the takedown attempt.
Hasselfrau lands an elbow that stopped TryTo in his tracks for a moment.
Hasselfrau creates a bit of distance and throws an elbow that only just misses.
Hasselfrau connects with a knee to the head.
That's three minutes gone in the round.
Hasselfrau tries to land a knee to the head but TryTo blocks with his arms.
Hasselfrau prevents the takedown attempt.
TryTo drops down looking for an ankle pick but Hasselfrau pulls his leg out and moves away.
TryTo is breathing heavily.

Hasselfrau rushes TryTo and presses him up against the cage.
TryTo seems to have got his legs back now.
Hasselfrau throws a hook to the body. More of an arm punch but it's all scoring with the judges.
Hasselfrau lands an elbow inside that TryTo shrugs off.
TryTo gets a nice trip takedown into half guard.
The fighters are pressed up against the cage, both looking to find a bit of space to work.
Hasselfrau blocking the ground and pound attempt from TryTo.
Hasselfrau wants to get back to his feet.
That's four minutes gone in the round.
Hasselfrau kicks TryTo off and gets back to his feet.
Hasselfrau checks a low kick. Bone on bone - not my idea of a good time.
TryTo looks to be in better condition than last time we saw him fight. Obviously he's been working hard on his cardio.
A nice combination there by Hasselfrau.
The fans in attendance giving it up for the two fighters, who have really let it all hang out in the last minute or so!
Hasselfrau closes the distance and presses his opponent up against the cage.
Hasselfrau misses with a knee to the head.
TryTo tries to score a body lock takedown but Hasselfrau shows good agility there to stay on his feet.
Hasselfrau landing knees to the body.
Hasselfrau using the Thai plumb to throw knees but TryTo has his back arched nicely, preventing the strike.
Hasselfrau tries to throw a body punch but TryTo avoids it by throwing Hasselfrau back against the cage.
The crowd applaud the fighters' efforts here as the round comes to an end.
Hasselfrau throws a vicious knee straight up the middle but TryTo blocks it with crossed arms.
Hasselfrau lands a glancing elbow in the clinch.
TryTo is looking for a takedown up against the cage. Hasselfrau gets underhooks though and prevents the takedown attempt.
Hasselfrau looking to throw knees to the head but TryTo is blocking nicely.
And thats the end of the round the fighters go back to their corners.
Zardu Hasselfrau dominated that round.
The fighters get back to their feet, the hooter sounds and we're back to the action!
Hasselfrau moves in looking to clinch but TryTo pushes him off.
Hasselfrau moves in looking to clinch but TryTo pushes him off.
Hasselfrau tries to close the distance and clinch up but TryTo swats him away and circles back towards the center.
TryTo shoots in and scores a nice double leg takedown into half guard.

TryTo stands up from half guard... He's had enough of that ground malarky for the time being.
We've had a slow start to the round here - hopefully the action picks up.
Hasselfrau wants to clinch.
TryTo tries to counter with a takedown but Hasselfrau is quick to defend against it.
Hasselfrau has been the more effective fighter overall so far.
Hasselfrau tries to clinch up.
Hasselfrau is looking to take this fight into the clinch.
That's one minute gone in the round.
Hasselfrau misses with a head kick.
Hasselfrau rushes TryTo and pushes him back against the cage in a clinch.
TryTo avoids a wild elbow strike from Hasselfrau.
TryTo goes for a takedown in the clinch but Hasselfrau prevents it.
Hasselfrau connects with a nasty looking knee right to TryTo's face.
Hasselfrau misses with a knee to the head.
Hasselfrau lands a glancing elbow in the clinch.
Hasselfrau scores with a knee to the head.
Hasselfrau pushes off and fires off an elbow that misses, before clinching up again, against the cage.
Hasselfrau with an attempt at a knee that misses.
TryTo wants a takedown but no success here.
Hasselfrau with the Thai clinch, lands a knee to the head.
That's two minutes gone in the round.
With the fighters up against the cage, Hasselfrau throws an elbow but misses.
Hasselfrau presses TryTo against the cage and delivers a mid-strength body shot.
Hasselfrau tries to land a knee to the head but misses.
The crowd cheering loudly, showing their appreciation for the quality fight we're seeing here.
Hasselfrau scores a nice knee to the body.
Both fighters are absolutely exhausted here.
TryTo is working for takedown but Hasselfrau is calmly controlling the position for now.
That's three failed takedown attempts in the round for Never TryTo. That's going to take a lot out of him.
Hasselfrau landing knees to the head.
TryTo takes an elbow to the temple.
Hasselfrau is pressed up against the cage. TryTo has hold of a leg and is looking to drag Hasselfrau down to the mat. Hasselfrau avoids the attempt though and has circled away. We're back to striking at a distance.
TryTo swats away the attempt to clinch by Hasselfrau.
Hasselfrau closes the distance and presses his opponent up against the cage.
Hasselfrau trying to land knees to the body.
Hasselfrau connects with a knee to the head.
That's three minutes gone in the round.
Hasselfrau tries a knee to the head but he's missed.
Hasselfrau tries to land a knee to the head but TryTo blocks with his arms.
Hasselfrau throws a knee to the head but misses.
Hasselfrau lands an elbow just above TryTo 's eye.
Hasselfrau lands a glancing elbow in the clinch.
TryTo dodges an elbow strike from Hasselfrau.
Hasselfrau comes over the top with an elbow. That landed flush.
TryTo avoids the elbow strike from Hasselfrau, against the cage.
Hasselfrau tries to land a knee to the head but TryTo blocks with his arms.
Hasselfrau with the Thai clinch. He's looking to land a big knee but he's not managed it this time.
Hasselfrau lands a nice elbow.
Hasselfrau with the Thai clinch. He's looking to land a big knee but he's not managed it this time.
That's four minutes gone in the round.
Hasselfrau connects with a nasty looking knee right to TryTo's face.
Hasselfrau throws a vicious knee straight up the middle but TryTo blocks it with crossed arms.
Hasselfrau tries to land a knee to the head but TryTo blocks with his arms.
TryTo goes for a takedown in the clinch but Hasselfrau prevents it.
TryTo takes a knee to the side of the body.
This is a great period of action - very entertaining stuff!
Hasselfrau connects with a knee to the head.
Hasselfrau crunches a lovely knee into TryTo's ribcage.
Knees to the body from Hasselfrau.
Hasselfrau lands a knee to the head.
Hasselfrau goes for a body shot but it's blocked.
A knee to the head by Hasselfrau.
Hasselfrau pushes off and fires off an elbow that misses, before clinching up again, against the cage.
And thats the end of the round the fighters go back to their corners.
Zardu Hasselfrau showed his class in that round. I'd imagine he'll take it on all the scorecards.
That's the end of the round. The referee orders the cornermen out of the cage so we can get back down to business. This is the final round!

TryTo shoots for a double leg takedown but Hasselfrau sprawls well. He's pushed TryTo's face into the mat and manages to get back to his feet relatively easily.
As TryTo backs off Hasselfrau throws a huge counter combo but TryTo manages to avoid it all.
Hasselfrau gets tackled into the cage by TryTo. TryTo maintains the clinch.
Hasselfrau pushes off and fires off an elbow that misses, before clinching up again, against the cage.
TryTo has dropped down and is looking to force the takedown but it's defended by Hasselfrau after a bit of a struggle.
Hasselfrau lands a glancing elbow in the clinch.
Hasselfrau throws a vicious knee straight up the middle but TryTo blocks it with crossed arms.
Hasselfrau looks to throw an elbow but misses.
Hasselfrau lands a nice elbow from the clinch.
TryTo prevents a body shot from Hasselfrau.
We've had a slow start to the round here - hopefully the action picks up.
Hasselfrau is defending well against a takedown attempt.
That's three failed takedown attempts in the round for Never TryTo. That's going to take a lot out of him.
Hasselfrau misses with an elbow strike.
Hasselfrau lands an elbow inside.
Hasselfrau throws an elbow but it misses.
Hasselfrau looking to throw knees to the head but TryTo is blocking nicely.
That's one minute gone in the round.
TryTo wants a takedown.
Both fighters are breathing heavily.
TryTo takes an elbow to the forehead.
TryTo wants a takedown but no success here.
Hasselfrau lands an elbow inside.
A right hook to the body lands for Hasselfrau.
Hasselfrau lands an elbow inside.
Hasselfrau connects with a nasty looking knee right to TryTo's face.
Hasselfrau misses with an elbow over the top.
Hasselfrau lands an elbow just above TryTo 's eye.
Hasselfrau misses with a shot to the kidneys.
TryTo takes an elbow to the temple.
Hasselfrau misses with a body punch.
That's two minutes gone in the round.
TryTo is pressed against the cage. Hasselfrau pushes back and unleashes a big elbow that really hurts TryTo! Two more big strikes from Hasselfrau and TryTo crumples to the mat and taps out furiously due to the strikes!
Ladies and gentlemen, after 2:10 of round 3, we have a winner by way of Submission (Strikes). Zardu Hasselfrau!
In his post fight interview, Zardu Hasselfrau started talking himself up. Luckily his charisma kept the crowd on side and gave him a good reception.
|
|
|
|
|
|
|
|
|
|
|
|
|
|
|
|
|
|
|
|
|
|
|
| S |
C
A |
G |
S |
C
B |
G |
|
S |
C |
G |
|
energy
A | B |
|
hype
A | B |
|
pop
A | B |
|
mgr
A | B |
|
FIGHT
RATING
74% |
|
|
|
|
|
|
|
Undercard bout
|
Coming up we have a featherweight MMA rules bout between Echart Tolle (ranked 4753 p4p, 355 weight class) and Jazz Clementine (ranked 5782 p4p, 396 weight class). The fight MMA fans around the world have waited their entire lives for!
 |
|
 |
| 180 cm
19
145 lbs
2 - 1 - 0 |
|
170 cm
19
145 lbs
2 - 1 - 0 |
BJJ Blue Belt
Excellent boxer
Granite chin |
|
BJJ White Belt
Excellent MT
Powerful |
|
| |
|
Ladies and gentlemen. This fight is 3 rounds, in the featherweight division.
Introducing the fighter to my left, fighting out of the red corner.
With a record of
2 - 1 - 0, fighting out of London, Echart Tolle!
And introducing the fighter to my right, fighting out of the blue corner.
With a record of
2 - 1 - 0, fighting out of Montreal, Jazz Clementine!
The judges for this bout are , Jack Bonds and Frank Antenori.
The bell rings for round one and we are underway!
Clementine dips to his left and cracks Tolle with an uppercut!
Tolle rushes Clementine and presses him up against the cage.
Clementine lands a shoulder strike that jolts his opponent's head backwards.
Clementine lands a nice shot to the body.
Tolle looks like he'd prefer to be striking at range right now.
Tolle working aggressively here.
Tolle tries a shoulder strike but it doesn't do any damage.
Clementine misses with a punch on the inside.
Clementine lands a body punch in the clinch.
Clementine gets through Tolle's defenses to land a nice punch to the side of the head.
Tolle takes a shot to the head.
Tolle wants to strike at distance but he can't break free of the clinch.
Tolle working hard to break the clinch.
Clementine throws a blind hook that connects with the side of Tolles head.
Clementine working aggressively here.
Clementine lands a shoulder strike that jolts his opponent's head backwards.
Wooooo! Give it up for these two warriors! They are putting on a show!
Tolle looks like he'd prefer to be striking at range right now.
A short right from Clementine on the inside.
Clementine is trying to slow down the pace in the clinch, to catch his breath.
Clementine lands a body punch in the clinch.
Clementine displaying some good clinch control by pressing Tolle up against the cage.
Clementine swings wildly with an uppercut but Tolle uses good head movement to avoid it.
That's one minute gone in the round.
Tolle landing some nice looking knees to the body.
A head punch blocked on the inside by Clementine.
Clementine lands with a short punch from the clinch.
Clementine misses with a short punch on the inside.
Clementine misses with a punch on the inside.
Clementine scores with a shoulder strike.
Tolle really does look like a pencil wearing a pair of gloves. Let's hope he has a gameplan to suit that ridiculous body shape.
Clementine prevents Tolle from breaking the clinch.
Clementine lands an uppercut.
Clementine working on landing some head shots here - that one got through nicely.
Tolle is rocked!
Clementine lands a right hand.
Oh Tolle is still all over the place! His legs are completely gone! Will he be able to recover?!!
Clementine dips a shoulder and cracks Tolle with a mighty uppercut! Tolle falls back against the cage and Clementine unloads with a barrage of strikes! Tolle is completely out with his eyes open, only supported by the cage! Save him ref! Eventually the ref decides to do his job and jumps in - Clementine screams abuse at the incompetent official before going over to celebrate with his corner. Brutal stuff!
Ladies and gentlemen, after 1:40 of round 1, we have a winner by way of TKO (Strikes). Jazz Clementine!
After the fight, Jazz Clementine was humble in paying tribute to his opponent but made it clear he wants to go on to bigger and better things. It seemed to go down well with the crowd who cheered him loudly.
|
|
|
|
|
|
|
|
|
|
|
|
|
|
|
|
|
|
|
|
|
|
|
| S |
C
A |
G |
S |
C
B |
G |
|
S |
C |
G |
|
energy
A | B |
|
hype
A | B |
|
pop
A | B |
|
mgr
A | B |
|
FIGHT
RATING
69% |
|
|
|
|
|
|
|
Undercard bout
|
Coming up we have a featherweight MMA rules bout between Tim Slater (ranked 2687 p4p, 236 weight class) and Alessio Bianchi (ranked 3969 p4p, 317 weight class). Slater comes into the arena with Chad VanGaalen - Blonde Hash blaring out of the sound system. Bianchi has chosen Die Antwoord - Pitbull Terrier as his entrance music. This should be a great matchup!
 |
|
 |
| 170 cm
19
145 lbs
3 - 0 - 0 |
|
174 cm
19
155 lbs
2 - 1 - 0 |
Good wrestling
Counter fighter
Granite chin |
|
Good wrestler
Basic striking
Granite chin |
|
| |
|
Ladies and gentlemen. This fight is 5 rounds, for the featherweight championship of the world!
Introducing the champion to my left, fighting out of the red corner.
With a record of
3 - 0 - 0, fighting out of Montreal, Tim Slater!
And introducing the challenger to my right, fighting out of the blue corner.
With a record of
2 - 1 - 0, fighting out of London, Alessio Bianchi!
The judges for this bout are Timothy Bukovac, Don Winkell and Jack Bonds.
The bell rings for round one and we are underway!
Bianchi fails with the takedown.
Bianchi looks for a takedown here. Will he get it? Slater is fending him off so far but Bianchi persists. Nope, Slater circles away and we're back to standing.
Bianchi shoots for a takedown but Slater saw that one coming a mile off and avoided it easily.
Slater is looking to counter punch.
Tim Slater has stuffed three takedown attempts in the round now. That's going to take a lot out of Alessio Bianchi.
Bianchi fails with a takedown attempt.
Bianchi tries to drive through with a takedown attempt but Slater defends well and Bianchi ends up having to push Slater into the cage where they will battle it out in the clinch.
Slater feinted with a counter takedown.
Bianchi gets a double leg takedown into Slater's guard.
Bianchi scores with a decent looking elbow strike.
The fighters are pressed up against the cage, both looking to find a bit of space to work.
We've had a slow start to the round here - hopefully the action picks up.
Bianchi passes into half guard.
Slater blocking the ground and pound attempt from Bianchi.
Bianchi is working hard to pass the guard. He's done it - he's now in full mount! Trouble for Slater!
That's one minute gone in the round.
Bianchi lands with some vicious ground and pound - can Slater hang on?
Slater is trying desperately to improve position.
Slater slips a leg in and gets back to half guard.
Bianchi not throwing his punches with enough precision this time.
Bianchi landing with strikes to the body and head, softening up his opponent.
Slater is working for an escape here. He's hooked one of Bianchi's legs and he's managed to sneak out and take Bianchi's back!
Bianchi can't escape the position.
The ref warns both fighters not to hold the cage as they work up against the meshing.
Bianchi breaks Slater's hooks off and manages to turn into his guard.
Bianchi stands up and looks to throw the legs aside to pass to side control. Slater swivels though and keeps the full guard.
Bianchi stopping the sweep attempt from Slater.
That's two minutes gone in the round.
Bianchi trying to control the position from guard on top but Slater is wriggling around, looking for whatever he can.
Bianchi postures up as if he's going to throw some strikes but drops back for an ankle! Slater is in big trouble! He looks ready to tap! But no, he's escaped and dives on top of Bianchi, into his guard.

Slater has to be careful here, sitting in the guard of a superior BJJ player.
The crowd cheering loudly, showing their appreciation for the quality fight we're seeing here.
Bianchi manages to sweep nicely, so he's now on top. Slater manages to get himself to full guard.

Slater looking to hit a scissor sweep but Bianchi is one step ahead there.
Bianchi stands up over Slater, holding his feet. He dives back in and lands a decent shot to the head.
That's three minutes gone in the round.
The fighters are going at a pretty good pace and they're both starting to sweat now.
Slater looking to hit a scissor sweep but Bianchi is one step ahead there.
Slater is throwing his legs up, looking for submissions. Bianchi is aware though and is defending well.
Bianchi postures up and lands some nice ground and pound.
Bianchi stands up and looks to throw the legs aside to pass to side control. Slater swivels though and keeps the full guard.
Bianchi is still trying to improve position.
Bianchi slips effortlessly into side control - very nice.
Bianchi trying to control the action but Slater is working from the bottom.
That's four minutes gone in the round.
Bianchi swings around for an armbar but Slater sees it coming a mile off and turns beautifully into Bianchi's guard.
Slater trying to control the position from guard on top but Bianchi is wriggling around, looking for whatever he can.
Bianchi looking to sweep here. No luck so far.
Bianchi working from the bottom, still in full guard. He's managed to get a loose triangle. Slater doesn't seem to be doing much to defend here, obviously he feels comfortable in the position. Slater manages to throw the legs off his shoulder and he's back into guard - no problem.
Bianchi is working the butterfly guard. He manages to land a nice scissor sweep and is now in half guard on the top. Nice move.
Slater is looking for a sweep. Bianchi is wise to his cunning plan and keeps the top position.
And thats the end of the round the fighters go back to their corners.
Alessio Bianchi dominated that round.
The minute break is over - no more time for sponges and pep talks - back to the action!
Bianchi throws a looping left and ducks down for a takedown. He's got his arms around Slater's waist but Slater gets an underhook and avoids the takedown by throwing Bianchi off to one side.
Bianchi dives in for a single leg takedown but Slater sprawls and the fighters end up clinched against the cage.
Slater feinted with a counter takedown.
Bianchi fails with the takedown.
Tim Slater has stuffed three takedown attempts in the round now. That's going to take a lot out of Alessio Bianchi.
Slater throws a big shot that misses.
Slater throws a hard body shot but it just misses.
Horrible takedown attempt by Bianchi or perhaps it was just good defense by Slater, which made it look bad.
Slater drops down looking for a counter takedown but Bianchi sprawls and moves away.
We've had a slow start to the round here - hopefully the action picks up.
A really sloppy takedown attempt there from Bianchi.
Bianchi shoots for a takedown but Slater saw that one coming a mile off and avoided it easily.
Slater attempts a counter takedown but Bianchi avoids it well and moves away.
Bianchi shoots in for a takedown. "I don't think so" says Slater as he avoids it easily.
Slater has been working on his balance at True North Fight Team, so perhaps that has help him stuff some of the takedown attempts by Bianchi.
That's one minute gone in the round.
Bianchi shoots in but doesn't get the takedown
and Slater counters with a straight right hand.
Slater closes the distance and looks for a trip takedown... aaaand he's got it - Slater lands in his opponent's guard.
Bianchi looking to control.
Bianchi keeping moving, preventing Slater from controlling successfully.
Slater passes into half guard.
Slater wants to control but Bianchi is keeping him busy.
Bianchi gets full guard.
Alessio Bianchi has got the better of the ground game so far.
Slater tries to free his leg and advance position but Bianchi is retaining full guard.
That's two minutes gone in the round.
Slater pushing down on Bianchi's thigh, trying to pass to half guard. He's managed it... Nice work.
Bianchi tries to get to full guard but Slater has control of the leg.
Bianchi is persisting with the attempt to improve his position.
Slater is trying to work for a kimura. This could be trouble! No, Bianchi has managed to free his arm - good work.
Bianchi regains full guard. Nicely done.
Bianchi is looking to sweep but instead, Slater has passed into half guard.
Slater tries to pass the half guard into mount. Bianchi knows what he's doing though and prevents the attempt.
That's three minutes gone in the round.
Slater trying to control the action but Bianchi is working from the bottom.
Bianchi is looking to regain full guard. Not this time though.
Slater is looking to pass Bianchi's guard but actually Bianchi recovers to full guard.
Slater wants to pass the guard but Bianchi is keeping the position.
That's four minutes gone in the round.
Neither fighter has done anything of merit for a good minute or two here and the crowd are not happy about it.
Bianchi looking to sweep here. No luck so far.
Slater looking to control the position here, rather than advance.
Bianchi looking to sweep here. No luck so far.
Slater looking to sit in guard and control but Bianchi gets the butterfly guard and sweeps. He's now in the guard on the top.
Slater on his back here. We all know that wrestlers don't like being on their back so let's see if Slater tries to get out of the position.
Slater has momentary wrist control but Bianchi slips an elbow through the middle.
Boooooooooooooooooooo!!! God, this has been a terrible round. Come on you two, sort yourselves out!
Bianchi tries to free his leg and advance position but Slater is retaining full guard.
Bianchi with a flurry of punches that miss.
And thats the end of the round the fighters go back to their corners.
Tim Slater dominated that second round.
That's time! Slater's corner gives him a slap on the ass as he gets ready to fight.
Slater connects nicely with a jab. Noted by the judges no doubt.
Bianchi misses with a takedown attempt - Slater sprawls well and throws a nice strike on the way out which just misses.
Slater throws a hard body shot but it just misses.
Bianchi tries to shoot in for a takedown. He's got hold of a leg but Slater swivels and escapes.
Excellent takedown into side control there by Slater.
Bianchi manages to land a sweep and he's now on top! Lovely Jiu Jitsu!
Bianchi trying to mount his opponent but Slater defends it.
Slater looking for submissions off his back.
Slater is trying to maintain the position but Bianchi is very close to passing his half guard.
That's one minute gone in the round.
Slater regains full guard. Nicely done.
Slater tries to land a sweep but no joy.
Bianchi distracts Slater with his right hand and drops a big elbow with his other arm.
Bianchi sneaks a leg through and gets to half guard. That was like a knife through butter how easily he passed Slater's guard.
Bianchi is working hard to pass the guard. He's done it - he's now in full mount! Trouble for Slater!
Slater is in a horrible position here. Bianchi smacks him with another shot as he tries to escape the position.
Slater tries to reverse the position but Bianchi maintains control.
That's two minutes gone in the round.
Bianchi landing strikes, looking to finish!
Bianchi unloading with bombs!
Bianchi drops a big elbow. That's hurt Slater! More shots from Bianchi and the ref steps in! The fight is over!
Ladies and gentlemen, after 2:40 of round 3, we have a winner by way of TKO (Strikes). Alessio Bianchi!
Alessio Bianchi is the new featherweight champion!
A very excited looking Alessio Bianchi made sure he remembered to thank all the fans both in the arena and on the internet. He said all the coolest people spend all day on MMA websites, which got a big reaction.
|
|
|
|
|
|
|
|
|
|
|
|
|
|
|
|
|
|
|
|
|
|
|
| S |
C
A |
G |
S |
C
B |
G |
|
S |
C |
G |
|
energy
A | B |
|
hype
A | B |
|
pop
A | B |
|
mgr
A | B |
|
FIGHT
RATING
36% |
|
|
|
|
|
|
|
Co-main event
|
Coming up we have a welterweight MMA rules bout between Meatball Destroyer (ranked 1769 p4p, 223 weight class) and Cornelius Barnaby (ranked 3180 p4p, 368 weight class). Barnaby has chosen There Will Be Blood as his entrance music. Both fighters will be looking to make this an exciting fight for the fans, I'm sure!
 |
|
 |
| 175 cm
26
167 lbs
4 - 0 - 0 |
|
185 cm
19
181 lbs
3 - 1 - 0 |
BJJ White Belt
Excellent boxer
Very strong |
|
BJJ Blue Belt
Excellent MT
Powerful |
|
| |
|
Ladies and gentlemen. This fight is 5 rounds, for the welterweight championship of the world!
Introducing the champion to my left, fighting out of the red corner.
With a record of
4 - 0 - 0, fighting out of St Petersburg, Meatball Destroyer!
And introducing the challenger to my right, fighting out of the blue corner.
With a record of
3 - 1 - 0, fighting out of Montreal, Cornelius Barnaby!
The judges for this bout are Don Winkell, and Jack Bonds.
The bell rings for round one and we are underway!
A swing and a miss from Destroyer.
Destroyer throws a monster uppercut resembling something out of street fighter but it doesn't land.
Barnaby connects with a leg kick. He turned his hip over nicely there.
A jab from Destroyer misses.
Destroyer misses with a body punch
letting Barnaby counter with a right hand.
Destroyer stumbles momentarily as he takes a strong leg kick from Barnaby.
We've been told by Destroyer's head coaches at Destroyer MMA that he's been working on his takedown defense in preparation for this fight.
Destroyer misses with a body shot. Nice footwork from Barnaby.
Barnaby throws a sloppy head kick and Destroyer moves out of range easily.
Destroyer swings and misses with a hook to the body.
Barnaby throws a mid kick that lands with a slap.
We've had a slow start to the round here - hopefully the action picks up.
Barnaby throws a right and a left that both miss.
Destroyer lands with a nice body punch.
Barnaby uses some good footwork to avoid the body shot by Destroyer.
Destroyer swings and misses with a hook to the body.
Barnaby feints a counter leg kick.
That's one minute gone in the round.
Destroyer throws a body shot but no joy.
Destroyer throws a combination but it was largely blocked by Barnaby.
Barnaby swings away with a counter right hand but no contact made.
Barnaby fakes a head punch and goes low to the body. Nicely done.
Barnaby staying out of range there.
A head kick misses from Barnaby.
Barnaby misses with a looping left.
Barnaby chopping away at his opponent's legs.
Meatball Destroyer seems to be the more aggressive standup fighter in this bout.
Destroyer throws a combination that misses
and Barnaby connects with a straight left hand counter down the middle.
An inside leg kick lands from Barnaby.
Barnaby misses with a looping left.
Barnaby lunges at Destroyer with a hook that half lands and is half blocked by Destroyer's hand.
Destroyer throws a series of punches but Barnaby moves out of range.
Destroyer misses with a body shot
and Barnaby counters with a good right hand that lands right on the jaw.
That's two minutes gone in the round.
We've seen a great period of action over the last minute or so - credit to both fighters for going all out!
Destroyer misses the shot to the body.
A jab from Barnaby does it's job there.
Barnaby ducks under a wild hook from Destroyer.
Barnaby looked like he wanted to counter with a punch but didn't throw it.
Barnaby lands an overhand left. A wild punch that just about connected.
Barnaby has used his reach advantage pretty well so far tonight.
Destroyer throws a body shot but no joy.
Barnaby misses the shot to the body.
Destroyer swung with a counter punch to the body but it didn't connect.
Destroyer on the wrong end of a decent looking cross there.
Destroyer throws a sloppy body shot
and Barnaby counters with a stiff right hand.
Destroyer walks straight into a jab right on the nose. That one stung - he's blinking and trying to clear his head.
Barnaby avoids a punch combination nicely.
Barnaby takes a shot right to the liver - Bas would have been proud of that punch.
That's three minutes gone in the round.
Barnaby showing good head movement there, avoiding the strikes from Destroyer.
Barnaby stooping low to avoid any incoming strikes and then lunges in with an uppercut come cross that lands flush.
A slow jab from Destroyer misses its intended target.
Barnaby misses with a hook.
It looked like Destroyer wanted to counter with a hook but didn't fully commit.
Destroyer throws a nice hook to the body that draws an oooh from the crowd.
Barnaby fakes the leg kick and cracks Destroyer in the body.
Barnaby scores with a slapping inside leg kick.
Destroyer scores with a hook to the body. Barnaby takes a step back and tries to catch his breath.
A shot to the body from Destroyer misses
and Barnaby counters with a body kick.
Destroyer stumbles momentarily as he takes a strong leg kick from Barnaby.
Barnaby works his jab well there, keeping his opponent at a distance.
That's four minutes gone in the round.
We've seen a great period of action over the last minute or so - credit to both fighters for going all out!
Destroyer fakes high and swings low for a body shot but Barnaby manages to avoid it.
Barnaby ducks right into an uppercut from Destroyer.
Destroyer just misses with a punch to the body.
Destroyer goes to the watering hole and comes back with a big thumbs up from the judges as he scores a three punch combo.
Destroyer misses the shot to the body.
Barnaby throws a hook to the body but it doesn't connect.
Destroyer swings and misses with a shot to the body
and Barnaby counters with a lovely straight right hand!
Destroyer misses with a shot to the body
and Barnaby connects with a straight left hand counter down the middle.
Barnaby fakes a couple of low kicks, before throwing one on the third attempt. It connects and Destroyer has to reset his feet before getting ready to engage.
Barnaby avoids the body shot from Destroyer.
Destroyer throws a hook but Barnaby avoids it easily.
Barnaby lets it all go there with a big combo counter but none of the punches connected.
Barnaby avoids the body shot from Destroyer.
And thats the end of the round the fighters go back to their corners.
Cornelius Barnaby dominated that round.
Well, the break between rounds is over. Let's get back to the scrappin!
Barnaby chopping away at his opponent's legs.
Destroyer misses with a hook
and Barnaby finishes the little exchange by landing a big kick to the body.
Barnaby has done a lot of speed work in the buildup to this fight.
Destroyer throws a body shot but no joy.
Destroyer swings wildly with a right hand that was never going to find it's target.
Barnaby steps in looking to counter with the mid kick but it doesn't connect.
Destroyer misses with a wild combination.
Barnaby throws a chopping leg kick but Destroyer manages to avoid taking any serious damage.
Destroyer misses with a combination
and Barnaby counters with a leg kick that reverborates around the arena.
We've had a slow start to the round here - hopefully the action picks up.
Destroyer looks to score with a jab to the body but Barnaby is just out of range.
Destroyer loads up on a big right hand but Barnaby slips the punch.
Barnaby uses good head movement to avoid the hook from Destroyer.
Barnaby keeping a good distance there, avoiding the body shot.
That's one minute gone in the round.
Destroyer misses with a right hand
and Barnaby counters with a good low kick that Destroyer was not able to check.
Destroyer throws a hard body shot but it just misses.
Destroyer is looking to wear down Barnaby with body shots, infact he's throwing more body shots than head shots at the moment.
Barnaby slips under a jab.
Barnaby thinks about the counter body kick.
Cornelius Barnaby seems to be getting the better of the standup.
Destroyer fakes high and swings low for a body shot but Barnaby manages to avoid it.
Destroyer swings and misses with a hook to the body.
Destroyer misses the body punch
and Barnaby counters with a good right hand that lands right on the jaw.
Destroyer gets his head snapped back by a nice shot there.
Destroyer gets his head snapped back by a nice shot there.
Barnaby avoids the body shot from Destroyer.
Barnaby appeared to try and counter that last move with a leg kick.
Destroyer ducks down and throws a hook to the body but Barnaby moves away.
A lazy left from Barnaby finds it's target.
Barnaby darts in and clinches Destroyer up against the cage.
That's two minutes gone in the round.
Destroyer has had enough of the clinch and is looking to separate.
A hook to the body from Destroyer.
Barnaby taking a breather.
Destroyer is hobbling a little on that front leg after taking quite a few leg kicks so far in this fight.
Barnaby keeps the fight in the clinch, despite Destroyer's efforts to push away.
Barnaby swings away with an uppercut that misses.
Destroyer wants to strike at distance but he can't break free of the clinch.
Barnaby swings away with an uppercut that misses.
Barnaby has been the more effective fighter overall so far.
We've seen a great period of action over the last minute or so - credit to both fighters for going all out!
Barnaby lands with a short shot to the head.
Destroyer scores with a nice hook to the head.
A short left from Barnaby.
Destroyer blocks a couple of punches on the inside.
Destroyer is trying to slow down the pace of the fight but Barnaby is keeping busy.
A head punch blocked on the inside by Destroyer.
That's three minutes gone in the round.
A nice left hand lands by Destroyer.
Destroyer wants to push off and get back to the center of the mat but Barnaby has him pressed against the cage.
Barnaby misses with a hook from the clinch.
Destroyer wants to break free. God knows he wants to breaaaak freeee.
Barnaby fails to land with a short punch on the inside.
Destroyer is working hard here but doesn't seem to be able to control effectively, up against the cage.
Barnaby taking a breather.

Destroyer escapes the clinch and we're back to striking.
Destroyer jabbing away but nothing is landing.
Destroyer throws a predictable looking body shot
and Barnaby counters with a good right hand that lands right on the jaw.
Barnaby with a jab.
Destroyer takes a swing at Barnaby's ribcage but misses.
Destroyer swings wildly with a couple of big hooks
and Barnaby connects with a straight left hand counter down the middle.
Destroyer is rocked!
That's four minutes gone in the round.
Barnaby cracks Destroyer with a big right hand that sees him stumbling back against the cage! Destroyer falls to his knees and Barnaby doesn't need a second invitatation - he rushes in and fires off several unanswered shots that force the referee to stop the fight! This one is all over!
Ladies and gentlemen, after 4:08 of round 2, we have a winner by way of TKO (Strikes). Cornelius Barnaby!
Cornelius Barnaby is the new welterweight champion!
Cornelius Barnaby thanked the fans post fight for their support.
Meatball Destroyer was interviewed post fight and said 'Organic Nutrition all the way'.
|
|
|
|
|
|
|
|
|
|
|
|
|
|
|
|
|
|
|
|
|
|
|
| S |
C
A |
G |
S |
C
B |
G |
|
S |
C |
G |
|
energy
A | B |
|
hype
A | B |
|
pop
A | B |
|
mgr
A | B |
|
FIGHT
RATING
48% |
|
|
|
|
|
|
|
Main event
|
Coming up we have a heavyweight MMA rules bout between Benny Alison (ranked 1659 p4p, 166 weight class) and Bruno Faze (ranked 2973 p4p, 305 weight class). Alison kept the crowd waiting but all that was forgotten when his ring entrance music started. The incomparable musical genius that is The Greatest (I am). Faze has chosen Ride on these MOTHA fuckas-by 2PAC as his entrance music. The key to victory for Benny Alison has got to be keeping the fight on the feet.
 |
|
 |
| 193 cm
26
268 lbs
7 - 1 - 0 |
|
192 cm
26
270 lbs
3 - 1 - 0 |
BJJ Blue Belt
Solid boxing
KO power |
|
Good wrestler
Basic striking
Experienced |
|
| |
|
Ladies and gentlemen. This fight is 3 rounds, in the heavyweight division.
Introducing the fighter to my left, fighting out of the red corner.
With a record of
7 - 1 - 0, fighting out of St Petersburg, Benny Alison!
And introducing the fighter to my right, fighting out of the blue corner.
With a record of
3 - 1 - 0, fighting out of Hilo, Bruno Faze!
The judges for this bout are , Jack Bonds and Timothy Bukovac.
The bell rings for round one and we are underway!
The fighters circling - Faze throws out the jab but it was never going to land.
Alison throws a hook but Faze avoids it easily.
Faze throws a monster uppercut resembling something out of street fighter but it doesn't land.
Alison throws a right hand that misses
and Faze counters with a shoot takedown. Alison fights it but they end up in guard.
Alison wants to sweep but no luck.
Faze controlling from the guard. I say controlling but really, he's stalling.
Faze tries to free his leg and advance position but Alison is retaining full guard.
We've had a slow start to the round here - hopefully the action picks up.
Faze is intent on slowing down the pace of the fight, simply looking to control.
Faze has been taking part in the yoga sessions down at Makoa - Hilo Cheapest Gym. Presumably he's going to look for a slick submission... Or maybe he's looking to avoid one.
That's one minute gone in the round.
Alison trying to control the position.
We must be close to a standup if these guys don't pick up the pace.
Faze controlling from the top position.

The referee decides to stand the fighters back up.
The crowd cheers as Alison lands an impressive looking overhand right. Faze doesn't seem phased though.
It looks like Bruno Faze has been cut.
Alison throws out a loose jab but Faze uses good head movement to avoid it.
Faze defending well as Alison loads up on a big left hand.
Faze tried to score with a low kick but Alison checks it.
Faze misses with a takedown attempt. He shot from a bit too far out.
That's two minutes gone in the round.
Faze misses with an uppercut. Alison saw that one coming.
Faze tries to shoot in for a takedown. He's got hold of a leg but Alison swivels and escapes.
Faze looks for a takedown here. Will he get it? Alison is fending him off so far but Faze persists. Nope, Alison circles away and we're back to standing.
Benny Alison has stuffed three takedown attempts in the round now. That's going to take a lot out of Bruno Faze.
A jab from Faze misses.
Faze looks frustrated there after his takedown attempt is stuffed easily.
Alison swung with a counter right hand that didn't connect.
Faze closes the distance and scores a nice trip takedown into half guard. Alison did well to prevent Faze getting side control.
Faze is trying to work for a kimura but Alison is defending well.
Alison wants to control but Faze is keeping busy.
Alison is defending against the submission attempts here by Faze.
That's three minutes gone in the round.
Faze wants to work for an arm triangle but Alison is really keeping half guard well and defending the submission attempt.
Alison is looking to regain full guard. Not this time though.
Faze wants to work for an arm triangle but Alison is really keeping half guard well and defending the submission attempt.
The referee calls for the fighters to work.
That's four minutes gone in the round.
The crowd are getting on the fighters' backs, as the pace has dropped off in the last minute or so.
The fighters are battling for position here. Alison manages to regain full guard. Nice work.
Faze wants to pass the guard but Alison is keeping the position.
Alison tries to land a sweep but no joy.
Faze wants to pass the guard but Alison is keeping the position.
Alison is looking to stand up but Faze isn't so interested in that idea.
Alison can't do much from the bottom at the moment, as Faze controls the pace.
The referee decides to stand the fighters back up.
Boooooooooooooooooooo!!! God, this has been a terrible round. Come on you two, sort yourselves out!
Alison connects with a jab.
And thats the end of the round the fighters go back to their corners.
A close round but Bruno Faze will probably get the nod.
The cut man is working on Bruno Faze's cut.
That's time! Back to the action!
Alison uses decent footwork to sidestep a right hand from Faze.
Alison darts in and out, connecting with a jab.
A swing and a miss from Faze.
Faze closes the distance and gets a double leg, slamming Alison to the mat! Alison manages to get full guard.
Alison is working an open guard here, looking to improve his position. No doubt that will leave him open to counters but at least he's being more offensive.
Faze drops back looking for a heel hook - he quickly realises he's not going to get it but Alison manages to dive on top of him before he can escape and now Faze has Alison in his guard.
Faze looking for submissions from the bottom here. Moving his hips around, possibly looking for an armbar.
We've had a slow start to the round here - hopefully the action picks up.
Faze is working actively off his back, looking to secure an arm or perhaps work for a triangle.
That's one minute gone in the round.
Faze trying to control the position here.
Faze is looking for a guillotine. You can't force these things though and Alison defends well.
The ref warns both fighters not to hold the cage as they work up against the meshing.
Faze throwing his legs up looking for a triangle.
Faze is throwing his legs up, looking for submissions. Alison is aware though and is defending well.
That's two minutes gone in the round.
There's not a lot going on here and the crowd are letting the fighters know they're not willing to tolerate a lack of action.
Faze is looking for a triangle but Alison pushes his legs off easily.
Alison has to be careful here, sitting in the guard of a superior BJJ player.
Faze had isolated an arm as going for a kimura. Alison defends it easily.
Alison wants to control from the top but Faze keeps moving.
Faze looking for submissions off his back, moving his hips, looking for an opening.
Faze is looking for a triangle but Alison pushes his legs off easily.
That's three minutes gone in the round.
Alison gets to his feet. Faze looking to butt scoot but the ref puts an end to that. On your feet son!
Faze moves forwards but Alison connects with a nice, crisp jab.
That has opened up Bruno Faze's cut even more.
We've been told by Alison's head coaches at Destroyer MMA that he's been working on his takedown defense in preparation for this fight.
A big right from Alison misses.
Bruno Faze seems to be the more aggressive standup fighter in this bout.
Alison ducks under a wild hook from Faze.
Faze scores with a nice takedown into half guard. Let's see what he's got on the ground.
Alison wants to control but Faze is keeping busy and won't allow it.
Faze is looking to stall here but Alison recovers full guard.
Faze tries to free his leg and advance position but Alison is retaining full guard.
Bruno Faze has got the better of the ground game so far.
That's four minutes gone in the round.
Faze looking to sit in guard and control but Alison gets the butterfly guard and sweeps. He's now in the guard on the top.
Faze working from the bottom, still in full guard. He's managed to get a loose triangle. Alison doesn't seem to be doing much to defend here, obviously he feels comfortable in the position. Alison manages to throw the legs off his shoulder and he's back into guard - no problem.
Faze is working actively off his back, looking to secure an arm or perhaps work for a triangle.
Alison decides to stand up and beckons his opponent to follow.
Boooooooooooooooooooo!!! God, this has been a terrible round. Come on you two, sort yourselves out!
Faze shoots in but no luck this time.
A little feinted left hand from Alison on the counter but he doesn't commit to it.
And thats the end of the round the fighters go back to their corners.
That was a close second round but I would say that Benny Alison will probably get the nod.
The cut man is working on Bruno Faze's cut.
The corners get their ten second warning. Both fighters stand from their stools and stare eachother down, ready to get back to the action. Ladies and gentlemen, this is the final round!
Faze misses with a takedown attempt - Alison sprawls well and throws a nice strike on the way out which just misses.
Faze bobs and weaves well there to avoid the strikes.
Alison stuffs a takedown. It's all about dictating where the fight takes place and Alison wants it to stay on the feet.
Faze fails miserably with a takedown attempt.
Benny Alison has stuffed three takedown attempts in the round now. That's going to take a lot out of Bruno Faze.
A swing and a miss from Alison.
Faze tries to score a power double leg takedown but Alison sees that one coming and sprawls well. That will dishearten Faze somewhat.
Benny Alison is winning the standup battle so far.
We've had a slow start to the round here - hopefully the action picks up.
Alison scores with a big left there. The judges will like that one.
Alison throws a lazy right hand but Faze sees it coming a mile off and sidesteps it easily.
That's one minute gone in the round.
Faze shoots in looking for a takedown. Alison tries to sprawl out of it but Faze keeps driving through. The fighters are pinned against the cage. Alison manages to get underhooks and after a bit of a struggle, circles away and we're back to standing.
Faze uses good footwork to avoid the strikes from Alison.
Alison is really head hunting here, hardly looking to strike to the body at all.
Alison lands a head shot.
Alison keeps his opponent at a distance with a nice jab.
The cut above Bruno Faze's eye is starting to cause him problems now.
Nice defenses there by Faze.
Benny Alison is looking to keep the fight on the feet at all costs.
Faze slips under a jab from Alison.
Alison waving his hands out in front of him, looking to distract Faze.
Faze moves out of range as Alison strikes.
Alison leaves Faze with his face pressed against the mat as he sprawls beautifully, defending against a solid takedown attempt.
Alison lands a big right hand that sends Faze crashing to the mat! Alison stays standing though and waves Faze back to his feet!
That's two minutes gone in the round.
Wooooo! Give it up for these two warriors! They are putting on a show!
Faze misses the jab.
Alison closes the distance and lands a vicious right hand that drops Faze! Alison dives in looking to finish! Faze is still trying to defend himself but he's taking too many shots and the referee has no choice but to stop the fight!
Ladies and gentlemen, after 2:17 of round 3, we have a winner by way of TKO (Strikes). Benny Alison!
A pretty intense looking Benny Alison took the opportunity post-fight to ask for a shot at the title.
Bruno Faze was interviewed post fight and said 'I threw the fight for a payday....'.
|
|
|
|
|
|
|
|
|
|
|
|
|
|
|
|
|
|
|
|
|
|
|
| S |
C
A |
G |
S |
C
B |
G |
|
S |
C |
G |
|
energy
A | B |
|
hype
A | B |
|
pop
A | B |
|
mgr
A | B |
|
FIGHT
RATING
39% |
|
|
|
|
|
|
|
|
|
|
