 |
EFA 13 Harrington vs Pavlov PBP Commentary |
Undercard bout
|
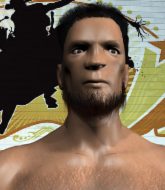
Coming up we have a welterweight MMA rules bout between Gordon Miles (ranked 24776 p4p, 726 weight class) and Nigel Mutt (ranked 24628 p4p, 737 weight class). Chooooooooon! I think Miles might be my favorite fighter, now he's come out to Can't Stop. Nigel Mutt has the better chin. Will he look to stand and bang today?
 |
|
 |
| 184 cm
20
167 lbs
1 - 4 - 0 |
|
175 cm
19
175 lbs
1 - 2 - 0 |
BJJ White Belt
Solid boxing
KO power |
|
BJJ White Belt
Basic striking
Prefers standup |
|
| |
|
Ladies and gentlemen. This fight is 3 rounds, in the welterweight division.
Introducing the fighter to my left, fighting out of the red corner.
With a record of
1 - 4 - 0, fighting out of London, Gordon Miles!
And introducing the fighter to my right, fighting out of the blue corner.
With a record of
1 - 2 - 0, fighting out of Las Vegas, Nigel Mutt!
The judges for this bout are Ben Watson, John Mangel and Chris Dean.

The bell rings for round one and we are underway!

Mutt clinches with his opponent.
Mutt is pressed up against the cage. Miles has hold of a leg and is looking to drag Mutt down to the mat. Mutt avoids the attempt though and has circled away. We're back to striking at a distance.
Mutt clinches.
Mutt wants to get back to striking at distance but Miles won't allow it.

Mutt breaks the clinch and we're back to striking at distance.
Mutt closes the distance and presses his opponent up against the cage.
Mutt tries to break the clinch but Miles is controlling the position.
Mutt working hard to break the clinch.
Mutt has had enough of the clinch but Miles keeps him there for the moment.
Mutt manages to break the clinch.
Miles shoots in and drives through. Mutt sprawls well.
Miles tries to close the distance and clinch up but Mutt swats him away and circles back towards the center.

Miles clinches up with Mutt and pushes him back against the cage.
Miles is trying to work out of this bad position, with his back against the cage.
We've had a slow start to the round here - hopefully the action picks up.
Mutt is trying to work out of this bad position, with his back against the cage.
Mutt is trying to force a seperation but Miles has the dominant position.
Mutt avoids the elbow strike from Miles, against the cage.
Mutt wants to break free. God knows he wants to breaaaak freeee.
Mutt tries to circle away but Miles has him pinned against the cage.
Miles has a couple of punches blocked by Mutt.
Mutt keeps control of Miles as he tries to wriggle out of the double underhooks.

That's one minute gone in the round.
Miles pushes off and fires off an elbow that misses, before clinching up again, against the cage.
Miles is working for takedown but Mutt is calmly controlling the position for now.
That's three failed takedown attempts in the round for Gordon Miles. That's going to take a lot out of him.
Mutt is trying to force a seperation but Miles has the dominant position.
Mutt is looking to break free of the clinch but Miles has double underhooks.
Mutt is looking to break free of the clinch but Miles has double underhooks.
Mutt breaks the clinch.
Mutt works Miles's body with a nice hook.
Mutt fails to land with the punch combination there - jab, cross, hook, miss, miss, miss.
Miles wants to clinch up but Mutt keeps it at a distance.
Miles is looking to clinch but Mutt is avoiding it.
Mutt's coach down at was telling us pre-fight that they have been working on Mutt's balance. Obviously they view that as a key factor in the outcome of this fight.
Miles shoots in looking for a takedown. Mutt tries to sprawl out of it but Miles keeps driving through. The fighters are pinned against the cage. Mutt manages to get underhooks and after a bit of a struggle, circles away and we're back to standing.
Miles tries to clinch but Mutt is having none of it.
Miles shoots in for a takedown but Mutt shows good takedown defense there and keeps this one on the feet.
Miles is breathing heavily.
Miles showing good head movement there, avoiding the strikes from Mutt.

That's two minutes gone in the round.
Mutt gets a clinch.
Mutt is trying to break the clinch but Miles is controlling him.
Mutt keeps the fight in the clinch, despite Miles's efforts to push away.
Miles misses with the head strike.
Mutt tries to circle away but Miles has him pinned against the cage.
Mutt escapes the clinch and we're back to striking.
Mutt misses with a double jab.
Mutt scores with a shot to the body.
Mutt scores with the left hand. Miles knows he should have avoided that one.
Miles tries to grapple but his opponent circles
and Mutt counters with a quick right hand to the jaw.
The crowd are loving this. Great action here.
Mutt swings wildly with a couple of big hooks
and Miles counters with a two punch combo.
Mutt wings a very wild body shot but it does the job and lands to the midsection.

That's three minutes gone in the round.
Mutt showing good head movement there, avoiding the strikes from Miles.
Mutt fakes and then throws a beautiful body shot. Miles looks a bit winded and takes a step backwards to take a breath.
Miles is looking to clinch.
Nigel Mutt is looking to keep the fight on the feet at all costs.
Mutt slaps away a takedown attempt from Miles, before circling back to the center of the mat.
Mutt throws a two punch combo that lands nicely.
Mutt throws a series of punches but Miles avoids them all with ease.
Mutt is the aggressor but that punch slipped nicely by Miles.
Mutt misses with a jab and misses with a cross straight after too.
Miles moves in looking to clinch but Mutt pushes him off.
Mutt connects with a jab.
Mutt instigates a clinch.

That's four minutes gone in the round.
Miles has Mutt pressed against the cage, preventing Mutt from circling away and getting back to striking at range.
Miles throws a head punch that misses.
Mutt escapes the clinch and we're back to striking.
Miles tries to clinch but Mutt is having none of it.
Mutt is loading up here, looking for a big counter of his own.
Mutt throws a right hand that Miles ducks under and follows up with a left that Miles also avoids with ease.
Mutt fakes with an overhand right and moves in to clinch with Miles, pushing him back against the cage.
The crowd are loving this. Great action here.
Miles is trying to work out of this bad position, with his back against the cage.
Mutt pushes off and circles away, back to the middle of the mat.
Miles with poor footwork there. He got himself in a bit of a tangle, enabling Mutt to score with a decent uppercut.
Mutt avoids the clinch attempt nicely.
Mutt fails to land with the punch combination there - jab, cross, hook, miss, miss, miss.
Mutt gets a clinch.
Mutt dodges an elbow strike from Miles.
Mutt can't break the clinch.
Mutt prevents a takedown attempt there.
Mutt is trying to force a seperation but Miles has the dominant position.
And thats the end of the round the fighters go back to their corners.
Nigel Mutt dominated that round.
The corners get their ten second warning. Both fighters stand from their stools and stare eachother down, ready to get back to the action.

Miles moves in looking to clinch but Mutt pushes him off.
Miles throws a series of punches but Mutt moves out of range.
Mutt closes the distance and pushes Miles back into the cage.
Mutt has been the more effective fighter overall so far.
Mutt pushes off and circles away, back to the middle of the mat.
Mutt connects nicely with a jab. Noted by the judges no doubt.
Mutt clinches.
Miles lands a left hand.
Mutt escapes the clinch and we're back to striking.
Mutt misses with a jab and misses with a cross straight after too.
Mutt swats away the attempt to clinch by Miles.
We've had a slow start to the round here - hopefully the action picks up.
Miles tries to clinch but Mutt moves away
and Mutt counters with a left and a right that stings Miles.
Mutt tries to bum rush Miles with a series of wild strikes but Miles uses good footwork to avoid the assault.
We are yet to see a takedown attempt from Mutt in the fight. On paper you would think he is the more dominant ground fighter so let's see if these unusual tactics pay off.
Miles on the wrong end of a vicious looking body shot.
Fantastic stuff here - a very entertaining period of action, which has drawn cheers from the crowd.
Miles fails with the takedown.
Gordon Miles is looking to throw some combinations by the looks of things.
Both fighters are absolutely exhausted here.
That's one minute gone in the round.
Miles is on the wrong end of a nice combination from Mutt.
Miles walks straight into an uppercut. Luckily it didn't land flush.
Mutt misses with a double jab.
Mutt clinches.
Mutt is trying to work out of this bad position, with his back against the cage.
A short left from Miles.
Mutt looks like he'd prefer to be striking at range right now.
Miles throws a vicious knee straight up the middle but Mutt blocks it with crossed arms.
Miles wants to get back to striking at distance but Mutt won't allow it.
Mutt wants to get back to striking at distance but Miles won't allow it.
Mutt wants to push off and get back to the center of the mat but Miles has him pressed against the cage.
Miles is trying to pull guard but being pressed up against the cage enables Mutt to keep the fight standing.
Miles wants a takedown but no success here.
That's three failed takedown attempts in the round for Gordon Miles. That's going to take a lot out of him.
Mutt breaks the clinch and we're back to striking at distance.
Mutt throws a series of punches but Miles moves out of range.
That's two minutes gone in the round.
Mutt scores with a jab to the body.
Mutt throws a body shot but no joy.
Miles with a lazy takedown attempt
and Mutt counters with a straight punch to the midsection.
Sloppy strikes from Mutt. Those never looked like landing.
Nigel Mutt seems to be getting the better of the standup.
Fantastic stuff here - a very entertaining period of action, which has drawn cheers from the crowd.
Mutt lands with a nice combination. Miles backs away looking to recover.
Miles tries to shoot in for a takedown. He's got hold of a leg but Mutt swivels and escapes.
Mutt has managed to clinch.
Good anti-grappling being displayed by Mutt as Miles tries to tie him up.
Mutt escapes the clinch and we're back to striking.
Mutt takes the fight into the clinch.
Miles working hard to break the clinch.
Mutt breaks the clinch and we're back to striking at distance.
Mutt throws a combination but it was largely blocked by Miles.
That's three minutes gone in the round.
The fight stays on the outside here - Miles looks like he's thinking about clinching though.
Mutt misses with a double jab.
Miles is looking to clinch but Mutt is avoiding it.
Mutt avoids the clinch attempt nicely.
Miles slips a jab and a cross from Mutt.
Mutt gets to the clinch - let's see what his plan is here.
Miles scores with an uppercut up the middle.
Mutt wants to get back to striking at distance but Miles won't allow it.
Mutt is trying to break the clinch but Miles has him pressed against the cage.
Mutt tries to circle away but Miles has him pinned against the cage.
Miles can't break the clinch.
Miles is trying to break the clinch but Mutt is controlling him.
Mutt escapes the clinch and we're back to striking.
The fight moves into the clinch position.
That's four minutes gone in the round.
Mutt breaks the clinch and we're back to striking at distance.
Mutt avoids the clinch attempt nicely.
Mutt moves into range and throws a combination. A nice jab followed by a hook to the body.
Miles tries to clinch but is not successful on this occasion.
Miles tries to clinch but Mutt is having none of it.
Miles tries to close the distance and clinch but Mutt swats him to one side with an open hand palm strike and circles away.
Mutt lunges in with swinging rights and lefts but Miles circles away quickly and effectively.
Miles tries to keep at a distance but Mutt has taken the fight into the clinch.
Fantastic stuff here - a very entertaining period of action, which has drawn cheers from the crowd.
Miles prevents Mutt from breaking the clinch.
Mutt wants to break free but Miles has control.
With the fighters up against the cage, Miles throws an elbow but misses.
Mutt manages to break the clinch.
Miles moves into the clinch.
And thats the end of the round the fighters go back to their corners.
Nigel Mutt showed his class in that round. I'd imagine he'll take it on all the scorecards.
That's the end of the interval. I'm sure that seemed a lot quicker than a minute for our two fighters! Back to the action. This is the final round!

Mutt avoids the clinch attempt nicely.
Mutt leaves Miles with his face pressed against the mat as he sprawls beautifully, defending against a solid takedown attempt.
Mutt swings and misses with a hook to the body.
Miles tries to close the distance and clinch but Mutt swats him to one side with an open hand palm strike and circles away.
Mutt clinches.
Nigel Mutt seems to be working more effectively in the clinch in the fight so far.
Miles wants to push off and get back to the center of the mat but Mutt has him pressed against the cage.
Miles wants to get back to striking at distance but Mutt won't allow it.
Mutt on the defensive, avoiding the knees to the body.
Mutt breaks from the clinch.
Mutt comes forward and lands a shot to the body, then darts back out of range.
We've had a slow start to the round here - hopefully the action picks up.
Mutt throws a series of punches but Miles avoids them all with ease.
Miles drops down looking for a counter takedown but Mutt sprawls and moves away.
Mutt jabs Miles to the body, keeping him at a distance.
Mutt is throwing a lot of body shots here, looking to wear down Miles rather than just go for the knockout.
Miles shoots in looking for a double leg takedown. Mutt defends it nicely.
That's one minute gone in the round.
Mutt scores with a nice one two combo and darts back out of range to avoid anything coming in the opposite direction.
Both fighters are breathing heavily.
A combination from Mutt does no damage.
Mutt closes the distance and presses his opponent up against the cage.
Mutt wants to push off and get back to the center of the mat but Miles has him pressed against the cage.
Miles is trying to break the clinch but Mutt is controlling him.
Mutt breaks from the clinch.
Mutt moves into range and clinches up with Miles.
Mutt breaks from the clinch.
This is turning into a torrid day at the office for Miles. He's trying desperately to land a takedown but he's failing miserably and getting slapped silly on the feet to compound his misery.
Mutt throws a series of punches but Miles avoids them all with ease.
Mutt rushes Miles and pushes him back against the cage in a clinch.
Miles prevents Mutt from breaking the clinch.

Miles manages to break the clinch.
Miles shoots for a double leg takedown but Mutt sprawls well. He's pushed Miles's face into the mat and manages to get back to his feet relatively easily.
That's three failed takedown attempts in the round for Gordon Miles. That's going to take a lot out of him.
That's two minutes gone in the round.
Mutt throws a nice looking combination but Miles bobs and weaves to avoid any damage.
Miles is looking to counter the offense by Mutt and move into the clinch.
Miles tries to clinch there but Mutt circles away.
Mutt lets it all go there with a big combo counter but none of the punches connected.
Wow, both these guys are really going for it!
Mutt swings away but doesn't land with a series of punches.
Mutt misses with a wild body shot.
The crowd are loving this. Great action here.
Miles fakes a couple of low kicks, before throwing one on the third attempt. It connects and Mutt has to reset his feet before getting ready to engage.
Miles gets tackled into the cage by Mutt. Mutt maintains the clinch.
Mutt escapes the clinch and we're back to striking.
Mutt is the aggressor but that punch slipped nicely by Miles.
Mutt misses with a wild combination.
Miles throws a looping left and ducks down for a takedown. He's got his arms around Mutt's waist but Mutt gets an underhook and avoids the takedown by throwing Miles off to one side.
Miles is looking to take this fight into the clinch.
Some wild striking there from Mutt.
That's three minutes gone in the round.
Mutt circles away from the clinch attempt.
Mutt rushes Miles and pushes him back against the cage in a clinch.
Mutt pushes off and circles away, back to the middle of the mat.
Mutt darts in and clinches Miles up against the cage.
Mutt is looking to break free of the clinch but Miles has double underhooks.
Miles prevents Mutt from breaking the clinch.
Miles utilising his Muay Thai to score with a knee to the body.
Miles is trying to pull guard but Mutt turns him against the cage and we stay in the clinch.
Mutt escapes the clinch and we're back to striking.
Mutt closes the distance and clinches.
Mutt escapes the clinch and we're back to striking.
Miles shoots in for a takedown but Mutt shows good takedown defense.
Miles dodges the punch combination from Mutt.
That's four minutes gone in the round.
Mutt has closed the distance and engaged Miles in a clinch.
Mutt wants to break free but Miles has control.
Miles tries to break free but Mutt pushes him back against the cage.
Gordon Miles has stepped it up - he knows he needs a finish here!
Mutt wants to break free but Miles has control.
Mutt tries to break free but Miles pushes him back against the cage.
Mutt blocks an elbow strike from Miles.
Miles misses with a hook from the clinch.
Mutt tries to break free but Miles pushes him back against the cage.
Miles lands an uppercut.
Mutt pushes off and circles away, back to the middle of the mat.
The crowd are loving this. Great action here.
Mutt darts in and clinches Miles up against the cage.
Mutt working hard to break the clinch.
Miles lands with a left to the head.
Nigel Mutt is fighting for a decision - hopefully he's judged it right and he's actually winning the fight.
Miles lands a right uppercut that snaps the head of Mutt backwards.
And that's the end of the fight!
Nigel Mutt comfortably won the final round on my scorecard.
Well Mutt has outworked and out performed his opponent in all aspects of the game today. He was simply too good and the decision should be no more than a formality. Over to the ring announcer for the scorecards.
Ladies and gentlemen, after 3 rounds of action, we go to the scorecards for a decision.
Judge Ben Watson scores the fight 27:30
Judge John Mangel scores the fight 27:30
Judge Chris Dean scores the fight 27:30
In favor of your winner, by unanimous decision... Nigel Mutt!
|
|
|
|
|
|
|
|
|
|
|
|
|
|
|
|
|
|
|
|
|
|
|
| S |
C
A |
G |
S |
C
B |
G |
|
S |
C |
G |
|
energy
A | B |
|
hype
A | B |
|
pop
A | B |
|
mgr
A | B |
|
FIGHT
RATING
53% |
|
|
|
|
|
|
|
Undercard bout
|
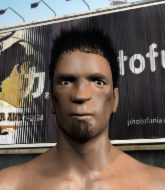
Coming up we have a welterweight MMA rules bout between Damian Anderson (ranked 4774 p4p, 509 weight class) and Alex Hadley Jr (ranked 7995 p4p, 660 weight class). Alex Hadley Jr is the more experienced fighter, so let's see if that makes a difference tonight.
 |
|
 |
| 170 cm
25
175 lbs
1 - 0 - 0 |
|
178 cm
18
170 lbs
1 - 1 - 0 |
Decent wrestler
Solid boxing
Good chin |
|
BJJ Blue Belt
Solid Muay Thai
Solid chin |
|
| |
|
Ladies and gentlemen. This fight is 3 rounds, in the welterweight division.
Introducing the fighter to my left, fighting out of the red corner.
With a record of
1 - 0 - 0, fighting out of Helsinki, Damian Anderson!
And introducing the fighter to my right, fighting out of the blue corner.
With a record of
1 - 1 - 0, fighting out of London, Alex Hadley Jr!
The judges for this bout are Francis DeMontford, Summer Carpenter and Damien Edna.
The bell rings for round one and we are underway!
A looping hook to the body misses from Hadley Jr. Anderson does a little dance to reset his feet.
Hadley Jr swings wildly with a couple of big hooks
and Anderson counters with a good right hand that lands right on the jaw.
Anderson fakes a head shot and lands one to the body.
Hadley Jr shoots in for a takedown but doesn't get it.
Hadley Jr throws a combination that misses
enabling Anderson to counter with a crisp jab.
Hadley Jr looks frustrated there after his takedown attempt is stuffed easily.
Anderson on the receiving end of a decent leg kick there by Hadley Jr. Hadley Jr obviously looking to wear him down.
Hadley Jr takes a shot to the nose. Hopefully that hasn't broken it.
Anderson cracks a nice hook into Hadley Jr's ribs.
Anderson scores with a reasonable looking shot to the body. Hadley Jr doesn't seem bothered though.
Anderson is moving around nicely and scores here with a single head shot.
Fantastic stuff here - a very entertaining period of action, which has drawn cheers from the crowd.
Hadley Jr slips under a jab.
Anderson looks to have improved his striking defense since last time we saw him fight.
Anderson could do with losing a few pounds - he looks very soft around the mid section, to put it politely.
Hadley Jr tries to clinch but is not successful on this occasion.
Anderson throwing a counter right hand but Hadley Jr manages to avoid it.
Anderson checks a low kick from Hadley Jr.
Hadley Jr has done a lot of speed work in the buildup to this fight.
That's one minute gone in the round.
Horrible takedown attempt by Hadley Jr or perhaps it was just good defense by Anderson, which made it look bad.
Damian Anderson has stuffed three takedown attempts in the round now. That's going to take a lot out of Alex Hadley Jr.
Hadley Jr misses with a kick to the body
and Anderson counters with a nice uppercut.
Anderson scores with a nice right hand.
Hadley Jr misses with a takedown
and Anderson cracks him with a counter punch right on the button.
Hadley Jr with a poor takedown
letting Anderson counter with a right hand.
Hadley Jr with a poor takedown
and Anderson counters with a stiff right hand.
Hadley Jr throws a jab when Anderson was well out of range.
Hadley Jr takes a shot to the nose. Hopefully that hasn't broken it.
Hadley Jr tries to clinch but Anderson is having none of it.
Damian Anderson is looking to keep the fight on the feet at all costs.
Anderson listening to his corner there, landing a nice uppercut.
Hadley Jr tries to clinch but Anderson moves away
and Anderson cracks him with a counter punch right on the button.
This has been an exciting period of action!
Anderson connects with a body shot.
That's two minutes gone in the round.
Anderson takes one on the button.
Anderson wings a very wild body shot but it does the job and lands to the midsection.
Anderson takes a head kick and keeps coming.

It looks like Damian Anderson has been cut.
Hadley Jr closes the distance and takes a jab right on the nose as he does so.
Hadley Jr shoots in but no luck this time.
Anderson tries to land with a swinging hook to the body but Hadley Jr was well out of range. Poor timing from Anderson.
Hadley Jr throws a lazy uppercut
and Anderson counters with a nice uppercut.
Crunch! Hadley Jr slams his shin into Anderson's torso.
Anderson works the jab nicely.
Anderson stuffs a takedown. It's all about dictating where the fight takes place and Anderson wants it to stay on the feet.
Hadley Jr looks to throw the jab but Anderson is out of range.
Hadley Jr shoots for a takedown but Anderson saw that one coming a mile off and avoided it easily.
Hadley Jr gets cracked with a nice right hand there by Anderson.
Jab by Anderson.
That's three minutes gone in the round.
Hadley Jr shoots in for a takedown. He's persisting with it as Anderson sprawls well. Anderson wins this battle and keeps the fight standing. Hadley Jr gets slowly back to his feet.
Anderson with a hook.
Anderson is really peppering his opponent's head with punches.
Anderson misses with a body shot. Nice footwork from Hadley Jr.
Anderson waving his hands out in front of him, looking to distract Hadley Jr.
Anderson throws a jab to the body, straight down the pipe. Boom. That sent Hadley Jr stumbling backwards but he manages to regain his composure quickly.
Hadley Jr tries to grapple but his opponent circles
and Anderson connects with a straight left hand counter down the middle.
Anderson lands with a shot to the body.
That's four minutes gone in the round.
Anderson just misses with a punch to the body.
Hadley Jr takes a shot to the nose. Hopefully that hasn't broken it.
A combination from Hadley Jr does no damage.
Anderson throws a series of strikes that have Hadley Jr backpedaling.
Anderson misses with an uppercut.
The crowd are loving this. Great action here.
Hadley Jr feints and then cracks Anderson's leading leg with a nice low kick. He's obviously looking to slow Anderson down.
Anderson tries to bum rush Hadley Jr with a series of wild strikes but Hadley Jr uses good footwork to avoid the assault.
Hadley Jr gets his takedown attempt stuffed easily
and Anderson counters nicely by changing levels and landing a hook to the body.
Hadley Jr scores with a kick to the body.
Anderson avoids a kick to the body.
Hadley Jr fails with the takedown
and Hadley Jr takes a counter punch right on the button for his troubles.
And thats the end of the round the fighters go back to their corners.
Damian Anderson dominated that round.
The cut man is working on Damian Anderson's cut.
The fighters' corners scream their final instructions, as the referee calls time. Here we go, back to the action!
Hadley Jr slips a jab and a cross from Anderson.
Hadley Jr with a lazy takedown attempt
and Anderson counters with a quick right hand to the jaw.
Alex Hadley Jr seems to be the more aggressive standup fighter in this bout.
Hadley Jr on the wrong end of a nice jab.
Hadley Jr throws a sloppy head kick and Anderson moves out of range easily.
Hadley Jr shoots in for a takedown. He's persisting with it as Anderson sprawls well. Anderson wins this battle and keeps the fight standing. Hadley Jr gets slowly back to his feet.
Anderson swung with a counter punch to the body but it didn't connect.
Alex Hadley Jr is looking to throw some combinations by the looks of things.
Anderson darts in and out, connecting with a jab.
We've had a slow start to the round here - hopefully the action picks up.
Anderson lands a body shot.
Hadley Jr tries to clinch up against the cage, rushing in to close the distance. Anderson manages to break the clinch and circles back to the middle of the mat.
Anderson moves out of range of the body kick.
Hadley Jr misses with a hook. Anderson ducked under it nicely.
That's one minute gone in the round.
Hadley Jr darts in trying to clinch
and Anderson cracks him with a counter punch right on the button.
Anderson swings and misses with a hook to the body.
Hadley Jr has a pretty nasty looking mouse under his right eye.
Anderson on the wrong end of a nice low kick. He's acting like it's no big deal but he doesn't want to take many more of those.
Anderson lands a jab. Then a cross. Then finally a nice hook to the body. Good work there by Anderson.
Hadley Jr keeping a good distance there, avoiding the body shot.
Hadley Jr gets in close and instigates a clinch.
Hadley Jr misses with an elbow over the top.
Anderson has Hadley Jr pressed up against the cage and is working for takedown. Hadley Jr manages to improve position though and keeps the fight standing.
Hadley Jr is pressed up against the cage. Anderson has hold of a leg and is looking to drag Hadley Jr down to the mat. Hadley Jr avoids the attempt though and has circled away. We're back to striking at a distance.
Hadley Jr turns his hip over beautifully as he lands a nice leg kick.
A big left from Hadley Jr misses.
Anderson swings for the body but Hadley Jr moves out of range.
That's two minutes gone in the round.
Anderson jabbing away but nothing is landing.
Hadley Jr moves to clinch but Anderson breaks away
and Anderson counters with a three punch combination, finished off with a leg kick. Nice work.
The fans in attendance giving it up for the two fighters, who have really let it all hang out in the last minute or so!
Hadley Jr tries to close the distance and clinch up against the cage but Anderson paws at him with a jab and circles away.
A quick step to the side and Anderson tries to counter with a shot to the body but it doesn't connect.
Good standup being displayed there by Anderson as he connects with a hook.
Hadley Jr tries to close the distance and clinch but Anderson swats him to one side with an open hand palm strike and circles away.
Hadley Jr tries to grapple but his opponent circles
and Hadley Jr takes a counter punch right on the button for his troubles.
Hadley Jr tries to clinch up.
Anderson fakes high and swings low for a body shot but Hadley Jr manages to avoid it.
Hadley Jr throws a quick head kick that skims the top of Anderson's head.
Hadley Jr misses with a lunging right hand
and Anderson counters with a shot to the ribs. That looked like it hurt.
That's three minutes gone in the round.
Hadley Jr is looking to clinch but Anderson is avoiding it.
Hadley Jr looks frustrated there after his takedown attempt is stuffed easily.
Damian Anderson has stuffed three takedown attempts in the round now. That's going to take a lot out of Alex Hadley Jr.
Hadley Jr throws a predictable looking body shot
and Anderson counters with a lovely straight right hand!
Anderson lands a powerful looking uppercut that connected with his opponent's jaw.
Anderson works Hadley Jr's body with a nice hook.
Anderson stuffs the takedown.
Hadley Jr misses with a head kick.
A looping hook to the body misses from Anderson. Hadley Jr does a little dance to reset his feet.
Anderson throws a right and a left that both miss.
Anderson keeps the fight on the outside.
Anderson appears to be looking for a counter punch to the body.
Anderson misses with a looping right.
Anderson swats away the attempt to clinch by Hadley Jr.
That's four minutes gone in the round.
Hadley Jr closes the distance and clinches up with Anderson, looking for a takedown. Hadley Jr pushes Anderson against the cage but Anderson circles to the side and manages to break the clinch.
Nice uppercut there from Anderson.
Anderson keeps the fight on the outside.
Hadley Jr tries to shoot in for a takedown. He's got hold of a leg but Anderson swivels and escapes.
It looked like Anderson wanted to counter with a hook but didn't fully commit.
Hadley Jr is trying hard to land a takedown here. Anderson sprawls well and keeps this one on the feet.
Hadley Jr is breathing heavily.
Anderson connects with a lovely jab that went straight through the gap between Hadley Jr's hands.
We've seen a great period of action over the last minute or so - credit to both fighters for going all out!
Nice straight punches there by Anderson. You know Roy Jones Jr respects the hands of Anderson.
Jab, cross, leg kick. Nice combination by Anderson!
Hadley Jr shoots in but no luck this time.
Anderson swings and misses with a hook to the body.
Anderson throws a body shot but no joy.
Hadley Jr is trying desperately to land a takedown but Anderson is having absolutely none of it. This is turning into a bit of a nightmare for Hadley Jr.
Hadley Jr scores with a head kick.
And thats the end of the round the fighters go back to their corners.
Damian Anderson dominated that second round.
The cut man is working on Damian Anderson's cut.
That's time! Anderson's corner gives him a slap on the ass as he gets ready to fight. This is the final round!

Hadley Jr shoots in for a takedown and gets it. Let's see what he's got on the mat.
Anderson wants to sweep but no luck.
Anderson can't keep his opponent in guard - Hadley Jr advances to half guard, no doubt looking to mount.
Anderson on his back here. We all know that wrestlers don't like being on their back so let's see if Anderson tries to get out of the position.
Anderson missing with punches from the bottom.
Anderson wants to improve his position but Hadley Jr is controlling well.
Hadley Jr wants to free his trapped foot but Anderson is holding on for dear life with his legs.
We've had a slow start to the round here - hopefully the action picks up.

Hadley Jr wants to work for an arm triangle but Anderson is really keeping half guard well and defending the submission attempt.
Anderson is working for an escape here. He's hooked one of Hadley Jr's legs and he's managed to sneak out and take Hadley Jr's back!
That's one minute gone in the round.
Anderson biding his time, controlling Hadley Jr.
Anderson missing with strikes from the back.
Anderson has good solid back control here.
Hadley Jr trying to control the hands but Anderson breaks the grip.
Hadley Jr is trying to get back to his feet but he's not managed it yet.
Hadley Jr tries to escape but Anderson has the hooks in and won't let him break free.
Hadley Jr wriggles onto his back under a barage of strikes.
That's two minutes gone in the round.
The crowd are starting to boo a lack of action.
Hadley Jr is working to get back to half guard.
Anderson looking to control and managing it successfully.
Hadley Jr is not a happy chappy
he wants out of there.
Anderson tucks in and makes sure he doesn't lose the dominant position.
Hadley Jr wants to control but Anderson is having none of it.
That's three minutes gone in the round.
Hadley Jr sneaks a leg under to get to half guard.
Anderson perhaps working for something from half guard, or maybe not. It looks like he's just sitting there.
Anderson is really dominating this fight. Is there anything that Hadley Jr can do to turn this around?
Anderson not throwing his punches with enough precision this time.
Damian Anderson is fighting for a decision here - he's started to take the cautious approach.
Anderson is just sitting in half guard, waiting for something to happen.
The ref warns both fighters not to hold the cage as they work up against the meshing.
Hadley Jr wants to get back to his feet.
The referee must be thinking about standing these guys back up.
Hadley Jr is looking to regain full guard. Not this time though.

The ref stands the fighters back up due to a lack of activity.
That's four minutes gone in the round.
The crowd are hurling abuse towards the fighters... You can hardly blame them though because there isn't a lot going on in the fight.
Anderson throws a body punch but Hadley Jr moves out of range.
Hadley Jr is looking to clinch but Anderson is avoiding it.
Anderson throwing a counter right hand but Hadley Jr manages to avoid it.
Damian Anderson is winning the standup battle so far.
Anderson ducks under an overhand right and circles away with a smile on his face.
Hadley Jr dives in for a single leg takedown but Anderson sprawls and the fighters end up clinched against the cage.
Anderson seem to be loading up, looking for a big counter.
Hadley Jr tries to clinch but Anderson is having none of it.
Anderson throws a body shot but no joy.
This fight brought to you by 5M nutrition - it's mmmmm tasty. Nice jab by Anderson.
Hadley Jr moves to clinch but Anderson breaks away
and Anderson counters with a nice jab to the body that keeps Hadley Jr thinking.
Alex Hadley Jr has stepped it up - he knows he needs a finish here!
Anderson swings and misses with a hook to the body.
Hadley Jr counters with a body kick.
Boooooooooooooooooooo!!! God, this has been a terrible round. Come on you two, sort yourselves out!
Hadley Jr tries to clinch up but Anderson circles away and keeps his distance.
Hadley Jr fails to land with a series of punches.
Anderson scores with a punch to the gut of his opponent.
And that's the end of the fight!
Damian Anderson showed his dominance in that final round.
Well I reckon that's a shut out for Anderson, winning every round. Will the judges agree? They are the ones who matter, even if they are often depressingly incompetent. Over to the ring announcer for the scorecards.
Ladies and gentlemen, after 3 rounds of action, we go to the scorecards for a decision.
Judge Francis DeMontford scores the fight 30:27
Judge Summer Carpenter scores the fight 30:27
Judge Damien Edna scores the fight 30:27
In favor of your winner, by unanimous decision... Damian Anderson!
Damian Anderson was full of energy after the big win and talked about how he thinks he can do big things in this sport. The crowd were appreciative of his determination to succeed.
|
|
|
|
|
|
|
|
|
|
|
|
|
|
|
|
|
|
|
|
|
|
|
| S |
C
A |
G |
S |
C
B |
G |
|
S |
C |
G |
|
energy
A | B |
|
hype
A | B |
|
pop
A | B |
|
mgr
A | B |
|
FIGHT
RATING
54% |
|
|
|
|
|
|
|
Undercard bout
|
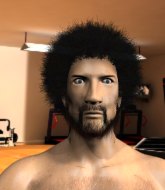
Coming up we have a light heavyweight MMA rules bout between Liam Berry (ranked 5352 p4p, 608 weight class) and Rob Krygos (ranked 23837 p4p, 819 weight class). Rob Krygos has the eye of the tiger tonight.
 |
|
 |
| 192 cm
21
219 lbs
1 - 0 - 0 |
|
199 cm
20
204 lbs
4 - 2 - 0 |
Good wrestling
Brawler
Big right hand |
|
BJJ Blue Belt
Brawler
Solid chin |
|
| |
|
Ladies and gentlemen. This fight is 3 rounds, in the light heavyweight division.
Introducing the fighter to my left, fighting out of the red corner.
With a record of
1 - 0 - 0, fighting out of Rio de Janeiro, Liam Berry!
And introducing the fighter to my right, fighting out of the blue corner.
With a record of
4 - 2 - 0, fighting out of St Petersburg, Rob Krygos!
The judges for this bout are Winston Howard, Ben Watson and John Mangel.
The bell rings for round one and we are underway!
Krygos walks straight into an uppercut. Luckily it didn't land flush.

It looks like Rob Krygos has been cut.
Berry comes forward and lands a shot to the body, then darts back out of range.
Berry scores with a jab to the jaw of his opponent.
Berry gets to the clinch - let's see what his plan is here.
Berry lands a short shot on the inside that snaps the head of Krygos backwards.
Berry dictating the pace here, as the fighters clinch against the cage.
Krygos takes a shot to the head.

Krygos is rocked!
Berry working some nice short punches in the clinch.
Krygos is still on wobbly legs! Can Berry finish him?
Berry breaks the clinch and we're back to striking at distance.
Berry lands an uppercut, right on the button! Krygos tumbles backwards into the cage, staring vacantly into space! He's got no idea where he is, who he is or what day it is... Poor guy.
Ladies and gentlemen, after 0:32 of round 1, we have a winner by way of KO (Punch). Liam Berry!
|
|
|
|
|
|
|
|
|
|
|
|
|
|
|
|
|
|
|
|
|
|
|
| S |
C
A |
G |
S |
C
B |
G |
|
S |
C |
G |
|
energy
A | B |
|
hype
A | B |
|
pop
A | B |
|
mgr
A | B |
|
FIGHT
RATING
100% |
|
|
|
|
|
|
|
Undercard bout
|
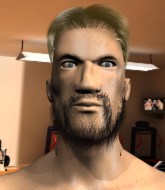
Coming up we have a lightweight MMA rules bout between Ty Sterling James (ranked 8375 p4p, 603 weight class) and Anthony Brooks (ranked 24931 p4p, 647 weight class). Brooks comes into a darkened arena with his song building. No Problem kicks in, the lights come on and the crowd goes wild! What a showman! Ty Sterling James is staring across the cage at his opponent, tweaking his nipples... Tweaking his own nipples that is.
 |
|
 |
| 176 cm
21
160 lbs
2 - 1 - 0 |
|
180 cm
18
165 lbs
2 - 2 - 0 |
BJJ Purple Belt
Brawler
Intelligent |
|
BJJ Blue Belt
Decent boxing
Intelligent |
|
| |
|
Ladies and gentlemen. This fight is 3 rounds, in the lightweight division.
Introducing the fighter to my left, fighting out of the red corner.
With a record of
2 - 1 - 0, fighting out of Los Angeles, Ty Sterling James!
And introducing the fighter to my right, fighting out of the blue corner.
With a record of
2 - 2 - 0, fighting out of Las Vegas, Anthony Brooks !
The judges for this bout are Winston Howard, Ben Watson and Darius Henderson.
The bell rings for round one and we are underway!
Brooks shoots in for a takedown from distance. He catches Sterling James napping and manages to drive through into side control!

Brooks decides to stand up, so the ref orders Sterling James to his feet.
Brooks clinches with his opponent.
Sterling James tries a knee to the head but Brooks blocks it.

Sterling James gets control of Brooks 's arms and successfully pulls guard. Sterling James will no doubt be looking for submissions off his back.
Brooks postures up and scores with a shot to the body and a follow up elbow to the head.
Sterling James throwing some rather feeble looking strikes off his back.
There's a bit of a scramble here and now Sterling James is on top in guard.

Brooks escapes his hips to the side and looks to be working for an armbar. Sterling James gives him a little smile and shakes his head. No chance.
Sterling James with a couple of shots to the head there. Not particularly brutal.
That's one minute gone in the round.
Sterling James won't allow Brooks to get back to his feet.
Sterling James controlling from the top position.
Brooks looks to be working for a triangle here. Oh, it looks like he might have it! Sterling James has picked Brooks up and slammed him! Brooks can't keep hold of the triangle and Sterling James manages to pass to side control!
Brooks tries to buck Sterling James off but Sterling James is having none of it.
Sterling James tries to cartwheel into mount but he doesn't manage it.
Brooks takes a couple of big shots there - the referee warns him that he has to defend himself better.
The referee asks Sterling James politely if he wouldn't mind getting on with it and actually doing something. Sterling James prefers to stall for the moment though.
Brooks is sneaking out the side here. He's bucked Sterling James off and has taken his back!
That's two minutes gone in the round.
Sterling James is really stuck here.
Brooks throwing lazy shots from the back mount that aren't doing any damage.
Good control from Brooks .
Brooks doesn't have the hooks in and Sterling James manages to turn into his guard.
Sterling James is just sitting in guard, looking to avoid any submissions.
Brooks is looking to get back to his feet but can't, whilst Sterling James is controlling him.
Brooks working for a triangle but Sterling James defends it easily.
The fighters are starting to get a bit slippery now, which will make submissions a bit more difficult.
Sterling James controls from within his opponent's guard.
That's three minutes gone in the round.

Sterling James drops back looking for a leg! Brooks is in trouble here! The fighters roll with the hold and Brooks manages to kick Sterling James off! Sterling James jumps back into Brooks 's guard.
Sterling James's corner is telling him to maintain position.
The fighters are pressed up against the cage, both looking to find a bit of space to work.
Sterling James got a little sloppy there for a moment and Brooks has worked his way into a loose triangle - can he finish it?! No, Sterling James has managed to get both his arms back between Brooks 's legs - danger averted.
That's four minutes gone in the round.
Neither fighter has done anything of merit for a good minute or two here and the crowd are not happy about it.
Sterling James is stalling in the full guard.
Sterling James trying to control but Brooks is working from the bottom.
Brooks tries to land a sweep but no joy.
The crowd thankful this round is nearly over.
Sterling James forces his way into half guard.
Sterling James trying to control from half guard but Brooks is working away.
And thats the end of the round the fighters go back to their corners.
Ty Sterling James dominated that round.
That's the end of the round. The referee orders the cornermen out of the cage so we can get back down to business.
Sterling James fakes with an overhand right and moves in to clinch with Brooks , pushing him back against the cage.
Sterling James's corner calls for him to break the clinch, which he does.
Brooks lands with a two punch combination before moving back out of range.
Sterling James looking for a takedown here - he's got it.
Brooks utilising some decent striking defenses from the guard, preventing the ground and pound.
Sterling James has decided he wants to stand but the closed guard of Brooks is proving hard to escape from.
Sterling James wants to control from the top but Brooks keeps moving.
We've had a slow start to the round here - hopefully the action picks up.
Sterling James trying to stand up but can't free himself from Brooks 's guard.
That's one minute gone in the round.
Brooks wants to sweep but no luck.
Sterling James looking to control the position here, rather than advance.
Sterling James is sitting in guard, working some ground and pound.
Sterling James content to stall in guard here.
Sterling James stopping the sweep attempt from Brooks .
The referee decides to stand the fighters back up.
That's two minutes gone in the round.
A few boos can be heard. I'm sure they will multiply if the fighters don't pick up the pace.
Brooks is looking to clinch but Sterling James is avoiding it.
Sterling James shoots in for a takedown from distance. He catches Brooks napping and manages to drive through into side control!
Brooks is looking to reverse the position.
Sterling James controls the position.
Brooks tries to bench press Sterling James off him but Sterling James keeps the position.
Brooks wants to control but Sterling James postures up.
Brooks prevents Sterling James from moving into mount.
That's three minutes gone in the round.

Sterling James stands up and we're back to a striking position.
Sterling James throws a sloppy body shot
and Brooks counters with a three punch combo that has Sterling James backing up. Sterling James nods at Brooks to acknowledge the strikes.
Sterling James darts in and clinches Brooks up against the cage.
Sterling James breaks the clinch.
Sterling James takes the fight into the clinch.
Sterling James breaks the clinch and we're back to striking at distance.
Brooks tries to clinch but Sterling James is having none of it.
Sterling James has closed the distance and engaged Brooks in a clinch.
Sterling James stalling against the cage.
Sterling James is really dominating this fight. Is there anything that Brooks can do to turn this around?
Sterling James cracks Brooks with a nice body shot.
Sterling James has dropped down and is working for a takedown. Brooks is trying to keep an underhook but Sterling James manages to get the takedown into half guard.
That's four minutes gone in the round.
This is a great period of action - very entertaining stuff!
Brooks gets back to full guard.
Sterling James has decided he wants to stand but the closed guard of Brooks is proving hard to escape from.
Sterling James avoids a guillotine attempt easily.
Brooks wants to improve his position but instead Sterling James has moved into half guard.
Sterling James seems to be working for a kimura but Brooks defends the submission attempt.
And thats the end of the round the fighters go back to their corners.
Ty Sterling James dominated that second round.
The fighters get back to their feet, the hooter sounds and we're back to the action! Let's get this one finished - here comes the final round!
Sterling James throws a leg kick but Brooks sees it coming and moves out of range.
Sterling James keeps the fight on the outside.
Sterling James throws a big counter combination but Brooks scrambles out of danger and avoids any damage.
Sterling James darts in and clinches Brooks up against the cage.
A frustrated look appears on Brooks 's face as he tries to break the clinch.
Both guys are working to get underhooks.
Sterling James is struggling to control the position.
Sterling James has Brooks pressed up against the cage. He's trying to work for a single leg takedown. Sterling James pulls back from the cage and twists to the side, sending Brooks tumbling to the mat - Sterling James dives into Brooks 's guard.

Brooks pushes Sterling James off and scrambles back to his feet.
We've had a slow start to the round here - hopefully the action picks up.
Sterling James moves into the clinch successfully.
That's one minute gone in the round.
An uppercut on the inside fails to land for Sterling James.
Brooks lands a right hand that snaps the head of Sterling James backwards.
Stalling in the clinch from Brooks .
Brooks wants to break the clinch but can't.
Brooks has Sterling James pressed up against the cage and is working for takedown. Sterling James manages to improve position though and keeps the fight standing.
Brooks working hard to break the clinch.
Sterling James avoiding damage.
Sterling James gets control of Brooks 's arms and successfully pulls guard. Sterling James will no doubt be looking for submissions off his back.
Sterling James pulls Brooks in to control the position.
Sterling James is trying to control the position from the bottom.
That's two minutes gone in the round.
Brooks stays in close to Sterling James's body and controls the position.
Brooks is working the ground and pound from guard. He might want to try advancing position though to get more of an impact.
Sterling James working for a triangle but Brooks defends it easily.
Sterling James working from the bottom, still in full guard. He's managed to get a loose triangle. Brooks doesn't seem to be doing much to defend here, obviously he feels comfortable in the position. Brooks manages to throw the legs off his shoulder and he's back into guard - no problem.
Both fighters are breathing heavily.
Brooks wants to control from the top but Sterling James keeps moving.
That's three minutes gone in the round.
Sterling James is trying to control the position from the bottom.
Brooks wants to control from the top but Sterling James keeps moving.
Sterling James looking to sweep here. No luck so far.
Sterling James keeping moving, preventing Brooks from controlling successfully.
The referee has stepped in and called for a break in the action. We'll restart on the feet.
Sterling James feints and then dives in with a takedown. That was a long way out but the feint bought him enough time to close the distance and complete the takedown. Now we'll play guard for a bit and see who can get the better of that position.
Anthony Brooks has stepped it up - he knows he needs a finish here!
That's four minutes gone in the round.
Brooks controls Sterling James momentarily but Sterling James frees himself.
Ty Sterling James overall seems to be getting the better of the ground position in the fight so far.
Brooks looking for submissions from the bottom here. Moving his hips around, possibly looking for an armbar.
Sterling James tries to stand but Brooks is controlling from the bottom.
Brooks keeping moving, preventing Sterling James from controlling successfully.
Boooooooooooooooooooo!!! God, this has been a terrible round. Come on you two, sort yourselves out!
Sterling James pressing down on his opponent's thigh, looking to pass guard. Brooks is keeping the position for now.
And that's the end of the fight!
Ty Sterling James showed his dominance in that final round.
Well I reckon that's a shut out for Sterling James, winning every round. Will the judges agree? They are the ones who matter, even if they are often depressingly incompetent. Over to the ring announcer for the scorecards.
Ladies and gentlemen, after 3 rounds of action, we go to the scorecards for a decision.
Judge Winston Howard scores the fight 30:27
Judge Ben Watson scores the fight 30:27
Judge Darius Henderson scores the fight 30:27
In favor of your winner, by unanimous decision... Ty Sterling James!
|
|
|
|
|
|
|
|
|
|
|
|
|
|
|
|
|
|
|
|
|
|
|
| S |
C
A |
G |
S |
C
B |
G |
|
S |
C |
G |
|
energy
A | B |
|
hype
A | B |
|
pop
A | B |
|
mgr
A | B |
|
FIGHT
RATING
33% |
|
|
|
|
|
|
|
Undercard bout
|
|
|
|
Undercard bout
|
Coming up we have a lightweight MMA rules bout between Gunnar Impala (ranked 4812 p4p, 477 weight class) and Rocky Python (ranked 6205 p4p, 550 weight class). Impala comes to the cage accompanied by Ambitions of a ridah. Python is bouncing up and down as he enters the arena, backed by Not Afraid. I can't wait for this one - let's get the fighter introductions out of the way and get this one started!
 |
|
 |
| 177 cm
28
160 lbs
4 - 0 - 0 |
|
170 cm
20
160 lbs
1 - 0 - 0 |
BJJ Blue Belt
Basic striking
KO power |
|
BJJ Blue Belt
Excellent boxer
Prefers standup |
|
| |
|
Ladies and gentlemen. This fight is 3 rounds, in the lightweight division.
Introducing the fighter to my left, fighting out of the red corner.
With a record of
4 - 0 - 0, fighting out of London, Gunnar Impala!
And introducing the fighter to my right, fighting out of the blue corner.
With a record of
1 - 0 - 0, fighting out of Las Vegas, Rocky Python!
The judges for this bout are Darius Henderson, Ben Watson and Topper Green.
The bell rings for round one and we are underway!
Impala gets cracked with a nice right hand there by Python.
Impala shoots in and bounces Python off the cage to secure the takedown into guard.
Hammerfist, elbow! yells Impala's corner. There ya go! There ya go!
Our spies down at at Dungeon Brawler Gym ($800/week) inform us that Python has really been working on his submissions in the buildup to this fight. Will it pay off?
Impala working from the guard for now, landing some ground and pound.
Impala trying to land body shots but he keeps hitting the mat.
Python controls Impala momentarily but Impala frees himself.
Impala lands a couple of decent looking shots.
Impala postures up to throw the ground and pound strikes but they don't connect.
Impala landing some decent shots from guard.
Python is rocked!
Python is looking for a guillotine. You can't force these things though and Impala defends well.
Python is still in real trouble! Can Impala finish him?
Impala postures up from his opponent's guard, before exploding into some vicious ground and pound! Python covers up, he's hurt! Impala keeps throwing the strikes, glancing at the referee... Will he stop it?? One more big shot from Impala and the ref steps in to end the fight! Impala can't hide his delight as he celebrates with his corner.
Ladies and gentlemen, after 1:58 of round 1, we have a winner by way of TKO (Strikes). Gunnar Impala!
During a confident post fight interview, Gunnar Impala thanked all his fans. He seemed very genuine when describing how motivated his fans keep him.
|
|
|
|
|
|
|
|
|
|
|
|
|
|
|
|
|
|
|
|
|
|
|
| S |
C
A |
G |
S |
C
B |
G |
|
S |
C |
G |
|
energy
A | B |
|
hype
A | B |
|
pop
A | B |
|
mgr
A | B |
|
FIGHT
RATING
79% |
|
|
|
|
|
|
|
Undercard bout
|
Coming up we have a featherweight MMA rules bout between Rahib Nagibov (ranked 24504 p4p, 541 weight class) and Perdue Willshire (ranked 24463 p4p, 549 weight class). Perdue Willshire has the better chin. Will he look to stand and bang today?
 |
|
 |
| 176 cm
26
145 lbs
0 - 7 - 0 |
|
172 cm
19
142 lbs
1 - 3 - 0 |
BJJ Blue Belt
Excellent MT
Very strong |
|
BJJ White Belt
Counter fighter
Likes musicals |
|
| |
|
Ladies and gentlemen. This fight is 3 rounds, in the featherweight division.
Introducing the fighter to my left, fighting out of the red corner.
With a record of
0 - 7 - 0, fighting out of St Petersburg, Rahib Nagibov!
And introducing the fighter to my right, fighting out of the blue corner.
With a record of
1 - 3 - 0, fighting out of Las Vegas, Perdue Willshire!
The judges for this bout are Skip Squint, Hugh Johnson and John Mangel.
The bell rings for round one and we are underway!
Nagibov doesn't manage to clinch there - Willshire circles away.
Nagibov closes the distance and looks for a trip takedown... aaaand he's got it - Nagibov lands in his opponent's guard.
Willshire is edging up against the cage. He's using the cage to get back to his feet. Nice work there - the fighters are clinched.
Willshire taking a breather.
Willshire looks like he'd prefer to be striking at range right now.
Willshire breaks from the clinch.
Nagibov shoots in with a lovely double leg takedown. Willshire manages to land in full guard to minimise the damage.
Willshire looking to sweep here. No luck so far.
That's one minute gone in the round.
Willshire has butterfly guard. He's looking to stand up here. He pushes Nagibov off him and springs to his feet nicely. The crowd applauds.
Sloppy strikes from Nagibov. Those never looked like landing.
Nagibov wants to clinch up but Willshire keeps it at a distance.
The fight stays on the outside here - Nagibov looks like he's thinking about clinching though.
Nagibov fails in his attempt to clinch.
Nagibov gets a takedown into half guard.
Willshire is looking to regain full guard. Not this time though.
Willshire is doing well to avoid being mounted. He's controlling the position at the moment.
That's two minutes gone in the round.
Willshire wants to improve his position but Nagibov is controlling well.
Willshire has one foot on Nagibov's thigh - he pushes off and manages to get back to his feet.
The crowd are loving this. Great action here.
Nagibov shoots in looking for a single leg takedown. Willshire is trying to defend but Nagibov finishes it well and ends up in half guard. Let's see if he can advance position further.
Nagibov is breathing heavily.
Willshire is trying to get back to full guard.
That's three minutes gone in the round.
Willshire wants to stand back up but Nagibov manages to pass into side control.
Nagibov throwing strikes but missing, from side control.
Willshire really doesn't want to stay on the ground with Nagibov. If he can't get it back to his feet, it's only a matter of time before he'll be tapping out.
Both fighters take a look at the clock.
Willshire regains half guard.
Nagibov seems to be looking for submissions.
The fighters are pressed up against the cage, both looking to find a bit of space to work.
That's four minutes gone in the round.
The crowd are getting on the fighters' backs, as the pace has dropped off in the last minute or so.
Nagibov escapes and gets back to his feet.
Nagibov throws a left and a right that both miss
and Willshire counters with a takedown into side control.
Willshire tries to move into full mount but can't pass Nagibov's legs.
Nagibov taking a bit of punishment here - Willshire scoring with strikes.
Nagibov taking a bit of punishment here - Willshire scoring with strikes.
Willshire has hold of Nagibov's arm. He's looking for a kimura. Nagibov seems comfortable defending it but Willshire has shifted his position slighty and is cranking on the arm! Nagibov is real pain and he's forced to tap out! Nagibov is disgusted with himself for not defending it better but Willshire couldn't care less - he's delighted!
Ladies and gentlemen, after 4:55 of round 1, we have a winner by way of Submission (Kimura). Perdue Willshire!
|
|
|
|
|
|
|
|
|
|
|
|
|
|
|
|
|
|
|
|
|
|
|
| S |
C
A |
G |
S |
C
B |
G |
|
S |
C |
G |
|
energy
A | B |
|
hype
A | B |
|
pop
A | B |
|
mgr
A | B |
|
FIGHT
RATING
40% |
|
|
|
|
|
|
|
Undercard bout
|
|
|
|
Co-main event
|
#R1#
Foreman takes a punch right to his stomach. That took the wind out of him momentarily.
Foreman has been working on his boxing with his coaches at The Shark Tank in the buildup to the fight.
Azgada throws a shot to the body.
Azgada looks to land a left hand but Foreman moved out of range nicely.
Foreman throwing a counter right hand but Azgada manages to avoid it.
Foreman swings widly with a right hand
and Azgada counters with a stiff right hand. #CUT2#
It looks like Joe Foreman has been cut.
Azgada throws the left hand but Foreman avoids the punch easily.
It looked like Foreman wanted to counter with a hook but didn't fully commit.
Azgada misses with a hook to the body
and Foreman counters with a stiff right hand.
Azgada fakes and then throws a beautiful body shot. Foreman looks a bit winded and takes a step backwards to take a breath.
Foreman throws a looping overhand right but Azgada ducks down to avoid it.
We've had a slow start to the round here - hopefully the action picks up.
Azgada blocks a jab.
Azgada throws a hard body shot but it just misses.
Foreman uses good footwork to avoid the strikes from Azgada.
Azgada throws a jab when Foreman was well out of range.#T1#
Azgada connects with a good right hand that stumbles Foreman . Foreman circles away out of range and recomposes himself.
Foreman fakes a jab and then connects with a hook.
Azgada cracks Foreman with an open hand slap.
Foreman misses with a hook. Azgada ducked under it nicely.
Azgada throws a jab, cross combination which is slipped
and Foreman counters with a quick right hand to the jaw.
Azgada misses with a left hand
and Foreman counters with a lovely straight right hand!#ROC#
Azgada is rocked!
Azgada throws the left hand but Foreman avoids the punch easily.
Foreman was looking to counter that last move with a shot to the body but he didn't commit.
Azgada is still on wobbly legs! Can Foreman finish him?
Azgada misses with a hook
and Foreman rattles Azgada with a well-timed uppercut counter. - Azgada tries to back away and recover but his hands are down low and he gets tagged again, sending him stumbling down to the canvas. Foreman dives in after him and quickly finishes the job with a trio of brutal punches, leaving Azgada stiff and motionless on the mat!
Ladies and gentlemen, after 1:47 of round 1, we have a winner by way of KO (Strikes). Joe Foreman !
Joe Foreman retains his heavyweight title!
|
|
|
|
Main event
|
Coming up we have a bantamweight MMA rules bout between Harry Harrington (ranked 3197 p4p, 154 weight class) and Matvey Pavlov (ranked 1240 p4p, 55 weight class). Both these fighters are unbeaten, so somebody's 0 has got to go!Rumors backstage are that the fighters have been paid to keep it standing but we know that would never happen in MMA!
 |
|
 |
| 178 cm
26
144 lbs
7 - 0 - 0 |
|
166 cm
21
149 lbs
6 - 0 - 0 |
Decent wrestler
Excellent MT
Very strong |
|
Good wrestler
Basic striking
Granite chin |
|
| |
|
Ladies and gentlemen. This fight is 5 rounds, for the bantamweight championship of the world!
Introducing the champion to my left, fighting out of the red corner.
With a record of
7 - 0 - 0, fighting out of Rio de Janeiro, Harry Harrington!
And introducing the challenger to my right, fighting out of the blue corner.
With a record of
6 - 0 - 0, fighting out of Las Vegas, Matvey Pavlov!
The judges for this bout are Chris Dean, John Mangel and Ron Honeybunn.
The bell rings for round one and we are underway!
Harrington lands a jab. Then a cross. Then finally a nice hook to the body. Good work there by Harrington.
Harrington slaps away a takedown attempt from Pavlov, before circling back to the center of the mat.
Harrington jabs Pavlov to the body, keeping him at a distance.
Harrington has been working on his boxing with his coaches at 10th planet rio in the buildup to the fight.
Pavlov closes this distance looking for a takedown but Harrington circles away.
A cross from Harrington lands.
Matvey Pavlov seems to be the more aggressive standup fighter in this bout.
Pavlov closes the distance and clinches up, looking for a takedown. He shifts his weight and gets a nice trip into half guard.
Harrington knows he needs to get back to his feet asap. He's simply no match for Pavlov on the ground.
Pavlov is working for submissions here but there's nothing on.
The crowd are loving this. Great action here.
Pavlov is trying to work for a kimura. This could be trouble! No, Harrington has managed to free his arm - good work.
Pavlov has hold of the far side arm. He's working for the Kimura, can Harrington defend it? Pavlov steps over the head and cranks it - Harrington is tapping out! That was textbook stuff right there - nice submission victory for Pavlov!
Ladies and gentlemen, after 0:39 of round 1, we have a winner by way of Submission (Kimura). Matvey Pavlov!
Matvey Pavlov is the new bantamweight champion!
Matvey Pavlov gave a mention to Mockstar Energy Drinks 160Q in his post fight interview. That will please them (and hopefully generate some sales).
|
|
|
|
|
|
|
|
|
|
|
|
|
|
|
|
|
|
|
|
|
|
|
| S |
C
A |
G |
S |
C
B |
G |
|
S |
C |
G |
|
energy
A | B |
|
hype
A | B |
|
pop
A | B |
|
mgr
A | B |
|
FIGHT
RATING
100% |
|
|
|
|
|
|
|
|
|
|
