 |
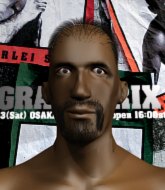
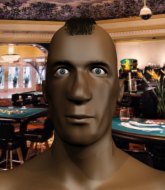
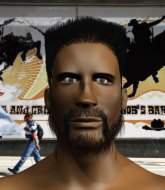
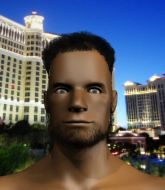
NJMMA #5: Boozer v Sane PBP Commentary |
Undercard bout
|
|
|
|
Undercard bout
|
|
|
|
Undercard bout
|
Coming up we have a featherweight MMA rules bout between Jens Kyllonen (ranked 8355 p4p, 546 weight class) and Rizky Nanda (ranked 25162 p4p, 622 weight class). Fingers crossed for an exciting fight - I'm sure both fighters are looking for a nice under the table bonus!
 |
|
 |
| 173 cm
25
150 lbs
0 - 1 - 0 |
|
171 cm
22
149 lbs
2 - 5 - 0 |
BJJ White Belt
Excellent boxer
KO power |
|
BJJ Purple Belt
Solid Muay Thai
Granite chin |
|
| |
|
Ladies and gentlemen. This fight is 3 rounds, in the featherweight division.
Introducing the fighter to my left, fighting out of the red corner.
With a record of
0 - 1 - 0, fighting out of Helsinki, Jens Kyllonen!
And introducing the fighter to my right, fighting out of the blue corner.
With a record of
2 - 5 - 0, fighting out of Sydney, Rizky Nanda!
The judges for this bout are Joseph Jones, Anthony Taglia and Alyssa Summers.

The bell rings for round one and we are underway!
Kyllonen getting the better of the striking in that exchange.
Nanda takes one on the chin but seems OK.
Nanda shoots in for a takedown. "I don't think so" says Kyllonen as he avoids it easily.
Kyllonen scores with a shot to the body.
Nanda misses with a double jab.
Kyllonen with a hook.
Both fighters are looking to counter, which isn't making for the most exciting fight in the world.
Nanda swings wildly with a right hand that was never going to find it's target.
Kyllonen lands with a right hand.
Kyllonen checks a low kick from Nanda.
Nanda shoots in for a takedown. He's persisting with it as Kyllonen sprawls well. Kyllonen wins this battle and keeps the fight standing. Nanda gets slowly back to his feet.

That's one minute gone in the round.
A clash of legs there as Nanda blocks the low kick.
Kyllonen fakes high and swings low for a body shot but Nanda manages to avoid it.
Nanda is clearly trying to counter these attacks from Kyllonen with a body shot.
Kyllonen keeping a good distance there, avoiding the body shot.
Kyllonen throwing a counter right hand but Nanda manages to avoid it.
Nanda closes the distance and clinches up with Kyllonen, looking for a takedown. Nanda pushes Kyllonen against the cage but Kyllonen circles to the side and manages to break the clinch.
Jens Kyllonen has stuffed three takedown attempts in the round now. That's going to take a lot out of Rizky Nanda.
A jab from Kyllonen finds it's way through Nanda's defenses.
Kyllonen scores with a sloppy right hand. Nanda should have avoided that one.
Kyllonen jabs at Nanda's body.

That's two minutes gone in the round.
Good shot there by Kyllonen.
Sloppy strikes from Nanda. Those never looked like landing.
Kyllonen connects with a good right hand that stumbles Nanda. Nanda circles away out of range and recomposes himself.
Kyllonen keeps his opponent at a distance with a nice jab.
Nanda fails with the takedown.
Nanda shoots in but doesn't get the takedown
and Kyllonen cracks him with a counter punch right on the button.

That's three minutes gone in the round.
Nice uppercut lands for Kyllonen. That snapped Nanda's head back.
Kyllonen looks to be in better condition than last time we saw him fight. Obviously he's been working hard on his cardio.
Kyllonen cracks Nanda with a right hand to the side of the head.
Nanda is trying hard to land a takedown here. Kyllonen sprawls well and keeps this one on the feet.
Kyllonen lands a jab, followed by a cross and another cross, as Nanda backs up against the cage.
Nanda throws a jab when Kyllonen was well out of range.
Kyllonen wants to take advantage of his opponent's missed offense by moving into the clinch.
Kyllonen lands a beauty of a right hand that gets the crowd cheering.
Kyllonen lands a nice shot to the body.
Nanda tries to clinch up but Kyllonen circles away and keeps his distance.
Kyllonen scores with a reasonable looking shot to the body. Nanda doesn't seem bothered though.

That's four minutes gone in the round.
Kyllonen fakes a head punch and goes low to the body. Nicely done.
Nanda looks winded!
The crowd are loving this. Great action here.
Nanda misses with a hook. Kyllonen ducked under it nicely.
Nanda lands with a hook. Kyllonen tried to avoid it but it clipped the top of his head.
Nanda swings away but doesn't land with a series of punches.
An attempted straight right counter from Kyllonen misses the target.
Nanda shoots in for a takedown. He's persisting with it as Kyllonen sprawls well. Kyllonen wins this battle and keeps the fight standing. Nanda gets slowly back to his feet.
Kyllonen is really peppering his opponent's head with punches.
Kyllonen throws a body shot but no joy.
And thats the end of the round the fighters go back to their corners.
Jens Kyllonen dominated that round.
The minute break is over - no more time for sponges and pep talks - back to the action!

Nanda shoots for a takedown but Kyllonen saw that one coming a mile off and avoided it easily.
Kyllonen sizes up Nanda with a pawing jab and scores with a straight right down the middle.
Nanda throws a nice looking combination but Kyllonen bobs and weaves to avoid any damage.
Kyllonen works his jab well there, keeping his opponent at a distance.
Kyllonen jabs. That one connects to the head of his opponent.
Nice takedown defense from Kyllonen. No joy for Nanda on that attempt.
We've had a slow start to the round here - hopefully the action picks up.
Nanda shoots in but doesn't get the takedown
enabling Kyllonen to counter with a crisp jab.
Jens Kyllonen has stuffed three takedown attempts in the round now. That's going to take a lot out of Rizky Nanda.
Nanda is breathing heavily.
Nanda shakes his hands off, looking to compose himself, but takes a jab to the jaw whilst he does it.
That's one minute gone in the round.
Kyllonen tries to land with a swinging hook to the body but Nanda was well out of range. Poor timing from Kyllonen.
Nanda throws a monster uppercut resembling something out of street fighter but it doesn't land.
Kyllonen was looking to counter that last move with a shot to the body but he didn't commit.
Kyllonen scores with a sloppy punch to the body. Not much technique there but it did the business.
Nanda tries to land with a swinging hook to the body but Kyllonen was well out of range. Poor timing from Nanda.
Nanda throws a push kick but Kyllonen slaps the foot to one side.
Kyllonen works Nanda's body with a nice hook.
Kyllonen swings for the body but Nanda moves out of range.
Nanda misses with a jab and misses with a cross straight after too.
That's two minutes gone in the round.
Kyllonen lands with a nice body punch.
Kyllonen tries to land with a swinging hook to the body but Nanda was well out of range. Poor timing from Kyllonen.
Nanda steps in looking to clinch after the strikes miss from Kyllonen.
Both these guys seem content to just stand up and trade with eachother but Nanda might want to think about changing up his gameplan a bit because over the course of the fight, Kyllonen has got the better of the exchanges.
Nanda shoots in but Kyllonen avoids the takedown attempt easily.
Nanda moves his head to the side to avoid a jab but walks straight into a cross.
Nanda uses some good footwork to avoid the body shot by Kyllonen.
Nanda lets it all go there with a big combo counter but none of the punches connected.
Nanda tries for a takedown but Kyllonen sees it coming a mile off and avoids it easily.
That's three minutes gone in the round.
Decent striking displayed by Kyllonen there.
Kyllonen scores with a decent looking hook.
Kyllonen misses with a hook to the body
and Nanda connects with a straight left hand counter down the middle.
Kyllonen slips a jab from Nanda.
Nanda throws a combination but it was largely blocked by Kyllonen.
Nanda fails with the takedown
and Kyllonen counters with a straight right hand.
Nanda gets cracked with a nice right hand there by Kyllonen.
Rizky Nanda is looking to throw some combinations by the looks of things.
That's four minutes gone in the round.
Nanda uses some good footwork to avoid the body shot by Kyllonen.
Nanda is looking for the big counter here.
Nanda misses with a double jab.
Kyllonen lands a vicious shot with the stealth of a sniper and the strength of a viper. Are vipers that strong? I can think of lots of things that are stronger than a viper - not many rhyme with sniper though.
A jab from Nanda misses.
Kyllonen lands a body shot.
This has been an exciting period of action!
Kyllonen feints a straight left to the body, then turns around with a flashy move and hits Nandas jaw with a dramatic spinning back fist!
Nanda takes a shot to the nose. Hopefully that hasn't broken it.
Kyllonen throws a body punch but Nanda moves out of range.
And thats the end of the round the fighters go back to their corners.
Jens Kyllonen dominated that second round.
That's the end of the interval. I'm sure that seemed a lot quicker than a minute for our two fighters! Back to the action. This is the final round!

Nanda throws a head kick that misses.
Nanda throws a lazy uppercut
and Kyllonen counters with a right hand to the body.
Kyllonen lands a lovely overhand right.
Nanda has a pretty nasty looking mouse under his right eye.
Nanda shoots in looking for a takedown but Kyllonen manages to keep the fight standing, pushing Nanda's face into the canvas for good measure before circling away.
A lazy left from Kyllonen finds it's target.
Kyllonen listening to his corner there, landing a nice uppercut.
Kyllonen is really dominating this fight. Is there anything that Nanda can do to turn this around?
We've had a slow start to the round here - hopefully the action picks up.
A shot to the body from Nanda misses
and Kyllonen counters with a right hand to the body.
Kyllonen digs a good hook to Nanda's body.
Kyllonen dips to his left and cracks Nanda with an uppercut!
Nanda takes a big intake of breath there - he's definitely tired.
That's one minute gone in the round.
A head kick misses from Nanda.
Kyllonen lands with a cross.
Kyllonen misses the shot to the body.
Nanda looks like he wants to counter punch here.
Kyllonen misses with a body shot. Nice footwork from Nanda.
Kyllonen displays some good footwork, moving neatly out of range as Nanda throws out the jab.
Kyllonen ducks down and throws a hook to the body but Nanda moves away.
Nanda pivots as if he's going to throw a leg kick but stops half way.
Kyllonen is looking to counter punch.
That's two minutes gone in the round.
Nanda looks shocked there as he takes a right hand to the temple.
Kyllonen lands with a two punch combination before moving back out of range.
Kyllonen misses with a hook. Nanda ducked under it nicely.
Nanda takes a shot to the body in his stride.
Nanda fails to land the takedown.
Kyllonen throws a big counter combination but Nanda scrambles out of danger and avoids any damage.
Nanda is trying desperately to land a takedown but Kyllonen is having absolutely none of it. This is turning into a bit of a nightmare for Nanda.
Nanda tries to close the distance and clinch up but Kyllonen swats him away and circles back towards the center.
Sloppy strikes from Nanda. Those never looked like landing.
Kyllonen tries to counter by moving into the clinch but Nanda manages to circle out of the way.
That's three minutes gone in the round.
Kyllonen slips in close and lands a nice hook before moving back out of range.
Kyllonen misses with a body shot. Nice footwork from Nanda.
Kyllonen lunges in with an uppercut that skims his opponent's chin.
Nanda swings away but doesn't land with a series of punches.
Nanda swings and misses with a hook to the body.
Kyllonen keeps his opponent at a distance with a nice jab.
A jab lands there for Kyllonen.
Jens Kyllonen is fighting for a decision here - he's started to take the cautious approach.
That's four minutes gone in the round.
Nanda gets cracked there but stands up to it.
Nanda throws a body kick despite being completely out of range
and Kyllonen counters with a good right hand that lands right on the jaw.
Nanda shoots in but doesn't get the takedown
and Kyllonen counters with a straight right hand.
Jens Kyllonen has stuffed three takedown attempts in the round now. That's going to take a lot out of Rizky Nanda.
A low kick from Nanda is predictable there
and Kyllonen counters with a good right hand that lands right on the jaw.
Nice cross by Kyllonen.
The crowd cheering loudly, showing their appreciation for the quality fight we're seeing here.
Kyllonen has a takedown stuffed.
And that's the end of the fight!
Jens Kyllonen showed his dominance in that final round.
Well Kyllonen has outscored his opponent in every aspect of the fight today. Only a scarily incompetent judge or two will keep him from a well deserved win... Over to the ring announcer for the scorecards.
Ladies and gentlemen, after 3 rounds of action, we go to the scorecards for a decision.
Judge Joseph Jones scores the fight 30:27
Judge Anthony Taglia scores the fight 30:27
Judge Alyssa Summers scores the fight 30:27
In favor of your winner, by unanimous decision... Jens Kyllonen!
Jens Kyllonen decided to thank the fans in attendance for making a great atmosphere. It seemed to go down pretty well.
|
|
|
|
|
|
|
|
|
|
|
|
|
|
|
|
|
|
|
|
|
|
|
| S |
C
A |
G |
S |
C
B |
G |
|
S |
C |
G |
|
energy
A | B |
|
hype
A | B |
|
pop
A | B |
|
mgr
A | B |
|
FIGHT
RATING
45% |
|
|
|
|
|
|
|
Undercard bout
|
Coming up we have a welterweight MMA rules bout between Blazing Bob (ranked 9317 p4p, 801 weight class) and Zapi Zap (ranked 9177 p4p, 793 weight class). Bob's ring entrance music is that housewives' favourite, Born to be wild. Blazing Bob is staring across the cage at his opponent, tweaking his nipples... Tweaking his own nipples that is.
 |
|
 |
| 180 cm
18
168 lbs
2 - 4 - 0 |
|
172 cm
20
170 lbs
1 - 1 - 0 |
BJJ Blue Belt
Counter fighter
Good in bed |
|
BJJ Blue Belt
Brawler
Likes musicals |
|
| |
|
Ladies and gentlemen. This fight is 3 rounds, in the welterweight division.
Introducing the fighter to my left, fighting out of the red corner.
With a record of
2 - 4 - 0, fighting out of Helsinki, Blazing Bob!
And introducing the fighter to my right, fighting out of the blue corner.
With a record of
1 - 1 - 0, fighting out of Los Angeles, Zapi Zap!
The judges for this bout are Lou da Vinci, Alyssa Summers and Jorge Garcia.
The bell rings for round one and we are underway!
Bob throws a sloppy head kick and Zap moves out of range easily.
Bob moves into range and throws a lovely three punch combination.
Bob tries to grapple but his opponent circles

and Zap decides to take the opportunity to score a takedown. He's landed in Bob's guard.
Zap wants to stand but Bob is controlling his posture from full guard.
Zap engaging in some classic timewasting tactics.
We've had a slow start to the round here - hopefully the action picks up.
That's one minute gone in the round.
Zap wants to pass the guard but Bob is keeping the position.
Zap trying to stand up but can't free himself from Bob's guard.
Zap is taking a break and basically stalling. The referee will not allow him to do that for long.
Zap is working Bob over from the guard. He should look to pass the guard and do a little more damage with these strikes.
Zap sitting in guard, not really doing much.
Bob is working an open guard here, looking to improve his position. No doubt that will leave him open to counters but at least he's being more offensive.

The referee has decided to stand the fighters back up, so we'll restart on the feet.
That's two minutes gone in the round.
Neither fighter has done anything of merit for a good minute or two here and the crowd are not happy about it.
Zap shoots in but no luck this time.
Bob tries to close the distance and clinch up but Zap swats him away and circles back towards the center.

A momentary lapse in concentration from Zap enables Bob to shoot in and score with a neat double leg. Zap manages to secure a closed guard as the fighters hit the mat.
The fighters are pressed up against the cage, both looking to find a bit of space to work.
Zap is trying to stand up but he's not managed so far.
Zap is controlling Bob's posture.
Bob stands up and looks to throw the legs aside to pass to side control. Zap swivels though and keeps the full guard.

Zap escapes his hips to the side and looks to be working for an armbar. Bob gives him a little smile and shakes his head. No chance.
That's three minutes gone in the round.
Zap bucks up whilst keeping hold of a body lock, managing to reverse the position. Now he's in top in Bob's guard.

Bob has momentary wrist control but Zap slips an elbow through the middle.
Bob wants to sweep here but Zap controlling him for the moment.
Zap engaging in some classic timewasting tactics.
Zap trying to pass the guard but can't manage it just yet.
Zap controlling from the top position.
That's four minutes gone in the round.
Zap is looking to stand up but Bob won't let him.
Zap preventing the sweep.
Zap stands up and looks to throw the legs aside to pass to side control. Bob swivels though and keeps the full guard.
Zap is sitting in guard, working some ground and pound.
Boooooooooooooooooooo!!! God, this has been a terrible round. Come on you two, sort yourselves out!
Zap drops back looking for a leg! Bob is in trouble here! The fighters roll with the hold and Bob manages to kick Zap off! Zap jumps back into Bob's guard.
Zap controlling from the guard. I say controlling but really, he's stalling.
The referee decides to stand the fighters back up.
And thats the end of the round the fighters go back to their corners.
A close round but Zapi Zap will probably get the nod.
That's the end of the round. The referee orders the cornermen out of the cage so we can get back down to business.
Bob tries a switch kick but it misses it's target.
Bob shoots for a double leg takedown but Zap sprawls well. He's pushed Bob's face into the mat and manages to get back to his feet relatively easily.
The fight stays on the outside here - Bob looks like he's thinking about clinching though.
Zap changes levels and drives through with a really nice takedown into side control. Bob looks really pissed at himself for not defending that better.
Zapi Zap has got the better of the ground game so far.
Bob is being controlled here.
The ref warns both fighters not to hold the cage as they work up against the meshing.
We've had a slow start to the round here - hopefully the action picks up.
Zap is continuing to stall.
That's one minute gone in the round.
Zap creates a bit of distance and throws down some hard shots.
Zap just content to control the position.
Let's hope that Zap has the urge to step up the pace any second now because for the last 15 or 20 seconds he's just been holding on tight.
Zap wants to work for a kimura but he's foiled early by Bob, who protects the arm well.
That's two minutes gone in the round.
A lull in the action here being met with boos from the crowd.
Zap moving around in side mount but really he's just happy to control for now.
Zap's corner are shouting for him to control the position and he seems happy to oblige.
We may be looking at a referee standup if the pace doesn't pick up soon.
Bob wants to escape from the position here - easier said than done!
The referee decides to stand the fighters back up.
Zap tries to drive through with a takedown attempt but Bob defends well and Zap ends up having to push Bob into the cage where they will battle it out in the clinch.
That's three minutes gone in the round.
Bob wants to clinch.
Zap steps in looking to counter with the mid kick but it doesn't connect.
Zap misses with a leg kick.
Bob seemed to be looking to counter by closing the distance.
Blazing Bob is looking to throw some combinations by the looks of things.
Bob throws a right and a left that Zap avoids nicely.
Bob uses some good footwork to avoid the body shot by Zap.
Bob misses with a jab and misses with a cross straight after too.
Zap fails with a takedown attempt.
Bob fakes a jab and scores with a low kick.
That's four minutes gone in the round.
Zap tries to close the distance and clinch up but Bob swats him away and circles back towards the center.
Bob changes levels looking for a counter takedown but doesn't commit.

The fight moves into the clinch position.
Bob goes for a takedown in the clinch but Zap prevents it.
Zap tries for a takedown. No joy.
Blazing Bob has stuffed three takedown attempts in the round now. That's going to take a lot out of Zapi Zap.
Zap goes for a takedown in the clinch but Bob prevents it.
Bob tries a knee to the head but he's missed.
Boooooooooooooooooooo!!! God, this has been a terrible round. Come on you two, sort yourselves out!
Zap digs a right hand underneath Bob's ribcage. Bob let out a lung full of air as it connected.

Zap breaks the clinch.

Zap closes the distance and clinches.

Bob breaks the clinch and we return to the middle of the mat.
And thats the end of the round the fighters go back to their corners.
A close second round but Zapi Zap will probably get the nod - 10:9.
That's time! Back to the action! So, we enter the final round. Let's see if either fighter can bring us a finish, or whether we're going to the judges scorecards.
The fight moves into the clinch position.
Bob is trying to work for a single leg takedown but Zap pulls him back up using the underhooks.
Zap has Bob pressed against the cage, preventing Bob from circling away and getting back to striking at range.
Zap stalling here - the referee won't stand for too much of that.
Bob tries for a takedown. No joy.
Bob is trying to break free.
Zap trying to land knees to the body.
Zap pushes off and circles away, back to the middle of the mat.
We've had a slow start to the round here - hopefully the action picks up.
Zap pushes Bob up against the cage in a clinch.
Zap gets underhooks to prevent Bob's takedown attempt.
That's three failed takedown attempts in the round for Blazing Bob. That's going to take a lot out of him.
Both fighters are breathing heavily.
Bob goes for a takedown in the clinch but Zap prevents it.
Bob is trying to force a seperation but Zap has the dominant position.
That's one minute gone in the round.
Zap jumps guard.
Zap is pulling down on Bob's head. It's preventing any offense from Bob, at least for the moment.
Zap tries to land a sweep but no joy.
Zap is looking for a guillotine. You can't force these things though and Bob defends well.
Zap is looking for a guillotine. You can't force these things though and Bob defends well.
Bob throws a big right hand that misses.
That's two minutes gone in the round.
Zap wants to stand but Bob is controlling the position.
Bob working some ground and pound from guard but it's not doing any damage.
Bob is fighting to break Zap's control of his arms but Zap is doing a good job of controlling the position at the moment.
Bob won't allow Zap to sweep him here.
We must be close to a standup if these guys don't pick up the pace.
Zap is looking for a guillotine. You can't force these things though and Bob defends well.
Bob has decided he wants to stand but the closed guard of Zap is proving hard to escape from.
The ref stands the fighters back up due to a lack of activity.
That's three minutes gone in the round.
Zap looking to score a takedown here. Bob is defending well but Zap drives through and ends up in Bob's guard.
Zap wanted to stand there but Bob had control of the position.

Bob is looking for a guillotine. You can't force these things though and Zap defends well.
Zap trying to pass the guard but can't manage it just yet.
Bob looking to control.
That's four minutes gone in the round.
Bob wants to get back to his feet but Zap is in a dominant position and won't allow it.
Blazing Bob has stepped it up - he knows he needs a finish here!
Bob avoiding any damage from the ground and pound.
Bob keeping full guard, as Zap tries to pass.
The referee has motioned to the fighters to stand back up. He just wasn't happy with the level of activity.
Zap looks to score with a jab to the body but Bob is just out of range.
Zap tries to shoot in for a takedown. He's got hold of a leg but Bob swivels and escapes.
Bob thuds a mid kick into his opponent's body. That will wear on Zap if he has to take too many more of those.
Zap has been the more effective fighter overall so far.
Boooooooooooooooooooo!!! God, this has been a terrible round. Come on you two, sort yourselves out!
Bob tries a switch kick but it misses it's target.
Zap has taken the fight to the clinch.
And that's the end of the fight!
Zapi Zap comfortably won the final round on my scorecard.
I've got Zap winning every round here. Surely the decision will go his way and he'll pick up a well deserved decision victory. Over to the ring announcer for the scorecards.
Ladies and gentlemen, after 3 rounds of action, we go to the scorecards for a decision.
Judge Lou da Vinci scores the fight 28:29
Judge Alyssa Summers scores the fight 27:30
Judge Jorge Garcia scores the fight 28:29
In favor of your winner, by unanimous decision... Zapi Zap!
|
|
|
|
|
|
|
|
|
|
|
|
|
|
|
|
|
|
|
|
|
|
|
| S |
C
A |
G |
S |
C
B |
G |
|
S |
C |
G |
|
energy
A | B |
|
hype
A | B |
|
pop
A | B |
|
mgr
A | B |
|
FIGHT
RATING
24% |
|
|
|
|
|
|
|
Undercard bout
|
Coming up we have a heavyweight MMA rules bout between Ross Barkley (ranked 8517 p4p, 724 weight class) and Soldier Wren (ranked 9325 p4p, 752 weight class). Both fighters look fresh as a daisy as they make their way towards the cage.
 |
|
 |
| 204 cm
18
277 lbs
0 - 1 - 0 |
|
191 cm
18
250 lbs
1 - 1 - 0 |
BJJ White Belt
Excellent boxer
Granite chin |
|
BJJ Blue Belt
Brawler
Heavy handed |
|
| |
|
Ladies and gentlemen. This fight is 3 rounds, in the heavyweight division.
Introducing the fighter to my left, fighting out of the red corner.
With a record of
0 - 1 - 0, fighting out of New York, Ross Barkley!
And introducing the fighter to my right, fighting out of the blue corner.
With a record of
1 - 1 - 0, fighting out of Montreal, Soldier Wren!
The judges for this bout are Lou da Vinci, Joseph Jones and John Roberts.
The bell rings for round one and we are underway!
Barkley moves in looking to clinch but Wren pushes him off.
Barkley throws a shot to the body.
Barkley clinches up against the cage.
Wren stalling in the clinch but Barkley improves position.
Barkley lands a shoulder strike.
Barkley throws a punch but it's blocked by Wren.
Barkley lands a hook to the side of the head.
Both guys are working to get underhooks.
Barkley throws a head punch that misses.
Barkley stalls.
Wren looking for a takedown.
We've had a slow start to the round here - hopefully the action picks up.
Barkley scores with a shot to the side of Wren's head.
Wren's head jolts backwards as he takes an uppercut right on the button!
Barkley is trying to stall.
Wren is working for a takedown up against the cage. He can't get it on this occasion though.
Wren pulls guard.
That's one minute gone in the round.
Barkley wanted to stand there but Wren had control of the position.
Barkley is stalling in the full guard.
Wren wants to stand up but Barkley is controlling him.
The ref warns both fighters not to hold the cage as they work up against the meshing.
Barkley is fighting to break Wren's control of his arms but Wren is doing a good job of controlling the position at the moment.
Wren keeping moving, preventing Barkley from controlling successfully.
Wren is looking to cinch up a triangle. Barkley throws the leg off to one side though and gets in tight to Wren's body to avoid the submission. Wren has instead reached around Barkley's neck and now has a guillotine! Oh, this is biiiig trouble! Wren arches his back and squeezes and forces the tap from his hapless opponent.
Ladies and gentlemen, after 2:56 of round 1, we have a winner by way of Submission (Guillotine). Soldier Wren!
|
|
|
|
|
|
|
|
|
|
|
|
|
|
|
|
|
|
|
|
|
|
|
| S |
C
A |
G |
S |
C
B |
G |
|
S |
C |
G |
|
energy
A | B |
|
hype
A | B |
|
pop
A | B |
|
mgr
A | B |
|
FIGHT
RATING
39% |
|
|
|
|
|
|
|
Undercard bout
|
|
|
|
Undercard bout
|
Coming up we have a heavyweight MMA rules bout between go Sleep (ranked 3702 p4p, 414 weight class) and Elias Taylor (ranked 7358 p4p, 691 weight class). Elias Taylor will no doubt be looking to use his reach advantage to good effect.
 |
|
 |
| 155 cm
26
222 lbs
4 - 3 - 0 |
|
191 cm
19
260 lbs
1 - 0 - 0 |
BJJ White Belt
Lethal high kicks
Experienced |
|
Good wrestler
Counter fighter
Granite chin |
|
| |
|
Ladies and gentlemen. This fight is 3 rounds, in the heavyweight division.
Introducing the fighter to my left, fighting out of the red corner.
With a record of
4 - 3 - 0, fighting out of Tokyo, go Sleep!
And introducing the fighter to my right, fighting out of the blue corner.
With a record of
1 - 0 - 0, fighting out of Montreal, Elias Taylor!
The judges for this bout are David Schapiro, John Roberts and Jorge Garcia.
The bell rings for round one and we are underway!
Both fighters are only really looking to counter, so after a good 30 seconds of circling eachother endlessly, the referee has stepped in and told them both to be more aggressive.
Sleep pushes Taylor away with a front kick.
Sleep is looking to chop away at Taylor's legs.
Taylor is clearly trying to counter these attacks from Sleep with a body shot.
We've had a slow start to the round here - hopefully the action picks up.
Sleep fakes a jab and throws a low kick but Taylor checks it well.
A countering left hand to the body from Taylor misses.
Sleep with a nice looking leg kick. You could hear that one land in a back row.
That's one minute gone in the round.
Taylor dives in for a single leg takedown but Sleep sprawls and the fighters end up clinched against the cage.
Sleep thinks about countering with a body kick.
go Sleep is looking to keep the fight on the feet at all costs.
Sleep misses with a leg kick
and Taylor counters with a shoot takedown into half guard.
Taylor trying to control from Sleep's half guard. Sleep has other ideas though and has regained full guard.
Sleep working the defensive guard well to avoid strikes from Taylor.
Taylor lands a couple of decent looking shots.
Taylor is working Sleep over from the guard. He should look to pass the guard and do a little more damage with these strikes.
That's two minutes gone in the round.
Taylor seems content to control from guard here. He's going to have to remain active though if he doesn't want to get stood back up.
The ref warns both fighters not to hold the cage as they work up against the meshing.
Taylor stands up and looks to throw the legs aside to pass to side control. Sleep swivels though and keeps the full guard.
Taylor is still trying to improve position.
Sleep on his back here. We all know that wrestlers don't like being on their back so let's see if Sleep tries to get out of the position.
Sleep preventing the ground and pound from doing any damage.
Taylor throwing shots from guard but he's hitting more mat than opponent.
Taylor wants to control from the top but Sleep keeps moving.
Sleep could do with losing a few pounds - he looks very soft around the mid section, to put it politely.
Sleep working the defensive guard well to avoid strikes from Taylor.
That's three minutes gone in the round.
Taylor slows down the pace of the fight for a moment. He'll need to remain active if he doesn't want to see the fight stood back up.
Sleep keeping moving, preventing Taylor from controlling successfully.
Sleep has improved his flexibility recently so we will have to see if he can use that to his advantage.
Taylor seems content to control from guard here. He's going to have to remain active though if he doesn't want to get stood back up.
The referee is pacing around the two fighters - he looks like he's thinking about a standup.
The referee has motioned to the fighters to stand back up. He just wasn't happy with the level of activity.
Sleep thows a leg kick but Taylor checks it
and Taylor decides to take the opportunity to score a takedown. He's landed in Sleep's guard.
That's four minutes gone in the round.
Taylor lands a nice shot whilst sitting in his opponent's guard.
Taylor throwing shots from guard but he's hitting more mat than opponent.
Taylor wants to control from the top but Sleep keeps moving.
Taylor cracks Sleep with a solid left hand.
Taylor throwing shots from guard but he's hitting more mat than opponent.
Taylor scoring with some ground and pound.
Taylor engaging in some classic timewasting tactics.
Taylor has the superior BJJ but he's also working some ground strikes into his gameplan.
Let's hope that Taylor has the urge to step up the pace any second now because for the last 15 or 20 seconds he's just been holding on tight.
The fighters are pressed up against the cage, both looking to find a bit of space to work.
Boooooooooooooooooooo!!! God, this has been a terrible round. Come on you two, sort yourselves out!
Taylor cracks Sleep with a solid left hand.
And thats the end of the round the fighters go back to their corners.
Elias Taylor dominated that round.
The fighters' corners scream their final instructions, as the referee calls time. Here we go, back to the action!
Taylor will have to do better than that with his takedown attempts.
Sleep misses with a body kick.
Sleep gets caught napping as Taylor dives in and scores a takedown. Sleep manages to retain guard.
We've had a slow start to the round here - hopefully the action picks up.
Taylor trying to control the position from guard on top but Sleep is wriggling around, looking for whatever he can.
A big thud reverberates around the arena there as Taylor accidentally thumps the mat. Hopefully he's not broken his hand.
That's one minute gone in the round.
Taylor connects with a couple of short punches.
Taylor throws an elbow that misses. Sleep uses the momentum to reverse the position. He's now in Taylor's guard. Nice move by Sleep!

Taylor throws some sloppy strikes off his back.
Taylor looking for a sweep. Not yet Taylor, not yet.
Taylor working the defensive guard well to avoid strikes from Sleep.
Taylor working a defensive guard here.
Taylor manages to sweep nicely, so he's now on top. Sleep manages to get himself to full guard.
Sleep knows he needs to get back to his feet asap. He's simply no match for Taylor on the ground.
Taylor is in close to Sleep's body, working some short punches and elbows.
Taylor looking to control the position here, rather than advance.
Sleep is looking to stand up but Taylor isn't so interested in that idea.
That's two minutes gone in the round.
Taylor with a flurry of punches that miss.
Taylor controls the pace of the fight for a moment.
Taylor working some ground and pound from guard but it's not doing any damage.
Taylor stops Sleep from standing up.
Taylor looking to sit in guard and control but Sleep gets the butterfly guard and sweeps. He's now in the guard on the top.
Taylor manages to sweep nicely, so he's now on top. Sleep manages to get himself to full guard.
Taylor landing some decent shots from guard.
Taylor throwing strikes from guard but Sleep blocks nicely.
Taylor distracts Sleep with his right hand and drops a big elbow with his other arm.
That's three minutes gone in the round.
Sleep has momentary wrist control but Taylor slips an elbow through the middle.
Sleep has momentary wrist control but Taylor slips an elbow through the middle.
Taylor with a flurry of punches that miss.
Taylor with a flurry of punches that miss.
Taylor is in close to Sleep's body, working some short punches and elbows.
A big thud reverberates around the arena there as Taylor accidentally thumps the mat. Hopefully he's not broken his hand.
Both fighters are absolutely exhausted here.
Taylor scoring with punches to the head and body.
Taylor's corner is telling him to maintain position.
Sleep preventing the ground and pound from doing any damage.
Taylor passes easily into side control. Nice work.
Sleep is not content to let Taylor control the position.
Sleep avoids any damage from the ground and pound of Taylor.
That's four minutes gone in the round.
Taylor controlling from side mount.
Taylor throws a knee to the body but it doesn't do much damage.
Sleep is letting Taylor control him for a moment.
Taylor lands some shots froms side control.
Taylor working the strikes but Sleep uses the opportunity to regain half guard.
The crowd thankful this round is nearly over.
Taylor with a momentary lay and pray from half guard.
Sleep on the receiving end of some nice ground and pound.
And thats the end of the round the fighters go back to their corners.
Elias Taylor showed his class in that round. I'd imagine he'll take it on all the scorecards.
OK. That's time! The bell goes and we're back to the action. The crowd applaud as we get ready to start the final round!
Taylor shoots and misses
and Sleep counters with a thumping low kick.
Taylor misses with a takedown attempt
and Sleep counters with a thumping low kick.
Sleep lands a leg kick and bounces back out of range.
We've had a slow start to the round here - hopefully the action picks up.
Sleep walks forward and throws out a flicking leg kick. Taylor checks it nicely though, as he moves to the side.
That's one minute gone in the round.
Sleep throws a leg kick that is checked
and Taylor counters with a nice double leg into half guard.
Taylor content to control rather than advance.
Taylor is continuing to stall.
Elias Taylor has got the better of the ground game so far.
Taylor slips a nice elbow through Sleep's hands, connecting with Sleep's forehead.
The two fighters exchange a few words. I couldn't hear what they were saying but maybe it's more fun if you make it up yourself. Taylor connects with a nice short shot to Sleep's temple.
Sleep might be looking to lock onto one of his opponent's long limbs for a submission, whilst we're on the ground.
That's two minutes gone in the round.
Taylor slows the pace down in half guard.
Taylor has been the more effective fighter overall so far.
Taylor lands with a punch from half guard.
Taylor content to sit in half guard and control for a moment.
Taylor stops Sleep from getting back to his feet.
Taylor thumps the canvas. Not on purpose obviously - he just missed Sleep's head.
Taylor sitting and controlling from the half guard.
Sleep taking some punishment here, with Taylor in his half guard.
That's three minutes gone in the round.
Taylor takes advantage of the dominant position to land a couple of big hammer fists.
Nice strikes from Taylor there.
Both fighters are breathing heavily.
Taylor throwing shots but Sleep is blocking nicely.
Sleep pushes Taylor off looking to stand but Taylor dives back in and keeps control.
Sleep taking some punishment here, with Taylor in his half guard.
Sleep taking some punishment here, with Taylor in his half guard.
Taylor tries to pass the half guard into mount. Sleep knows what he's doing though and prevents the attempt.
Taylor with a momentary lay and pray from half guard.
Taylor thows a wild elbow that connects with the canvas.
That's four minutes gone in the round.
Taylor lands with a punch from half guard.
Taylor thows a huge punch but Sleep dodges it nicely.
Sleep taking some punishment here, with Taylor in his half guard.
Taylor working Sleep over with strikes.
Taylor not landing any meaningful shots this time.
Taylor working some ground and pound from close in. He's looking to maintain this position and strike for a while by the looks of things... although he'll probably advance to full mount in a minute now I've said that.
Taylor working Sleep over with strikes.

Sleep is rocked!
Taylor thows a wild elbow that connects with the canvas.
Oh Sleep is still in real trouble! Will he be able to recover?!!
Taylor looks over to his corner - he wants some instructions but his corner are not responding.
Sleep seems to have got his legs back now.
Boooooooooooooooooooo!!! God, this has been a terrible round. Come on you two, sort yourselves out!
Sleep keeping his head moving to avoid the ground and pound.
go Sleep has stepped it up - he knows he needs a finish here!
Elias Taylor is fighting for a decision - hopefully he's judged it right and he's actually winning the fight.
Taylor passes to side control.
Taylor is working Sleep over with some ground and pound from side control.
And that's the end of the fight!
Elias Taylor comfortably won the final round on my scorecard.
I've got Taylor winning every round here. Surely the decision will go his way and he'll pick up a well deserved decision victory. Over to the ring announcer for the scorecards.
Ladies and gentlemen, after 3 rounds of action, we go to the scorecards for a decision.
Judge David Schapiro scores the fight 27:30
Judge John Roberts scores the fight 27:30
Judge Jorge Garcia scores the fight 27:30
In favor of your winner, by unanimous decision... Elias Taylor!
|
|
|
|
|
|
|
|
|
|
|
|
|
|
|
|
|
|
|
|
|
|
|
| S |
C
A |
G |
S |
C
B |
G |
|
S |
C |
G |
|
energy
A | B |
|
hype
A | B |
|
pop
A | B |
|
mgr
A | B |
|
FIGHT
RATING
29% |
|
|
|
|
|
|
|
Undercard bout
|
Coming up we have a light heavyweight MMA rules bout between Guilherme Brito (ranked 3965 p4p, 502 weight class) and Karson Campbell (ranked 5170 p4p, 613 weight class). Karson Campbell looks lathargic as he enters the arena. Wake up son, you're about to have a fight!
 |
|
 |
| 189 cm
25
212 lbs
2 - 0 - 0 |
|
205 cm
18
210 lbs
0 - 1 - 0 |
BJJ White Belt
Excellent MT
Big right hand |
|
BJJ White Belt
Decent boxing
Heavy handed |
|
| |
|
Ladies and gentlemen. This fight is 3 rounds, in the light heavyweight division.
Introducing the fighter to my left, fighting out of the red corner.
With a record of
2 - 0 - 0, fighting out of Rio de Janeiro, Guilherme Brito!
And introducing the fighter to my right, fighting out of the blue corner.
With a record of
0 - 1 - 0, fighting out of Hilo, Karson Campbell!
The judges for this bout are Russell Pearce, Anthony Taglia and Dean Styles.
The bell rings for round one and we are underway!
Brito connects with a looping left hand that seems like it dazed Campbell momentarily.

It looks like Karson Campbell has been cut.
Brito is moving around nicely and scores here with a single head shot.
We can't be sure of the tactics at this early stage but we have heard that Campbell has been working on his takedowns a lot in the buildup to the fight and we can only assume he's going to look to take this to the mat.
Brito connects with a body shot.
Brito wings a very wild body shot but it does the job and lands to the midsection.
Campbell looks winded!
Brito throws an overhand right that has Campbell reeling! Brito follows up with more punches and Campbell is out cold! This one is all over!
Ladies and gentlemen, after 0:24 of round 1, we have a winner by way of KO (Punches). Guilherme Brito!
Jumping up and down and very excited, Guilherme Brito waved his t-shirt featuring Wild Rio Nutrition - 90% Laundry's logo in front of the cameras.
|
|
|
|
|
|
|
|
|
|
|
|
|
|
|
|
|
|
|
|
|
|
|
| S |
C
A |
G |
S |
C
B |
G |
|
S |
C |
G |
|
energy
A | B |
|
hype
A | B |
|
pop
A | B |
|
mgr
A | B |
|
FIGHT
RATING
100% |
|
|
|
|
|
|
|
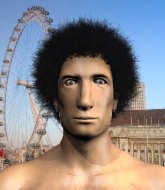
Co-main event
|
Coming up we have a lightweight MMA rules bout between Axel Boozer (ranked 4508 p4p, 394 weight class) and Justin Sane (ranked 4182 p4p, 370 weight class). Boozer comes to the cage accompanied by Kraftwerk - The Model. These two fighters really are very evenly matched on the feet - it will be fascinating to see who can assert themselves in that aspect of the fight.
 |
|
 |
| 180 cm
25
161 lbs
2 - 0 - 0 |
|
170 cm
25
162 lbs
1 - 0 - 0 |
Good takedowns
Counter fighter
Big heart |
|
Good takedowns
Basic striking
Solid chin |
|
| |
|
Ladies and gentlemen. This fight is 3 rounds, in the lightweight division.
Introducing the fighter to my left, fighting out of the red corner.
With a record of
2 - 0 - 0, fighting out of New York, Axel Boozer!
And introducing the fighter to my right, fighting out of the blue corner.
With a record of
1 - 0 - 0, fighting out of New York, Justin Sane!
The judges for this bout are Lou da Vinci, Joseph Jones and Reed Andrews.
The bell rings for round one and we are underway!
Sane drives through with a really nice takedown into side control.
Sane looks more muscular than last time we saw him. He must have been on the weights.
Boozer is looking for a sweep.
Sane wants to control but Boozer is keeping him busy.
Boozer is trying to buck Sane off.
Sane wants to work for a kimura but he's foiled early by Boozer, who protects the arm well.
We've had a slow start to the round here - hopefully the action picks up.
Boozer is not content to let Sane control the position.
Sane just content to control the position.
That's one minute gone in the round.
Boozer manages to get one leg in to regain half guard.
Sane content to control rather than advance.
The fighters are pressed up against the cage, both looking to find a bit of space to work.
Boozer is looking to sinch up a guillotine here but Sane pulls his head out easily.
Boozer actively working from the bottom here.
Sane is figuring out what he wants to do next.
Boozer is in a tricky position but he's been working on his transitions down at WildBoar's Pig Pen (Strength and Conditioning) $40, so we'll see if he gets out of it.
That's two minutes gone in the round.
The crowd are getting on the fighters' backs, as the pace has dropped off in the last minute or so.
Sane trying to control from half guard but Boozer is working away.
Boozer wants to get back to full guard.
The referee wants the fighters to be more active or he's going to reset them on the feet.
Boozer actively working from the bottom here.
Sane is trying to control the action in half guard but Boozer is working away on the bottom, looking perhaps to get back to full guard.
The referee decides to stand the fighters back up.
Sane closes the distance and scores a nice trip takedown into half guard. Boozer did well to prevent Sane getting side control.
Sane is trying for a guillotine from the top but the pressure isn't in the right place so Boozer is just riding it out for now. Sane eventually gives up the hold.
Sane is trying to control. Boozer wants to improve his position but can't escape this time.
That's three minutes gone in the round.
Boozer is looking to improve his position.
Sane is trying to control the action in half guard but Boozer is working away on the bottom, looking perhaps to get back to full guard.
Sane not doing much here.
Sane looking for a submission but Boozer manages to get full guard, putting an end to that submission attempt.
Sane tries to free his leg and advance position but Boozer is retaining full guard.
That's four minutes gone in the round.
A few boos can be heard. I'm sure they will multiply if the fighters don't pick up the pace.
Boozer can't keep his opponent in guard - Sane advances to half guard, no doubt looking to mount.
Boozer looking to work for a kimura from the bottom.
Sane is working hard to pass the guard. He's done it - he's now in full mount! Trouble for Boozer!
Boozer tries to hold on but Sane postures up.
Boooooooooooooooooooo!!! God, this has been a terrible round. Come on you two, sort yourselves out!
Sane can't quite control the action as he would like just now, as Boozer is looking to escape.
Sane moves to the back.
And thats the end of the round the fighters go back to their corners.
Justin Sane dominated that round.
The fighters get back to their feet, the hooter sounds and we're back to the action!
A momentary lapse in concentration from Boozer enables Sane to shoot in and score with a neat double leg. Boozer manages to secure a closed guard as the fighters hit the mat.
Sane must be cautious of submissions here, given that his opponent has the superior Jiu Jitsu.
Boozer working for a triangle but Sane defends it easily.
Sane trying to control but Boozer is working from the bottom.
Sane advances position into side control!
We've had a slow start to the round here - hopefully the action picks up.
Boozer tries to bench press Sane off him but Sane keeps the position.
Justin Sane has got the better of the ground game so far.
Sane tries for a kimura. Not really close to a finish though.
That's one minute gone in the round.
Boozer is not content to let Sane control the position.
Sane is in a good position here but he's just trying to control... And he's not even managing to do that successfully.
Boozer tries to strike but it doesn't land.
That's two minutes gone in the round.
Well. There's a bit of a lull in the action here and the crowd are starting to get restless.
Boozer tries to buck Sane off but Sane is having none of it.
Sane laying and praying for a moment but Boozer takes advantage and regains half guard.
Boozer wants to improve his position but Sane is controlling well.
Sane passes the guard and advances to mount!
Sane looking for a guillotine from mount but Boozer is having none of it.
Sane tries to control but Boozer wriggling away.
That's three minutes gone in the round.
Boozer tries to hold on but Sane postures up.
Boozer really trying hard to get back to half guard here.
Boozer has given up his back. Will we see Sane going for some submissions?
Boozer is keeping busy.
Sane has got his arm under Boozer's chin working for the choke
has he got it? It looks pretty tight! Oh! Boozer has spun round into Sane's guard beautifully! Well done that man!
That's four minutes gone in the round.
Boozer looking to sit in guard and control but Sane gets the butterfly guard and sweeps. He's now in the guard on the top.
Sane drops back, looking for a kneebar! Boozer looks panicked! The fighters roll across the mat, one looking to finish, one looking to escape. Boozer looks to have wriggled free... Yes, he's got his leg free and he's dived into side control! Good work there from Boozer!
Boozer happy to just control the position for now.
Boooooooooooooooooooo!!! God, this has been a terrible round. Come on you two, sort yourselves out!
And thats the end of the round the fighters go back to their corners.
Justin Sane showed his class in that round. I'd imagine he'll take it on all the scorecards.
That's time! Back to the action! This is the final round!
Sane drives through with a really nice takedown into side control.
Sane is maintaining the dominant position - no doubt Boozer will start to get frustrated soon if he's not already.
Sane trying to control the action but Boozer is working from the bottom.
Sane has been the more effective fighter overall so far.
We've had a slow start to the round here - hopefully the action picks up.
Sane wants to take a breather but Boozer manages to regain guard - a lesson learnt for Sane.
Boozer looking for subs off his back but Sane has passed one foot through into half guard.
That's one minute gone in the round.
Sane is working for a kimura here but Boozer manages to reverse the position and he's now in Sane's guard.
Sane looking for a guillotine here but Boozer defends easily.
Boozer looking to pass the guard.
That's two minutes gone in the round.
The crowd are hurling abuse towards the fighters... You can hardly blame them though because there isn't a lot going on in the fight.
Sane is working an open guard here, looking to improve his position. No doubt that will leave him open to counters but at least he's being more offensive.
Boozer wants to control from the top but Sane keeps moving.
There's a bit of a scramble here and now Sane is on top in guard.
That's three minutes gone in the round.
Sane seems content to control from guard here. He's going to have to remain active though if he doesn't want to get stood back up.
Boozer looking for a guillotine here but Sane defends easily.
Axel Boozer has stepped it up - he knows he needs a finish here!
Sane advances position into side control!
Sane swings around for an armbar but Boozer sees it coming a mile off and turns beautifully into Sane's guard.
That's four minutes gone in the round.
Boozer trying to pass the guard but can't manage it just yet.
Boozer trying to control but Sane is working from the bottom.
Sane tries to land a sweep but no joy.
Sane is looking for a triangle but Boozer pushes his legs off easily.
Boozer in full guard, throwing the ground and pound. No damage this time.
Boooooooooooooooooooo!!! God, this has been a terrible round. Come on you two, sort yourselves out!
Boozer landing with the ground and pound.
Boozer postures up as if he's going to throw some strikes but drops back for an ankle! Sane is in big trouble! He looks ready to tap! But no, he's escaped and dives on top of Boozer, into his guard.
And that's the end of the fight!
I would just about give that final round to Justin Sane.
Well Sane has outworked and out performed his opponent in all aspects of the game today. He was simply too good and the decision should be no more than a formality. Over to the ring announcer for the scorecards.
Ladies and gentlemen, after 3 rounds of action, we go to the scorecards for a decision.
Judge Lou da Vinci scores the fight 27:30
Judge Joseph Jones scores the fight 27:30
Judge Reed Andrews scores the fight 27:30
In favor of your winner, by unanimous decision... Justin Sane!
Justin Sane tried to hype himself up post fight but didn't word it too well and it ended up with him sounding like a bit of a tool.
In defeat, Axel Boozer stepped up to the mic, saying 'NEEEEEEEEEEEEEEEEEEEEEEEEEEEEEEEEEEEEEEIIIIIIINNNNNNN!!!!!!!!!!!'.
|
|
|
|
|
|
|
|
|
|
|
|
|
|
|
|
|
|
|
|
|
|
|
| S |
C
A |
G |
S |
C
B |
G |
|
S |
C |
G |
|
energy
A | B |
|
hype
A | B |
|
pop
A | B |
|
mgr
A | B |
|
FIGHT
RATING
24% |
|
|
|
|
|
|
|
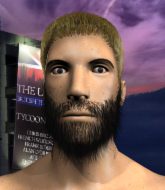
Main event
|
Coming up we have a light heavyweight MMA rules bout between Frank Lloyd (ranked 3571 p4p, 465 weight class) and Djamolidine Abdoujaparov (ranked 4206 p4p, 530 weight class). The atmosphere really building for this one as we go over to our ring announcer for the fighter introductions!
 |
|
 |
| 195 cm
25
215 lbs
3 - 0 - 0 |
|
194 cm
25
213 lbs
2 - 0 - 0 |
BJJ White Belt
Excellent MT
Good chin |
|
BJJ White Belt
Excellent boxer
Solid chin |
|
| |
|
Ladies and gentlemen. This fight is 3 rounds, in the light heavyweight division.
Introducing the fighter to my left, fighting out of the red corner.
With a record of
3 - 0 - 0, fighting out of New York, Frank Lloyd!
And introducing the fighter to my right, fighting out of the blue corner.
With a record of
2 - 0 - 0, fighting out of New York, Djamolidine Abdoujaparov!
The judges for this bout are Eddie Farnsworth, Chad Campbell and Reed Andrews.
The bell rings for round one and we are underway!
Abdoujaparov takes an uppercut right on the button but keeps his composure.
Lloyd gets a clinch.
Abdoujaparov blocking some punches.
Lloyd scores with a nice hook to the head.
Abdoujaparov softening up his opponent with strikes, against the cage.
Abdoujaparov looking to slow down the pace here.
Lloyd lands a nice uppercut.
Lloyd lands a left hand.
Abdoujaparov taking a breather.
An uppercut on the inside fails to land for Lloyd.
Lloyd misses with a short punch on the inside.
Abdoujaparov is trying to slow down the pace in the clinch, to catch his breath.
Lloyd lands with a light punch inside.
Lloyd is struggling to control the position.
Nice body punch from Lloyd - that landed with a thud.
The crowd are loving this. Great action here.
Abdoujaparov tries a shoulder strike but it doesn't do any damage.
Lloyd lands a shoulder strike.
A right handed body shot lands from Lloyd.
That's one minute gone in the round.
Lloyd lands an uppercut.
Lloyd lands with a short head shot on the inside.
With the fighters clinched against the cage, Lloyd creates a bit of distance for himself and scores with a nice uppercut.

Abdoujaparov is rocked!
A head punch on the inside from Lloyd fails to land.
Abdoujaparov is still on wobbly legs! Can Lloyd finish him?
Lloyd misses with a short punch on the inside.
Abdoujaparov seems to have recovered his senses.
Abdoujaparov lands a nice shot to the body.
Lloyd cracks Abdoujaparov with a nice body shot.
Lloyd unloads with a big right hand that wobbles Abdoujaparov! He's leaning against the cage trying to keep his feet but Lloyd is unloading with more strikes now! Abdoujaparov drops to his knees and the referee stops the fight for a TKO!
Ladies and gentlemen, after 1:28 of round 1, we have a winner by way of TKO (Strikes). Frank Lloyd!
Jumping up and down and very excited, Frank Lloyd waved his t-shirt featuring Free Bands inc.'s logo in front of the cameras.
|
|
|
|
|
|
|
|
|
|
|
|
|
|
|
|
|
|
|
|
|
|
|
| S |
C
A |
G |
S |
C
B |
G |
|
S |
C |
G |
|
energy
A | B |
|
hype
A | B |
|
pop
A | B |
|
mgr
A | B |
|
FIGHT
RATING
67% |
|
|
|
|
|
|
|
|
|
|
