 |
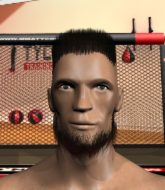
CSW 019 Lockyer vs Hood PBP Commentary |
Undercard bout
|
Coming up we have a middleweight MMA rules bout between Andre Costa (ranked 23257 p4p, 858 weight class) and Pascal Oaza (ranked 25636 p4p, 814 weight class). There are an array of beautiful celebrities at ringside tonight! I wonder if any of them paid for their tickets.
 |
|
 |
| 187 cm
25
187 lbs
4 - 3 - 1 |
|
188 cm
18
188 lbs
0 - 4 - 0 |
Decent wrestler
Brawler
Experienced |
|
BJJ Purple Belt
Brawler
Tends to cut |
|
| |
|
Ladies and gentlemen. This fight is 3 rounds, in the middleweight division.
Introducing the fighter to my left, fighting out of the red corner.
With a record of
4 - 3 - 1, fighting out of Rio de Janeiro, Andre Costa!
And introducing the fighter to my right, fighting out of the blue corner.
With a record of
0 - 4 - 0, fighting out of Rio de Janeiro, Pascal Oaza!
The judges for this bout are Emerson Jorge, Felipe Paraventi and Matheus Silva.

The bell rings for round one and we are underway!

Oaza gets caught napping as Costa dives in and scores a takedown. Oaza manages to retain guard.
Oaza keeping full guard, as Costa tries to pass.
Costa not doing a lot at the moment. He'll have to show some more aggression or the fight will get stood up.
Oaza pulls Costa in close to prevent any damage.
Costa preventing the sweep.
Costa trying to pass the guard but can't manage it just yet.
We've had a slow start to the round here - hopefully the action picks up.
Oaza trying to strike off his back.
A big thud reverberates around the arena there as Costa accidentally thumps the mat. Hopefully he's not broken his hand.
Costa engaging in some classic timewasting tactics.

The referee decides to stand the fighters back up.
Costa bobs and weaves into range and then changes levels and scores with a nice takedown into side control.

That's one minute gone in the round.
Costa is moving around in side control but his primary objective seems to be to maintain the position.
Oaza takes a big shot right to the temple there but he's taken it well.
Costa misses with an attempted head punch from side control.
Oaza wants to get back to his feet but Costa drags him back down.
Costa wants to stand but Oaza is controlling his arm.

Costa is working to tighten his grip on Oaza's neck. He's isolated an arm and is working for an arm triangle. Oaza has recognised the danger and is trying to turn with the submission but Costa is really squeezing tight and eventually Oaza passes out! Costa breaks the hold and jumps onto the cage to celebrate! Submission of the night, I'd say!
Ladies and gentlemen, after 2:56 of round 1, we have a winner by way of Submission (Arm Triangle). Andre Costa!
|
|
|
|
|
|
|
|
|
|
|
|
|
|
|
|
|
|
|
|
|
|
|
| S |
C
A |
G |
S |
C
B |
G |
|
S |
C |
G |
|
energy
A | B |
|
hype
A | B |
|
pop
A | B |
|
mgr
A | B |
|
FIGHT
RATING
39% |
|
|
|
|
|
|
|
Undercard bout
|
Coming up we have a featherweight MMA rules bout between Youkou Oonishi (ranked 7954 p4p, 573 weight class) and Helmut Kohl (ranked 25288 p4p, 658 weight class). Oonishi is coming into this fight with a significant injury, which will no doubt have an effect on his cardio. Over to our ring announcer for the fighter introductions!
 |
|
 |
| 176 cm
25
149 lbs
1 - 1 - 0 |
|
199 cm
18
150 lbs
1 - 3 - 0 |
Decent wrestler
Brawler
Granite chin |
|
BJJ Blue Belt
Brawler
Intelligent |
|
| |
|
Ladies and gentlemen. This fight is 3 rounds, in the featherweight division.
Introducing the fighter to my left, fighting out of the red corner.
With a record of
1 - 1 - 0, fighting out of Rio de Janeiro, Youkou Oonishi!
And introducing the fighter to my right, fighting out of the blue corner.
With a record of
1 - 3 - 0, fighting out of Rio de Janeiro, Helmut Kohl!
The judges for this bout are Matheus Silva, Paulo Santos and Thiago Cunha.
The bell rings for round one and we are underway!
Kohl throws a one two combo.
Oonishi is breathing heavily.
Oonishi shoots in looking for a takedown but Kohl manages to keep the fight standing, pushing Oonishi's face into the canvas for good measure before circling away.
Kohl is on the wrong end of a nice combination from Oonishi.

Kohl is looking for a takedown here. He's shot in and has managed to get it, finishing up in Oonishi's half guard.
Kohl is just sitting in half guard, waiting for something to happen.
Oonishi is not content to let Kohl control the position.
Kohl tries to pass to full mount but Oonishi defends it.
Oonishi looks like he's trying to stand up.
That's one minute gone in the round.
Kohl not doing much here.
The fighters are pressed up against the cage, both looking to find a bit of space to work.

Kohl is trying to work for a kimura but Oonishi is defending well.
The ref warns both fighters not to hold the cage as they work up against the meshing.
The two fighters exchange a few words. I couldn't hear what they were saying but maybe it's more fun if you make it up yourself. Kohl connects with a nice short shot to Oonishi's temple.
Kohl is keen to just control but Oonishi is a slippery customer.
Kohl trying to control the pace.
If this pace continues, the referee will definitely step in and force a standup.
Oonishi might be looking to lock onto one of his opponent's long limbs for a submission, whilst we're on the ground.

That's two minutes gone in the round.
The crowd are getting on the fighters' backs, as the pace has dropped off in the last minute or so.
Kohl trying to control from Oonishi's half guard. Oonishi has other ideas though and has regained full guard.
Oonishi looking to sweep using the butterfly guard but Kohl puts pay to that idea as he passes nicely into half guard.
Oonishi is not content to let Kohl control the position.
Kohl seems to be looking for submissions.

That's three minutes gone in the round.
Kohl is scoring with some nice ground and pound from the dominant position.
The fighters are starting to perspire pretty heavily.
Kohl wants to take a breather but Oonishi is having none of it.
Kohl drops an elbow to the side of Oonishi's head.
Kohl is trying to work for a kimura but Oonishi is defending well.
Kohl trying to control the action but Oonishi is working from the bottom.
The referee decides to stand the fighters back up.
Kohl pulls out of a head kick attempt.

That's four minutes gone in the round.
A lull in the action here being met with boos from the crowd.
Oonishi gets caught flat footed, as Kohl shoots in with a quick takedown into guard.
Oonishi on his back here. We all know that wrestlers don't like being on their back so let's see if Oonishi tries to get out of the position.
Kohl wants to get up but he can't break Oonishi's closed guard. He needs to be careful trying to break the legs open, as he's open to submissions here.
Oonishi wants to sweep here but Kohl controlling him for the moment.
Kohl engaging in some classic timewasting tactics.
Kohl postures up to throw the ground and pound strikes but they don't connect.
Boooooooooooooooooooo!!! God, this has been a terrible round. Come on you two, sort yourselves out!
Kohl looking to control the position here, rather than advance.
And thats the end of the round the fighters go back to their corners.
Helmut Kohl dominated that round.
Well, the break between rounds is over. Let's get back to the scrappin!

Kohl shoots in for a double leg but Oonishi sprawls well. That's going to sap some energy.
Oonishi circles away from the clinch attempt.
Kohl fails with a rather predictable takedown attempt.

Kohl has Oonishi up against the cage in a clinch.
Kohl has Oonishi pressed up against the cage and is working for takedown. Oonishi manages to improve position though and keeps the fight standing.
Youkou Oonishi has stuffed three takedown attempts in the round now. That's going to take a lot out of Helmut Kohl.
Oonishi is trying to work for a single leg takedown but Kohl pulls him back up using the underhooks.
We've had a slow start to the round here - hopefully the action picks up.
Kohl misses with a hook from the clinch.
Kohl has had enough of the clinch and is looking to separate.
Kohl is looking to score with knees to the body. Maybe he'll change it up and go body then head. Oonishi is defending well for now.
Both fighters are absolutely exhausted here.
Kohl fails to pull the fight into his guard.
That's one minute gone in the round.
Oonishi tries to jump guard but he falls flat on his backside. Kohl smiles and moves away.
Oonishi takes a shot to the body in his stride.
Kohl has been the more effective fighter overall so far.
Kohl has Oonishi up against the cage in a clinch.
Kohl is trying to pull guard but being pressed up against the cage enables Oonishi to keep the fight standing.
Kohl tries to land a knee to the body but he is off balance and Oonishi avoids it.
Kohl changes levels and goes for a takedown here. Oonishi fights it off and pushes away nicely.
Oonishi throws a body kick but he was well out of range there.
Kohl fakes high and shoots in for a takedown but Oonishi avoids it really well and circles away.
That's two minutes gone in the round.
Kohl shoots in but Oonishi avoids the takedown attempt easily.
Youkou Oonishi is looking to throw some combinations by the looks of things.
Oonishi tries to clinch up against the cage, rushing in to close the distance. Kohl manages to break the clinch and circles back to the middle of the mat.
Oonishi gets caught napping as Kohl dives in and scores a takedown. Oonishi manages to retain guard.
Kohl chips away with some ground and pound.
Kohl trying to control but Oonishi is working from the bottom.
Oonishi looking for submissions off his back, moving his hips, looking for an opening.
Kohl wants to pass the guard but Oonishi is keeping the position.
That's three minutes gone in the round.
Oonishi working a defensive guard here.
Kohl stands up and looks to throw the legs aside to pass to side control. Oonishi swivels though and keeps the full guard.
Kohl landing some decent shots from guard.
Kohl stands up and looks to throw the legs aside to pass to side control. Oonishi swivels though and keeps the full guard.
The referee decides to stand the fighters back up.
That's four minutes gone in the round.
Well. There's a bit of a lull in the action here and the crowd are starting to get restless.
Kohl swings wildly with a hook that is half blocked by Oonishi.
Kohl has taken the fight to the clinch.
Kohl jumps guard but his hands slip and he falls flat on his back. Well, he's made himself look a right mug there, as Oonishi walks away with a smile on his face. Kohl gets slowly back to his feet and shakes his head.
Kohl is looking to clinch but Oonishi is avoiding it.
Kohl fails with the takedown.
Kohl gets a takedown into half guard.
Boooooooooooooooooooo!!! God, this has been a terrible round. Come on you two, sort yourselves out!
Kohl wants to stand up but Oonishi has a hold of him and won't allow it.
And thats the end of the round the fighters go back to their corners.
Helmut Kohl showed his class in that round. I'd imagine he'll take it on all the scorecards.
That's the end of the interval. I'm sure that seemed a lot quicker than a minute for our two fighters! Back to the action. And we move into the final round!

Oonishi gets caught on his heels momentarily as he allows Kohl to score an easy takedown into full guard.
Oonishi has an active guard here but Kohl has managed to pass into half guard.
Oonishi is looking to improve his position.
We've had a slow start to the round here - hopefully the action picks up.
Kohl is thinking about going for an arm triangle but he can't free his leg.
Both fighters are breathing heavily.
That's one minute gone in the round.
Kohl is trying to control the action in half guard but Oonishi is working away on the bottom, looking perhaps to get back to full guard.
Kohl takes a deep breath and rests his weight momentarily on top of his opponent, to control the position.
Kohl is scoring with some nice ground and pound from the dominant position.
Kohl wants to lay and pray for a moment but Oonishi keeps working.
Helmut Kohl has got the better of the ground game so far.
Kohl is nestled in close to Oonishi, controlling him well. He's worked in a nice elbow to the side of the head as well, for good measure.
Oonishi is staying active underneath Kohl, who seems content to just control the action from this position.
That's two minutes gone in the round.
A lull in the action here being met with boos from the crowd.
Kohl trying to control the pace.
The ref stands the fighters back up due to a lack of activity.
Kohl shoots in looking for a double leg takedown. Oonishi defends it nicely.
Kohl fakes high and shoots in for a takedown but Oonishi avoids it really well and circles away.
That's three minutes gone in the round.
Oonishi displays good takedown defense there as he swats away a double leg from Kohl.
Youkou Oonishi has stuffed three takedown attempts in the round now. That's going to take a lot out of Helmut Kohl.
Oonishi moves in looking to clinch but Kohl pushes him off.
Kohl stuffs the takedown attempt from Oonishi. Oonishi gets slowly back to his feet.
Kohl throws a good cross that connects.
Kohl tries a switch kick but it misses it's target.
Kohl scores a trip takedown into side control. Nice.
Kohl is looking to take a break and control but Oonishi is keeping him honest, looking to work from the bottom.
Kohl fails to land a wild elbow strike.
That's four minutes gone in the round.
Oonishi tries to buck Kohl off but Kohl is having none of it.
Oonishi tries to strike but it doesn't land.
A control attempt from Oonishi but he's now mounted!
Kohl controlling the position easily from mount.
Boooooooooooooooooooo!!! God, this has been a terrible round. Come on you two, sort yourselves out!
Oonishi is in all sorts of trouble here.
And that's the end of the fight!
Helmut Kohl comfortably won the final round on my scorecard.
Well Kohl has outworked and out performed his opponent in all aspects of the game today. He was simply too good and the decision should be no more than a formality. Over to the ring announcer for the scorecards.
Ladies and gentlemen, after 3 rounds of action, we go to the scorecards for a decision.
Judge Matheus Silva scores the fight for Helmut Kohl!
Judge Paulo Santos scores the fight for Helmut Kohl!
Judge Thiago Cunha scores the fight for Helmut Kohl!
Helmut Kohl wins by unanimous decision!
|
|
|
|
|
|
|
|
|
|
|
|
|
|
|
|
|
|
|
|
|
|
|
| S |
C
A |
G |
S |
C
B |
G |
|
S |
C |
G |
|
energy
A | B |
|
hype
A | B |
|
pop
A | B |
|
mgr
A | B |
|
FIGHT
RATING
28% |
|
|
|
|
|
|
|
Undercard bout
|
Coming up we have a super heavyweight MMA rules bout between Vinod Zaaijer (ranked 5148 p4p, 180 weight class) and Ragnar Lotbrook (ranked 5186 p4p, 184 weight class). Vinod Zaaijer has a significant reach advantage - let's see if he can make it count.
 |
|
 |
| 211 cm
25
277 lbs
2 - 0 - 0 |
|
200 cm
25
278 lbs
2 - 1 - 0 |
BJJ Blue Belt
Solid Muay Thai
Cuts easily |
|
BJJ Blue Belt
Solid Muay Thai
Determined |
|
| |
|
Ladies and gentlemen. This fight is 3 rounds, in the super heavyweight division.
Introducing the fighter to my left, fighting out of the red corner.
With a record of
2 - 0 - 0, fighting out of Rio de Janeiro, Vinod Zaaijer!
And introducing the fighter to my right, fighting out of the blue corner.
With a record of
2 - 1 - 0, fighting out of Rio de Janeiro, Ragnar Lotbrook!
The judges for this bout are Seu Braga, Felipe Paraventi and Alexandre Firmino.
The bell rings for round one and we are underway!
Zaaijer shoots in for a takedown. "Ole!" shouts Lotbrook as he jumps to the side.

Zaaijer darts in and clinches Lotbrook up against the cage.
Zaaijer gets underhooks to prevent Lotbrook's takedown attempt.
Zaaijer dodges an elbow strike from Lotbrook.
A bit of stalling here from Lotbrook.
Zaaijer manages to pull guard. Let's see whether he can land a sub off his back.
Lotbrook stands up and looks to throw the legs aside to pass to side control. Zaaijer swivels though and keeps the full guard.
Lotbrook trying to control the position from guard on top but Zaaijer is wriggling around, looking for whatever he can.
We've had a slow start to the round here - hopefully the action picks up.
Zaaijer trying to control the position.
Zaaijer has his hands on Lotbrook's head, controlling the position.
That's one minute gone in the round.
Lotbrook stands up and looks to throw the legs aside to pass to side control. Zaaijer swivels though and keeps the full guard.
Zaaijer can't do much from the bottom at the moment, as Lotbrook controls the pace.
Zaaijer will need to keep those long limbs tucked in whilst he's on the ground, to prevent any submissions.
Lotbrook prevents Zaaijer from getting back to his feet.
We've had a lack of effective grappling in the last minute or so, which could well see a referee standup.
Lotbrook trying to pass the guard. He's being very persistent here but Zaaijer manages to land a sweep and now he's on top!

Zaaijer showing good wrestling skills to control the position.
That's two minutes gone in the round.
A lull in the action here being met with boos from the crowd.
Zaaijer postures up in Lotbrook's guard and throws a big left but Lotbrook blocks it.
Lotbrook wants to stand and escape but Zaaijer is having none of it.
Lotbrook looking for a sweep. Not yet Lotbrook, not yet.
Zaaijer pressing down on his opponent's thigh, looking to pass guard. Lotbrook is keeping the position for now.
Zaaijer's corner is telling him to maintain position.
The referee has motioned to the fighters to stand back up. He just wasn't happy with the level of activity.
Nice takedown defense from Lotbrook. No joy for Zaaijer on that attempt.
Lotbrook cracks Zaaijer with an open hand slap.
Lotbrook shoots and misses
letting Zaaijer counter with a right hand.
That's three minutes gone in the round.
Lotbrook lands a head kick!

It looks like Vinod Zaaijer has been cut.
Lotbrook wants to clinch up but Zaaijer keeps it at a distance.
Zaaijer appears to be looking for a counter punch to the body.
Zaaijer tries to drive through with a takedown attempt but Lotbrook defends well and Zaaijer ends up having to push Lotbrook into the cage where they will battle it out in the clinch.
That's three failed takedown attempts in the round for Vinod Zaaijer. That's going to take a lot out of him.
Lotbrook displays good takedown defense there as he swats away a double leg from Zaaijer.
Zaaijer fakes a head punch and goes low to the body. Nicely done.
Lotbrook misses the shot to the body.
Zaaijer fails with a rather predictable takedown attempt.
Zaaijer fails with a takedown attempt from distance.
A really sloppy takedown attempt there from Zaaijer.
Zaaijer is breathing heavily.
That's four minutes gone in the round.
Nice takedown defense from Lotbrook. No joy for Zaaijer on that attempt.
Zaaijer sees a low kick coming and goes to check it, but it's actually a body kick and it thuds into his unprotected ribs.
Lotbrook moves into the clinch successfully.
Zaaijer is trying to drag Lotbrook to the mat but Lotbrook just about manages to keep his footing. He used the cage to his advantage there.
Zaaijer tries to jump guard but he falls flat on his backside. Lotbrook smiles and moves away.
A head kick misses from Lotbrook.
Zaaijer goes for a double leg but Lotbrook avoids the attempt and the two fighters end up clinched against the cage as Lotbrook continues to drive forward.
The crowd thankful this round is nearly over.
Lotbrook shoots in for a takedown - he's clinched up with Zaaijer but Zaaijer pushes him off and we're back to square one.
Wooooo! Give it up for these two warriors! They are putting on a show!
Lotbrook shoots in looking for a double leg takedown. Zaaijer defends it nicely.
Zaaijer was looking to counter that last move with a shot to the body but he didn't commit.
The fighters are starting to get sweaty, which will make takedowns a bit more tricky.
And thats the end of the round the fighters go back to their corners.
Ragnar Lotbrook dominated that round.
The cut man is working on Vinod Zaaijer's cut.
The fighters get back to their feet, the hooter sounds and we're back to the action!
Some wild striking there from Lotbrook.
Ohhhhh! A huge head kick from Lotbrook! Zaaijer is out on his feet! Lotbrook rushes in and throws more strikes. The ref is looking closely - Zaaijer is covering up but the punishment is just too much and the ref steps in to stop the fight! Zaaijer is staring into space, just thankful that the beatdown has ended. Brutal finish.
Ladies and gentlemen, after 0:16 of round 2, we have a winner by way of TKO (Strikes). Ragnar Lotbrook!
|
|
|
|
|
|
|
|
|
|
|
|
|
|
|
|
|
|
|
|
|
|
|
| S |
C
A |
G |
S |
C
B |
G |
|
S |
C |
G |
|
energy
A | B |
|
hype
A | B |
|
pop
A | B |
|
mgr
A | B |
|
FIGHT
RATING
28% |
|
|
|
|
|
|
|
Undercard bout
|
Coming up we have a light heavyweight MMA rules bout between Jean Pierre Papin (ranked 3789 p4p, 504 weight class) and Lechu Szulcu (ranked 24319 p4p, 929 weight class). The fight MMA fans around the world have waited their entire lives for!
 |
|
 |
| 202 cm
30
211 lbs
9 - 5 - 0 |
|
199 cm
19
210 lbs
2 - 4 - 0 |
Good wrestling
World class boxer
Insanely flexible |
|
BJJ Blue Belt
Brawler
Granite chin |
|
| |
|
Ladies and gentlemen. This fight is 3 rounds, in the light heavyweight division.
Introducing the fighter to my left, fighting out of the red corner.
With a record of
9 - 5 - 0, fighting out of Los Angeles, Jean Pierre Papin!
And introducing the fighter to my right, fighting out of the blue corner.
With a record of
2 - 4 - 0, fighting out of Rio de Janeiro, Lechu Szulcu!
The judges for this bout are Matheus Silva, Alexandre Firmino and Mauricio Rocha.
The bell rings for round one and we are underway!
Szulcu tries for a takedown but Papin circles away easily
and Papin counters with a good right hand that lands right on the jaw.
Papin closes the distance and presses his opponent up against the cage.
A short body shot lands from Papin as the two fighters clinch.
Papin avoiding damage.
Szulcu tries to stall but Papin uses the opportunity to gain a better position.
Papin scores with a hook to the body.
Szulcu tries for a takedown. No joy.
Papin gets underhooks to prevent Szulcu's takedown attempt.
Jean Pierre Papin has stuffed three takedown attempts in the round now. That's going to take a lot out of Lechu Szulcu.
A left hand lands to the body for Papin.
We've had a slow start to the round here - hopefully the action picks up.
Papin lands a right uppercut that snaps the head of Szulcu backwards.
Papin lands a right uppercut that snaps the head of Szulcu backwards.
A quick uppercut on the inside from Papin.
Szulcu tries to pull guard but Papin forces him back to his feet, against the cage.
Papin is leaning against Szulcu and scores with a nice uppercut to the body.
Szulcu looks winded!
That's one minute gone in the round.
Szulcu tries to break free but Papin pushes him back against the cage.
Papin gets through Szulcu's defenses to land a nice punch to the side of the head.
Papin's corner are urging him to control the action in the clinch for a moment, rather than mount any serious offense. I'm sure the crowd appreciate those instructions... not.
Papin slowing the pace effectively.
Papin gets through Szulcu's defenses to land a nice punch to the side of the head.
Szulcu tries to break the clinch but Papin is controlling the position.
A right hand to the body from Papin.
Szulcu tries for a takedown but Papin manages to get underhooks.
A bit of stalling here from Papin.
An uppercut to the body lands inside from Papin.
Papin leaning against his opponent.
Papin slows down the pace here.
Papin prevents Szulcu from breaking the clinch.
That's two minutes gone in the round.
Szulcu is working hard here but doesn't seem to be able to control effectively, up against the cage.
Papin stalling against the cage.
Papin stalls.
Papin seems to have come into the fight with the intention of avoiding any damage in the clinch, rather than actually showing any aggression.
The ref breaks the fighters up, due to lack of action by Jean Pierre Papin.
Papin closes the distance and clinches.
Szulcu letting Papin take a breather here.
Papin has Szulcu pressed against the cage.
A short uppercut from Papin.
Nice body punch from Papin.
A frustrated look appears on Szulcu's face as he tries to break the clinch.
That's three minutes gone in the round.
Papin lands an elbow inside that Szulcu shrugs off.

It looks like Lechu Szulcu has been cut.
Papin lands a left hand that snaps the head of Szulcu backwards.
Papin blocks an uppercut.
Szulcu has a couple of punches blocked by Papin.
Papin lands a hook to the side of the head.
Papin working on landing some head shots here - that one got through nicely.
A right hook to the body lands for Papin.
Papin stalling in the clinch.
A body shot lands from Papin.
Papin stays in close to his opponent and throws a right hand to the body.
Papin pushes Szulcu back against the cage and lands a hook to the side of the head.
Papin scores with a shot to the side of Szulcu's head.
A nice right hand lands inside from Papin.
Fantastic stuff here - a very entertaining period of action, which has drawn cheers from the crowd.
Papin lands with a short shot to the head.
Papin lands a body shot.
That's four minutes gone in the round.
Papin lands a body punch.
Papin is working Szulcu over against the cage.
Both guys are working to get underhooks.
Papin stalls.
Papin lands with a short shot to the head.
Papin scores with an uppercut up the middle.
Szulcu takes a shot to the head.
Papin lands a hook that snaps the head of Szulcu backwards.

Szulcu is rocked!
Papin throws a big uppercut that drops Szulcu! More strikes from Papin and the referee jumps in to stop the fight! Szulcu lies dazed against the cage as Papin celebrates with his cornermen!
Ladies and gentlemen, after 4:45 of round 1, we have a winner by way of TKO (Strikes). Jean Pierre Papin!
Jean Pierre Papin decided to thank the fans in attendance for making a great atmosphere. It seemed to go down pretty well.
|
|
|
|
|
|
|
|
|
|
|
|
|
|
|
|
|
|
|
|
|
|
|
| S |
C
A |
G |
S |
C
B |
G |
|
S |
C |
G |
|
energy
A | B |
|
hype
A | B |
|
pop
A | B |
|
mgr
A | B |
|
FIGHT
RATING
46% |
|
|
|
|
|
|
|
Undercard bout
|
Coming up we have a middleweight MMA rules bout between Nicolas Nico (ranked 6067 p4p, 634 weight class) and Gordon Ramsay (ranked 3448 p4p, 416 weight class). I'm sure you'll be fascinated to know that I was talking to some pointless Z list celebrity before the fight and he thought that Gordon Ramsay was going to win. Let's see if he was right.
 |
|
 |
| 190 cm
29
194 lbs
9 - 6 - 0 |
|
172 cm
45
192 lbs
20 - 11 - 0 |
BJJ White Belt
Basic striking
Experienced |
|
Good wrestler
Excellent boxer
Knockout power |
|
| |
|
Ladies and gentlemen. This fight is 3 rounds, in the middleweight division.
Introducing the fighter to my left, fighting out of the red corner.
With a record of
9 - 6 - 0, fighting out of Rio de Janeiro, Nicolas Nico!
And introducing the fighter to my right, fighting out of the blue corner.
With a record of
20 - 11 - 0, fighting out of Las Vegas, Gordon Ramsay!
The judges for this bout are Matheus Silva, Seu Braga and Edson Gomes.
The bell rings for round one and we are underway!
A really sloppy takedown attempt there from Ramsay.
Nico lands with a hook. Ramsay tried to avoid it but it clipped the top of his head.
Ramsay avoids a lazy jab quite easily.
Nico thows a left - swing and a miss!
Nico misses with an uppercut.
Nico throws a shot from downtown. Ramsay moves away and avoids it.
A lazy left from Ramsay finds it's target.
Ramsay uses some good footwork to avoid the body shot by Nico.
Nico misses with a shot to the body
and Ramsay counters with a shoot takedown into half guard.
Nico pushes Ramsay off looking to stand but Ramsay dives back in and keeps control.
Ramsay perhaps working for something from half guard, or maybe not. It looks like he's just sitting there.
Nico on his back here. We all know that wrestlers don't like being on their back so let's see if Nico tries to get out of the position.
Ramsay takes advantage of the dominant position to land a couple of big hammer fists.
Ramsay has the superior BJJ but he's also working some ground strikes into his gameplan.
Ramsay is nestled in close to Nico, controlling him well. He's worked in a nice elbow to the side of the head as well, for good measure.
Fantastic stuff here - a very entertaining period of action, which has drawn cheers from the crowd.
Ramsay scoring with strikes to the body and head.
That's one minute gone in the round.
Nico tries to kick Ramsay off but Ramsay keeps his base steady and stays in half guard.
Ramsay working some ground and pound from close in. He's looking to maintain this position and strike for a while by the looks of things... although he'll probably advance to full mount in a minute now I've said that.
Ramsay is just sitting in half guard, waiting for something to happen.
Nico scrambles, trying to get to his feet, but Ramsay manages to mount him!
Ramsay in mount throwing good strikes here, bouncing his opponent's head off the canvas.
Nico really wants to buck Ramsay off and get back to his feet.
Ramsay has hold of an arm here, looking to extend it. He's committed to the armbar attempt here! Will he get it?! Yes! Nico is forced to tap!
Ladies and gentlemen, after 2:56 of round 1, we have a winner by way of Submission (Armbar). Gordon Ramsay!
Our winner, Gordon Ramsay, made sure he spent some time buttering up the crowd during his post fight interview, which will no doubt bring him a few more fans.
|
|
|
|
|
|
|
|
|
|
|
|
|
|
|
|
|
|
|
|
|
|
|
| S |
C
A |
G |
S |
C
B |
G |
|
S |
C |
G |
|
energy
A | B |
|
hype
A | B |
|
pop
A | B |
|
mgr
A | B |
|
FIGHT
RATING
56% |
|
|
|
|
|
|
|
Undercard bout
|
Coming up we have a middleweight MMA rules bout between Jack Zabijaka (ranked 3494 p4p, 422 weight class) and Ala Moana Bowls (ranked 9674 p4p, 781 weight class). Over to our ring announcer for the fighter introductions!
 |
|
 |
| 185 cm
19
190 lbs
8 - 0 - 0 |
|
180 cm
19
195 lbs
2 - 1 - 0 |
BJJ Blue Belt
Solid Muay Thai
Good chin |
|
BJJ Purple Belt
Basic striking
Very confident |
|
| |
|
Ladies and gentlemen. This fight is 3 rounds, in the middleweight division.
Introducing the fighter to my left, fighting out of the red corner.
With a record of
8 - 0 - 0, fighting out of Rio de Janeiro, Jack Zabijaka!
And introducing the fighter to my right, fighting out of the blue corner.
With a record of
2 - 1 - 0, fighting out of Rio de Janeiro, Ala Moana Bowls!
The judges for this bout are Paulo Santos, Emerson Jorge and Seu Braga.
The bell rings for round one and we are underway!
Bowls gets tackled into the cage by Zabijaka. Zabijaka maintains the clinch.
Still in the clinch, Zabijaka scores with a nice short uppercut.
A quick uppercut on the inside from Zabijaka.
Zabijaka lands a left hand.
A battle for position here, against the cage.
Bowls has hold of a leg and is looking for a trip takedown. Zabijaka avoids it nicely though and we remain in the clinch.
Zabijaka lands punches inside but they're not really causing much damage.
Zabijaka gets through Bowls's defenses to land a nice punch to the side of the head.
A right handed body shot lands from Zabijaka.
Zabijaka working on landing some head shots here - that one got through nicely.
Bowls has hold of a leg and is looking for a trip takedown. Zabijaka avoids it nicely though and we remain in the clinch.
Zabijaka lands with a light punch inside.
The crowd are loving this. Great action here.
Zabijaka scores with a shoulder strike.
Zabijaka is leaning against Bowls and scores with a nice uppercut to the body.

Zabijaka escapes the clinch and we're back to striking.
Zabijaka comes forward and lands a shot to the body, then darts back out of range.
Bowls looks winded!
Zabijaka rushes Bowls and presses him up against the cage.
Zabijaka breaks the clinch and we're back to striking at distance.

Zabijaka bobbing and weaving well here. And he's unloaded with a massive right hand that drops Bowls! He dives into his guard looking to finish!
Bowls is rocked!
It looks like Ala Moana Bowls has been cut.

Zabijaka gets to his feet - Bowls follows without any prompting.
Bowls is still on wobbly legs! Can Zabijaka finish him?
That's one minute gone in the round.
Zabijaka clinches up against the cage.
Bowls seems to have recovered his senses.
Bowls tries to land a knee to the head but Zabijaka blocks with his arms.
Zabijaka throws a hook to the body. More of an arm punch but it's all scoring with the judges.
Bowls is working on a leg, looking for a takedown but Zabijaka is defending well.
Jack Zabijaka has stuffed three takedown attempts in the round now. That's going to take a lot out of Ala Moana Bowls.
Zabijaka prevents the takedown attempt.
Zabijaka lands with a good tight uppercut to the head.
Zabijaka utilising his Muay Thai to score with a knee to the body.
A left hand lands to the body for Zabijaka.
Zabijaka lands a right hand that snaps the head of Bowls backwards.
Zabijaka lands a right uppercut that snaps the head of Bowls backwards.
Zabijaka breaks from the clinch.
Bowls fails with a takedown attempt from distance.
Zabijaka moves into the clinch.
Zabijaka leaning his opponent against the cage.
Zabijaka leaning his opponent against the cage.
Zabijaka gets a warning from the ref for wasting time.
That's two minutes gone in the round.
Nice body punch from Zabijaka - that landed with a thud.
The crowd are loving this. Great action here.
Bowls's head jolts backwards as he takes an uppercut right on the button!
Zabijaka escapes the clinch and we're back to striking.
Zabijaka forces Bowls back against the cage and clinches.
Bowls misses with some punches.
A short right from Zabijaka on the inside.
Zabijaka breaks the clinch and we're back to striking at distance.
Bowls tries to keep at a distance but Zabijaka has taken the fight into the clinch.
Zabijaka breaks the clinch and we're back to striking at distance.
Jack Zabijaka is looking to keep the fight on the feet at all costs.
Zabijaka cracks a nice hook into Bowls's ribs.
Bowls get stunned by a cross and takes another one on the button. Bowls stumbles backwards and tries to bounce back off the cage but Zabijaka runs in and jumps on him with a leaping lead hook that puts him out! Wow, that was highlight reel stuff! Awesome finish!
Ladies and gentlemen, after 2:50 of round 1, we have a winner by way of KO (Punch). Jack Zabijaka!
Jack Zabijaka thanked the fans post fight for their support.
|
|
|
|
|
|
|
|
|
|
|
|
|
|
|
|
|
|
|
|
|
|
|
| S |
C
A |
G |
S |
C
B |
G |
|
S |
C |
G |
|
energy
A | B |
|
hype
A | B |
|
pop
A | B |
|
mgr
A | B |
|
FIGHT
RATING
73% |
|
|
|
|
|
|
|
Undercard bout
|
Coming up we have a featherweight MMA rules bout between Finn Balor (ranked 2265 p4p, 245 weight class) and Max Tauer (ranked 3998 p4p, 393 weight class). Balor comes to the cage accompanied by Monster. Rumors backstage are that the fighters have been paid to keep it standing but we know that would never happen in MMA!
 |
|
 |
| 172 cm
43
152 lbs
34 - 19 - 1 |
|
182 cm
34
156 lbs
14 - 11 - 0 |
Good wrestling
World class boxer
KO power |
|
Good wrestler
Excellent MT
Heavy handed |
|
| |
|
Ladies and gentlemen. This fight is 3 rounds, in the featherweight division.
Introducing the fighter to my left, fighting out of the red corner.
With a record of
34 - 19 - 1, fighting out of St Petersburg, Finn Balor!
And introducing the fighter to my right, fighting out of the blue corner.
With a record of
14 - 11 - 0, fighting out of St Petersburg, Max Tauer!
The judges for this bout are Felipe Paraventi, Seu Braga and Luis Engracia.
The bell rings for round one and we are underway!
Tauer jabbing away but nothing is landing.
Balor was looking to counter that last move with a shot to the body but he didn't commit.
Balor gets a takedown into half guard.
We get told so often about how wrestlers don't like to be on their backs. Let's see if Tauer can do anything to dispel that myth.
Balor is scoring with some nice ground and pound from the dominant position.
Balor is trying to work for a kimura but Tauer is defending well.
Balor working the head and body with strikes.
We've had a slow start to the round here - hopefully the action picks up.
Balor is controlling the pace.
That's one minute gone in the round.
Balor not throwing his punches with enough precision this time.
Balor working some ground and pound from close in. He's looking to maintain this position and strike for a while by the looks of things... although he'll probably advance to full mount in a minute now I've said that.
Tauer holds on for dear life, maintaining half guard for now.
Tauer is trying to stand.
Neither fighter is being very active at the moment, with Balor in particular looking to stall.
Balor missing with the ground and pound from half guard.
Balor is thwarting Tauer's attempts to control the position.
Balor is controlling the pace.
Balor thumps the canvas. Not on purpose obviously - he just missed Tauer's head.
That's two minutes gone in the round.
Well. There's a bit of a lull in the action here and the crowd are starting to get restless.
Tauer is not content to let Balor control the position.
Tauer wants to get back to full guard.
Balor slips a nice elbow through Tauer's hands, connecting with Tauer's forehead.
Balor is scoring with some nice ground and pound from the dominant position.
Tauer is looking for a sweep. Balor is wise to his cunning plan and keeps the top position.
Tauer won't allow Balor to pass to mount.
Tauer is looking to regain full guard. He's left an arm up in the air though and Balor has latched onto it... Big trouble! Balor pivots for an armbar - it's in tight and it Tauer is tapping in no time flat! Great counter grappling there from Balor!
Ladies and gentlemen, after 3:57 of round 1, we have a winner by way of Submission (Armbar). Finn Balor!
A victorious Finn Balor thanked his army of followers in his post fight interview, telling people to make sure they follow him on Twitter.
|
|
|
|
|
|
|
|
|
|
|
|
|
|
|
|
|
|
|
|
|
|
|
| S |
C
A |
G |
S |
C
B |
G |
|
S |
C |
G |
|
energy
A | B |
|
hype
A | B |
|
pop
A | B |
|
mgr
A | B |
|
FIGHT
RATING
31% |
|
|
|
|
|
|
|
Undercard bout
|
Coming up we have a lightweight MMA rules bout between Jake Elwood (ranked 1648 p4p, 184 weight class) and Wohehiv Herman (ranked 2273 p4p, 239 weight class). The crowd seem to be enjoying Herman's choice of entrance music: Many Men . Over to our ring announcer for the fighter introductions!
 |
|
 |
| 180 cm
37
170 lbs
24 - 13 - 0 |
|
172 cm
31
162 lbs
10 - 1 - 0 |
Good wrestling
World class boxer
Cardio machine |
|
Decent wrestler
Good kicks
Good gas tank |
|
| |
|
Ladies and gentlemen. This fight is 3 rounds, in the lightweight division.
Introducing the fighter to my left, fighting out of the red corner.
With a record of
24 - 13 - 0, fighting out of Tokyo, Jake Elwood!
And introducing the fighter to my right, fighting out of the blue corner.
With a record of
10 - 1 - 0, fighting out of New York, Wohehiv Herman!
The judges for this bout are Paulo Santos, Alexandre Firmino and Mauricio Rocha.
The bell rings for round one and we are underway!
Elwood looks to score with a combo but nothing lands.
Elwood swings and misses with a shot to the body
enabling Herman to counter with a crisp jab.
Herman misses with an uppercut. Elwood saw that one coming.
Herman displaying good standup as he scores with a three punch combination.
Herman's jab looks to have found its range, popping Elwood under the eye.
Herman looks to score with a jab to the body but Elwood is just out of range.
Elwood connects with a leg kick. He turned his hip over nicely there.
Herman swings widly with a right hand
and Elwood counters with a three punch combo that has Herman backing up. Herman nods at Elwood to acknowledge the strikes.
We've seen a great period of action over the last minute or so - credit to both fighters for going all out!
Elwood showing good head movement there, avoiding the strikes from Herman.
Herman connects with a lovely right hand, straight down the pipe.
Elwood moves into range and lands a nice leg kick.
Jake Elwood seems to be the more aggressive standup fighter in this bout.
Elwood cracks the inside of Herman's front leg.
Herman will need to tighten up his combinations if he doesn't want to gas himself out, swinging at thin air.
Herman fails to land with a series of punches.
A jab from Herman misses.
Elwood throws a head kick but Herman moves out of range.
Herman looks like he wants to counter punch here.
Elwood lands a hook that stumbles Herman back into the cage. Elwood follows up with a straight and another hook that land right on the button, dropping Herman to the canvas! Elwood pounces and lands several unanswered shots - Herman has had enough and taps out! This one is all over!
Ladies and gentlemen, after 1:57 of round 1, we have a winner by way of Submission (Strikes). Jake Elwood!
During a confident post fight interview, Jake Elwood thanked all his fans. He seemed very genuine when describing how motivated his fans keep him.
Wohehiv Herman was interviewed post fight and said 'Fear my pack'.
|
|
|
|
|
|
|
|
|
|
|
|
|
|
|
|
|
|
|
|
|
|
|
| S |
C
A |
G |
S |
C
B |
G |
|
S |
C |
G |
|
energy
A | B |
|
hype
A | B |
|
pop
A | B |
|
mgr
A | B |
|
FIGHT
RATING
94% |
|
|
|
|
|
|
|
Co-main event
|
Coming up we have a heavyweight MMA rules bout between Edward Bravie (ranked 1976 p4p, 243 weight class) and Buster Hymen (ranked 1428 p4p, 172 weight class). Over to our ring announcer for the fighter introductions!
 |
|
 |
| 199 cm
35
271 lbs
25 - 7 - 0 |
|
198 cm
39
257 lbs
33 - 8 - 1 |
BJJ Purple Belt
Lethal high kicks
Cardio machine |
|
Excellent grappler
World class boxer
Granite chin |
|
| |
|
Ladies and gentlemen. This fight is 3 rounds, in the heavyweight division.
Introducing the fighter to my left, fighting out of the red corner.
With a record of
25 - 7 - 0, fighting out of London, Edward Bravie!
And introducing the fighter to my right, fighting out of the blue corner.
With a record of
33 - 8 - 1, fighting out of Rio de Janeiro, Buster Hymen!
The judges for this bout are Paulo Santos, Leandro Rodrigues and Felipe Paraventi.
The bell rings for round one and we are underway!
The fight stays on the outside here - Hymen looks like he's thinking about clinching though.
Bravie seem to be loading up, looking for a big counter.
Hymen fakes a head punch and goes low to the body. Nicely done.
Hymen keeps Bravie at a distance using the push kick.
Buster Hymen seems to be the more aggressive standup fighter in this bout.
Hymen throws out a powerful jab.
It looks like Edward Bravie has been cut.
Bravie displays good takedown defense there as he swats away a double leg from Hymen.
Bravie appears to be looking for a big counter.
We've had a slow start to the round here - hopefully the action picks up.
Horrible takedown attempt by Hymen or perhaps it was just good defense by Bravie, which made it look bad.
Bravie went nuts there looking for a big combo counter but none of the flurry connected.
That's one minute gone in the round.
Hymen rushes Bravie and pushes him back against the cage in a clinch.
Hymen tries to land a knee to the body but he is off balance and Bravie avoids it.
Hymen changes levels and goes for a takedown here. Bravie fights it off and pushes away nicely.
Edward Bravie has stuffed three takedown attempts in the round now. That's going to take a lot out of Buster Hymen.
Hymen misses with a combination
and Bravie counters with a one-two to the body.
Bravie avoids the head kick by Hymen.
Bravie went nuts there looking for a big combo counter but none of the flurry connected.
Hymen tries to clinch up but Bravie circles away and keeps his distance.
Hymen is looking to clinch.
Bravie seem to be loading up, looking for a big counter.
That's two minutes gone in the round.
Hymen drives through and clinches with Bravie against the cage.
Hymen manages to get underhooks and slows down the pace for a moment.
Bravie has Hymen pushed against the cage.
Hymen tries to break the clinch but Bravie is controlling the position.
Hymen is trying to pull guard but being pressed up against the cage enables Bravie to keep the fight standing.
Bravie taking a breather.
Bravie leaning against his opponent.
That's three minutes gone in the round.
The referee calls for Hymen to work.
Hymen will no doubt start fighting again in a minute but for now he's just having a little rest, leaning Bravie up against the cage.
Hymen has had enough of the clinch but Bravie keeps him there for the moment.
The referee is keeping an eye on Bravie - much more stalling and he will separate the fighters.
Bravie manages to get underhooks and slows down the pace for a moment.
That's four minutes gone in the round.
The crowd are showing their displeasure at the lack of action as loud boos ring out around the arena.

Hymen pushes off and circles away, back to the middle of the mat.
Hymen throws a head kick but Bravie moves out of range.
Hymen is looking to take this fight into the clinch.
Bravie seem to be loading up, looking for a big counter.
Hymen rushes Bravie and pushes him back against the cage in a clinch.
Boooooooooooooooooooo!!! God, this has been a terrible round. Come on you two, sort yourselves out!
Hymen working hard to break the clinch.
And thats the end of the round the fighters go back to their corners.
Buster Hymen dominated that round.
The cut man is working on Edward Bravie's cut.
OK. That's time! The bell goes and we're back to the action.
Hymen throws a jab, cross combination which is slipped
and Bravie counters with a three punch combo that has Hymen backing up. Hymen nods at Bravie to acknowledge the strikes.
Hymen wants to clinch up but Bravie keeps it at a distance.
Bravie appears to be looking for a big counter.
Hymen gets a clinch.
Hymen tries for a takedown but Bravie manages to get underhooks.
Hymen pressing his opponent against the cage.
Nice body punch from Hymen - that landed with a thud.
We've had a slow start to the round here - hopefully the action picks up.
Bravie will no doubt start fighting again in a minute but for now he's just having a little rest, leaning Hymen up against the cage.
Hymen breaks the clinch and we return to the middle of the mat.
Edward Bravie is winning the standup battle so far.
That's one minute gone in the round.
Hymen shoots for a takedown but Bravie saw that one coming a mile off and avoided it easily.
Bravie seem to be loading up, looking for a big counter.
Hymen lands a leg kick that knocks Bravie off balance momentarily.
Hymen moves to clinch but Bravie breaks away
and Bravie counters with a three punch combination, finished off with a leg kick. Nice work.
A decent looking cross lands there for Hymen.
Bravie moves out of range of the body kick from Hymen.
Hymen pushes Bravie up against the cage in a clinch.
That's two minutes gone in the round.
Bravie is pushing Hymen up against the cage, for a bit of lean and pray action. Action being used the in the loosest possible sense of the word.
Hymen lands with a good tight uppercut to the head.
Hymen tries to score a body lock takedown but Bravie shows good agility there to stay on his feet.
Edward Bravie has stuffed three takedown attempts in the round now. That's going to take a lot out of Buster Hymen.
Bravie prevents a body shot from Hymen.
Bravie is struggling to control the position.
Hymen tries to pull guard but Bravie won't allow it.
Bravie prevents a body shot from Hymen.
That's three minutes gone in the round.
Hymen drops down for a takedown but doesn't get it.
Hymen wants to get back to striking at distance but Bravie won't allow it.
Hymen manages to break the clinch.
Hymen misses with a looping left.
Bravie is looking for a counter combo.
Hymen wants to clinch
and Bravie counters with a two punch combo.
Hymen shoots in for a double leg but Bravie sprawls well. That's going to sap some energy.
As Hymen looks to move away, Bravie throws a big counter combo but Hymen just gets out of the way.
Bravie keeps the fight on the outside.
That's four minutes gone in the round.
Hymen tries to clinch but Bravie moves away
and Bravie counters with a three punch combination, finished off with a leg kick. Nice work.
Bravie circles away from the clinch attempt
and Bravie counters with a series of strikes. Hymen will be more careful next time no doubt.
A looping hook to the body misses from Hymen. Bravie does a little dance to reset his feet.
Hymen tries to clinch up.
Bravie throws a big counter combination but Hymen scrambles out of danger and avoids any damage.
The crowd thankful this round is nearly over.
Hymen shoots and misses
and Bravie counters with a left and a right that stings Hymen.
This has been an exciting period of action!
Hymen instigates a clinch.
And thats the end of the round the fighters go back to their corners.
Edward Bravie dominated that second round.
The cut man is working on Edward Bravie's cut.
Well, the break between rounds is over. Let's get back to the scrappin! This is the final round!
Hymen wants to clinch.
Bravie went nuts there looking for a big combo counter but none of the flurry connected.
Hymen closes the distance looking to clinch
and Bravie counters with a series of strikes. Hymen will be more careful next time no doubt.
We've had a slow start to the round here - hopefully the action picks up.
Hymen tries to clinch up.
Bravie went nuts there looking for a big combo counter but none of the flurry connected.
Hymen lands with a shot to the body.
Hymen closes the distance and clinches.
That's one minute gone in the round.
Hymen is looking to score with knees to the body. Maybe he'll change it up and go body then head. Bravie is defending well for now.
Hymen wants a takedown.
Hymen drops to a knee looking for a takedown but Bravie gets the underhooks and prevents it.
Hymen can't break the clinch.
A bit of stalling here from Hymen.
Hymen is trying to pull guard but being pressed up against the cage enables Bravie to keep the fight standing.
Edward Bravie has stuffed three takedown attempts in the round now. That's going to take a lot out of Buster Hymen.
Hymen lands a knee to the body.
Bravie stalling the fight.
That's two minutes gone in the round.
Bravie prevents a body shot from Hymen.
Hymen tries to pull guard but can't drag his opponent to the mat. Bravie just stands there and leans against the cage.
Hymen fails to pull the fight into his guard.
Bravie dictating the pace here, as the fighters clinch against the cage.
Hymen pushes off and fires off an elbow that misses, before clinching up again, against the cage.
Hymen pulls guard effortlessly.
Hymen wants to sweep here but Bravie controlling him for the moment.
Bravie trying to move into half guard but instead Hymen has managed to sweep!

That's three minutes gone in the round.
Bravie controls Hymen momentarily but Hymen frees himself.
Hymen controlling from the top position.
Bravie looking to sweep here. No luck so far.
Hymen throws a big right hand that misses.
Bravie wants to sweep here but Hymen controlling him for the moment.
Hymen trying to pass the guard but can't manage it just yet.
That's four minutes gone in the round.
A few boos can be heard. I'm sure they will multiply if the fighters don't pick up the pace.
Bravie has a closed guard, preventing anything of note from happening. Perhaps he's looking to stall.

Bravie is working an open guard so Hymen takes the opportunity to get back to his feet.
Hymen tries to clinch up but Bravie circles away and keeps his distance.
Hymen with a poor takedown
and Bravie counters with a two punch combo.
Boooooooooooooooooooo!!! God, this has been a terrible round. Come on you two, sort yourselves out!
Hymen dives in for a single leg takedown but Bravie sprawls and the fighters end up clinched against the cage.
As Hymen looks to move away, Bravie throws a big counter combo but Hymen just gets out of the way.
Bravie circles away from the clinch attempt.
Bravie went nuts there looking for a big combo counter but none of the flurry connected.
And that's the end of the fight!
I would just about give that final round to Buster Hymen.
I think Hymen has won this one but let's see whether the judges agree with me. Over to the ring announcer for the scorecards.
Ladies and gentlemen, after 3 rounds of action, we go to the scorecards for a decision.
Judge Paulo Santos scores the fight for Edward Bravie!
Judge Leandro Rodrigues scores the fight for Edward Bravie!
Judge Felipe Paraventi scores the fight for Edward Bravie!
Edward Bravie wins by unanimous decision!
A victorious Edward Bravie thanked his army of followers in his post fight interview, telling people to make sure they follow him on Twitter.
|
|
|
|
|
|
|
|
|
|
|
|
|
|
|
|
|
|
|
|
|
|
|
| S |
C
A |
G |
S |
C
B |
G |
|
S |
C |
G |
|
energy
A | B |
|
hype
A | B |
|
pop
A | B |
|
mgr
A | B |
|
FIGHT
RATING
31% |
|
|
|
|
|
|
|
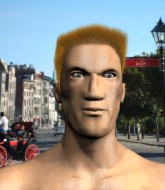
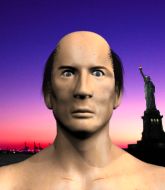
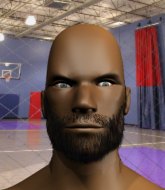
Main event
|
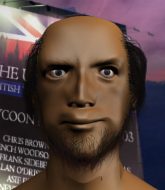
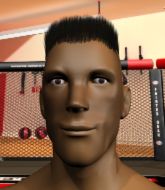
Coming up we have a super heavyweight MMA rules bout between Darren Lockyer (ranked 670 p4p, 15 weight class) and Lucas Hood (ranked 881 p4p, 20 weight class). I can't wait for this one - let's get the fighter introductions out of the way and get this one started!
 |
|
 |
| 189 cm
45
198 lbs
47 - 24 - 2 |
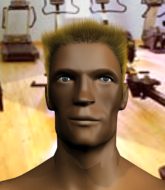
|
190 cm
30
260 lbs
12 - 4 - 0 |
Good wrestling
World class boxer
Cardio machine |
|
Good wrestler
Excellent MT
Good gas tank |
|
| |
|
Ladies and gentlemen. This fight is 5 rounds, for the super heavyweight championship of the world!
Introducing the champion to my left, fighting out of the red corner.
With a record of
47 - 24 - 2, fighting out of Amsterdam, Darren Lockyer!
And introducing the challenger to my right, fighting out of the blue corner.
With a record of
12 - 4 - 0, fighting out of Montreal, Lucas Hood!
The judges for this bout are Leandro Rodrigues, Seu Braga and Felipe Paraventi.
The bell rings for round one and we are underway!
Hood has managed to clinch.
Lockyer breaks the clinch and we're back to striking at distance.
Hood ducks under a wild hook from Lockyer.
It seemed like Hood was going to counter with the hook but didn't fully commit to it.
Hood works his jab well there, keeping his opponent at a distance.
Lockyer fails to land with a series of punches.
Lockyer scores with a nice right hand.
Lockyer waving his hands out in front of him, looking to distract Hood.
It seemed like Hood was going to counter with the hook but didn't fully commit to it.
Both fighters circling a little - Lockyer finishes the exchange with a kick to the body.
Lockyer misses with a straight right.
Lockyer throws out a loose jab but Hood uses good head movement to avoid it.
Hood swings away with a counter right hand but no contact made.
Lockyer scores with a punch to the gut of his opponent.
Lockyer avoids a punch combination nicely.
Hood shoots in looking for a double leg takedown. Lockyer defends it nicely.
It looked like Lockyer was trying to counter with a body shot coming off that last attack from Hood.
That's one minute gone in the round.
Lockyer throws a hook to the body but it doesn't connect.
Hood fails in his attempt to clinch.
Lockyer will need to close the distance a bit before he attacks - that leg kick was thrown from too far away.
Lockyer cracks the inside of Hood's front leg.
A low kick from Lockyer is predictable there
and Hood counters with a nice uppercut.
Hood connects with the punch.
Lockyer wings a very wild body shot but it does the job and lands to the midsection.
Lockyer tries to keep at a distance but Hood has taken the fight into the clinch.
Hood doesn't land with the attempted body shot.
A head punch blocked on the inside by Lockyer.
A bit of stalling here from Hood.
With the two fighters working up against the cage, Lockyer just misses with a elbow thrown towards Hood's brow.
Hood blocks a knee to the body. He'll have a nicely bruised forearm in the morning.
Hood tries a shoulder strike but it doesn't do any damage.
Hood tries to land a shot to the body but it's blocked.
Lockyer wants to break the clinch but can't.
A head punch blocked on the inside by Lockyer.
That's two minutes gone in the round.
A left hand lands to the body for Hood.
Lockyer doesn't land with the attempted body shot.
An uppercut on the inside fails to land for Hood.
Fantastic stuff here - a very entertaining period of action, which has drawn cheers from the crowd.
Lockyer lands with a right to the head.
Hood has Lockyer pressed up against the cage and is working for takedown. Lockyer manages to improve position though and keeps the fight standing.
A shot in the inside from Hood.
A head punch on the inside from Hood fails to land.
A head punch on the inside from Lockyer fails to land.
Hood tried to land a shot to the body but connects with Lockyer's elbow.
Lockyer breaks the clinch and we return to the middle of the mat.
Lockyer tries to score with an inside leg kick but telegraphs it and Hood is able to avoid easily.
Lockyer throws out a loose jab but Hood uses good head movement to avoid it.
Lockyer gets caught napping as Hood dives in and scores a takedown. Lockyer manages to retain guard.

Lockyer is edging up against the cage. He's using the cage to get back to his feet. Nice work there - the fighters are clinched.
Lockyer breaks the clinch and we're back to striking at distance.
Hood uses some good footwork to avoid the body shot by Lockyer.
Despite the aggression on Hood's face he doesn't fully commit to the counter.
That's three minutes gone in the round.
Lockyer tries to keep at a distance but Hood has taken the fight into the clinch.
Lockyer trying to stall but Hood improves his position.
Lockyer misses with a punch on the inside.
Hood wants a takedown.
Darren Lockyer has stuffed three takedown attempts in the round now. That's going to take a lot out of Lucas Hood.
Lockyer lands a short shot on the inside that snaps the head of Hood backwards.
Lockyer's head jolts backwards as he takes an uppercut right on the button!
Lockyer wants to push off and get back to the center of the mat but Hood has him pressed against the cage.
Lockyer lands a shoulder strike.
Hood stalling here - the referee won't stand for too much of that.
Hood lands with a light punch inside.
Hood is stalling here.
Lockyer breaks the clinch and we're back to striking at distance.
Lockyer throws a jab when Hood was well out of range.
Lockyer scores with a jab to the jaw.
Hood misses with a straight left.
Lockyer catches Hood with a nice straight right. He seems pissed - ooooh, it's on now! On like donkey kong!
That's four minutes gone in the round.
The crowd are loving this. Great action here.
Lockyer misses the shot to the body.
Hood is looking to take this fight into the clinch.
Hood walks into a stiff left hand from Lockyer.
Lockyer throws a front kick that sends Hood stumbling back into the cage.
Darren Lockyer is looking to keep the fight on the feet at all costs.
Hood fakes a jab and then connects with a hook.
Lockyer misses with a lunging right hand
and Hood counters with a nice uppercut.
Lockyer circles away from the clinch attempt.
Lockyer throws a body kick despite being completely out of range
and Lockyer takes a counter punch right on the button for his troubles.
Hood ducks under a wild hook from Lockyer.
Hood takes a step back and watches a body kick go sailing past his mid section.
Lockyer works Hood's body with a nice hook.

That's five minutes gone in the round.
Lockyer misses with a wild combination.
Lockyer looks to land a right hand but Hood moved out of range.
Darren Lockyer seems to be the more aggressive standup fighter in this bout.
Nice body punch from Lockyer.
Lockyer needs to keep his hands up - Hood had a free shot at his head there.
Lockyer pulls out of a head kick attempt.
Hood tries to clinch but is not successful on this occasion.
Hood looks to land a combination but Lockyer avoids it well.
Lockyer connects with a lovely jab that went straight through the gap between Hood's hands.
Hood moves out of range of the body kick.
Lockyer tests Hood's chin there with a solid looking shot.
Lockyer throws an off balance right hand

and Lockyer is countered with a crisp right hand from Hood that sends him to the canvas! Hood follows him to the mat into side control.
This has been an exciting period of action!
Lockyer sneaks back into half guard.

That's six minutes gone in the round.
Hood not throwing his punches with enough precision this time.
The fighters are pressed up against the cage, both looking to find a bit of space to work.
Lockyer wants to get back to full guard but Hood has mounted him!
Lockyer is trying to escape the mount.
Lockyer avoids a series of strikes thrown by Hood.
Lockyer is wriggling around trying to escape.
Lockyer regains half guard.
Hood thumps the canvas. Not on purpose obviously - he just missed Lockyer's head.
The ref warns both fighters not to hold the cage as they work up against the meshing.
Lockyer has hold of Hood's hands but Hood slips his arm to the side and lands an elbow.
Hood scoring with strikes to the body and head.
Hood throwing punches and elbows but they're not doing any damage.
Hood scoring with strikes to the body and head.

Lockyer is rocked!

That's seven minutes gone in the round.
Hood scores with a big shot! Lockyer's head bounced off the canvas with a huge thud! More strikes land and the referee has jumped in to save Lockyer! He was hurt real bad - good stoppage!
Ladies and gentlemen, after 7:23 of round 1, we have a winner by way of TKO (Strikes). Lucas Hood!
Lucas Hood is the new super heavyweight champion!
|
|
|
|
|
|
|
|
|
|
|
|
|
|
|
|
|
|
|
|
|
|
|
| S |
C
A |
G |
S |
C
B |
G |
|
S |
C |
G |
|
energy
A | B |
|
hype
A | B |
|
pop
A | B |
|
mgr
A | B |
|
FIGHT
RATING
47% |
|
|
|
|
|
|
|
|
|
|
