 |
TIT 8 - Bitchslapis v Tasvetet PBP Commentary |
Undercard bout
|
|
|
|
Undercard bout
|
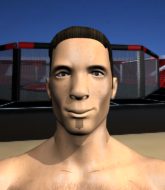
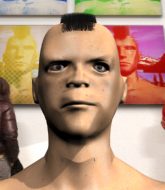
Coming up we have a lightweight MMA rules bout between Nate Diaz (ranked 0 p4p, 0 weight class) and Enda OSullivan (ranked 0 p4p, 0 weight class). Man, I cannot wait for this one!
 |
|
 |
| 183 cm
16
162 lbs
1 - 0 - 0 |
|
174 cm
20
136 lbs
0 - 2 - 0 |
BJJ Blue Belt
Counter fighter
Good chin |
|
BJJ Blue Belt
Basic striking
Intelligent |
|
| |
|
Ladies and gentlemen. This fight is 3 rounds, in the lightweight division.
Introducing the fighter to my left, fighting out of the red corner.
With a record of
1 - 0 - 0, fighting out of The Island, Nate Diaz!
And introducing the fighter to my right, fighting out of the blue corner.
With a record of
0 - 2 - 0, fighting out of The Island, Enda OSullivan!
The judges for this bout are Bart Greer, Peter Branson and Michael Johnstone.

The bell rings for round one and we are underway!
Diaz fails with a takedown attempt.
Enda OSullivan seems to be the more aggressive standup fighter in this bout.

Diaz tries to sprawl but OSullivan drives through with a takedown into half guard.
Diaz wants to get back to full guard.
Diaz moves his hips nicely and gets into full guard.
We've had a slow start to the round here - hopefully the action picks up.

Diaz had isolated an arm as going for a kimura. OSullivan defends it easily.
Diaz working from the bottom, still in full guard. He's managed to get a loose triangle. OSullivan doesn't seem to be doing much to defend here, obviously he feels comfortable in the position. OSullivan manages to throw the legs off his shoulder and he's back into guard - no problem.
OSullivan trying to control the position from guard on top but Diaz is wriggling around, looking for whatever he can.

That's one minute gone in the round.
OSullivan is in a good position here but he's just trying to control... And he's not even managing to do that successfully.

OSullivan decides he's had enough of playing guard and decides to stand. Come on Diaz, up you get!
OSullivan shoots in looking for a single leg takedown. Diaz is trying to defend but OSullivan finishes it well and ends up in half guard. Let's see if he can advance position further.
Diaz tries to roll over but OSullivan keeps him under control.
Diaz gets back to full guard.
Diaz had isolated an arm as going for a kimura. OSullivan defends it easily.
Diaz is throwing his legs up, looking for submissions. OSullivan is aware though and is defending well.

That's two minutes gone in the round.
Diaz looking to sweep here. No luck so far.
Diaz throwing his legs up looking for a triangle.
OSullivan is stalling in the full guard.
Diaz is looking to cinch up a triangle. OSullivan throws the leg off to one side though and gets in tight to Diaz's body to avoid the submission. Diaz has instead reached around OSullivan's neck and now has a guillotine! Oh, this is biiiig trouble! Diaz arches his back and squeezes and forces the tap from his hapless opponent.
Ladies and gentlemen, after 2:46 of round 1, we have a winner by way of Submission (Guillotine). Nate Diaz!
|
|
|
|
|
|
|
|
|
|
|
|
|
|
|
|
|
|
|
|
|
|
|
| S |
C
A |
G |
S |
C
B |
G |
|
S |
C |
G |
|
energy
A | B |
|
hype
A | B |
|
pop
A | B |
|
mgr
A | B |
|
FIGHT
RATING
37% |
|
|
|
|
|
|
|
Undercard bout
|
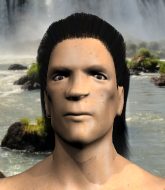
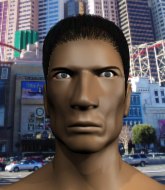
Coming up we have a welterweight MMA rules bout between Frank Tyson (ranked 0 p4p, 0 weight class) and Jagannath Behera (ranked 0 p4p, 0 weight class). Frank Tyson is staring across the cage at his opponent, tweaking his nipples... Tweaking his own nipples that is.
 |
|
 |
| 182 cm
18
175 lbs
0 - 0 - 0 |
|
180 cm
18
180 lbs
0 - 1 - 0 |
BJJ White Belt
Excellent boxer
KO power |
|
BJJ White Belt
Excellent MT
Solid chin |
|
| |
|
Ladies and gentlemen. This fight is 3 rounds, in the welterweight division.
Introducing the fighter to my left, fighting out of the red corner.
With a record of
0 - 0 - 0, fighting out of The Island, Frank Tyson!
And introducing the fighter to my right, fighting out of the blue corner.
With a record of
0 - 1 - 0, fighting out of The Island, Jagannath Behera!
The judges for this bout are David Hoff, Sandra Marshall and Winston Alpacca.
The bell rings for round one and we are underway!
Tyson looks to land a combination but Behera avoids it well.
Behera throws out a token jab with nothing on it.
Frank Tyson seems to be the more aggressive standup fighter in this bout.

Behera clinches up against the cage.
Tyson tries to break the clinch but Behera is controlling the position.
Behera scores with a nice hook to the head.
A short left from Behera.
Behera scores with a shot to the side of Tyson's head.

Tyson is rocked!
Behera throws a blind hook that connects with the side of Tysons head.
Oh Tyson is still all over the place! His legs are completely gone! Will he be able to recover?!!
Behera pushes Tyson against the cage and as Tyson bounces back, Behera cracks him with a massive overhand right that sends him crashing to the mat! Behera follows up with more strikes but Tyson was out from that first, devastating punch! Wow!
Ladies and gentlemen, after 0:34 of round 1, we have a winner by way of KO (Punch). Jagannath Behera!
|
|
|
|
|
|
|
|
|
|
|
|
|
|
|
|
|
|
|
|
|
|
|
| S |
C
A |
G |
S |
C
B |
G |
|
S |
C |
G |
|
energy
A | B |
|
hype
A | B |
|
pop
A | B |
|
mgr
A | B |
|
FIGHT
RATING
100% |
|
|
|
|
|
|
|
Undercard bout
|
|
|
|
Undercard bout
|
Coming up we have a middleweight MMA rules bout between Augusto Mendes (ranked 0 p4p, 0 weight class) and Robbie Jamieson (ranked 0 p4p, 0 weight class). I don't know about you partner, but I'm pumped for this one!
 |
|
 |
| 186 cm
18
195 lbs
1 - 0 - 0 |
|
200 cm
20
194 lbs
0 - 1 - 0 |
BJJ White Belt
Excellent boxer
Big right hand |
|
BJJ White Belt
Brawler
Inexperienced |
|
| |
|
Ladies and gentlemen. This fight is 3 rounds, in the middleweight division.
Introducing the fighter to my left, fighting out of the red corner.
With a record of
1 - 0 - 0, fighting out of The Island, Augusto Mendes!
And introducing the fighter to my right, fighting out of the blue corner.
With a record of
0 - 1 - 0, fighting out of The Island, Robbie Jamieson!
The judges for this bout are Peter Branson, Michael Johnstone and Sandra Marshall.
The bell rings for round one and we are underway!
A slow jab from Mendes misses its intended target.
Mendes misses with a straight right.
Mendes looks to throw the jab but Jamieson is out of range.
Robbie Jamieson seems to be the more aggressive standup fighter in this bout.
Mendes throws an overhand right that lands on Jamieson's shoulder, as Jamieson tries to avoid the shot.
Jamieson throws a lazy head kick
and Mendes counters with a straight right hand.
Mendes lands with a hook. Jamieson tried to avoid it but it clipped the top of his head.
Jamieson has his takedown stuffed
and Mendes counters with a crisp hook to the side of the head.
Mendes lands with a right hand.
Mendes steps in with a hook that catches Jamieson right on the chin and knocks him to the floor! Mendes follows him down with more strikes and that's all she wrote! Jamieson looks absolutely devastated.
Ladies and gentlemen, after 0:38 of round 1, we have a winner by way of TKO (Strikes). Augusto Mendes!
|
|
|
|
|
|
|
|
|
|
|
|
|
|
|
|
|
|
|
|
|
|
|
| S |
C
A |
G |
S |
C
B |
G |
|
S |
C |
G |
|
energy
A | B |
|
hype
A | B |
|
pop
A | B |
|
mgr
A | B |
|
FIGHT
RATING
96% |
|
|
|
|
|
|
|
Undercard bout
|
Coming up we have a lightweight MMA rules bout between Keddhoo Hwo (ranked 0 p4p, 0 weight class) and Stephen King (ranked 0 p4p, 0 weight class). Over to our ring announcer for the fighter introductions!
 |
|
 |
| 175 cm
25
156 lbs
0 - 1 - 0 |
|
175 cm
25
165 lbs
0 - 2 - 0 |
BJJ Purple Belt
Solid boxing
Good chin |
|
BJJ Purple Belt
Decent boxing
Heavy handed |
|
| |
|
Ladies and gentlemen. This fight is 3 rounds, in the lightweight division.
Introducing the fighter to my left, fighting out of the red corner.
With a record of
0 - 1 - 0, fighting out of The Island, Keddhoo Hwo!
And introducing the fighter to my right, fighting out of the blue corner.
With a record of
0 - 2 - 0, fighting out of The Island, Stephen King!
The judges for this bout are Peter Branson, Michael Johnstone and Bart Greer.
The bell rings for round one and we are underway!
Hwo displays good takedown defense there as he swats away a double leg from King.
Hwo ducks under an overhand right and circles away with a smile on his face.
No joy there for King, who threw a few shots but didn't land.
Hwo looks to land a combination but King avoids it well.
King throws a jab when Hwo was well out of range.
Hwo takes a really solid shot there but just smiles back and shrugs his shoulders.
A lazy left from King finds it's target.
Nice defenses there by Hwo.
Hwo swung with a counter punch to the body but it didn't connect.
Hwo takes a swing at King's ribcage but misses.
We've had a slow start to the round here - hopefully the action picks up.
Hwo has his head snapped back a nice jab. A little nod from Hwo there as he acknowledges the shot.
King falls off balance throwing a combination

and Hwo counters into the clinch. Nicely done.

King pushes off and circles away, back to the middle of the mat.
That's one minute gone in the round.
Hwo uses good head movement to avoid the hook from King.
King fakes a jab and then connects with a hook.
King lands a nice hook to Hwo's body. Hwo takes it in his stride and looks to land his own strikes.
King takes a jab right on the nose. That must have hurt but he shrugs his shoulders and looks to return the favor.
Hwo moves into the clinch.

Hwo escapes the clinch and we're back to striking.
Hwo drives through and clinches with King against the cage.
King looks more muscular than last time we saw him. He must have been on the weights.
King manages to break the clinch.
King catches Hwo with a nice straight right. He seems pissed - ooooh, it's on now! On like donkey kong!
King connects with a looping left hand that seems like it dazed Hwo momentarily.
Hwo slips a jab and a cross from King.
It looked like Hwo was looking amped, ready to throw a big counter but didn't commit.
Hwo rushes forward with a series of wild hooks but King moves out of range and avoids them all easily.
Fantastic stuff here - a very entertaining period of action, which has drawn cheers from the crowd.
Hwo gets to the clinch - let's see what his plan is here.
That's two minutes gone in the round.
Hwo throws a head punch that misses.
King pushes off and circles away, back to the middle of the mat.
Hwo scores with a nice looking left hook and follows it up with an uppercut!
King takes a shot right to the liver - Bas would have been proud of that punch.
King looks to throw the jab but Hwo is out of range.
Hwo gets his head snapped back by a nice shot there.
King throws a hook but Hwo blocks it.
Hwo throws a combination that misses
enabling King to counter with a crisp jab.
Hwo displays some good footwork, moving neatly out of range as King throws out the jab.
Hwo throws a body shot but no joy.
Sloppy strikes from King. Those never looked like landing.
Hwo ducks right into an uppercut from King.

That's three minutes gone in the round.
Hwo throws a right and a left that both miss.
Hwo throws a series of punches but King moves out of range.
King is loading up here, looking for a big counter of his own.
King throws the overhand right but ducks down into a quick takedown attempt. Hwo was covering up waiting for the punch and King finishes the takedown easily into guard.
King trying to control the position from guard on top but Hwo is wriggling around, looking for whatever he can.
King lying in Hwo's guard like a wet fish here, stalling away. Hwo decides he's had enough of all that nonsense - he escapes his hips and locks up an armbar! Wow, that was slick! King taps! This one is aaaaaaaaaaall over!
Ladies and gentlemen, after 3:47 of round 1, we have a winner by way of Submission (Armbar). Keddhoo Hwo!
|
|
|
|
|
|
|
|
|
|
|
|
|
|
|
|
|
|
|
|
|
|
|
| S |
C
A |
G |
S |
C
B |
G |
|
S |
C |
G |
|
energy
A | B |
|
hype
A | B |
|
pop
A | B |
|
mgr
A | B |
|
FIGHT
RATING
55% |
|
|
|
|
|
|
|
Undercard bout
|
Coming up we have a middleweight MMA rules bout between Drake Bell (ranked 0 p4p, 0 weight class) and Aussie Warrior (ranked 0 p4p, 0 weight class). Both fighters look pumped up here. Let's hope this is a good fight!
 |
|
 |
| 168 cm
25
139 lbs
1 - 1 - 0 |
|
182 cm
22
187 lbs
1 - 0 - 0 |
Good wrestling
Basic striking
KO power |
|
BJJ Blue Belt
Counter fighter
Granite chin |
|
| |
|
Ladies and gentlemen. This fight is 3 rounds, in the middleweight division.
Introducing the fighter to my left, fighting out of the red corner.
With a record of
1 - 1 - 0, fighting out of The Island, Drake Bell!
And introducing the fighter to my right, fighting out of the blue corner.
With a record of
1 - 0 - 0, fighting out of The Island, Aussie Warrior!
The judges for this bout are Winston Alpacca, Daniel Franklin and Michael Johnstone.
The bell rings for round one and we are underway!
A nice combination there by Bell.

It looks like Aussie Warrior has been cut.
Bell definitely looks more muscular than last time we saw him fight.
The fight stays on the outside here - Warrior looks like he's thinking about clinching though.
Horrible takedown attempt by Warrior or perhaps it was just good defense by Bell, which made it look bad.
Bell throws a right hand that Warrior ducks under and follows up with a left that Warrior also avoids with ease.
Warrior tries to close the distance and clinch up but Bell swats him away and circles back towards the center.
A swing and a miss from Bell.
Bell misses with an uppercut.
Warrior doesn't manage to clinch there - Bell circles away.
Bell uses good footwork to get in and out, landing a nice hook.
We've had a slow start to the round here - hopefully the action picks up.
Warrior tries to clinch up.
Warrior tries to shoot in for a takedown. He's got hold of a leg but Bell swivels and escapes.
Drake Bell seems to be the more aggressive standup fighter in this bout.
Warrior moves in looking to clinch but Bell pushes him off.
Warrior closes the distance looking to clinch
and Bell cracks him with a counter punch right on the button.
That's one minute gone in the round.
Warrior wants to clinch up but Bell keeps it at a distance.
Warrior misses with a wild combination.
Bell throws a body shot but no joy.
Bell looks to score with a combo but nothing lands.
Warrior tries to counter by closing the distance.
Warrior tries to close the distance and clinch up against the cage but Bell paws at him with a jab and circles away.
Bell keeping at a good range here, avoiding a leg kick.
No joy there for Warrior, who threw a few shots but didn't land.
Warrior avoids the body shot from Bell.
Bell swings away but doesn't land with a series of punches.
Drake Bell is looking to keep the fight on the feet at all costs.
Bell pushes Warrior up against the cage in a clinch.
Warrior can't find room to land a body shot as Bell controls the action.
Warrior has hold of a leg and is looking for a trip takedown. Bell avoids it nicely though and we remain in the clinch.
Drake Bell has stuffed three takedown attempts in the round now. That's going to take a lot out of Aussie Warrior.
Warrior changes levels and goes for a takedown here. Bell fights it off and pushes away nicely.
That's two minutes gone in the round.
Warrior fails in his attempt to clinch.
Bell connects with a lovely jab that went straight through the gap between Warrior's hands.
Warrior moves out of range of the strikes.
Warrior takes a shot right to the liver - Bas would have been proud of that punch.
Bell scores with a one two! Warrior had his feet all tangled up there and couldn't avoid the strikes.
The fans in attendance giving it up for the two fighters, who have really let it all hang out in the last minute or so!
Bell swings and misses with a hook to the body.
Bell throws out a loose jab but Warrior uses good head movement to avoid it.
Warrior doesn't manage to clinch there - Bell circles away.
Bell fails to land with the punch combination there - jab, cross, hook, miss, miss, miss.
Bell throws a hook to the body but it doesn't connect.
Warrior with the counter takedown but Bell avoids it easily.
Warrior looks shocked there as he takes a right hand to the temple.
Bell stuffs the takedown.
Warrior fails with a rather predictable takedown attempt.
That's three minutes gone in the round.
Bell cracks Warrior with a good shot that sees him stumbling back into the cage.
Bell connects with a body shot.
Bell connects with a jab.
Warrior moves to clinch but Bell breaks away
and Bell counters with a straight right hand.
Bell rushes Warrior and pushes him back against the cage in a clinch.
Bell throws a hook to the body. More of an arm punch but it's all scoring with the judges.
Bell stalling against the cage.
Nice body punch from Bell.
Some stalling of biblical proportions here from Bell.
Bell pushes Warrior back against the cage and lands a hook to the side of the head.
Bell presses Warrior against the cage and delivers a mid-strength body shot.
Bell gets double underhooks to prevent a takedown attempt from Warrior.
Bell lands a hook that snaps the head of Warrior backwards.

That's four minutes gone in the round.
Fantastic stuff here - a very entertaining period of action, which has drawn cheers from the crowd.
A short right from Bell on the inside.
Bell lands a shoulder strike that jolts his opponent's head backwards.
Warrior has Bell pressed up against the cage and is working for takedown. Bell manages to improve position though and keeps the fight standing.
A shot in the inside from Bell.
Bell lands a shoulder strike that jolts his opponent's head backwards.
Warrior is trying to drag Bell to the mat but Bell just about manages to keep his footing. He used the cage to his advantage there.
Warrior looks winded!
Bell lands a short shot on the inside that snaps the head of Warrior backwards.
Bell lands a nice shot to the body.
Bell lands a right uppercut that snaps the head of Warrior backwards.
Bell scores with a hook to the body.
Warrior's head jolts backwards as he takes an uppercut right on the button!
The pace slowing considerably in the clinch, as Bell takes a break from that fighting nonsense to think about the finer things in life.
Warrior misses the knee to the body. Nice hip positioning from Bell.
And thats the end of the round the fighters go back to their corners.
Drake Bell dominated that round.
The cut man is working on Aussie Warrior's cut.
The minute break is over - no more time for sponges and pep talks - back to the action!

Warrior takes a shot right to the liver - Bas would have been proud of that punch.
Warrior fails to land the takedown.
It really doesn't seem like the step up in weight is hurting Bell here at all. He's more than holding his own against the bigger man.
Warrior fails in his attempt to clinch.
Bell lands with a shot to the body.
Bell with a hook.
Warrior changes levels and looks for a double leg takedown. Bell tries to avoid it but Warrior manages to keep hold of a leg and drag Bell to the ground. Bell escapes though and pops straight back up to his feet.
Bell thuds a left hand into Warrior's body.
Bell cracks a nice hook into Warrior's ribs.
Bell connects with a body shot.
We've had a slow start to the round here - hopefully the action picks up.
Warrior doesn't manage to clinch there - Bell circles away.
Bell is looking to counter punch.
Bell tests Warrior's chin there with a solid looking shot.
Bell scores with a hook.
Aussie Warrior is looking to throw some combinations by the looks of things.
That's one minute gone in the round.
Bell gets a clinch.
Warrior is breathing heavily.
Warrior tries to land knees in the clinch but Bell avoids the damage to the body.
Nice body punch from Bell.
Drake Bell has scored more points in the clinch so far.
Bell working some nice short punches in the clinch.
Warrior goes for a takedown in the clinch but Bell prevents it.
Drake Bell has stuffed three takedown attempts in the round now. That's going to take a lot out of Aussie Warrior.
Warrior letting Bell take a breather here.
Bell lands a right hand.
Warrior trying to stall but Bell improves his position.
Bell lands punches inside but they're not really causing much damage.
Bell blocks an elbow strike.
A short right from Bell.
Bell lands with a quick shot inside that doesn't really do much damage.
Bell is really dominating this fight. Is there anything that Warrior can do to turn this around?
Bell is pressed up against the cage. Warrior has hold of a leg and is looking to drag Bell down to the mat. Bell avoids the attempt though and has circled away. We're back to striking at a distance.
Warrior tries to clinch up.
Bell scores with a shot to the body.
Bell closes the distance and pushes Warrior back into the cage.
That's two minutes gone in the round.
The crowd are loving this. Great action here.
Bell stays in close to his opponent and throws a right hand to the body.
Bell escapes the clinch and we're back to striking.
Bell feints a straight left to the body, then turns around with a flashy move and hits Warriors jaw with a dramatic spinning back fist!
Warrior avoids the body shot from Bell.
Bell swinging wildly here.
Warrior takes one to the chin there.
Warrior tries to clinch up.
Nice cross by Bell.
Bell connects with a right hand. Warrior shakes it off.
Warrior gets cracked there but stands up to it.
Bell displays good takedown defense there as he swats away a double leg from Warrior.
That's three minutes gone in the round.
Warrior tries to close the distance and clinch up against the cage but Bell paws at him with a jab and circles away.
Bell throwing a counter right hand but Warrior manages to avoid it.
Bell has taken the fight to the clinch.
Bell lands a left hand that snaps the head of Warrior backwards.
A short left from Bell.
Bell lands a left hand.
Bell lands a body punch in the clinch.
Warrior letting Bell take a breather here.
Bell working some nice short punches in the clinch.
Still in the clinch, Bell scores with a nice short uppercut.
Bell digs a right hand underneath Warrior's ribcage. Warrior let out a lung full of air as it connected.
A right hand to the body from Bell.
Bell gets through Warrior's defenses to land a nice punch to the side of the head.

Warrior is rocked!
Bell lands a hook to the body. It's hard to tell if that hurt Warrior or not.
This has been an exciting period of action!
The referee calls for Bell to work.
Warrior tries to pull guard but Bell holds him up against the cage and eventually Warrior drops back down to his feet.
That's four minutes gone in the round.
A short uppercut from Bell.
Good body shot from Bell.
Warrior's head jolts backwards as he takes an uppercut right on the button!
Warrior is still on wobbly legs! Can Bell finish him?
Bell lands with a good tight uppercut to the head.
Bell lands a body punch - he's looking to wear down Warrior.
Bell looks like he'd prefer to be striking at range right now.
Bell lands a hook that snaps the head of Warrior backwards.
Bell pushes Warrior back against the cage and lands a hook to the side of the head.
The referee calls for Bell to work.
Bell cracks Warrior with a nice body shot.
Bell lands with a short head shot on the inside.
Bell lands a body punch in the clinch.
Bell lands a body punch in the clinch.
Bell lands a body punch - he's looking to wear down Warrior.
Bell creates a bit of space for himself and rocks Warrior with a big uppercut! Warrior tries to clinch up but Bell pushes him back against the cage and lands another monster strike that crumples Warrior to the mat! Warrior covers up and Bell unloads with more strikes until the referee steps in to end the bout!
Ladies and gentlemen, after 4:49 of round 2, we have a winner by way of TKO (Punches). Drake Bell!
|
|
|
|
|
|
|
|
|
|
|
|
|
|
|
|
|
|
|
|
|
|
|
| S |
C
A |
G |
S |
C
B |
G |
|
S |
C |
G |
|
energy
A | B |
|
hype
A | B |
|
pop
A | B |
|
mgr
A | B |
|
FIGHT
RATING
70% |
|
|
|
|
|
|
|
Undercard bout
|
Coming up we have a heavyweight MMA rules bout between Reinhardt Greenholt (ranked 0 p4p, 0 weight class) and Pete Lattimer (ranked 0 p4p, 0 weight class). Well, I have no idea who's going to take this one!
 |
|
 |
| 185 cm
19
230 lbs
0 - 1 - 0 |
|
190 cm
18
240 lbs
0 - 1 - 0 |
BJJ Purple Belt
Brawler
Granite chin |
|
BJJ White Belt
Excellent boxer
Determined |
|
| |
|
Ladies and gentlemen. This fight is 3 rounds, in the heavyweight division.
Introducing the fighter to my left, fighting out of the red corner.
With a record of
0 - 1 - 0, fighting out of The Island, Reinhardt Greenholt!
And introducing the fighter to my right, fighting out of the blue corner.
With a record of
0 - 1 - 0, fighting out of The Island, Pete Lattimer!
The judges for this bout are Bart Greer, David Hoff and Daniel Franklin.
The bell rings for round one and we are underway!
Greenholt moves into the clinch successfully.
Lattimer working on landing some head shots here - that one got through nicely.
Lattimer tries to pull guard but can't drag his opponent to the mat. Greenholt just stands there and leans against the cage.
Greenholt could do with losing a few pounds - he looks very soft around the mid section, to put it politely.
Lattimer blocks a punch to the side of the head.
Lattimer looks more muscular than last time we saw him. He must have been on the weights.
Greenholt controlling the action here for a moment.
Lattimer drops down looking for an ankle pick but Greenholt pulls his leg out and moves away.
Lattimer fails in his attempt to clinch.
Greenholt clinches up against the cage.
Lattimer has had enough of the clinch and is looking to separate.
We've had a slow start to the round here - hopefully the action picks up.
Greenholt pushes off and circles away, back to the middle of the mat.
Lattimer has Greenholt up against the cage in a clinch.
Greenholt has Lattimer pressed against the cage, preventing Lattimer from circling away and getting back to striking at range.
Greenholt manages to break the clinch.
That's one minute gone in the round.
Greenholt closes the distance and presses his opponent up against the cage.
Greenholt breaks the clinch.
Greenholt misses the shot to the body.
Lattimer is definitely looking for the counter takedowns here.
Greenholt keeps the fight on the outside.
Lattimer dives in and grabs Greenholt's left leg, looking for a takedown. Greenholt pushes down on Lattimer's head and hops out.
Reinhardt Greenholt has stuffed three takedown attempts in the round now. That's going to take a lot out of Pete Lattimer.
Greenholt gets to the clinch - let's see what his plan is here.
Lattimer avoiding damage.
Greenholt jumps guard but his hands slip and he falls flat on his back. Well, he's made himself look a right mug there, as Lattimer walks away with a smile on his face. Greenholt gets slowly back to his feet and shakes his head.
Lattimer looks for a takedown here. Will he get it? Greenholt is fending him off so far but Lattimer persists. Nope, Greenholt circles away and we're back to standing.
Lattimer gets his takedown attempt stuffed easily
and Greenholt counters with a body kick that brings a smile to the face of both fighters.
Lattimer tries to score a power double leg takedown but Greenholt sees that one coming and sprawls well. That will dishearten Lattimer somewhat.
That's two minutes gone in the round.
A low kick from Lattimer misses

and Greenholt counters with a driving takedown into guard. Nice work there by Greenholt.
Greenholt tries to stand but Lattimer is controlling from the bottom.
Lattimer is looking to stand back up... there's a bit of a scramble and Greenholt dives into side control.
We've seen a great period of action over the last minute or so - credit to both fighters for going all out!
Greenholt wants to stand but Lattimer is controlling his arm.
Lattimer is trying to buck Greenholt off.
Lattimer is positioning himself to get back to half guard.
Greenholt is staying tight to Lattimer's torso, preventing him from escaping.
That's three minutes gone in the round.
Greenholt looks up at the clock and then as Lattimer takes his cue and looks up at the clock too, Greenholt smacks him right in the chops with a big elbow! How rude!
Greenholt wants to stand but Lattimer has his arm trapped.
Lattimer looking for a sweep but Greenholt has passed into full mount! Oh no!
Greenholt landing strikes from the mount and Lattimer is in trouble!
Greenholt with some aggressive grappling here. He's looking for submissions here, rather than waiting for the opportunity to counter.
That's four minutes gone in the round.
Greenholt tucks in and makes sure he doesn't lose the dominant position.
Lattimer really doesn't want to stay on the ground with Greenholt. If he can't get it back to his feet, it's only a matter of time before he'll be tapping out.
Greenholt's ground tactics aren't going to win him many fans. Let's hope he's got fireworks for us if he gets back to his feet because he's not doing much on the ground.
The crowd thankful this round is nearly over.
Lattimer tries to get back to half guard but can't.
And thats the end of the round the fighters go back to their corners.
Reinhardt Greenholt dominated that round.
The minute break is over - no more time for sponges and pep talks - back to the action!
Greenholt throws a series of punches but Lattimer avoids them all with ease.
Greenholt gets in close and instigates a clinch.
Lattimer can't get the takedown.
Lattimer tries to pull guard but Greenholt won't allow it.
Lattimer wants a takedown but no success here.
Reinhardt Greenholt has stuffed three takedown attempts in the round now. That's going to take a lot out of Pete Lattimer.
Lattimer is looking to control Greenholt's arms but Greenholt gets an underhook and turns him. Now Lattimer has his back to the cage.
Lattimer is looking to take this one to the mat.
Greenholt decides to pull guard.
Greenholt is pulling down on Lattimer's head to control his posture.
We've had a slow start to the round here - hopefully the action picks up.
Greenholt throws a couple of weedy looking strikes off his back.
That's one minute gone in the round.
Lattimer wants to control from the top but Greenholt keeps moving.
Greenholt looking to sweep here. No luck so far.
Lattimer looking to pass the guard.
Lattimer is posturing up here but Greenholt has hold of an arm and he's gone for an armbar! Lattimer tries to roll out but it's too tight and Lattimer has to tap! Slick submission there by Greenholt!
Ladies and gentlemen, after 1:45 of round 2, we have a winner by way of Submission (Armbar). Reinhardt Greenholt!
|
|
|
|
|
|
|
|
|
|
|
|
|
|
|
|
|
|
|
|
|
|
|
| S |
C
A |
G |
S |
C
B |
G |
|
S |
C |
G |
|
energy
A | B |
|
hype
A | B |
|
pop
A | B |
|
mgr
A | B |
|
FIGHT
RATING
32% |
|
|
|
|
|
|
|
Co-main event
|
Coming up we have a middleweight MMA rules bout between Keith Blubb (ranked 0 p4p, 0 weight class) and Teofil Poplawski (ranked 0 p4p, 0 weight class). I'm sure you'll be fascinated to know that I was talking to some pointless Z list celebrity before the fight and he thought that Teofil Poplawski was going to win. Let's see if he was right.
 |
|
 |
| 178 cm
25
192 lbs
1 - 0 - 0 |
|
200 cm
25
191 lbs
2 - 0 - 0 |
BJJ White Belt
Solid Muay Thai
Big right hand |
|
Good takedowns
Counter fighter
Tends to cut |
|
| |
|
Ladies and gentlemen. This fight is 3 rounds, in the middleweight division.
Introducing the fighter to my left, fighting out of the red corner.
With a record of
1 - 0 - 0, fighting out of The Island, Keith Blubb!
And introducing the fighter to my right, fighting out of the blue corner.
With a record of
2 - 0 - 0, fighting out of The Island, Teofil Poplawski!
The judges for this bout are Dirk Anderson, Daniel Franklin and David Hoff.
The bell rings for round one and we are underway!
Blubb throws a jab but it's blocked by Poplawski.
Blubb thows a left - swing and a miss!
Poplawski takes a jab on the nose there. A little bit of blood seems to be coming out. Hopefully that won't affect his breathing.
Poplawski on the wrong end of an overhand right that came out of nowhere.
It looks like Teofil Poplawski has been cut.
Poplawski fails with a takedown attempt from distance.
Blubb uses good footwork to get in and out, landing a nice hook.
Poplawski is rocked!
Blubb knocks out Poplawski with a massive right hand! The ref tackles Blubb before he can follow up with any more strikes and that's it everyone. Blubb picks up the big W with a huge KO!
Ladies and gentlemen, after 0:37 of round 1, we have a winner by way of KO (Punch). Keith Blubb!
An out of breath and clearly excited Keith Blubb thanked Quark's for their help and support (and free stuff they sent him).
|
|
|
|
|
|
|
|
|
|
|
|
|
|
|
|
|
|
|
|
|
|
|
| S |
C
A |
G |
S |
C
B |
G |
|
S |
C |
G |
|
energy
A | B |
|
hype
A | B |
|
pop
A | B |
|
mgr
A | B |
|
FIGHT
RATING
87% |
|
|
|
|
|
|
|
Main event
|
Coming up we have a heavyweight MMA rules bout between Christos Bitchslapis (ranked 0 p4p, 0 weight class) and Tauli Tasvetet (ranked 0 p4p, 0 weight class). Bitchslapis comes into the arena with Colossus of Rhodes blaring out of the sound system. Tauli Tasvetet has the power to score a knockout today if he connects clean with Christos Bitchslapis's chin.
 |
|
 |
| 196 cm
25
236 lbs
2 - 0 - 0 |
|
225 cm
25
225 lbs
2 - 0 - 0 |
BJJ Blue Belt
Basic striking
Big heart |
|
BJJ Blue Belt
Basic striking
Solid chin |
|
| |
|
Ladies and gentlemen. This fight is 5 rounds, for the heavyweight championship of the world!
Introducing the champion to my left, fighting out of the red corner.
With a record of
2 - 0 - 0, fighting out of The Island, Christos Bitchslapis!
And introducing the challenger to my right, fighting out of the blue corner.
With a record of
2 - 0 - 0, fighting out of The Island, Tauli Tasvetet!
The judges for this bout are Winston Alpacca, Bart Greer and Daniel Franklin.
The bell rings for round one and we are underway!
Tasvetet tries to close the distance and clinch up but Bitchslapis swats him away and circles back towards the center.
Bitchslapis shoots in and gets a takedown into Tasvetet's guard.
Bitchslapis trying to control the position from guard on top but Tasvetet is wriggling around, looking for whatever he can.
The fighters are pressed up against the cage, both looking to find a bit of space to work.
Tasvetet wants to sweep but no luck.
Bitchslapis wants to pass the guard but Tasvetet is keeping the position.
Tasvetet pulls Bitchslapis in close to his closed guard and prevents Bitchslapis from doing any damage or advancing position.
We've had a slow start to the round here - hopefully the action picks up.
Bitchslapis advances position into side control!
Tasvetet is trying to get back to half guard.
Bitchslapis is moving around in side control but his primary objective seems to be to maintain the position.
That's one minute gone in the round.
Bitchslapis trying to control the position but Tasvetet is working away.
Tasvetet is trying to control Bitchslapis's posture but Bitchslapis avoids it.
Bitchslapis trying to control the action but Tasvetet is working from the bottom.
Tasvetet keeps Bitchslapis under control for a moment.
Tasvetet stops Bitchslapis from passing to mount.
Tasvetet can't do much from the bottom here.
That's two minutes gone in the round.
My god... these two guys really need to pick up the pace or everyone will leave to go get a beer.
Tasvetet gets one leg under and gets the fight to half guard.
Bitchslapis is just sitting in half guard, waiting for something to happen.
Bitchslapis is keen to just control but Tasvetet is a slippery customer.
Tasvetet tries to get to full guard but Bitchslapis has control of the leg.
Tasvetet wants to control but Bitchslapis is keeping busy.
Tasvetet wants to get back to full guard.
Tasvetet moves into full guard.
Bitchslapis working in close now, lands a nice elbow to the side of Tasvetet's head.
That's three minutes gone in the round.
Bitchslapis is taking a break and basically stalling. The referee will not allow him to do that for long.
Tasvetet looking for a sweep. Not yet Tasvetet, not yet.
Bitchslapis sitting in guard, not really doing much.

The ref stands the fighters back up due to a lack of activity.
Tauli Tasvetet seems to be the more aggressive standup fighter in this bout.
Bitchslapis closes the distance and clinches.
Tasvetet digs a right hand underneath Bitchslapis's ribcage. Bitchslapis let out a lung full of air as it connected.
Tasvetet throws a hook to the body. More of an arm punch but it's all scoring with the judges.
Tasvetet blocks the elbow strike.
Bitchslapis pushes off and fires off an elbow that misses, before clinching up again, against the cage.
That's four minutes gone in the round.
Tasvetet taking a break, stalling in the clinch.
Bitchslapis tries a body shot but Tasvetet blocks it.
A head punch blocked on the inside by Bitchslapis.
Bitchslapis tries to land knees in the clinch but Tasvetet avoids the damage to the body.
A quick uppercut on the inside from Tasvetet.
Tasvetet misses with a punch on the inside.
Tasvetet's coach down at The Island Gym was telling us pre-fight that they have been working on Tasvetet's balance. Obviously they view that as a key factor in the outcome of this fight.
Bitchslapis looking for a takedown.
Tasvetet blocks an uppercut.
A short right hand to the side of the head by Tasvetet.
Tasvetet pushes Bitchslapis back against the cage and lands a hook to the side of the head.
A quick uppercut on the inside from Tasvetet.
Bitchslapis has picked Tasvetet up - he's going for a ride! Bitchslapis dumps his opponent to the mat with a thud and settles into half guard.
We've seen a great period of action over the last minute or so - credit to both fighters for going all out!
Tasvetet trying to control but Bitchslapis postures up.
The crowd thankful this round is nearly over.
Tasvetet desperately trying to maintain half guard.
And thats the end of the round the fighters go back to their corners.
That was a close round but I would say that Christos Bitchslapis will probably get the nod.
That's the end of the round. The referee orders the cornermen out of the cage so we can get back down to business.
Tasvetet rushes Bitchslapis and presses him up against the cage.
Bitchslapis taking a breather.
Tasvetet swings away with an uppercut that misses.
Tasvetet controlling the action here for a moment.
Bitchslapis tries to land a knee to the body but he is off balance and Tasvetet avoids it.
Bitchslapis tries to land a knee to the head but misses.
Bitchslapis misses with a knee strike.
Bitchslapis misses the knee to the body. Nice hip positioning from Tasvetet.
We've had a slow start to the round here - hopefully the action picks up.
A head punch blocked on the inside by Bitchslapis.
Tasvetet stops a takedown attempt from Bitchslapis.
Tasvetet prevents a takedown attempt there.
Tasvetet fails to land with a short punch on the inside.
Tasvetet lands a nice looking hook to the body, against the cage.
Tasvetet is a painfully thin specimen of a man. You do wonder whether a good body kick would snap him clean in two.
That's one minute gone in the round.
Tasvetet scores with a nice hook to the head.
Tasvetet lands with a quick shot inside that doesn't really do much damage.
Bitchslapis tries to land a knee to the body but he is off balance and Tasvetet avoids it.
A hook to the body from Tasvetet.
Both fighters are absolutely exhausted here.
Tasvetet pushes Bitchslapis back against the cage and lands a hook to the side of the head.
A nice left hand lands by Tasvetet.
Tasvetet lands with a left to the head.
Tasvetet gets through Bitchslapis's defenses to land a nice punch to the side of the head.
Tasvetet lands a shoulder strike that jolts his opponent's head backwards.
Tasvetet lands a shoulder strike.
Bitchslapis is rocked!
Tasvetet throws a big uppercut that drops Bitchslapis! More strikes from Tasvetet and the referee jumps in to stop the fight! Bitchslapis lies dazed against the cage as Tasvetet celebrates with his cornermen!
Ladies and gentlemen, after 1:45 of round 2, we have a winner by way of TKO (Strikes). Tauli Tasvetet!
Tauli Tasvetet is the new heavyweight champion!
During a confident post fight interview, Tauli Tasvetet thanked all his fans. He seemed very genuine when describing how motivated his fans keep him.
|
|
|
|
|
|
|
|
|
|
|
|
|
|
|
|
|
|
|
|
|
|
|
| S |
C
A |
G |
S |
C
B |
G |
|
S |
C |
G |
|
energy
A | B |
|
hype
A | B |
|
pop
A | B |
|
mgr
A | B |
|
FIGHT
RATING
31% |
|
|
|
|
|
|
|
|
|
|
