 |
MMAHelsinki - 112 PBP Commentary |
Undercard bout
|
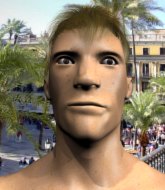
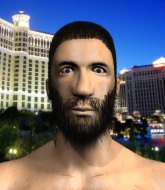
Coming up we have a welterweight MMA rules bout between Willem Kriel (ranked 0 p4p, 0 weight class) and Ikuhisa Matsumoto (ranked 0 p4p, 0 weight class). Kriel comes to the cage accompanied by Jack Parow & Freshlyground - Army Of One. Ikuhisa Matsumoto has the better chin. Will he look to stand and bang today?
 |
|
 |
| 178 cm
24
183 lbs
6 - 7 - 0 |
|
180 cm
23
181 lbs
8 - 10 - 0 |
Good wrestling
Dangerous knees
Cardio machine |
|
Good wrestler
World class boxer
Powerful |
|
| |
|
Ladies and gentlemen. This fight is 3 rounds, in the welterweight division.
Introducing the fighter to my left, fighting out of the red corner.
With a record of
6 - 7 - 0, fighting out of New York, Willem Kriel!
And introducing the fighter to my right, fighting out of the blue corner.
With a record of
8 - 10 - 0, fighting out of Las Vegas, Ikuhisa Matsumoto!
The judges for this bout are Arvi Lind, Ben Zyskovitsi and Tarja Halkonen.

The bell rings for round one and we are underway!
A chopping leg kick lands by Kriel.
Matsumoto fails with an attempt to clinch.
Matsumoto misses with a right hand
and Kriel counters with a leg kick that reverborates around the arena.
Kriel moves his head to the side to avoid a jab but walks straight into a cross.
Matsumoto tries to close the distance and clinch up against the cage but Kriel paws at him with a jab and circles away.
Kriel appeared to be looking to counter that last move with a leg kick.
Matsumoto misses the shot to the body.
As Matsumoto looks to move away, Kriel throws a big counter combo but Matsumoto just gets out of the way.
A jab lands there for Kriel.
Matsumoto looks more muscular than last time we saw him. He must have been on the weights.
We've had a slow start to the round here - hopefully the action picks up.
Kriel is looking to score with low kicks.
Matsumoto misses with a left hand
and Kriel counters with a crisp hook to the side of the head.

It looks like Ikuhisa Matsumoto has been cut.

That's one minute gone in the round.

Kriel drops Matsumoto with a hook right on the temple. He thinks about going to the ground but Matsumoto looks back up at him and smiles so Kriel waves him back to his feet - he obviously thinks he can knock him out after that shot landed.

Matsumoto is rocked!
Kriel lunges in with a left hook that violently twists Matsumoto head around and knocks him out cold! Kriel hops onto the cage and yells out at the top of his lungs - Yeeeeeeeeaaaaaaaaah! They're showing the replay on the big screens now; that was nasty! I hope one of the photographers got a good shot of it.
Ladies and gentlemen, after 1:17 of round 1, we have a winner by way of KO (Punch). Willem Kriel!
A very excited looking Willem Kriel rambled incoherently for about 5 minutes post fight about how awesome he is. It was kinda funny for a while but then everyone got annoyed.
|
|
|
|
|
|
|
|
|
|
|
|
|
|
|
|
|
|
|
|
|
|
|
| S |
C
A |
G |
S |
C
B |
G |
|
S |
C |
G |
|
energy
A | B |
|
hype
A | B |
|
pop
A | B |
|
mgr
A | B |
|
FIGHT
RATING
69% |
|
|
|
|
|
|
|
Undercard bout
|
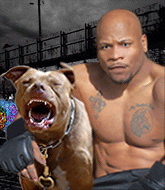
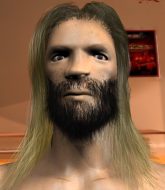
Coming up we have a super heavyweight MMA rules bout between Bruno Brown (ranked 0 p4p, 0 weight class) and Estafan Atunes (ranked 0 p4p, 0 weight class). Atunes has chosen Fireball as his entrance music. Estafan Atunes has the better chin. Will he look to stand and bang today?
 |
|
 |
| 195 cm
24
260 lbs
5 - 0 - 0 |
|
225 cm
26
278 lbs
6 - 4 - 0 |
Good wrestling
World class boxer
Insanely flexible |
|
Good wrestler
World class boxer
Fast |
|
| |
|
Ladies and gentlemen. This fight is 5 rounds, for the super heavyweight championship of the world!
Introducing the champion to my left, fighting out of the red corner.
With a record of
5 - 0 - 0, fighting out of Las Vegas, Bruno Brown!
And introducing the challenger to my right, fighting out of the blue corner.
With a record of
6 - 4 - 0, fighting out of New York, Estafan Atunes!
The judges for this bout are Matti Vanhoillinen, Roosa Järviläinen and Arvi Lind.
The bell rings for round one and we are underway!
Brown connects with a hook to the side of his opponent's head.
Brown tries to land with a swinging hook to the body but Atunes was well out of range. Poor timing from Brown.
Atunes defending well as Brown loads up on a big left hand.
Atunes tries to clinch up against the cage, rushing in to close the distance. Brown manages to break the clinch and circles back to the middle of the mat.
Atunes takes a punch right to his stomach. That took the wind out of him momentarily.
Atunes avoids a kick to the body.
A head kick by Atunes misses
and Atunes takes a counter punch right on the button for his troubles.
Atunes throws a head kick but Brown moves out of range.
Brown tries a head kick but it misses.
Atunes throws a head kick that misses and slips in the process. He scrambles back to his feet and the fighters circle.
Atunes tries a head kick but it misses.
Brown throws a jab when Atunes was well out of range.
Atunes throws out a token jab with nothing on it.
It looked like Brown was trying to counter with a body shot coming off that last attack from Atunes.
Brown dips to his left and cracks Atunes with an uppercut!
Brown blocks a head kick by Atunes.
Estafan Atunes seems to be the more aggressive standup fighter in this bout.
Brown throws a head kick that misses and slips in the process. He scrambles back to his feet and the fighters circle.
We've seen a great period of action over the last minute or so - credit to both fighters for going all out!

Atunes closes the distance and clinches.
Brown pushes Atunes back against the cage and unloads with a body punch.
Atunes looks winded!
Brown throws a head punch that misses.
Brown has a couple of punches blocked by Atunes.
That's one minute gone in the round.
Brown lands with a left to the head.
Brown lands a body punch in the clinch.
Brown presses Atunes against the cage and delivers a mid-strength body shot.
Brown makes some space for himself and lands an uppercut.
Brown presses Atunes against the cage and delivers a mid-strength body shot.
A right hand to the body from Brown.
Brown scores with a shot to the side of Atunes's head.
It looks like Estafan Atunes has been cut.
Brown misses with the head strike.
Atunes misses with a short punch on the inside.
A head punch blocked on the inside by Atunes.
A body shot lands from Brown.
Brown lands a nice shot to the body.
Brown tries a body shot but Atunes blocks it.
Brown lands with a left to the head.
A shot in the inside from Brown.
Brown lands a body punch - he's looking to wear down Atunes.
The fans in attendance giving it up for the two fighters, who have really let it all hang out in the last minute or so!
Brown lands a hook that snaps the head of Atunes backwards.
Atunes is a painfully thin specimen of a man. You do wonder whether a good body kick would snap him clean in two.
A quick uppercut on the inside from Brown.
Atunes tries a shoulder strike but it doesn't do any damage.
Atunes misses with some punches.
I was talking to Brown's coach per-fight and he was telling me that they'd been working on the clinch in the runup to this fight.

That's two minutes gone in the round.
Brown lands a body punch in the clinch.
Brown scores with a shoulder strike.
A nice left hand lands by Brown.
We can't be sure of the tactics at this early stage but we have heard that Atunes has been working on his takedowns a lot in the buildup to the fight and we can only assume he's going to look to take this to the mat.
Brown lands punches inside but they're not really causing much damage.
Brown cracks Atunes with a nice body shot.
A short uppercut from Brown.
Brown lands a right hand.
Brown lands a body punch in the clinch.
Brown drops Atunes onto one knee with a big uppercut from the clinch! Atunes is propped up by the cage and works his way back to his feet!
Atunes is rocked!
Brown lands a body shot.
Atunes is still on wobbly legs! Can Brown finish him?
Brown lands on the inside with an uppercut.
Brown lands an uppercut in the clinch that drops Atunes to his knees! Brown keeps firing more shots against his stricken opponent and the referee jumps in to save him!
Ladies and gentlemen, after 2:42 of round 1, we have a winner by way of TKO (Strikes). Bruno Brown!
Bruno Brown retains his super heavyweight title!
After winning the bout, Bruno Brown thanked all his fans and promised he'd do even better in his next fight. The crowd seemed to love his humility.
|
|
|
|
|
|
|
|
|
|
|
|
|
|
|
|
|
|
|
|
|
|
|
| S |
C
A |
G |
S |
C
B |
G |
|
S |
C |
G |
|
energy
A | B |
|
hype
A | B |
|
pop
A | B |
|
mgr
A | B |
|
FIGHT
RATING
67% |
|
|
|
|
|
|
|
Co-main event
|
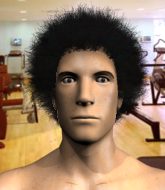
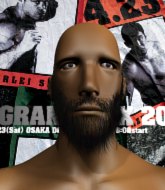
Coming up we have a light heavyweight MMA rules bout between Jorma Joukahainen (ranked 0 p4p, 0 weight class) and Patrick Hager (ranked 0 p4p, 0 weight class). Jorma Joukahainen has the edge in experience - let's see if he can make that count tonight.
 |
|
 |
| 205 cm
28
220 lbs
13 - 5 - 0 |
|
183 cm
21
224 lbs
5 - 0 - 0 |
BJJ Purple Belt
Excellent boxer
Cardio machine |
|
Good wrestler
Counter fighter
Good gas tank |
|
| |
|
Ladies and gentlemen. This fight is 3 rounds, in the light heavyweight division.
Introducing the fighter to my left, fighting out of the red corner.
With a record of
13 - 5 - 0, fighting out of London, Jorma Joukahainen!
And introducing the fighter to my right, fighting out of the blue corner.
With a record of
5 - 0 - 0, fighting out of Las Vegas, Patrick Hager!
The judges for this bout are Arvi Lind, Roosa Järviläinen and Johanna Lukiainen.
The bell rings for round one and we are underway!
Joukahainen works his jab well there, keeping his opponent at a distance.
Joukahainen pushing out the jab but it's not landing.
Hager tries to counter by closing the distance.
Hager staying out of range there.
A telegraphed takedown attempt from Hager is defended easily by Joukahainen.
Joukahainen stuffs a takedown. It's all about dictating where the fight takes place and Joukahainen wants it to stay on the feet.
Hager uses good footwork to avoid the strikes from Joukahainen.
Joukahainen stuffs a takedown. It's all about dictating where the fight takes place and Joukahainen wants it to stay on the feet.
Jorma Joukahainen has stuffed three takedown attempts in the round now. That's going to take a lot out of Patrick Hager.
Hager fails with the takedown.
Joukahainen throws a big counter combination but Hager scrambles out of danger and avoids any damage.
We've had a slow start to the round here - hopefully the action picks up.
Joukahainen connects with a good right hand that stumbles Hager. Hager circles away out of range and recomposes himself.
Joukahainen takes a swing at Hager's ribcage but misses.
Joukahainen lands a big right hand that sends Hager crashing to the mat! Joukahainen stays standing though and waves Hager back to his feet!
Hager is rocked!
That's one minute gone in the round.
Joukahainen finds Hager's off switch, with a big overhand right that connects perfectly to the side of the head! Hager flops back against the cage, eyes gazing into the distance. Joukahainen lands an unnecessary shot before the referee has time to step in and end the fight. Brutal stuff but I'm sure Hager will be OK.
Ladies and gentlemen, after 1:09 of round 1, we have a winner by way of KO (Punch). Jorma Joukahainen!
|
|
|
|
|
|
|
|
|
|
|
|
|
|
|
|
|
|
|
|
|
|
|
| S |
C
A |
G |
S |
C
B |
G |
|
S |
C |
G |
|
energy
A | B |
|
hype
A | B |
|
pop
A | B |
|
mgr
A | B |
|
FIGHT
RATING
70% |
|
|
|
|
|
|
|
Main event
|
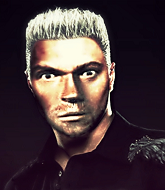
Coming up we have a featherweight MMA rules bout between Khal Stark (ranked 0 p4p, 0 weight class) and Jacob Whitehorse (ranked 0 p4p, 0 weight class). Stark's entrance music is Relentless Beating by Cannibal Corpse. A fine choice. Whitehorse has chosen The Builders and The Butchers - Black Dresses as his entrance music. Jacob Whitehorse has the eye of the tiger tonight.
 |
|
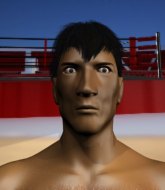 |
| 174 cm
29
158 lbs
14 - 5 - 0 |
|
161 cm
26
140 lbs
13 - 2 - 0 |
Good wrestling
Excellent boxer
Granite chin |
|
Excellent grappler
Excellent MT
Good gas tank |
|
| |
|
Ladies and gentlemen. This fight is 5 rounds, for the featherweight championship of the world!
Introducing the champion to my left, fighting out of the red corner.
With a record of
14 - 5 - 0, fighting out of New York, Khal Stark!
And introducing the challenger to my right, fighting out of the blue corner.
With a record of
13 - 2 - 0, fighting out of Los Angeles, Jacob Whitehorse!
The judges for this bout are Arvi Lind, Johanna Lukiainen and Ben Zyskovitsi.
The bell rings for round one and we are underway!
Stark swinging wildly here.
Whitehorse scores with a sloppy punch to the body. Not much technique there but it did the business.
Whitehorse drives through and clinches with Stark against the cage.

Stark breaks the clinch and we return to the middle of the mat.
Khal Stark seems to be the more aggressive standup fighter in this bout.
Stark misses with a body punch
and Whitehorse counters with a crisp hook to the side of the head.
Left hook, right uppercut from Whitehorse.
Whitehorse throws a body kick that digs right into the meat.
Stark throws a wild combination but nothing lands.
Stark throws a push kick but Whitehorse slaps the foot to one side.
Stark fakes low and throws an overhand right that catches Whitehorse on the side of the head.
The crowd are loving this. Great action here.
Stark misses with a double jab.
Whitehorse tries to land a front kick but Stark steps back. That was a bit too telegraphed.
Stark takes a shot right to the bread basket.
Whitehorse takes a step back and watches a body kick go sailing past his mid section.
Whitehorse drops down looking to force a counter takedown but Stark defends it well.

The fight moves into the clinch position.
Whitehorse goes for a body shot but it's blocked.
Stark pushes off and circles away, back to the middle of the mat.
That's one minute gone in the round.
Stark tries to clinch but Whitehorse is having none of it.
Stark tries a switch kick but it misses it's target.
Whitehorse tries to clinch up but Stark circles away and keeps his distance.
Stark tries to bum rush Whitehorse with a series of wild strikes but Whitehorse uses good footwork to avoid the assault.
Stark misses with a wild combination.
Stark looks to throw a body kick

and Whitehorse counters with a takedown into side control.
Stark prevents Whitehorse from moving into mount.

Whitehorse is looking for a kimura. He might have it! No, Stark has escaped the position, nice work there.
Whitehorse is looking to take a break and control but Stark is keeping him honest, looking to work from the bottom.
That's two minutes gone in the round.
We've been hearing good reports from Stark's training camp. Apparently he has been rolling around with some good quality BJJ practitioners and has been sharpening his skills. Let's see if that has an impact on the fight today.
Whitehorse throws a knee to the body but it doesn't do much damage.
Stark is looking for a sweep.
Whitehorse fails to land a wild elbow strike.
Whitehorse taking a breather here.
The fighters are pressed up against the cage, both looking to find a bit of space to work.
An elbow from Whitehorse crashes against the mat.
Whitehorse lands a decent elbow from side control.
Whitehorse with the ground and pound but Stark regains half guard under the barage of strikes.
Fantastic stuff here - a very entertaining period of action, which has drawn cheers from the crowd.
Whitehorse trying to control from half guard but Stark is working away.

That's three minutes gone in the round.
Stark regains full guard. Nicely done.
Whitehorse has the superior BJJ but he's also working some ground strikes into his gameplan.
Stark preventing the ground and pound from doing any damage.
Whitehorse looking to sit in guard and control but Stark gets the butterfly guard and sweeps. He's now in the guard on the top.

A big thud reverberates around the arena there as Stark accidentally thumps the mat. Hopefully he's not broken his hand.
Whitehorse is pulling down on Stark's head. It's preventing any offense from Stark, at least for the moment.
Whitehorse trying to control the position.
Stark trying to control but Whitehorse is working from the bottom.

That's four minutes gone in the round.
Whitehorse looking to control the pace of the fight rather than finish it.
Stark throwing shots from guard but he's hitting more mat than opponent.
Stark stopping the sweep attempt from Whitehorse.
Stark pressing down on his opponent's thigh, looking to pass guard. Whitehorse is keeping the position for now.
We must be close to a standup if these guys don't pick up the pace.

Stark has gone for a leg lock! Whitehorse slips out almost immediately though and dives into Stark's guard.

Whitehorse passes easily into side control. Nice work.
And thats the end of the round the fighters go back to their corners.
A close round but Jacob Whitehorse will probably get the nod.
The fighters get back to their feet, the hooter sounds and we're back to the action!

Whitehorse misses with a hook.
Whitehorse checks a leg kick.
A slow jab from Whitehorse misses its intended target.
Whitehorse fakes a head shot and lands one to the body.
Stark will need to tighten up his combinations if he doesn't want to gas himself out, swinging at thin air.
Stark tries to score with a leg kick but it misses it's target.
Stark comes forward and lands a shot to the body, then darts back out of range.
Whitehorse misses with a body kick.
Stark scores with a jab. Whitehorse acknowledges it with a nod of the head.
Stark attempts a low kick but it misses it's target.
Whitehorse closes the distance and lands a one-two.
Whitehorse moves out of range of the body kick from Stark.
Whitehorse tries to counter by closing the distance.
Whitehorse takes a big uppercut there. He seems a bit wobbly but no, he's OK.
Fantastic stuff here - a very entertaining period of action, which has drawn cheers from the crowd.
Whitehorse tries to shoot in for a takedown. He's got hold of a leg but Stark swivels and escapes.
Whitehorse uses some good footwork to avoid the body shot by Stark.
Whitehorse throws out a token jab with nothing on it.
Stark throws a low kick but it's checked well by Whitehorse.
Stark backing away here, and Whitehorse unleashes a leg kick that just misses.
Stark looks to score with a jab to the body but Whitehorse is just out of range.
That's one minute gone in the round.
Stark finds nothing but air with that leg kick attempt.
Stark tries a switch kick but it misses it's target.
Stark throws a jab to the body, straight down the pipe. Boom. That sent Whitehorse stumbling backwards but he manages to regain his composure quickly.
Whitehorse misses with a body shot.
Whitehorse loads up on a big right hand but Stark slips the punch.
Whitehorse avoids the head kick by Stark.
Stark tries to clinch but Whitehorse moves out of range.
Whitehorse takes a head kick and keeps coming.
Stark is looking to clinch.
Whitehorse lands a jab to Stark's midsection.
Stark ducks under an overhand right and circles away with a smile on his face.
Stark looked to counter that last move with a leg kick but didn't pull the trigger.
Whitehorse takes an uppercut right on the jaw but it doesn't phase him.
Whitehorse checks a leg kick.
Stark throws a body kick but he was well out of range there.
Stark changes levels and scores with a jab to the body.
Stark takes a jab right on the kisser.
Fantastic stuff here - a very entertaining period of action, which has drawn cheers from the crowd.
Stark attempts a low kick but it misses it's target.
Whitehorse clinches with his opponent.
Whitehorse scores with a shot to the side of Stark's head.
That's two minutes gone in the round.
Whitehorse misses with a body punch.
Stark is trying to stall.
Whitehorse lands a right uppercut that snaps the head of Stark backwards.
Stark blocks an uppercut.
Whitehorse misses with a shot to the kidneys.
Stark escapes the clinch and we're back to striking.
Stark misses with a leg kick.
Stark wants to land a leg kick but Whitehorse is out of range.
Whitehorse looks to score with a jab to the body but Stark is just out of range.
Stark throws a head kick that misses.
Whitehorse tries to clinch but Stark moves out of range.
Stark keeps the fight on the outside.
Whitehorse dances in quickly and lands a nice inside leg kick on Stark. That did some damage!
Whitehorse shoots in for a takedown but Stark shows good takedown defense.
Whitehorse moves out of range of the body kick.
Whitehorse now looks to counter with a shot at the body.
That's three minutes gone in the round.
Whitehorse looking to shoot here. He's gone for it and he's landed a takedown into side control! Oh, that's bad for Stark!

Stark throws his opponent off and manages to get back to his feet! Nicely done!
Khal Stark is winning the standup battle so far.
Well, he's not going to score with shots like that. A lazy body kick attempt from Whitehorse.
Stark fails to land with a series of punches.
Whitehorse tries a counter takedown but it's more of a dummy move, and he uses it to push himself away.
Whitehorse checks a leg kick.
Khal Stark is looking to keep the fight on the feet at all costs.
Whitehorse closes the distance, clinches up and gets a nice trip takedown into side control. Very smooth.
The fans in attendance giving it up for the two fighters, who have really let it all hang out in the last minute or so!
Whitehorse working the body and head with strikes.
Whitehorse tries to cartwheel into mount but he doesn't manage it.
Stark can't do much from the bottom here.
The ground and pound from Whitehorse seems to be hitting the mat more than his opponent.
That's four minutes gone in the round.
Stark holds on to Whitehorse's head and controls the position momentarily.
Stark is trying to control Whitehorse's posture but Whitehorse avoids it.
Stark trying to remain calm as Whitehorse controls from the top position.
Whitehorse looking to punish the body of his opponent here but Stark is avoiding damage well.
Stark is not content to let Whitehorse control the position.
Whitehorse landing with strikes to the head and body from side control.
Whitehorse throwing strikes but missing, from side control.
Whitehorse slows the pace down.
Whitehorse misses with an attempted head punch from side control.
And thats the end of the round the fighters go back to their corners.
That was a close second round but I would say that Khal Stark will probably get the nod.
The fighters' corners scream their final instructions, as the referee calls time. Here we go, back to the action!

Stark moves into range and lands a nice leg kick.
Stark jabs at Whitehorse's body.
Stark throws a leg kick
and Whitehorse counters with a nice shoot takedown that brings the fighters to the ground.
Whitehorse looking to pass the guard.
Whitehorse throws a big elbow that misses.
Stark is trying to stand up but he's not managed so far.
Whitehorse trying to control the position from guard on top but Stark is wriggling around, looking for whatever he can.
We've had a slow start to the round here - hopefully the action picks up.
Stark pushes Whitehorse off for just long enough to get back to his feet. Very athletic spring there.
Whitehorse throws a low kick, looking for Stark's leg but Stark calmly moves out of range.
That's one minute gone in the round.
Stark attempts a leg kick but it's missed by a good margin.
Stark looks to score with a jab to the body but Whitehorse is just out of range.
Stark takes a nice looking leg kick right on the meat of his thigh there.
Whitehorse fakes with an overhand right and moves in to clinch with Stark, pushing him back against the cage.
Whitehorse misses with a hook from the clinch.
Whitehorse swings wildly with an uppercut but Stark uses good head movement to avoid it.
Stark working hard to break the clinch.
Stark is trying to work out of this bad position, with his back against the cage.
Stark is stalling here. The referee will be looking to step in if he doesn't pick up the pace.
Stark has had enough of the clinch but Whitehorse keeps him there for the moment.
Whitehorse misses the knee to the body. Nice hip positioning from Stark.
Stark tries to circle away but Whitehorse has him pinned against the cage.
Stark trying to land knees to the body.
That's two minutes gone in the round.
Stark blocks a knee to the body. He'll have a nicely bruised forearm in the morning.
Stark throws a hook to the body. More of an arm punch but it's all scoring with the judges.
With the fighters up against the cage, Stark throws an elbow but misses.
Whitehorse goes for a body shot but it's blocked.
Stark misses with an elbow strike.
An uppercut on the inside fails to land for Stark.
A head punch blocked on the inside by Whitehorse.
Whitehorse is working for a takedown up against the cage. He can't get it on this occasion though.
Whitehorse tries to land a shot to the body but it's blocked.
Whitehorse throws a blind hook that connects with the side of Starks head.
Whitehorse tries to land a shot to the body but it's blocked.
Whitehorse pushes Stark back against the cage and unloads with a body punch.
Whitehorse tries to throw a body punch but Stark avoids it by throwing Whitehorse back against the cage.
Whitehorse has Stark pressed up against the cage and is working for takedown. Stark manages to improve position though and keeps the fight standing.
That's three minutes gone in the round.
Stark lands a body punch - he's looking to wear down Whitehorse.
Whitehorse misses with a punch on the inside.
Whitehorse can't find room to land a body shot as Stark controls the action.
Stark breaks the clinch and we're back to striking at distance.
Stark throws out a leg kick but Whitehorse moves out of range and Stark only half commits.
Stark takes a jab on the nose there. A little bit of blood seems to be coming out. Hopefully that won't affect his breathing.
Stark avoids the body shot from Whitehorse.
A shot to the liver by Whitehorse. Beautiful body shot.
A shot to the liver by Whitehorse. Beautiful body shot.
Whitehorse checks a low kick. Bone on bone - not my idea of a good time.
Whitehorse checks the leg kick.
Whitehorse connects with a body shot that sends Stark's belly button to the back.
Whitehorse takes one to the side of the head.
Whitehorse dodges the punch combination from Stark.
Stark throws a decent looking leg kick but it doesn't land clean.
That's four minutes gone in the round.
Stark ducks down and throws a hook to the body but Whitehorse moves away.
Whitehorse lands a leg kick that knocks Stark off balance momentarily.
This is a great period of action - very entertaining stuff!
Stark throws a head kick that misses
and Stark takes a counter punch right on the button for his troubles.
Stark is looking to wear down Whitehorse with body shots, infact he's throwing more body shots than head shots at the moment.
Stark scores with a hook.
Whitehorse shoots in for a takedown and gets it. Let's see what he's got on the mat.
Whitehorse stands up over Stark, holding his feet. He dives back in and lands a decent shot to the head.
Whitehorse lands a couple of decent looking shots.
Whitehorse stands up and looks to throw the legs aside to pass to side control. Stark swivels though and keeps the full guard.
Stark will need to keep those long limbs tucked in whilst he's on the ground, to prevent any submissions.
Whitehorse lands a couple of elbows.
Whitehorse's corner is telling him to maintain position.
Whitehorse tries to free his leg and advance position but Stark is retaining full guard.
The ref warns both fighters not to hold the cage as they work up against the meshing.
Stark can't keep his opponent in guard - Whitehorse advances to half guard, no doubt looking to mount.
Stark is defending against the submission attempts here by Whitehorse.
And thats the end of the round the fighters go back to their corners.
A close third round but Jacob Whitehorse just about did enough to take it.
OK. That's time! The bell goes and we're back to the action.

Stark misses with an attempted mid kick.
Stark is using his height advantage well here, landing a good percentage of his punches.
Stark misses with a body shot. Nice footwork from Whitehorse.
Whitehorse tries to clinch but is not successful on this occasion.
Stark pulls out of a head kick attempt.
Stark throws a right and a left that both miss.
Stark takes a solid shot to the body. That one hurt him but he's trying not to show it.
Stark is looking to chop away at Whitehorse's legs.
Good work by Stark as he checks the leg kick.
Whitehorse looks to score with a jab to the body but Stark is just out of range.
Stark misses with an uppercut
and Whitehorse counters with a nice uppercut.
Whitehorse avoids the head kick by Stark.
A head kick by Stark misses
and Whitehorse counters with a nice double leg into guard.
A big thud reverberates around the arena there as Whitehorse accidentally thumps the mat. Hopefully he's not broken his hand.
Whitehorse postures up to throw the ground and pound strikes but they don't connect.
Whitehorse trying to control the position from guard on top but Stark is wriggling around, looking for whatever he can.
Stark keeping full guard, as Whitehorse tries to pass.
That's one minute gone in the round.
Whitehorse not doing a lot at the moment. He'll have to show some more aggression or the fight will get stood up.
Whitehorse tries to free his leg and advance position but Stark is retaining full guard.
Stark wants to sweep here but Whitehorse controlling him for the moment.
Stark keeping moving, preventing Whitehorse from controlling successfully.

The ref stands the fighters back up due to a lack of activity.
Whitehorse shakes his hands off, looking to compose himself, but takes a jab to the jaw whilst he does it.
Whitehorse looks for a takedown here. Will he get it? Stark is fending him off so far but Whitehorse persists. Nope, Stark circles away and we're back to standing.
A telegraphed takedown attempt from Whitehorse is defended easily by Stark.
That's two minutes gone in the round.
Whitehorse checks a leg kick.
Stark throws a low kick but it's checked well by Whitehorse.
Whitehorse appeared to try and counter that last move with a leg kick.
Whitehorse avoids the head kick by Stark.
Stark changes levels and scores with a jab to the body.
Whitehorse misses with a body kick.
Whitehorse instigates a clinch.
Whitehorse tries to land a shot to the body but it's blocked.
Jacob Whitehorse seems to be working more effectively in the clinch in the fight so far.
A frustrated look appears on Stark's face as he tries to break the clinch.
Whitehorse swings away with an uppercut that misses.
Stark's corner calls for him to break the clinch, which he does.
Stark feints and then cracks Whitehorse's leading leg with a nice low kick. He's obviously looking to slow Whitehorse down.
Stark misses with a low kick.
Stark misses with a low kick.
Stark tries to work over Whitehorse's front leg with a kick but Whitehorse checks it.
Whitehorse follows through with a counter body kick but it doesn't land.
Stark moves out of range of the strikes.
That's three minutes gone in the round.
Boom, another hit is landed. "You're gunna get knocked out" taunts Stark, as that shot connected.
Stark tries to clinch up
and Whitehorse counters with a good right hand that lands right on the jaw.
Whitehorse cracks the inside of Stark's front leg.
A jab from Whitehorse finds it's way through Stark's defenses.
Whitehorse lands a right hook to the body.
A solid leg kick lands there for Whitehorse.
Stark throws a body punch but Whitehorse moves out of range.
Stark lands a leg kick and bounces back out of range.
Whitehorse tries to clinch up against the cage, rushing in to close the distance. Stark manages to break the clinch and circles back to the middle of the mat.
A bone on bone clash there as Stark blocks the leg kick.
Whitehorse wants to clinch up but Stark keeps it at a distance.
Stark is trying to close the distance and clinch up, after that failed offence from Whitehorse.
Stark misses with a half-hearted attempt at a head kick.
Stark throws a series of punches but Whitehorse avoids them all with ease.
Stark throws a body kick that misses.
Nice shot by Stark.
That's four minutes gone in the round.
The crowd cheering loudly, showing their appreciation for the quality fight we're seeing here.
Whitehorse looking to shoot here. He's gone for it and he's landed a takedown into side control! Oh, that's bad for Stark!
Stark can't do much from the bottom here.
It's got to the stage where if one of these guys blows hard enough, the other might fall over.
Whitehorse is working Stark over with some ground and pound from side control.
Whitehorse lands an elbow.
Whitehorse is looking to take a break and control but Stark is keeping him honest, looking to work from the bottom.
Whitehorse happy to just control the position for now.
And thats the end of the round the fighters go back to their corners.
That was a close fourth round but I would say that Khal Stark will probably get the nod.
That's the end of the interval. I'm sure that seemed a lot quicker than a minute for our two fighters! Back to the action. This is the final round!

Whitehorse scores with the left hand. Stark knows he should have avoided that one.
Stark tries a switch kick but it misses it's target.
Whitehorse feints and then dives in with a takedown. That was a long way out but the feint bought him enough time to close the distance and complete the takedown. Now we'll play guard for a bit and see who can get the better of that position.
Whitehorse tries to free his leg and advance position but Stark is retaining full guard.
Whitehorse works a leg free and moves into half guard.
Stark tries to get to full guard but Whitehorse has control of the leg.
Jacob Whitehorse has got the better of the ground game so far.
Stark is trying to defend against the ground and pound but Whitehorse scores with a couple of nice shots.
We've had a slow start to the round here - hopefully the action picks up.
Whitehorse throwing shots but they're hitting the canvas more than the man.
Stark avoiding damage under a succession of punches from Whitehorse.
Stark is trying to stand.
Whitehorse not doing much here.
That's one minute gone in the round.
Whitehorse is looking for a kimura. It's going to be difficult to finish that from half guard though and Stark defends it well.
Stark works his way to full guard. Good work.
Stark keeping moving, preventing Whitehorse from controlling successfully.
Whitehorse won't allow Stark to sweep him here.
Whitehorse is looking to pass into half guard but Stark pushes him away with his feet and jumps on top - now Stark is in guard.
Whitehorse has a closed guard, preventing anything of note from happening. Perhaps he's looking to stall.
That's two minutes gone in the round.
Stark stopping the sweep attempt from Whitehorse.
Stark pressing down on his opponent's thigh, looking to pass guard. Whitehorse is keeping the position for now.
Stark preventing the sweep.
Whitehorse trying to keep a closed guard but Stark is proving a slippery customer.
Whitehorse looking to sweep here. No luck so far.
Whitehorse keeping full guard, as Stark tries to pass.
The referee has stepped in and called for a break in the action. We'll restart on the feet.
Whitehorse dips down and scores with a jab to the body.
Stark cracks Whitehorse with a nice right hand that draws applause from the crowd.
That's three minutes gone in the round.
Whitehorse tries to clinch but is not successful on this occasion.
Whitehorse misses with a wild body shot.
Whitehorse throws a push kick but Stark slaps the foot to one side.
Whitehorse checks a low kick from Stark.
Whitehorse throws a body punch but Stark moves out of range.
Whitehorse fakes high and swings low for a body shot but Stark manages to avoid it.
Whitehorse throws a low kick but his opponent is out of range.
Whitehorse rushes Stark and presses him up against the cage.
Stark lands a right hand.
Stark manages to break the clinch.
Stark tries to score with a low kick but Whitehorse moves his leg out of the way.
Whitehorse checks a leg kick nicely.
Whitehorse looks for the body kick but Stark saw that one coming.
Whitehorse fakes high and swings low for a body shot but Stark manages to avoid it.
As Whitehorse backs away, Stark returns fire with a leg kick that just misses.
Stark scores with a reasonable looking shot to the body. Whitehorse doesn't seem bothered though.
Whitehorse comes forward and lands a shot to the body, then darts back out of range.
That's four minutes gone in the round.
Whitehorse throws a low kick but Stark moves out of range easily.
Whitehorse avoids the head kick by Stark.
Stark misses with a right hand
and Whitehorse counters with a good right hand that lands right on the jaw.
Whitehorse tries to clinch there but Stark circles away.
Whitehorse throws the kick towards the body but Stark avoids it.
Wooooo! Give it up for these two warriors! They are putting on a show!
Whitehorse bobs and weaves well there to avoid the strikes.
Stark tries a switch kick but it misses it's target.
Whitehorse digs a good hook to Stark's body.
Stark connects with a high kick.
Whitehorse throws a low kick but his opponent is out of range.
Whitehorse tries to clinch but Stark is having none of it.
Stark fakes a head punch and goes low to the body. Nicely done.
Stark misses with a wild body shot.
Stark throws a front kick aimed at Whitehorse's knee but Whitehorse avoids it well.
Stark lands with a shot to the body.
Stark throws a head kick but Whitehorse moves out of range.
And that's the end of the fight!
That was a close round. You could make an argument for either fighter but I would give it to Khal Stark.
I think Stark has won this one but let's see what the judges have to say. Over to the ring announcer for the scorecards.
Ladies and gentlemen, after 5 rounds of action, we go to the scorecards for a decision.
Judge Arvi Lind scores the fight 48:48
Judge Johanna Lukiainen scores the fight 47:49
Judge Ben Zyskovitsi scores the fight 48:47
The fight is ruled a draw!
Khal Stark retains his title. It's always disappointing when a championship fight ends as a draw but that's what happens when you leave the fight in the judges hands!
|
|
|
|
|
|
|
|
|
|
|
|
|
|
|
|
|
|
|
|
|
|
|
| S |
C
A |
G |
S |
C
B |
G |
|
S |
C |
G |
|
energy
A | B |
|
hype
A | B |
|
pop
A | B |
|
mgr
A | B |
|
FIGHT
RATING
56% |
|
|
|
|
|
|
|
|
|
|

