 |
MMAHelsinki - 104 PBP Commentary |
Undercard bout
|
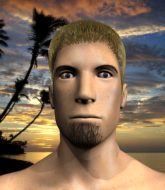
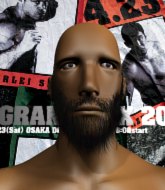
Coming up we have a super heavyweight MMA rules bout between Hello Bay (ranked 0 p4p, 0 weight class) and Von Peon (ranked 0 p4p, 0 weight class). Von Peon will no doubt be looking to use his reach advantage to good effect.
 |
|
 |
| 206 cm
27
300 lbs
10 - 4 - 0 |
|
225 cm
21
300 lbs
10 - 2 - 0 |
Powerful takedowns
Solid boxing
Granite chin |
|
BJJ Blue Belt
Excellent boxer
Granite chin |
|
| |
|
Ladies and gentlemen. This fight is 3 rounds, in the super heavyweight division.
Introducing the fighter to my left, fighting out of the red corner.
With a record of
10 - 4 - 0, fighting out of Montreal, Hello Bay!
And introducing the fighter to my right, fighting out of the blue corner.
With a record of
10 - 2 - 0, fighting out of New York, Von Peon!
The judges for this bout are Marco Blurström, Ben Zyskovitsi and Anni Minnemäki.

The bell rings for round one and we are underway!

Bay instigates a clinch.
Peon looks like he'd prefer to be striking at range right now.
Peon is trying to break the clinch but Bay has him pressed against the cage.
Bay is working Peon over against the cage.
Peon tried to land a shot to the body but connects with Bay's elbow.
Peon struggles to land a body shot inside as Bay controls his hands.

Peon's corner calls for him to break the clinch, which he does.

Bay throws a big overhand right that connects, sending Peon tumbling to the canvas!

It looks like Von Peon has been cut.
The fans in attendance giving it up for the two fighters, who have really let it all hang out in the last minute or so!
Bay scoring with some ground and pound.
Bay trying to control but Peon is working from the bottom.
Peon working the defensive guard well to avoid strikes from Bay.
Peon working the defensive guard well to avoid strikes from Bay.
Peon working the defensive guard well to avoid strikes from Bay.
Bay being controlled here momentarily.
Bay throwing elbows and punches but not connecting, as Peon works some decent striking defense from the bottom.
Bay wants to control from the top but Peon keeps moving.
Bay works over Peon with some ground and pound from guard.
Bay might be looking to lock onto one of his opponent's long limbs for a submission, whilst we're on the ground.

That's one minute gone in the round.
Peon utilising some decent striking defenses from the guard, preventing the ground and pound.
Peon trying to control the position here.
Bay has to be careful here, sitting in the guard of a superior BJJ player.
Bay postures up in Peon's guard and throws a big left but Peon blocks it.
Peon utilising some decent striking defenses from the guard, preventing the ground and pound.
Bay working some ground and pound from guard but it's not doing any damage.
Peon is doing well to control the posture of his opponent and prevent any damage.
Peon's corner are shouting for him to control the position and he seems happy to oblige.
Bay landing some decent shots from guard.

That's two minutes gone in the round.
Well. There's a bit of a lull in the action here and the crowd are starting to get restless.
Bay throwing strikes from guard but Peon blocks nicely.
Peon pulls Bay in to control the position.
Peon preventing the ground and pound from doing any damage.
Bay throws an elbow that misses. Peon uses the momentum to reverse the position. He's now in Bay's guard. Nice move by Peon!

The ref warns both fighters not to hold the cage as they work up against the meshing.
Bay wants to stand and escape but Peon is having none of it.
Peon is standing up over Bay. Bay looks to escape but Peon dives into side control.
Peon is pausing for a moment. What's he doing? It looks like he's clearing his nose. Oh dude! He's shot a load of snot all down Bay's shoulder. That is not cool.
Bay tries to wriggle free to get back to his feet but he's given up his back! Oops.
Peon has the hooks sunk in and you can see the will to fight slowly draining out of Bay's body.

That's three minutes gone in the round.
Bay is trying to get back to his feet but Peon has full control of the position and if anything, Bay has just worked his way into a worse spot.
Bay is very frustrated here, being controlled quite effectively by Peon.
Bay wants to get back to his feet.
Peon controlling from the back.
Bay is trying to get back to his feet but he's not managed it yet.

That's four minutes gone in the round.
The crowd are showing their displeasure at the lack of action as loud boos ring out around the arena.
Peon is looking cool and calm here, just waiting for a good opportunity to attack and finish the fight from this dominant position.
Bay wants to get back to his feet.
The crowd thankful this round is nearly over.
Peon has the hooks sunk in and you can see the will to fight slowly draining out of Bay's body.
Bay is trying to get back to his feet but he's not managed it yet.
And thats the end of the round the fighters go back to their corners.
Hello Bay dominated that round.
The cut man is working on Von Peon's cut.
That's time! Bay's corner gives him a slap on the ass as he gets ready to fight.

Bay closes the distance and presses his opponent up against the cage.
Bay has dropped down and is looking to force the takedown but it's defended by Peon after a bit of a struggle.
Bay is really dominating this fight. Is there anything that Peon can do to turn this around?
Peon prevents a body shot from Bay.
Peon escapes the clinch and we're back to striking.
Bay throws a combination but it was largely blocked by Peon.
Bay gets cracked with a nice right hand there by Peon.

Bay closes the distance and scores a nice trip takedown into half guard. Peon did well to prevent Bay getting side control.
Bay thumps the canvas. Not on purpose obviously - he just missed Peon's head.
Peon is trying to defend against the ground and pound but Bay scores with a couple of nice shots.
Bay prevents Peon from improving his position.
Peon keeps control of the position for the meantime.
The fighters are pressed up against the cage, both looking to find a bit of space to work.
Bay trying to control from half guard but Peon is working away.
Hello Bay overall seems to be getting the better of the ground position in the fight so far.
Peon keeping his head moving to avoid the ground and pound.
Bay not landing any meaningful shots this time.
That's one minute gone in the round.
Peon blocking the ground and pound attempt from Bay.
Bay lands strikes from half guard.
Peon has found himself in a tricky position here. He's been working his transitions in training so let's see if he can work his way out of it.
Bay thows a wild elbow that connects with the canvas.
We get told so often about how wrestlers don't like to be on their backs. Let's see if Peon can do anything to dispel that myth.
Peon desperately trying to maintain half guard.
Bay misses with a head shot. Peon uses the momentum to regain guard.
Bay trying to control but Peon is working from the bottom.
Bay loading up with the ground and pound but he's missing more than he's landing in this flurry.
Bay throwing strikes from guard but Peon blocks nicely.
Peon trying to control the position here.
Bay throws a strike but Peon rolls with it and manages to sweep. Now he's in guard on top.
That's two minutes gone in the round.
Peon is stalling in the full guard.
Bay is trying to stand up but he's not managed so far.
Bay is looking to stand back up but Peon counters by passing into half guard. Oops... bit sloppy there by Bay.
Bay pushes Peon off looking to stand but Peon dives back in and keeps control.
Peon controlling the action here.
That's three minutes gone in the round.
Peon prevents Bay from standing back up.

The ref stands the fighters back up due to a lack of activity.
Bay with a lazy takedown attempt
and Peon counters with a good right hand that lands right on the jaw.
Bay clinches with his opponent.
A head punch on the inside from Peon fails to land.
A short right hand to the side of the head by Bay.
A head punch on the inside from Peon fails to land.
Bay lands a nice uppercut.
Peon's head jolts backwards as he takes an uppercut right on the button!
Peon has had enough of the clinch and is looking to separate.
That's four minutes gone in the round.
Peon wants to get back to striking at distance but Bay won't allow it.
Bay lands a shoulder strike that jolts his opponent's head backwards.
Peon lands a body punch - he's looking to wear down Bay.
Peon misses with a hook to the ribs.
Bay lands with a short punch from the clinch.
Bay drops to a knee looking for a takedown but Peon gets the underhooks and prevents it.
That's three failed takedown attempts in the round for Hello Bay. That's going to take a lot out of him.
A short left from Bay.
Wooooo! Give it up for these two warriors! They are putting on a show!
Bay swings wildly with an uppercut but Peon uses good head movement to avoid it.
Bay drops to a knee looking for a takedown but Peon gets the underhooks and prevents it.
Bay lands a right uppercut that snaps the head of Peon backwards.
A nice left hand lands by Bay.
Bay lands a body shot in the clinch.
Peon is breathing heavily.
A short right hand to the side of the head by Bay.
A shot in the inside from Bay.
And thats the end of the round the fighters go back to their corners.
Hello Bay dominated that second round.
The cut man is working on Von Peon's cut.
That's time! Bay's corner gives him a slap on the ass as he gets ready to fight. Let's get this one finished - here comes the final round!

No luck for Bay with that takedown attempt.
Bay tries to clinch but Peon moves out of range.
Peon closes the distance and lands a one-two.
Bay gets to the clinch - let's see what his plan is here.
Bay lands a hook that snaps the head of Peon backwards.
Hello Bay has scored more points in the clinch so far.
Bay lands punches inside but they're not really causing much damage.
Our sources have told us that Bay has been working on his elbows in the gym.
Bay blocks an uppercut.
Peon lands a body shot in the clinch.
With the fighters clinched against the cage, Bay creates a bit of distance for himself and scores with a nice uppercut.
Bay drags the fight down to the ground.
Bay is trying to stand up but he's not managed so far.
Bay trying desperately to get back to his feet here but he's not having any joy at all. He's going to tire himself out if he's not careful.
That's one minute gone in the round.
Peon controls the pace of the fight for a moment.
Peon is continuing to stall.
Bay is trying to stand up but he's not managed so far.
It looks like the ref is thinking about a standup.
Peon stays in close to Bay's body and controls the position.
The ref stands the fighters back up due to a lack of activity.
Bay fails with an attempt to clinch.
Peon keeps the fight standing with a nice sprawl.
Peon tries to keep at a distance but Bay has taken the fight into the clinch.
Bay tries to work over Peon's body with a swooping hook but it only glances the target.
That's two minutes gone in the round.
The crowd are starting to boo a lack of action.
Bay blocking some punches.
Bay lands with a left to the head.
Bay jumps guard.
Peon controlling from the top position.
Let's hope that Peon has the urge to step up the pace any second now because for the last 15 or 20 seconds he's just been holding on tight.
Peon prevents Bay from getting back to his feet.
Peon is standing up over Bay. Bay looks to escape but Peon dives into side control.
A lull in the action here.
That's three minutes gone in the round.
Bay is trying to stand back up. He's worked his way up against the cage but Peon has just dragged him back down to the mat.
Von Peon has stepped it up - he knows he needs a finish here!
Peon taking a breather here.
Bay is putting a lot of effort into getting back to his feet here.
Bay tries to wriggle free to get back to his feet but he's given up his back! Oops.
Bay is trying to get back to his feet but he's not managed it yet.
Peon really has the hooks in deep now - there seems like no escape for Bay.
That's four minutes gone in the round.
The crowd are getting on the fighters' backs, as the pace has dropped off in the last minute or so.
Bay trying to get back to his feet but Peon is in full control for now.
I would not like to be Bay right now.
Bay wants to get back to his feet.
Hello Bay is fighting for a decision here - he's started to take the cautious approach.
The crowd thankful this round is nearly over.
And that's the end of the fight!
I would just about give that final round to Von Peon.
I think Bay has won this one but let's see what the judges have to say. Over to the ring announcer for the scorecards.
Ladies and gentlemen, after 3 rounds of action, we go to the scorecards for a decision.
Judge Marco Blurström scores the fight 29:28
Judge Ben Zyskovitsi scores the fight 29:28
Judge Anni Minnemäki scores the fight 29:28
In favor of your winner, by unanimous decision... Hello Bay!
A victorious Hello Bay thanked his army of followers in his post fight interview, telling people to make sure they follow him on Twitter.
|
|
|
|
|
|
|
|
|
|
|
|
|
|
|
|
|
|
|
|
|
|
|
| S |
C
A |
G |
S |
C
B |
G |
|
S |
C |
G |
|
energy
A | B |
|
hype
A | B |
|
pop
A | B |
|
mgr
A | B |
|
FIGHT
RATING
38% |
|
|
|
|
|
|
|
Undercard bout
|
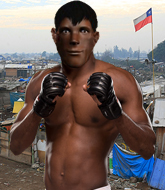
Coming up we have a heavyweight MMA rules bout between Vito Belto (ranked 0 p4p, 0 weight class) and Baruch Zahav (ranked 0 p4p, 0 weight class). These two fighters really are very evenly matched on the feet - it will be fascinating to see who can assert themselves in that aspect of the fight.
 |
|
 |
| 195 cm
30
265 lbs
7 - 5 - 0 |
|
196 cm
26
258 lbs
5 - 2 - 0 |
BJJ Brown Belt
Decent elbows
Very quick |
|
BJJ White Belt
Excellent boxer
Powerful |
|
| |
|
Ladies and gentlemen. This fight is 3 rounds, in the heavyweight division.
Introducing the fighter to my left, fighting out of the red corner.
With a record of
7 - 5 - 0, fighting out of Helsinki, Vito Belto!
And introducing the fighter to my right, fighting out of the blue corner.
With a record of
5 - 2 - 0, fighting out of New York, Baruch Zahav!
The judges for this bout are Marco Blurström, Arvi Lind and Ben Zyskovitsi.
The bell rings for round one and we are underway!
Belto throws a combination but comes up with nothing but fresh air.
Belto is moving around nicely and scores here with a single head shot.
Zahav moving in and out of range nicely, whilst landing the scoring shot.

It looks like Vito Belto has been cut.
Belto misses with the combination.
Nice defenses there by Zahav.
Zahav throws a left jab followed by a right to the body, Oh Belto colapses and takes a barrage of punches from Zahav as he moves to mount! the ref stops the fight and Belto is left battered and dazed whilst Zahav and his camp cheer!
Ladies and gentlemen, after 0:21 of round 1, we have a winner by way of TKO (Strikes). Baruch Zahav!
Baruch Zahav spent the whole post fight interview bigging himself up. It didn't go down that well with the fans after a while as they thought it was a bit arrogant.
The defeated Vito Belto had this to say: 'I have no excuse I lost.'.
|
|
|
|
|
|
|
|
|
|
|
|
|
|
|
|
|
|
|
|
|
|
|
| S |
C
A |
G |
S |
C
B |
G |
|
S |
C |
G |
|
energy
A | B |
|
hype
A | B |
|
pop
A | B |
|
mgr
A | B |
|
FIGHT
RATING
100% |
|
|
|
|
|
|
|
Undercard bout
|
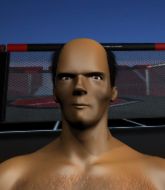
Coming up we have a light heavyweight MMA rules bout between Patrick Hager (ranked 0 p4p, 0 weight class) and Steve Jackson (ranked 0 p4p, 0 weight class). Steve Jackson is the more experienced fighter, so let's see if that makes a difference tonight.
 |
|
 |
| 183 cm
21
224 lbs
4 - 0 - 0 |
|
198 cm
28
220 lbs
7 - 2 - 0 |
Good wrestling
Counter fighter
Very quick |
|
Decent wrestler
Great elbows
Granite chin |
|
| |
|
Ladies and gentlemen. This fight is 3 rounds, in the light heavyweight division.
Introducing the fighter to my left, fighting out of the red corner.
With a record of
4 - 0 - 0, fighting out of Las Vegas, Patrick Hager!
And introducing the fighter to my right, fighting out of the blue corner.
With a record of
7 - 2 - 0, fighting out of Las Vegas, Steve Jackson!
The judges for this bout are Anni Minnemäki, Roosa Järviläinen and Arvi Lind.
The bell rings for round one and we are underway!
Jackson tries to clinch up against the cage, rushing in to close the distance. Hager manages to break the clinch and circles back to the middle of the mat.
Jackson defends well against a solid takedown attempt from Hager.
Hager definitely looks more muscular than last time we saw him fight.
Jackson tries to close the distance and clinch up against the cage but Hager paws at him with a jab and circles away.
Hager fails with a rather predictable takedown attempt.

Jackson instigates a clinch.

Hager breaks the clinch and we return to the middle of the mat.
Hager gets tackled into the cage by Jackson. Jackson maintains the clinch.
The referee is keeping an eye on Jackson - much more stalling and he will separate the fighters.
Jackson slows down the pace here.
We've had a slow start to the round here - hopefully the action picks up.
Hager blocks a knee to the body. He'll have a nicely bruised forearm in the morning.
Jackson lands an elbow that stopped Hager in his tracks for a moment.
Jackson crunches a lovely knee into Hager's ribcage.
That's one minute gone in the round.
Hager pulls guard effortlessly.
Hager keeping moving, preventing Jackson from controlling successfully.
Jackson being controlled here momentarily.
Hager wants to sweep but no luck.
Jackson wants to control from the top but Hager keeps moving.
Hager is doing well to control the posture of his opponent and prevent any damage.
That's two minutes gone in the round.
The crowd are getting on the fighters' backs, as the pace has dropped off in the last minute or so.
Hager looking to hit a scissor sweep but Jackson is one step ahead there.
Hager keeping full guard, as Jackson tries to pass.
The referee has motioned to the fighters to stand back up. He just wasn't happy with the level of activity.
Jackson pushes Hager up against the cage in a clinch.
Hager can't get the takedown.
That's three failed takedown attempts in the round for Patrick Hager. That's going to take a lot out of him.
Jackson lands an elbow just above Hager 's eye.
Jackson using the Thai plumb to throw knees but Hager has his back arched nicely, preventing the strike.
Jackson gets underhooks to prevent Hager's takedown attempt.
Hager works for the underhooks and manages to get a trip takedown into guard.
Hager lands a nice shot whilst sitting in his opponent's guard.
That's three minutes gone in the round.
Jackson is trying to stand up but he's not managed so far.
Hager is just sitting in guard, looking to avoid any submissions.
Hager missing there with some ground and pound from the guard.

Hager thinks about going for a leg but decides against it, in order to maintain the position.
Hager wants to control from the top but Jackson keeps moving.
Jackson is looking to stand back up but Hager counters by passing into half guard. Oops... bit sloppy there by Jackson.
Hager looks to score some points with some ground and pound.
That's four minutes gone in the round.
My god... these two guys really need to pick up the pace or everyone will leave to go get a beer.
Hager sitting in half guard, looking to land shots. Jackson defending well though.
Jackson is trying to control but Hager passes into side control!
Hager controlling the position from side mount.
Hager in side control lands a nice looking series of punches and elbows.
Hager takes a little break here. Jackson wants to take advantage but he is being controlled well.
The crowd thankful this round is nearly over.
Jackson bucks up and tries to throw Hager off but instead Hager has got his back!
And thats the end of the round the fighters go back to their corners.
That was a close round but I would say that Patrick Hager will probably get the nod.
That's the end of the round. The referee orders the cornermen out of the cage so we can get back down to business.
Jackson takes the fight into the clinch.
Hager manages to break the clinch.
Patrick Hager is looking to throw some combinations by the looks of things.
Hager fails with a takedown attempt from distance.
Hager avoids the head kick by Jackson.
Hager is looking for a counter combo.
Jackson gets in close and instigates a clinch.
Jackson lands an elbow just above Hager 's eye.
Hager blocks a knee to the body. He'll have a nicely bruised forearm in the morning.
Hager drops down for a takedown but doesn't get it.
A knee to the head by Jackson.
We've had a slow start to the round here - hopefully the action picks up.
Jackson is trying to wear down his opponent with knees to the body.
Jackson blocks a knee to the body. He'll have a nicely bruised forearm in the morning.
Jackson with an attempt at a knee that misses.
Jackson putting his Muay Thai to good use. He has Hager in a tight clinch and is doing some damage with knees to the body.
That's one minute gone in the round.
Hager jumps guard.
Hager trying to control the position.
Jackson looking to sit in guard and control but Hager gets the butterfly guard and sweeps. He's now in the guard on the top.

Hager pressing down on his opponent's thigh, looking to pass guard. Jackson is keeping the position for now.
The ref warns both fighters not to hold the cage as they work up against the meshing.
Hager stays in close to Jackson's body and controls the position.
Hager seems to have a rather negative gameplan on the ground. He seems keen to just score the takedown and hold down Jackson for as long as he can get away with.
That's two minutes gone in the round.
Hager trying to land body shots but he keeps hitting the mat.
A big thud reverberates around the arena there as Hager accidentally thumps the mat. Hopefully he's not broken his hand.
A big thud reverberates around the arena there as Hager accidentally thumps the mat. Hopefully he's not broken his hand.
The fighters are pressed up against the cage, both looking to find a bit of space to work.
Hager throwing strikes from guard but Jackson blocks nicely.
Jackson can't do much from the bottom at the moment, as Hager controls the pace.
Hager trying to land body shots but he keeps hitting the mat.
Jackson really doesn't want to stay on the ground with Hager. If he can't get it back to his feet, it's only a matter of time before he'll be tapping out.
That's three minutes gone in the round.
Jackson is looking to stand up but Hager isn't so interested in that idea.
The ref stands the fighters back up due to a lack of activity.
Hager shoots in for a double leg but Jackson sprawls well. That's going to sap some energy.
That's three failed takedown attempts in the round for Patrick Hager. That's going to take a lot out of him.
Jackson forces Hager back against the cage and clinches.
Hager is trying to break free.
Hager avoids the elbow strike from Jackson, against the cage.
Hager gets double underhooks and manages to take the fight to the ground.
Jackson is wriggling around but Hager manages to pass to half guard.
Hager prevents Jackson from improving his position.
Hager wants to control but Jackson is keeping him busy.
That's four minutes gone in the round.
Hager stalling.
Hager continues to stall.
Hager is trying a forearm choke
I don't think that's going to do much at this level of the game.
Hager sitting and controlling from the half guard.
The crowd thankful this round is nearly over.
Jackson avoiding damage under a succession of punches from Hager.
And thats the end of the round the fighters go back to their corners.
A close second round but Steve Jackson will probably get the nod - 10:9.
The minute break is over - no more time for sponges and pep talks - back to the action! The crowd applaud as we get ready to start the final round!
Hager scores a trip takedown into side control. Nice.
Hager tries for a kimura but Jackson is defending well.
Hager trying to control the action but Jackson is working from the bottom.
Hager working the head and body with strikes.
We've had a slow start to the round here - hopefully the action picks up.
Jackson bucks up and tries to throw Hager off but instead Hager has got his back!
Hager working for the choke.
Hager is punishing Jackson with some ground and pound.
That's one minute gone in the round.
Hager is looking to finish the fight by rear naked choke. Jackson knows exactly what he's got planned though, so he's defending well. Maybe a few strikes would soften Jackson for a finish.
Hager is working for the choke. It looks like he might have got it... has he...? Yes! Jackson is tapping out! This one is all over!
Ladies and gentlemen, after 1:32 of round 3, we have a winner by way of Submission (RNC). Patrick Hager!
Patrick Hager made sure to mention his sponsor, Arcticus University: London in his post fight interview.
|
|
|
|
|
|
|
|
|
|
|
|
|
|
|
|
|
|
|
|
|
|
|
| S |
C
A |
G |
S |
C
B |
G |
|
S |
C |
G |
|
energy
A | B |
|
hype
A | B |
|
pop
A | B |
|
mgr
A | B |
|
FIGHT
RATING
43% |
|
|
|
|
|
|
|
Co-main event
|
Coming up we have a featherweight MMA rules bout between Khal Stark (ranked 0 p4p, 0 weight class) and Alejandro Sepulveda (ranked 0 p4p, 0 weight class). Stark comes to the cage accompanied by War Is Coming by Six Feet Under. Sepulveda has chosen Llorando se Fue as his entrance music. Khal Stark had a look across the cage there at his opponent. He definitely means business
 |
|
 |
| 174 cm
29
157 lbs
13 - 5 - 0 |
|
159 cm
25
158 lbs
16 - 8 - 1 |
Good wrestling
Excellent boxer
Granite chin |
|
Good wrestler
Excellent MT
Good gas tank |
|
| |
|
Ladies and gentlemen. This fight is 5 rounds, for the featherweight championship of the world!
Introducing the champion to my left, fighting out of the red corner.
With a record of
13 - 5 - 0, fighting out of New York, Khal Stark!
And introducing the challenger to my right, fighting out of the blue corner.
With a record of
16 - 8 - 1, fighting out of Sydney, Alejandro Sepulveda!
The judges for this bout are Arvi Lind, Matti Vanhoillinen and Marco Blurström.
The bell rings for round one and we are underway!
Sepulveda fails with a takedown attempt.
Sepulveda throws a looping left and ducks down for a takedown. He's got his arms around Stark's waist but Stark gets an underhook and avoids the takedown by throwing Sepulveda off to one side.
Stark throws a body punch but Sepulveda moves out of range.
Stark throws a nice looking combination but Sepulveda bobs and weaves to avoid any damage.

Sepulveda shoots in for a takedown and gets it. Let's see what he's got on the mat.
Sepulveda being controlled here momentarily.

Sepulveda thinks about going for a leg but decides against it, in order to maintain the position.
Sepulveda being controlled here momentarily.
We've had a slow start to the round here - hopefully the action picks up.
Stark looking to control.
Sepulveda wants to control from the top but Stark keeps moving.
That's one minute gone in the round.
Sepulveda's corner is telling him to maintain position.
We've been hearing good reports from Stark's training camp. Apparently he has been rolling around with some good quality BJJ practitioners and has been sharpening his skills. Let's see if that has an impact on the fight today.
Sepulveda trying to control the position from guard on top but Stark is wriggling around, looking for whatever he can.
Sepulveda stopping the sweep attempt from Stark.
The referee has stepped in and called for a break in the action. We'll restart on the feet.
Khal Stark is looking to keep the fight on the feet at all costs.
Sepulveda staying out of range there.
Stark getting the better of the striking in that exchange.
Sepulveda slips under a jab.
Sepulveda avoids the body shot from Stark.
The fighters circle momentarily. Stark darts into range and connects with a nice straight punch.
Wow, both these guys are really going for it!
Sepulveda slips a jab from Stark.
Stark looks to throw the jab but Sepulveda is out of range.
Sepulveda tries to clinch up.
Stark will need to tighten up his combinations if he doesn't want to gas himself out, swinging at thin air.
Sepulveda manages to get an easy takedown there - catching Stark on his heels. He'll look to pass Stark's guard now, I'm sure.

Stark pushes Sepulveda off and scrambles back to his feet.
That's two minutes gone in the round.
Fantastic stuff here - a very entertaining period of action, which has drawn cheers from the crowd.
Stark tries a head kick but it misses.
Stark bobs and weaves and unloads with a good uppercut.
Stark leaves Sepulveda with his face pressed against the mat as he sprawls beautifully, defending against a solid takedown attempt.
Khal Stark has stuffed three takedown attempts in the round now. That's going to take a lot out of Alejandro Sepulveda.
Stark rushes forward with a series of wild hooks but Sepulveda moves out of range and avoids them all easily.
Stark keeps the fight standing with a nice sprawl.
Sepulveda ducks under an overhand right and circles away with a smile on his face.
Stark lands an overhand right.
Stark is using his reach advantage well here, landing the more effective single shots from range.
Sepulveda will have to do better than that with his takedown attempts.
Stark fakes and then throws a beautiful body shot. Sepulveda looks a bit winded and takes a step backwards to take a breath.
Sepulveda closes the distance and clinches up with Stark, looking for a takedown. Sepulveda pushes Stark against the cage but Stark circles to the side and manages to break the clinch.
Sepulveda shoots in for a takedown but Stark shows good takedown defense there and keeps this one on the feet.
Stark stuffs a takedown. It's all about dictating where the fight takes place and Stark wants it to stay on the feet.
Sepulveda looks winded!
Sepulveda ducks under an overhand right and circles away with a smile on his face.
Stark thows a left - swing and a miss!
Stark misses the shot to the body.
Stark misses with a straight left.
Sepulveda avoids a kick to the body.
Good standup being displayed there by Stark as he connects with a hook.
Khal Stark seems to be the more aggressive standup fighter in this bout.
Sepulveda tries a head kick but it misses.
That's three minutes gone in the round.
Sepulveda ducks under a wild hook from Stark.
A big right from Stark misses.
Sepulveda shoots in looking for a takedown but Stark manages to keep the fight standing, pushing Sepulveda's face into the canvas for good measure before circling away.
Stark fakes low and throws an overhand right that catches Sepulveda on the side of the head.
Sepulveda fails with a takedown attempt.
Stark misses with a hook. Sepulveda ducked under it nicely.
A nice side step and Sepulveda releases a counter shot to the body, but it doesn't find it's home.
Stark fails to land with the punch combination there - jab, cross, hook, miss, miss, miss.
Stark throws a big shot that misses.
Stark throws a half hearted mid kick.
Sepulveda is trying hard to land a takedown here. Stark sprawls well and keeps this one on the feet.
Sepulveda staying out of range there.
Stark missing with a left hand there. Sepulveda was out of range so wasted energy throwing that one.
Stark jabs Sepulveda right on the nose. Sepulveda blinks but takes it well.
Stark connects with a lovely right hand, straight down the pipe.
The fighters are starting to perspire pretty heavily.
Stark connects with a lovely jab that went straight through the gap between Sepulveda's hands.
Stark is really peppering his opponent's head with punches.
Sepulveda shoots in for a takedown. "I don't think so" says Stark as he avoids it easily.
Wooooo! Give it up for these two warriors! They are putting on a show!
An inside leg kick lands from Stark.
Stark lands a jab to the nose.

Sepulveda is rocked!
That's four minutes gone in the round.
Stark looks to score with a combo but nothing lands.
Sepulveda is still on wobbly legs! Can Stark finish him?
Sepulveda scores with a nice takedown into half guard. Let's see what he's got on the ground.
Stark kicks Sepulveda off and gets back to his feet.
Stark pulls out of a head kick attempt.
Nice takedown defense from Stark. No joy for Sepulveda on that attempt.
Sepulveda seems to have recovered his senses.
Stark throws a series of punches but Sepulveda moves out of range.
Sepulveda drops down looking to force a counter takedown but Stark defends it well.
Sepulveda slips a jab from Stark.
Sepulveda darts in looking for a takedown but Stark gets double underhooks and turns Sepulveda into the cage.
Stark looks to land a right hand but Sepulveda moved out of range.
Sepulveda takes a punch right to his stomach. That took the wind out of him momentarily.
Stark stuffs a takedown. It's all about dictating where the fight takes place and Stark wants it to stay on the feet.
Stark throws a hard body shot but it just misses.
Stark connects with a looping right hand.
Stark drops Sepulveda with a beautiful combination! Sepulveda stares up at his opponent, who ushers him back to his feet - Stark is looking for the KO!
Sepulveda takes a push kick to the midsection and stumbles backwards.
Sepulveda moves away from the strike by Stark.
The crowd applaud the fighters' efforts here as the round comes to an end.
Sepulveda looking to score a takedown here. Stark is defending well but Sepulveda drives through and ends up in Stark's guard.
Sepulveda wants to control from the top but Stark keeps moving.
Stark looking to hit a scissor sweep but Sepulveda is one step ahead there.
And thats the end of the round the fighters go back to their corners.
Khal Stark dominated that round.
That's time! Back to the action!
Sepulveda lands with an overhand left.
Stark misses with a few strikes there.
Sepulveda tries to score a power double leg takedown but Stark sees that one coming and sprawls well. That will dishearten Sepulveda somewhat.
Stark throws a quick counter kick to the body but Sepulveda avoids it.
Sepulveda takes a shot right to the liver - Bas would have been proud of that punch.
Stark misses with an attempted mid kick.
Stark stuffs the takedown.
Sepulveda avoids a punch combination nicely.
Sepulveda tries a counter takedown but it's more of a dummy move, and he uses it to push himself away.
We've had a slow start to the round here - hopefully the action picks up.
Sepulveda shoots for a takedown but Stark saw that one coming a mile off and avoided it easily.
Stark swung with a counter right hand that didn't connect.
Khal Stark has stuffed three takedown attempts in the round now. That's going to take a lot out of Alejandro Sepulveda.
Stark connects with a crisp jab.
Stark throws a left and a right that both miss
and Sepulveda counters with a straight punch to the midsection.
Sepulveda shoots in for a double leg but Stark sprawls well. That's going to sap some energy.
Stark is really dominating this fight. Is there anything that Sepulveda can do to turn this around?
Stark lands a right hook to the body.
A kick lands to the mid section there for Stark.
The crowd cheering loudly, showing their appreciation for the quality fight we're seeing here.
Stark bobs and weaves and unloads with a good uppercut.
Sepulveda is breathing heavily.
That's one minute gone in the round.
Stark scores with a shot to the body.
Stark connects with a body shot that sends Sepulveda's belly button to the back.
Sepulveda ducks under a wild hook from Stark.
Stark throws the left hand but Sepulveda avoids the punch easily.
Sepulveda feints the counter takedown.
Stark fails to land with the punch combination there - jab, cross, hook, miss, miss, miss.
And Sepulveda tries to counter it with a takedown but Stark pushes his down on his head and steps out.
Stark dips down and scores with a jab to the body.
Sepulveda ducks right into an uppercut from Stark.
Sepulveda fails miserably with a takedown attempt.
The fighters circle momentarily. Stark darts into range and connects with a nice straight punch.
A big right from Sepulveda misses.
Sepulveda lands with a shot to the body.
A really sloppy takedown attempt there from Sepulveda.
Stark lands a vicious shot with the stealth of a sniper and the strength of a viper. Are vipers that strong? I can think of lots of things that are stronger than a viper - not many rhyme with sniper though.
We've seen a great period of action over the last minute or so - credit to both fighters for going all out!
Stark misses the shot to the body.
Sepulveda will have to do better than that with his takedown attempts.
That's two minutes gone in the round.
Sepulveda shoots in but Stark avoids the takedown attempt easily.
Stark throws a quick counter kick to the body but Sepulveda avoids it.
Sepulveda throws a head kick that misses.
Stark comes forward and lands a shot to the body, then darts back out of range.
Stark lands a left and a right that send Sepulveda crashing to the mat, dazed. Stark thinks about following him to the mat but decides to wave him back up to his feet!
Stark drops Sepulveda with a straight right hand, right on the button! Stark follows him down to the mat and pounds him out with hammerfists until the referee jumps in to end the fight!
Ladies and gentlemen, after 2:22 of round 2, we have a winner by way of TKO (Strikes). Khal Stark!
Khal Stark retains his featherweight title!
Jumping up and down and very excited, Khal Stark waved his t-shirt featuring Zenith Nutrition (160q/225$)'s logo in front of the cameras.
|
|
|
|
|
|
|
|
|
|
|
|
|
|
|
|
|
|
|
|
|
|
|
| S |
C
A |
G |
S |
C
B |
G |
|
S |
C |
G |
|
energy
A | B |
|
hype
A | B |
|
pop
A | B |
|
mgr
A | B |
|
FIGHT
RATING
66% |
|
|
|
|
|
|
|
Main event
|
Coming up we have a bantamweight MMA rules bout between Zaki Zaki (ranked 0 p4p, 0 weight class) and Paul Murhaa (ranked 0 p4p, 0 weight class). Zaki Zaki has the edge in experience - let's see if he can make that count tonight.
 |
|
 |
| 150 cm
23
138 lbs
5 - 10 - 0 |
|
169 cm
18
145 lbs
0 - 0 - 0 |
BJJ Brown Belt
Brawler
Experienced |
|
Good wrestler
Basic striking
Granite chin |
|
| |
|
Ladies and gentlemen. This fight is 3 rounds, in the bantamweight division.
Introducing the fighter to my left, fighting out of the red corner.
With a record of
5 - 10 - 0, fighting out of London, Zaki Zaki!
And introducing the fighter to my right, fighting out of the blue corner.
With a record of
0 - 0 - 0, fighting out of Hilo, Paul Murhaa!
The judges for this bout are Ben Zyskovitsi, Johanna Lukiainen and Marco Blurström.
The bell rings for round one and we are underway!
Zaki doesn't succeed with the takedown
and Murhaa counters with a lovely shot to the body.
Zaki tries to clinch up.
Jab by Murhaa.
Zaki throws a combination but comes up with nothing but fresh air.
Zaki could do with losing a few pounds - he looks very soft around the mid section, to put it politely.
Murhaa avoids the head kick by Zaki.
Murhaa paws at his opponent with the jab and then lunges in with a straight, right on the button.
Murhaa circles away from the clinch attempt.
Murhaa throws a counter combo.
Paul Murhaa seems to be the more aggressive standup fighter in this bout.
Murhaa ducks low and lands a nice hook to the body of his opponent.
Zaki takes a body punch that cleary hurt but he's trying not to show any weakness.
Zaki tries to clinch but Murhaa is having none of it.
A jab from Murhaa finds it's way through Zaki's defenses.
Murhaa cracks Zaki with a good shot that sees him stumbling back into the cage.
This is a great period of action - very entertaining stuff!
Murhaa throws a nice hook to the body that draws an oooh from the crowd.
Zaki showing good head movement there, avoiding the strikes from Murhaa.
That's one minute gone in the round.
A left lands for Murhaa.
Zaki rushes forward with a series of wild hooks but Murhaa moves out of range and avoids them all easily.
Murhaa displays good takedown defense there as he swats away a double leg from Zaki.
Murhaa lands a nice shot to the body.
Zaki misses with a double jab.
Zaki gets his head snapped back by a nice shot there.
Murhaa lands a powerful looking uppercut that connected with his opponent's jaw.
Zaki shoots in but no luck this time.
That's three failed takedown attempts in the round for Zaki Zaki. That's going to take a lot out of him.
Murhaa scores with a crisp jab that stopped Zaki in his tracks.
Murhaa dodges the punch combination from Zaki.
That's two minutes gone in the round.
A jab from Murhaa finds it's way through Zaki's defenses.
Wooooo! Give it up for these two warriors! They are putting on a show!
Murhaa moves into range and connects with a jab.

Zaki is rocked!
Zaki looks up at the clock. Bad move! Murhaa lands a right hand from hell, dropping Zaki. Murhaa pounces and finishes the fight with a flurry of punches and elbows.
Ladies and gentlemen, after 2:24 of round 1, we have a winner by way of TKO (Strikes). Paul Murhaa!
|
|
|
|
|
|
|
|
|
|
|
|
|
|
|
|
|
|
|
|
|
|
|
| S |
C
A |
G |
S |
C
B |
G |
|
S |
C |
G |
|
energy
A | B |
|
hype
A | B |
|
pop
A | B |
|
mgr
A | B |
|
FIGHT
RATING
55% |
|
|
|
|
|
|
|
|
|
|

