 |
QFC Tournament 726 Round 2 PBP Commentary |
Undercard bout
|
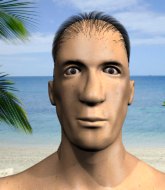
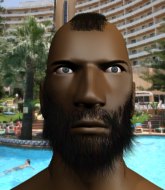
Coming up we have a lightweight MMA rules bout between Curtis Link (ranked 0 p4p, 0 weight class) and Venomous Maximus (ranked 0 p4p, 0 weight class). Over to our ring announcer for the fighter introductions!
 |
|
 |
| 167 cm
23
168 lbs
1 - 0 - 0 |
|
180 cm
25
161 lbs
1 - 0 - 0 |
BJJ Blue Belt
Counter fighter
Self confident |
|
Good wrestler
Counter fighter
Powerful |
|
| |
|
Ladies and gentlemen. This fight is 3 rounds, in the lightweight division.
Introducing the fighter to my left, fighting out of the red corner.
With a record of
1 - 0 - 0, fighting out of Montreal, Curtis Link!
And introducing the fighter to my right, fighting out of the blue corner.
With a record of
1 - 0 - 0, fighting out of Montreal, Venomous Maximus!
The judges for this bout are Gregory Folan, Steve Smith and Yves DeLean.

The bell rings for round one and we are underway!
Link tries to clinch up against the cage, rushing in to close the distance. Maximus manages to break the clinch and circles back to the middle of the mat.

Link shoots in and gets a takedown into Maximus's guard.
Maximus looking to sweep here. No luck so far.
Link trying to control the position from guard on top but Maximus is wriggling around, looking for whatever he can.
Maximus looking for a sweep. Not yet Maximus, not yet.
Maximus keeping moving, preventing Link from controlling successfully.
We've had a slow start to the round here - hopefully the action picks up.
Maximus is avoiding any damage by keeping wrist control.
Link stands up and looks to throw the legs aside to pass to side control. Maximus swivels though and keeps the full guard.
If this pace continues, the referee will definitely step in and force a standup.

That's one minute gone in the round.
Maximus is working an open guard here, looking to improve his position. No doubt that will leave him open to counters but at least he's being more offensive.

The referee has motioned to the fighters to stand back up. He just wasn't happy with the level of activity.

Maximus bobs and weaves into range and then changes levels and scores with a nice takedown into side control.
Link knows he needs to get back to his feet asap. He's simply no match for Maximus on the ground.
Maximus is chipping away with strikes.
Link gets back to half guard.
Maximus is looking to advance position but Link won't allow it.
Link has hold of Maximus's hands but Maximus slips his arm to the side and lands an elbow.
The fighters are pressed up against the cage, both looking to find a bit of space to work.
Maximus looks towards his corner to check for any instructions. The corner give him nothing to work with, so he cracks Link with a short hammerfist. I guess that's as good as any advice he could get in this position.

That's two minutes gone in the round.
Link is trying to maintain the position but Maximus is very close to passing his half guard.
Maximus is trying to control. Link wants to improve his position but can't escape this time.
Maximus stalling away here and it's allowed Link to slip out his trapped foot and regain full guard.
Maximus throwing strikes from guard but Link blocks nicely.
Maximus postures up and lands a big shot to Link's brow.
Maximus slips effortlessly into side control - very nice.
Maximus just content to control the position.
Maximus lands a knee to the body and follows it up with some ground and pound to the head. That will wear Link down.

That's three minutes gone in the round.
Maximus working away diligently from side control. Landing strikes effectively there - that will score him some points on the judges scorecards.
Maximus lands a decent elbow from side control.

Link is rocked!
Maximus lands a decent elbow from side control.
Oh Link is still in real trouble! Will he be able to recover?!!
Link taking punishment in the form of punches.
Maximus scoring with punches from side control.
A big shot lands for Maximus! That's hurt Link! Will he recover? Maximus fires away with more strikes and the referee has to step in to stop the fight!
Ladies and gentlemen, after 3:37 of round 1, we have a winner by way of TKO (Strikes). Venomous Maximus!
|
|
|
|
|
|
|
|
|
|
|
|
|
|
|
|
|
|
|
|
|
|
|
| S |
C
A |
G |
S |
C
B |
G |
|
S |
C |
G |
|
energy
A | B |
|
hype
A | B |
|
pop
A | B |
|
mgr
A | B |
|
FIGHT
RATING
35% |
|
|
|
|
|
|
|
Undercard bout
|
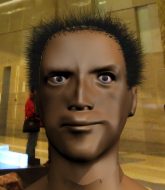
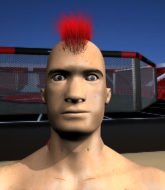
Coming up we have a lightweight MMA rules bout between Kit Dood (ranked 0 p4p, 0 weight class) and Walter White (ranked 0 p4p, 0 weight class). White has chosen Breaking Bad as his entrance music, which hasn't gone down very well with the crowd. Over to our ring announcer for the fighter introductions!
 |
|
 |
| 150 cm
25
165 lbs
1 - 0 - 0 |
|
178 cm
25
158 lbs
1 - 0 - 0 |
BJJ White Belt
Brawler
Self confident |
|
BJJ White Belt
Excellent MT
Inexperienced |
|
| |
|
Ladies and gentlemen. This fight is 3 rounds, in the lightweight division.
Introducing the fighter to my left, fighting out of the red corner.
With a record of
1 - 0 - 0, fighting out of Montreal, Kit Dood!
And introducing the fighter to my right, fighting out of the blue corner.
With a record of
1 - 0 - 0, fighting out of Montreal, Walter White!
The judges for this bout are Ian Loll, Gregory Folan and Steve Smith.
The bell rings for round one and we are underway!

Dood clinches up against the cage.
Dood avoiding damage as White throws knees to the body.
Dood misses with a short punch on the inside.
Dood misses with a body punch.
An uppercut on the inside fails to land for Dood.
Dood misses with some punches.
Dood lands with a short head shot on the inside.
Dood pushes White back against the cage and unloads with a body punch.
Dood misses with a shot to the kidneys.
Dood lands with a good tight uppercut to the head.
White lands a body punch.
A head punch blocked on the inside by White.
Dood misses with a short punch on the inside.
Dood presses White against the cage and delivers a mid-strength body shot.
Dood blocking some punches.
Dood lands a nice looking hook to the body, against the cage.
A head punch on the inside from Dood fails to land.
White blocks a couple of punches on the inside.
White tries to land a shot to the body but it's blocked.
Dood gets through White's defenses to land a nice punch to the side of the head.
That's one minute gone in the round.
Dood lands a body shot.
White blocks a couple of punches on the inside.
Dood takes a knee to the side of the body.
Dood is leaning against White and scores with a nice uppercut to the body.
White looks winded!
Dood scores with an uppercut up the middle.
Dood working aggressively here.
Dood has a couple of punches blocked by White.
A right handed body shot lands from Dood.
Dood softening up his opponent with strikes, against the cage.
A shot in the inside from Dood.
White misses with a punch to the body.
Dood tries a shoulder strike but it doesn't do any damage.
Dood lands a shoulder strike that jolts his opponent's head backwards.

White is rocked!
A shot in the inside from Dood.
White is still on wobbly legs! Can Dood finish him?
White blocks a punch to the side of the head.
This has been an exciting period of action!
Dood misses with a short punch on the inside.
Dood swings away with an uppercut that misses.
Dood really is built like a bowling ball. I wonder if he'd roll if you pushed him down a hill...
White goes for a body shot but it's blocked.
An uppercut on the inside fails to land for White.
White trying to land knees to the body.
Dood works for underhooks and lands a body shot in the process.
That's two minutes gone in the round.
White blocks an uppercut.
White blocks an uppercut.
Dood swings wildly with an uppercut but White uses good head movement to avoid it.
Dood throws a head punch that misses.
Dood stays in close to his opponent and throws a right hand to the body.
Dood misses with a short punch on the inside.
White misses with some punches.
Dood working aggressively here.
White seems to have recovered his senses.
An uppercut on the inside fails to land for Dood.
Dood throws a blind hook that connects with the side of Whites head.
Dood makes some space for himself and lands an uppercut.
Dood lands a hook that snaps the head of White backwards.
White throws a punch but it's blocked by Dood.
Good body shot from Dood.
Dood misses with a punch to the body.
Dood doesn't land with the attempted body shot.
A real battle for position is taking place between these two warriors.
Dood goes for a body shot but it's blocked.
White blocks a couple of punches on the inside.
A frustrated look appears on White's face as he tries to break the clinch.
That's three minutes gone in the round.
Dood blocks a couple of punches on the inside.
Dood swings away with an uppercut that misses.
White taking a breather.
Dood lands with a short shot to the head.
An uppercut on the inside fails to land for Dood.
Dood lands with a left to the head.
White makes some space for himself and lands an uppercut.
White tries to work over Dood's body with a swooping hook but it only glances the target.
Dood tries a shoulder strike but it doesn't do any damage.
Dood misses with a hook from the clinch.
Dood can't find room to land a body shot as White controls the action.
White can't find room to land a body shot as Dood controls the action.
Dood scores with a hook to the body.
White misses the knee to the body. Nice hip positioning from Dood.
Dood working aggressively here.
Dood misses with a hook to the ribs.

That's four minutes gone in the round.
Dood struggles to land a body shot inside as White controls his hands.
Dood managing to block the knees to the body from White.

White pushes off and circles away, back to the middle of the mat.
Dood tries to clinch but White moves away
and White counters with a good right hand that lands right on the jaw.
White circles away from the clinch attempt
and White cracks him with a counter punch right on the button.
Dood doesn't react quick enough there as he takes a shot to the body.
This is a great period of action - very entertaining stuff!
Dood wants to clinch up but White keeps it at a distance.
White connects with a lovely right hand, straight down the pipe.
Dood gets in close and instigates a clinch.
Dood misses with a punch to the body.
White blocks a couple of punches on the inside.
White escapes the clinch and we're back to striking.
Dood moves to clinch but White breaks away
and White counters with a right hand to the body.
And thats the end of the round the fighters go back to their corners.
Kit Dood dominated that round.
The referee calls time. The cornermen exit stage left and we're back to business.

Dood gets cracked with a nice right hand there by White.
White takes a step towards his opponent and connects with a left hand, before circling away.
Dood tries to clinch up
and White counters with a straight punch to the midsection.
Dood gets a clinch.
White lands a nice uppercut.
An uppercut to the body lands inside from Dood.
Dood swings away with an uppercut that misses.
White blocks a body shot from Dood.
White makes some space for himself and lands an uppercut.
Dood has not gone for a single takedown so far in this fight, which seems like a very strange tactic when you consider that he has the superior wrestling and BJJ.
We've had a slow start to the round here - hopefully the action picks up.
Dood blocking some punches.
Dood misses with a shot to the kidneys.
Dood misses with some punches.
Dood tries to throw a body punch but White avoids it by throwing Dood back against the cage.
Kit Dood has scored more points in the clinch so far.
White prevents a body shot from Dood.
Dood throws a punch but it's blocked by White.
That's one minute gone in the round.
White escapes the clinch and we're back to striking.
White connects with a lovely jab that went straight through the gap between Dood's hands.
White has used his reach advantage pretty well so far tonight.
Dood tries to clinch but White moves away
and White counters with a nice uppercut.
Dood closes the distance and presses his opponent up against the cage.
Both fighters are absolutely exhausted here.
White leaning his opponent against the cage.
A head punch blocked on the inside by Dood.
White blocks a punch to the side of the head.
Dood tries a shoulder strike but it doesn't do any damage.
White working on landing some head shots here - that one got through nicely.
Dood working aggressively here.
White works on Dood's body with a couple of short punches.
White lands with a light punch inside.
White lands with a short punch from the clinch.
White blocks a couple of punches on the inside.
White lands with a light punch inside.
That's two minutes gone in the round.
Fantastic stuff here - a very entertaining period of action, which has drawn cheers from the crowd.
White's head jolts backwards as he takes an uppercut right on the button!
Dood misses with a punch on the inside.
A nice left hand lands by White.
White blocking some punches.
Dood is really dominating this fight. Is there anything that White can do to turn this around?
White's corner calls for him to break the clinch, which he does.
Dood is looking to clinch but White is avoiding it.
Dood showing good head movement there, avoiding the strikes from White.
Dood half commits to a counter takedown before pushing away, out of range.
Walter White seems to be getting the better of the standup.
Dood closes the distance looking to clinch
and White counters with a straight right hand.
Dood is looking to clinch.
White looks like he wants to counter punch here.
White circles away from the clinch attempt.
White throws out a counter right but Dood avoids it with no problem.
Kit Dood is looking to throw some combinations by the looks of things.
White connects with a crisp jab.
White jabs Dood to the body, keeping him at a distance.
Dood tries to close the distance and clinch but White swats him to one side with an open hand palm strike and circles away.
White looks like he wants to counter punch here.
That's three minutes gone in the round.
White cracks Dood with a hook to the jaw. Both fighters smile at eachother and high-five before getting back down to business.
Dood is looking to take this fight into the clinch.
A jab from White finds it's way through Dood's defenses.
Dood tries to clinch but White is having none of it.
Dood fails in his attempt to clinch.
A punch lands to the side of Dood 's head but he takes it in his stride.
White circles away from the clinch attempt.
White throws a combination but comes up with nothing but fresh air.
Dood tries to clinch but White moves away
and White counters with a lovely shot to the body.
White scores with a hook to the body. Dood takes a step back and tries to catch his breath.
Dood walks into a stiff left hand from White.
Dood walks straight into a jab right on the nose. That one stung - he's blinking and trying to clear his head.
White is using his reach advantage to land shots from outside his opponent's range.
White scores with a body shot.
That's four minutes gone in the round.
Wooooo! Give it up for these two warriors! They are putting on a show!
White cracks Dood with a hook to the jaw. Both fighters smile at eachother and high-five before getting back down to business.
White changes levels and scores with a jab to the body.
White throws a combination. Dood tries to block but a couple of punches get through.
A punch combination from White misses.
Dood takes one on the chin but seems OK.
White slips in close and lands a nice hook before moving back out of range.
Dood takes a solid shot to the body. That one hurt him but he's trying not to show it.
Good exchange - White coming out on top.
White digs a good hook to Dood's body.
White fakes a head shot and lands one to the body.
Dood takes a jab on the nose. He smiles like he loves it and keeps coming.
The crowd applaud the fighters' efforts here as the round comes to an end.
White's corner calls for a 1-2. White obliges with the 1 part as he scores the single shot and moves back out of range.
White lands with a nice body punch.
Dood is looking to clinch but White is avoiding it.
And thats the end of the round the fighters go back to their corners.
Walter White showed his class in that round. I'd imagine he'll take it on all the scorecards.
The minute break is over - no more time for sponges and pep talks - back to the action! This is the final round!

White lands a beauty of a right hand that gets the crowd cheering.
White keeps the fight on the outside.
White scores to the head and body with a nice combination!
Dood fails in his attempt to clinch.
Dood closes the distance but White moves to the side
and White counters with a quick right hand to the jaw.
Dood ducks right into an uppercut from White.
Dood gets in close and instigates a clinch.
Good body shot from White.
Dood throws a punch but it's blocked by White.
We've had a slow start to the round here - hopefully the action picks up.
A short uppercut from White.
White tries to land a shot to the body but it's blocked.
Dood goes for a body shot but it's blocked.
Dood misses with a short punch on the inside.
Dood throws a head punch that misses.
Both fighters are breathing heavily.
A body shot lands from White.
Dood looks like he's developed a pretty tasty lump over his left eye. He'll need to avoid taking much more damage to that.
That's one minute gone in the round.
Dood tries to work over White's body with a swooping hook but it only glances the target.
A hook to the body from Dood.
White swings wildly with an uppercut but Dood uses good head movement to avoid it.
Dood misses with the head strike.
Dood tries to throw a body punch but White avoids it by throwing Dood back against the cage.
White throws a punch but it's blocked by Dood.
Dood misses with a shot to the kidneys.
White breaks from the clinch.
White thuds his right hand into Dood's forehead from close range. That could be painful for both fighters.
White throws a right hand that Dood ducks under and follows up with a left that Dood also avoids with ease.
Nice shot by White.
Dood wants to clinch
enabling White to counter with a crisp jab.
Dood showing good head movement there, avoiding the strikes from White.
That's two minutes gone in the round.
Dood darts in trying to clinch
and White counters with a good right hand that lands right on the jaw.
White tests Dood's chin there with a solid looking shot.
A left lands for White.
This has been an exciting period of action!
Dood takes one to the chin there.
Dood moves to clinch but White breaks away
and White counters with a stiff right hand.
White's corner calls for a 1, 2 combination and White duly obliges.
White lands a jab to Dood's midsection.
White scores with the left hand. Dood knows he should have avoided that one.
Dood takes a shot to the nose. Hopefully that hasn't broken it.
Dood moves into range and clinches up with White.
Walter White is fighting for a decision here - he's started to take the cautious approach.
That's three minutes gone in the round.
Dood misses with a punch on the inside.
Dood swings away with an uppercut that misses.
White lands a right hand that snaps the head of Dood backwards.
Dood tries to work over White's body with a swooping hook but it only glances the target.
Dood goes for a body shot but it's blocked.
Dood misses with some punches.
White blocks an uppercut.
White makes some space for himself and lands an uppercut.
Dood tries to throw a body punch but White avoids it by throwing Dood back against the cage.
Dood misses with a short punch on the inside.
A head punch on the inside from Dood fails to land.
That's four minutes gone in the round.
White blocks a couple of punches on the inside.
White lands a shoulder strike that jolts his opponent's head backwards.
Dood doesn't land with the attempted body shot.
A short right from White on the inside.
White lands a nice looking hook to the body, against the cage.
White lands a hook to the side of the head.
White misses the knee to the body. Nice hip positioning from Dood.
A head punch blocked on the inside by White.
Dood working aggressively here.
White misses the knee to the body. Nice hip positioning from Dood.
White tries to land a knee to the body but he is off balance and Dood avoids it.
White blocks a punch to the side of the head.
Kit Dood has stepped it up - he knows he needs a finish here!
We've seen a great period of action over the last minute or so - credit to both fighters for going all out!
Dood tries to throw a body punch but White avoids it by throwing Dood back against the cage.
And that's the end of the fight!
Walter White comfortably won the final round on my scorecard.
I think White has won this one but let's see whether the judges agree with me. Over to the ring announcer for the scorecards.
Ladies and gentlemen, after 3 rounds of action, we go to the scorecards for a decision.
Judge Ian Loll scores the fight for Walter White!
Judge Gregory Folan scores the fight for Walter White!
Judge Steve Smith scores the fight for Walter White!
Walter White wins by unanimous decision!
An out of breath Walter White thanked his loyal fans in his post fight interview, giving them credit for his success over the course of his career.
|
|
|
|
|
|
|
|
|
|
|
|
|
|
|
|
|
|
|
|
|
|
|
| S |
C
A |
G |
S |
C
B |
G |
|
S |
C |
G |
|
energy
A | B |
|
hype
A | B |
|
pop
A | B |
|
mgr
A | B |
|
FIGHT
RATING
71% |
|
|
|
|
|
|
|
Co-main event
|
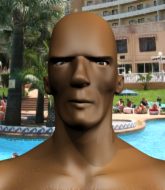
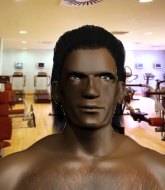
Coming up we have a lightweight MMA rules bout between Marie Asmuth (ranked 0 p4p, 0 weight class) and Teemu Packalen (ranked 0 p4p, 0 weight class). Marie Asmuth could well score a knockout today. He has the power to get to Teemu Packalen's chin.
 |
|
 |
| 172 cm
18
140 lbs
1 - 0 - 0 |
|
185 cm
25
160 lbs
1 - 0 - 0 |
BJJ Blue Belt
Basic striking
KO power |
|
Good takedowns
Counter fighter
Determined |
|
| |
|
Ladies and gentlemen. This fight is 3 rounds, in the lightweight division.
Introducing the fighter to my left, fighting out of the red corner.
With a record of
1 - 0 - 0, fighting out of Montreal, Marie Asmuth!
And introducing the fighter to my right, fighting out of the blue corner.
With a record of
1 - 0 - 0, fighting out of Montreal, Teemu Packalen!
The judges for this bout are Ian Loll, Dillan Fox and Yves DeLean.
The bell rings for round one and we are underway!
Asmuth misses with a few strikes there.
Packalen changes levels for a counter takedown but doesn't follow through with his attempt.
Asmuth displays good takedown defense there as he swats away a double leg from Packalen.
Packalen misses with a wild combination.
Asmuth throws a combination but comes up with nothing but fresh air.
Asmuth throws a combination that misses
and Packalen counters with a takedown into side control! That could mean trouble for Asmuth!
We've had a slow start to the round here - hopefully the action picks up.
The referee asks Packalen politely if he wouldn't mind getting on with it and actually doing something. Packalen prefers to stall for the moment though.
Asmuth tries to escape but Packalen is in control.
Asmuth knows he needs to get back to his feet asap. He's simply no match for Packalen on the ground.
Packalen is trying to move to mount but Asmuth reverses beautifully and ends up in Packalen's guard.

Packalen looking to try and escape his hips here, looking for a submission. It looks like he's going for a triangle but Asmuth is defending well. Packalen quickly switches to an armbar and extends the arm! Asmuth has no choice but to tap, to a very quick submission! Wow, that was lightning fast! Packalen celebrates on the cage, with the crowd.
Ladies and gentlemen, after 1:55 of round 1, we have a winner by way of Submission (Armbar). Teemu Packalen!
|
|
|
|
|
|
|
|
|
|
|
|
|
|
|
|
|
|
|
|
|
|
|
| S |
C
A |
G |
S |
C
B |
G |
|
S |
C |
G |
|
energy
A | B |
|
hype
A | B |
|
pop
A | B |
|
mgr
A | B |
|
FIGHT
RATING
72% |
|
|
|
|
|
|
|
Main event
|
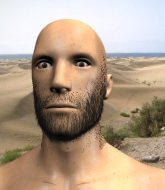
Coming up we have a lightweight MMA rules bout between Charles Briscoe (ranked 0 p4p, 0 weight class) and Matty Williams (ranked 0 p4p, 0 weight class). Charles Briscoe has the edge in experience - let's see if he can make that count tonight.
 |
|
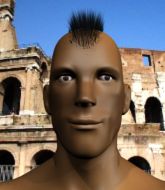 |
| 170 cm
24
153 lbs
1 - 0 - 0 |
|
175 cm
25
160 lbs
1 - 0 - 0 |
Decent wrestler
Counter fighter
Good chin |
|
BJJ White Belt
Excellent MT
Solid chin |
|
| |
|
Ladies and gentlemen. This fight is 3 rounds, in the lightweight division.
Introducing the fighter to my left, fighting out of the red corner.
With a record of
1 - 0 - 0, fighting out of Montreal, Charles Briscoe!
And introducing the fighter to my right, fighting out of the blue corner.
With a record of
1 - 0 - 0, fighting out of Montreal, Matty Williams!
The judges for this bout are Elvis Blanc, Dillan Fox and Steve Smith.
The bell rings for round one and we are underway!
Briscoe fails with an attempt to clinch.
Despite the aggression on Williams's face he doesn't fully commit to the counter.
Briscoe has Williams up against the cage in a clinch.
Williams prevents a takedown attempt there.
Williams gets underhooks to prevent Briscoe's takedown attempt.
Williams slowing the pace effectively.
We've had a slow start to the round here - hopefully the action picks up.
Williams is pressed up against the cage. Briscoe has hold of a leg and is looking to drag Williams down to the mat. Williams avoids the attempt though and has circled away. We're back to striking at a distance.
That's three failed takedown attempts in the round for Charles Briscoe. That's going to take a lot out of him.
Briscoe fails in his attempt to clinch.
Williams lets it all go there with a big combo counter but none of the punches connected.
Williams tries a head kick but it misses.
That's one minute gone in the round.
Briscoe moves out of range as Williams strikes.
Briscoe tries to clinch but is not successful on this occasion.
Despite the aggression on Williams's face he doesn't fully commit to the counter.
Williams misses with a jab, cross combination.
Williams stuffs a takedown. It's all about dictating where the fight takes place and Williams wants it to stay on the feet.
Briscoe shoots in for a takedown but Williams shows good takedown defense there and keeps this one on the feet.
Briscoe ducks down and throws a hook to the body but Williams moves away.
Williams is loading up here, looking for a big counter of his own.
Briscoe throws a low kick but Williams avoids it.
Williams is looking for the big counter here.
Briscoe swinging wildly here.
That's two minutes gone in the round.
Briscoe throws a body kick but he was well out of range there.
Williams now looks to counter with a shot at the body.
No luck with that takedown attempt from Briscoe.
Williams tries a switch kick but it misses it's target.
Charles Briscoe seems to be the more aggressive standup fighter in this bout.
Williams tries to keep at a distance but Briscoe has taken the fight into the clinch.
Williams escapes the clinch and we're back to striking.
Briscoe slips a jab and a cross from Williams.
As Williams looks to move away, Briscoe throws a big counter combo but Williams just gets out of the way.
That's three minutes gone in the round.
Briscoe avoids a punch combination nicely.
A momentary lapse in concentration from Williams enables Briscoe to shoot in and score with a neat double leg. Williams manages to secure a closed guard as the fighters hit the mat.

The fighters are working up against the cage. Williams manages to wriggle his way back to his feet, so the fighters are now clinched against the cage.
Briscoe being controlled against the cage.
Briscoe has dropped down and is looking to force the takedown but it's defended by Williams after a bit of a struggle.
That's four minutes gone in the round.
Williams's corner calls for him to break the clinch, which he does.
Briscoe changes levels and looks for a double leg takedown. Williams tries to avoid it but Briscoe manages to keep hold of a leg and drag Williams to the ground. Williams escapes though and pops straight back up to his feet.
Briscoe uses decent footwork to sidestep a right hand from Williams.
Briscoe half commits to a counter takedown before pushing away, out of range.
Briscoe shoots in for a takedown but Williams shows good takedown defense there and keeps this one on the feet.
Nice sprawl there from Williams as Briscoe shoots in.
Williams doesn't fully commit to the body shot counter.
Williams throws a body punch but Briscoe moves out of range.
Briscoe drops down looking for a counter takedown but Williams sprawls and moves away.
Wooooo! Give it up for these two warriors! They are putting on a show!
The crowd thankful this round is nearly over.
Briscoe tries to clinch up.
And thats the end of the round the fighters go back to their corners.
Matty Williams dominated that round.
The referee calls time. The cornermen exit stage left and we're back to business.
Briscoe with a lazy takedown attempt
and Williams counters with a two punch combo.
Briscoe misses with a takedown
and Williams counters nicely by changing levels and landing a hook to the body.
Briscoe pulls out of a head kick attempt.
Briscoe throws a half hearted mid kick.
Williams is looking for the big counter here.
A momentary lapse in concentration from Williams enables Briscoe to shoot in and score with a neat double leg. Williams manages to secure a closed guard as the fighters hit the mat.
The ref warns both fighters not to hold the cage as they work up against the meshing.
We've had a slow start to the round here - hopefully the action picks up.
Williams utilising some decent striking defenses from the guard, preventing the ground and pound.
Briscoe chips away with some ground and pound.
Briscoe throws a big right hand that misses.
Briscoe postures up and lands a big shot to Williams's brow.
Briscoe has been looking to land a fair amount of strikes on the ground. He might be looking to soften his opponent up in order to work for a submission.
That's one minute gone in the round.
Briscoe with a couple of shots to the head there. Not particularly brutal.
Briscoe postures up and scores with a shot to the body and a follow up elbow to the head.
Williams is looking to stand up but Briscoe isn't so interested in that idea.
Briscoe scoring with some ground and pound.
Williams has momentary wrist control but Briscoe slips an elbow through the middle.
Briscoe keeps in close for a moment and lands a decent shot to the side of Williams's head.
Briscoe lands a couple of digs.
Briscoe is working the ground and pound from guard. He might want to try advancing position though to get more of an impact.
Briscoe throwing strikes but missing.
Williams wants to stand up but Briscoe is controlling him.
The fighters are working up against the cage. Williams manages to wriggle his way back to his feet, so the fighters are now clinched against the cage.
Williams stalls.
That's two minutes gone in the round.
Williams breaks the clinch and we're back to striking at distance.
Briscoe tries to clinch but Williams is having none of it.
A looping hook to the body misses from Briscoe. Williams does a little dance to reset his feet.
The fight stays on the outside here - Briscoe looks like he's thinking about clinching though.
Charles Briscoe is looking to throw some combinations by the looks of things.
A clash of legs there as Williams blocks the low kick.
As Briscoe backs off Williams throws a huge counter combo but Briscoe manages to avoid it all.
Briscoe looking to score a takedown here. Williams is defending well but Briscoe drives through and ends up in Williams's guard.
That's three minutes gone in the round.
Briscoe is looking to work some ground and pound but Williams has wrist control.
Briscoe stands up over Williams, holding his feet. He dives back in and lands a decent shot to the head.
Briscoe cracks Williams with a solid left hand.
Williams keeping moving, preventing Briscoe from controlling successfully.
Briscoe content to strike from guard, landing some decent shots.
Briscoe trying to control the position from guard on top but Williams is wriggling around, looking for whatever he can.
The fighters are pressed up against the cage, both looking to find a bit of space to work.
Briscoe prevents Williams from getting back to his feet.
Charles Briscoe overall seems to be getting the better of the ground position in the fight so far.
Briscoe working in close now, lands a nice elbow to the side of Williams's head.
Briscoe trying to land body shots but he keeps hitting the mat.
Williams really doesn't want to stay on the ground with Briscoe. If he can't get it back to his feet, it's only a matter of time before he'll be tapping out.
Williams is trying to stand up but he's not managed so far.
Briscoe scoring with some ground and pound.
That's four minutes gone in the round.
The fighters are starting to get a bit slippery now, which will make submissions a bit more difficult.
Briscoe won't allow Williams to get back to his feet.
Briscoe is sitting in guard, working some ground and pound.
Briscoe connects with a couple of short punches.
Williams is looking to stand up but Briscoe isn't so interested in that idea.
Briscoe distracts Williams with his right hand and drops a big elbow with his other arm.
Briscoe working some strikes from top position.
Briscoe throwing strikes from guard but Williams blocks nicely.
A big thud reverberates around the arena there as Briscoe accidentally thumps the mat. Hopefully he's not broken his hand.
Briscoe is in close to Williams's body, working some short punches and elbows.
Briscoe trying to control but Williams is working from the bottom.
Williams is looking to stand up but Briscoe isn't so interested in that idea.
And thats the end of the round the fighters go back to their corners.
Charles Briscoe dominated that second round.
Well, the break between rounds is over. Let's get back to the scrappin! This is the final round!
Briscoe looks to land a right hand but Williams moved out of range.
Williams looks to score with a combo but nothing lands.
Briscoe has his takedown stuffed
and Williams counters with a one-two to the body.
Williams looks for the body kick but Briscoe saw that one coming.
We've had a slow start to the round here - hopefully the action picks up.
Briscoe misses with a double jab.
Briscoe showing good head movement there, avoiding the strikes from Williams.
That's one minute gone in the round.
Williams rushes forward with a series of wild hooks but Briscoe moves out of range and avoids them all easily.
Briscoe turns his hip over beautifully as he lands a nice leg kick.
Williams displays good takedown defense there as he swats away a double leg from Briscoe.
As Briscoe backs off Williams throws a huge counter combo but Briscoe manages to avoid it all.
Williams misses with a hook. Briscoe ducked under it nicely.
Briscoe shoots in looking for a takedown but Williams manages to keep the fight standing, pushing Briscoe's face into the canvas for good measure before circling away.
That's three failed takedown attempts in the round for Charles Briscoe. That's going to take a lot out of him.
Briscoe closes the distance and gets a double leg, slamming Williams to the mat! Williams manages to get full guard.
That's two minutes gone in the round.
Briscoe stops Williams from standing up.
Briscoe makes a bit of distance and scores with some ground and pound, still in guard.

Briscoe gets to his feet and steps away from his opponent.
Williams keeping a good distance there, avoiding the body shot.
It seemed like Williams was going to counter with the hook but didn't fully commit to it.
Both fighters are breathing heavily.
Williams throws a head kick that misses and slips in the process. He scrambles back to his feet and the fighters circle.
Briscoe looks to score with a combo but nothing lands.
Williams unleashes a big counter combination but Briscoe bobs and weaves and avoids any damage.
Briscoe tries to shoot in for a takedown. He's got hold of a leg but Williams swivels and escapes.
Williams throws a counter combo.
Briscoe tries to clinch but Williams moves out of range.
Williams lets it all go there with a big combo counter but none of the punches connected.
Matty Williams is looking to keep the fight on the feet at all costs.
That's three minutes gone in the round.
Briscoe instigates a clinch.
Briscoe drops down for a takedown but doesn't get it.
Briscoe drops down looking for an ankle pick but Williams pulls his leg out and moves away.
Briscoe tries to clinch there but Williams circles away.
Williams misses with a combination
and Briscoe counters with a driving takedown into guard. Nice work there by Briscoe.
That's four minutes gone in the round.
Hammerfist, elbow! yells Briscoe's corner. There ya go! There ya go!
Briscoe looking to pass the guard.
A big thud reverberates around the arena there as Briscoe accidentally thumps the mat. Hopefully he's not broken his hand.
Williams is trying to stand up but he's not managed so far.
Williams working the defensive guard well to avoid strikes from Briscoe.
Williams utilising some decent striking defenses from the guard, preventing the ground and pound.
Briscoe wants to control from the top but Williams keeps moving.
We get told so often about how wrestlers don't like to be on their backs. Let's see if Williams can do anything to dispel that myth.
Briscoe lands a couple of decent looking shots.
The crowd thankful this round is nearly over.
A big thud reverberates around the arena there as Briscoe accidentally thumps the mat. Hopefully he's not broken his hand.
Briscoe throwing elbows and punches but not connecting, as Williams works some decent striking defense from the bottom.
Williams working the defensive guard well to avoid strikes from Briscoe.
And that's the end of the fight!
That was a close round. You could make an argument for either fighter but I would give it to Charles Briscoe.
I think Briscoe has won this one but let's see what the judges have to say. Over to the ring announcer for the scorecards.
Ladies and gentlemen, after 3 rounds of action, we go to the scorecards for a decision.
Judge Elvis Blanc scores the fight for Charles Briscoe!
Judge Dillan Fox scores the fight for Charles Briscoe!
Judge Steve Smith scores the fight for Charles Briscoe!
Charles Briscoe wins by unanimous decision!
|
|
|
|
|
|
|
|
|
|
|
|
|
|
|
|
|
|
|
|
|
|
|
| S |
C
A |
G |
S |
C
B |
G |
|
S |
C |
G |
|
energy
A | B |
|
hype
A | B |
|
pop
A | B |
|
mgr
A | B |
|
FIGHT
RATING
36% |
|
|
|
|
|
|
|
|
|
|
