 |
Super-Saturday PBP Commentary |
Undercard bout
|
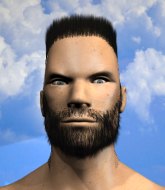
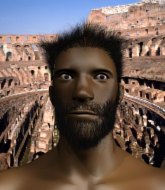
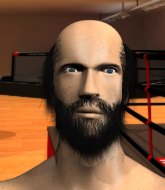
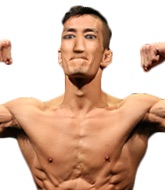
Coming up we have a heavyweight MMA rules bout between Travis Bickle (ranked 0 p4p, 0 weight class) and Muay Box (ranked 0 p4p, 0 weight class). These two fighters really are very evenly matched on the feet - it will be fascinating to see who can assert themselves in that aspect of the fight.
 |
|
 |
| 198 cm
26
280 lbs
9 - 7 - 0 |
|
200 cm
25
270 lbs
5 - 1 - 0 |
Decent wrestler
Solid boxing
Experienced |
|
BJJ White Belt
Excellent MT
Granite chin |
|
| |
|
Ladies and gentlemen. This fight is 3 rounds, in the heavyweight division.
Introducing the fighter to my left, fighting out of the red corner.
With a record of
9 - 7 - 0, fighting out of The Island, Travis Bickle!
And introducing the fighter to my right, fighting out of the blue corner.
With a record of
5 - 1 - 0, fighting out of The Island, Muay Box!
The judges for this bout are Michael Johnstone, Dirk Anderson and Winston Alpacca.

The bell rings for round one and we are underway!
Bickle misses with a shot to the body
and Box counters with a quick right hand to the jaw.

It looks like Travis Bickle has been cut.
A looping hook to the body misses from Box. Bickle does a little dance to reset his feet.
Bickle scores with a punch to the head.
Bickle waving his hands out in front of him, looking to distract Box.
Box walks into a straight right hand from Bickle.
Bickle lands a body shot.
Bickle cracks a nice hook into Box's ribs.
Bickle ducks under a wild hook from Box.
Box uses good footwork to avoid the strikes from Bickle.
Bickle definitely looks more muscular than last time we saw him fight.
We've had a slow start to the round here - hopefully the action picks up.
Box cracks Bickle with a nice right hand that draws applause from the crowd.
Bickle misses with a shot to the body
and Bickle takes a counter punch right on the button for his troubles.
Bickle throws the left hand but Box avoids the punch easily.
Wooooo! Give it up for these two warriors! They are putting on a show!
Box just misses with a punch to the body.

That's one minute gone in the round.
Box misses the shot to the body.
Box throws an overhand right that lands on Bickle's shoulder, as Bickle tries to avoid the shot.
Box takes a jab on the nose there. A little bit of blood seems to be coming out. Hopefully that won't affect his breathing.
Box misses the shot to the body.
Bickle paws at his opponent with the jab and then lunges in with a straight, right on the button.
Bickle ducks down and throws a hook to the body but Box moves away.
Box throws a hook to the body but it doesn't connect.
Bickle throws a hard body shot but it just misses.
Bickle fakes high and swings low for a body shot but Box manages to avoid it.
Box swings away with a counter right hand but no contact made.
Bickle throws a right and a left that Box avoids nicely.
Bickle throws a hard body shot but it just misses.

That's two minutes gone in the round.
Bickle lands an overhand right.
Box misses with a straight left.
Bickle is looking to counter with a shot to the body.
Bickle just misses with a punch to the body.
Box lets it all go there with a big combo counter but none of the punches connected.
A punch combination from Bickle misses.
Bickle jabbing away but nothing is landing.
Bickle fakes a head punch and goes low to the body. Nicely done.
A combination from Bickle does no damage.
This is a great period of action - very entertaining stuff!
Box throws the left hand but Bickle avoids the punch easily.
Bickle is looking to counter punch.
Bickle lands with an overhand left.
Bickle punishes Box's body with a nice straight punch.
Box looks winded!
Bickle throws an uppercut from half a mile away. Box sees it coming and avoids it easily.
Bickle punishes Box's body with a nice straight punch.

That's three minutes gone in the round.
Bickle ducks under an overhand right and circles away with a smile on his face.
It looked like Bickle was trying to counter with a body shot coming off that last attack from Box.
Bickle works Box's body with a nice hook.
Bickle scores with a sloppy punch to the body. Not much technique there but it did the business.
Bickle dips down and scores with a jab to the body.
Box on the wrong end of an overhand right that came out of nowhere.
Travis Bickle seems to be the more aggressive standup fighter in this bout.
Bickle throws a hard body shot but it just misses.
Box shakes his hands off, looking to compose himself, but takes a jab to the jaw whilst he does it.
Bickle cracks Box with an open hand slap.
Bickle cracks Box with a good shot that sees him stumbling back into the cage.
Bickle lands a straight punch to the body, keeping Box at a distance.

That's four minutes gone in the round.
Box takes a solid shot to the body. That one hurt him but he's trying not to show it.
This is a great period of action - very entertaining stuff!
Box takes a shot right to the liver - Bas would have been proud of that punch.
Bickle throws a hard body shot but it just misses.
Bickle ducks down and throws a hook to the body.
Box walks into a straight right hand from Bickle.
Bickle lands with a cross to side of his opponent's head.
Box on the wrong end of a nice hook.
Jab, jab by Bickle - just one landing.
Bickle throws a right and a left that both miss.
A little jabbing left from Box on the counter but it doesn't find it's target.
Bickle misses the shot to the body.
Box's coach down at ReVoLuT!oN !sL@nD GYM was telling us pre-fight that they have been working on Box's balance. Obviously they view that as a key factor in the outcome of this fight.
Bickle is really peppering his opponent's head with punches.
Bickle lands with a cross.
And thats the end of the round the fighters go back to their corners.
Travis Bickle dominated that round.
The cut man is working on Travis Bickle's cut.
That's the end of the interval. I'm sure that seemed a lot quicker than a minute for our two fighters! Back to the action.

Bickle looks to score with a jab to the body but Box is just out of range.
Box showing good head movement there, avoiding the strikes from Bickle.
Bickle scores with a crisp jab that stopped Box in his tracks.
Bickle throws a looping overhand right but Box ducks down to avoid it.
Nice uppercut there from Bickle.
Bickle misses the shot to the body.
We've had a slow start to the round here - hopefully the action picks up.
Box connects with a slap. Keep your fist closed son.
Bickle throws a shot from downtown. Box moves away and avoids it.
Box uses some good footwork to avoid the body shot by Bickle.
And an attempted straight right on the counter from Box! But no joy.
Bickle punishes Box's body with a nice straight punch.
That's one minute gone in the round.
Nice cross by Box.
Box stuns Bickle with a nice body shot, before stepping back out of range.
Travis Bickle is winning the standup battle so far.
Box is breathing heavily.
Box showing good head movement there, avoiding the strikes from Bickle.
Box misses with a hook.
Box misses with an uppercut
and Bickle counters nicely by changing levels and landing a hook to the body.
Bickle looks to land a combination. Box sees it coming but can only parry a couple of the shots.
Bickle lands a jab to the nose.
Bickle throws a good cross that connects.
Box uses good footwork to avoid the strikes from Bickle.
That's two minutes gone in the round.
Bickle throws a series of punches but Box avoids them all with ease.
Box appears to be waiting to throw a counter punch to the body.
Bickle scores with a hook to the body. Box takes a step back and tries to catch his breath.
Fantastic stuff here - a very entertaining period of action, which has drawn cheers from the crowd.
Bickle lands a slapping body shot.
Bickle tests Box's chin there with a solid looking shot.
Box takes a body punch that cleary hurt but he's trying not to show any weakness.
Box takes one to the chin there.
Bickle throws a hook to the side of Box's head but Box sees it coming and ducks under it beautifully.
Bickle lands with a shot to the body.
A punch combination from Bickle misses.
Nice shot by Bickle.
That's three minutes gone in the round.
Bickle misses the shot to the body.
Some wild striking there from Bickle.
Bickle works the jab nicely.
This fight brought to you by 5M nutrition - it's mmmmm tasty. Nice jab by Bickle.
Bickle works over Box's head and body with a nice combination.
Box has a pretty nasty looking mouse under his right eye.
Bickle looks to score with a jab to the body but Box is just out of range.
Bickle fakes low and throws an overhand right that catches Box on the side of the head.
Bickle lands with a good body shot.
That's four minutes gone in the round.
Bickle blocks a jab.
Bickle works over Box's head and body with a nice combination.
We've seen a great period of action over the last minute or so - credit to both fighters for going all out!
Bickle scores with a reasonable looking shot to the body. Box doesn't seem bothered though.
Left hook, right uppercut from Bickle.
Bickle is really dominating this fight. Is there anything that Box can do to turn this around?
Box uses good head movement to avoid the hook from Bickle.
Box takes a body punch but keeps moving.
Bickle scores with a hook to the body. Box takes a step back and tries to catch his breath.
Bickle jabs Box to the body, keeping him at a distance.
Box walks into a stiff left hand from Bickle.
Bickle lands a nice shot that snaps Box's head back.
Bickle lands a powerful looking uppercut that connected with his opponent's jaw.
And thats the end of the round the fighters go back to their corners.
Travis Bickle dominated that second round.
The cut man is working on Travis Bickle's cut.
The minute break is over - no more time for sponges and pep talks - back to the action! This is the final round!

Bickle misses with a series of wild punches.
Box takes a jab right on the nose. That must have hurt but he shrugs his shoulders and looks to return the favor.
Bickle uses some good footwork to avoid the body shot by Box.
Bickle shuffles to his left behind two crisp jabs. Box eats them both and turns towards Bickle to reposition himself and eats a stinging right hand-left hook combo.
Box fakes a head punch and goes low to the body. Nicely done.
Box throws a jab but it's blocked by Bickle.
We've had a slow start to the round here - hopefully the action picks up.
Box slips a jab and a cross from Bickle.
Box takes a big intake of breath there - he's definitely tired.
A looping hook to the body misses from Bickle. Box does a little dance to reset his feet.
A left lands for Bickle.
That's one minute gone in the round.
Box throws out a loose jab but Bickle uses good head movement to avoid it.
Bickle scores with a reasonable looking shot to the body. Box doesn't seem bothered though.
Bickle lands a slapping body shot.
Bickle on the wrong end of a vicious looking body shot.
Bickle misses with a jab and misses with a cross straight after too.
Box looked like he wanted to counter with a punch but didn't throw it.
Both these guys seem content to just stand up and trade with eachother but Box might want to think about changing up his gameplan a bit because over the course of the fight, Bickle has got the better of the exchanges.
Bickle lands a body shot.
Bickle comes forward and lands a shot to the body, then darts back out of range.
Box fakes high and swings low for a body shot but Bickle manages to avoid it.
Bickle misses with a body shot. Nice footwork from Box.
Box is on the wrong end of a nice combination from Bickle.
That's two minutes gone in the round.
Bickle lands with a nice combination. Box backs away looking to recover.
The fans in attendance giving it up for the two fighters, who have really let it all hang out in the last minute or so!
Bickle uses good footwork to avoid the strikes from Box.
Bickle paws at his opponent with the jab and then lunges in with a straight, right on the button.
Bickle ducks down and throws a hook to the body.
Box takes a solid shot to the body. That one hurt him but he's trying not to show it.
A punch lands to the side of Box 's head but he takes it in his stride.
Box closes the distance and takes a jab right on the nose as he does so.
Bickle throws a combination but comes up with nothing but fresh air.
Bickle lands with a shot to the body.
Bickle connects with a body shot that sends Box's belly button to the back.
That's three minutes gone in the round.
Box drops his hands and takes a jab to the jaw for his troubles.
Bickle dips down and scores with a jab to the body.
Bickle lands a pitter patter jab to the forehead of his opponent.
Bickle lands a beauty of a right hand that gets the crowd cheering.
Bickle jabs Box right on the nose. Box blinks but takes it well.
Bickle cracks Box with an open hand slap.
Bickle just misses with a punch to the body.
Bickle cracks Box with a hook to the jaw. Both fighters smile at eachother and high-five before getting back down to business.
Bickle misses the shot to the body.
Box slips under a jab.
That's four minutes gone in the round.
Bickle stuns Box with a nice body shot, before stepping back out of range.
Muay Box has stepped it up - he knows he needs a finish here!
Bickle connects with a slap. Keep your fist closed son.
The fans in attendance giving it up for the two fighters, who have really let it all hang out in the last minute or so!
Bickle lands a slapping body shot.
Bickle looks to score with a jab to the body but Box is just out of range.
Bickle is looking to wear down Box with body shots, infact he's throwing more body shots than head shots at the moment.
Bickle scores with a one two! Box had his feet all tangled up there and couldn't avoid the strikes.
Box takes one on the chin but keeps coming.
Box on the wrong end of a nice jab.
Travis Bickle is fighting for a decision here - he's started to take the cautious approach.
Bickle lands a nice looking body shot.
Bickle fakes and then throws a beautiful body shot. Box looks a bit winded and takes a step backwards to take a breath.
Bickle lands with a hook. Box tried to avoid it but it clipped the top of his head.
And that's the end of the fight!
Travis Bickle showed his dominance in that final round.
Well Bickle has outscored his opponent in every aspect of the fight today. Only a scarily incompetent judge or two will keep him from a well deserved win... Over to the ring announcer for the scorecards.
Ladies and gentlemen, after 3 rounds of action, we go to the scorecards for a decision.
Judge Michael Johnstone scores the fight 30:26
Judge Dirk Anderson scores the fight 30:27
Judge Winston Alpacca scores the fight 30:27
In favor of your winner, by unanimous decision... Travis Bickle!
Travis Bickle looked relieved post fight as he said the following; 'i'm gonna clean these streets'.
|
|
|
|
|
|
|
|
|
|
|
|
|
|
|
|
|
|
|
|
|
|
|
| S |
C
A |
G |
S |
C
B |
G |
|
S |
C |
G |
|
energy
A | B |
|
hype
A | B |
|
pop
A | B |
|
mgr
A | B |
|
FIGHT
RATING
65% |
|
|
|
|
|
|
|
Undercard bout
|
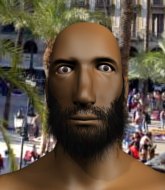
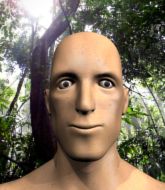
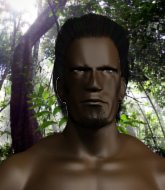
Coming up we have a middleweight MMA rules bout between Joe Rokocoko (ranked 0 p4p, 0 weight class) and Baked Ziti Esposito (ranked 0 p4p, 0 weight class). Both fighters look fresh as a daisy as they make their way towards the cage.
 |
|
 |
| 185 cm
26
202 lbs
4 - 2 - 0 |
|
182 cm
26
188 lbs
4 - 1 - 0 |
Decent wrestler
Excellent boxer
Granite chin |
|
Decent wrestler
Basic striking
Powerful |
|
| |
|
Ladies and gentlemen. This fight is 5 rounds, for the middleweight championship of the world!
Introducing the champion to my left, fighting out of the red corner.
With a record of
4 - 2 - 0, fighting out of The Island, Joe Rokocoko!
And introducing the challenger to my right, fighting out of the blue corner.
With a record of
4 - 1 - 0, fighting out of The Island, Baked Ziti Esposito !
The judges for this bout are David Hoff, Peter Branson and Sandra Marshall.
The bell rings for round one and we are underway!
Esposito misses with a body kick.
Esposito misses with a low kick.
Rokocoko takes a swing at Esposito 's ribcage but misses.
Esposito looks to score with a jab to the body but Rokocoko is just out of range.
Rokocoko was looking to counter that move with a punch but didn't quite pull the trigger.
Esposito misses with an uppercut.
The sound of bone on bone echoes around the arena as Rokocoko checks a leg kick.
Oooooooooooh, not good. A low kick from Esposito lands where it shouldn't have, right in the... well, you know what he did? He kicked him in the penis. He's injured, injured bad. The referee sends both fighters to their corners and Rokocoko has 5 minutes to recover. He's OK now though... a thumbs up from Rokocoko and we're back underway with a touch of gloves.
Rokocoko scores with a nice right hand.

Rokocoko clinches with his opponent.
Esposito misses with a shot to the kidneys.
Esposito working some nice short punches in the clinch.
Esposito is trying to pull guard but Rokocoko turns him against the cage and we stay in the clinch.
Esposito misses with a hook to the ribs.
We've had a slow start to the round here - hopefully the action picks up.
Esposito tries a shoulder strike but it doesn't do any damage.
Rokocoko misses with a hook from the clinch.
Esposito blocks an uppercut.
Rokocoko can't find room to land a body shot as Esposito controls the action.
Rokocoko scores with a shoulder strike.
Rokocoko works on Esposito 's body with a couple of short punches.
Esposito throws a punch but it's blocked by Rokocoko.
That's one minute gone in the round.
Rokocoko scores with a nice hook to the head.
Rokocoko lands a body punch in the clinch.
Esposito tries for a takedown. No joy.
Esposito goes for a body shot but it's blocked.
Rokocoko lands a hook to the side of the head.
Rokocoko misses with a punch on the inside.
Rokocoko has been talking about how he's improved his wrestling in the run up to the fight so let's see if that's enough to sway the balance.
Rokocoko digs a right hand into Esposito 's ribs. Those have got to be taking their toll on Esposito 's gas tank.
Rokocoko lands a right uppercut that snaps the head of Esposito backwards.
Esposito goes for a body shot but it's blocked.
Rokocoko gets through Esposito 's defenses to land a nice punch to the side of the head.
A head punch blocked on the inside by Rokocoko.
Rokocoko misses with some punches.
Rokocoko lands a right uppercut that snaps the head of Esposito backwards.
Esposito lands a hook that snaps the head of Rokocoko backwards.
Esposito struggles to land a body shot inside as Rokocoko controls his hands.
Esposito can't find room to land a body shot as Rokocoko controls the action.
Esposito working on landing some head shots here - that one got through nicely.
The crowd are loving this. Great action here.
Rokocoko scores with a shot to the side of Esposito 's head.
Rokocoko throws a head punch that misses.
Esposito misses with a punch to the body.
A nice right hand lands inside from Esposito .
That's two minutes gone in the round.
Rokocoko lands a nice looking hook to the body, against the cage.
Rokocoko lands with a left to the head.
Rokocoko tries a shoulder strike but it doesn't do any damage.
A short left from Rokocoko.
A right handed body shot lands from Rokocoko.
Esposito looks winded!
Rokocoko blocking some punches.
Rokocoko cracks Esposito with a nice body shot.
Esposito tries to pull guard but Rokocoko holds him up against the cage and eventually Esposito drops back down to his feet.
Joe Rokocoko has stuffed three takedown attempts in the round now. That's going to take a lot out of Baked Ziti Esposito .
Esposito struggles to land a body shot inside as Rokocoko controls his hands.
Rokocoko misses with the head strike.
Rokocoko lands with a short shot to the head.
Rokocoko lands a right hand.
A short left from Rokocoko.
Rokocoko lands with a good tight uppercut to the head.
Rokocoko lands punches inside but they're not really causing much damage.
Esposito blocks an uppercut.
Rokocoko lands a hook to the side of the head.
Esposito swings away with an uppercut that misses.
Rokocoko lands a right hand.
That's three minutes gone in the round.
Rokocoko misses with a hook from the clinch.
Rokocoko lands an uppercut.
Rokocoko blocking some punches.
Rokocoko is leaning against Esposito and scores with a nice uppercut to the body.
A short right hand to the side of the head by Rokocoko.
Rokocoko prevents the takedown attempt.
Esposito looks more muscular than last time we saw him. He must have been on the weights.
An uppercut on the inside fails to land for Rokocoko.
Rokocoko lands a body shot in the clinch.
A short right from Rokocoko on the inside.
Rokocoko scores with a shot to the side of Esposito 's head.

Esposito is rocked!
Esposito blocking some punches.
Esposito is still on wobbly legs! Can Rokocoko finish him?
Rokocoko lands an uppercut.
Rokocoko lands a shot to the body.
Rokocoko fails to land with a short punch on the inside.
With the fighters clinched against the cage, Rokocoko creates a bit of distance for himself and scores with a nice uppercut.
Fantastic stuff here - a very entertaining period of action, which has drawn cheers from the crowd.
Rokocoko dips a shoulder and cracks Esposito with a mighty uppercut! Esposito falls back against the cage and Rokocoko unloads with a barrage of strikes! Esposito is completely out with his eyes open, only supported by the cage! Save him ref! Eventually the ref decides to do his job and jumps in - Rokocoko screams abuse at the incompetent official before going over to celebrate with his corner. Brutal stuff!
Ladies and gentlemen, after 3:47 of round 1, we have a winner by way of TKO (Strikes). Joe Rokocoko!
Joe Rokocoko is the new middleweight champion!
Joe Rokocoko decided to thank the fans in attendance for making a great atmosphere. It seemed to go down pretty well.
|
|
|
|
|
|
|
|
|
|
|
|
|
|
|
|
|
|
|
|
|
|
|
| S |
C
A |
G |
S |
C
B |
G |
|
S |
C |
G |
|
energy
A | B |
|
hype
A | B |
|
pop
A | B |
|
mgr
A | B |
|
FIGHT
RATING
58% |
|
|
|
|
|
|
|
Undercard bout
|
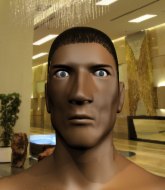
Coming up we have a featherweight MMA rules bout between Thorn Black (ranked 0 p4p, 0 weight class) and Kumamoto Kimura (ranked 0 p4p, 0 weight class). Black comes into the arena with Enter the Sandman blaring out of the sound system. Kumamoto Kimura is staring across the cage at his opponent, tweaking his nipples.
 |
|
 |
| 160 cm
25
157 lbs
7 - 1 - 0 |
|
150 cm
25
155 lbs
5 - 2 - 0 |
Powerful takedowns
Basic striking
Very strong |
|
Good takedowns
Brawler
Knockout power |
|
| |
|
Ladies and gentlemen. This fight is 3 rounds, in the featherweight division.
Introducing the fighter to my left, fighting out of the red corner.
With a record of
7 - 1 - 0, fighting out of The Island, Thorn Black!
And introducing the fighter to my right, fighting out of the blue corner.
With a record of
5 - 2 - 0, fighting out of The Island, Kumamoto Kimura!
The judges for this bout are Bart Greer, Santiago Holmes and Winston Alpacca.
The bell rings for round one and we are underway!
Kimura gets tackled into the cage by Black. Black maintains the clinch.
Kimura jumps guard but Black turns him against the cage and keeps the fight standing.
Kimura tries to take the fight to the ground by pulling guard but can't manage it.
Kimura fails to pull guard.
Thorn Black has stuffed three takedown attempts in the round now. That's going to take a lot out of Kumamoto Kimura.
Kimura tries to pull guard but Black forces him back to his feet, against the cage.
Black tries to work over Kimura's body with a swooping hook but it only glances the target.
Kimura prevents a body shot from Black.
Black tries to throw a body punch but Kimura avoids it by throwing Black back against the cage.
Kimura tries to pull guard but can't drag his opponent to the mat. Black just stands there and leans against the cage.
Black misses with a punch to the body.
Kimura tries to pull guard but can't drag his opponent to the mat. Black just stands there and leans against the cage.
Kimura jumps guard but Black stands there with Kimura around his waist. Kimura gives up and drops back to his feet. We remain in the clinch.
We've had a slow start to the round here - hopefully the action picks up.
Black tries to work over Kimura's body with a swooping hook but it only glances the target.
Black tries to work over Kimura's body with a swooping hook but it only glances the target.
Kimura prevents a body shot from Black.
Kimura jumps guard but his hands slip and he falls flat on his back. Well, he's made himself look a right mug there, as Black walks away with a smile on his face. Kimura gets slowly back to his feet and shakes his head.
That's one minute gone in the round.
Kimura darts in looking for a takedown but Black gets double underhooks and turns Kimura into the cage.

Black closes the distance and gets a double leg, slamming Kimura to the mat! Kimura manages to get full guard.
Black trying to control but Kimura is working from the bottom.
Black advances position into side control!
Kimura manages to work his way to half guard, despite Black's best efforts.

Kimura looking for submissions from an awkward position here.
Kimura tries to get to full guard but Black has control of the leg.
Black has improved his flexibility recently so we will have to see if he can use that to his advantage.
Black controlling the action here.
Kimura should think about turning a few of those tyres round his middle into muscle if he wants people to take him seriously as an athlete.
Kimura wants to improve his position but Black is controlling well.
Black wants to take a breather but Kimura is having none of it.
Black scoring with strikes to the body and head.
That's two minutes gone in the round.
Black thows a huge punch but Kimura dodges it nicely.
Kimura looking for submissions off his back.
Kimura actively working from the bottom here.
Black working Kimura over with strikes.
Kimura is trying to get back to full guard.
Kimura actively working from the bottom here.
Black looking to pass the half guard. Not this time.
Kimura looking to work for a kimura from the bottom.
Black controlling the pace.
The crowd cheering loudly, showing their appreciation for the quality fight we're seeing here.
Black passes the guard and advances to mount!
That's three minutes gone in the round.
Kimura manages to regain half guard. Good work.
Black throwing shots but Kimura is blocking nicely.
Kimura looking for submissions off his back.
Kimura looking for a kimura from the bottom but Black passes into side control!
Black wants to lay and pray for a moment but Kimura keeps working.
Kimura manages to get one leg in to regain half guard.
Black is trying to control. Kimura wants to improve his position but can't escape this time.
Black is really struggling to control Kimura but he's trying to hold on to the position.
Black stalling.
Black thows a huge punch but Kimura dodges it nicely.
That's four minutes gone in the round.
Kimura looking to work for a kimura from the bottom.
Black working over Kimura with some ground and pound. Kimura looks like he wants out of this position, which is understandable.
Kimura actively working from the bottom here.
Black not doing much here.
Black wants to take a breather but Kimura is having none of it.
Kimura looking for submissions from an awkward position here.
Kimura is staying active underneath Black, who seems content to just control the action from this position.
The crowd thankful this round is nearly over.
Kimura manages to get to full guard.
Kimura looking for submissions from the bottom here. Moving his hips around, possibly looking for an armbar.
And thats the end of the round the fighters go back to their corners.
Thorn Black dominated that round.
The fighters' corners scream their final instructions, as the referee calls time. Here we go, back to the action!
Kimura fails with a takedown attempt.
Kimura shoots in but Black avoids the takedown attempt easily.
Black is really dominating this fight. Is there anything that Kimura can do to turn this around?
Black has managed to clinch.
Black struggles to land a body shot inside as Kimura controls his hands.
Black struggles to land a body shot inside as Kimura controls his hands.
Kimura prevents a body shot from Black.
Kimura is trying to pull guard but being pressed up against the cage enables Black to keep the fight standing.
Thorn Black has stuffed three takedown attempts in the round now. That's going to take a lot out of Kumamoto Kimura.
Black misses with a punch to the body.
Black struggles to land a body shot inside as Kimura controls his hands.
Kimura tries to pull guard but Black holds him up against the cage and eventually Kimura drops back down to his feet.
We've had a slow start to the round here - hopefully the action picks up.
An uppercut on the inside fails to land for Black.
Kimura is trying to pull guard but being pressed up against the cage enables Black to keep the fight standing.
Black tries to land a shot to the body but it's blocked.
Black doesn't land with the attempted body shot.
That's one minute gone in the round.
Kimura fails to pull guard.
Black misses with a body punch.
Kimura is trying to pull guard but being pressed up against the cage enables Black to keep the fight standing.
Kimura jumps guard but his hands slip and he falls flat on his back. Well, he's made himself look a right mug there, as Black walks away with a smile on his face. Kimura gets slowly back to his feet and shakes his head.
Black clinches up against the cage.
Kimura tries to pull guard but Black holds him up against the cage and eventually Kimura drops back down to his feet.
A body shot lands from Black.
Black misses with a hook to the ribs.
Black tries to land a shot to the body but it's blocked.
Kimura is trying to pull guard but being pressed up against the cage enables Black to keep the fight standing.
Kimura prevents a body shot from Black.
Black struggles to land a body shot inside as Kimura controls his hands.
Black misses with a punch to the body.
Black struggles to land a body shot inside as Kimura controls his hands.
That's two minutes gone in the round.
Kimura jumps guard but his hands slip and he falls flat on his back. Well, he's made himself look a right mug there, as Black walks away with a smile on his face. Kimura gets slowly back to his feet and shakes his head.
Kimura fails with a takedown attempt from distance.
Black gets to the clinch - let's see what his plan is here.
Kimura is trying to pull guard but Black turns him against the cage and we stay in the clinch.
Kimura tries to pull guard but Black won't allow it.
Kimura is breathing heavily.
Black struggles to land a body shot inside as Kimura controls his hands.
Black pushes Kimura back against the cage and unloads with a body punch.
Kimura is trying to pull guard but Black has him pressed against the cage.
Kimura is trying to pull guard but Black has him pressed against the cage.
Black doesn't land with the attempted body shot.
We're hearing some news coming in from back stage. It's official - Kimura has eaten all the pies!
Kimura jumps guard but his hands slip and he falls flat on his back. Well, he's made himself look a right mug there, as Black walks away with a smile on his face. Kimura gets slowly back to his feet and shakes his head.
Black has closed the distance and engaged Kimura in a clinch.
Kimura jumps guard but Black stands there with Kimura around his waist. Kimura gives up and drops back to his feet. We remain in the clinch.
Kimura is trying to pull guard but being pressed up against the cage enables Black to keep the fight standing.
Black doesn't land with the attempted body shot.
That's three minutes gone in the round.
Black tries to throw a body punch but Kimura avoids it by throwing Black back against the cage.
Black can't find room to land a body shot as Kimura controls the action.
Kimura jumps guard but his hands slip and he falls flat on his back. Well, he's made himself look a right mug there, as Black walks away with a smile on his face. Kimura gets slowly back to his feet and shakes his head.
Black gets in close and instigates a clinch.
Kimura tries to take the fight to the ground by pulling guard but can't manage it.
A right handed body shot lands from Black.
Kimura jumps guard but Black turns him against the cage and keeps the fight standing.
Black doesn't land with the attempted body shot.
Black tries to land a shot to the body but it's blocked.
Kimura tries to take the fight to the ground by pulling guard but can't manage it.
Kimura fails to pull the fight into his guard.
Black tries to land a shot to the body but it's blocked.
Black misses with a shot to the kidneys.
Thorn Black has scored more points in the clinch so far.
Black working on landing some head shots here - that one got through nicely.
Black doesn't land with the attempted body shot.
That's four minutes gone in the round.
Black misses with a shot to the kidneys.
Black misses with a body punch.
Kimura is trying to pull guard but Black turns him against the cage and we stay in the clinch.
Black misses with a punch to the body.
Black tries to throw a body punch but Kimura avoids it by throwing Black back against the cage.
Kimura fails to pull the fight into his guard.
Kimura tries to pull guard but can't drag his opponent to the mat. Black just stands there and leans against the cage.
Black lands a body shot in the clinch.
Kimura tries to pull guard but can't drag his opponent to the mat. Black just stands there and leans against the cage.
Kimura jumps guard but his hands slip and he falls flat on his back. Well, he's made himself look a right mug there, as Black walks away with a smile on his face. Kimura gets slowly back to his feet and shakes his head.
Kumamoto Kimura is looking to throw some combinations by the looks of things.
Kimura gets tackled into the cage by Black. Black maintains the clinch.
Kimura jumps guard but Black turns him against the cage and keeps the fight standing.
The crowd thankful this round is nearly over.
Kimura prevents a body shot from Black.
Black tried to land a shot to the body but connects with Kimura's elbow.
Kimura jumps guard but Black turns him against the cage and keeps the fight standing.
This has been an exciting period of action!
Kimura is trying to pull guard but Black has him pressed against the cage.
And thats the end of the round the fighters go back to their corners.
Thorn Black dominated that second round.
That's the end of the round. The referee orders the cornermen out of the cage so we can get back down to business. This is the final round!
Kimura darts in looking for a takedown but Black gets double underhooks and turns Kimura into the cage.
Black takes the fight into the clinch.
Kimura jumps guard but Black turns him against the cage and keeps the fight standing.
Black lands a right hand.
Kimura tries to take the fight to the ground by pulling guard but can't manage it.
Thorn Black has stuffed three takedown attempts in the round now. That's going to take a lot out of Kumamoto Kimura.
Kimura fails to pull the fight into his guard.
Kimura tries to pull guard but Black holds him up against the cage and eventually Kimura drops back down to his feet.
Black fails to land with a short punch on the inside.
Kimura is trying to pull guard but Black has him pressed against the cage.
We've had a slow start to the round here - hopefully the action picks up.
Black misses with a punch to the body.
Kimura takes a big intake of breath there - he's definitely tired.
A short right from Black.
Kimura prevents a body shot from Black.
Black doesn't land with the attempted body shot.
Kimura tries to pull guard but Black forces him back to his feet, against the cage.
That's one minute gone in the round.
Kimura tries to jump guard but he falls flat on his backside. Black smiles and moves away.
Black has closed the distance and engaged Kimura in a clinch.
Black misses with a shot to the kidneys.
Black tried to land a shot to the body but connects with Kimura's elbow.
Black misses with a punch to the body.
Black doesn't land with the attempted body shot.
A head punch blocked on the inside by Kimura.
Kimura prevents a body shot from Black.
Kimura jumps guard but his hands slip and he falls flat on his back. Well, he's made himself look a right mug there, as Black walks away with a smile on his face. Kimura gets slowly back to his feet and shakes his head.
Black moves into the clinch.
Black has a couple of punches blocked by Kimura.
Black presses Kimura against the cage and delivers a mid-strength body shot.
Black fails to land with a short punch on the inside.
Black misses with a hook to the ribs.
Black tries to throw a body punch but Kimura avoids it by throwing Black back against the cage.
Thorn Black is fighting for a decision here - he's started to take the cautious approach.
That's two minutes gone in the round.
Black doesn't land with the attempted body shot.
Kimura jumps guard but his hands slip and he falls flat on his back. Well, he's made himself look a right mug there, as Black walks away with a smile on his face. Kimura gets slowly back to his feet and shakes his head.
Kimura shoots in and drives through. Black sprawls well.
Kimura shoots in for a takedown but Black shows good takedown defense there and keeps this one on the feet.
Black closes the distance and presses his opponent up against the cage.
Kimura tries to pull guard but can't drag his opponent to the mat. Black just stands there and leans against the cage.
Kimura tries to pull guard but can't drag his opponent to the mat. Black just stands there and leans against the cage.
Kimura is trying to pull guard but Black turns him against the cage and we stay in the clinch.
Kimura tries to take the fight to the ground by pulling guard but can't manage it.
Kimura fails to pull the fight into his guard.
Black tries to throw a body punch but Kimura avoids it by throwing Black back against the cage.
Kimura tries to pull guard but Black won't allow it.
That's three minutes gone in the round.
Kimura blocks a couple of punches on the inside.
Kimura jumps guard but Black stands there with Kimura around his waist. Kimura gives up and drops back to his feet. We remain in the clinch.
Kimura blocks a body shot from Black.
Kimura jumps guard but Black turns him against the cage and keeps the fight standing.
Black tries a body shot but Kimura blocks it.
Kimura fails to pull the fight into his guard.
Kimura jumps guard but Black stands there with Kimura around his waist. Kimura gives up and drops back to his feet. We remain in the clinch.
Kimura jumps guard but Black turns him against the cage and keeps the fight standing.
Kimura is trying to pull guard but being pressed up against the cage enables Black to keep the fight standing.
That's four minutes gone in the round.
The crowd are getting on the fighters' backs, as the pace has dropped off in the last minute or so.
Kimura fails to pull the fight into his guard.
Kimura blocks a body shot from Black.
Black doesn't land with the attempted body shot.
Kimura is trying to pull guard but being pressed up against the cage enables Black to keep the fight standing.
Black doesn't land with the attempted body shot.
Kimura tries to pull guard but Black forces him back to his feet, against the cage.
Kimura is trying to pull guard but Black has him pressed against the cage.
Black tried to land a shot to the body but connects with Kimura's elbow.
Black misses with a shot to the kidneys.
The crowd thankful this round is nearly over.
Kimura fails to pull the fight into his guard.
Black can't find room to land a body shot as Kimura controls the action.
Kumamoto Kimura has stepped it up - he knows he needs a finish here!
Black managing to block the knees to the body from Kimura.
And that's the end of the fight!
Thorn Black showed his dominance in that final round.
Well Black has outscored his opponent in every aspect of the fight today. Only a scarily incompetent judge or two will keep him from a well deserved win... Over to the ring announcer for the scorecards.
Ladies and gentlemen, after 3 rounds of action, we go to the scorecards for a decision.
Judge Bart Greer scores the fight 30:25
Judge Santiago Holmes scores the fight 30:25
Judge Winston Alpacca scores the fight 30:25
In favor of your winner, by unanimous decision... Thorn Black!
Thorn Black seemed lost for words in his post fight interview but he remembered to thank his fans and directed everyone to his website.
|
|
|
|
|
|
|
|
|
|
|
|
|
|
|
|
|
|
|
|
|
|
|
| S |
C
A |
G |
S |
C
B |
G |
|
S |
C |
G |
|
energy
A | B |
|
hype
A | B |
|
pop
A | B |
|
mgr
A | B |
|
FIGHT
RATING
34% |
|
|
|
|
|
|
|
Co-main event
|
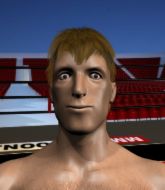
Coming up we have a lightweight MMA rules bout between Derek Pappalardo (ranked 0 p4p, 0 weight class) and Frank Dux (ranked 0 p4p, 0 weight class). Fingers crossed for an exciting fight - I'm sure both fighters are looking for a nice under the table bonus!
 |
|
 |
| 175 cm
26
166 lbs
7 - 1 - 0 |
|
182 cm
26
158 lbs
6 - 1 - 0 |
Decent wrestler
Solid boxing
Very quick |
|
Powerful takedowns
Basic striking
Powerful |
|
| |
|
Ladies and gentlemen. This fight is 5 rounds, for the lightweight championship of the world!
Introducing the champion to my left, fighting out of the red corner.
With a record of
7 - 1 - 0, fighting out of The Island, Derek Pappalardo!
And introducing the challenger to my right, fighting out of the blue corner.
With a record of
6 - 1 - 0, fighting out of The Island, Frank Dux!
The judges for this bout are Winston Alpacca, Daniel Franklin and Peter Branson.
The bell rings for round one and we are underway!
Pappalardo displays good takedown defense there as he swats away a double leg from Dux.
Dux ducks under a wild hook from Pappalardo.
Dux misses with a low kick.

Dux dives in and scores a takedown into Pappalardo's guard.
Dux is stalling in the full guard.
Dux pushes down on Pappalardo's leg and manages to get into half guard.
Pappalardo won't allow Dux to pass to mount.
We've had a slow start to the round here - hopefully the action picks up.
Pappalardo avoiding damage under a succession of punches from Dux.
Pappalardo taking some punishment here, with Dux in his half guard.
Pappalardo is looking to regain full guard. Not this time though.
That's one minute gone in the round.
Pappalardo trying to control but Dux postures up.
Dux is figuring out what he wants to do next.
Dux is looking for an arm triangle, whilst trying to pass to side control. Pappalardo doesn't seem that keen to cooperate though. No luck this time Dux.
Dux seems like he's working for an arm triangle here. He's freed his trapped foot and he's rotating nicely. Pappalardo is in big trouble! He's tapping out! This one is aaaaaaaaaaaall over!
Ladies and gentlemen, after 1:47 of round 1, we have a winner by way of Submission (Arm Triangle). Frank Dux!
Frank Dux is the new lightweight champion!
|
|
|
|
|
|
|
|
|
|
|
|
|
|
|
|
|
|
|
|
|
|
|
| S |
C
A |
G |
S |
C
B |
G |
|
S |
C |
G |
|
energy
A | B |
|
hype
A | B |
|
pop
A | B |
|
mgr
A | B |
|
FIGHT
RATING
45% |
|
|
|
|
|
|
|
Main event
|
Coming up we have a welterweight MMA rules bout between Barney Wehmer (ranked 0 p4p, 0 weight class) and Do Hoo Jung (ranked 0 p4p, 0 weight class). This should be fireworks!
 |
|
 |
| 180 cm
26
164 lbs
8 - 1 - 0 |
|
170 cm
26
168 lbs
7 - 2 - 0 |
Good wrestling
Counter fighter
Good chin |
|
Good takedowns
Basic striking
Solid chin |
|
| |
|
Ladies and gentlemen. This fight is 5 rounds, for the welterweight championship of the world!
Introducing the champion to my left, fighting out of the red corner.
With a record of
8 - 1 - 0, fighting out of The Island, Barney Wehmer!
And introducing the challenger to my right, fighting out of the blue corner.
With a record of
7 - 2 - 0, fighting out of The Island, Do Hoo Jung!
The judges for this bout are Santiago Holmes, Winston Alpacca and Daniel Franklin.
The bell rings for round one and we are underway!
Jung tries to land with a swinging hook to the body but Wehmer was well out of range. Poor timing from Jung.
Wehmer closes the distance and clinches up with Jung, looking for a takedown. Wehmer pushes Jung against the cage but Jung circles to the side and manages to break the clinch.
Jung tries to drive through with a takedown attempt but Wehmer defends well and Jung ends up having to push Wehmer into the cage where they will battle it out in the clinch.
Wehmer seems to be moving with more speed, compared to his last bout. He must have been working on that in the gym.
Wehmer shoots for a takedown but Jung saw that one coming a mile off and avoided it easily.
Wehmer gets caught flat footed, as Jung shoots in with a quick takedown into guard.
Wehmer wants to sweep but no luck.

Wehmer throws his legs up looking for a submission but Jung uses it to pass to side control.
Jung trying to control the action but Wehmer is working from the bottom.
We've had a slow start to the round here - hopefully the action picks up.
Jung is trying to land an Americana. He has the arm isolated but Wehmer is keeping cool and he's avoided the danger for now.
Jung goes for an armbar here - this could be all over! But no, Wehmer has escaped beautifully and is now on top in side control! Oh, that's unlucky for Jung but great work by Wehmer.
That's one minute gone in the round.
Jung tries to improve position but can't.
Jung gets back to half guard.
Jung is looking for a sweep. Wehmer is wise to his cunning plan and keeps the top position.
The fighters are pressed up against the cage, both looking to find a bit of space to work.
Wehmer wants to control but Jung is keeping him busy.
Jung controlling the position well.
Jung wants to get back to full guard.
Jung trying to control here.
Jung is looking for a sweep. Wehmer is wise to his cunning plan and keeps the top position.
Wehmer is thwarting Jung's attempts to control the position.
Jung wants to improve his position but Wehmer is controlling well.
That's two minutes gone in the round.
Wehmer throwing shots but they're hitting the canvas more than the man.
Wehmer wants to take a breather but Jung is having none of it.
Jung trying to control but Wehmer postures up.
Wehmer is scoring with some nice ground and pound from the dominant position.
Jung taking some punishment here, with Wehmer in his half guard.
Jung trying to control but Wehmer postures up.
Wehmer passes to side control.
Wehmer connects with a decent looking elbow from side control that caused Jung some visible discomfort.
Jung is trying to improve his position.
Wehmer scores with a couple of nice shots to the head there. The referee takes a look at Jung to see if he's OK.
That's three minutes gone in the round.
Wehmer working away.
Wehmer is moving around in side control but his primary objective seems to be to maintain the position.
Wehmer trying to control the action but Jung is working from the bottom.
Jung on the wrong end of some ground and pound.
Jung is trying to get back to half guard. He's pushing on Wehmer's leg. He's managed it. Nice work.
Jung is trying to control but can't.
Wehmer is working for a submission of some sort.
The referee walks around the fighters to get a better view of the action. Wehmer lands a nice short elbow.
Jung slips a foot under and gets full guard. Nice work.
That's four minutes gone in the round.
Jung looking to hit a scissor sweep but Wehmer is one step ahead there.
Jung looking for a guillotine here but Wehmer defends easily.
Wehmer throws a big right hand that misses.
Wehmer being controlled here momentarily.
Wehmer is looking to work some ground and pound but Jung has wrist control.
The crowd thankful this round is nearly over.
Wehmer is stalling in the full guard.
Wehmer pushes down on Jung's leg and manages to get into half guard.
And thats the end of the round the fighters go back to their corners.
Barney Wehmer dominated that round.
Well, the break between rounds is over. Let's get back to the scrappin!
Jung will have to do better than that with his takedown attempts.
Jung tries to score a power double leg takedown but Wehmer sees that one coming and sprawls well. That will dishearten Jung somewhat.
Wehmer is really dominating this fight. Is there anything that Jung can do to turn this around?
Jung closes the distance and gets a trip takedown into side control. Wehmer quickly recovers to half guard.
Wehmer is doing well to control the position and prevent Jung from advancing to side control.
Wehmer wants to improve his position but Jung is controlling well.
We've had a slow start to the round here - hopefully the action picks up.
Wehmer wants to control but Jung is keeping busy and won't allow it.
Jung has hold of the far side arm. He's working for the Kimura, can Wehmer defend it? Jung steps over the head and cranks it - Wehmer is tapping out! That was textbook stuff right there - nice submission victory for Jung!
Ladies and gentlemen, after 1:56 of round 2, we have a winner by way of Submission (Kimura). Do Hoo Jung!
Do Hoo Jung is the new welterweight champion!
|
|
|
|
|
|
|
|
|
|
|
|
|
|
|
|
|
|
|
|
|
|
|
| S |
C
A |
G |
S |
C
B |
G |
|
S |
C |
G |
|
energy
A | B |
|
hype
A | B |
|
pop
A | B |
|
mgr
A | B |
|
FIGHT
RATING
28% |
|
|
|
|
|
|
|
|
|
|
