 |
AFC 22 PBP Commentary |
Undercard bout
|
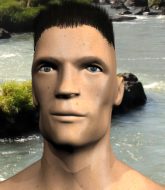
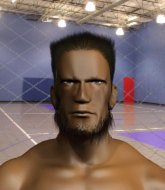
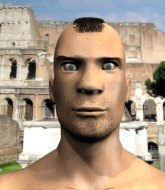
Coming up we have a middleweight MMA rules bout between Murmillo Crixus (ranked 0 p4p, 0 weight class) and Ken Shamrock (ranked 0 p4p, 0 weight class). Murmillo Crixus has the better chin. Will he look to stand and bang today?
 |
|
 |
| 180 cm
27
185 lbs
4 - 3 - 0 |
|
183 cm
21
185 lbs
0 - 0 - 0 |
BJJ White Belt
Excellent boxer
Big right hand |
|
BJJ Blue Belt
Brawler
Determined |
|
| |
|
Ladies and gentlemen. This fight is 3 rounds, in the middleweight division.
Introducing the fighter to my left, fighting out of the red corner.
With a record of
4 - 3 - 0, fighting out of London, Murmillo Crixus!
And introducing the fighter to my right, fighting out of the blue corner.
With a record of
0 - 0 - 0, fighting out of Los Angeles, Ken Shamrock !
The judges for this bout are Phil Schofield, Sam Margolis and James Glass.

The bell rings for round one and we are underway!

Shamrock closes the distance and looks for a trip takedown... aaaand he's got it - Shamrock lands in his opponent's guard.
Crixus on his back here. We all know that wrestlers don't like being on their back so let's see if Crixus tries to get out of the position.
Crixus looks exhausted already! Oh dear, he should have come in in better shape than this!
Crixus working the defensive guard well to avoid strikes from Shamrock .
Shamrock throws a big right hand that misses.
Shamrock advances position into side control!
Shamrock lands some shots froms side control.

Shamrock is looking to finish here, going for an Americana. Crixus knows the correct defense though, so he's OK.
Shamrock has hold of Crixus's arm. He's looking for a kimura. Crixus seems comfortable defending it but Shamrock has shifted his position slighty and is cranking on the arm! Crixus is real pain and he's forced to tap out! Crixus is disgusted with himself for not defending it better but Shamrock couldn't care less - he's delighted!
Ladies and gentlemen, after 0:43 of round 1, we have a winner by way of Submission (Kimura). Ken Shamrock !
A victorious Ken Shamrock thanked his army of followers in his post fight interview, telling people to make sure they follow him on Twitter.
|
|
|
|
|
|
|
|
|
|
|
|
|
|
|
|
|
|
|
|
|
|
|
| S |
C
A |
G |
S |
C
B |
G |
|
S |
C |
G |
|
energy
A | B |
|
hype
A | B |
|
pop
A | B |
|
mgr
A | B |
|
FIGHT
RATING
93% |
|
|
|
|
|
|
|
Undercard bout
|
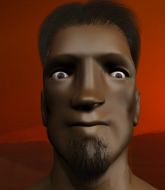
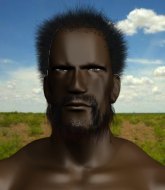
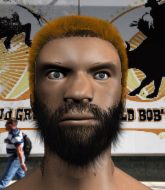
Coming up we have a middleweight MMA rules bout between Marcus Attilius (ranked 0 p4p, 0 weight class) and Flamma Flamma (ranked 0 p4p, 0 weight class). Over to our ring announcer for the fighter introductions!
 |
|
 |
| 192 cm
27
185 lbs
1 - 4 - 0 |
|
201 cm
27
185 lbs
2 - 4 - 0 |
BJJ White Belt
Excellent boxer
Cuts easily |
|
BJJ White Belt
Excellent boxer
Granite chin |
|
| |
|
Ladies and gentlemen. This fight is 3 rounds, in the middleweight division.
Introducing the fighter to my left, fighting out of the red corner.
With a record of
1 - 4 - 0, fighting out of London, Marcus Attilius!
And introducing the fighter to my right, fighting out of the blue corner.
With a record of
2 - 4 - 0, fighting out of London, Flamma Flamma!
The judges for this bout are Paul Tew, Donald Grub and Colin Fotheringham.
The bell rings for round one and we are underway!

Attilius gets a clinch.
Attilius misses with a hook from the clinch.

Flamma pushes off and circles away, back to the middle of the mat.
Attilius moves into range and throws a lovely three punch combination.
Flamma lands three nice shots there - that looked like it hurt!
The crowd cheers as Flamma lands an impressive looking overhand right. Attilius doesn't seem phased though.
Attilius takes a shot right to the liver - Bas would have been proud of that punch.
Flamma ducks down and throws a hook to the body but Attilius moves away.
Attilius fakes and then throws a beautiful body shot. Flamma looks a bit winded and takes a step backwards to take a breath.
The crowd are loving this. Great action here.
Flamma keeping a good distance there, avoiding the body shot.
Flamma misses with a two punch combination.
Flamma throws a right hand that Attilius ducks under and follows up with a left that Attilius also avoids with ease.
Flamma throws a right hand that Attilius ducks under and follows up with a left that Attilius also avoids with ease.
Attilius rushes forward with a series of wild hooks but Flamma moves out of range and avoids them all easily.
Attilius gets a clinch.
Flamma pushes off and circles away, back to the middle of the mat.
Attilius drives through and clinches with Flamma against the cage.

Attilius manages to break the clinch.
Attilius ducks low and lands a nice hook to the body of his opponent.

That's one minute gone in the round.
Attilius closes the distance and clinches.
Attilius breaks the clinch.
Attilius throws a right and a left that both miss.
Attilius tries to move into range but Flamma moves to the side and lands with a nice right hand.
Flamma takes a swing at Attilius's ribcage but misses.
Flamma looks to score with a jab to the body but Attilius is just out of range.
Attilius throws a one two combo.
Flamma throws a wild combination but nothing lands.
Attilius throws a series of punches but Flamma moves out of range.
Attilius dodges the punch combination from Flamma.
Attilius moves into the clinch.
A short right hand to the side of the head by Flamma.
The crowd cheering loudly, showing their appreciation for the quality fight we're seeing here.
Attilius lands a shot to the body.
Attilius lands a body punch - he's looking to wear down Flamma.
Flamma breaks the clinch and we return to the middle of the mat.

That's two minutes gone in the round.
Attilius is looking to clinch.
Attilius will need to tighten up his combinations if he doesn't want to gas himself out, swinging at thin air.
Attilius throws a combination. Flamma tries to block but a couple of punches get through.
Wow, both these guys are really going for it!
Attilius misses with a body shot.
Flamma keeping a good distance there, avoiding the body shot.
Flamma is loading up here, looking for a big counter of his own.
Flamma drops his hands momentarily and Attilius takes advantage with a crisp shot to the head.
Attilius moves into range and clinches up with Flamma.
Flamma is a painfully thin specimen of a man. You do wonder whether a good body kick would snap him clean in two.
Flamma manages to break the clinch.
Attilius looks to be in better condition than last time we saw him fight. Obviously he's been working hard on his cardio.
Attilius throws a right hand that Flamma ducks under and follows up with a left that Flamma also avoids with ease.
Attilius throws a wild combination but nothing lands.
Flamma looks more muscular than last time we saw him. He must have been on the weights.
Attilius ducks down and throws a hook to the body but Flamma moves away.
Flamma is loading up here, looking for a big counter of his own.
A looping hook to the body misses from Attilius. Flamma does a little dance to reset his feet.
Attilius lands a right hook to the body.
Flamma throws a hook to the body but it doesn't connect.
Attilius is trying to close the distance and clinch up, after that failed offence from Flamma.
Flamma takes a body punch that cleary hurt but he's trying not to show any weakness.

That's three minutes gone in the round.
Attilius tries to land with a swinging hook to the body but Flamma was well out of range. Poor timing from Attilius.
Attilius swings wildly with a couple of big hooks
and Flamma counters with a straight punch to the midsection.
Attilius tries to clinch there but Flamma circles away.
Flamma throws a right and a left that both miss.
Nice shot lands for Attilius.
Attilius fakes high and swings low for a body shot but Flamma manages to avoid it.
Attilius tries to bum rush Flamma with a series of wild strikes but Flamma uses good footwork to avoid the assault.
Attilius misses with the combination.
Flamma feints the counter takedown.
Flamma fails to land with the punch combination there - jab, cross, hook, miss, miss, miss.
Attilius pushes Flamma up against the cage in a clinch.
Flamma breaks the clinch and we return to the middle of the mat.
Attilius showing good head movement there, avoiding the strikes from Flamma.
Attilius misses the shot to the body.
Despite the aggression on Flamma's face he doesn't fully commit to the counter.
Flamma takes a step towards his opponent and connects with a left hand, before circling away.
A left and a right from Flamma both land. Nice combination.

That's four minutes gone in the round.
This is a great period of action - very entertaining stuff!
The crowd cheers as Flamma lands an impressive looking overhand right. Attilius doesn't seem phased though.
Attilius doesn't manage to clinch there - Flamma circles away.
Attilius is looking to clinch but Flamma is avoiding it.
Attilius loads up on a big right hand but Flamma slips the punch.
Flamma let fly with a counter punch to the body but it didn't land.

Flamma clinches up with Attilius and pushes him back against the cage.
Flamma pushes off and circles away, back to the middle of the mat.
Attilius throws a one two combo.
Attilius throws a combination but it was largely blocked by Flamma.
Flamma swings and misses with a hook to the body.
Attilius swings away but doesn't land with a series of punches.
Flamma rushes Attilius and pushes him back against the cage in a clinch.
Attilius pushes off and circles away, back to the middle of the mat.
The crowd applaud the fighters' efforts here as the round comes to an end.
Attilius throws a wild combination but nothing lands.
Flamma tries to bum rush Attilius with a series of wild strikes but Attilius uses good footwork to avoid the assault.
Flamma just misses with a punch to the body.
A left and a right from Flamma both land. Nice combination.
And thats the end of the round the fighters go back to their corners.
That was a close round but I would say that Marcus Attilius will probably get the nod.
The fighters get back to their feet, the hooter sounds and we're back to the action!

Attilius with a hook.
Attilius moves in looking to clinch but Flamma pushes him off.
Flamma lunges at Attilius with a hook that half lands and is half blocked by Attilius's hand.
Flamma swings and misses with a hook to the body.
Marcus Attilius is looking to throw some combinations by the looks of things.
Attilius fails to land with the punch combination there - jab, cross, hook, miss, miss, miss.
Flamma throws a combination but comes up with nothing but fresh air.
Marcus Attilius is winning the standup battle so far.
Flamma gets in close and instigates a clinch.
Attilius breaks the clinch.
Flamma fakes and then throws a beautiful body shot. Attilius looks a bit winded and takes a step backwards to take a breath.
A combination from Attilius does no damage.
Flamma misses with a wild combination.
Flamma is looking to clinch.
The fight stays on the outside here - Flamma looks like he's thinking about clinching though.
Flamma tries to close the distance and clinch up against the cage but Attilius paws at him with a jab and circles away.
A left and a right from Flamma both land. Nice combination.

It looks like Marcus Attilius has been cut.
That's one minute gone in the round.
Flamma gets to the clinch - let's see what his plan is here.
Attilius pushes off and circles away, back to the middle of the mat.
Flamma misses with the combination.
Flamma swings and misses with a hook to the body.
Flamma keeping a good distance there, avoiding the body shot.
Attilius fails to land with a series of punches.
A countering left hand to the body from Flamma misses.
A right-left combo lands from Flamma.
Attilius swings away but doesn't land with a series of punches.
Attilius on the wrong end of a nice hook.
Flamma keeps the fight on the outside.
Flamma has used his reach advantage pretty well so far tonight.
Flamma misses with a double jab.
Attilius is looking to wear down Flamma with body shots, infact he's throwing more body shots than head shots at the moment.
Attilius misses with a series of wild punches.
Flamma let fly with a counter punch to the body but it didn't land.
Flamma closes the distance and clinches.
The fans in attendance giving it up for the two fighters, who have really let it all hang out in the last minute or so!
Flamma manages to break the clinch.
That's two minutes gone in the round.
Attilius lunges in with swinging rights and lefts but Flamma circles away quickly and effectively.
Attilius throws a body punch but Flamma moves out of range.
Attilius swings and misses with a hook to the body.
Attilius throws a combination but comes up with nothing but fresh air.
Flamma fails to land with a series of punches.
Flamma throws a series of punches but Attilius avoids them all with ease.
A lazy left from Flamma finds it's target.
Attilius swinging wildly here.
Flamma changes levels for a counter takedown but doesn't follow through with his attempt.
Attilius lands a jab-cross combination.
Attilius misses with a few strikes there.
Flamma is definitely looking for the counter takedowns here.
Flamma throws a nice hook to the body that draws an oooh from the crowd.
Attilius dodges the punch combination from Flamma.
Flamma misses with the combination.
That's three minutes gone in the round.
Attilius clinches up with Flamma and pushes him back against the cage.
Attilius pushes Flamma back against the cage and unloads with a body punch.
Attilius missing with knees to the body.
Flamma escapes the clinch and we're back to striking.
Attilius displaying good standup as he scores with a three punch combination.
Flamma avoids a punch combination nicely.
Attilius has his head slapped from side to side by a 3 punch combination. That must have hurt him.
Attilius connects with a good right hand that stumbles Flamma. Flamma circles away out of range and recomposes himself.
Attilius rushes Flamma and pushes him back against the cage in a clinch.
Attilius pushes off and circles away, back to the middle of the mat.
Flamma throws out a powerful jab.
That's four minutes gone in the round.
This is a great period of action - very entertaining stuff!
The fight moves into the clinch position.
Attilius breaks the clinch.
Attilius rushes Flamma and pushes him back against the cage in a clinch.
Attilius breaks the clinch and we're back to striking at distance.
Attilius dodges the punch combination from Flamma.
A right-left combo lands from Flamma.
Attilius throws a predictable looking body shot
and Flamma moves into the clinch.
Attilius tries to land knees in the clinch but Flamma avoids the damage to the body.
Flamma manages to break the clinch.
The crowd applaud the fighters' efforts here as the round comes to an end.
Attilius tries to close the distance and clinch up but Flamma swats him away and circles back towards the center.
Attilius clinches up with Flamma and pushes him back against the cage.
Flamma's corner calls for him to break the clinch, which he does.
Attilius works his jab well there, keeping his opponent at a distance.
And thats the end of the round the fighters go back to their corners.
A close second round but Flamma Flamma will probably get the nod - 10:9.
The cut man is working on Marcus Attilius's cut.
The referee calls time. The cornermen exit stage left and we're back to business. This is the final round!

Flamma fakes with an overhand right and moves in to clinch with Attilius, pushing him back against the cage.
Attilius's corner calls for him to break the clinch, which he does.
Attilius moves into the clinch.
Flamma's corner calls for him to break the clinch, which he does.
Attilius avoids a punch combination nicely.
Flamma lands a right hook to the body.
Attilius clinches up with Flamma and pushes him back against the cage.
A battle for position here, against the cage.
Attilius escapes the clinch and we're back to striking.
We've had a slow start to the round here - hopefully the action picks up.
Attilius throws a wild combination but nothing lands.
Flamma is loading up here, looking for a big counter of his own.
Flamma will need to tighten up his combinations if he doesn't want to gas himself out, swinging at thin air.
Flamma swings away but doesn't land with a series of punches.
Attilius closes the distance and presses his opponent up against the cage.
That's one minute gone in the round.
Attilius is trying to maintain a safe position but Flamma gets an underhook and turns Attilius into the cage.
Flamma escapes the clinch and we're back to striking.
A punch combination from Attilius misses.
Attilius misses with the combination.
Flamma bobs and weaves well there to avoid the strikes.
Flamma lets the fists fly and connects with a left straight followed by a right hook.
Attilius throws a nice looking combination but Flamma bobs and weaves to avoid any damage.
Flamma tries to clinch up against the cage, rushing in to close the distance. Attilius manages to break the clinch and circles back to the middle of the mat.
Attilius just misses with a punch to the body.
Attilius looks to land a combination but Flamma avoids it well.
A looping hook to the body misses from Flamma. Attilius does a little dance to reset his feet.
Flamma jabs at Attilius's body.
Flamma looks to land a combination but Attilius avoids it well.
Flamma misses with an uppercut. Attilius saw that one coming.
Flamma jabs Attilius right on the nose. Attilius blinks but takes it well.
That's two minutes gone in the round.
Attilius tries to clinch but Flamma is having none of it.
We've seen a great period of action over the last minute or so - credit to both fighters for going all out!
Flamma ducks down and throws a hook to the body.
Flamma will need to tighten up his combinations if he doesn't want to gas himself out, swinging at thin air.
Flamma misses with a series of wild punches.
Attilius will need to tighten up his combinations if he doesn't want to gas himself out, swinging at thin air.
Attilius showing good head movement there, avoiding the strikes from Flamma.
Attilius gets to the clinch - let's see what his plan is here.
Flamma breaks the clinch and we return to the middle of the mat.
Flamma lunges in with swinging rights and lefts but Attilius circles away quickly and effectively.
A looping hook to the body misses from Attilius. Flamma does a little dance to reset his feet.
That's three minutes gone in the round.
Flamma ducks low and lands a nice hook to the body of his opponent.
Flamma misses with a few strikes there.
Flamma takes a big intake of breath there - he's definitely tired.
Attilius misses with a jab, cross combination.
Attilius takes a swing at Flamma's ribcage but misses.
Flamma rushes forward with a series of wild hooks but Attilius moves out of range and avoids them all easily.
A left and a right from Attilius both land. Nice combination.
Attilius ducks down and throws a hook to the body but Flamma moves away.
Attilius throws a combination. Flamma tries to block but a couple of punches get through.
Attilius misses with a jab, cross combination.
Attilius looks to land a combination but Flamma avoids it well.
Attilius misses with a body shot. Nice footwork from Flamma.
Flamma closes the distance and clinches.
We've seen a great period of action over the last minute or so - credit to both fighters for going all out!
Attilius escapes the clinch and we're back to striking.
The fight stays on the outside here - Attilius looks like he's thinking about clinching though.
Flamma tries to clinch up against the cage, rushing in to close the distance. Attilius manages to break the clinch and circles back to the middle of the mat.
That's four minutes gone in the round.
Attilius misses with a combination
and Flamma counters with a lovely shot to the body.
Flamma slips a jab and a cross from Attilius.
Flamma dodges the punch combination from Attilius.
Attilius throws a series of punches but Flamma moves out of range.
Flamma gets in close and instigates a clinch.
Flamma breaks the clinch and we're back to striking at distance.
Attilius wants to clinch up but Flamma keeps it at a distance.
Flamma throws a shot to the body.
Flamma looks to score with a combo but nothing lands.
Attilius tries to keep at a distance but Flamma has taken the fight into the clinch.
Flamma breaks from the clinch.
Flamma misses with the combination.
Attilius tries to counter with a takedown but Flamma is quick to defend against it.
And that's the end of the fight!
I would just about give that final round to Flamma Flamma.
I think Flamma has won this one but let's see whether the judges agree with me. Over to the ring announcer for the scorecards.
Ladies and gentlemen, after 3 rounds of action, we go to the scorecards for a decision.
Judge Paul Tew scores the fight 28:29
Judge Donald Grub scores the fight 28:29
Judge Colin Fotheringham scores the fight 28:29
In favor of your winner, by unanimous decision... Flamma Flamma!
During a confident post fight interview, Flamma Flamma thanked all his fans. He seemed very genuine when describing how motivated his fans keep him.
|
|
|
|
|
|
|
|
|
|
|
|
|
|
|
|
|
|
|
|
|
|
|
| S |
C
A |
G |
S |
C
B |
G |
|
S |
C |
G |
|
energy
A | B |
|
hype
A | B |
|
pop
A | B |
|
mgr
A | B |
|
FIGHT
RATING
81% |
|
|
|
|
|
|
|
Undercard bout
|
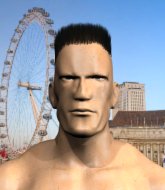
Coming up we have a welterweight MMA rules bout between Augustus Hercules (ranked 0 p4p, 0 weight class) and Thracian Spartacus (ranked 0 p4p, 0 weight class). Hercules has a slight injury, which hopefully won't affect the fight too much. Over to our ring announcer for the fighter introductions!
 |
|
 |
| 182 cm
27
170 lbs
0 - 5 - 0 |
|
180 cm
27
170 lbs
5 - 2 - 0 |
BJJ White Belt
Excellent boxer
Good chin |
|
BJJ White Belt
Excellent boxer
Granite chin |
|
| |
|
Ladies and gentlemen. This fight is 3 rounds, in the welterweight division.
Introducing the fighter to my left, fighting out of the red corner.
With a record of
0 - 5 - 0, fighting out of London, Augustus Hercules!
And introducing the fighter to my right, fighting out of the blue corner.
With a record of
5 - 2 - 0, fighting out of London, Thracian Spartacus!
The judges for this bout are Richard Clark, Sam Margolis and James Atkins.
The bell rings for round one and we are underway!
Spartacus lands a nice shot to the body.
Hercules looks exhausted already! Oh dear, he should have come in in better shape than this!
A shot to the liver by Spartacus. Beautiful body shot.
The crowd cheers as Spartacus lands an impressive looking overhand right. Hercules doesn't seem phased though.
Hercules takes one to the side of the head.
Spartacus throws a nice looking combination but Hercules bobs and weaves to avoid any damage.
Hercules fires out a quick counter leg kick but Spartacus just manages to avoid it.
Spartacus tests Hercules's chin there with a solid looking shot.
Spartacus scores to the head and body with a nice combination!
Spartacus looks more muscular than last time we saw him. He must have been on the weights.
Hercules takes a body punch that cleary hurt but he's trying not to show any weakness.
The fans in attendance giving it up for the two fighters, who have really let it all hang out in the last minute or so!
Hercules dodges the punch combination from Spartacus.
Hercules finds himself stumbling back on wobbly legs after being clipped by a right hand. He's up against the cage, ducking and weaving under Spartacus's strikes but an uppercut finds it's way through and Hercules falls! - He's completely out of it and the ref jumps in to save him!
Ladies and gentlemen, after 0:37 of round 1, we have a winner by way of TKO (Strikes). Thracian Spartacus!
An out of breath Thracian Spartacus thanked his loyal fans in his post fight interview, giving them credit for his success over the course of his career.
|
|
|
|
|
|
|
|
|
|
|
|
|
|
|
|
|
|
|
|
|
|
|
| S |
C
A |
G |
S |
C
B |
G |
|
S |
C |
G |
|
energy
A | B |
|
hype
A | B |
|
pop
A | B |
|
mgr
A | B |
|
FIGHT
RATING
100% |
|
|
|
|
|
|
|
Undercard bout
|
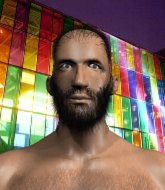
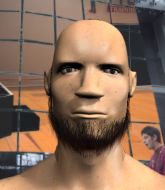
Coming up we have a light heavyweight MMA rules bout between Pasquale Barra (ranked 0 p4p, 0 weight class) and Daiki Yamaguchi (ranked 0 p4p, 0 weight class). Barra comes to the cage accompanied by Barriera Armata. These two fighters really are very evenly matched on the feet - it will be fascinating to see who can assert themselves in that aspect of the fight.
 |
|
 |
| 185 cm
27
205 lbs
4 - 3 - 0 |
|
185 cm
27
215 lbs
1 - 3 - 0 |
Decent wrestler
Decent elbows
Granite chin |
|
Good wrestler
Excellent boxer
Granite chin |
|
| |
|
Ladies and gentlemen. This fight is 3 rounds, in the light heavyweight division.
Introducing the fighter to my left, fighting out of the red corner.
With a record of
4 - 3 - 0, fighting out of New York, Pasquale Barra!
And introducing the fighter to my right, fighting out of the blue corner.
With a record of
1 - 3 - 0, fighting out of Las Vegas, Daiki Yamaguchi!
The judges for this bout are Donald Grub, Paul Tew and Daniel Bishop.
The bell rings for round one and we are underway!
Barra takes an uppercut right on the jaw but it doesn't phase him.
Pasquale Barra seems to be the more aggressive standup fighter in this bout.
Barra moves away from the strike by Yamaguchi.
Yamaguchi ducks under an overhand right and circles away with a smile on his face.
It seemed like Yamaguchi was going to counter with the hook but didn't fully commit to it.
Yamaguchi takes one to the side of the head.
Yamaguchi scores with a punch to the head.
Yamaguchi connects with a body shot.
Yamaguchi's coach down at Better Alternative ($800/week) was telling us pre-fight that they have been working on Yamaguchi's balance. Obviously they view that as a key factor in the outcome of this fight.
Both fighters are looking to counter, which isn't making for the most exciting fight in the world.
A jab from Barra misses.
Yamaguchi looks like he wants to counter punch here.
We've had a slow start to the round here - hopefully the action picks up.
Yamaguchi will need to tighten up his combinations if he doesn't want to gas himself out, swinging at thin air.
Yamaguchi connects with a lovely jab that went straight through the gap between Barra's hands.
That's one minute gone in the round.
Barra avoids a punch combination nicely.
It looked like Barra wanted to counter with a hook but didn't fully commit.
Barra takes a step towards his opponent and connects with a left hand, before circling away.
Barra bobs and weaves and throws out a fast jab that snaps Yamaguchi's head backwards.
Barra throws a combination but comes up with nothing but fresh air.
Barra lands with a hook. Yamaguchi tried to avoid it but it clipped the top of his head.
Yamaguchi shuffles to his left behind two crisp jabs. Barra eats them both and turns towards Yamaguchi to reposition himself and eats a stinging right hand-left hook combo.
That's two minutes gone in the round.
Yamaguchi looks to land a combination but Barra avoids it well.
Barra throws a jab but it's blocked by Yamaguchi.
Yamaguchi throws out a counter right but Barra avoids it with no problem.
Barra looks to be in better condition than last time we saw him fight. Obviously he's been working hard on his cardio.
Yamaguchi ducks down and throws a hook to the body but Barra moves away.
Barra is looking to clinch but Yamaguchi is avoiding it.
Decent striking displayed by Yamaguchi there.
This has been an exciting period of action!
Barra wants to clinch up but Yamaguchi keeps it at a distance.
Barra takes a solid shot to the body. That one hurt him but he's trying not to show it.
Yamaguchi throws a body punch but Barra moves out of range.
Barra jabbing away but nothing is landing.
That's three minutes gone in the round.
A combination from Yamaguchi does no damage.
Yamaguchi throws an off balance right hand
and Barra counters with a good right hand that lands right on the jaw.
Barra takes a jab on the nose there. A little bit of blood seems to be coming out. Hopefully that won't affect his breathing.
A jab from Yamaguchi finds it's way through Barra's defenses.
Yamaguchi misses the jab.
It looked like Barra wanted to counter with a hook but didn't fully commit.
Barra throws a looping overhand right but Yamaguchi ducks down to avoid it.
Barra walks into a jab.
Barra throws a hook but Yamaguchi blocks it.
A countering left hand to the body from Yamaguchi misses.
That's four minutes gone in the round.
Barra takes a punch to the jaw and another one to the bread basket.
Yamaguchi defending well as Barra loads up on a big left hand.
Yamaguchi looked like he wanted to counter with a punch but didn't throw it.
Barra has his head snapped back a nice jab. A little nod from Barra there as he acknowledges the shot.
We've seen a great period of action over the last minute or so - credit to both fighters for going all out!

Yamaguchi lands a big right hand that sends Barra crashing to the mat! Yamaguchi stays standing though and waves Barra back to his feet!

Barra is rocked!
Yamaguchi misses with a wild combination.
Oh Barra is still all over the place! His legs are completely gone! Will he be able to recover?!!
Yamaguchi drops Barra with a hook right on the temple. He thinks about going to the ground but Barra looks back up at him and smiles so Yamaguchi waves him back to his feet - he obviously thinks he can knock him out after that shot landed.
Yamaguchi falls off balance throwing a combination
and Barra counters with a shot to the ribs. That looked like it hurt.
And thats the end of the round the fighters go back to their corners.
Daiki Yamaguchi dominated that round.
That's the end of the interval. I'm sure that seemed a lot quicker than a minute for our two fighters! Back to the action.
Barra throws a hard body shot but it just misses.
Barra seems to have got his legs back now.
Barra cracks Yamaguchi with a right hand to the side of the head.
Yamaguchi throws a jab to the body, straight down the pipe. Boom. That sent Barra stumbling backwards but he manages to regain his composure quickly.
Barra lands an overhand right.
Yamaguchi jabs. That one connects to the head of his opponent.
Barra takes a shot right to the liver - Bas would have been proud of that punch.
Barra is really head hunting here, hardly looking to strike to the body at all.
We've had a slow start to the round here - hopefully the action picks up.
Yamaguchi works Barra's body with a nice hook.
Barra misses with a lunging right hand
and Yamaguchi cracks him with a counter punch right on the button.
No joy there for Yamaguchi, who threw a few shots but didn't land.
That's one minute gone in the round.
Barra misses with an uppercut
and Yamaguchi counters with a nice uppercut.
Barra throws a jab when Yamaguchi was well out of range.
Yamaguchi looked like he wanted to counter with a punch but didn't throw it.
Barra fails in his attempt to clinch.
Good exchange - Yamaguchi coming out on top.
Yamaguchi lands an overhand left. A wild punch that just about connected.
Barra is rocked!
Pasquale Barra is looking to throw some combinations by the looks of things.
Barra misses with a jab, cross combination.
Yamaguchi swings away but doesn't land with a series of punches.
Yamaguchi lands a left and a right that send Barra crashing to the mat, dazed. Yamaguchi thinks about following him to the mat but decides to wave him back up to his feet!
Oh Barra is still all over the place! His legs are completely gone! Will he be able to recover?!!
That's two minutes gone in the round.
We've seen a great period of action over the last minute or so - credit to both fighters for going all out!
Yamaguchi scores with a punch to the gut of his opponent.
Both fighters are absolutely exhausted here.
Barra takes a shot right to the bread basket.
Yamaguchi will need to tighten up his combinations if he doesn't want to gas himself out, swinging at thin air.
Barra seems to have got his legs back now.
Yamaguchi swings and misses with a hook to the body.
Barra throws an ugly left hook that misses
and Yamaguchi counters with a nice body shot.
Barra walks into a straight right hand from Yamaguchi.
Yamaguchi cracks Barra with a nasty uppercut that draws ooohs from the crowd and sends Barra tumbling backwards onto the mat. He tries to recover but Yamaguchi pounces and lands a hail of unanswered strikes that forces the referee to step in to end the fight! Barra is not happy but he gave the referee no choice!
Ladies and gentlemen, after 2:49 of round 2, we have a winner by way of TKO (Strikes). Daiki Yamaguchi!
Daiki Yamaguchi really struggled to get his t-shirt on before his hand was raised. Making sure that Voodoo Nutrition logo gets some air time is pretty tricky when you're all sweaty.
Pasquale Barra was interviewed post fight and said 'T'accid a famigl'.
|
|
|
|
|
|
|
|
|
|
|
|
|
|
|
|
|
|
|
|
|
|
|
| S |
C
A |
G |
S |
C
B |
G |
|
S |
C |
G |
|
energy
A | B |
|
hype
A | B |
|
pop
A | B |
|
mgr
A | B |
|
FIGHT
RATING
63% |
|
|
|
|
|
|
|
Undercard bout
|
Coming up we have a super heavyweight MMA rules bout between Cassios Ginga (ranked 0 p4p, 0 weight class) and Kampatimar Shankariya (ranked 0 p4p, 0 weight class). Both these guys have solid standup skills and neither is particularly fantastic on the ground, so let's hope for a nice standup war!
 |
|
 |
| 195 cm
20
270 lbs
3 - 1 - 0 |
|
210 cm
20
300 lbs
2 - 2 - 0 |
BJJ White Belt
Excellent MT
Prefers standup |
|
BJJ Blue Belt
Excellent boxer
Good gas tank |
|
| |
|
Ladies and gentlemen. This fight is 3 rounds, in the super heavyweight division.
Introducing the fighter to my left, fighting out of the red corner.
With a record of
3 - 1 - 0, fighting out of Amsterdam, Cassios Ginga!
And introducing the fighter to my right, fighting out of the blue corner.
With a record of
2 - 2 - 0, fighting out of Helsinki, Kampatimar Shankariya!
The judges for this bout are Colin Fotheringham, William Gold and Andrew Berry.
The bell rings for round one and we are underway!
Shankariya misses with an uppercut.
A slapping leg kick lands for Ginga.
Ginga closes the distance looking to clinch
and Shankariya counters with a lovely straight right hand!
It looks like Cassios Ginga has been cut.
Ginga throws a lazy uppercut
and Shankariya counters with a good right hand that lands right on the jaw.
Shankariya wings a very wild body shot but it does the job and lands to the midsection.
Shankariya scores with a big left there. The judges will like that one.
Ginga moves to clinch but Shankariya breaks away
and Shankariya counters with a crisp right hand that drops Ginga! Shankariya lets Ginga back up to his feet, looking for a finish!
Ginga is rocked!
This has been an exciting period of action!
Ginga bobbing and weaving nicely... He's ducked under a jab and ducks again but ooooooh! Shankariya comes at him with an uppercut from hell! Ginga falls to the canvas, unconscious! This one is all over! Oh man, looking at the replay that was right on the button! Ginga was out before he hit the floor!
Ladies and gentlemen, after 0:44 of round 1, we have a winner by way of KO (Punch). Kampatimar Shankariya!
|
|
|
|
|
|
|
|
|
|
|
|
|
|
|
|
|
|
|
|
|
|
|
| S |
C
A |
G |
S |
C
B |
G |
|
S |
C |
G |
|
energy
A | B |
|
hype
A | B |
|
pop
A | B |
|
mgr
A | B |
|
FIGHT
RATING
100% |
|
|
|
|
|
|
|
Undercard bout
|
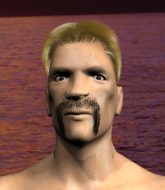
Coming up we have a welterweight MMA rules bout between Joey Black (ranked 0 p4p, 0 weight class) and Daniel Malcoms (ranked 0 p4p, 0 weight class). Joey Black has the better chin. Will he look to stand and bang today?
 |
|
 |
| 173 cm
26
175 lbs
4 - 2 - 0 |
|
182 cm
21
176 lbs
3 - 1 - 0 |
BJJ Blue Belt
Basic striking
Good chin |
|
BJJ Blue Belt
Decent boxing
Prefers standup |
|
| |
|
Ladies and gentlemen. This fight is 3 rounds, in the welterweight division.
Introducing the fighter to my left, fighting out of the red corner.
With a record of
4 - 2 - 0, fighting out of London, Joey Black!
And introducing the fighter to my right, fighting out of the blue corner.
With a record of
3 - 1 - 0, fighting out of London, Daniel Malcoms !
The judges for this bout are Donald Grub, Paul Tew and James Glass.
The bell rings for round one and we are underway!
Malcoms paws at his opponent with the jab and then lunges in with a straight, right on the button.
Malcoms throws a body shot but no joy.
Good exchange - Malcoms coming out on top.
Black throws a left and a right that both miss
letting Malcoms counter with a right hand.
Boom, another hit is landed. "You're gunna get knocked out" taunts Malcoms , as that shot connected.
Black fails to land with a series of punches.
Malcoms looked like he wanted to counter with a punch but didn't throw it.
Black falls off balance throwing a combination
and Malcoms counters with a crisp hook to the side of the head.
Malcoms connects with a single shot there.
Black misses with a wild combination.
Malcoms throws a hook to the body but it doesn't connect.
Black throws a hard body shot but it just misses.
Black misses with a right hand
and Malcoms counters with a nice uppercut.
This is a great period of action - very entertaining stuff!
Black misses with a left hand
and Malcoms counters with a stiff right hand.
Black misses with an uppercut
enabling Malcoms to counter with a crisp jab.
Nice sprawl there from Malcoms as Black shoots in.
Black ducks right into an uppercut from Malcoms .
That's one minute gone in the round.
Black fails with a rather predictable takedown attempt.
Black is breathing heavily.
Black misses with a series of wild punches.
Malcoms misses with a hook.
Malcoms throws the left hand but Black avoids the punch easily.
Black gets his takedown attempt stuffed easily
and Malcoms counters with a stiff right hand.
That's three failed takedown attempts in the round for Joey Black. That's going to take a lot out of him.
Black fails with a takedown attempt from distance.
Black keeping a good distance there, avoiding the body shot.
Joey Black seems to be the more aggressive standup fighter in this bout.
Black doesn't succeed with the takedown
letting Malcoms counter with a right hand.
Black throws a jab when Malcoms was well out of range.
Malcoms has been working on his striking defense in training and it's paying off as Black is landing a low percentage of strikes.
Malcoms lands a head shot.
Nice jab there from Malcoms .
Malcoms slips in close and lands a nice hook before moving back out of range.
That's two minutes gone in the round.
Black looks to score with a combo but nothing lands.
Black shakes his hands off, looking to compose himself, but takes a jab to the jaw whilst he does it.
Wooooo! Give it up for these two warriors! They are putting on a show!
Black takes a shot right to the bread basket.
Boom, another hit is landed. "You're gunna get knocked out" taunts Black, as that shot connected.
Nice cross by Malcoms .
Black walks into a stiff left hand from Malcoms .
Malcoms has used his reach advantage pretty well so far tonight.
Malcoms scores with a jab to the jaw of his opponent.
Black doesn't react quick enough there as he takes a shot to the body.
Malcoms is landing a lot of head punches in this opening round! Black had better start moving his head a bit unless he wants his face to turn into pâté.
Black misses with a hook.
Malcoms throws out a counter right but Black avoids it with no problem.
Malcoms lands an overhand right.
No joy there for Black, who threw a few shots but didn't land.
It seemed like Malcoms was going to counter with the hook but didn't fully commit to it.
Black misses with a double jab
and Malcoms connects with a straight left hand counter down the middle.
Malcoms with a body punch. A glancing blow.
Black takes a shot right to the liver - Bas would have been proud of that punch.
That's three minutes gone in the round.
Malcoms connects with a crisp jab.
This fight brought to you by 5M nutrition - it's mmmmm tasty. Nice jab by Malcoms .
Malcoms connects with a lovely jab that went straight through the gap between Black's hands.
Black thows a left - swing and a miss!
Malcoms 's jab looks to have found its range, popping Black under the eye.
Black is really struggling to find his range with his punches. Malcoms 's reach advantage is clearly causing him problems.
Malcoms takes a swing at Black's ribcage but misses.
Black fails to land with a series of punches.
Malcoms throws out a counter right but Black avoids it with no problem.
Malcoms lands with a hook. Black tried to avoid it but it clipped the top of his head.
Malcoms smiles there as he lands a nice right hand right on the button.
Black fails with a rather predictable takedown attempt.
Malcoms swings away with a counter right hand but no contact made.
Black looks like he's developed a pretty tasty lump over his left eye. He'll need to avoid taking much more damage to that.
Malcoms lands with an overhand left.
This is a great period of action - very entertaining stuff!
Black throws a combination that misses
and Malcoms counters with a stiff right hand.
Malcoms paws at his opponent with the jab and then lunges in with a straight, right on the button.
Malcoms might want to mix his strikes up a bit more. He's just going for head shots at the moment and that can become a bit predictable.
That's four minutes gone in the round.
Black misses with a right hand
and Malcoms cracks him with a counter punch right on the button.
Malcoms works the jab nicely.
Malcoms slips a jab and a cross from Black.
Malcoms slips in close and lands a nice hook before moving back out of range.
Malcoms lands a straight punch to the body, keeping Black at a distance.
Black throws an uppercut from half a mile away. Malcoms sees it coming and avoids it easily.
A cross from Malcoms lands.
Black misses with a looping left.
Malcoms looks like he wants to counter punch here.
Black cracks Malcoms with a right hand to the side of the head.
Black throws a left and a right that both miss
and Black takes a counter punch right on the button for his troubles.
Malcoms bobs and weaves and throws out a fast jab that snaps Black's head backwards.
Black is rocked!
Malcoms connects with a nice looking jab.
Oh Black is still all over the place! His legs are completely gone! Will he be able to recover?!!
The crowd applaud the fighters' efforts here as the round comes to an end.
Black looks for a takedown here. Will he get it? Malcoms is fending him off so far but Black persists. Nope, Malcoms circles away and we're back to standing.
Black takes one on the button.
Black walks into a jab.
And thats the end of the round the fighters go back to their corners.
Daniel Malcoms dominated that round.
The minute break is over - no more time for sponges and pep talks - back to the action!
Black misses with a double jab.
Black seems to have got his legs back now.
Malcoms lands the left hand.
Black uses decent footwork to sidestep a right hand from Malcoms .
Malcoms looks to throw the jab but Black is out of range.
Malcoms connects with the punch.
This entire fight has taken place on the feet so far and you wonder whether Black might be better served trying to take this one to the ground because he's losing the standup battle so far.
No joy there for Black, who threw a few shots but didn't land.
Black misses with a series of wild punches.
Black looks to score with a combo but nothing lands.
Black misses with a wild combination.
Daniel Malcoms seems to be getting the better of the standup.
We've had a slow start to the round here - hopefully the action picks up.
Black throws an off balance right hand
and Malcoms counters with a shot to the ribs. That looked like it hurt.
Black shakes his hands off, looking to compose himself, but takes a jab to the jaw whilst he does it.
Black misses with a series of wild punches.
Both fighters are absolutely exhausted here.
Malcoms moves into range and connects with a jab.
That's one minute gone in the round.
Malcoms with a nice cross.
Black throws a left and a right that both miss
and Malcoms counters with a shot to the ribs. That looked like it hurt.
Malcoms drops Black with a right and a left! Malcoms comes rushing in but Black regains his composure and manages to keep Malcoms in guard.
Malcoms gets to his feet and stands over Black, holding his ankles. He dives in with a big left hand that connects! Black felt that one! Malcoms unloads more punches and elbows and this one is over! The ref has dived in to save Black from any more punishment!
Ladies and gentlemen, after 1:37 of round 2, we have a winner by way of TKO (Strikes). Daniel Malcoms !
|
|
|
|
|
|
|
|
|
|
|
|
|
|
|
|
|
|
|
|
|
|
|
| S |
C
A |
G |
S |
C
B |
G |
|
S |
C |
G |
|
energy
A | B |
|
hype
A | B |
|
pop
A | B |
|
mgr
A | B |
|
FIGHT
RATING
80% |
|
|
|
|
|
|
|
Undercard bout
|
Coming up we have a lightweight MMA rules bout between Dave Priest (ranked 0 p4p, 0 weight class) and I Am Champion (ranked 0 p4p, 0 weight class). Dave Priest could well score a knockout today. He has the power to get to I Am Champion's chin.
 |
|
 |
| 169 cm
26
156 lbs
4 - 2 - 0 |
|
186 cm
26
165 lbs
3 - 1 - 0 |
Decent wrestler
Solid Muay Thai
Cuts easily |
|
BJJ Blue Belt
Brawler
Heavy handed |
|
| |
|
Ladies and gentlemen. This fight is 3 rounds, in the lightweight division.
Introducing the fighter to my left, fighting out of the red corner.
With a record of
4 - 2 - 0, fighting out of London, Dave Priest!
And introducing the fighter to my right, fighting out of the blue corner.
With a record of
3 - 1 - 0, fighting out of London, I Am Champion!
The judges for this bout are Richard Clark, Chris Edwards and Donald Grub.
The bell rings for round one and we are underway!
Boom, another hit is landed. "You're gunna get knocked out" taunts Priest, as that shot connected.
Priest closes the distance and presses his opponent up against the cage.
Champion breaks from the clinch.
Priest swats away the attempt to clinch by Champion.
Nice uppercut there from Priest.
Priest drives through and clinches with Champion against the cage.
Priest tries a body shot but Champion blocks it.
Priest misses with some punches.
Priest breaks the clinch.
Nice uppercut there from Champion.
It looks like Dave Priest has been cut.
Champion moves into the clinch.
Priest tries to land a knee to the body but he is off balance and Champion avoids it.
Priest lands a left hand that snaps the head of Champion backwards.
This has been an exciting period of action!
Priest tries a knee to the head but he's missed.
Champion's coach down at London MMA Club was telling us pre-fight that they have been working on Champion's balance. Obviously they view that as a key factor in the outcome of this fight.
Champion escapes the clinch and we're back to striking.
That's one minute gone in the round.
Priest swings away but doesn't land with a series of punches.
Champion misses with an uppercut. Priest saw that one coming.
Priest lands a leg kick and bounces back out of range.
Priest throws a head kick but Champion moves out of range.
Priest lands a high kick!
Priest scores with a head kick.
Champion misses with a wild body shot.
Nice defenses there by Champion.
Priest looking to land some kicks to the body here.
Champion has Priest up against the cage in a clinch.
Priest prevents Champion from breaking the clinch.
Champion's head jolts backwards as he takes an uppercut right on the button!
Priest lands punches inside but they're not really causing much damage.
That's two minutes gone in the round.
Fantastic stuff here - a very entertaining period of action, which has drawn cheers from the crowd.
Champion can't break the clinch.
A short right hand to the side of the head by Priest.
Champion takes a knee right on the jaw!
Champion scores with a shot to the side of Priest's head.
Priest throws a vicious knee straight up the middle but Champion blocks it with crossed arms.
Good body shot from Priest.
Champion presses Priest against the cage and delivers a mid-strength body shot.
Champion is trying to force a seperation but Priest has the dominant position.
A head punch blocked on the inside by Champion.
Priest misses with a shot to the kidneys.
Champion looks to throw an elbow but misses.
Champion blocks a couple of punches on the inside.
Priest scores with an uppercut up the middle.
Champion is trying to force a seperation but Priest has the dominant position.
Champion takes a knee right on the jaw!
That's three minutes gone in the round.
Priest pushes Champion back against the cage and lands a hook to the side of the head.
Priest breaks from the clinch.
Champion wants to clinch up but Priest keeps it at a distance.
Priest darts in and clinches Champion up against the cage.
Priest with the Thai clinch. He's looking to land a big knee but he's not managed it this time.
Champion blocks a body shot from Priest.
Champion trying to land knees to the body.
Priest lands a hook to the body. It's hard to tell if that hurt Champion or not.
Champion lands with a short shot to the head.
Priest with a knee to the head.
Champion misses with a body punch.
Priest lands a nice uppercut.
Priest pushes off and circles away, back to the middle of the mat.
Champion swings wildly with a couple of big hooks
and Priest counters with a deadly accurate combination that rocks Champion badly! He tries to strike back but Priest puts an end to that with another precision combo that knocks Champion out cold! Oh man, Champion will never hear the end of this one!
Ladies and gentlemen, after 4:57 of round 1, we have a winner by way of KO (Punches). Dave Priest!
|
|
|
|
|
|
|
|
|
|
|
|
|
|
|
|
|
|
|
|
|
|
|
| S |
C
A |
G |
S |
C
B |
G |
|
S |
C |
G |
|
energy
A | B |
|
hype
A | B |
|
pop
A | B |
|
mgr
A | B |
|
FIGHT
RATING
49% |
|
|
|
|
|
|
|
Undercard bout
|
Coming up we have a heavyweight MMA rules bout between Brent Boston (ranked 0 p4p, 0 weight class) and Ricky Bubbles (ranked 0 p4p, 0 weight class). Both fighters really staring each other down here, as Ricky Bubbles enters the cage!
 |
|
 |
| 182 cm
19
282 lbs
4 - 0 - 0 |
|
189 cm
26
242 lbs
4 - 2 - 0 |
Good wrestling
Counter fighter
KO power |
|
Good wrestler
Brawler
Determined |
|
| |
|
Ladies and gentlemen. This fight is 3 rounds, in the heavyweight division.
Introducing the fighter to my left, fighting out of the red corner.
With a record of
4 - 0 - 0, fighting out of Helsinki, Brent Boston!
And introducing the fighter to my right, fighting out of the blue corner.
With a record of
4 - 2 - 0, fighting out of Amsterdam, Ricky Bubbles!
The judges for this bout are Phil Schofield, Chris Edwards and James Glass.
The bell rings for round one and we are underway!
Boston shoots in for a takedown. "I don't think so" says Bubbles as he avoids it easily.
A combination from Bubbles does no damage.
Bubbles connects with a single shot there.
Bubbles tries to close the distance and clinch but Boston swats him to one side with an open hand palm strike and circles away.
Boston changes levels looking for a counter takedown but doesn't commit.
Bubbles feints a jab promting Boston to slip. Bubbles then demonstrates his capabilities by jabbing again. Boston slips again and ducks right into an uppercut.
It looks like Brent Boston has been cut.
Bubbles throws a looping overhand right but Boston ducks down to avoid it.
Bubbles fakes with an overhand right and moves in to clinch with Boston, pushing him back against the cage.
Bubbles tries to break free but Boston pushes him back against the cage.
Boston on the defensive, avoiding the knees to the body.

Boston is working on a single leg takedown against the cage. Bubbles can't fight it off and eventually Boston manages to take the fight to the floor. Bubbles looks annoyed but at least he's managed to land in guard.
The fighters are pressed up against the cage, both looking to find a bit of space to work.
Wooooo! Give it up for these two warriors! They are putting on a show!
Boston working some ground and pound from guard but it's not doing any damage.
Bubbles looking to sweep here. No luck so far.
Boston postures up.
Boston is looking to work some ground and pound but Bubbles has wrist control.
That's one minute gone in the round.
Boston postures up.
Boston won't allow Bubbles to sweep him here.
Bubbles pulls Boston in close to prevent any damage.
Boston throws a big right hand that misses.
Boston preventing the sweep.
Bubbles has a closed guard, preventing anything of note from happening. Perhaps he's looking to stall.
Bubbles is trying to control the position but Boston postures up.
Bubbles preventing the ground and pound from doing any damage.
Boston postures up to throw the ground and pound strikes but they don't connect.
Boston scoring with some ground and pound.
That's two minutes gone in the round.
There's not a lot going on here and the crowd are letting the fighters know they're not willing to tolerate a lack of action.
Boston wants to control from the top but Bubbles keeps moving.
Boston tries to free his leg and advance position but Bubbles is retaining full guard.
Boston postures up to throw the ground and pound strikes but they don't connect.
We've been hearing good reports from Boston's training camp. Apparently he has been rolling around with some good quality BJJ practitioners and has been sharpening his skills. Let's see if that has an impact on the fight today.
Bubbles has his hands on Boston's head, controlling the position.
Boston passes Bubbles's left leg - he's now in half guard.
Bubbles is looking to improve his position.
Boston has been looking to land a fair amount of strikes on the ground. He might be looking to soften his opponent up in order to work for a submission.
Bubbles controlling the position well.
Boston working some ground and pound from close in. He's looking to maintain this position and strike for a while by the looks of things... although he'll probably advance to full mount in a minute now I've said that.
The ref warns both fighters not to hold the cage as they work up against the meshing.
That's three minutes gone in the round.
Ground and pound from Boston.
Boston slips a nice elbow through Bubbles's hands, connecting with Bubbles's forehead.

That has opened up Ricky Bubbles's cut even more.
Bubbles wants to control but Boston is keeping busy and won't allow it.
Bubbles desperately trying to maintain half guard.
Boston sitting in half guard, looking to land shots. Bubbles defending well though.
Boston stalling.
Bubbles is trying to get back to full guard.
We get told so often about how wrestlers don't like to be on their backs. Let's see if Bubbles can do anything to dispel that myth.
Bubbles on the receiving end of some nice ground and pound.
The cut above Ricky Bubbles's eye is starting to cause him problems now.
The referee calls the doctor in to look at Ricky Bubbles's cut. Oh no, the doctor has called an end to the bout!
Ladies and gentlemen, after 4:21 of round 1, we have a winner by way of TKO (Cut). Brent Boston!
|
|
|
|
|
|
|
|
|
|
|
|
|
|
|
|
|
|
|
|
|
|
|
| S |
C
A |
G |
S |
C
B |
G |
|
S |
C |
G |
|
energy
A | B |
|
hype
A | B |
|
pop
A | B |
|
mgr
A | B |
|
FIGHT
RATING
18% |
|
|
|
|
|
|
|
Co-main event
|
Coming up we have a heavyweight MMA rules bout between Gregory Erickson (ranked 0 p4p, 0 weight class) and Don Masino (ranked 0 p4p, 0 weight class). Erickson's entrance music is Valhalla . A fine choice. Masino comes into a darkened arena with his song building. Il Padrino kicks in, the lights come on and the crowd goes wild! What a showman! This should be a great matchup!
 |
|
 |
| 193 cm
27
263 lbs
6 - 0 - 0 |
|
190 cm
26
250 lbs
5 - 2 - 0 |
Good wrestling
Excellent boxer
Very quick |
|
BJJ White Belt
Excellent MT
Heavy handed |
|
| |
|
Ladies and gentlemen. This fight is 5 rounds, for the heavyweight championship of the world!
Introducing the champion to my left, fighting out of the red corner.
With a record of
6 - 0 - 0, fighting out of Las Vegas, Gregory Erickson!
And introducing the challenger to my right, fighting out of the blue corner.
With a record of
5 - 2 - 0, fighting out of Las Vegas, Don Masino!
The judges for this bout are William Gold, James Atkins and Richard Clark.
The bell rings for round one and we are underway!
Erickson connects with a single shot there.
It looks like Don Masino has been cut.
Masino fails with an attempt to clinch.
Erickson appears to be looking for a counter punch to the body.
Masino fails with an attempt to clinch.
Erickson clobbers Masino with an overhand right that has the crowd gasping. That made a horrendous noise.
Erickson swats away the attempt to clinch by Masino.
A telegraphed right hand from Erickson misses the target.
Masino closes the distance looking to clinch
and Erickson counters with a stiff right hand.
We've had a slow start to the round here - hopefully the action picks up.
Masino tries to clinch but Erickson moves out of range.
That's one minute gone in the round.
Masino closes the distance and presses his opponent up against the cage.
Erickson blocks a body shot from Masino.
An uppercut on the inside fails to land for Masino.
Masino throws a punch but it's blocked by Erickson.
Erickson working aggressively here.
Masino throws a punch but it's blocked by Erickson.
Nice body punch from Erickson - that landed with a thud.
Masino takes a shot to the head.
Erickson is struggling to control the position.
Masino keeps control of Erickson as he tries to wriggle out of the double underhooks.
Erickson working aggressively here.
Erickson wants to stall.
Masino misses with a short punch on the inside.
A short right from Masino on the inside.
Erickson taking a breather.
That's two minutes gone in the round.
Erickson lands punches inside but they're not really causing much damage.
Erickson wants to break free. God knows he wants to breaaaak freeee.
A short uppercut from Masino.
A short right from Masino.
Masino tries to land a shot to the body but it's blocked.
The fans in attendance giving it up for the two fighters, who have really let it all hang out in the last minute or so!
Erickson looking to stall.
Erickson misses with a hook from the clinch.
Masino tries to throw a body punch but Erickson avoids it by throwing Masino back against the cage.
Erickson swings wildly with an uppercut but Masino uses good head movement to avoid it.
Masino swings away with an uppercut that misses.
Masino fails to land with a short punch on the inside.
Erickson is looking to control Masino's arms but Masino gets an underhook and turns him. Now Erickson has his back to the cage.
Masino has Erickson pressed against the cage, preventing Erickson from circling away and getting back to striking at range.
A head punch on the inside from Masino fails to land.
Masino has been looking to improve his clinch game in recent weeks. Erickson seems to have the measure of him in the clinch so far, so let's see if Masino can turn it around.
Masino prevents a body shot from Erickson.
That's three minutes gone in the round.
Masino lands with a short head shot on the inside.
A quick uppercut on the inside from Masino.
Masino fails to land with a short punch on the inside.
Erickson misses with a shot to the kidneys.
Masino struggles to land a body shot inside as Erickson controls his hands.
Erickson throws a head punch that misses.
Masino blocks a punch to the side of the head.
A nice left hand lands by Masino.
Come on Erickson - let's have some action - none of this stalling nonsense.
Masino misses with some punches.
The referee calls for Erickson to work.
Erickson blocking some punches.
Masino swings wildly with an uppercut but Erickson uses good head movement to avoid it.
Masino lands a left hand that snaps the head of Erickson backwards.
Erickson wants to break the clinch but can't.
That's four minutes gone in the round.
Erickson stalling here - the referee won't stand for too much of that.
A frustrated look appears on Erickson's face as he tries to break the clinch.
A nice left hand lands by Masino.
Erickson misses with some punches.
Masino doesn't land with the attempted body shot.
Masino throws a head punch that misses.
Erickson lands punches inside but they're not really causing much damage.
This has been an exciting period of action!
Masino misses with the head strike.
An uppercut on the inside fails to land for Erickson.
An uppercut on the inside fails to land for Masino.
Masino misses with a punch to the body.
Erickson misses with a body punch.
Masino blocks an uppercut.
Masino misses with some punches.
Erickson has had enough of the clinch and is looking to separate.
Erickson blocks an uppercut.
Masino throws a punch but it's blocked by Erickson.
A body shot lands from Masino.
And thats the end of the round the fighters go back to their corners.
A close round but Don Masino will probably get the nod.
The cut man is working on Don Masino's cut.
That's the end of the round. The referee orders the cornermen out of the cage so we can get back down to business.
Masino tries to close the distance and clinch but Erickson swats him to one side with an open hand palm strike and circles away.
Don Masino seems to be the more aggressive standup fighter in this bout.
A cross from Erickson lands.
Masino avoids a lazy jab quite easily.
Erickson keeps the fight on the outside.
Masino fails with an attempt to clinch.
Masino tries to clinch up against the cage, rushing in to close the distance. Erickson manages to break the clinch and circles back to the middle of the mat.
Erickson throwing a counter right hand but Masino manages to avoid it.
We've had a slow start to the round here - hopefully the action picks up.
Erickson circles away from the clinch attempt.
Erickson swung with a counter right hand that didn't connect.
The fight stays on the outside here - Masino looks like he's thinking about clinching though.
That's one minute gone in the round.

Erickson drops Masino with a beautiful combination! Masino stares up at his opponent, who ushers him back to his feet - Erickson is looking for the KO!

Masino is rocked!
That has opened up Don Masino's cut even more.
Erickson is looking light on his feet compared to last time was saw him fight.
Masino tries to clinch up
and Erickson counters with a huge right that knocks Masino out cold! Erickson is running around with a crazed look on his face - you can see how much that meant to him!
Ladies and gentlemen, after 1:23 of round 2, we have a winner by way of KO (Punch). Gregory Erickson!
Gregory Erickson retains his heavyweight title!
As Gregory Erickson got his breath back, he grabbed the microphone and managed to blurt out the following: Bow before me!'.
The defeated Don Masino had this to say: 'I will kill your family...Mafia doesn't forget'.
|
|
|
|
|
|
|
|
|
|
|
|
|
|
|
|
|
|
|
|
|
|
|
| S |
C
A |
G |
S |
C
B |
G |
|
S |
C |
G |
|
energy
A | B |
|
hype
A | B |
|
pop
A | B |
|
mgr
A | B |
|
FIGHT
RATING
36% |
|
|
|
|
|
|
|
Main event
|
Coming up we have a middleweight MMA rules bout between Zachary Braxton (ranked 0 p4p, 0 weight class) and Jonnhy Four (ranked 0 p4p, 0 weight class). Braxton comes to the cage accompanied by Special Delivery Remix . Zachary Braxton has the better chin. Will he look to stand and bang today?
 |
|
 |
| 181 cm
27
195 lbs
6 - 0 - 0 |
|
188 cm
26
195 lbs
6 - 1 - 0 |
Good wrestling
Excellent boxer
Very quick |
|
BJJ White Belt
Excellent MT
Powerful |
|
| |
|
Ladies and gentlemen. This fight is 5 rounds, for the middleweight championship of the world!
Introducing the champion to my left, fighting out of the red corner.
With a record of
6 - 0 - 0, fighting out of Las Vegas, Zachary Braxton!
And introducing the challenger to my right, fighting out of the blue corner.
With a record of
6 - 1 - 0, fighting out of London, Jonnhy Four!
The judges for this bout are Phil Schofield, James Glass and Chris Edwards.
The bell rings for round one and we are underway!
Four tries to clinch but Braxton is having none of it.
Braxton has been talking about how he's improved his wrestling in the run up to the fight so let's see if that's enough to sway the balance.
Braxton throws a shot from downtown. Four moves away and avoids it.
Four comes forward and lands a shot to the body, then darts back out of range.
Four takes the fight into the clinch.
Four scores with a hook to the body.
Four lands a body punch.
A head punch blocked on the inside by Four.
Four keeps the fight in the clinch, despite Braxton's efforts to push away.
Four swings wildly with an uppercut but Braxton uses good head movement to avoid it.
We've had a slow start to the round here - hopefully the action picks up.
Four lands with a quick shot inside that doesn't really do much damage.
Braxton misses with some punches.
Braxton tries a shoulder strike but it doesn't do any damage.
Four throws a head punch that misses.
A short right hand to the side of the head by Four.
That's one minute gone in the round.
Four blocks an uppercut.
Four working on landing some head shots here - that one got through nicely.
Four swings wildly with an uppercut but Braxton uses good head movement to avoid it.
A head punch blocked on the inside by Braxton.
Braxton blocking some punches.
Four lands a short shot on the inside that snaps the head of Braxton backwards.
Four misses with a punch on the inside.
Four throws a punch but it's blocked by Braxton.
Braxton blocking some punches.
Four swings away with an uppercut that misses.
Four misses with some punches.
Braxton is trying to force a seperation but Four has the dominant position.
We've been informed that Four has been sparring a lot of Muay Thai in the buildup to this fight so let's see if that has an impact on the result.
Braxton lands punches inside but they're not really causing much damage.
Braxton is trying to break the clinch but Four has him pressed against the cage.
Four lands a body shot.
Four throws a punch but it's blocked by Braxton.
Braxton blocks an uppercut.
That's two minutes gone in the round.
A head punch on the inside from Braxton fails to land.
Braxton is trying to break the clinch but Four has him pressed against the cage.
An uppercut on the inside fails to land for Four.
An uppercut on the inside fails to land for Braxton.
Braxton has had enough of the clinch and is looking to separate.
Braxton doesn't land with the attempted body shot.
A short right from Braxton.
Fantastic stuff here - a very entertaining period of action, which has drawn cheers from the crowd.
Braxton blocks a punch to the side of the head.
Braxton misses with the head strike.
Four misses with the head strike.
Four digs a right hand underneath Braxton's ribcage. Braxton let out a lung full of air as it connected.
Four misses with a body punch.
Four tries a shoulder strike but it doesn't do any damage.
Braxton tries to throw a body punch but Four avoids it by throwing Braxton back against the cage.
Four lands a nice uppercut.
Braxton fails to land with a short punch on the inside.
Four working aggressively here.
Four lands with a short head shot on the inside.
That's three minutes gone in the round.
Braxton tries a shoulder strike but it doesn't do any damage.
Nice body punch from Four.
Four misses with a hook from the clinch.
Four lands with a short shot to the head.
Four scores with a shoulder strike.
Braxton swings away with an uppercut that misses.
Braxton struggles to land a body shot inside as Four controls his hands.
Four lands a left hand that snaps the head of Braxton backwards.
Braxton blocks a body shot from Four.
Four lands a right hand.
Four misses with a punch on the inside.
Four lands a right uppercut that snaps the head of Braxton backwards.
Four digs a right hand into Braxton's ribs. Those have got to be taking their toll on Braxton's gas tank.
A short right from Four on the inside.
Four tried to land a shot to the body but connects with Braxton's elbow.
Four scores with a shot to the side of Braxton's head.
The crowd cheering loudly, showing their appreciation for the quality fight we're seeing here.
Four works on Braxton's body with a couple of short punches.
That's four minutes gone in the round.
Braxton blocking some punches.
Four lands with a short shot to the head.
A head punch blocked on the inside by Braxton.
Four tries to land a shot to the body but it's blocked.
Four misses with a hook from the clinch.
Four misses with a hook from the clinch.
Four throws a punch but it's blocked by Braxton.
Four blocks an uppercut.
Braxton misses with a punch on the inside.
Braxton wants to break free but Four has control.
Four has a couple of punches blocked by Braxton.
Braxton working hard to break the clinch.
Four has Braxton pressed against the cage, preventing Braxton from circling away and getting back to striking at range.
Braxton misses with a shot to the kidneys.
Four working some nice short punches in the clinch.
A body shot lands from Braxton.
Braxton blocking some punches.
And thats the end of the round the fighters go back to their corners.
Jonnhy Four dominated that round.
OK. That's time! The bell goes and we're back to the action.
Four scores with a punch to the head.
Braxton shakes his hands off, looking to compose himself, but takes a jab to the jaw whilst he does it.
Four tries to clinch but fails miserably
letting Braxton counter with a right hand.
Four tries to grapple but his opponent circles
and Braxton counters with a nice body shot.
Four wants to clinch up but Braxton keeps it at a distance.
Nice body punch from Four.
Nice body punch from Braxton.
We've had a slow start to the round here - hopefully the action picks up.
Braxton drops his hands momentarily and Four takes advantage with a crisp shot to the head.
Four tries to clinch but is not successful on this occasion.
Four lands a big uppercut and Braxton crumbles to the floor! The ref thinks about stopping the fight but Braxton looks OK. Four waves Braxton back to his feet!
Braxton is rocked!
Fantastic stuff here - a very entertaining period of action, which has drawn cheers from the crowd.
Four tries to clinch there but Braxton circles away.
Braxton seem to be loading up, looking for a big counter.
Oh Braxton is still all over the place! His legs are completely gone! Will he be able to recover?!!
Four lunges in with swinging rights and lefts but Braxton circles away quickly and effectively.
A little feinted left hand from Braxton on the counter but he doesn't commit to it.
That's one minute gone in the round.
Four ducks under a wild hook from Braxton.
Braxton seems to have got his legs back now.
Braxton throws a body punch but Four moves out of range.
Four wants to clinch.
Four tries to clinch up
and Braxton cracks him with a counter punch right on the button.
Braxton scores with a punch to the gut of his opponent.
Four moving in and out of range nicely, whilst landing the scoring shot.
Four ducks down and throws a hook to the body.
Four misses with a wild body shot.
Four throws a sloppy body shot
letting Braxton counter with a right hand.
That's two minutes gone in the round.
Four is moving around nicely and scores here with a single head shot.
Four wants to clinch but Braxton slips to the side
and Braxton connects with a straight left hand counter down the middle.
Braxton moves away from the strike by Four.
The fans in attendance giving it up for the two fighters, who have really let it all hang out in the last minute or so!
Braxton circles away from the clinch attempt.
Braxton avoids a lazy jab quite easily.
Braxton connects with a right hand. Four shakes it off.
Zachary Braxton is looking to throw some combinations by the looks of things.
Four tries to clinch up but Braxton circles away and keeps his distance.
Braxton circles away from the clinch attempt
and Braxton connects with a straight left hand counter down the middle.
Four connects with a right hand. Braxton shakes it off.
Four fails with an attempt to clinch.
Braxton swung with a counter punch to the body but it didn't connect.
That's three minutes gone in the round.
Four lands a big right hand that sends Braxton crashing to the mat! Four stays standing though and waves Braxton back to his feet!
It looks like Zachary Braxton has been cut.
Four swings wildly with a right hand that was never going to find it's target.
Braxton takes a solid shot to the body. That one hurt him but he's trying not to show it.
Four has used his reach advantage pretty well so far tonight.
Four tries to close the distance and clinch but Braxton swats him to one side with an open hand palm strike and circles away.
Four tries to clinch up but Braxton circles away and keeps his distance.
Braxton is looking to counter with a shot to the body.
Four gets in close and instigates a clinch.
Four misses with some punches.
Jonnhy Four seems to be working more effectively in the clinch in the fight so far.
The crowd cheering loudly, showing their appreciation for the quality fight we're seeing here.
Braxton fails to land with a short punch on the inside.
Braxton doesn't land with the attempted body shot.
Braxton lands with a left to the head.
Four lands a left hand.
Four lands a hook that snaps the head of Braxton backwards.
Braxton doesn't land with the attempted body shot.
Braxton blocks an uppercut.
A left hand lands to the body for Four.
That's four minutes gone in the round.
Braxton tries to land a shot to the body but it's blocked.
Braxton is trying to break the clinch but Four has him pressed against the cage.
Braxton throws a punch but it's blocked by Four.
Braxton wants to break the clinch but can't.
Four gets through Braxton's defenses to land a nice punch to the side of the head.
Four fails to land with a short punch on the inside.
Four prevents Braxton from breaking the clinch.
Braxton blocks a punch to the side of the head.
A nice right hand lands inside from Four.
Four has been the more effective fighter overall so far.
An uppercut to the body lands inside from Four.
Braxton blocks a punch to the side of the head.
Braxton throws a punch but it's blocked by Four.
The crowd applaud the fighters' efforts here as the round comes to an end.
A head punch blocked on the inside by Braxton.
Braxton blocks an uppercut.
Braxton looks like he'd prefer to be striking at range right now.
Braxton is trying to break the clinch but Four has him pressed against the cage.
And thats the end of the round the fighters go back to their corners.
Jonnhy Four showed his class in that round. I'd imagine he'll take it on all the scorecards.
The cut man is working on Zachary Braxton's cut.
OK. That's time! The bell goes and we're back to the action.
Four tries to clinch but Braxton is having none of it.
It looked like Braxton was looking amped, ready to throw a big counter but didn't commit.
Four feints and then winds up with a huge right hand that connects perfectly and sends Braxton sprawling to the canvas! Braxton rolls over backwards and springs off the cage and manages to regain his footing - how acrobatic! Oh, he's still wobbly - can Four finish him?!
Four looks to clinch
and Braxton counters with a crisp hook to the side of the head.
Four has Braxton up against the cage in a clinch.
Four tries a shoulder strike but it doesn't do any damage.
Four has a couple of punches blocked by Braxton.
Four tried to land a shot to the body but connects with Braxton's elbow.
The crowd are loving this. Great action here.
Four lands a shoulder strike.
A head punch on the inside from Four fails to land.
Braxton wants to get back to striking at distance but Four won't allow it.
A head punch blocked on the inside by Four.
Braxton tried to land a shot to the body but connects with Four's elbow.
Four scores with a shot to the side of Braxton's head.
Braxton blocks a punch to the side of the head.
Braxton tries to throw a body punch but Four avoids it by throwing Braxton back against the cage.
That's one minute gone in the round.
A head punch on the inside from Four fails to land.
Nice body punch from Four - that landed with a thud.
Four misses with a hook from the clinch.
A head punch blocked on the inside by Braxton.
Braxton prevents a body shot from Four.
Four working aggressively here.
An uppercut on the inside fails to land for Four.
Braxton has had enough of the clinch and is looking to separate.
Braxton prevents a body shot from Four.
A head punch blocked on the inside by Four.
Braxton wants to break free. God knows he wants to breaaaak freeee.
Braxton blocking some punches.
Braxton softening up his opponent with strikes, against the cage.
Four lands a shoulder strike.
Braxton works for underhooks and lands a body shot in the process.
Four has Braxton pressed against the cage, preventing Braxton from circling away and getting back to striking at range.
That's two minutes gone in the round.
Four swings away with an uppercut that misses.
A right handed body shot lands from Four.
Four lands punches inside but they're not really causing much damage.
Braxton struggles to land a body shot inside as Four controls his hands.
An uppercut on the inside fails to land for Four.
Braxton tries to break the clinch but Four is controlling the position.
Four misses with the head strike.
A nice right hand lands inside from Four.
Four misses with a shot to the kidneys.
Wooooo! Give it up for these two warriors! They are putting on a show!
Four lands with a light punch inside.
Still in the clinch, Four scores with a nice short uppercut.
Braxton blocks an uppercut.
Braxton misses with a hook from the clinch.
Braxton swings away with an uppercut that misses.
Four lands a hook that snaps the head of Braxton backwards.
Braxton swings away with an uppercut that misses.
That's three minutes gone in the round.
Four lands a right hand.
Four digs a right hand underneath Braxton's ribcage. Braxton let out a lung full of air as it connected.
Four has a couple of punches blocked by Braxton.
Braxton blocks a body shot from Four.
Braxton doesn't land with the attempted body shot.
Braxton tried to land a shot to the body but connects with Four's elbow.
Four has Braxton pressed against the cage, preventing Braxton from circling away and getting back to striking at range.
Four pushes Braxton back against the cage and lands a hook to the side of the head.
Braxton is trying to break the clinch but Four is controlling him.
Braxton scores with a shoulder strike.
An uppercut on the inside fails to land for Four.
Four cracks Braxton with a nice body shot.
Both fighters are breathing heavily.
Braxton misses with the head strike.
Four working some nice short punches in the clinch.
A quick uppercut on the inside from Braxton.
Four swings wildly with an uppercut but Braxton uses good head movement to avoid it.
That's four minutes gone in the round.
Four blocks a punch to the side of the head.
Braxton misses with the head strike.
Four is leaning against Braxton and scores with a nice uppercut to the body.
Four misses with some punches.
A head punch on the inside from Four fails to land.
This has been an exciting period of action!
Four working on landing some head shots here - that one got through nicely.
Braxton doesn't land with the attempted body shot.
Four working aggressively here.
Four lands a body punch - he's looking to wear down Braxton.
Four pushes Braxton against the cage. Four is working some dirty boxing. Four pushes off with a quick right hook! Braxton goes down! Braxton tries to stand but stumbles back to his kness! Four moves in to finish and the ref steps in to prevent any more damage!
Ladies and gentlemen, after 4:46 of round 3, we have a winner by way of TKO (Strikes). Jonnhy Four!
Jonnhy Four is the new middleweight champion!
In defeat, Zachary Braxton stepped up to the mic, saying 'Fuck it... shit happens...'.
|
|
|
|
|
|
|
|
|
|
|
|
|
|
|
|
|
|
|
|
|
|
|
| S |
C
A |
G |
S |
C
B |
G |
|
S |
C |
G |
|
energy
A | B |
|
hype
A | B |
|
pop
A | B |
|
mgr
A | B |
|
FIGHT
RATING
64% |
|
|
|
|
|
|
|
|
|
|
