 |
FWC 22: Hug vs. Maafala 2 PBP Commentary |
Undercard bout
|
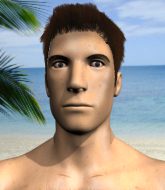
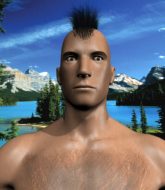
Coming up we have a middleweight MMA rules bout between Ralph Machio (ranked 0 p4p, 0 weight class) and Jack Shepherd (ranked 0 p4p, 0 weight class). These two fighters really are very evenly matched on the feet - it will be fascinating to see who can assert themselves in that aspect of the fight.
 |
|
 |
| 190 cm
27
193 lbs
6 - 6 - 0 |
|
185 cm
25
185 lbs
2 - 1 - 0 |
Powerful takedowns
Decent elbows
Very quick |
|
Good wrestler
Basic striking
Granite chin |
|
| |
|
Ladies and gentlemen. This fight is 3 rounds, in the middleweight division.
Introducing the fighter to my left, fighting out of the red corner.
With a record of
6 - 6 - 0, fighting out of Montreal, Ralph Machio!
And introducing the fighter to my right, fighting out of the blue corner.
With a record of
2 - 1 - 0, fighting out of Montreal, Jack Shepherd!
The judges for this bout are Steve Smith, Dillan Fox and Gregory Folan.

The bell rings for round one and we are underway!

Machio shoots in for a takedown! He's got it and he's managed to land in side control! That's better than Machio was expecting from the takedown attempt, I'm sure!
Machio trying to control the position but Shepherd is working away.
Machio cracks Shepherd with a big elbow.
Machio working the ground and pound.

Machio is in a dominant position here, looking for a kimura. Shepherd looks calm but he's in trouble here. Machio gets his leg over his opponent's head and yanks on the arm. Shepherd is tapping like a morse code operator on the titanic! SOS! SOS! Machio lets go of the hold and Shepherd can pop his arm back in it's socket.
Ladies and gentlemen, after 0:43 of round 1, we have a winner by way of Submission (Kimura). Ralph Machio!
A very excited looking Ralph Machio made sure he remembered to thank all the fans both in the arena and on the internet. He said all the coolest people spend all day on MMA websites, which got a big reaction.
|
|
|
|
|
|
|
|
|
|
|
|
|
|
|
|
|
|
|
|
|
|
|
| S |
C
A |
G |
S |
C
B |
G |
|
S |
C |
G |
|
energy
A | B |
|
hype
A | B |
|
pop
A | B |
|
mgr
A | B |
|
FIGHT
RATING
100% |
|
|
|
|
|
|
|
Undercard bout
|
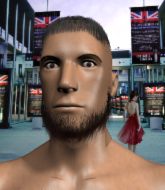
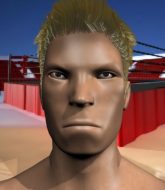
Coming up we have a bantamweight MMA rules bout between John Doo (ranked 0 p4p, 0 weight class) and Joe Bradley (ranked 0 p4p, 0 weight class). Bradley has chosen rocky road to dublin as his entrance music. John Doo has the edge in experience - let's see if he can make that count tonight.
 |
|
 |
| 150 cm
25
145 lbs
7 - 6 - 0 |
|
179 cm
21
138 lbs
0 - 4 - 0 |
BJJ Blue Belt
Solid Muay Thai
Experienced |
|
BJJ Blue Belt
Counter fighter
Prefers standup |
|
| |
|
Ladies and gentlemen. This fight is 3 rounds, in the bantamweight division.
Introducing the fighter to my left, fighting out of the red corner.
With a record of
7 - 6 - 0, fighting out of Montreal, John Doo !
And introducing the fighter to my right, fighting out of the blue corner.
With a record of
0 - 4 - 0, fighting out of Montreal, Joe Bradley!
The judges for this bout are Dillan Fox, Robert Douchet and Yves DeLean.
The bell rings for round one and we are underway!
Doo throws a head kick but Bradley moves out of range.

Doo has closed the distance and engaged Bradley in a clinch.
Bradley avoids a wild elbow strike from Doo .
Bradley is a painfully thin specimen of a man. You do wonder whether a good body kick would snap him clean in two.
Bradley tries to break free but Doo pushes him back against the cage.
Doo comes over the top with an elbow. That landed flush.
Doo lands a body punch.
A head punch on the inside from Doo fails to land.
Doo lands with a quick shot inside that doesn't really do much damage.
Bradley blocks an elbow strike from Doo .
We've had a slow start to the round here - hopefully the action picks up.
Doo tried to land a shot to the body but connects with Bradley's elbow.
Doo holding his opponent close, against the cage.
Bradley working hard to break the clinch.

That's one minute gone in the round.
Doo makes some space for himself and lands an uppercut.
Our sources have told us that Doo has been working on his knees in the buildup to the fight.
Doo 's corner are urging him to control the action in the clinch for a moment, rather than mount any serious offense. I'm sure the crowd appreciate those instructions... not.
Doo tries to work over Bradley's body with a swooping hook but it only glances the target.
The pace really dropping off here, momentarily.
Doo misses with a punch to the body.
Doo dictating the pace here, as the fighters clinch against the cage.
Doo trying to stall but Bradley improves his position.

That's two minutes gone in the round.
There's not a lot going on here and the crowd are letting the fighters know they're not willing to tolerate a lack of action.
Doo stalling in the clinch but Bradley improves position.
The ref breaks the fighters up, due to lack of action by John Doo .
Doo tries to close the distance and clinch up but Bradley swats him away and circles back towards the center.
Doo throws a head kick that misses.
Despite the aggression on Bradley's face he doesn't fully commit to the counter.
Doo moves into range and clinches up with Bradley.
Doo misses with a punch on the inside.
Bradley avoids a wild elbow strike from Doo .
Doo misses with a hook to the ribs.
Bradley blocks a knee to the body. He'll have a nicely bruised forearm in the morning.
Doo tries to land knees in the clinch but Bradley avoids the damage to the body.
Doo is struggling to control the position.
Doo crunches a lovely knee into Bradley's ribcage.

That's three minutes gone in the round.
Bradley is trying to force a seperation but Doo has the dominant position.
Doo tries to land a shot to the body but it's blocked.
Doo is trying to wear down his opponent with knees to the body.
Doo creates a bit of distance and throws an elbow that only just misses.
Come on Doo - let's have some action - none of this stalling nonsense.
Doo doesn't land with the attempted body shot.
Doo working aggressively here.
A short left from Doo .
Doo tries a shoulder strike but it doesn't do any damage.
Doo misses with a body punch.

That's four minutes gone in the round.
Bradley blocks an elbow strike.
Doo lands a right uppercut that snaps the head of Bradley backwards.
Bradley looks like he'd prefer to be striking at range right now.
The referee is keeping an eye on Doo - much more stalling and he will separate the fighters.
Doo gets an overhook and lands an elbow to the side of the head.
Doo misses with a body punch.
Bradley has had enough of the clinch and is looking to separate.
Doo can't find room to land a body shot as Bradley controls the action.
The crowd thankful this round is nearly over.
Doo with the Thai clinch. He's looking to land a big knee but he's not managed it this time.
Bradley prevents a body shot from Doo .
Doo tries to land a knee to the body but he is off balance and Bradley avoids it.
And thats the end of the round the fighters go back to their corners.
John Doo dominated that round.
The fighters get back to their feet, the hooter sounds and we're back to the action!

Doo wants to clinch
and Bradley counters with a one-two to the body.
Doo moves in looking to clinch but Bradley pushes him off.
Despite the aggression on Bradley's face he doesn't fully commit to the counter.
Doo fails with an attempt to clinch.
Bradley is looking for the big counter here.
Bradley takes a body punch but keeps moving.
Doo gets to the clinch - let's see what his plan is here.
Doo misses with a hook to the ribs.

Bradley breaks the clinch and we're back to striking at distance.
We've had a slow start to the round here - hopefully the action picks up.
Doo closes the distance and clinches.
Doo lands a damaging elbow.

Bradley is rocked!

It looks like Joe Bradley has been cut.
Doo crunches a lovely knee into Bradley's ribcage.
Bradley is still on wobbly legs! Can Doo finish him?
A short right from Doo on the inside.
Clinched against the cage, Doo lands a big elbow that drops Bradley! The ref dives in to save him from more shots - Bradley is complaining that he's OK but he was done.
Ladies and gentlemen, after 1:58 of round 2, we have a winner by way of TKO (Strikes). John Doo !
|
|
|
|
|
|
|
|
|
|
|
|
|
|
|
|
|
|
|
|
|
|
|
| S |
C
A |
G |
S |
C
B |
G |
|
S |
C |
G |
|
energy
A | B |
|
hype
A | B |
|
pop
A | B |
|
mgr
A | B |
|
FIGHT
RATING
33% |
|
|
|
|
|
|
|
Undercard bout
|
Coming up we have a bantamweight MMA rules bout between Lamar Butler (ranked 0 p4p, 0 weight class) and Tae Larkin (ranked 0 p4p, 0 weight class). Buckle up people - heeeeeeeeeere we go!
 |
|
 |
| 170 cm
20
141 lbs
1 - 2 - 0 |
|
159 cm
27
135 lbs
5 - 3 - 0 |
BJJ Blue Belt
Brawler
Cuts easily |
|
BJJ White Belt
Excellent boxer
Powerful |
|
| |
|
Ladies and gentlemen. This fight is 3 rounds, in the bantamweight division.
Introducing the fighter to my left, fighting out of the red corner.
With a record of
1 - 2 - 0, fighting out of Montreal, Lamar Butler!
And introducing the fighter to my right, fighting out of the blue corner.
With a record of
5 - 3 - 0, fighting out of Montreal, Tae Larkin!
The judges for this bout are William Peck, Trevor Gratis and Robert Douchet.
The bell rings for round one and we are underway!
Butler on the wrong end of a nice jab.
Larkin works the jab nicely.
Larkin lands a straight punch to the body, keeping Butler at a distance.

Larkin has closed the distance and engaged Butler in a clinch.
Butler tries to pull guard but Larkin forces him back to his feet, against the cage.
A quick uppercut on the inside from Larkin.
Larkin scores with a shot to the side of Butler's head.
Butler tries to take the fight to the ground by pulling guard but can't manage it.
Butler has a body lock and is looking for a takedown. Larkin is bouncing around trying to prevent the takedown and somehow he has indeed managed to stay on his feet.
That's three failed takedown attempts in the round for Lamar Butler. That's going to take a lot out of him.
A short left from Larkin.
Butler misses with a body punch.
Larkin lands a right hand that snaps the head of Butler backwards.
This is a great period of action - very entertaining stuff!
Larkin scores with an uppercut up the middle.
Larkin cracks Butler with a nice body shot.
Larkin lands with a light punch inside.

Butler is rocked!
Larkin lands a body shot.
Oh Butler is still all over the place! His legs are completely gone! Will he be able to recover?!!
Larkin lands with a quick shot inside that doesn't really do much damage.
Butler is trying to slow down the pace in the clinch, to catch his breath.
A hook to the body from Larkin.
A short body shot lands from Larkin as the two fighters clinch.
That's one minute gone in the round.
Larkin gets through Butler's defenses to land a nice punch to the side of the head.
Larkin unloads with a big right hand that wobbles Butler! He's leaning against the cage trying to keep his feet but Larkin is unloading with more strikes now! Butler drops to his knees and the referee stops the fight for a TKO!
Ladies and gentlemen, after 1:11 of round 1, we have a winner by way of TKO (Strikes). Tae Larkin!
After the big win, Tae Larkin made sure to do all the important stuff like thanking his sponsors Namunamu Clothing and telling the interviewer how much he loves him.
|
|
|
|
|
|
|
|
|
|
|
|
|
|
|
|
|
|
|
|
|
|
|
| S |
C
A |
G |
S |
C
B |
G |
|
S |
C |
G |
|
energy
A | B |
|
hype
A | B |
|
pop
A | B |
|
mgr
A | B |
|
FIGHT
RATING
86% |
|
|
|
|
|
|
|
Undercard bout
|
Coming up we have a middleweight MMA rules bout between AC Slater (ranked 0 p4p, 0 weight class) and Jimmy Frazier (ranked 0 p4p, 0 weight class). Slater comes to the cage accompanied by Stop What Ya Doin. Both fighters look fresh as a daisy as they make their way towards the cage.
 |
|
 |
| 190 cm
29
195 lbs
8 - 2 - 0 |
|
178 cm
32
180 lbs
9 - 7 - 0 |
Good wrestling
Solid boxing
Cardio machine |
|
Good wrestler
Solid Muay Thai
Good gas tank |
|
| |
|
Ladies and gentlemen. This fight is 3 rounds, in the middleweight division.
Introducing the fighter to my left, fighting out of the red corner.
With a record of
8 - 2 - 0, fighting out of Montreal, AC Slater!
And introducing the fighter to my right, fighting out of the blue corner.
With a record of
9 - 7 - 0, fighting out of New York, Jimmy Frazier!
The judges for this bout are Trevor Gratis, Alec Ball and Dillan Fox.
The bell rings for round one and we are underway!
Frazier gets his takedown attempt stuffed easily
and Frazier takes a counter punch right on the button for his troubles.
Frazier swings wildly with a right hand that was never going to find it's target.
Frazier tries to clinch but Slater is having none of it.
Slater closes this distance looking for a takedown but Frazier circles away.
Slater looks to have improved his striking defense since last time we saw him fight.
Jimmy Frazier seems to be the more aggressive standup fighter in this bout.
Frazier moves into the clinch successfully.
Frazier is working for a takedown up against the cage. He can't get it on this occasion though.
Frazier tried to land a shot to the body but connects with Slater's elbow.
Frazier gets double underhooks to prevent a takedown attempt from Slater.
Frazier utilising his Muay Thai to score with a knee to the body.
We've had a slow start to the round here - hopefully the action picks up.
Frazier misses with some punches.
Frazier drops to a knee looking for a takedown but Slater gets the underhooks and prevents it.
AC Slater has stuffed three takedown attempts in the round now. That's going to take a lot out of Jimmy Frazier.
Frazier lands an elbow just above Slater 's eye.
That's one minute gone in the round.
Slater is looking to take this one to the mat.
Frazier stops a takedown attempt from Slater.
Slater prevents the takedown attempt.
Slater avoids the elbow strike from Frazier, against the cage.
Frazier has dropped down and is looking to force the takedown but it's defended by Slater after a bit of a struggle.
Frazier scores with a nice hook to the head.
Frazier has a couple of punches blocked by Slater.
Frazier has hold of a leg and is looking for a trip takedown. Slater avoids it nicely though and we remain in the clinch.
Frazier tries to score a body lock takedown but Slater shows good agility there to stay on his feet.
Frazier drops to a knee looking for a takedown but Slater gets the underhooks and prevents it.
Frazier with an attempt at a knee that misses.

Frazier gets a nice trip takedown into half guard.
That's two minutes gone in the round.
Slater is looking to improve his position.
Slater manages to get to full guard.
Frazier throwing elbows and punches but not connecting, as Slater works some decent striking defense from the bottom.
Frazier wants to control from the top but Slater keeps moving.
Frazier working some strikes from top position.
Frazier with a flurry of punches that miss.
Frazier makes a bit of distance and scores with some ground and pound, still in guard.
Frazier stopping the sweep attempt from Slater.
Frazier throwing elbows and punches but not connecting, as Slater works some decent striking defense from the bottom.
Frazier working from the guard for now, landing some ground and pound.
That's three minutes gone in the round.
Frazier throwing strikes from guard but Slater blocks nicely.
Frazier postures up to throw the ground and pound strikes but they don't connect.
Frazier is working Slater over from the guard. He should look to pass the guard and do a little more damage with these strikes.
We've been informed that Frazier has been working hard on his conditioning in the buildup to the fight.
Slater is working an open guard here, looking to improve his position. No doubt that will leave him open to counters but at least he's being more offensive.
Frazier has the superior BJJ but he's also working some ground strikes into his gameplan.
Frazier lands a couple of digs.
The ref warns both fighters not to hold the cage as they work up against the meshing.
Frazier working some strikes from top position.
Slater wants to sweep here but Frazier controlling him for the moment.
Hammerfist, elbow! yells Frazier's corner. There ya go! There ya go!
Slater looking for a sweep. Not yet Slater, not yet.
That's four minutes gone in the round.
Frazier lands a nice shot whilst sitting in his opponent's guard.
Slater is controlling Frazier's posture.
Frazier is sitting in guard, working some ground and pound.
Frazier sitting in guard here, content to control.
Frazier preventing the sweep.
The crowd thankful this round is nearly over.
Frazier keeps in close for a moment and lands a decent shot to the side of Slater's head.
Frazier trying to control but Slater is working from the bottom.
Slater tries to land a sweep but no joy.
And thats the end of the round the fighters go back to their corners.
Jimmy Frazier dominated that round.
OK. That's time! The bell goes and we're back to the action.
Frazier staying out of range there.
Slater circles away from the clinch attempt
and Slater counters with a lovely shot to the body.
Slater misses with a double jab.
Frazier shoots in looking for a takedown. Slater tries to sprawl out of it but Frazier keeps driving through. The fighters are pinned against the cage. Slater manages to get underhooks and after a bit of a struggle, circles away and we're back to standing.
Slater stuffs the takedown attempt from Frazier. Frazier gets slowly back to his feet.
We've had a slow start to the round here - hopefully the action picks up.
Slater darts in and out, connecting with a jab.
Slater shoots in looking for a takedown. Frazier tries to sprawl out of it but Slater keeps driving through. The fighters are pinned against the cage. Frazier manages to get underhooks and after a bit of a struggle, circles away and we're back to standing.
That's one minute gone in the round.
Frazier bobs and weaves well there to avoid the strikes.
Frazier closes the distance but Slater moves to the side
and Slater counters with a takedown into side control.
Slater working away.
Frazier holds on to Slater's head and controls the position momentarily.
Slater throws a strike aimed at the side of Frazier's head but Frazier avoids it well.
Frazier pecks away with a couple of strikes from the bottom.
Slater looking to punish the body of his opponent here but Frazier is avoiding damage well.
Slater lands a few punches from side control.
Slater scoring with punches and elbows.
Frazier is moving his hips around well on the bottom and has managed to get back to half guard.
Frazier is refusing to be controlled, as Slater sits in half guard.
That's two minutes gone in the round.
Slater is thwarting Frazier's attempts to control the position.
Jimmy Frazier has got the better of the ground game so far.
Slater takes advantage of the dominant position to land a couple of big hammer fists.
Slater missing with the ground and pound from half guard.
Slater seems very keen to just sit and control from half guard but Frazier does not like that idea so much and is remaining active off his back.
We've seen a great period of action over the last minute or so - credit to both fighters for going all out!
Slater is trying to work for a kimura but Frazier is defending well.
The fighters are pressed up against the cage, both looking to find a bit of space to work.
Frazier tries to roll over but Slater keeps him under control.
That's three minutes gone in the round.
Frazier gets full guard.
Slater trying to land body shots but he keeps hitting the mat.
Slater postures up to throw the ground and pound strikes but they don't connect.
Frazier looking for a sweep. Not yet Frazier, not yet.
Slater is just sitting in guard, looking to avoid any submissions.
Slater pressing down on his opponent's thigh, looking to pass guard. Frazier is keeping the position for now.
Slater slows down the pace of the fight, as he sits in guard.
Frazier lands a beautiful sweep and he's now moved into his opponent's guard.

That's four minutes gone in the round.
Slater controlling the position.
Slater has momentary wrist control but Frazier slips an elbow through the middle.
Frazier preventing the sweep.
Frazier with a flurry of punches that miss.
Frazier works a leg free and moves into half guard.
Slater avoiding damage under a succession of punches from Frazier.
Slater blocking the ground and pound attempt from Frazier.
The crowd thankful this round is nearly over.
Frazier seems to be taking a bit of a break to think of his next move. He lands a short punch in the meantime.
Frazier is keeping good posture, landing some ground and pound.
Slater manages to get to full guard.
And thats the end of the round the fighters go back to their corners.
AC Slater dominated that second round.
The referee calls time. The cornermen exit stage left and we're back to business. Ladies and gentlemen, this is the final round!

Slater shoots in looking for a takedown but Frazier manages to keep the fight standing, pushing Slater's face into the canvas for good measure before circling away.
Slater sets himself, and Frazier steps forward looking for the clinch! Slater avoids it this time.
AC Slater is looking to throw some combinations by the looks of things.
Frazier drives through and clinches with Slater against the cage.
Slater has a body lock and is looking for a takedown. Frazier is bouncing around trying to prevent the takedown and somehow he has indeed managed to stay on his feet.
With the fighters clinched against the cage, Frazier creates a bit of distance for himself and scores with a nice uppercut.
Slater fails to pull guard.
That's three failed takedown attempts in the round for AC Slater. That's going to take a lot out of him.
Frazier tries to work over Slater's body with a swooping hook but it only glances the target.
Frazier working aggressively here.
Frazier has double underhooks and is working for a body lock takedown. He's got it. The fighters land in half guard but Slater regains guard immediately.
Slater is avoiding any damage by keeping wrist control.
We've had a slow start to the round here - hopefully the action picks up.
Slater has controlled the position for a good 20 seconds, which will no doubt be starting to frustrate his opponent.
Slater looking to hit a scissor sweep but Frazier is one step ahead there.
That's one minute gone in the round.
Slater looking to control the pace of the fight rather than finish it.
Frazier lands a couple of elbows.
Frazier working from the guard for now, landing some ground and pound.
Slater utilising some decent striking defenses from the guard, preventing the ground and pound.
Slater is working an open guard here, looking to improve his position. No doubt that will leave him open to counters but at least he's being more offensive.
Frazier trying to pass the guard but can't manage it just yet.
That's two minutes gone in the round.
The crowd are hurling abuse towards the fighters... You can hardly blame them though because there isn't a lot going on in the fight.
There's a bit of a scramble here and now Slater is on top in guard.


Frazier is edging up against the cage. He's using the cage to get back to his feet. Nice work there - the fighters are clinched.
Slater blocks a knee to the body. He'll have a nicely bruised forearm in the morning.
Frazier wants to take the fight to the mat but Slater manages to get underhooks and keep the fight in the clinch.
Frazier wants to take the fight to the mat but Slater manages to get underhooks and keep the fight in the clinch.
Frazier is working hard here but doesn't seem to be able to control effectively, up against the cage.
Slater is working on a leg, looking for a takedown but Frazier is defending well.
Slater is trying to drag Frazier to the mat but Frazier just about manages to keep his footing. He used the cage to his advantage there.
Slater takes an elbow to the forehead.
That's three minutes gone in the round.
Frazier lands a knee to the head there! That was nasty!
Frazier pressing his opponent against the cage.
Slater can't break the clinch.
Slater tightens his grip and picks Frazier up, before dumping him to the ground. Frazier manages to land in guard.
Slater landing some decent shots from guard.
Slater with a flurry of punches that miss.
Frazier preventing the ground and pound from doing any damage.
Slater throws an elbow that misses. Frazier uses the momentum to reverse the position. He's now in Slater's guard. Nice move by Frazier!
Frazier throwing elbows and punches but not connecting, as Slater works some decent striking defense from the bottom.
That's four minutes gone in the round.
Slater tries to land a sweep but no joy.
Frazier throws a big elbow that misses.
Frazier wants to control from the top but Slater keeps moving.
Frazier in full guard, throwing the ground and pound. No damage this time.
Frazier trying to control but Slater is working from the bottom.
Frazier cracks Slater with a solid left hand.
Slater keeping moving, preventing Frazier from controlling successfully.
The crowd thankful this round is nearly over.
Slater working a defensive guard here.
Slater tries to land a sweep but no joy.
And that's the end of the fight!
Jimmy Frazier comfortably won the final round on my scorecard.
I think Frazier has won this one but let's see whether the judges agree with me. Over to the ring announcer for the scorecards.
Ladies and gentlemen, after 3 rounds of action, we go to the scorecards for a decision.
Judge Trevor Gratis scores the fight 28:29
Judge Alec Ball scores the fight 28:29
Judge Dillan Fox scores the fight 28:29
In favor of your winner, by unanimous decision... Jimmy Frazier!
|
|
|
|
|
|
|
|
|
|
|
|
|
|
|
|
|
|
|
|
|
|
|
| S |
C
A |
G |
S |
C
B |
G |
|
S |
C |
G |
|
energy
A | B |
|
hype
A | B |
|
pop
A | B |
|
mgr
A | B |
|
FIGHT
RATING
33% |
|
|
|
|
|
|
|
Undercard bout
|
Coming up we have a lightweight MMA rules bout between Rob Tracey (ranked 0 p4p, 0 weight class) and Ryan Bennett (ranked 0 p4p, 0 weight class). Tracey comes to the cage accompanied by Metallica - Seek & Destroy. Over to our ring announcer for the fighter introductions!
 |
|
 |
| 173 cm
37
152 lbs
25 - 10 - 0 |
|
177 cm
24
160 lbs
6 - 2 - 0 |
Good wrestling
Excellent boxer
Cardio machine |
|
BJJ Blue Belt
Basic striking
Determined |
|
| |
|
Ladies and gentlemen. This fight is 3 rounds, in the lightweight division.
Introducing the fighter to my left, fighting out of the red corner.
With a record of
25 - 10 - 0, fighting out of Montreal, Rob Tracey!
And introducing the fighter to my right, fighting out of the blue corner.
With a record of
6 - 2 - 0, fighting out of Montreal, Ryan Bennett!
The judges for this bout are Elvis Blanc, William Peck and Alec Ball.
The bell rings for round one and we are underway!
Bennett on the wrong end of a nice jab.
Bennett's coach down at MM eh Academy was telling us pre-fight that they have been working on Bennett's balance. Obviously they view that as a key factor in the outcome of this fight.
Tracey slips in close and lands a nice hook before moving back out of range.
Bennett tries to clinch but Tracey moves out of range.
Tracey is looking to counter with a shot to the body.
Tracey connects with an inside leg kick.
Bennett wants to clinch but Tracey slips to the side
enabling Tracey to counter with a crisp jab.
Bennett clinches.

Tracey breaks from the clinch.
A punch lands to the side of Bennett 's head but he takes it in his stride.
Bennett wants to clinch
and Tracey counters with a nice uppercut.
Bennett wants to clinch
and Tracey counters with a crisp hook to the side of the head.
Bennett is rocked!
This has been an exciting period of action!
Bennett tries to clinch but Tracey moves away

and Tracey counters with a nice right hand that sends Bennett toppling to the canvas! Bennett scrambles and gets back to his feet - can Tracey finish him?!
Bennett is still on wobbly legs! Can Tracey finish him?
Tracey lands a jab and follows it up with a massive straight that knocks Bennett out cold! Bennett is crumpled in the corner, his head only propped up by the cage! That's one for the organiziational promos right there! Wow, what a finish!
Ladies and gentlemen, after 1:56 of round 1, we have a winner by way of KO (Punches). Rob Tracey!
Rob Tracey really struggled to get his t-shirt on before his hand was raised. Making sure that Fury Nutrition logo gets some air time is pretty tricky when you're all sweaty.
|
|
|
|
|
|
|
|
|
|
|
|
|
|
|
|
|
|
|
|
|
|
|
| S |
C
A |
G |
S |
C
B |
G |
|
S |
C |
G |
|
energy
A | B |
|
hype
A | B |
|
pop
A | B |
|
mgr
A | B |
|
FIGHT
RATING
97% |
|
|
|
|
|
|
|
Co-main event
|
Coming up we have a lightweight MMA rules bout between Anton Newcombe (ranked 0 p4p, 0 weight class) and Jamar Lullard (ranked 0 p4p, 0 weight class). Lullard comes into a darkened arena with his song building. Move That Doh kicks in, the lights come on and the crowd goes wild! What a showman! Both fighters look fresh as a daisy as they make their way towards the cage.
 |
|
 |
| 165 cm
28
150 lbs
11 - 6 - 0 |
|
177 cm
27
155 lbs
4 - 4 - 0 |
Powerful takedowns
Counter fighter
Granite chin |
|
BJJ Blue Belt
Decent boxing
Knockout power |
|
| |
|
Ladies and gentlemen. This fight is 3 rounds, in the lightweight division.
Introducing the fighter to my left, fighting out of the red corner.
With a record of
11 - 6 - 0, fighting out of Montreal, Anton Newcombe!
And introducing the fighter to my right, fighting out of the blue corner.
With a record of
4 - 4 - 0, fighting out of Montreal, Jamar Lullard!
The judges for this bout are Ian Loll, Gregory Folan and William Peck.
The bell rings for round one and we are underway!
Lullard misses with a jab and misses with a cross straight after too.
Newcombe keeps the fight on the outside.
Newcombe throws a nice hook to the body that draws an oooh from the crowd.
Newcombe swats away the attempt to clinch by Lullard.
Good exchange - Newcombe coming out on top.
Lullard throws a head kick but Newcombe moves out of range.
Newcombe swung with a counter right hand that didn't connect.
Newcombe manages to get an easy takedown there - catching Lullard on his heels. He'll look to pass Lullard's guard now, I'm sure.
Newcombe loading up with the ground and pound but he's missing more than he's landing in this flurry.
Lullard looking for a sweep. Not yet Lullard, not yet.
Lullard can't keep his opponent in guard - Newcombe advances to half guard, no doubt looking to mount.
Newcombe is pressing down on Lullard's thigh, looking to free his foot. Lullard is holding on for now.
Lullard is trying to defend against the ground and pound but Newcombe scores with a couple of nice shots.
That's one minute gone in the round.
The referee calls for the fighters to work.
Newcombe slips a nice elbow through Lullard's hands, connecting with Lullard's forehead.
Lullard tries to roll over but Newcombe keeps him under control.
Newcombe trying to pass the guard but Lullard defending well.
Newcombe winds up and cracks Lullard with a swinging punch to the side of the head.
Newcombe throwing shots but they're hitting the canvas more than the man.
Newcombe sitting in half guard, looking to land shots. Lullard defending well though.
Newcombe frees up his trapped foot and advances to mount.
Newcombe working away from the top, dropping strikes.
That's two minutes gone in the round.
Newcombe scoring with some good ground and pound from mount here. Will he manage to finish Lullard?
Lullard is rocked!
Newcombe dominating with strikes here.
Lullard is still in real trouble! Can Newcombe finish him?
The ref warns both fighters not to hold the cage as they work up against the meshing.
Newcombe postures up and throws a couple of big shots that have Lullard in real trouble here! The ref calls for Lullard to improve his position which he doesn't do, so the referee has no choice but to end the fight due to the strikes!
Ladies and gentlemen, after 2:28 of round 1, we have a winner by way of TKO (Strikes). Anton Newcombe!
In his post fight interview, Anton Newcombe started talking himself up. Luckily his charisma kept the crowd on side and gave him a good reception.
|
|
|
|
|
|
|
|
|
|
|
|
|
|
|
|
|
|
|
|
|
|
|
| S |
C
A |
G |
S |
C
B |
G |
|
S |
C |
G |
|
energy
A | B |
|
hype
A | B |
|
pop
A | B |
|
mgr
A | B |
|
FIGHT
RATING
52% |
|
|
|
|
|
|
|
Main event
|
Coming up we have a heavyweight MMA rules bout between Hades Hug (ranked 0 p4p, 0 weight class) and Itula Maafala (ranked 0 p4p, 0 weight class). Hug kept the crowd waiting but all that was forgotten when his ring entrance music started. The incomparable musical genius that is Animal I Have Become . There are an array of beautiful celebrities at ringside tonight! I wonder if any of them paid for their tickets.
 |
|
 |
| 207 cm
43
285 lbs
32 - 24 - 1 |
|
190 cm
31
280 lbs
10 - 7 - 2 |
Good wrestling
World class boxer
Very quick |
|
Good wrestler
Decent boxing
Good gas tank |
|
| |
|
Ladies and gentlemen. This fight is 5 rounds, for the heavyweight championship of the world!
Introducing the champion to my left, fighting out of the red corner.
With a record of
32 - 24 - 1, fighting out of Montreal, Hades Hug!
And introducing the challenger to my right, fighting out of the blue corner.
With a record of
10 - 7 - 2, fighting out of New York, Itula Maafala!
The judges for this bout are Alec Ball, Gregory Folan and Robert Douchet.
The bell rings for round one and we are underway!
Maafala shoots in for a takedown and gets it. Let's see what he's got on the mat.
Maafala stays in close to Hug's body and controls the position.
Maafala throwing elbows and punches but not connecting, as Hug works some decent striking defense from the bottom.
Maafala prevents Hug from getting back to his feet.
Maafala lands a nice shot whilst sitting in his opponent's guard.
A big thud reverberates around the arena there as Maafala accidentally thumps the mat. Hopefully he's not broken his hand.
Maafala postures up to throw the ground and pound strikes but they don't connect.
Maafala controlling from the guard. I say controlling but really, he's stalling.
Maafala missing there with some ground and pound from the guard.
We've had a slow start to the round here - hopefully the action picks up.
Hug keeping moving, preventing Maafala from controlling successfully.
Hug wants to stand but Maafala is controlling the position.

The referee has motioned to the fighters to stand back up. He just wasn't happy with the level of activity.
Hug misses with a wild combination.
That's one minute gone in the round.
Maafala loads up on a big right hand but Hug slips the punch.
The fight moves into the clinch position.
Hug pushes off and circles away, back to the middle of the mat.
Maafala doesn't manage to clinch there - Hug circles away.
Hug throws a big counter combination but Maafala scrambles out of danger and avoids any damage.
Hades Hug seems to be the more aggressive standup fighter in this bout.
Maafala blocks a head kick by Hug.
Hug throws a nice head kick!
It looks like Itula Maafala has been cut.
Maafala closes the distance and clinches.
Hug escapes the clinch and we're back to striking.
Hug stalks Maafala and leaps in with a furious combination of punches. Uppercuts and crosses smash into Maafala's face. Maafala staggers backwards, shaken.
Hug misses with a two punch combination.
Maafala tries to counter by closing the distance.
Hug shoots in for a takedown. "I don't think so" says Maafala as he avoids it easily.
Maafala wants to counter the offense by Hug and move into the clinch position.
We've seen a great period of action over the last minute or so - credit to both fighters for going all out!
Maafala tries to clinch but Hug is having none of it.
Hug swings away but doesn't land with a series of punches.
Maafala dodges the punch combination from Hug.
Maafala wants to counter with a clinch but Hug pushes him away.
Maafala showing good head movement there, avoiding the strikes from Hug.
That's two minutes gone in the round.
Hug looks for a takedown. He's got it. We're now in half guard.
Hug is breathing heavily.
Hug is controlling the pace.
Maafala wants to get back to his feet.
Hug wants to get back to his feet.
Maafala is looking to control Hug's leg but it's slowly edging free. Can Maafala avoid being mounted?
That's three minutes gone in the round.
Maafala wants to improve his position but Hug is controlling well.
The referee calls for the fighters to work.
The ref warns both fighters not to hold the cage as they work up against the meshing.
Maafala is trying to control but can't.
The referee has decided to stand the fighters back up, so we'll restart on the feet.
Maafala shoots in but Hug avoids the takedown attempt easily.
It looked like Hug was looking amped, ready to throw a big counter but didn't commit.
Maafala closes the distance and presses his opponent up against the cage.
That's four minutes gone in the round.
The crowd are hurling abuse towards the fighters... You can hardly blame them though because there isn't a lot going on in the fight.
Hug is trying to break the clinch but Maafala is controlling him.
Maafala throws a vicious knee straight up the middle but Hug blocks it with crossed arms.
Maafala tries to land a knee to the body but he is off balance and Hug avoids it.
Hug has had enough of the clinch and is looking to separate.
Maafala is looking to score with knees to the body. Maybe he'll change it up and go body then head. Hug is defending well for now.
Hug pushes off and circles away, back to the middle of the mat.
Hug misses with a double jab
and Maafala moves into the clinch.
Maafala misses the knee to the body. Nice hip positioning from Hug.
Hug avoiding damage as Maafala throws knees to the body.
A frustrated look appears on Hug's face as he tries to break the clinch.
Hug escapes the clinch and we're back to striking.
Maafala doesn't manage to clinch there - Hug circles away.
Maafala tries to clinch up.
Maafala drives through and clinches with Hug against the cage.
Maafala trying to land knees to the body.
A short uppercut from Hug.
Hug is defending well against a takedown attempt.
Maafala lands a shoulder strike.
And thats the end of the round the fighters go back to their corners.
That was a close round but I would say that Hades Hug will probably get the nod.
The cut man is working on Itula Maafala's cut.
That's the end of the interval. I'm sure that seemed a lot quicker than a minute for our two fighters! Back to the action.
Hug looks to land a combination. Maafala sees it coming but can only parry a couple of the shots.
Hug misses with a half-hearted attempt at a head kick.
Hug misses with a takedown attempt. He shot from a bit too far out.
Hug is really dominating this fight. Is there anything that Maafala can do to turn this around?
Hug throws a right hand that Maafala ducks under and follows up with a left that Maafala also avoids with ease.
Hug sets himself, and Maafala steps forward looking for the clinch! Hug avoids it this time.
Maafala looks more muscular than last time we saw him. He must have been on the weights.
Hug swings away but doesn't land with a series of punches.
Hug avoids the clinch attempt nicely.
Hug with a lazy takedown attempt
and Maafala counters with a one-two to the body.
Maafala moves in looking to clinch but Hug pushes him off.
Hug misses with a jab and misses with a cross straight after too.
Maafala instigates a clinch.
Wooooo! Give it up for these two warriors! They are putting on a show!
Maafala is trying to slow down the pace of the fight but Hug is keeping busy.
Maafala looking to stall.
Maafala fails to land with a short punch on the inside.
Maafala stalling the fight.
Maafala working some nice short punches in the clinch.
A head punch on the inside from Maafala fails to land.
That's one minute gone in the round.
Hug wants to break the clinch but can't.
Maafala has picked Hug up - he's going for a ride! Maafala dumps his opponent to the mat with a thud and settles into half guard.

Hug has one foot on Maafala's thigh - he pushes off and manages to get back to his feet.
Hug looks to land a combination but Maafala avoids it well.
Hug misses with a jab, cross combination.
Both fighters are absolutely exhausted here.
Hug throws a left and a right that both miss
and Maafala counters with a nice double leg into half guard.
The fans in attendance giving it up for the two fighters, who have really let it all hang out in the last minute or so!
Maafala trying to mount his opponent but Hug defends it.
Maafala not throwing his punches with enough precision this time.
Maafala missing with some ground and pound from the half guard.
Maafala throwing shots but they're hitting the canvas more than the man.
Neither fighter is being very active at the moment, with Maafala in particular looking to stall.
Maafala sitting in half guard, looking to land shots. Hug defending well though.
That's two minutes gone in the round.

Maafala is trying a forearm choke
I don't think that's going to do much at this level of the game.
Ground and pound from Maafala.
Maafala winds up and cracks Hug with a swinging punch to the side of the head.
The fighters are pressed up against the cage, both looking to find a bit of space to work.
Hug avoiding damage under a succession of punches from Maafala.
Hug keeping his head moving to avoid the ground and pound.
Maafala works his way into full mount!
Maafala working away from the top, dropping strikes.
Maafala thuds his fist into the canvas! Oooouch!
That's three minutes gone in the round.
Maafala thowing shots but they're missing.
Maafala lands with some strikes.
Hug is writhing around trying to get back to his feet.
Maafala misses with a series of strikes from mount. He'll no doubt be working on his ground and pound when he gets back to the gym.
The crowd growing excited in anticipation of a finish here! Right on cue, Maafala cracks his opponent with a massive right hand that draws loud cheers!
Hug is rocked!
Maafala lands a heavy shot. That's hurt Hug! Maafala sees the opportunity and turns up the heat - strike after strike land to the defenseless Hug and the ref dives in to save him! This one is all over!
Ladies and gentlemen, after 3:54 of round 2, we have a winner by way of KO (Strikes). Itula Maafala!
Itula Maafala is the new heavyweight champion!
|
|
|
|
|
|
|
|
|
|
|
|
|
|
|
|
|
|
|
|
|
|
|
| S |
C
A |
G |
S |
C
B |
G |
|
S |
C |
G |
|
energy
A | B |
|
hype
A | B |
|
pop
A | B |
|
mgr
A | B |
|
FIGHT
RATING
44% |
|
|
|
|
|
|
|
|
|
|
