 |
LKO Fight Night 3 PBP Commentary |
Undercard bout
|
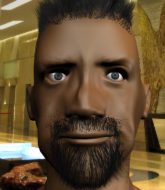
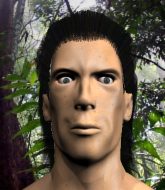
Coming up we have a welterweight MMA rules bout between Tyson Pearson (ranked 0 p4p, 0 weight class) and Chris Thompson (ranked 0 p4p, 0 weight class). Thompson has chosen The Boys Are Back by Dropkick Murphys as his entrance music. Over to our ring announcer for the fighter introductions!
 |
|
 |
| 180 cm
18
185 lbs
0 - 0 - 0 |
|
170 cm
19
170 lbs
4 - 6 - 0 |
BJJ White Belt
Excellent boxer
Very strong |
|
BJJ Blue Belt
Brawler
Knockout power |
|
| |
|
Ladies and gentlemen. This fight is 3 rounds, in the welterweight division.
Introducing the fighter to my left, fighting out of the red corner.
With a record of
0 - 0 - 0, fighting out of New York, Tyson Pearson!
And introducing the fighter to my right, fighting out of the blue corner.
With a record of
4 - 6 - 0, fighting out of New York, Chris Thompson!
The judges for this bout are Reed Andrews, Chad Campbell and Lou da Vinci.

The bell rings for round one and we are underway!
Thompson tries to close the distance and clinch up but Pearson swats him away and circles back towards the center.
Pearson cracks Thompson with a good shot that sees him stumbling back into the cage.

Thompson clinches up with Pearson and pushes him back against the cage.
Both fighters working to control the clinch.
Thompson has a couple of punches blocked by Pearson.
Pearson wants to strike at distance but he can't break free of the clinch.
Pearson working hard to break the clinch.
Thompson tries to score a body lock takedown but Pearson shows good agility there to stay on his feet.
Pearson lands a right hand that snaps the head of Thompson backwards.
Thompson stays in close to his opponent and throws a right hand to the body.
Thompson landing knees to the body.
Pearson is looking to break free of the clinch but Thompson has double underhooks.
We've had a slow start to the round here - hopefully the action picks up.
Pearson tries to break the clinch but Thompson is controlling the position.
Thompson prevents Pearson from breaking the clinch.
Thompson trying to land knees to the body.
Pearson is trying to break the clinch but Thompson has him pressed against the cage.
A short right hand to the side of the head by Thompson.
Thompson avoiding damage as Pearson throws knees to the body.

That's one minute gone in the round.
Thompson stalling in the clinch.
Pearson is looking to break free of the clinch but Thompson has double underhooks.
Thompson keeps control of Pearson as he tries to wriggle out of the double underhooks.
Thompson misses with a hook from the clinch.
Thompson misses with the head strike.
Pearson throws a head punch that misses.
Pearson wants to push off and get back to the center of the mat but Thompson has him pressed against the cage.
Pearson is trying to break the clinch but Thompson is controlling him.
Pearson wants to push off and get back to the center of the mat but Thompson has him pressed against the cage.
Pearson tries to circle away but Thompson has him pinned against the cage.
Pearson wants to push off and get back to the center of the mat but Thompson has him pressed against the cage.
Thompson goes for a takedown attempt but Pearson pushes him away and we're back to fighting at a distance.
Pearson looks to land a combination but Thompson avoids it well.
Pearson slips in close and lands a nice hook before moving back out of range.
Thompson drops his hands momentarily and Pearson takes advantage with a crisp shot to the head.
Thompson shoots in for a takedown but Pearson shows good takedown defense there and keeps this one on the feet.
Tyson Pearson has stuffed three takedown attempts in the round now. That's going to take a lot out of Chris Thompson.
Pearson clobbers Thompson with an overhand right that has the crowd gasping. That made a horrendous noise.

That's two minutes gone in the round.
Thompson tries to grapple but his opponent circles
and Pearson counters with a right hand to the body.
Thompson is looking to clinch but Pearson is avoiding it.
Pearson lunges in with an uppercut that skims his opponent's chin.
Pearson sizes up Thompson with a pawing jab and scores with a straight right down the middle.
The crowd cheering loudly, showing their appreciation for the quality fight we're seeing here.
Pearson drops Thompson with a naaaaasty hook - Thompson is in real trouble here! Pearson dives in to side control and pounds out his opponent for a TKO victory! The crowd goes nuts!
Ladies and gentlemen, after 2:30 of round 1, we have a winner by way of TKO (Strikes). Tyson Pearson!
|
|
|
|
|
|
|
|
|
|
|
|
|
|
|
|
|
|
|
|
|
|
|
| S |
C
A |
G |
S |
C
B |
G |
|
S |
C |
G |
|
energy
A | B |
|
hype
A | B |
|
pop
A | B |
|
mgr
A | B |
|
FIGHT
RATING
42% |
|
|
|
|
|
|
|
Undercard bout
|
|
|
|
Undercard bout
|
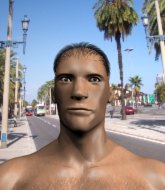
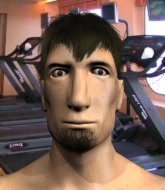
Coming up we have a middleweight MMA rules bout between Ryan Poole (ranked 0 p4p, 0 weight class) and Cameron MacGruffyd (ranked 0 p4p, 0 weight class). These two fighters really are very evenly matched on the feet - it will be fascinating to see who can assert themselves in that aspect of the fight.
 |
|
 |
| 190 cm
23
185 lbs
1 - 0 - 0 |
|
183 cm
24
185 lbs
3 - 2 - 0 |
BJJ Blue Belt
Solid boxing
Self confident |
|
BJJ Blue Belt
Brawler
Solid chin |
|
| |
|
Ladies and gentlemen. This fight is 3 rounds, in the middleweight division.
Introducing the fighter to my left, fighting out of the red corner.
With a record of
1 - 0 - 0, fighting out of New York, Ryan Poole!
And introducing the fighter to my right, fighting out of the blue corner.
With a record of
3 - 2 - 0, fighting out of London, Cameron MacGruffyd!
The judges for this bout are John Kavanagh, Alyssa Summers and Joseph Jones.
The bell rings for round one and we are underway!
Poole shoots in but MacGruffyd avoids the takedown attempt easily.
Poole shoots in for a takedown. "I don't think so" says MacGruffyd as he avoids it easily.
MacGruffyd tries to clinch but Poole moves out of range.
MacGruffyd just misses with a punch to the body.
Poole seem to be loading up, looking for a big counter.
MacGruffyd misses with a series of wild punches.
Poole doesn't manage to clinch there - MacGruffyd circles away.
MacGruffyd is looking for the big counter here.
MacGruffyd tries to clinch up but Poole circles away and keeps his distance.
Poole shoots for a double leg takedown but MacGruffyd sprawls well. He's pushed Poole's face into the mat and manages to get back to his feet relatively easily.
That's three failed takedown attempts in the round for Ryan Poole. That's going to take a lot out of him.
Poole avoids a punch combination nicely.
MacGruffyd throws a hard body shot but it just misses.
We've had a slow start to the round here - hopefully the action picks up.
MacGruffyd wants to clinch.
MacGruffyd fakes with an overhand right and moves in to clinch with Poole, pushing him back against the cage.
That's one minute gone in the round.

MacGruffyd breaks the clinch.
MacGruffyd jabs at Poole's body.

Poole closes the distance and presses his opponent up against the cage.
Poole taking a break, stalling in the clinch.

Poole escapes the clinch and we're back to striking.
MacGruffyd tries to close the distance and clinch up but Poole swats him away and circles back towards the center.
Poole misses with a half-hearted attempt at a head kick.
Poole rushes MacGruffyd and presses him up against the cage.
Poole breaks the clinch and we're back to striking at distance.
MacGruffyd dips down and scores with a jab to the body.
MacGruffyd has managed to clinch.
MacGruffyd throws a head punch that misses.
MacGruffyd breaks the clinch.
Poole throws a head kick that misses and slips in the process. He scrambles back to his feet and the fighters circle.
MacGruffyd closes the distance and clinches.
This is a great period of action - very entertaining stuff!
MacGruffyd manages to break the clinch.
That's two minutes gone in the round.
Poole pulls out of a head kick attempt.
MacGruffyd is loading up here, looking for a big counter of his own.
MacGruffyd tries to clinch up but Poole circles away and keeps his distance.
A telegraphed takedown attempt from Poole is defended easily by MacGruffyd.
MacGruffyd lands a jab, followed by a cross and another cross, as Poole backs up against the cage.
Poole has taken the fight to the clinch.
Poole blocking some punches.
MacGruffyd misses with some punches.
MacGruffyd manages to break the clinch.
Poole tries to score with a low kick but MacGruffyd moves his leg out of the way.
MacGruffyd takes a head kick and keeps coming.
MacGruffyd misses the shot to the body.
Poole has a takedown stuffed.

That's three minutes gone in the round.
Poole takes the fight into the clinch.
Poole breaks the clinch.
Poole looks to be in better condition than last time we saw him fight. Obviously he's been working hard on his cardio.
MacGruffyd throws a body punch but Poole moves out of range.
Poole scores with a hook.
MacGruffyd is throwing a lot of body shots here, looking to wear down Poole rather than just go for the knockout.
Poole dives in for a single leg takedown but MacGruffyd sprawls and the fighters end up clinched against the cage.
Poole darts in looking for a takedown but MacGruffyd gets double underhooks and turns Poole into the cage.
Poole misses the shot to the body.
Poole gets tackled into the cage by MacGruffyd. MacGruffyd maintains the clinch.
Poole effectively controlling the action here.
A short right hand to the side of the head by MacGruffyd.
MacGruffyd escapes the clinch and we're back to striking.

That's four minutes gone in the round.
Poole tries to clinch up.
Poole misses with a takedown attempt. He shot from a bit too far out.
Poole is breathing heavily.
MacGruffyd moves into the clinch.
Poole is trying to drag MacGruffyd to the mat but MacGruffyd just about manages to keep his footing. He used the cage to his advantage there.
MacGruffyd breaks the clinch.
Poole drives through and clinches with MacGruffyd against the cage.
The crowd cheering loudly, showing their appreciation for the quality fight we're seeing here.
MacGruffyd breaks the clinch and we return to the middle of the mat.
Poole throws a half hearted mid kick.
A telegraphed takedown attempt from Poole is defended easily by MacGruffyd.
MacGruffyd misses with a jab and misses with a cross straight after too.
And thats the end of the round the fighters go back to their corners.
Cameron MacGruffyd dominated that round.
The fighters get back to their feet, the hooter sounds and we're back to the action!

MacGruffyd clinches up against the cage.
Poole is trying to work out of this bad position, with his back against the cage.
Poole taking a breather.
MacGruffyd tries a shoulder strike but it doesn't do any damage.
MacGruffyd breaks the clinch.
MacGruffyd moves into the clinch.
Poole is trying to pull guard but being pressed up against the cage enables MacGruffyd to keep the fight standing.
MacGruffyd breaks from the clinch.
MacGruffyd fakes and then throws a beautiful body shot. Poole looks a bit winded and takes a step backwards to take a breath.
MacGruffyd leaves Poole with his face pressed against the mat as he sprawls beautifully, defending against a solid takedown attempt.
We've had a slow start to the round here - hopefully the action picks up.
MacGruffyd clinches up against the cage.
MacGruffyd breaks the clinch and we're back to striking at distance.
Poole misses with a body kick.
MacGruffyd moves into the clinch.
That's one minute gone in the round.
MacGruffyd escapes the clinch and we're back to striking.
Poole closes the distance and clinches.
MacGruffyd can't find room to land a body shot as Poole controls the action.
Cameron MacGruffyd seems to be working more effectively in the clinch in the fight so far.
Poole is trying to force a seperation but MacGruffyd has the dominant position.
MacGruffyd breaks the clinch and we're back to striking at distance.
Poole shoots in but no luck this time.
That's three failed takedown attempts in the round for Ryan Poole. That's going to take a lot out of him.
Poole shoots in for a takedown. "I don't think so" says MacGruffyd as he avoids it easily.
Both fighters are absolutely exhausted here.
Poole walks into a jab.
Poole has a takedown stuffed.
MacGruffyd gets a clinch.
MacGruffyd's corner calls for him to break the clinch, which he does.
MacGruffyd has been the more effective fighter overall so far.
MacGruffyd moves into the clinch successfully.
MacGruffyd lands with a left to the head.

Poole has managed to pull guard. Let's see whether he can work an aggressive guard. It will also be interesting to see what tactics MacGruffyd uses from the top position.
That's two minutes gone in the round.
MacGruffyd has decided he wants to stand but the closed guard of Poole is proving hard to escape from.

Poole is working an open guard so MacGruffyd takes the opportunity to get back to his feet.
Wooooo! Give it up for these two warriors! They are putting on a show!
MacGruffyd moves into range and clinches up with Poole.
MacGruffyd breaks the clinch and we're back to striking at distance.
MacGruffyd moves into the clinch successfully.
Poole jumps guard and drags MacGruffyd to the mat. He's obviously going to be looking for submissions off his back.

Poole has a loose triangle. He'll be looking to tighten that up but MacGruffyd can see exactly what he's planning and manages to posture up and free himself.
MacGruffyd decides he's had enough of playing guard and decides to stand. Come on Poole, up you get!
MacGruffyd scores with a three punch combo!
Poole darts in looking for a takedown but MacGruffyd gets double underhooks and turns Poole into the cage.
Cameron MacGruffyd seems to be the more aggressive standup fighter in this bout.
That's three minutes gone in the round.
MacGruffyd tries to close the distance and clinch up against the cage but Poole paws at him with a jab and circles away.
Poole shoots in for a double leg but MacGruffyd sprawls well. That's going to sap some energy.
MacGruffyd looks to land a combination but Poole avoids it well.
MacGruffyd tries to close the distance and clinch but Poole swats him to one side with an open hand palm strike and circles away.
MacGruffyd scores with a body shot.
MacGruffyd tries to close the distance and clinch up but Poole swats him away and circles back towards the center.
Poole throws a body kick that misses.
No joy there for MacGruffyd, who threw a few shots but didn't land.
Cameron MacGruffyd seems to be getting the better of the standup.
MacGruffyd has Poole up against the cage in a clinch.
MacGruffyd gets double underhooks to prevent a takedown attempt from Poole.
MacGruffyd breaks the clinch and we return to the middle of the mat.
MacGruffyd clinches up against the cage.
That's four minutes gone in the round.
MacGruffyd swings away with an uppercut that misses.
A short uppercut from MacGruffyd.
Poole jumps guard.
MacGruffyd decides he's had enough of playing guard and decides to stand. Come on Poole, up you get!
We've seen a great period of action over the last minute or so - credit to both fighters for going all out!
MacGruffyd lands a jab to Poole's midsection.
MacGruffyd gets in close and instigates a clinch.
MacGruffyd manages to break the clinch.
MacGruffyd misses with a series of wild punches.
Poole tries to clinch up but MacGruffyd circles away and keeps his distance.
Poole shoots in looking for a double leg takedown. MacGruffyd defends it nicely.
MacGruffyd tries to clinch there but Poole circles away.
And thats the end of the round the fighters go back to their corners.
Cameron MacGruffyd showed his class in that round. I'd imagine he'll take it on all the scorecards.
That's time! Poole's corner gives him a slap on the ass as he gets ready to fight. This is the final round!

Poole takes a jab right on the nose. That must have hurt but he shrugs his shoulders and looks to return the favor.
MacGruffyd tries to clinch up.
Poole moves into range and clinches up with MacGruffyd.
Poole is trying to break the clinch but MacGruffyd has him pressed against the cage.
Poole pushes off and circles away, back to the middle of the mat.
Poole with a lazy takedown attempt
and MacGruffyd counters with a right hand to the body.
MacGruffyd drives through and clinches with Poole against the cage.
Poole tries to stall but MacGruffyd uses the opportunity to gain a better position.
MacGruffyd breaks the clinch.
Poole shoots in but MacGruffyd avoids the takedown attempt easily.
We've had a slow start to the round here - hopefully the action picks up.
Poole takes a solid shot to the body. That one hurt him but he's trying not to show it.
Poole with a lazy takedown attempt
and MacGruffyd moves into the clinch.
That's three failed takedown attempts in the round for Ryan Poole. That's going to take a lot out of him.
Poole tries for a takedown but MacGruffyd manages to get underhooks.
MacGruffyd breaks the clinch and we're back to striking at distance.
That's one minute gone in the round.
Some wild striking there from MacGruffyd.
Both fighters are breathing heavily.
MacGruffyd dips down and scores with a jab to the body.
MacGruffyd has closed the distance and engaged Poole in a clinch.
MacGruffyd softening up his opponent with strikes, against the cage.
MacGruffyd breaks the clinch and we're back to striking at distance.
MacGruffyd doesn't manage to clinch there - Poole circles away.
MacGruffyd clinches with his opponent.
Poole with an attempt at a knee that misses.
MacGruffyd breaks the clinch.
MacGruffyd pushes Poole up against the cage in a clinch.
Poole is trying to work for a single leg takedown but MacGruffyd pulls him back up using the underhooks.
Poole is trying to pull guard but MacGruffyd has him pressed against the cage.
That's two minutes gone in the round.
MacGruffyd manages to break the clinch.
Poole shoots in with a takedown attempt and he has MacGruffyd pinned against the cage. MacGruffyd gets the underhooks and manages to circle away.
MacGruffyd has closed the distance and engaged Poole in a clinch.
This has been an exciting period of action!
MacGruffyd breaks the clinch and we're back to striking at distance.
MacGruffyd clinches with his opponent.
MacGruffyd breaks the clinch.
Poole closes the distance and clinches.
MacGruffyd tries to throw a body punch but Poole avoids it by throwing MacGruffyd back against the cage.
MacGruffyd breaks from the clinch.
Poole fails with the takedown.
That's three minutes gone in the round.
Poole throws a looping left and ducks down for a takedown. He's got his arms around MacGruffyd's waist but MacGruffyd gets an underhook and avoids the takedown by throwing Poole off to one side.
A nice side step and MacGruffyd releases a counter shot to the body, but it doesn't find it's home.
MacGruffyd clinches up with Poole and pushes him back against the cage.
MacGruffyd tries a shoulder strike but it doesn't do any damage.
MacGruffyd's corner calls for him to break the clinch, which he does.
MacGruffyd clinches with his opponent.
MacGruffyd breaks the clinch and we return to the middle of the mat.
MacGruffyd swings and misses with a hook to the body.
Poole went nuts there looking for a big combo counter but none of the flurry connected.
MacGruffyd drives through and clinches with Poole against the cage.
MacGruffyd doesn't land with the attempted body shot.
MacGruffyd manages to break the clinch.
A swing and a miss from Poole.
MacGruffyd takes a swing at Poole's ribcage but misses.
MacGruffyd is looking to clinch but Poole is avoiding it.
Poole tries to close the distance and clinch up but MacGruffyd swats him away and circles back towards the center.
Poole dives in and grabs MacGruffyd's left leg, looking for a takedown. MacGruffyd pushes down on Poole's head and hops out.
That's four minutes gone in the round.
MacGruffyd is looking to clinch.
MacGruffyd moves into the clinch.
Poole jumps guard but MacGruffyd turns him against the cage and keeps the fight standing.
MacGruffyd keeps control of Poole as he tries to wriggle out of the double underhooks.
MacGruffyd missing with knees to the body.
MacGruffyd misses with a short punch on the inside.
Poole is trying to pull guard but MacGruffyd has him pressed against the cage.
This has been an exciting period of action!
Poole is trying to break the clinch but MacGruffyd has him pressed against the cage.
MacGruffyd breaks the clinch.
MacGruffyd swings and misses with a hook to the body.
Poole tries for a takedown but MacGruffyd sees it coming a mile off and avoids it easily.
MacGruffyd with a hook.
Cameron MacGruffyd is fighting for a decision - hopefully he's judged it right and he's actually winning the fight.
Jab, cross, leg kick. Nice combination by MacGruffyd!
Ryan Poole has stepped it up - he knows he needs a finish here!
MacGruffyd rushes Poole and pushes him back against the cage in a clinch.
And that's the end of the fight!
Cameron MacGruffyd comfortably won the final round on my scorecard.
I've got MacGruffyd winning every round here. Surely the decision will go his way and he'll pick up a well deserved decision victory. Over to the ring announcer for the scorecards.
Ladies and gentlemen, after 3 rounds of action, we go to the scorecards for a decision.
Judge John Kavanagh scores the fight 27:30
Judge Alyssa Summers scores the fight 27:30
Judge Joseph Jones scores the fight 27:30
In favor of your winner, by unanimous decision... Cameron MacGruffyd!
|
|
|
|
|
|
|
|
|
|
|
|
|
|
|
|
|
|
|
|
|
|
|
| S |
C
A |
G |
S |
C
B |
G |
|
S |
C |
G |
|
energy
A | B |
|
hype
A | B |
|
pop
A | B |
|
mgr
A | B |
|
FIGHT
RATING
58% |
|
|
|
|
|
|
|
Undercard bout
|
|
|
|
Undercard bout
|
|
|
|
Undercard bout
|
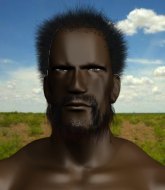
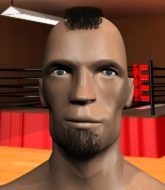
Coming up we have a lightweight MMA rules bout between Koya Urabe (ranked 0 p4p, 0 weight class) and Alexander Klim (ranked 0 p4p, 0 weight class). Alexander Klim has the eye of the tiger tonight.
 |
|
 |
| 178 cm
27
150 lbs
5 - 6 - 1 |
|
175 cm
23
163 lbs
2 - 0 - 0 |
BJJ White Belt
Excellent MT
KO power |
|
BJJ White Belt
Decent boxing
Heavy handed |
|
| |
|
Ladies and gentlemen. This fight is 3 rounds, in the lightweight division.
Introducing the fighter to my left, fighting out of the red corner.
With a record of
5 - 6 - 1, fighting out of New York, Koya Urabe!
And introducing the fighter to my right, fighting out of the blue corner.
With a record of
2 - 0 - 0, fighting out of Helsinki, Alexander Klim!
The judges for this bout are Bruno Lombardi, David Schapiro and Eddie Farnsworth.
The bell rings for round one and we are underway!
Urabe tries to close the distance and clinch up against the cage but Klim paws at him with a jab and circles away.
Klim let fly with a counter punch to the body but it didn't land.
Koya Urabe seems to be the more aggressive standup fighter in this bout.
Urabe tries to grapple but his opponent circles
and Klim counters with a left to the body.
Urabe tries to clinch there but Klim circles away.
Urabe moves in looking to clinch but Klim pushes him off.
Urabe doesn't manage to clinch there - Klim circles away.
Urabe doesn't manage to clinch there - Klim circles away.
Urabe tries to clinch up but Klim circles away and keeps his distance.
Urabe ducks under an overhand right and circles away with a smile on his face.
Urabe is looking to counter with head kicks.
Urabe tries to clinch up.
Klim tries to bum rush Urabe with a series of wild strikes but Urabe uses good footwork to avoid the assault.
We've had a slow start to the round here - hopefully the action picks up.
Urabe tries to close the distance and clinch up but Klim swats him away and circles back towards the center.
Urabe tries to close the distance and clinch up against the cage but Klim paws at him with a jab and circles away.
Urabe has closed the distance and engaged Klim in a clinch.
Klim's corner calls for him to break the clinch, which he does.
Good shot there by Klim.
Urabe is looking to clinch.
Klim looks more muscular than last time we saw him. He must have been on the weights.
That's one minute gone in the round.
Urabe wants to clinch.
Urabe tries to clinch there but Klim circles away.
Urabe looks to clinch
and Klim counters with a right hand to the body.
Urabe moves in looking to clinch but Klim pushes him off.
Klim ducks down and throws a hook to the body.
Urabe closes the distance and clinches.
Klim wants to get back to striking at distance but Urabe won't allow it.
Urabe trying to control the position but instead, Klim has worked for underhooks and has pushed Urabe into the cage.
Urabe pushes off and fires off an elbow that misses, before clinching up again, against the cage.
Klim tries to circle away but Urabe has him pinned against the cage.
Urabe prevents a body shot from Klim.
Urabe is trying to slow down the pace in the clinch, to catch his breath.
Urabe pushes off an throws an elbow but Klim leans to the side and avoids it. We're back to clinching against the cage.
That's two minutes gone in the round.
A real battle for position is taking place between these two warriors.
Urabe tried to land a shot to the body but connects with Klim's elbow.
Urabe tries to stall but Klim uses the opportunity to gain a better position.
Urabe lands with a right to the head.
Klim pushes off and circles away, back to the middle of the mat.
Urabe fails in his attempt to clinch.
Urabe tries to clinch there but Klim circles away.
Klim circles away from the clinch attempt.
Klim tries to counter by closing the distance.
Urabe wants to clinch up but Klim keeps it at a distance.
Urabe closes the distance but Klim moves to the side
and Klim counters with a crisp hook to the side of the head.
Klim attempts a low kick but it misses it's target.
Urabe fails with an attempt to clinch.
Klim lands a jab, followed by a cross and another cross, as Urabe backs up against the cage.
This is a great period of action - very entertaining stuff!
Klim circles away from the clinch attempt.
That's three minutes gone in the round.
Urabe tries to close the distance and clinch up against the cage but Klim paws at him with a jab and circles away.
Urabe tries to close the distance and clinch up but Klim swats him away and circles back towards the center.
Klim attempts a low kick but it misses it's target.
Urabe tries to grapple but his opponent circles
and Klim counters with a lovely straight right hand!

Urabe is rocked!
Urabe tries to clinch up against the cage, rushing in to close the distance. Klim manages to break the clinch and circles back to the middle of the mat.
Klim circles away from the clinch attempt
and Urabe takes a counter punch right on the button for his troubles.
Oh Urabe is still all over the place! His legs are completely gone! Will he be able to recover?!!
Urabe wants to clinch
and Klim counters with a right, left combo that wobbles Urabe badly! Klim follows up with a massive right hook, straight to the bridge of the nose that knocks Urabe out cold! Oh wow, what a finish! Very reminiscent of Koscheck vs Yoshida as Klim finished him against the cage.
Ladies and gentlemen, after 3:43 of round 1, we have a winner by way of KO (Punches). Alexander Klim!
A very excited looking Alexander Klim made sure he remembered to thank all the fans both in the arena and on the internet. He said all the coolest people spend all day on MMA websites, which got a big reaction.
|
|
|
|
|
|
|
|
|
|
|
|
|
|
|
|
|
|
|
|
|
|
|
| S |
C
A |
G |
S |
C
B |
G |
|
S |
C |
G |
|
energy
A | B |
|
hype
A | B |
|
pop
A | B |
|
mgr
A | B |
|
FIGHT
RATING
34% |
|
|
|
|
|
|
|
Undercard bout
|
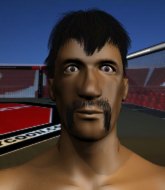
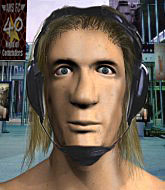
Coming up we have a heavyweight MMA rules bout between Raistlin Lovelair (ranked 0 p4p, 0 weight class) and Ramen Johnson (ranked 0 p4p, 0 weight class). Buckle up people - heeeeeeeeeere we go!
 |
|
 |
| 192 cm
25
220 lbs
0 - 0 - 0 |
|
185 cm
25
270 lbs
2 - 0 - 0 |
BJJ Blue Belt
Solid Muay Thai
Good chin |
|
BJJ White Belt
Excellent boxer
Solid chin |
|
| |
|
Ladies and gentlemen. This fight is 3 rounds, in the heavyweight division.
Introducing the fighter to my left, fighting out of the red corner.
With a record of
0 - 0 - 0, fighting out of New York, Raistlin Lovelair!
And introducing the fighter to my right, fighting out of the blue corner.
With a record of
2 - 0 - 0, fighting out of Los Angeles, Ramen Johnson !
The judges for this bout are Reed Andrews, David Schapiro and Alyssa Summers.
The bell rings for round one and we are underway!
Lovelair bobs and weaves and throws out a fast jab that snaps Johnson 's head backwards.
Lovelair gets to the clinch - let's see what his plan is here.
Johnson wants to get back to striking at distance but Lovelair won't allow it.
Nice body punch from Lovelair.
Lovelair lands a nice elbow.
Lovelair lands an elbow that stopped Johnson in his tracks for a moment.
Lovelair working on landing some head shots here - that one got through nicely.
Lovelair lands a nice elbow.
Lovelair scores a nice knee to the body.
Lovelair lands a right hand.
Lovelair controlling the action here for a moment.
Good anti-grappling being displayed by Lovelair as Johnson tries to tie him up.
Johnson 's coach down at NYC Alpha (Conditioning and Sparring Gym) was telling us pre-fight that they have been working on Johnson 's balance. Obviously they view that as a key factor in the outcome of this fight.
Lovelair lands a right uppercut that snaps the head of Johnson backwards.
The crowd are loving this. Great action here.
Johnson tries to circle away but Lovelair has him pinned against the cage.
Lovelair lands a shoulder strike.
That's one minute gone in the round.
Lovelair pressing his opponent against the cage.
Lovelair makes some space for himself and lands an uppercut.
Lovelair comes over the top with an elbow. That landed flush.
Lovelair misses with a shot to the kidneys.
Lovelair with the Thai clinch, lands a knee to the head.
A shot in the inside from Lovelair.
Lovelair with an attempt at a knee that misses.
Johnson looks like he'd prefer to be striking at range right now.
Lovelair lands with a quick shot inside that doesn't really do much damage.

Johnson is rocked!
Lovelair creates a bit of space for himself and sneaks an elbow through Johnson 's defenses.
Johnson is still on wobbly legs! Can Lovelair finish him?
Clinched against the cage, Lovelair lands a big elbow that drops Johnson ! The ref dives in to save him from more shots - Johnson is complaining that he's OK but he was done.
Ladies and gentlemen, after 1:54 of round 1, we have a winner by way of TKO (Strikes). Raistlin Lovelair!
Ramen Johnson spoke after the fight, saying 'I want a rematch '.
|
|
|
|
|
|
|
|
|
|
|
|
|
|
|
|
|
|
|
|
|
|
|
| S |
C
A |
G |
S |
C
B |
G |
|
S |
C |
G |
|
energy
A | B |
|
hype
A | B |
|
pop
A | B |
|
mgr
A | B |
|
FIGHT
RATING
55% |
|
|
|
|
|
|
|
Undercard bout
|
Coming up we have a middleweight MMA rules bout between Austin Mahone (ranked 0 p4p, 0 weight class) and Joe Laston (ranked 0 p4p, 0 weight class). Mahone comes to the cage accompanied by Shadow - Austin Mahone. Over to our ring announcer for the fighter introductions!
 |
|
 |
| 188 cm
25
193 lbs
3 - 2 - 0 |
|
203 cm
25
197 lbs
2 - 0 - 0 |
BJJ White Belt
Excellent MT
Self confident |
|
BJJ White Belt
Decent boxing
Solid chin |
|
| |
|
Ladies and gentlemen. This fight is 3 rounds, in the middleweight division.
Introducing the fighter to my left, fighting out of the red corner.
With a record of
3 - 2 - 0, fighting out of New York, Austin Mahone!
And introducing the fighter to my right, fighting out of the blue corner.
With a record of
2 - 0 - 0, fighting out of New York, Joe Laston!
The judges for this bout are Reed Andrews, Dean Styles and Anthony Taglia.
The bell rings for round one and we are underway!
Laston falls off balance throwing a combination
and Mahone counters with a quick right hand to the jaw.
Austin Mahone seems to be the more aggressive standup fighter in this bout.
Laston moves his head to the side to avoid a jab but walks straight into a cross.
Mahone throws a right hand that misses
and Laston counters with a quick right hand to the jaw.
Laston scores with a three punch combo!
Laston throws a wild combination but nothing lands.
Mahone looks to score with a jab to the body but Laston is just out of range.
Mahone throws out a powerful jab.
Mahone looks to land a combination but Laston avoids it well.
The fans in attendance giving it up for the two fighters, who have really let it all hang out in the last minute or so!
Mahone tries to clinch but Laston is having none of it.
Laston throws a counter combo.
A shot to the liver by Mahone. Beautiful body shot.
Jab by Mahone.
Mahone throws a body punch but Laston moves out of range.
Mahone throws a jab when Laston was well out of range.
A slow jab from Laston misses its intended target.
Mahone throws a monster uppercut resembling something out of street fighter but it doesn't land.
Laston throws a left and a right that both miss
and Mahone counters with a right hand to the body.
That's one minute gone in the round.
Mahone swings wildly with a right hand that was never going to find it's target.
A punch combination from Laston misses.
Mahone lands with an overhand left.
Mahone takes a swing at Laston's ribcage but misses.
Mahone scores with a jab to the body.
Mahone throws a looping overhand right but Laston ducks down to avoid it.
Laston swings away with a counter right hand but no contact made.
Laston throws a right hand that misses
and Mahone cracks him with a counter punch right on the button.
Mahone throws a couple of head shots and lands with the final one - a decent hook, which struck Laston on the side of the head.
Mahone fails with an attempt to clinch.
A cross from Mahone lands.
Laston throws a hook to the side of Mahone's head but Mahone sees it coming and ducks under it beautifully.
Laston throws a series of punches but Mahone avoids them all with ease.
Mahone throws a leg kick but he was too far away and it doesn't land.
Laston loads up on a big right hand but Mahone slips the punch.
Fantastic stuff here - a very entertaining period of action, which has drawn cheers from the crowd.
Mahone looks to score with a jab to the body but Laston is just out of range.
That's two minutes gone in the round.
Mahone wings a very wild body shot but it does the job and lands to the midsection.
Laston falls off balance throwing a combination
and Mahone counters with a quick right hand to the jaw.
Laston has his head snapped back a nice jab. A little nod from Laston there as he acknowledges the shot.
Laston is rocked!
Mahone is really peppering his opponent's head with punches.
Mahone is looking for an opening here. He's unloaded a big left hand that catches Laston flush on the jaw and sends him tumbling to the canvas! Laston is out cold! Mahone holds back from landing any unnecessary shots to his unconscious opponent, as the referee reacts slowly to the situation. A brutal knockout and then some excellent sportsmanship - this guy is my new favorite fighter!
Ladies and gentlemen, after 2:23 of round 1, we have a winner by way of KO (Punch). Austin Mahone!
Austin Mahone decided to hype himself up post fight. It was going well but he went on about it a bit too long and the crowd turned on him a little.
|
|
|
|
|
|
|
|
|
|
|
|
|
|
|
|
|
|
|
|
|
|
|
| S |
C
A |
G |
S |
C
B |
G |
|
S |
C |
G |
|
energy
A | B |
|
hype
A | B |
|
pop
A | B |
|
mgr
A | B |
|
FIGHT
RATING
63% |
|
|
|
|
|
|
|
Co-main event
|
Coming up we have a super heavyweight MMA rules bout between Fritz Haarmann (ranked 0 p4p, 0 weight class) and Douglas Pondingham (ranked 0 p4p, 0 weight class). Haarmann comes to the cage accompanied by Macabre - Fritz Haarmann The Butcher . On his way into the cage it seems that Fritz Haarmann has been attacked by a crazed fan! It looks like it might have been the just bleed guy! Luckily Fritz Haarmann seems to be OK! I thought that lunatic was in prison!?
 |
|
 |
| 190 cm
30
223 lbs
22 - 14 - 0 |
|
202 cm
29
276 lbs
11 - 4 - 0 |
Abu Dhabi Champ
Excellent boxer
Insanely flexible |
|
Good wrestler
Excellent boxer
Good gas tank |
|
| |
|
Ladies and gentlemen. This fight is 3 rounds, in the super heavyweight division.
Introducing the fighter to my left, fighting out of the red corner.
With a record of
22 - 14 - 0, fighting out of New York, Fritz Haarmann!
And introducing the fighter to my right, fighting out of the blue corner.
With a record of
11 - 4 - 0, fighting out of Las Vegas, Douglas Pondingham!
The judges for this bout are Russell Pearce, Jorge Garcia and Lou da Vinci.
The bell rings for round one and we are underway!
Haarmann feints and then dives in with a takedown. That was a long way out but the feint bought him enough time to close the distance and complete the takedown. Now we'll play guard for a bit and see who can get the better of that position.

Pondingham pushes Haarmann off for just long enough to get back to his feet. Very athletic spring there.
Haarmann looks for a takedown but Pondingham sprawls well.
A little jabbing left from Pondingham on the counter but it doesn't find it's target.
Nice sprawl there from Pondingham as Haarmann shoots in.
No luck with that takedown attempt from Haarmann.
That's three failed takedown attempts in the round for Fritz Haarmann. That's going to take a lot out of him.
Pondingham throws a quick inside leg kick.
Pondingham misses with a wild combination.
Haarmann doesn't manage to clinch there - Pondingham circles away.
Nice cross by Pondingham.
Wooooo! Give it up for these two warriors! They are putting on a show!
Haarmann shoots in for a takedown. He's persisting with it as Pondingham sprawls well. Pondingham wins this battle and keeps the fight standing. Haarmann gets slowly back to his feet.
Pondingham connects with a body shot.
Pondingham scores with a body shot.
Pondingham swings away but doesn't land with a series of punches.
Haarmann goes for a double leg but Pondingham avoids the attempt and the two fighters end up clinched against the cage as Pondingham continues to drive forward.
That's one minute gone in the round.
Haarmann takes a punch to the jaw and another one to the bread basket.
Haarmann has been talking about how he's improved his wrestling in the run up to the fight so let's see if that's enough to sway the balance.
No luck with that takedown attempt from Haarmann.
Pondingham swings away but doesn't land with a series of punches.
Haarmann tries to counter with a takedown but Pondingham is quick to defend against it.
Haarmann has his takedown stuffed
and Pondingham counters with a series of strikes. Haarmann will be more careful next time no doubt.
Haarmann is breathing heavily.
Haarmann closes this distance looking for a takedown but Pondingham circles away.

Pondingham lands a big uppercut and Haarmann crumbles to the floor! The ref thinks about stopping the fight but Haarmann looks OK. Pondingham waves Haarmann back to his feet!
We've seen a great period of action over the last minute or so - credit to both fighters for going all out!
Pondingham drops Haarmann with a beautiful combination! Haarmann stares up at his opponent, who ushers him back to his feet - Pondingham is looking for the KO!
Haarmann is rocked!
Pondingham throws a combination but comes up with nothing but fresh air.
Oh Haarmann is still all over the place! His legs are completely gone! Will he be able to recover?!!
We've been informed that Pondingham has been sparring a lot of Muay Thai in the buildup to this fight so let's see if that has an impact on the result.
Haarmann takes a solid shot to the body. That one hurt him but he's trying not to show it.
Haarmann takes a shot right to the liver - Bas would have been proud of that punch.
Pondingham jabs at Haarmann's body.
Haarmann seems to have got his legs back now.
Pondingham lands with a right and another and another! Haarmann is in big trouble! Pondingham lands again and this time it's lights out for Haarmann! A quality knockout there for Pondingham.
Ladies and gentlemen, after 1:44 of round 1, we have a winner by way of KO (Strikes). Douglas Pondingham!
After winning the bout, Douglas Pondingham thanked all his fans and promised he'd do even better in his next fight. The crowd seemed to love his humility.
In defeat, Fritz Haarmann stepped up to the mic, saying 'Zum Teufel!'.
|
|
|
|
|
|
|
|
|
|
|
|
|
|
|
|
|
|
|
|
|
|
|
| S |
C
A |
G |
S |
C
B |
G |
|
S |
C |
G |
|
energy
A | B |
|
hype
A | B |
|
pop
A | B |
|
mgr
A | B |
|
FIGHT
RATING
100% |
|
|
|
|
|
|
|
Main event
|
Coming up we have a super heavyweight MMA rules bout between Boe Hogan (ranked 0 p4p, 0 weight class) and Lucas Blye (ranked 0 p4p, 0 weight class). Man, I cannot wait for this one!
 |
|
 |
| 170 cm
36
157 lbs
32 - 16 - 0 |
|
173 cm
26
155 lbs
14 - 8 - 0 |
Good wrestling
Lethal high kicks
Insanely flexible |
|
Excellent grappler
Excellent MT
Good gas tank |
|
| |
|
Ladies and gentlemen. This fight is 3 rounds, in the super heavyweight division.
Introducing the fighter to my left, fighting out of the red corner.
With a record of
32 - 16 - 0, fighting out of New York, Boe Hogan!
And introducing the fighter to my right, fighting out of the blue corner.
With a record of
14 - 8 - 0, fighting out of Amsterdam, Lucas Blye!
The judges for this bout are David Schapiro, Reed Andrews and Columbo Gatti.
The bell rings for round one and we are underway!
Hogan tries to land a front kick but Blye steps back. That was a bit too telegraphed.
Hogan on the wrong end of an overhand right that came out of nowhere.
Blye slips a straight right by Hogan.
Blye takes a shot to the body in his stride.
Blye swats away the attempt to clinch by Hogan.
Hogan throws a leg kick but Blye moved away.
Hogan uses some good footwork to avoid the body shot by Blye.
Boe Hogan seems to be the more aggressive standup fighter in this bout.
Hogan throws a big shot that misses.
Hogan misses the body punch
and Blye counters with a three punch combination, finished off with a leg kick. Nice work.
Hogan swats away the attempt to clinch by Blye.
Hogan moves out of range of the strikes.
Blye takes a shot to the nose. Hopefully that hasn't broken it.
Hogan throws a hard body shot but it just misses.
Hogan attempts a leg kick but it's missed by a good margin.
That's one minute gone in the round.
Blye moves forwards but Hogan connects with a nice, crisp jab.
Blye ducks right into an uppercut from Hogan.
Hogan punishes Blye's body with a nice straight punch.
Blye checks a leg kick.
Blye fails with a takedown attempt.
Hogan lands a slapping body shot.
Hogan scores with a body shot.
Well, he's not going to score with shots like that. A lazy body kick attempt from Hogan.
Hogan thows a left - swing and a miss!
Blye blocks a jab.
That's two minutes gone in the round.
Hogan lands a jab to the head.
Hogan tries to land with a swinging hook to the body but Blye was well out of range. Poor timing from Hogan.
Hogan walks into a stiff left hand from Blye.
Hogan is looking light on his feet compared to last time was saw him fight.
The fans in attendance giving it up for the two fighters, who have really let it all hang out in the last minute or so!
Hogan walks forward and throws out a flicking leg kick. Blye checks it nicely though, as he moves to the side.
Blye looks to score with a combo but nothing lands.
Blye chopping away at his opponent's legs.
Hogan connects with a leg kick. He turned his hip over nicely there.

Blye bobs and weaves into range and then changes levels and scores with a nice takedown into side control.
Hogan is not in a great position here, taking some shots.
Blye working away.
Hogan is looking for a sweep.
You can see the frustration on Hogan's face, being in this tough position on the bottom.
That's three minutes gone in the round.
Blye throwing strikes but missing, from side control.
Blye working the body and head with strikes.
Blye working away diligently from side control. Landing strikes effectively there - that will score him some points on the judges scorecards.
Blye scores with punches from side control.
Blye trying to control the position but Hogan is working away.
Hogan is looking to reverse the position.
The ref warns both fighters not to hold the cage as they work up against the meshing.
Blye scores with a couple of short elbows.
Blye connects with a decent looking elbow from side control that caused Hogan some visible discomfort.
Blye misses with an attempted head punch from side control.
Blye working away.
Hogan is trying to get back to half guard.
Blye scoring with punches from side control.
That's four minutes gone in the round.
Hogan dodges the ground and pound from Blye.
Hogan is trying to improve his position.
Blye cracks Hogan with an elbow. That is naaassty.
Blye looks up at the clock and then as Hogan takes his cue and looks up at the clock too, Blye smacks him right in the chops with a big elbow! How rude!
Blye scoring with punches and elbows.
Blye working the head and body with strikes.
Fantastic stuff here - a very entertaining period of action, which has drawn cheers from the crowd.
Blye looking to punish the body of his opponent here but Hogan is avoiding damage well.
Blye lands some shots froms side control.

Blye is trying to land an Americana. He has the arm isolated but Hogan is keeping cool and he's avoided the danger for now.
Blye scoring with punches and elbows.
Hogan struggling a bit here.
Blye looks up at the clock and then as Hogan takes his cue and looks up at the clock too, Blye smacks him right in the chops with a big elbow! How rude!
And thats the end of the round the fighters go back to their corners.
Lucas Blye dominated that round.
The referee calls time. The cornermen exit stage left and we're back to business.
Hogan swings and misses with a hook to the body.
Hogan will need to close the distance a bit before he attacks - that leg kick was thrown from too far away.
Blye has been the more effective fighter overall so far.
A slow jab from Hogan misses its intended target.
Blye misses with a body shot. Nice footwork from Hogan.
Hogan thows a body kick. Blye tries to catch it but that hurt him.
Hogan takes a swing at Blye's ribcage but misses.
Hogan takes a swing at Blye's ribcage but misses.
Hogan thows a leg kick but Blye checks it
and Blye counters with a nice double leg into guard.
The fighters are pressed up against the cage, both looking to find a bit of space to work.
Hogan looking to hit a scissor sweep but Blye is one step ahead there.
Blye has the superior BJJ but he's also working some ground strikes into his gameplan.
Hogan looking for submissions off his back, moving his hips, looking for an opening.
We've had a slow start to the round here - hopefully the action picks up.
Blye postures up and lands a big shot to Hogan's brow.
Lucas Blye has got the better of the ground game so far.
Hogan lands a beautiful sweep and he's now moved into his opponent's guard.

That's one minute gone in the round.
Blye looking to sweep here. No luck so far.
Hogan trying to pass the guard but can't manage it just yet.
Blye seems keen to control rather than go for a submission, at least for now.
Blye's corner are shouting for him to control the position and he seems happy to oblige.
Blye looking for submissions from the bottom here. Moving his hips around, possibly looking for an armbar.
Blye not looking particularly offensive just at the moment.
Hogan scoring with some ground and pound.
Hogan trying to control but Blye is working from the bottom.
That's two minutes gone in the round.
A few boos can be heard. I'm sure they will multiply if the fighters don't pick up the pace.
Hogan stands up and looks to throw the legs aside to pass to side control. Blye swivels though and keeps the full guard.
Hogan wants to control from the top but Blye keeps moving.
Blye is throwing his legs up, looking for submissions. Hogan is aware though and is defending well.
There's a bit of a scramble here and now Blye is on top in guard.

Hogan controls Blye momentarily but Blye frees himself.
Blye with a flurry of punches that miss.
Blye lands a couple of decent looking shots.
That's three minutes gone in the round.
Hogan is active off his back here, looking for submissions.
A big thud reverberates around the arena there as Blye accidentally thumps the mat. Hopefully he's not broken his hand.
Blye got a little sloppy there for a moment and Hogan has worked his way into a loose triangle - can he finish it?! No, Blye has managed to get both his arms back between Hogan's legs - danger averted.
Blye is sitting in guard, working some ground and pound.
Hammerfist, elbow! yells Blye's corner. There ya go! There ya go!
Hogan throws his legs up looking to secure a triangle. Oh, that looks pretty tight, I gotta say! Blye escapes and throws Hogan's legs to the side, diving into side control!
Hogan is moving his hips around well on the bottom and has managed to get back to half guard.
Blye is scoring with some nice ground and pound from the dominant position.
Hogan tries to roll over but Blye keeps him under control.
Blye thumps the canvas. Not on purpose obviously - he just missed Hogan's head.
That's four minutes gone in the round.
The referee walks around the fighters to get a better view of the action. Blye lands a nice short elbow.
Hogan is trying to get back to full guard.
Hogan is looking to control Blye's leg but it's slowly edging free. Can Hogan avoid being mounted?
Blye sitting in half guard, looking to land shots. Hogan defending well though.
The two fighters exchange a few words. I couldn't hear what they were saying but maybe it's more fun if you make it up yourself. Blye connects with a nice short shot to Hogan's temple.
Hogan is trying to get back to full guard.
Hogan has hold of Blye's hands but Blye slips his arm to the side and lands an elbow.
Hogan wants to get back to full guard.
The crowd thankful this round is nearly over.
Blye is nestled in close to Hogan, controlling him well. He's worked in a nice elbow to the side of the head as well, for good measure.
Blye prevents Hogan from improving his position.
Ground and pound from Blye.
And thats the end of the round the fighters go back to their corners.
Lucas Blye showed his class in that round. I'd imagine he'll take it on all the scorecards.
That's the end of the round. The referee orders the cornermen out of the cage so we can get back down to business. The crowd applaud as we get ready to start the final round!
Hogan throws a head kick but Blye moves out of range.
Hogan throws an overhand right that lands on Blye's shoulder, as Blye tries to avoid the shot.
Hogan defending well as Blye loads up on a big left hand.
A chopping leg kick lands by Hogan.
Hogan just misses with a punch to the body.
Hogan is looking to score with low kicks.
Hogan throws a wild body kick that Blye sees coming a mile off.
Boe Hogan is winning the standup battle so far.
Blye fails to land with the punch combination there - jab, cross, hook, miss, miss, miss.
Blye lands a glancing blow to the side of Hogan's head.
Blye lands with a thumping leg kick.
We've had a slow start to the round here - hopefully the action picks up.
Hogan fakes and then throws a beautiful body shot. Blye looks a bit winded and takes a step backwards to take a breath.
Hogan swings and misses with a hook to the body.
A low kick from Hogan is predictable there
and Blye counters with a nice double leg into side control. Hogan won't be happy with that.
This has been an exciting period of action!
Blye cracks Hogan with an elbow. That is naaassty.
That's one minute gone in the round.
An elbow from Blye crashes against the mat.
Blye working the head and body with strikes.
Hogan wants to control but Blye postures up.
Blye landing strikes.
Blye working the body and head with strikes.
Blye lands a knee to the body and a forearm to the face.
Blye is chipping away with strikes.
Blye lands a few punches from side control.
Blye is working Hogan over with some ground and pound from side control.
Blye lands some shots froms side control.
Hogan taking a bit of punishment here - Blye scoring with strikes.
Hogan is rocked!
Blye creates a bit of distance and throws down some hard shots.
Boe Hogan has stepped it up - he knows he needs a finish here!
Oh Hogan is still in real trouble! Will he be able to recover?!!
That's two minutes gone in the round.
Blye creates a bit of distance and throws down some hard shots.
Hogan manages to work his way to half guard, despite Blye's best efforts.
Blye lands with an elbow from half guard - that looked like it hurt.
Blye sitting in half guard, looking to land shots. Hogan defending well though.
Hogan trying to control from the bottom.
Hogan seems to have got his legs back now.
Blye lands strikes from half guard.
Wooooo! Give it up for these two warriors! They are putting on a show!
Blye working some ground and pound from close in. He's looking to maintain this position and strike for a while by the looks of things... although he'll probably advance to full mount in a minute now I've said that.
Blye winds up and cracks Hogan with a swinging punch to the side of the head.
Hogan avoiding damage under a succession of punches from Blye.
Hogan has no desire to be mounted, so is trying to control. Blye is working away from the top position though.
Ground and pound from Blye.
That's three minutes gone in the round.
Blye wants to control but Hogan is keeping him busy.
The two fighters exchange a few words. I couldn't hear what they were saying but maybe it's more fun if you make it up yourself. Blye connects with a nice short shot to Hogan's temple.
Hogan on the receiving end of some nice ground and pound.
Blye seems very keen to just sit and control from half guard but Hogan does not like that idea so much and is remaining active off his back.
Hogan is looking to improve his position.
Blye looks to score some points with some ground and pound.
Blye not landing any meaningful shots this time.
Blye working some ground and pound from close in. He's looking to maintain this position and strike for a while by the looks of things... although he'll probably advance to full mount in a minute now I've said that.
Blye missing with the ground and pound from half guard.
Blye is keeping good posture, landing some ground and pound.
Blye missing with some ground and pound from the half guard.
Hogan tries to get to full guard but Blye has control of the leg.
Hogan is trying to control but can't.
That's four minutes gone in the round.
Hogan actively working from the bottom here.
Both fighters are breathing heavily.
Hogan is holding on to half guard well.
The referee walks around the fighters to get a better view of the action. Blye lands a nice short elbow.
Lucas Blye is fighting for a decision - hopefully he's judged it right and he's actually winning the fight.
Blye is looking to take a break and control but Hogan is keeping him honest, looking to work from the bottom.
Hogan actively working from the bottom here.
Hogan tries to get to full guard but Blye has control of the leg.
Hogan has hold of Blye's hands but Blye slips his arm to the side and lands an elbow.
Hogan flails away from the bottom but he's not doing any damage.
And that's the end of the fight!
Lucas Blye comfortably won the final round on my scorecard.
I've got Blye winning every round here. Surely the decision will go his way and he'll pick up a well deserved decision victory. Over to the ring announcer for the scorecards.
Ladies and gentlemen, after 3 rounds of action, we go to the scorecards for a decision.
Judge David Schapiro scores the fight 27:30
Judge Reed Andrews scores the fight 27:30
Judge Columbo Gatti scores the fight 27:30
In favor of your winner, by unanimous decision... Lucas Blye!
|
|
|
|
|
|
|
|
|
|
|
|
|
|
|
|
|
|
|
|
|
|
|
| S |
C
A |
G |
S |
C
B |
G |
|
S |
C |
G |
|
energy
A | B |
|
hype
A | B |
|
pop
A | B |
|
mgr
A | B |
|
FIGHT
RATING
48% |
|
|
|
|
|
|
|
|
|
|

