 |
Pulse Fight Night 1 PBP Commentary |
Undercard bout
|
|
|
|
Undercard bout
|
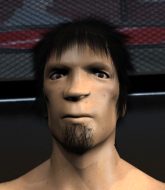
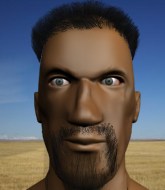
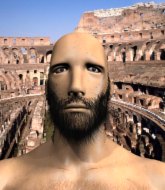
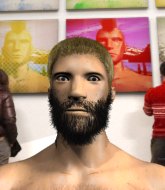
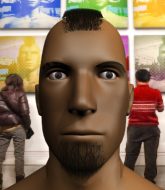
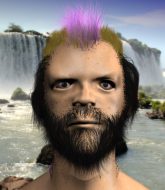
Coming up we have a heavyweight MMA rules bout between Serj Tankian (ranked 0 p4p, 0 weight class) and Takashi Tiura (ranked 0 p4p, 0 weight class). Tankian comes to the ring accompanied by War (System of a Down). Both fighters look fresh as a daisy as they make their way towards the ring.
 |
|
 |
| 225 cm
25
280 lbs
2 - 1 - 0 |
|
216 cm
26
248 lbs
4 - 4 - 0 |
BJJ White Belt
Excellent MT
Very strong |
|
BJJ Purple Belt
Counter fighter
Knockout power |
|
| |
|
Ladies and gentlemen. This fight is 3 rounds, in the heavyweight division.
Introducing the fighter to my left, fighting out of the red corner.
With a record of
2 - 1 - 0, fighting out of Hilo, Serj Tankian!
And introducing the fighter to my right, fighting out of the blue corner.
With a record of
4 - 4 - 0, fighting out of Tokyo, Takashi Tiura!
The judges for this bout are Yuuki Gou, Yasuomi Hirokawa and Ren Mimura.

The bell rings for round one and we are underway!
Tankian tries to clinch up but Tiura circles away and keeps his distance.
Tiura now looks to counter with a shot at the body.
Tankian tries to clinch but Tiura moves away
and Tiura counters with a nice uppercut.
Sloppy strikes from Tiura. Those never looked like landing.
Tankian fails in his attempt to clinch.

Tankian clinches up against the ropes.
A nice right hand lands inside from Tankian.
A short right from Tankian on the inside.
Tankian lands a big right hand that drops Tiura! The killer instinct kicks in and Tankian finishes his opponent with a series of strikes from mount. A dominating finish by Tankian!
Ladies and gentlemen, after 0:35 of round 1, we have a winner by way of TKO (Strikes). Serj Tankian!
Serj Tankian took to the mic in his post fight interview and said 'First i want to thank mother earth without her nothing is possible. I want thank my family for standing by me. Lastly i want to thank all my fans and my coaches and training partners. '.
|
|
|
|
|
|
|
|
|
|
|
|
|
|
|
|
|
|
|
|
|
|
|
| S |
C
A |
G |
S |
C
B |
G |
|
S |
C |
G |
|
energy
A | B |
|
hype
A | B |
|
pop
A | B |
|
mgr
A | B |
|
FIGHT
RATING
100% |
|
|
|
|
|
|
|
Undercard bout
|
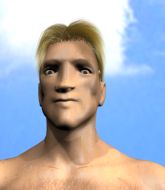
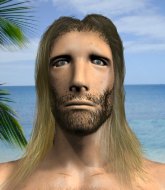
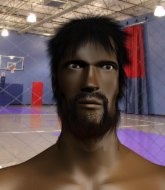
Coming up we have a welterweight MMA rules bout between Kimbo Slime (ranked 0 p4p, 0 weight class) and Kichirou Maeda (ranked 0 p4p, 0 weight class). Both fighters look fresh as a daisy as they make their way towards the ring.
 |
|
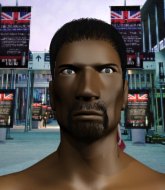 |
| 190 cm
20
186 lbs
3 - 2 - 0 |
|
184 cm
25
184 lbs
2 - 0 - 0 |
Powerful takedowns
Solid boxing
Granite chin |
|
BJJ Blue Belt
Basic striking
Granite chin |
|
| |
|
Ladies and gentlemen. This fight is 3 rounds, in the welterweight division.
Introducing the fighter to my left, fighting out of the red corner.
With a record of
3 - 2 - 0, fighting out of London, Kimbo Slime!
And introducing the fighter to my right, fighting out of the blue corner.
With a record of
2 - 0 - 0, fighting out of Tokyo, Kichirou Maeda!
The judges for this bout are Kenichi Hosakawa, Yukihiro Shimada and Yasuomi Hirokawa.
The bell rings for round one and we are underway!
A telegraphed takedown attempt from Maeda is defended easily by Slime.
We've been hearing reports that Slime has been drilling takedowns in recent sessions so let's see if that has an impact on the result of this fight.
Maeda avoids a punch combination nicely.
Maeda misses with a takedown attempt. He shot from a bit too far out.
Slime changes levels looking for a counter takedown but doesn't commit.
Slime misses with a two punch combination.
Slime connects with the punch.
Slime connects with a looping left hand that seems like it dazed Maeda momentarily.

Maeda shoots in and gets a takedown into half guard. Maeda showed some decent athleticism there.
Slime is trying to stand.
Maeda wants to lay and pray for a moment but Slime keeps working.

That's one minute gone in the round.
Maeda with the ground and pound but Slime uses the opportunity to regain guard.
Maeda throws a big right hand that misses.
Maeda wants to control from the top but Slime keeps moving.
The fighters are trapped in the ropes so we're going to have a reposition here. The ref calls for a break and repositions the fighters in the center of the ring.
Maeda lands a couple of digs.
Maeda in full guard, throwing the ground and pound. No damage this time.
Maeda is sitting in guard, working some ground and pound.
Slime working the defensive guard well to avoid strikes from Maeda.
Slime wants to get back to his feet but Maeda is in a dominant position and won't allow it.

Slime kicks Maeda off and gets to his feet.
Maeda takes a shot right to the liver - Bas would have been proud of that punch.
Maeda tries to clinch

and Slime counters with a shoot takedown. Maeda fights it but they end up in guard.

That's two minutes gone in the round.
Maeda preventing the ground and pound from doing any damage.
Maeda wants to stand up but Slime is controlling him.
Maeda not looking particularly offensive just at the moment.
Slime is stalling in the full guard.

Maeda is looking for a guillotine. You can't force these things though and Slime defends well.
Slime is working Maeda over from the guard. He should look to pass the guard and do a little more damage with these strikes.
This has been an exciting period of action!
Maeda working a defensive guard here.
Maeda trying to control the position here.

That's three minutes gone in the round.
Maeda throwing strikes off his back to little effect.
Maeda looking to control.
It looks like the ref is thinking about a standup.
Maeda has the superior BJJ but he's also working some ground strikes into his gameplan.
Maeda has momentary wrist control but Slime slips an elbow through the middle.
Maeda preventing the ground and pound from doing any damage.
Slime wants to control from the top but Maeda keeps moving.
Slime postures up.
Maeda is working an open guard here, looking to improve his position. No doubt that will leave him open to counters but at least he's being more offensive.
Slime stands up and looks to throw the legs aside to pass to side control. Maeda swivels though and keeps the full guard.
Slime in full guard, throwing the ground and pound. No damage this time.

That's four minutes gone in the round.
Well. There's a bit of a lull in the action here and the crowd are starting to get restless.
Slime postures up.

The referee has stepped in and called for a break in the action. We'll restart on the feet.
Slime drives through with a takedown into guard.
Slime looking to sit in guard and control but Maeda gets the butterfly guard and sweeps. He's now in the guard on the top.

Slime avoiding any damage from the ground and pound.
Maeda has decided he wants to stand but the closed guard of Slime is proving hard to escape from.
Slime on his back here. We all know that wrestlers don't like being on their back so let's see if Slime tries to get out of the position.
Maeda loading up with the ground and pound but he's missing more than he's landing in this flurry.
Maeda is looking to work some ground and pound but Slime has wrist control.
Maeda with a flurry of punches that miss.
Maeda stands up over Slime, holding his feet. He dives back in and lands a decent shot to the head.
Slime bucks up whilst keeping hold of a body lock, managing to reverse the position. Now he's in top in Maeda's guard.

And thats the end of the round the fighters go back to their corners.
Kimbo Slime dominated that round.
The fighters' corners scream their final instructions, as the referee calls time. Here we go, back to the action!

Maeda tries to move into range but Slime moves to the side and lands with a nice right hand.
Maeda tries to clinch but is not successful on this occasion.
Kichirou Maeda is looking to throw some combinations by the looks of things.
Slime lands a right hook to the body.
Decent striking displayed by Slime there.
Slime throws the overhand right but ducks down into a quick takedown attempt. Maeda was covering up waiting for the punch and Slime finishes the takedown easily into guard.
Slime lands a couple of digs.
Slime trying to control but Maeda is working from the bottom.
Slime with a couple of shots to the head there. Not particularly brutal.
Slime scores with a decent looking elbow strike.
Maeda is trying to control the position but Slime postures up.
Slime scoring with some ground and pound.
That's one minute gone in the round.
Slime throws a big elbow that misses.
Slime with a couple of shots to the head there. Not particularly brutal.
Slime makes a bit of distance and scores with some ground and pound, still in guard.
Slime throwing strikes from guard but Maeda blocks nicely.
Slime trying to control the position from guard on top but Maeda is wriggling around, looking for whatever he can.
Maeda is trying to stand up but he's not managed so far.
Slime working from the guard for now, landing some ground and pound.
Slime trying to pass the guard but can't manage it just yet.
That's two minutes gone in the round.
Slime working in close now, lands a nice elbow to the side of Maeda's head.
Maeda utilising some decent striking defenses from the guard, preventing the ground and pound.
Slime content to strike from guard, landing some decent shots.
Maeda is looking to stand back up... there's a bit of a scramble and Slime dives into side control.
Maeda is looking for a sweep.
Maeda struggling a bit here.
Maeda taking a bit of punishment here - Slime scoring with strikes.
Slime scoring with punches from side control.
Slime scores with punches from side control.
Slime landing strikes.
Maeda on the wrong end of some ground and pound.
That's three minutes gone in the round.
You can see the frustration on Maeda's face, being in this tough position on the bottom.
Maeda might have to switch it up a bit here because his efforts to control Slime haven't been going to plan, at least at the current moment in time.
Slime works a knee to the body and follows up with a nice elbow to the head.
Slime working the ground and pound from side control.
Maeda takes a big shot right to the temple there but he's taken it well.
Slime lands a few punches from side control.

Maeda is rocked!
Maeda tries to bench press Slime off him but Slime keeps the position.
Slime lands a big elbow and you can see that really hurt Maeda! Slime senses the opportunity and scores with more strikes - he's put Maeda out! The ref tackles him out of the way to prevent him landing more strikes - this one is all over!
Ladies and gentlemen, after 4:59 of round 2, we have a winner by way of KO (Strikes). Kimbo Slime!
After winning the bout, Kimbo Slime thanked all his fans and promised he'd do even better in his next fight. The crowd seemed to love his humility.
|
|
|
|
|
|
|
|
|
|
|
|
|
|
|
|
|
|
|
|
|
|
|
| S |
C
A |
G |
S |
C
B |
G |
|
S |
C |
G |
|
energy
A | B |
|
hype
A | B |
|
pop
A | B |
|
mgr
A | B |
|
FIGHT
RATING
46% |
|
|
|
|
|
|
|
Undercard bout
|
|
|
|
Undercard bout
|
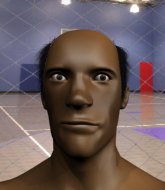
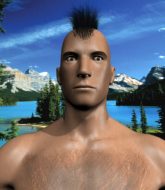
Coming up we have a lightweight MMA rules bout between Jerome Turner (ranked 0 p4p, 0 weight class) and Mamoru Date (ranked 0 p4p, 0 weight class). Mamoru Date has the better chin. Will he look to stand and bang today?
 |
|
 |
| 178 cm
26
155 lbs
3 - 3 - 0 |
|
178 cm
18
160 lbs
1 - 0 - 0 |
BJJ Blue Belt
Brawler
Experienced |
|
BJJ White Belt
Excellent MT
Granite chin |
|
| |
|
Ladies and gentlemen. This fight is 3 rounds, in the lightweight division.
Introducing the fighter to my left, fighting out of the red corner.
With a record of
3 - 3 - 0, fighting out of New York, Jerome Turner!
And introducing the fighter to my right, fighting out of the blue corner.
With a record of
1 - 0 - 0, fighting out of Tokyo, Mamoru Date!
The judges for this bout are Shirou Masuda, Hirohito Nitta and Ren Mimura.
The bell rings for round one and we are underway!
Date scores with a straight right hand, right through his opponent's guard.

It looks like Jerome Turner has been cut.
Turner misses with a series of wild punches.
Turner sets himself, and Date steps forward looking for the clinch! Turner avoids it this time.
Turner closes the distance and clinches up with Date, looking for a takedown. Turner pushes Date against the ropes but Date circles to the side and manages to break the clinch.
Turner shoots in for a takedown but Date shows good takedown defense.
Date is trying to avoid his opponent's strikes and get into the clinch.
Turner on the wrong end of a nice hook.
Turner shoots in for a takedown but doesn't get it.
That's three failed takedown attempts in the round for Jerome Turner. That's going to take a lot out of him.
Turner with poor footwork there. He got himself in a bit of a tangle, enabling Date to score with a decent uppercut.
Date slips in close and lands a nice hook before moving back out of range.

Turner is rocked!
Date has done a lot of speed work in the buildup to this fight.
Date connects with a picture perfect right hand that knocks Turner out cold! This one is over in a flash!
Ladies and gentlemen, after 0:41 of round 1, we have a winner by way of KO (Punch). Mamoru Date!
|
|
|
|
|
|
|
|
|
|
|
|
|
|
|
|
|
|
|
|
|
|
|
| S |
C
A |
G |
S |
C
B |
G |
|
S |
C |
G |
|
energy
A | B |
|
hype
A | B |
|
pop
A | B |
|
mgr
A | B |
|
FIGHT
RATING
94% |
|
|
|
|
|
|
|
Undercard bout
|
Coming up we have a middleweight MMA rules bout between Money Maker (ranked 0 p4p, 0 weight class) and Josh Buttler (ranked 0 p4p, 0 weight class). Josh Buttler told me before the fight that he's been watching a lot of DVDs so let's see if that helps him in this one! I can't wait to find out!
 |
|
 |
| 190 cm
25
194 lbs
4 - 0 - 0 |
|
188 cm
25
195 lbs
1 - 0 - 0 |
BJJ White Belt
Excellent boxer
Good chin |
|
BJJ Blue Belt
Excellent boxer
Heavy handed |
|
| |
|
Ladies and gentlemen. This fight is 3 rounds, in the middleweight division.
Introducing the fighter to my left, fighting out of the red corner.
With a record of
4 - 0 - 0, fighting out of London, Money Maker!
And introducing the fighter to my right, fighting out of the blue corner.
With a record of
1 - 0 - 0, fighting out of Tokyo, Josh Buttler!
The judges for this bout are Shigeki Sano, Hirohito Nitta and Yuuki Gou.
The bell rings for round one and we are underway!
Maker lunges at Buttler with a hook that half lands and is half blocked by Buttler's hand.
Buttler throws a big shot that misses.
Maker definitely looks more muscular than last time we saw him fight.
Buttler misses with an uppercut.

Buttler forces Maker back against the ropes and clinches.
Maker stalling in the clinch.
Maker lands a body punch - he's looking to wear down Buttler.
Buttler swings wildly with an uppercut but Maker uses good head movement to avoid it.
A nice left hand lands by Maker.
Maker pushes Buttler back against the ropes and lands a hook to the side of the head.
Maker lands a right hand.
Maker blocks a body shot from Buttler.
Maker lands a hook that snaps the head of Buttler backwards.
Maker lands on the inside with an uppercut.
The crowd are loving this. Great action here.
Maker lands a left hand that snaps the head of Buttler backwards.
Buttler misses with a hook from the clinch.
Buttler has a couple of punches blocked by Maker.
Buttler swings away with an uppercut that misses.
Buttler misses with a punch on the inside.
Maker makes some space for himself and lands an uppercut.
Buttler is rocked!
Buttler misses with a hook from the clinch.
Buttler is still on wobbly legs! Can Maker finish him?
Maker throws a blind hook that connects with the side of Buttlers head.
Maker lands a big right hand that drops Buttler! The killer instinct kicks in and Maker finishes his opponent with a series of strikes from mount. A dominating finish by Maker!
Ladies and gentlemen, after 1:55 of round 1, we have a winner by way of TKO (Strikes). Money Maker!
|
|
|
|
|
|
|
|
|
|
|
|
|
|
|
|
|
|
|
|
|
|
|
| S |
C
A |
G |
S |
C
B |
G |
|
S |
C |
G |
|
energy
A | B |
|
hype
A | B |
|
pop
A | B |
|
mgr
A | B |
|
FIGHT
RATING
83% |
|
|
|
|
|
|
|
Undercard bout
|
Coming up we have a light heavyweight MMA rules bout between Sajin Komamura (ranked 0 p4p, 0 weight class) and Memento Mori (ranked 0 p4p, 0 weight class). Komamura comes to the ring accompanied by Killing In The Name. Both fighters look fresh as a daisy as they make their way towards the ring.
 |
|
 |
| 186 cm
27
210 lbs
5 - 3 - 0 |
|
189 cm
20
216 lbs
3 - 0 - 0 |
Powerful takedowns
Basic striking
KO power |
|
BJJ Purple Belt
Excellent boxer
Heavy handed |
|
| |
|
Ladies and gentlemen. This fight is 3 rounds, in the light heavyweight division.
Introducing the fighter to my left, fighting out of the red corner.
With a record of
5 - 3 - 0, fighting out of Tokyo, Sajin Komamura!
And introducing the fighter to my right, fighting out of the blue corner.
With a record of
3 - 0 - 0, fighting out of Las Vegas, Memento Mori!
The judges for this bout are Yukihiro Shimada, Kenichi Hosakawa and Sosuke Kotani.
The bell rings for round one and we are underway!
Komamura drives through with a takedown into guard.
Komamura is frustrating his opponent with some stalling tactics from top position.
Komamura works over Mori with some ground and pound from guard.
Mori controls Komamura momentarily but Komamura frees himself.
Komamura advances position into side control!
Komamura working away diligently from side control. Landing strikes effectively there - that will score him some points on the judges scorecards.
We've had a slow start to the round here - hopefully the action picks up.
Mori can't do much from the bottom here.
Komamura working the ground and pound but he's contacting the mat, not the fighter.
Komamura is looking to take a break and control but Mori is keeping him honest, looking to work from the bottom.
Mori wants to control but Komamura postures up.
That's one minute gone in the round.
Mori is looking for a sweep.
Komamura tries to land with some ground and pound but misses.
Komamura throws a knee to the body but it doesn't do much damage.
Mori is trying to get back to half guard.
Komamura lands a few punches from side control.
Komamura is looking to take a break and control but Mori is keeping him honest, looking to work from the bottom.
Mori manages to land a sweep and he's now on top! Lovely Jiu Jitsu!
That's two minutes gone in the round.
Mori thows a huge punch but Komamura dodges it nicely.
Mori is trying to get back to his feet now but his leg is trapped.

Mori decides he's had enough of the ground and stands up.
Mori missing with a left hand there. Komamura was out of range so wasted energy throwing that one.
Mori gets caught flat footed, as Komamura shoots in with a quick takedown into guard.
Mori not looking particularly offensive just at the moment.
Komamura is looking to work some ground and pound but Mori has wrist control.
Komamura wants to pass the guard but Mori is keeping the position.
Komamura content to strike from guard, landing some decent shots.
The fighters are tangled up in the ropes here. We might need a restart if the fighters can't break free themselves.
Mori is looking to get back to his feet but can't, whilst Komamura is controlling him.
Komamura working from the guard for now, landing some ground and pound.
That's three minutes gone in the round.

Mori has his feet on Komamura's hips. He pushes off and gets to his feet. Nice work.
Komamura takes a jab on the nose there. A little bit of blood seems to be coming out. Hopefully that won't affect his breathing.
Memento Mori is looking to keep the fight on the feet at all costs.
Komamura goes for a double leg but Mori avoids the attempt and the two fighters end up clinched against the ropes as Mori continues to drive forward.
Mori lands with a hook. Komamura tried to avoid it but it clipped the top of his head.
Mori misses with a looping left.
Komamura takes an uppercut right on the jaw but it doesn't phase him.
Komamura is rocked!
Komamura leaves his chin hanging out and Mori seizes the opportunity with an uppercut! Komamura crumbles to the floor in a heap! The referee steps in and tends to the downed fighter! What a knockout!
Ladies and gentlemen, after 3:42 of round 1, we have a winner by way of KO (Punch). Memento Mori!
After winning the bout, Memento Mori thanked all his fans and promised he'd do even better in his next fight. The crowd seemed to love his humility.
|
|
|
|
|
|
|
|
|
|
|
|
|
|
|
|
|
|
|
|
|
|
|
| S |
C
A |
G |
S |
C
B |
G |
|
S |
C |
G |
|
energy
A | B |
|
hype
A | B |
|
pop
A | B |
|
mgr
A | B |
|
FIGHT
RATING
39% |
|
|
|
|
|
|
|
Co-main event
|
Coming up we have a welterweight MMA rules bout between Yuzan Yakuza (ranked 0 p4p, 0 weight class) and Ned Nedeltsev (ranked 0 p4p, 0 weight class). Yuzan Yakuza is staring across the ring at his opponent, tweaking his nipples... Tweaking his own nipples that is.
 |
|
 |
| 182 cm
27
180 lbs
6 - 3 - 0 |
|
181 cm
26
169 lbs
7 - 2 - 0 |
BJJ Blue Belt
Excellent boxer
Experienced |
|
BJJ Purple Belt
Basic striking
Determined |
|
| |
|
Ladies and gentlemen. This fight is 3 rounds, in the welterweight division.
Introducing the fighter to my left, fighting out of the red corner.
With a record of
6 - 3 - 0, fighting out of Hilo, Yuzan Yakuza!
And introducing the fighter to my right, fighting out of the blue corner.
With a record of
7 - 2 - 0, fighting out of Tokyo, Ned Nedeltsev!
The judges for this bout are Hirohito Nitta, Shigeki Sano and Tatsuya Matsuyama.
The bell rings for round one and we are underway!
Yakuza gets to the clinch - let's see what his plan is here.

Nedeltsev pushes off and circles away, back to the middle of the mat.
Yakuza moves into the clinch successfully.
Nedeltsev goes for a takedown attempt but Yakuza pushes him away and we're back to fighting at a distance.
Yakuza gets in close and instigates a clinch.
Yakuza lands a nice uppercut.
Yakuza throws a blind hook that connects with the side of Nedeltsevs head.
Nedeltsev wants to break free but Yakuza has control.
Yakuza lands with a short punch from the clinch.
Nedeltsev wants to get back to striking at distance but Yakuza won't allow it.
Yakuza lands a nice shot to the body.
A nice left hand lands by Yakuza.

It looks like Ned Nedeltsev has been cut.
A short left from Yakuza.
The crowd cheering loudly, showing their appreciation for the quality fight we're seeing here.
Good body shot from Yakuza.
Nedeltsev looks winded!
Yakuza working on landing some head shots here - that one got through nicely.
A quick uppercut on the inside from Yakuza.
Nedeltsev is rocked!
Yakuza stalling against the ropes.
Yakuza lands a nice uppercut.
Nedeltsev tries to break free but Yakuza pushes him back against the ropes.
That's one minute gone in the round.
Yakuza lands an uppercut.
Nedeltsev is still on wobbly legs! Can Yakuza finish him?

Yakuza drops Nedeltsev onto one knee with a big uppercut from the clinch! Nedeltsev is propped up by the ropes and works his way back to his feet!
Yakuza pushes Nedeltsev against the ropes. Yakuza is working some dirty boxing. Yakuza pushes off with a quick right hook! Nedeltsev goes down! Nedeltsev tries to stand but stumbles back to his kness! Yakuza moves in to finish and the ref steps in to prevent any more damage!
Ladies and gentlemen, after 1:16 of round 1, we have a winner by way of TKO (Strikes). Yuzan Yakuza!
|
|
|
|
|
|
|
|
|
|
|
|
|
|
|
|
|
|
|
|
|
|
|
| S |
C
A |
G |
S |
C
B |
G |
|
S |
C |
G |
|
energy
A | B |
|
hype
A | B |
|
pop
A | B |
|
mgr
A | B |
|
FIGHT
RATING
91% |
|
|
|
|
|
|
|
Main event
|
Coming up we have a lightweight MMA rules bout between Tommy Taylor (ranked 0 p4p, 0 weight class) and CJ Risky (ranked 0 p4p, 0 weight class). Tommy Taylor could well score a knockout today. He has the power to get to CJ Risky's chin.
 |
|
 |
| 175 cm
23
160 lbs
8 - 5 - 0 |
|
172 cm
26
163 lbs
3 - 0 - 0 |
BJJ Brown Belt
Brawler
Granite chin |
|
BJJ White Belt
Excellent boxer
Powerful |
|
| |
|
Ladies and gentlemen. This fight is 3 rounds, in the lightweight division.
Introducing the fighter to my left, fighting out of the red corner.
With a record of
8 - 5 - 0, fighting out of Tokyo, Tommy Taylor!
And introducing the fighter to my right, fighting out of the blue corner.
With a record of
3 - 0 - 0, fighting out of New York, CJ Risky!
The judges for this bout are Shirou Masuda, Yuuki Gou and Shigeki Fujiwara.
The bell rings for round one and we are underway!
Risky stuffs the takedown attempt from Taylor. Taylor gets slowly back to his feet.
Risky scores with a sloppy punch to the body. Not much technique there but it did the business.
Taylor looks frustrated there after his takedown attempt is stuffed easily.
Risky scores with the left hand. Taylor knows he should have avoided that one.
Risky lands a vicious shot with the stealth of a sniper and the strength of a viper. Are vipers that strong? I can think of lots of things that are stronger than a viper - not many rhyme with sniper though.
Risky scores with a nice strike.
Taylor walks straight into an uppercut. Luckily it didn't land flush.
Taylor takes a punch right to his stomach. That took the wind out of him momentarily.
A shot to the liver by Risky. Beautiful body shot.
Risky tests Taylor's chin there with a solid looking shot.
The crowd cheering loudly, showing their appreciation for the quality fight we're seeing here.
Risky lands a jab.
Risky uses good footwork to get in and out and land a nice right hand before Taylor has time to react.
Taylor throws a lazy head kick
and Risky counters with a nice uppercut.
Taylor is breathing heavily.
That's one minute gone in the round.
Donk. Risky catches Taylor right on the button with a cross.
Risky scores with a decent looking hook.
Taylor has his takedown stuffed
and Risky cracks him with a counter punch right on the button.
That's three failed takedown attempts in the round for Tommy Taylor. That's going to take a lot out of him.
Risky scores with a nice one two combo and darts back out of range to avoid anything coming in the opposite direction.
Taylor is rocked!
Risky ducks down into range and throws a picture perfect right hook that connects with Taylor's jaw. Taylor's eyes stare off into space as he falls to the mat, out cold! Risky does the decent thing and steps back, rather than landing any shots to his unconscious opponent.
Ladies and gentlemen, after 1:25 of round 1, we have a winner by way of KO (Punch). CJ Risky!
|
|
|
|
|
|
|
|
|
|
|
|
|
|
|
|
|
|
|
|
|
|
|
| S |
C
A |
G |
S |
C
B |
G |
|
S |
C |
G |
|
energy
A | B |
|
hype
A | B |
|
pop
A | B |
|
mgr
A | B |
|
FIGHT
RATING
73% |
|
|
|
|
|
|
|
|
|
|
