 |
Pacio Fight Night 16 PBP Commentary |
Undercard bout
|
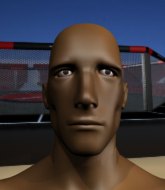
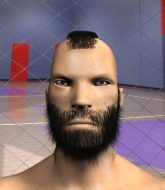
Coming up we have a super heavyweight MMA rules bout between Adam Malysz (ranked 0 p4p, 0 weight class) and Siusiakov Pindolov (ranked 0 p4p, 0 weight class). The fight MMA fans around the world have waited their entire lives for!
 |
|
 |
| 200 cm
25
300 lbs
0 - 2 - 0 |
|
197 cm
27
280 lbs
3 - 6 - 0 |
BJJ Blue Belt
Excellent boxer
Likes comics |
|
Good wrestler
Brawler
Heavy handed |
|
| |
|
Ladies and gentlemen. This fight is 3 rounds, in the super heavyweight division.
Introducing the fighter to my left, fighting out of the red corner.
With a record of
0 - 2 - 0, fighting out of Tokyo, Adam Malysz!
And introducing the fighter to my right, fighting out of the blue corner.
With a record of
3 - 6 - 0, fighting out of Tokyo, Siusiakov Pindolov!
The judges for this bout are Shigeki Fujiwara, Hirohito Nitta and Shirou Masuda.

The bell rings for round one and we are underway!
Pindolov fails to land with the punch combination there - jab, cross, hook, miss, miss, miss.
Malysz is starting to get sloppy and is letting his hands down. Pindolov just took advantage and landed a stinging jab. Oh! Now a right hook, right on the button! Malysz has gone limp and this one is over!
Ladies and gentlemen, after 0:09 of round 1, we have a winner by way of KO (Punches). Siusiakov Pindolov!
Siusiakov Pindolov spent the whole post fight interview bigging himself up. It didn't go down that well with the fans after a while as they thought it was a bit arrogant.
|
|
|
|
|
|
|
|
|
|
|
|
|
|
|
|
|
|
|
|
|
|
|
| S |
C
A |
G |
S |
C
B |
G |
|
S |
C |
G |
|
energy
A | B |
|
hype
A | B |
|
pop
A | B |
|
mgr
A | B |
|
FIGHT
RATING
100% |
|
|
|
|
|
|
|
Undercard bout
|
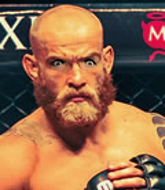
Coming up we have a bantamweight MMA rules bout between Ethan Falcon (ranked 0 p4p, 0 weight class) and Myke Toifer (ranked 0 p4p, 0 weight class). Both fighters look fresh as a daisy as they make their way towards the cage.
 |
|
 |
| 170 cm
20
137 lbs
1 - 4 - 0 |
|
171 cm
18
132 lbs
8 - 3 - 0 |
BJJ Blue Belt
Solid boxing
Experienced |
|
BJJ Brown Belt
Counter fighter
Granite chin |
|
| |
|
Ladies and gentlemen. This fight is 3 rounds, in the bantamweight division.
Introducing the fighter to my left, fighting out of the red corner.
With a record of
1 - 4 - 0, fighting out of Tokyo, Ethan Falcon!
And introducing the fighter to my right, fighting out of the blue corner.
With a record of
8 - 3 - 0, fighting out of Tokyo, Myke Toifer!
The judges for this bout are Taro Takaoka, Sosuke Kotani and Shigeki Sano.
The bell rings for round one and we are underway!
Toifer shoots in for a takedown but Falcon shows good takedown defense.
Toifer misses with a takedown
and Falcon connects with a straight left hand counter down the middle.
Toifer shoots in for a takedown but doesn't get it.
Ethan Falcon has stuffed three takedown attempts in the round now. That's going to take a lot out of Myke Toifer.
Falcon scores with a punch to the head.
Falcon connects with a nice looking jab.
Toifer doesn't succeed with the takedown
and Toifer takes a counter punch right on the button for his troubles.
Falcon tries to bum rush Toifer with a series of wild strikes but Toifer uses good footwork to avoid the assault.
Nice straight punches there by Falcon. You know Roy Jones Jr respects the hands of Falcon.
Falcon displays good takedown defense there as he swats away a double leg from Toifer.
Falcon takes a step towards his opponent and connects with a left hand, before circling away.
Toifer looks for a takedown here. Will he get it? Falcon is fending him off so far but Toifer persists. Nope, Falcon circles away and we're back to standing.

That's one minute gone in the round.
Falcon scores with a shot to the body.

Falcon shoots in for a takedown and gets it. Let's see what he's got on the mat.
Falcon not doing a lot at the moment. He'll have to show some more aggression or the fight will get stood up.
The fighters are pressed up against the cage, both looking to find a bit of space to work.
Falcon has controlled the position for a good 20 seconds, which will no doubt be starting to frustrate his opponent.
Falcon wants to pass the guard but Toifer is keeping the position.
Falcon sitting in guard here, content to control.

Toifer is looking for a guillotine. You can't force these things though and Falcon defends well.
Falcon stays in close to Toifer's body and controls the position.

That's two minutes gone in the round.
Toifer looking for submissions off his back, moving his hips, looking for an opening.
Falcon wants to pass the guard but Toifer is keeping the position.
Falcon stays in close to Toifer's body and controls the position.
Toifer has his foot on Falcon's thigh. He's trying to push off and get in position for a triangle, I think. Falcon works his way back into a safe position though.
Toifer looks winded!
Toifer can't do much from the bottom at the moment, as Falcon controls the pace.
Toifer is throwing his legs up, looking for submissions. Falcon is aware though and is defending well.
Falcon knows he needs to get back to his feet asap. He's simply no match for Toifer on the ground.
Falcon sneaks a leg through and gets to half guard. That was like a knife through butter how easily he passed Toifer's guard.
Both fighters have adopted an aggressive gameplan on the ground!
Neither fighter is being very active at the moment, with Falcon in particular looking to stall.
Toifer looking to work for a kimura from the bottom.
Falcon controlling the pace.

That's three minutes gone in the round.
Toifer looking for submissions from an awkward position here.
Falcon content to control rather than advance.
Falcon is pressing down on Toifer's thigh, looking to free his foot. Toifer is holding on for now.
Falcon winds up and cracks Toifer with a swinging punch to the side of the head.
Falcon trying to control the pace.
Toifer wants to control but Falcon is keeping busy.
Toifer looking for submissions from an awkward position here.

That's four minutes gone in the round.
The crowd are starting to boo a lack of action.
Toifer looking for submissions from an awkward position here.
Falcon looks over to his corner - he wants some instructions but his corner are not responding.
Toifer is trying to defend against the ground and pound but Falcon scores with a couple of nice shots.
Toifer is looking to sinch up a guillotine here but Falcon pulls his head out easily.
Falcon sitting and controlling from the half guard.
The crowd thankful this round is nearly over.
Toifer tries to roll over but Falcon keeps him under control.
Still in half guard, Falcon seems content to control.
And thats the end of the round the fighters go back to their corners.
Ethan Falcon dominated that round.
That's the end of the interval. I'm sure that seemed a lot quicker than a minute for our two fighters! Back to the action.

Toifer is on the wrong end of a nice combination from Falcon.
Falcon scores with a one two! Toifer had his feet all tangled up there and couldn't avoid the strikes.
Falcon misses with a wild combination.
Falcon looks to be in better condition than last time we saw him fight. Obviously he's been working hard on his cardio.
No luck for Toifer with that takedown attempt.
A jab lands there for Falcon.
Falcon is really dominating this fight. Is there anything that Toifer can do to turn this around?
Nice sprawl there from Falcon as Toifer shoots in.
We've had a slow start to the round here - hopefully the action picks up.
Toifer shoots in for a takedown. "I don't think so" says Falcon as he avoids it easily.
Ethan Falcon has stuffed three takedown attempts in the round now. That's going to take a lot out of Myke Toifer.
A combination from Falcon does no damage.
Falcon fakes a jab and scores with a low kick.
Ethan Falcon is looking to throw some combinations by the looks of things.
Toifer shoots in for a takedown - he's clinched up with Falcon but Falcon pushes him off and we're back to square one.
Ethan Falcon is winning the standup battle so far.
Toifer is breathing heavily.
That's one minute gone in the round.
Falcon looking to score a takedown here. Toifer is defending well but Falcon drives through and ends up in Toifer's guard.
Toifer is looking to cinch up a triangle. Falcon throws the leg off to one side though and gets in tight to Toifer's body to avoid the submission. Toifer has instead reached around Falcon's neck and now has a guillotine! Oh, this is biiiig trouble! Toifer arches his back and squeezes and forces the tap from his hapless opponent.
Ladies and gentlemen, after 1:33 of round 2, we have a winner by way of Submission (Guillotine). Myke Toifer!
|
|
|
|
|
|
|
|
|
|
|
|
|
|
|
|
|
|
|
|
|
|
|
| S |
C
A |
G |
S |
C
B |
G |
|
S |
C |
G |
|
energy
A | B |
|
hype
A | B |
|
pop
A | B |
|
mgr
A | B |
|
FIGHT
RATING
39% |
|
|
|
|
|
|
|
Undercard bout
|
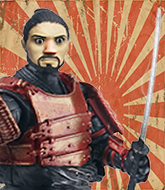
Coming up we have a super heavyweight MMA rules bout between Kyato Sakunariatoyu (ranked 0 p4p, 0 weight class) and Josh Garnett (ranked 0 p4p, 0 weight class). Josh Garnett will no doubt be looking to use his reach advantage to good effect.
 |
|
 |
| 198 cm
27
280 lbs
3 - 5 - 0 |
|
225 cm
26
300 lbs
2 - 4 - 0 |
Good takedowns
Brawler
Very quick |
|
Good wrestler
Counter fighter
Determined |
|
| |
|
Ladies and gentlemen. This fight is 3 rounds, in the super heavyweight division.
Introducing the fighter to my left, fighting out of the red corner.
With a record of
3 - 5 - 0, fighting out of Tokyo, Kyato Sakunariatoyu!
And introducing the fighter to my right, fighting out of the blue corner.
With a record of
2 - 4 - 0, fighting out of Tokyo, Josh Garnett!
The judges for this bout are Shigeki Fujiwara, Kenichi Hosakawa and Shirou Masuda.
The bell rings for round one and we are underway!
Sakunariatoyu darts in and lands a nice takedown into half guard.

Garnett makes some distance and scrambles quickly back to his feet. Nice work!
Sakunariatoyu drives through with a really nice takedown into side control.
The fighters are pressed up against the cage, both looking to find a bit of space to work.
We've seen a great period of action over the last minute or so - credit to both fighters for going all out!
Garnett is trying to improve his position.
Sakunariatoyu scores with a couple of nice shots to the head there. The referee takes a look at Garnett to see if he's OK.
Sakunariatoyu lands a few punches from side control.

Garnett is rocked!
Sakunariatoyu working the ground and pound from side control.
Garnett is still in real trouble! Can Sakunariatoyu finish him?
Sakunariatoyu scores with a big shot from side control... and another... and another! Oh Garnett is done here - save him referee! More strikes land and eventually the ref does step in and Sakunariatoyu can finally stop beating on his defenseless opponent!
Ladies and gentlemen, after 1:58 of round 1, we have a winner by way of TKO (Strikes). Kyato Sakunariatoyu!
An out of breath Kyato Sakunariatoyu thanked his loyal fans in his post fight interview, giving them credit for his success over the course of his career.
|
|
|
|
|
|
|
|
|
|
|
|
|
|
|
|
|
|
|
|
|
|
|
| S |
C
A |
G |
S |
C
B |
G |
|
S |
C |
G |
|
energy
A | B |
|
hype
A | B |
|
pop
A | B |
|
mgr
A | B |
|
FIGHT
RATING
100% |
|
|
|
|
|
|
|
Undercard bout
|
Coming up we have a middleweight MMA rules bout between Alvin Fifka (ranked 0 p4p, 0 weight class) and Mateusz Kowalski (ranked 0 p4p, 0 weight class). Alvin Fifka could well score a knockout today. He has the power to get to Mateusz Kowalski's chin.
 |
|
 |
| 202 cm
25
190 lbs
0 - 1 - 0 |
|
177 cm
27
180 lbs
4 - 5 - 0 |
BJJ Purple Belt
Solid boxing
Granite chin |
|
Good wrestler
Brawler
Good gas tank |
|
| |
|
Ladies and gentlemen. This fight is 3 rounds, in the middleweight division.
Introducing the fighter to my left, fighting out of the red corner.
With a record of
0 - 1 - 0, fighting out of Tokyo, Alvin Fifka!
And introducing the fighter to my right, fighting out of the blue corner.
With a record of
4 - 5 - 0, fighting out of Tokyo, Mateusz Kowalski!
The judges for this bout are Yasuomi Hirokawa, Ren Mimura and Shigeki Sano.
The bell rings for round one and we are underway!

Kowalski takes the fight into the clinch.
Kowalski is pushing Fifka up against the cage, for a bit of lean and pray action. Action being used the in the loosest possible sense of the word.
Kowalski is stalling here. The referee will be looking to step in if he doesn't pick up the pace.
The crowd are getting on Kowalski's back here. They're not happy about his lack of aggression in the clinch.
Fifka jumps guard but Kowalski turns him against the cage and keeps the fight standing.
Kowalski dictating the pace here, as the fighters clinch against the cage.
Kowalski pressing his opponent against the cage.
Some stalling of biblical proportions here from Kowalski.
We've had a slow start to the round here - hopefully the action picks up.
The ref breaks the fighters up, due to lack of action by Mateusz Kowalski.
No luck for Fifka with that takedown attempt.
Kowalski has closed the distance and engaged Fifka in a clinch.
Kowalski avoiding damage.
Fifka wants a takedown.
That's three failed takedown attempts in the round for Alvin Fifka. That's going to take a lot out of him.
That's one minute gone in the round.
Stalling in the clinch from Kowalski.
Kowalski displaying some good clinch control by pressing Fifka up against the cage.
Kowalski continues to stall. The referee tells him to work or he's going to break them up.
Fifka has been working on his balance at Cozad MMA Tokyo, so perhaps that has help him stuff some of the takedown attempts by Kowalski.
The referee is keeping an eye on Kowalski - much more stalling and he will separate the fighters.
Kowalski holding his opponent close, against the cage.
The ref breaks the fighters up, due to lack of action by Mateusz Kowalski.
Kowalski closes the distance and clinches.
Fifka is trying to pull guard but Kowalski turns him against the cage and we stay in the clinch.
Kowalski is struggling to control the position.
Fifka really does look like a pencil wearing a pair of gloves. Let's hope he has a gameplan to suit that ridiculous body shape.
Fifka has dropped down and is looking to force the takedown but it's defended by Kowalski after a bit of a struggle.
The referee is keeping an eye on Kowalski - much more stalling and he will separate the fighters.
Fifka being controlled against the cage.
Fifka fails to pull guard.
That's two minutes gone in the round.
Kowalski stalling here - the referee won't stand for too much of that.
Kowalski taking a break, stalling in the clinch.
The ref breaks the fighters up, due to lack of action by Mateusz Kowalski.
Fifka fails to land the takedown.
The fight moves into the clinch position.
Kowalski blocks a knee to the body. He'll have a nicely bruised forearm in the morning.
Kowalski has Fifka pressed against the cage.
Stalling in the clinch from Kowalski.
Kowalski has Fifka pressed against the cage.
Kowalski stalls.
Kowalski leaning against his opponent.
The ref breaks the fighters up, due to lack of action by Mateusz Kowalski.
Fifka fails with a takedown attempt.
Mateusz Kowalski seems to be the more aggressive standup fighter in this bout.
That's three minutes gone in the round.
Kowalski drives through and clinches with Fifka against the cage.
Kowalski has Fifka pushed against the cage.
Kowalski taking a breather.
The referee calls for Kowalski to work.
We've been informed that Kowalski has been working hard on his conditioning in the buildup to the fight.
Come on Kowalski - let's have some action - none of this stalling nonsense.
Fifka is trying to pull guard but Kowalski turns him against the cage and we stay in the clinch.
Kowalski avoiding damage.
The ref breaks the fighters up, due to lack of action by Mateusz Kowalski.
Fifka gets tackled into the cage by Kowalski. Kowalski maintains the clinch.
Fifka fails to land with a short punch on the inside.
Kowalski's corner are urging him to control the action in the clinch for a moment, rather than mount any serious offense. I'm sure the crowd appreciate those instructions... not.
The two fighters are working to gain dominance in the clinch.
That's four minutes gone in the round.
Kowalski has Fifka pushed against the cage.
Fifka trying to control the position but instead, Kowalski has worked for underhooks and has pushed Fifka into the cage.
Kowalski stalling here - the referee won't stand for too much of that.
Some stalling of biblical proportions here from Kowalski.
The ref breaks the fighters up, due to lack of action by Mateusz Kowalski.
Fifka throws a combination. Kowalski tries to block but a couple of punches get through.
Kowalski moves into the clinch.
Fifka jumps guard but his hands slip and he falls flat on his back. Well, he's made himself look a right mug there, as Kowalski walks away with a smile on his face. Fifka gets slowly back to his feet and shakes his head.
Fifka tries a head kick but it misses.
The crowd thankful this round is nearly over.
Fifka gets tackled into the cage by Kowalski. Kowalski maintains the clinch.
This is a great period of action - very entertaining stuff!
Kowalski stalls.
Fifka wants to stall.
And thats the end of the round the fighters go back to their corners.
Mateusz Kowalski dominated that round.
The minute break is over - no more time for sponges and pep talks - back to the action!
Kowalski drives through and clinches with Fifka against the cage.
Kowalski is struggling to control the position.
Fifka letting Kowalski take a breather here.
Kowalski holding his opponent close, against the cage.
Kowalski slowing the pace effectively.
The ref breaks the fighters up, due to lack of action by Mateusz Kowalski.
Fifka tries to clinch up but Kowalski circles away and keeps his distance.
Kowalski takes the fight into the clinch.
The pace really dropping off here, momentarily.
We've had a slow start to the round here - hopefully the action picks up.
Kowalski taking a breather.
Fifka is trying to slow down the pace in the clinch, to catch his breath.
Fifka has had enough of the clinch but Kowalski keeps him there for the moment.
That's one minute gone in the round.
Fifka letting Kowalski take a breather here.
The pace really dropping off here, momentarily.
Fifka goes for a takedown in the clinch but Kowalski prevents it.
Kowalski has been the more effective fighter overall so far.
Kowalski is pushing Fifka up against the cage, for a bit of lean and pray action. Action being used the in the loosest possible sense of the word.
Fifka tries to take the fight to the ground by pulling guard but can't manage it.
The referee is keeping an eye on Kowalski - much more stalling and he will separate the fighters.
The ref breaks the fighters up, due to lack of action by Mateusz Kowalski.
Kowalski avoids the head kick by Fifka.
Kowalski lets it all go there with a big combo counter but none of the punches connected.
Fifka shoots in and drives through. Kowalski sprawls well.
That's three failed takedown attempts in the round for Alvin Fifka. That's going to take a lot out of him.
Kowalski moves into the clinch.
The referee is keeping an eye on Kowalski - much more stalling and he will separate the fighters.
Fifka missing with knees to the body.
That's two minutes gone in the round.
Kowalski dictating the pace here, as the fighters clinch against the cage.
Fifka letting Kowalski take a breather here.
Kowalski receives a warning from the referee for stalling.
Kowalski taking a breather.
Fifka goes for a takedown attempt but Kowalski pushes him away and we're back to fighting at a distance.
Fifka wants to clinch up but Kowalski keeps it at a distance.
Kowalski is loading up here, looking for a big counter of his own.
Fifka tries to score a power double leg takedown but Kowalski sees that one coming and sprawls well. That will dishearten Fifka somewhat.
Fifka gets tackled into the cage by Kowalski. Kowalski maintains the clinch.
Kowalski is clearly stalling here... Pick up the pace son.
Stalling in the clinch from Kowalski.
That's three minutes gone in the round.
The ref breaks the fighters up, due to lack of action by Mateusz Kowalski.
Kowalski clinches with his opponent.
Kowalski stalling here - the referee won't stand for too much of that.
Some stalling of biblical proportions here from Kowalski.
The referee calls for Kowalski to work.
Fifka tries to land knees in the clinch but Kowalski avoids the damage to the body.
Kowalski holding his opponent close, against the cage.
Kowalski stalling in the clinch.
The ref breaks the fighters up, due to lack of action by Mateusz Kowalski.
Kowalski moves into the clinch.
Kowalski dictating the pace here, as the fighters clinch against the cage.
Fifka jumps guard but his hands slip and he falls flat on his back. Well, he's made himself look a right mug there, as Kowalski walks away with a smile on his face. Fifka gets slowly back to his feet and shakes his head.
Kowalski takes the fight into the clinch.
Some stalling of biblical proportions here from Kowalski.
That's four minutes gone in the round.
The pace slowing considerably in the clinch, as Kowalski takes a break from that fighting nonsense to think about the finer things in life.
The step up in weight doesn't seem to be a problem for Kowalski. He's performing admirably here against the bigger man.
Kowalski just leaning against Fifka, taking a breather.
Kowalski leaning his opponent against the cage.
The ref breaks the fighters up, due to lack of action by Mateusz Kowalski.
Fifka fails with a rather predictable takedown attempt.
Fifka throws a shot to the body.
Kowalski moves into the clinch.
A bit of stalling here from Kowalski.
Kowalski controlling the action here for a moment.
Kowalski stalls.
The crowd thankful this round is nearly over.
Kowalski taking a break, stalling in the clinch.
Fifka goes for a takedown in the clinch but Kowalski prevents it.
And thats the end of the round the fighters go back to their corners.
Mateusz Kowalski showed his class in that round. I'd imagine he'll take it on all the scorecards.
That's time! Fifka's corner gives him a slap on the ass as he gets ready to fight. Let's hear some noise people - this is the final round!

Kowalski darts in and clinches Fifka up against the cage.
Both guys are working to get underhooks.
Kowalski effectively controlling the action here.
Kowalski is struggling to control the position.
The ref breaks the fighters up, due to lack of action by Mateusz Kowalski.
Kowalski gets in close and instigates a clinch.
The referee calls for Kowalski to work.
Kowalski is stalling here.
Fifka letting Kowalski take a breather here.
We've had a slow start to the round here - hopefully the action picks up.
Kowalski is clearly stalling here... Pick up the pace son.
Kowalski just leaning against Fifka, taking a breather.
That's one minute gone in the round.
The ref breaks the fighters up, due to lack of action by Mateusz Kowalski.
Kowalski takes the fight into the clinch.
The referee is keeping an eye on Kowalski - much more stalling and he will separate the fighters.
Kowalski has Fifka pushed against the cage.
Kowalski is clearly stalling here... Pick up the pace son.
Kowalski has Fifka pressed against the cage, preventing Fifka from circling away and getting back to striking at range.
Fifka tries to jump guard but he falls flat on his backside. Kowalski smiles and moves away.
Kowalski darts in and clinches Fifka up against the cage.
Kowalski has Fifka pushed against the cage.
Fifka trying to control the position but instead, Kowalski has worked for underhooks and has pushed Fifka into the cage.
That's two minutes gone in the round.
Fifka being controlled against the cage.
Kowalski is clearly stalling here... Pick up the pace son.
The ref breaks the fighters up, due to lack of action by Mateusz Kowalski.
Kowalski takes the fight into the clinch.
Fifka jumps guard but Kowalski stands there with Fifka around his waist. Fifka gives up and drops back to his feet. We remain in the clinch.
Kowalski stalling the fight.
Kowalski pressing his opponent against the cage.
Kowalski is stalling here. The referee will be looking to step in if he doesn't pick up the pace.
Kowalski is stalling here.
That's three minutes gone in the round.
Kowalski content to slow the pace in the clinch.
The ref breaks the fighters up, due to lack of action by Mateusz Kowalski.
Kowalski has Fifka up against the cage in a clinch.
Kowalski stalling.
Fifka is looking to control Kowalski's arms but Kowalski gets an underhook and turns him. Now Fifka has his back to the cage.
Kowalski taking a breather.
Kowalski avoiding damage.
The fighters are pressed against the cage, as the pace of the fight slows.
Fifka tries to pull guard but can't drag his opponent to the mat. Kowalski just stands there and leans against the cage.
That's three failed takedown attempts in the round for Alvin Fifka. That's going to take a lot out of him.
Kowalski blocks a punch to the side of the head.
Mateusz Kowalski seems to be working more effectively in the clinch in the fight so far.
Kowalski is stalling here. The referee will be looking to step in if he doesn't pick up the pace.
That's four minutes gone in the round.
Kowalski has Fifka pressed against the cage.
The ref breaks the fighters up, due to lack of action by Mateusz Kowalski.
Nice takedown defense from Kowalski. No joy for Fifka on that attempt.
Fifka lands with a two punch combination before moving back out of range.
Fifka looking to land some kicks to the body here.
Kowalski forces Fifka back against the cage and clinches.
Kowalski has Fifka pressed against the cage.
Kowalski avoiding damage.
Fifka can't break the clinch.
Fifka tries to pull guard but Kowalski holds him up against the cage and eventually Fifka drops back down to his feet.
Fifka is trying to force a seperation but Kowalski has the dominant position.
Boooooooooooooooooooo!!! God, this has been a terrible round. Come on you two, sort yourselves out!
Kowalski is stalling here.
The pace slowing considerably in the clinch, as Kowalski takes a break from that fighting nonsense to think about the finer things in life.
And that's the end of the fight!
Mateusz Kowalski comfortably won the final round on my scorecard.
I've got Kowalski winning every round here. Surely the decision will go his way and he'll pick up a well deserved decision victory. Over to the ring announcer for the scorecards.
Ladies and gentlemen, after 3 rounds of action, we go to the scorecards for a decision.
Judge Yasuomi Hirokawa scores the fight 27:30
Judge Ren Mimura scores the fight 27:30
Judge Shigeki Sano scores the fight 27:30
In favor of your winner, by unanimous decision... Mateusz Kowalski!
A very excited looking Mateusz Kowalski made sure he remembered to thank all the fans both in the arena and on the internet. He said all the coolest people spend all day on MMA websites, which got a big reaction.
|
|
|
|
|
|
|
|
|
|
|
|
|
|
|
|
|
|
|
|
|
|
|
| S |
C
A |
G |
S |
C
B |
G |
|
S |
C |
G |
|
energy
A | B |
|
hype
A | B |
|
pop
A | B |
|
mgr
A | B |
|
FIGHT
RATING
30% |
|
|
|
|
|
|
|
Undercard bout
|
Coming up we have a light heavyweight MMA rules bout between David Blake (ranked 0 p4p, 0 weight class) and Runar Styrjoeld (ranked 0 p4p, 0 weight class). Over to our ring announcer for the fighter introductions!
 |
|
 |
| 188 cm
18
210 lbs
2 - 2 - 0 |
|
196 cm
20
215 lbs
1 - 2 - 0 |
BJJ White Belt
Solid boxing
Self confident |
|
BJJ White Belt
Decent boxing
Heavy handed |
|
| |
|
Ladies and gentlemen. This fight is 3 rounds, in the light heavyweight division.
Introducing the fighter to my left, fighting out of the red corner.
With a record of
2 - 2 - 0, fighting out of Tokyo, David Blake!
And introducing the fighter to my right, fighting out of the blue corner.
With a record of
1 - 2 - 0, fighting out of Tokyo, Runar Styrjoeld!
The judges for this bout are Shigeki Sano, Yuuki Gou and Shirou Masuda.
The bell rings for round one and we are underway!
Blake throws an uppercut from half a mile away. Styrjoeld sees it coming and avoids it easily.
Styrjoeld throws a hook but Blake blocks it.
Blake doesn't succeed with the takedown
enabling Styrjoeld to counter with a crisp jab.
Styrjoeld swings wildly with a right hand that was never going to find it's target.
Styrjoeld showing good head movement there, avoiding the strikes from Blake.

Blake moves into the clinch.
Blake misses with a short punch on the inside.
Blake lands a hook to the body. It's hard to tell if that hurt Styrjoeld or not.
An uppercut on the inside fails to land for Blake.
Styrjoeld tries a shoulder strike but it doesn't do any damage.
Styrjoeld throws a head punch that misses.
We've had a slow start to the round here - hopefully the action picks up.
Styrjoeld lands a shoulder strike.
Blake definitely looks more muscular than last time we saw him fight.
An uppercut on the inside fails to land for Blake.
Styrjoeld working aggressively here.
Styrjoeld misses with some punches.
A head punch blocked on the inside by Blake.
Styrjoeld lands a nice uppercut.
We've seen a great period of action over the last minute or so - credit to both fighters for going all out!
Styrjoeld working aggressively here.
That's one minute gone in the round.
Blake swings wildly with an uppercut but Styrjoeld uses good head movement to avoid it.
An uppercut on the inside fails to land for Blake.
Styrjoeld misses with the head strike.
Styrjoeld swings wildly with an uppercut but Blake uses good head movement to avoid it.
Blake swings away with an uppercut that misses.
An uppercut on the inside fails to land for Styrjoeld.
Blake blocking some punches.
Blake misses with a hook from the clinch.
A short right hand to the side of the head by Styrjoeld.
Blake missing with knees to the body.
Blake misses with a punch on the inside.
Styrjoeld lands a short shot on the inside that snaps the head of Blake backwards.
Styrjoeld scores with an uppercut up the middle.
Blake lands with a quick shot inside that doesn't really do much damage.
Styrjoeld working on landing some head shots here - that one got through nicely.
Styrjoeld lands a right hand.
The crowd are loving this. Great action here.
Blake blocks a couple of punches on the inside.
Styrjoeld doesn't land with the attempted body shot.
That's two minutes gone in the round.
An uppercut on the inside fails to land for Styrjoeld.
Styrjoeld misses with a hook from the clinch.
Styrjoeld lands with a quick shot inside that doesn't really do much damage.
A short left from Blake.
A head punch on the inside from Styrjoeld fails to land.
Blake blocks a punch to the side of the head.
An uppercut on the inside fails to land for Styrjoeld.
Blake misses with a hook from the clinch.
Styrjoeld misses with the head strike.
An uppercut on the inside fails to land for Styrjoeld.
Styrjoeld misses with a hook to the ribs.
Blake blocks a couple of punches on the inside.

Styrjoeld manages to break the clinch.
Styrjoeld misses with a wild body shot.
Blake tries to counter with a takedown but Styrjoeld is quick to defend against it.
Blake has taken the fight to the clinch.
Styrjoeld blocking some punches.
Blake can't find room to land a body shot as Styrjoeld controls the action.
Styrjoeld breaks the clinch.
Blake tries to close the distance and clinch up but Styrjoeld swats him away and circles back towards the center.
That's three minutes gone in the round.
A looping hook to the body misses from Styrjoeld. Blake does a little dance to reset his feet.
Blake gets to the clinch - let's see what his plan is here.
Blake misses the knee to the body. Nice hip positioning from Styrjoeld.
Styrjoeld misses with a short punch on the inside.
Blake throws a head punch that misses.
Blake lands a nice uppercut.
Styrjoeld blocks a punch to the side of the head.
An uppercut on the inside fails to land for Styrjoeld.
Styrjoeld throws a head punch that misses.
Styrjoeld swings away with an uppercut that misses.
Styrjoeld misses with a hook from the clinch.
Styrjoeld gets double underhooks to prevent a takedown attempt from Blake.
Styrjoeld lands a shoulder strike.
Blake blocks a couple of punches on the inside.
Blake takes a shot to the head.
Blake working aggressively here.
We've been informed that Styrjoeld has been working hard on his conditioning in the buildup to the fight.
Blake misses with some punches.
Blake misses with a punch on the inside.
That's four minutes gone in the round.
Blake scores with a shot to the side of Styrjoeld's head.
We've seen a great period of action over the last minute or so - credit to both fighters for going all out!
Styrjoeld swings wildly with an uppercut but Blake uses good head movement to avoid it.
Blake blocks a punch to the side of the head.
Blake lands a shoulder strike that jolts his opponent's head backwards.
Styrjoeld working aggressively here.
A short right hand to the side of the head by Blake.
A head punch blocked on the inside by Blake.
Styrjoeld lands punches inside but they're not really causing much damage.
Still in the clinch, Styrjoeld scores with a nice short uppercut.
A nice left hand lands by Blake.
Styrjoeld lands with a right to the head.
Styrjoeld gets through Blake's defenses to land a nice punch to the side of the head.
Styrjoeld lands a right hand.
Blake lands a right uppercut that snaps the head of Styrjoeld backwards.
The crowd applaud the fighters' efforts here as the round comes to an end.
Blake jumps guard but his hands slip and he falls flat on his back. Well, he's made himself look a right mug there, as Styrjoeld walks away with a smile on his face. Blake gets slowly back to his feet and shakes his head.
That's three failed takedown attempts in the round for David Blake. That's going to take a lot out of him.
Blake closes the distance but Styrjoeld moves to the side
and Styrjoeld makes him pay by landing a nice hook to the body before moving out of range.
Styrjoeld misses with a series of wild punches.
And thats the end of the round the fighters go back to their corners.
Runar Styrjoeld dominated that round.
That's the end of the interval. I'm sure that seemed a lot quicker than a minute for our two fighters! Back to the action.
Blake has his head slapped from side to side by a 3 punch combination. That must have hurt him.
Blake tries to clinch but Styrjoeld is having none of it.
David Blake is looking to throw some combinations by the looks of things.
Boom, another hit is landed. "You're gunna get knocked out" taunts Styrjoeld, as that shot connected.
Blake tries to clinch up.
Blake tries to clinch but Styrjoeld moves out of range.
Blake is looking to clinch but Styrjoeld is avoiding it.
Blake ducks under an overhand right and circles away with a smile on his face.
Styrjoeld throws a series of punches but Blake moves out of range.
Styrjoeld scores with a hook.
The fight stays on the outside here - Blake looks like he's thinking about clinching though.
Blake ducks under a wild hook from Styrjoeld.
A little feinted left hand from Blake on the counter but he doesn't commit to it.
We've had a slow start to the round here - hopefully the action picks up.
The fight stays on the outside here - Blake looks like he's thinking about clinching though.
Styrjoeld scores with a nice strike.
Nice shot lands for Styrjoeld.
Runar Styrjoeld seems to be getting the better of the standup.
Blake tries to clinch but Styrjoeld is having none of it.
That's one minute gone in the round.
Styrjoeld lands an overhand left. A wild punch that just about connected.
Blake tries to clinch up.
It seemed like Styrjoeld was going to counter with the hook but didn't fully commit to it.
Blake wants to clinch
and Styrjoeld counters with a nice uppercut.
Styrjoeld looks to land a combination. Blake sees it coming but can only parry a couple of the shots.

Blake is rocked!
Styrjoeld lands with a hook. Blake tried to avoid it but it clipped the top of his head.
Oh Blake is still all over the place! His legs are completely gone! Will he be able to recover?!!
Some wild striking there from Styrjoeld.
A jab from Styrjoeld finds it's way through Blake's defenses.
Styrjoeld bobs and weaves and unloads with a good uppercut.
Styrjoeld throws a lazy right hand but Blake sees it coming a mile off and sidesteps it easily.
Styrjoeld pushing out the jab but it's not landing.
Blake uses some good footwork to avoid the body shot by Styrjoeld.
Blake thows a left - swing and a miss!
Fantastic stuff here - a very entertaining period of action, which has drawn cheers from the crowd.
Styrjoeld loads up on a big right hand but Blake slips the punch.
Blake seems to have got his legs back now.
Nice defenses there by Blake.
Styrjoeld might want to mix his strikes up a bit more. He's just going for head shots at the moment and that can become a bit predictable.
Blake wants to clinch up but Styrjoeld keeps it at a distance.
Styrjoeld ducks down and throws a hook to the body.
Styrjoeld moves into range and throws a combination. A nice jab followed by a hook to the body.
Blake clinches with his opponent.
That's two minutes gone in the round.
Styrjoeld blocks a punch to the side of the head.
Styrjoeld throws a punch but it's blocked by Blake.
Blake blocks a couple of punches on the inside.
Styrjoeld swings away with an uppercut that misses.
Blake pressing his opponent against the cage.

Blake breaks from the clinch.
Blake tries to clinch up.
And an attempted straight right on the counter from Styrjoeld! But no joy.
Nice sprawl there from Styrjoeld as Blake shoots in.
Blake drives through and clinches with Styrjoeld against the cage.
Blake breaks the clinch and we're back to striking at distance.
Styrjoeld scores with a jab to the body.
Blake gets a clinch.
Styrjoeld misses with a hook from the clinch.
Styrjoeld misses with a punch on the inside.
Blake blocks a punch to the side of the head.
Styrjoeld misses with a short punch on the inside.
Blake misses with a short punch on the inside.
That's three minutes gone in the round.
Blake blocks a punch to the side of the head.
Blake blocks an uppercut.
Styrjoeld has been the more effective fighter overall so far.
Blake has a couple of punches blocked by Styrjoeld.
Styrjoeld working on landing some head shots here - that one got through nicely.
Blake blocking some punches.
Styrjoeld misses with a hook from the clinch.
Styrjoeld breaks from the clinch.
Styrjoeld throws a good cross that connects.
Blake bobs and weaves well there to avoid the strikes.
Blake has Styrjoeld up against the cage in a clinch.
Styrjoeld working aggressively here.
Styrjoeld has used his reach advantage pretty well so far tonight.
Styrjoeld throws a head punch that misses.
An uppercut on the inside fails to land for Styrjoeld.
Styrjoeld blocks an uppercut.
Styrjoeld misses with a body punch.
Blake blocks an uppercut.
Blake wants to stall.
That's four minutes gone in the round.
Blake looking to stall.
Styrjoeld lands a shoulder strike.
Styrjoeld lands on the inside with an uppercut.
Styrjoeld lands with a right to the head.
We've seen a great period of action over the last minute or so - credit to both fighters for going all out!
Blake is working hard here but doesn't seem to be able to control effectively, up against the cage.
Styrjoeld tries to land a shot to the body but it's blocked.
Blake blocks a couple of punches on the inside.
Styrjoeld throws a punch but it's blocked by Blake.
Styrjoeld lands a body shot.
A head punch on the inside from Styrjoeld fails to land.
A head punch blocked on the inside by Blake.
Styrjoeld misses with a hook from the clinch.
Styrjoeld lands a shoulder strike.
Blake blocks a couple of punches on the inside.
Styrjoeld tries a shoulder strike but it doesn't do any damage.
And thats the end of the round the fighters go back to their corners.
Runar Styrjoeld showed his class in that round. I'd imagine he'll take it on all the scorecards.
The corners get their ten second warning. Both fighters stand from their stools and stare eachother down, ready to get back to the action. This is the final round!
Blake changes levels and looks for a double leg takedown. Styrjoeld tries to avoid it but Blake manages to keep hold of a leg and drag Styrjoeld to the ground. Styrjoeld escapes though and pops straight back up to his feet.
Styrjoeld gets caught napping as Blake dives in and scores a takedown. Styrjoeld manages to retain guard.
Styrjoeld wriggles free and stands up.
Blake wants to clinch up but Styrjoeld keeps it at a distance.
Blake tries to close the distance and clinch but Styrjoeld swats him to one side with an open hand palm strike and circles away.
Blake walks straight into a jab right on the nose. That one stung - he's blinking and trying to clear his head.
Styrjoeld paws at his opponent with the jab and then lunges in with a straight, right on the button.
Blake fails in his attempt to clinch.
Styrjoeld throws a series of punches but Blake moves out of range.
The fans in attendance giving it up for the two fighters, who have really let it all hang out in the last minute or so!
Blake misses with a two punch combination.
Styrjoeld swings away with a counter right hand but no contact made.
Blake throws a combination but comes up with nothing but fresh air.
The fight stays on the outside here - Blake looks like he's thinking about clinching though.
Blake tries to clinch up against the cage, rushing in to close the distance. Styrjoeld manages to break the clinch and circles back to the middle of the mat.
Blake moves to clinch but Styrjoeld breaks away
and Styrjoeld counters with a quick right hand to the jaw.
Blake tries to clinch up.
Blake throws a nice looking combination but Styrjoeld bobs and weaves to avoid any damage.
That's one minute gone in the round.
Blake has his head snapped back a nice jab. A little nod from Blake there as he acknowledges the shot.
Blake wants to clinch.
Styrjoeld dips down and scores with a jab to the body.
Styrjoeld lands with an uppercut that bounces Blake off the cage and back into range.
Blake is looking to clinch.
Styrjoeld scores with a nice looking left hook and follows it up with an uppercut!
Blake throws a right and a left that Styrjoeld avoids nicely.
Styrjoeld lunges in with an uppercut that skims his opponent's chin.
Styrjoeld throws a combination but it was largely blocked by Blake.
Blake tries to clinch but fails miserably
enabling Styrjoeld to counter with a crisp jab.
Blake takes a shot to the nose. Hopefully that hasn't broken it.
David Blake seems to be the more aggressive standup fighter in this bout.
This is a great period of action - very entertaining stuff!
Blake tries to close the distance and clinch but Styrjoeld swats him to one side with an open hand palm strike and circles away.
Styrjoeld steps in with a hook that catches Blake right on the chin and knocks him to the floor! Styrjoeld follows him down with more strikes and that's all she wrote! Blake looks absolutely devastated.
Ladies and gentlemen, after 2:56 of round 3, we have a winner by way of TKO (Strikes). Runar Styrjoeld!
|
|
|
|
|
|
|
|
|
|
|
|
|
|
|
|
|
|
|
|
|
|
|
| S |
C
A |
G |
S |
C
B |
G |
|
S |
C |
G |
|
energy
A | B |
|
hype
A | B |
|
pop
A | B |
|
mgr
A | B |
|
FIGHT
RATING
85% |
|
|
|
|
|
|
|
Undercard bout
|
Coming up we have a welterweight MMA rules bout between Katsu Kazuhiro (ranked 0 p4p, 0 weight class) and Gastro Pastro (ranked 0 p4p, 0 weight class). Kazuhiro comes to the cage accompanied by BUSHIDO. Both fighters look fresh as a daisy as they make their way towards the cage.
 |
|
 |
| 178 cm
19
178 lbs
2 - 0 - 0 |
|
196 cm
25
175 lbs
0 - 1 - 0 |
BJJ Blue Belt
Solid boxing
Self confident |
|
BJJ Brown Belt
Brawler
Solid chin |
|
| |
|
Ladies and gentlemen. This fight is 3 rounds, in the welterweight division.
Introducing the fighter to my left, fighting out of the red corner.
With a record of
2 - 0 - 0, fighting out of New York, Katsu Kazuhiro!
And introducing the fighter to my right, fighting out of the blue corner.
With a record of
0 - 1 - 0, fighting out of Tokyo, Gastro Pastro!
The judges for this bout are Yuuki Gou, Yukihiro Yamamoto and Ren Mimura.
The bell rings for round one and we are underway!
Pastro throws a looping left and ducks down for a takedown. He's got his arms around Kazuhiro's waist but Kazuhiro gets an underhook and avoids the takedown by throwing Pastro off to one side.
Kazuhiro waving his hands out in front of him, looking to distract Pastro.
Pastro gets his head snapped back by a nice shot there.
Kazuhiro misses the jab.
Pastro goes for a double leg but Kazuhiro avoids the attempt and the two fighters end up clinched against the cage as Kazuhiro continues to drive forward.
Kazuhiro is looking to counter with a shot to the body.
Kazuhiro ducks low and lands a nice hook to the body of his opponent.
Pastro tries to drive through with a takedown attempt but Kazuhiro defends well and Pastro ends up having to push Kazuhiro into the cage where they will battle it out in the clinch.
Katsu Kazuhiro has stuffed three takedown attempts in the round now. That's going to take a lot out of Gastro Pastro.
Kazuhiro throws a looping overhand right but Pastro ducks down to avoid it.
Pastro is looking for the big counter here.
A swing and a miss from Kazuhiro.
Katsu Kazuhiro seems to be the more aggressive standup fighter in this bout.
The crowd cheers as Kazuhiro lands an impressive looking overhand right. Pastro doesn't seem phased though.
A telegraphed takedown attempt from Pastro is defended easily by Kazuhiro.
Kazuhiro fakes a jab and then connects with a hook.

It looks like Gastro Pastro has been cut.
That's one minute gone in the round.
Pastro has his hands up protecting his head but a hook from Kazuhiro finds it's way round the side to connect with Pastro's head.
Pastro staying out of range there.
Kazuhiro just misses with a punch to the body.
Kazuhiro throws the left hand but Pastro avoids the punch easily.
Pastro with a lazy takedown attempt
and Kazuhiro connects with a straight left hand counter down the middle.
Kazuhiro misses with a straight right.
Pastro doesn't succeed with the takedown
and Kazuhiro counters with a quick right hand to the jaw.
Kazuhiro is really head hunting here, hardly looking to strike to the body at all.
Pastro fails with a rather predictable takedown attempt.
Kazuhiro throws a body punch but Pastro moves out of range.
Kazuhiro throws a body punch but Pastro moves out of range.
Kazuhiro fails to land with a series of punches.
Pastro throws out a counter right but Kazuhiro avoids it with no problem.
Pastro doesn't succeed with the takedown
and Kazuhiro connects with a straight left hand counter down the middle.
That's two minutes gone in the round.
Kazuhiro throws a combination but comes up with nothing but fresh air.
The crowd are loving this. Great action here.
Pastro doesn't succeed with the takedown
and Kazuhiro counters with a right hand to the body.
Pastro shoots in for a takedown - he's clinched up with Kazuhiro but Kazuhiro pushes him off and we're back to square one.
Kazuhiro keeps his opponent at a distance with a nice jab.
Pastro gets his takedown attempt stuffed easily

and Pastro is countered with a crisp right hand from Kazuhiro that sends him to the canvas! Kazuhiro follows him to the mat into side control.
Pastro is rocked!
Kazuhiro scoring with punches from side control.
Pastro is still in real trouble! Can Kazuhiro finish him?

Kazuhiro is trying to get an arm triangle but Pastro is defending well.
Kazuhiro working hard here to secure a kimura but he's not really in the right position for it.
Pastro seems to have recovered his senses.
That's three minutes gone in the round.
Pastro regains half guard, as Kazuhiro was trying to land strikes.
Pastro trying to control from the bottom.
Kazuhiro looks towards his corner to check for any instructions. The corner give him nothing to work with, so he cracks Pastro with a short hammerfist. I guess that's as good as any advice he could get in this position.
Kazuhiro keeping composed on the top, looking to control the action.
That's four minutes gone in the round.
A few boos can be heard. I'm sure they will multiply if the fighters don't pick up the pace.
Kazuhiro stops Pastro from getting back to his feet.
Kazuhiro sitting in half guard, looking to land shots. Pastro defending well though.
Pastro is pressing down on Kazuhiro's left leg trying to get back to full guard. He's managed it.
Pastro is looking for a triangle here but Kazuhiro uses the submission attempt to pass into side control.
Kazuhiro in side control lands a decent elbow.
And thats the end of the round the fighters go back to their corners.
Katsu Kazuhiro dominated that round.
The cut man is working on Gastro Pastro's cut.
That's the end of the interval. I'm sure that seemed a lot quicker than a minute for our two fighters! Back to the action.
Pastro on the wrong end of a nice jab.
Pastro takes a big uppercut there. He seems a bit wobbly but no, he's OK.
Pastro gets his takedown attempt stuffed easily
and Pastro takes a counter punch right on the button for his troubles.
Kazuhiro swings away but doesn't land with a series of punches.
It looks like Kazuhiro has been trying to sharpen up his punching technique, as it looks crisper than last time we saw him.
A slow jab from Kazuhiro misses its intended target.
Kazuhiro cracks Pastro with a big right hand and Pastro goes down!
The crowd are loving this. Great action here.
Kazuhiro slows down the pace of the fight, as he sits in guard.
The ref warns both fighters not to hold the cage as they work up against the meshing.
Kazuhiro is really dominating this fight. Is there anything that Pastro can do to turn this around?
Pastro throws his legs up looking for a submission but Kazuhiro uses it to pass to side control.
That's one minute gone in the round.
Pastro tries to escape but Kazuhiro is in control.
The fighters are pressed up against the cage, both looking to find a bit of space to work.
Kazuhiro controlling from side mount.
Pastro is positioning himself to get back to half guard.
Kazuhiro is trying to get an arm triangle but Pastro is defending well.
Kazuhiro controls the position.
That's two minutes gone in the round.
The crowd are getting on the fighters' backs, as the pace has dropped off in the last minute or so.

Kazuhiro stands up.
Kazuhiro drops Pastro with a left right combo! Kazuhiro follows him down to the ground into side control.
Kazuhiro tries for an arm triangle. That looks pretty tight to me. Is this one over!?! Possibly, maybe, no Kazuhiro has let go of the choke. Obviously it wasn't as tight as we thought!
Kazuhiro just content to control the position.
Pastro is trying to get back to his feet.
That's three minutes gone in the round.
Kazuhiro throwing strikes but missing, from side control.
Katsu Kazuhiro overall seems to be getting the better of the ground position in the fight so far.
Pastro is trying to control Kazuhiro's posture but Kazuhiro avoids it.
Kazuhiro stands up and we're back to a striking position.
Kazuhiro connects with a body shot.
Pastro misses with a takedown
and Kazuhiro connects with a straight left hand counter down the middle.
That has opened up Gastro Pastro's cut even more.
Pastro shoots in but doesn't get the takedown
and Kazuhiro lands a stunning uppercut that sends Pastro to the mat!
Katsu Kazuhiro has stuffed three takedown attempts in the round now. That's going to take a lot out of Gastro Pastro.
Wooooo! Give it up for these two warriors! They are putting on a show!
Pastro trying to hold on to Kazuhiro's head to control him but Kazuhiro postures up.
That's four minutes gone in the round.
Kazuhiro takes advantage of the dominant position to land a couple of big hammer fists.
Kazuhiro is controlling the pace.
Kazuhiro lands strikes from half guard.
Kazuhiro stalling.
And thats the end of the round the fighters go back to their corners.
Katsu Kazuhiro dominated that second round.
The cut man is working on Gastro Pastro's cut.
Well, the break between rounds is over. Let's get back to the scrappin! This is the final round!
Kazuhiro getting the better of the striking in that exchange.
Pastro shoots in for a takedown but Kazuhiro shows good takedown defense there and keeps this one on the feet.
Kazuhiro closes the distance and presses his opponent up against the cage.
Kazuhiro is leaning against Pastro and scores with a nice uppercut to the body.
A right hook to the body lands for Kazuhiro.
A left hand lands to the body for Kazuhiro.
Kazuhiro lands a body punch.
With the fighters clinched against the cage, Kazuhiro creates a bit of distance for himself and scores with a nice uppercut.
Kazuhiro pushes Pastro back against the cage and unloads with a body punch.
We've had a slow start to the round here - hopefully the action picks up.
Good body shot from Kazuhiro.
Kazuhiro escapes the clinch and we're back to striking.
Pastro is trying desperately to land a takedown but Kazuhiro is having absolutely none of it. This is turning into a bit of a nightmare for Pastro.
Kazuhiro gets a clinch.
Pastro takes a big intake of breath there - he's definitely tired.
Kazuhiro pushes Pastro back against the cage and lands a hook to the side of the head.
We've seen a great period of action over the last minute or so - credit to both fighters for going all out!
Kazuhiro gets through Pastro's defenses to land a nice punch to the side of the head.
Pastro is a painfully thin specimen of a man. You do wonder whether a good body kick would snap him clean in two.
That's one minute gone in the round.
Kazuhiro presses Pastro against the cage and delivers a mid-strength body shot.
Kazuhiro breaks the clinch and we return to the middle of the mat.
Nice cross by Kazuhiro.
Pastro takes an uppercut right on the button but keeps his composure.
Kazuhiro knocks out Pastro with a massive right hand! The ref tackles Kazuhiro before he can follow up with any more strikes and that's it everyone. Kazuhiro picks up the big W with a huge KO!
Ladies and gentlemen, after 1:26 of round 3, we have a winner by way of KO (Punch). Katsu Kazuhiro!
Katsu Kazuhiro gave a mention to Arcticus University: London in his post fight interview. That will please them (and hopefully generate some sales).
|
|
|
|
|
|
|
|
|
|
|
|
|
|
|
|
|
|
|
|
|
|
|
| S |
C
A |
G |
S |
C
B |
G |
|
S |
C |
G |
|
energy
A | B |
|
hype
A | B |
|
pop
A | B |
|
mgr
A | B |
|
FIGHT
RATING
64% |
|
|
|
|
|
|
|
Undercard bout
|
Coming up we have a heavyweight MMA rules bout between Jack Larsson (ranked 0 p4p, 0 weight class) and Felix Katov (ranked 0 p4p, 0 weight class). Larsson kept the crowd waiting but all that was forgotten when his ring entrance music started. The incomparable musical genius that is BRUTALITY. Well, the cameraman is lingering on a pretty young lady for a bit too long there. Keep your eyes on the prize buddy or you'll miss the fighter intros!
 |
|
 |
| 189 cm
28
255 lbs
7 - 5 - 1 |
|
202 cm
19
265 lbs
3 - 3 - 0 |
Abu Dhabi Champ
Excellent boxer
Cardio machine |
|
Good wrestler
Brawler
Granite chin |
|
| |
|
Ladies and gentlemen. This fight is 3 rounds, in the heavyweight division.
Introducing the fighter to my left, fighting out of the red corner.
With a record of
7 - 5 - 1, fighting out of New York, Jack Larsson!
And introducing the fighter to my right, fighting out of the blue corner.
With a record of
3 - 3 - 0, fighting out of Tokyo, Felix Katov!
The judges for this bout are Sosuke Kotani, Taro Takaoka and Yukihiro Shimada.
The bell rings for round one and we are underway!
Katov takes a shot right to the bread basket.
Larsson drops Katov with a beautiful combination! Katov stares up at his opponent, who ushers him back to his feet - Larsson is looking for the KO!
It looks like Felix Katov has been cut.
Katov switches off momentarily and Larsson cracks him with a monster right hand! Katov topples backwards and makes a semi conscious attempt to cover up, as Larsson dives in to land one more shot, before the referee has time to call the fight. What a finish by Larsson!
Ladies and gentlemen, after 0:09 of round 1, we have a winner by way of KO (Punch). Jack Larsson!
Jack Larsson spent the whole post fight interview bigging himself up. It didn't go down that well with the fans after a while as they thought it was a bit arrogant.
|
|
|
|
|
|
|
|
|
|
|
|
|
|
|
|
|
|
|
|
|
|
|
| S |
C
A |
G |
S |
C
B |
G |
|
S |
C |
G |
|
energy
A | B |
|
hype
A | B |
|
pop
A | B |
|
mgr
A | B |
|
FIGHT
RATING
100% |
|
|
|
|
|
|
|
Undercard bout
|
Coming up we have a middleweight MMA rules bout between Caniel Dormier (ranked 0 p4p, 0 weight class) and Wayde West (ranked 0 p4p, 0 weight class). West has chosen Sober as his entrance music. Both fighters look fresh as a daisy as they make their way towards the cage.
 |
|
 |
| 178 cm
26
180 lbs
5 - 3 - 0 |
|
187 cm
28
194 lbs
15 - 8 - 0 |
Decent wrestler
Brawler
Experienced |
|
BJJ Purple Belt
Excellent MT
Good gas tank |
|
| |
|
Ladies and gentlemen. This fight is 3 rounds, in the middleweight division.
Introducing the fighter to my left, fighting out of the red corner.
With a record of
5 - 3 - 0, fighting out of Tokyo, Caniel Dormier!
And introducing the fighter to my right, fighting out of the blue corner.
With a record of
15 - 8 - 0, fighting out of Tokyo, Wayde West!
The judges for this bout are Tatsuya Matsuyama, Ren Mimura and Yuuki Gou.
The bell rings for round one and we are underway!
West throws a leg kick which misses Dormier's front leg but catches the back leg as Dormier tries to avoid it.

West lands a big head kick that sends Dormier tumbling to the mat! West takes a step backwards and waves Dormier back to his feet - he wants the finish!
Dormier is rocked!

It looks like Caniel Dormier has been cut.
West lands a leg kick that knocks Dormier off balance momentarily.
Oh Dormier is still all over the place! His legs are completely gone! Will he be able to recover?!!
Both fighters circling slowly here as the pace drops. Hopefully one of them does someth.. OOOHHHH!!!! West throws an absolute beast of a head kick! Dormier is done! He's out cold, twisted and contorted up against the cage! Wow!
Ladies and gentlemen, after 0:11 of round 1, we have a winner by way of KO (Head Kick). Wayde West!
Wayde West tried to hype himself up post fight but didn't word it too well and it ended up with him sounding like a bit of a tool.
|
|
|
|
|
|
|
|
|
|
|
|
|
|
|
|
|
|
|
|
|
|
|
| S |
C
A |
G |
S |
C
B |
G |
|
S |
C |
G |
|
energy
A | B |
|
hype
A | B |
|
pop
A | B |
|
mgr
A | B |
|
FIGHT
RATING
100% |
|
|
|
|
|
|
|
Co-main event
|
Coming up we have a lightweight MMA rules bout between Ryo Takajiri (ranked 0 p4p, 0 weight class) and Yolo Yolovski (ranked 0 p4p, 0 weight class). On his way into the cage it seems that Ryo Takajiri has been attacked by a crazed fan! It looks like it might have been the just bleed guy! Luckily Ryo Takajiri seems to be OK! I thought that lunatic was in prison!?
 |
|
 |
| 171 cm
21
163 lbs
8 - 3 - 0 |
|
150 cm
30
145 lbs
11 - 6 - 1 |
BJJ Purple Belt
Great low kicks
Very quick |
|
Good wrestler
Brawler
Powerful |
|
| |
|
Ladies and gentlemen. This fight is 3 rounds, for the lightweight championship of the world!
Introducing the champion to my left, fighting out of the red corner.
With a record of
8 - 3 - 0, fighting out of Tokyo, Ryo Takajiri!
And introducing the challenger to my right, fighting out of the blue corner.
With a record of
11 - 6 - 1, fighting out of Tokyo, Yolo Yolovski!
The judges for this bout are Taro Takaoka, Shigeki Sano and Kenichi Hosakawa.
The bell rings for round one and we are underway!
Takajiri plants his feet and lands a nice head kick!
It looks like Yolo Yolovski has been cut.
Takajiri lands a leg kick that knocks Yolovski off balance momentarily.
Yolovski has managed to clinch.
Yolovski drops down looking for an ankle pick but Takajiri pulls his leg out and moves away.
Yolovski is looking to take this fight into the clinch.
Takajiri lands with a nice low kick. That'll leave a bruise.
Yolovski takes a solid shot to the body. That one hurt him but he's trying not to show it.
Takajiri keeps the fight on the outside.
Yolovski takes a jab right on the nose. That must have hurt but he shrugs his shoulders and looks to return the favor.
Yolovski moves into the clinch.

Yolovski has picked Takajiri up - he's going for a ride! Yolovski dumps his opponent to the mat with a thud and settles into half guard.
This is a great period of action - very entertaining stuff!
Yolovski is looking for a kimura. It's going to be difficult to finish that from half guard though and Takajiri defends it well.
Yolovski is looking for an arm triangle, whilst trying to pass to side control. Takajiri doesn't seem that keen to cooperate though. No luck this time Yolovski.
Takajiri keeping control of the leg, stopping his opponent passing to mount.
That's one minute gone in the round.
Takajiri is looking to sinch up a guillotine here but Yolovski pulls his head out easily.
Yolovski looking for a kimura but he'll have to free his other leg if he wants to finish that. Perhaps he's just using it as a distraction technique.
Yolovski is looking for a kimura here.
Yolovski is sneakily working for an arm triangle but Takajiri sees it coming and defends easily.
Takajiri wants to control but Yolovski is keeping busy.
That's two minutes gone in the round.
There's not a lot going on here and the crowd are letting the fighters know they're not willing to tolerate a lack of action.
Takajiri tries to get to full guard but Yolovski has control of the leg.
Yolovski looking for a kimura but he'll have to free his other leg if he wants to finish that. Perhaps he's just using it as a distraction technique.
Takajiri makes his way to full guard. A much better position for Takajiri.
Takajiri is throwing his legs up, looking for submissions. Yolovski is aware though and is defending well.
Yolovski thinks about going for a leg but decides against it, in order to maintain the position.
Yolovski pressing down on his opponent's thigh, looking to pass guard. Takajiri is keeping the position for now.
Takajiri is trying to keep Yolovski in close.
Takajiri looking for a guillotine here but Yolovski defends easily.
That's three minutes gone in the round.
Yolovski passes easily into side control. Nice work.
Yolovski goes for an armbar here - this could be all over! But no, Takajiri has escaped beautifully and is now on top in side control! Oh, that's unlucky for Yolovski but great work by Takajiri.
Yolovski is trying to work for a sweep but Takajiri has mounted him!
Yolovski is wriggling around here but as he tries to escape, Takajiri has taken his back.
Yolovski showing good submission defense here.
Yolovski is defending well here and trying to improve his position.
Takajiri working for a choke but Yolovski is defending well.
Takajiri looking to break Yolovski's wrist control so he can sink in the choke. Yolovski remaining controlled and patient though - he really has to keep calm otherwise Takajiri will wrap this one up with the rear naked choke!
That's four minutes gone in the round.
Yolovski is really stuck here.
Takajiri just keeping the dominant position. He can't wait too long though, otherwise the referee will stand them back up.
The fighters are pressed up against the cage, both looking to find a bit of space to work.
Takajiri looking for the RNC.
Takajiri looking for the RNC.
This has been an exciting period of action!
Takajiri looking to break Yolovski's wrist control so he can sink in the choke. Yolovski remaining controlled and patient though - he really has to keep calm otherwise Takajiri will wrap this one up with the rear naked choke!
You can see the frustration on Yolovski's face
He knows he is in trouble unless he improves his position sooner rather than later.
Takajiri has his opponent's back and is working for the choke.
Takajiri working for the choke.
Takajiri working for a choke but Yolovski is defending well.
I really don't envy Yolovski right now.
And thats the end of the round the fighters go back to their corners.
Ryo Takajiri dominated that round.
The cut man is working on Yolo Yolovski's cut.
The corners get their ten second warning. Both fighters stand from their stools and stare eachother down, ready to get back to the action.
Yolovski tries to clinch up against the cage, rushing in to close the distance. Takajiri manages to break the clinch and circles back to the middle of the mat.
Takajiri tries to counter with a takedown but Yolovski is quick to defend against it.
Yolovski gets in close and instigates a clinch.
Yolovski drops to a knee looking for a takedown but Takajiri gets the underhooks and prevents it.
Takajiri is pressed up against the cage. Yolovski has hold of a leg and is looking to drag Takajiri down to the mat. Takajiri avoids the attempt though and has circled away. We're back to striking at a distance.
Yolovski takes a nice looking leg kick right on the meat of his thigh there.
Yolovski forces Takajiri back against the cage and clinches.
Takajiri goes for a body shot but it's blocked.
Yolovski tries to score a body lock takedown but Takajiri shows good agility there to stay on his feet.
Ryo Takajiri has stuffed three takedown attempts in the round now. That's going to take a lot out of Yolo Yolovski.
We've had a slow start to the round here - hopefully the action picks up.
Yolovski is looking for a takedown.
Yolovski drops down looking for an ankle pick but Takajiri pulls his leg out and moves away.
Takajiri avoids the clinch attempt nicely.
Takajiri lands a leg kick and bounces back out of range.
Takajiri dips down and scores with a jab to the body.
That's one minute gone in the round.
Takajiri scores with a jab to the jaw of his opponent.
Good leg kick by Takajiri there. It's the ones that make that thud noise that hurt and that was an almighty thud.
The fight stays on the outside here - Yolovski looks like he's thinking about clinching though.
A cross from Takajiri lands.
Takajiri lands a body shot.
Yolovski tries to clinch but Takajiri is having none of it.
Takajiri looking to take his opponent's legs away with the low kicks.
Ryo Takajiri is winning the standup battle so far.
Takajiri circles away from the clinch attempt.
Takajiri throws a good cross that connects.
Takajiri circles away from the clinch attempt.
Yolovski gets to the clinch - let's see what his plan is here.
Both fighters working to control the clinch.
I was talking to Takajiri's coach per-fight and he was telling me that they'd been working on the clinch in the runup to this fight.
Takajiri prevents the takedown attempt.
Takajiri is pressed up against the cage. Yolovski has hold of a leg and is looking to drag Takajiri down to the mat. Takajiri avoids the attempt though and has circled away. We're back to striking at a distance.
That's two minutes gone in the round.
Ouch! a nice leg kick from Takajiri, right into the meat.
Takajiri feints with a shoulder and throws a nice leg kick to Yolovski's calf.
We've seen a great period of action over the last minute or so - credit to both fighters for going all out!
Yolovski fails in his attempt to clinch.
Takajiri lands a nice looking body shot.
Takajiri scores with a slapping inside leg kick.
Yolovski tries to clinch there but Takajiri circles away.
Takajiri lands with a thumping leg kick.
Yolovski tries to clinch up against the cage, rushing in to close the distance. Takajiri manages to break the clinch and circles back to the middle of the mat.
Takajiri half commits to a counter takedown before pushing away, out of range.
Takajiri is using his reach advantage well here, landing the more effective single shots from range.
Yolovski drops his hands momentarily and Takajiri takes advantage with a crisp shot to the head.
Yolovski wants to clinch.
This fight brought to you by 5M nutrition - it's mmmmm tasty. Nice jab by Takajiri.
That's three minutes gone in the round.
That kick from Takajiri tenderised Yolovski's leg. Yolovski is trying to keep his angry face on.
Takajiri scores with a jab to the body.
Yolovski tries to close the distance and clinch but Takajiri swats him to one side with an open hand palm strike and circles away.
Takajiri drops down looking for a counter takedown but Yolovski sprawls and moves away.
Takajiri is looking to slow Yolovski down with leg kicks.
Yolovski tries to close the distance and clinch but Takajiri swats him to one side with an open hand palm strike and circles away.
Takajiri cracks a nice hook into Yolovski's ribs.
Takajiri scoring well with a low kick there.
Yolovski tries to clinch there but Takajiri circles away.
Yolo Yolovski is looking to throw some combinations by the looks of things.
Yolovski tries to clinch but Takajiri moves away
and Takajiri decides to take the opportunity to score a takedown. He's landed in Yolovski's guard.
Yolovski is looking for a guillotine. You can't force these things though and Takajiri defends well.
Takajiri is pushing down on Yolovski's leg trying to pass to half guard. Yolovski is fighting to maintain full guard but Takajiri has managed to sneak the leg through.
Takajiri is looking for a kimura but he's never going to get it from there.
We've seen a great period of action over the last minute or so - credit to both fighters for going all out!
Takajiri is looking for a kimura but he's never going to get it from there.
That's four minutes gone in the round.
Takajiri trying to control from half guard but Yolovski is working away.
Yolovski looking to work for a kimura from the bottom.
Takajiri is looking for a kimura but he's never going to get it from there.
Takajiri works his foot free and advances to mount.
Yolovski is looking to improve his position but Takajiri isn't that keen on the idea.
Yolovski is squirming around, avoiding Takajiri's attempts to control the action.
Takajiri takes Yolovski's back. Could be looking for a rear naked choke here - either way, Yolovski is in trouble.
And thats the end of the round the fighters go back to their corners.
Ryo Takajiri dominated that second round.
The cut man is working on Yolo Yolovski's cut.
OK. That's time! The bell goes and we're back to the action. This is the final round!
Yolovski closes the distance and presses his opponent up against the cage.
A right hand to the body from Takajiri.
Takajiri is using his height advantage well here, landing a good percentage of his punches.
Yolovski is working on a leg, looking for a takedown but Takajiri is defending well.
Takajiri tries a body shot but Yolovski blocks it.
Yolovski blocks a body shot from Takajiri.
Yolovski has double underhooks and is working for a body lock takedown. He's got it. The fighters land in half guard but Takajiri regains guard immediately.
Takajiri is active off his back here, looking for submissions.
We've had a slow start to the round here - hopefully the action picks up.
Takajiri working from the bottom, still in full guard. He's managed to get a loose triangle. Yolovski doesn't seem to be doing much to defend here, obviously he feels comfortable in the position. Yolovski manages to throw the legs off his shoulder and he's back into guard - no problem.
Takajiri is really dominating this fight. Is there anything that Yolovski can do to turn this around?
Takajiri had isolated an arm as going for a kimura. Yolovski defends it easily.
Yolovski stands up and looks to throw the legs aside to pass to side control. Takajiri swivels though and keeps the full guard.
That's one minute gone in the round.
Takajiri is looking for a guillotine. You can't force these things though and Yolovski defends well.
Takajiri looking for a guillotine here but Yolovski defends easily.
Yolovski pushes down on Takajiri's leg and manages to get into half guard.
Yolovski seems to be working for a kimura but Takajiri defends the submission attempt.
Takajiri works his way to full guard. Good work.
Takajiri is working actively off his back, looking to secure an arm or perhaps work for a triangle.
That's two minutes gone in the round.
Yolovski drops back looking for a leg! Takajiri is in trouble here! The fighters roll with the hold and Takajiri manages to kick Yolovski off! Yolovski jumps back into Takajiri's guard.
Yolovski drops back for a leg! It's a sloppy attempt though and Yolovski jumps back into guard quickly, to retain the dominant position.
Takajiri throwing his legs up looking for a triangle.
Yolovski forces his way into half guard.
Takajiri trying to control here.
Yolovski wants to work for an arm triangle but Takajiri is really keeping half guard well and defending the submission attempt.
That's three minutes gone in the round.
Yolovski is looking for a kimura but he's never going to get it from there.
Takajiri is looking to control Yolovski's leg but it's slowly edging free. Can Takajiri avoid being mounted?
Ryo Takajiri overall seems to be getting the better of the ground position in the fight so far.
Takajiri makes his way to full guard. A much better position for Takajiri.
Yolovski stands up and looks to throw the legs aside to pass to side control. Takajiri swivels though and keeps the full guard.
Takajiri is working actively off his back, looking to secure an arm or perhaps work for a triangle.
Yolovski avoids a guillotine attempt easily.
Yolovski passes Takajiri's left leg - he's now in half guard.
Ryo Takajiri is fighting for a decision here - he's started to take the cautious approach.
That's four minutes gone in the round.
Yolovski is trying for a guillotine from the top but the pressure isn't in the right place so Takajiri is just riding it out for now. Yolovski eventually gives up the hold.
Yolovski is sneakily working for an arm triangle but Takajiri sees it coming and defends easily.
Yolovski takes a big intake of breath there - he's definitely tired.
Takajiri is controlling Yolovski's position as best he can from this difficult position.
Takajiri looking for submissions off his back.
Takajiri works his way to full guard. Good work.
Yolovski must be cautious of submissions here, given that his opponent has the superior Jiu Jitsu.
Boooooooooooooooooooo!!! God, this has been a terrible round. Come on you two, sort yourselves out!
Yolovski tries to free his leg and advance position but Takajiri is retaining full guard.
Yolo Yolovski has stepped it up - he knows he needs a finish here!
Takajiri throwing his legs up looking for a triangle.
And that's the end of the fight!
I would just about give that final round to Yolo Yolovski.
I think Takajiri has won this one but let's see what the judges have to say. Over to the ring announcer for the scorecards.
Ladies and gentlemen, after 3 rounds of action, we go to the scorecards for a decision.
Judge Taro Takaoka scores the fight 29:28
Judge Shigeki Sano scores the fight 29:28
Judge Kenichi Hosakawa scores the fight 29:28
In favor of your winner, by unanimous decision... Ryo Takajiri!
Ryo Takajiri retains his lightweight title!
|
|
|
|
|
|
|
|
|
|
|
|
|
|
|
|
|
|
|
|
|
|
|
| S |
C
A |
G |
S |
C
B |
G |
|
S |
C |
G |
|
energy
A | B |
|
hype
A | B |
|
pop
A | B |
|
mgr
A | B |
|
FIGHT
RATING
42% |
|
|
|
|
|
|
|
Main event
|
Coming up we have a heavyweight MMA rules bout between Robert Sullivan (ranked 0 p4p, 0 weight class) and John Bulger (ranked 0 p4p, 0 weight class). Both fighters look fresh as a daisy as they make their way towards the cage.
 |
|
 |
| 215 cm
32
282 lbs
16 - 9 - 0 |
|
186 cm
27
245 lbs
7 - 5 - 0 |
Good wrestling
Dangerous knees
Cardio machine |
|
Good wrestler
Brawler
Heavy handed |
|
| |
|
Ladies and gentlemen. This fight is 3 rounds, in the heavyweight division.
Introducing the fighter to my left, fighting out of the red corner.
With a record of
16 - 9 - 0, fighting out of Tokyo, Robert Sullivan!
And introducing the fighter to my right, fighting out of the blue corner.
With a record of
7 - 5 - 0, fighting out of Tokyo, John Bulger!
The judges for this bout are Tatsuya Matsuyama, Sosuke Kotani and Ren Mimura.
The bell rings for round one and we are underway!
Bulger looks to land a right hand but Sullivan moved out of range.
Sullivan has been talking about how he's improved his wrestling in the run up to the fight so let's see if that's enough to sway the balance.
Sullivan gets a clinch.
Sullivan scores with a knee to the head.
It looks like John Bulger has been cut.
Sullivan misses with a knee to the head.
Sullivan misses with a knee to the head.
Bulger doesn't land with the attempted body shot.
Good body shot from Sullivan.
Sullivan scores with a knee to the head.
Sullivan drops Bulger with a big knee straight up the middle! Bulger is covering up against the cage but manages to escape and gets back to his feet!
Bulger is rocked!
We've seen a great period of action over the last minute or so - credit to both fighters for going all out!
Sullivan has closed the distance and engaged Bulger in a clinch.
Bulger is still on wobbly legs! Can Sullivan finish him?
Sullivan unloads a knee to the mid-section.
Bulger seems to have recovered his senses.
Bulger looks winded!
Sullivan connects with a nasty looking knee right to Bulger's face.
Sullivan is leaning against Bulger and scores with a nice uppercut to the body.
Sullivan lands a big knee to the head and Bulger goes down! Sullivan pounces and finishes the fight with strikes! He jumps to his feet and celebrates with the crowd!
Ladies and gentlemen, after 0:52 of round 1, we have a winner by way of TKO (Strikes). Robert Sullivan!
An out of breath Robert Sullivan thanked his loyal fans in his post fight interview, giving them credit for his success over the course of his career.
John Bulger was interviewed post fight and said 'Ill be back.'.
|
|
|
|
|
|
|
|
|
|
|
|
|
|
|
|
|
|
|
|
|
|
|
| S |
C
A |
G |
S |
C
B |
G |
|
S |
C |
G |
|
energy
A | B |
|
hype
A | B |
|
pop
A | B |
|
mgr
A | B |
|
FIGHT
RATING
100% |
|
|
|
|
|
|
|
|
|
|
