 |
ROF 2: Bawler vs. Dixon PBP Commentary |
Undercard bout
|
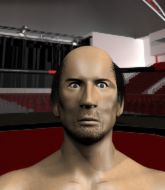
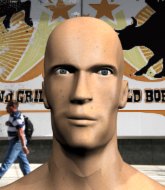
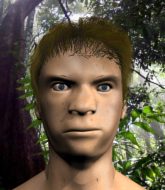
Coming up we have a middleweight MMA rules bout between John West (ranked 0 p4p, 0 weight class) and James Rodrigues (ranked 0 p4p, 0 weight class). The key to victory for John West has got to be keeping the fight on the feet.
 |
|
 |
| 197 cm
18
193 lbs
0 - 4 - 0 |
|
175 cm
18
185 lbs
0 - 2 - 0 |
BJJ White Belt
Solid boxing
Cuts easily |
|
BJJ Blue Belt
Counter fighter
Solid chin |
|
| |
|
Ladies and gentlemen. This fight is 3 rounds, in the middleweight division.
Introducing the fighter to my left, fighting out of the red corner.
With a record of
0 - 4 - 0, fighting out of Hilo, John West!
And introducing the fighter to my right, fighting out of the blue corner.
With a record of
0 - 2 - 0, fighting out of Sydney, James Rodrigues!
The judges for this bout are Hugh Johnson, Damien Edna and Summer Carpenter.

The bell rings for round one and we are underway!
West fails in his attempt to clinch.
Rodrigues looks really tired already! That doesn't bode well for a good, competitive fight!
West tries to close the distance and clinch up but Rodrigues swats him away and circles back towards the center.
Rodrigues looks more muscular than last time we saw him. He must have been on the weights.

West closes the distance and pushes Rodrigues back into the cage.
Rodrigues tries to pull guard but West won't allow it.
Rodrigues has West pressed up against the cage and is working for takedown. West manages to improve position though and keeps the fight standing.
West misses with the head strike.
West is trying to break the clinch but Rodrigues is controlling him.
Rodrigues is struggling to control the position.
West is trying to stall.
We've had a slow start to the round here - hopefully the action picks up.
West lands a nice elbow.
West scores with a nice hook to the head.

That's one minute gone in the round.
West is trying to drag Rodrigues to the mat but Rodrigues just about manages to keep his footing. He used the cage to his advantage there.
West prevents the takedown attempt.
John West has stuffed three takedown attempts in the round now. That's going to take a lot out of James Rodrigues.
West swings away with an uppercut that misses.
Rodrigues blocks a knee to the body. He'll have a nicely bruised forearm in the morning.
Rodrigues swings away with an uppercut that misses.
West tries to pull guard but Rodrigues won't allow it.
Rodrigues tries to pull guard but West won't allow it.
West can't find room to land a body shot as Rodrigues controls the action.

West escapes the clinch and we're back to striking.

That's two minutes gone in the round.
The fight stays on the outside here - West looks like he's thinking about clinching though.
Rodrigues is loading up here, looking for a big counter of his own.
Rodrigues takes a hook to the side of the head. I wonder if that's got his ears ringing.
West throws a sloppy head kick and Rodrigues moves out of range easily.
West shoots in for a double leg but Rodrigues sprawls well. That's going to sap some energy.
West fails with a takedown attempt from distance.

Rodrigues has closed the distance and engaged West in a clinch.
West is looking to score with knees to the body. Maybe he'll change it up and go body then head. Rodrigues is defending well for now.
Rodrigues goes for a takedown in the clinch but West prevents it.
West throws a head punch that misses.
West tries to land a knee to the head but misses.

That's three minutes gone in the round.
West breaks the clinch.
West lands with a cross to side of his opponent's head.
Rodrigues throws a head kick that misses.
An attempted straight right counter from West misses the target.
West connects with a lovely jab that went straight through the gap between Rodrigues's hands.
Rodrigues takes a head kick and shrugs it off.
West goes for a double leg but Rodrigues avoids the attempt and the two fighters end up clinched against the cage as Rodrigues continues to drive forward.
Rodrigues is loading up here, looking for a big counter of his own.
West scores with a punch to the head.
A head kick from West lands but Rodrigues takes it in his stride.
West lands a powerful looking uppercut that connected with his opponent's jaw.
West misses with a series of wild punches.
West is using his height advantage well here, landing a good percentage of his punches.
West doesn't manage to clinch there - Rodrigues circles away.
West moves into range and throws a lovely three punch combination.

That's four minutes gone in the round.
We've seen a great period of action over the last minute or so - credit to both fighters for going all out!
West shoots in for a double leg but Rodrigues sprawls well. That's going to sap some energy.
West throws a series of strikes that have Rodrigues backpedaling.
Rodrigues shapes like he's going to throw a leg kick but settles back down.
West tries to clinch up but Rodrigues circles away and keeps his distance.
West lets the fists fly and connects with a left straight followed by a right hook.
A head kick from West lands but Rodrigues takes it in his stride.
Rodrigues tries to drive through with a takedown attempt but West defends well and Rodrigues ends up having to push West into the cage where they will battle it out in the clinch.
West goes for a double leg but Rodrigues avoids the attempt and the two fighters end up clinched against the cage as Rodrigues continues to drive forward.
Rodrigues tries to land a leg kick but West saw it coming and moves away.
West feints a jab promting Rodrigues to slip. West then demonstrates his capabilities by jabbing again. Rodrigues slips again and ducks right into an uppercut.
West getting the better of the striking in that exchange.
And thats the end of the round the fighters go back to their corners.
John West dominated that round.
That's the end of the interval. I'm sure that seemed a lot quicker than a minute for our two fighters! Back to the action.

West tries to clinch but Rodrigues moves out of range.
The crowd cheers as West lands an impressive looking overhand right. Rodrigues doesn't seem phased though.
Rodrigues avoids a punch combination nicely.
West leaves Rodrigues with his face pressed against the mat as he sprawls beautifully, defending against a solid takedown attempt.
West drops down looking for a counter takedown but Rodrigues sprawls and moves away.
Rodrigues has his head slapped from side to side by a 3 punch combination. That must have hurt him.
West is using his reach advantage well here, landing the more effective single shots from range.
West goes to the watering hole and comes back with a big thumbs up from the judges as he scores a three punch combo.
West shoots for a double leg takedown but Rodrigues sprawls well. He's pushed West's face into the mat and manages to get back to his feet relatively easily.
We've had a slow start to the round here - hopefully the action picks up.
West throws a nice hook to the body that draws an oooh from the crowd.
Ooooh, nice body kick lands from West. Rodrigues shrugs it off though.
West lands with a kick to the temple. Rodrigues shrugs as if to say "is that all you've got?"
Both fighters are absolutely exhausted here.
This is a great period of action - very entertaining stuff!
West misses with a takedown attempt - Rodrigues sprawls well and throws a nice strike on the way out which just misses.
Rodrigues steps in looking to clinch after the strikes miss from West.
That's one minute gone in the round.
West tries to clinch but is not successful on this occasion.
West keeps the fight on the outside.
This fight brought to you by 5M nutrition - it's mmmmm tasty. Nice jab by West.
West tries to drive through with a takedown attempt but Rodrigues defends well and West ends up having to push Rodrigues into the cage where they will battle it out in the clinch.
That's three failed takedown attempts in the round for John West. That's going to take a lot out of him.
Rodrigues clinches with his opponent.
West looks like he'd prefer to be striking at range right now.
Rodrigues managing to block the knees to the body from West.
Rodrigues trying to land knees to the body.
A battle for position here, against the cage.
West escapes the clinch and we're back to striking.
That's two minutes gone in the round.
Rodrigues throws a right and a left that West avoids nicely.
West drops down looking for a counter takedown but Rodrigues sprawls and moves away.
West fails in his attempt to clinch.
West lets the fists fly and connects with a left straight followed by a right hook.
West's corner calls for a 1, 2 combination and West duly obliges.
West tries to close the distance and clinch up but Rodrigues swats him away and circles back towards the center.
Despite the aggression on Rodrigues's face he doesn't fully commit to the counter.
Rodrigues displays good takedown defense there as he swats away a double leg from West.
West fails to land with a series of punches.
The crowd cheering loudly, showing their appreciation for the quality fight we're seeing here.
Rodrigues dodges the punch combination from West.
That's three minutes gone in the round.
The fighters are starting to perspire pretty heavily.
Rodrigues has West up against the cage in a clinch.
Rodrigues is trying to pull guard but being pressed up against the cage enables West to keep the fight standing.
Rodrigues wants to break the clinch but can't.
West lands with a right to the head.
West lands a left hand that snaps the head of Rodrigues backwards.
A frustrated look appears on West's face as he tries to break the clinch.
West has Rodrigues pressed against the cage, preventing Rodrigues from circling away and getting back to striking at range.
West tries to break the clinch but Rodrigues is controlling the position.
That's four minutes gone in the round.
West is trying to work out of this bad position, with his back against the cage.
West misses with a punch on the inside.
West misses the knee to the body. Nice hip positioning from Rodrigues.

Rodrigues drags the fight down to the ground.
West wants to control from the top but Rodrigues keeps moving.
West pressing down on his opponent's thigh, looking to pass guard. Rodrigues is keeping the position for now.
West working some strikes from top position.
And thats the end of the round the fighters go back to their corners.
John West dominated that second round.
The referee calls time. The cornermen exit stage left and we're back to business. This is the final round!

Rodrigues slips a jab and a cross from West.
West fails with a takedown attempt from distance.
Rodrigues tries to counter with a clinch but West shakes him off and moves away.
West throws a right hand that Rodrigues ducks under and follows up with a left that Rodrigues also avoids with ease.
West tries to close the distance and clinch but Rodrigues swats him to one side with an open hand palm strike and circles away.
West shoots for a double leg takedown but Rodrigues sprawls well. He's pushed West's face into the mat and manages to get back to his feet relatively easily.
John West seems to be the more aggressive standup fighter in this bout.
West stuffs the takedown attempt from Rodrigues. Rodrigues gets slowly back to his feet.
West is really dominating this fight. Is there anything that Rodrigues can do to turn this around?

West closes the distance and scores a nice trip takedown into half guard. Rodrigues did well to prevent West getting side control.
We've had a slow start to the round here - hopefully the action picks up.
Rodrigues has hold of West's hands but West slips his arm to the side and lands an elbow.
West throwing shots but they're hitting the canvas more than the man.
Rodrigues is not content to let West control the position.
Both fighters are breathing heavily.
That's one minute gone in the round.
Rodrigues keeping his head moving to avoid the ground and pound.
The fighters are pressed up against the cage, both looking to find a bit of space to work.
West looking to pass the half guard. Not this time.

West is trying to work for a kimura but Rodrigues is defending well.
If this pace continues, the referee will definitely step in and force a standup.
The ref warns both fighters not to hold the cage as they work up against the meshing.
West throwing punches and elbows but they're not doing any damage.
Rodrigues wants to get back to full guard.
That's two minutes gone in the round.
Neither fighter has done anything of merit for a good minute or two here and the crowd are not happy about it.
Rodrigues keeping control of the position.

The referee has motioned to the fighters to stand back up. He just wasn't happy with the level of activity.
West misses with a few strikes there.
West throws a wild combination but nothing lands.
Rodrigues takes a head kick and shrugs it off.
Rodrigues fails to land with the punch combination there - jab, cross, hook, miss, miss, miss.
West looks to land a combination. Rodrigues sees it coming but can only parry a couple of the shots.
Rodrigues feints a jab promting West to slip. Rodrigues then demonstrates his capabilities by jabbing again. West slips again and ducks right into an uppercut.
West shoots in for a takedown but Rodrigues shows good takedown defense.
That's three failed takedown attempts in the round for John West. That's going to take a lot out of him.
West shoots in with a takedown attempt and he has Rodrigues pinned against the cage. Rodrigues gets the underhooks and manages to circle away.
Rodrigues unleashes a big counter combination but West bobs and weaves and avoids any damage.
West shoots in for a takedown but Rodrigues shows good takedown defense.
That's three minutes gone in the round.
West throws a hook to the body but it doesn't connect.
And an attempted straight right on the counter from Rodrigues! But no joy.
West shoots in looking for a takedown. Rodrigues tries to sprawl out of it but West keeps driving through. The fighters are pinned against the cage. Rodrigues manages to get underhooks and after a bit of a struggle, circles away and we're back to standing.
West looks frustrated there after his takedown attempt is stuffed easily.
West lands a lovely overhand right.
Rodrigues pulls out of a head kick attempt.
West misses with the combination.
Rodrigues needs to keep his hands up - West had a free shot at his head there.
West is really head hunting here, hardly looking to strike to the body at all.
That's four minutes gone in the round.
Rodrigues throws a body punch but West moves out of range.
West throws a combination but comes up with nothing but fresh air.
West throws a combination but comes up with nothing but fresh air.
Rodrigues avoids the clinch attempt nicely.
Rodrigues drives through and clinches with West against the cage.
Rodrigues tries to take the fight to the ground by pulling guard but can't manage it.
Good anti-grappling being displayed by Rodrigues as West tries to tie him up.
The crowd thankful this round is nearly over.
Rodrigues is leaning against West and scores with a nice uppercut to the body.
James Rodrigues has stepped it up - he knows he needs a finish here!
John West is fighting for a decision here - he's started to take the cautious approach.
A body shot lands from Rodrigues.
And that's the end of the fight!
John West showed his dominance in that final round.
Well West has outscored his opponent in every aspect of the fight today. Only a scarily incompetent judge or two will keep him from a well deserved win... Over to the ring announcer for the scorecards.
Ladies and gentlemen, after 3 rounds of action, we go to the scorecards for a decision.
Judge Hugh Johnson scores the fight 30:27
Judge Damien Edna scores the fight 30:27
Judge Summer Carpenter scores the fight 30:27
In favor of your winner, by unanimous decision... John West!
John West decided to thank the fans in attendance for making a great atmosphere. It seemed to go down pretty well.
|
|
|
|
|
|
|
|
|
|
|
|
|
|
|
|
|
|
|
|
|
|
|
| S |
C
A |
G |
S |
C
B |
G |
|
S |
C |
G |
|
energy
A | B |
|
hype
A | B |
|
pop
A | B |
|
mgr
A | B |
|
FIGHT
RATING
43% |
|
|
|
|
|
|
|
Undercard bout
|
|
|
|
Undercard bout
|
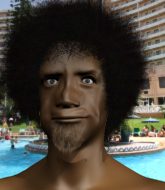
Coming up we have a lightweight MMA rules bout between Mark Mayer (ranked 0 p4p, 0 weight class) and Sol Dier (ranked 0 p4p, 0 weight class). Sol Dier has the power to score a knockout today if he connects clean with Mark Mayer's chin.
 |
|
 |
| 186 cm
24
160 lbs
0 - 0 - 0 |
|
166 cm
24
155 lbs
2 - 1 - 0 |
BJJ Blue Belt
Brawler
Big heart |
|
Dangerous GnP
Excellent boxer
Heavy handed |
|
| |
|
Ladies and gentlemen. This fight is 3 rounds, in the lightweight division.
Introducing the fighter to my left, fighting out of the red corner.
With a record of
0 - 0 - 0, fighting out of Hilo, Mark Mayer!
And introducing the fighter to my right, fighting out of the blue corner.
With a record of
2 - 1 - 0, fighting out of Sydney, Sol Dier!
The judges for this bout are Chris Dean, John Mangel and Skip Squint.
The bell rings for round one and we are underway!
Dier lands with a right and another and another! Mayer is in big trouble! Dier lands again and this time it's lights out for Mayer! A quality knockout there for Dier.
Ladies and gentlemen, after 0:05 of round 1, we have a winner by way of KO (Strikes). Sol Dier!
|
|
|
|
|
|
|
|
|
|
|
|
|
|
|
|
|
|
|
|
|
|
|
| S |
C
A |
G |
S |
C
B |
G |
|
S |
C |
G |
|
energy
A | B |
|
hype
A | B |
|
pop
A | B |
|
mgr
A | B |
|
FIGHT
RATING
0% |
|
|
|
|
|
|
|
Undercard bout
|
|
|
|
Co-main event
|
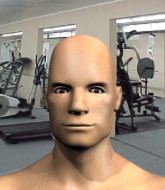
Coming up we have a welterweight MMA rules bout between Robert Mayer (ranked 0 p4p, 0 weight class) and Joe Black (ranked 0 p4p, 0 weight class). We have two fighters making their debuts here, so let's see who comes out of this one with their first professional victory.
 |
|
 |
| 190 cm
25
170 lbs
0 - 0 - 0 |
|
184 cm
19
183 lbs
0 - 0 - 0 |
BJJ Blue Belt
Good kicks
Self confident |
|
BJJ White Belt
Decent boxing
Inexperienced |
|
| |
|
Ladies and gentlemen. This fight is 3 rounds, in the welterweight division.
Introducing the fighter to my left, fighting out of the red corner.
With a record of
0 - 0 - 0, fighting out of Hilo, Robert Mayer!
And introducing the fighter to my right, fighting out of the blue corner.
With a record of
0 - 0 - 0, fighting out of Los Angeles, Joe Black!
The judges for this bout are Donatello Bradman, Ben Watson and Bruno Hogan.
The bell rings for round one and we are underway!
Mayer scores with a sloppy right hand. Black should have avoided that one.
Mayer misses with a takedown attempt. He shot from a bit too far out.
Nice shot lands for Black.
Black takes a thudding leg kick, right into the meat of the thigh.
Black looks to land a left hand but Mayer moved out of range nicely.
Black keeps his opponent at a distance with a nice jab.
Mayer takes a hook to the side of the head. I wonder if that's got his ears ringing.
Mayer fails miserably with a takedown attempt.
We've had a slow start to the round here - hopefully the action picks up.
Black lands with a hook. Mayer tried to avoid it but it clipped the top of his head.
Black connects with a slap. Keep your fist closed son.
That's one minute gone in the round.
Mayer tries a head kick but it misses.
Mayer shoots in for a takedown from distance. He catches Black napping and manages to drive through into side control!
Mayer really does look like a pencil wearing a pair of gloves. Let's hope he has a gameplan to suit that ridiculous body shape.
Mayer working away.
The referee asks Mayer politely if he wouldn't mind getting on with it and actually doing something. Mayer prefers to stall for the moment though.
Mayer is trying to land an Americana. He has the arm isolated but Black is keeping cool and he's avoided the danger for now.
Black can't do much from the bottom here.
Black is looking for a sweep.
The fighters are pressed up against the cage, both looking to find a bit of space to work.
That's two minutes gone in the round.
Black prevents Mayer from moving into mount.
Black is trying to stand back up. He's worked his way up against the cage but Mayer has just dragged him back down to the mat.
Black tries to work a leg under to get back to half guard but Mayer wriggles his own leg back out and remains in side control.
Mayer tries for an arm triangle. That looks pretty tight to me. Is this one over!?! Possibly, maybe, no Mayer has let go of the choke. Obviously it wasn't as tight as we thought!
Black tries to work a leg under to get back to half guard but Mayer wriggles his own leg back out and remains in side control.
Black keeps trying to improve his position.
Mayer trying to control the action but Black is working from the bottom.
Black is looking to regain half guard here but Mayer keeps moving and retains side control.
That's three minutes gone in the round.
Black struggling a bit here.
Black really doesn't want to stay on the ground with Mayer. If he can't get it back to his feet, it's only a matter of time before he'll be tapping out.
Mayer is maintaining the dominant position - no doubt Black will start to get frustrated soon if he's not already.
We may be looking at a referee standup if the pace doesn't pick up soon.
Black is looking for a sweep.
Mayer thinks about going for a far side armbar but bails out and retains the dominant position instead.

Mayer has had enough of the ground for now and decides to stand.
That's four minutes gone in the round.
The crowd are showing their displeasure at the lack of action as loud boos ring out around the arena.
Jab from Black.
Mayer tries to drive through with a takedown attempt but Black defends well and Mayer ends up having to push Black into the cage where they will battle it out in the clinch.
Black swings away with a counter right hand but no contact made.
That's three failed takedown attempts in the round for Robert Mayer. That's going to take a lot out of him.
Mayer is breathing heavily.
Jab from Black.
Mayer dives in and grabs Black's left leg, looking for a takedown. Black pushes down on Mayer's head and hops out.
Black stuffs the takedown attempt from Mayer. Mayer gets slowly back to his feet.
Mayer tries to close the distance and clinch but Black swats him to one side with an open hand palm strike and circles away.
The crowd thankful this round is nearly over.
Nice shot lands for Black.
Black sees a low kick coming and goes to check it, but it's actually a body kick and it thuds into his unprotected ribs.
Black throws a couple of head shots and lands with the final one - a decent hook, which struck Mayer on the side of the head.
And thats the end of the round the fighters go back to their corners.
A close round but Joe Black will probably get the nod.
The corners get their ten second warning. Both fighters stand from their stools and stare eachother down, ready to get back to the action.
Mayer takes a shot to the nose. Hopefully that hasn't broken it.
Black lands the left hand.
Mayer looks for a takedown but Black sprawls well.
No luck with that takedown attempt from Mayer.
Black looked like he wanted to counter with a punch but didn't throw it.
Mayer fails with a takedown attempt.
A little jabbing left from Black on the counter but it doesn't find it's target.
That's three failed takedown attempts in the round for Robert Mayer. That's going to take a lot out of him.
We've had a slow start to the round here - hopefully the action picks up.
Black takes a step towards his opponent and connects with a left hand, before circling away.
Both fighters are absolutely exhausted here.
Mayer dives in for a single leg takedown but Black sprawls and the fighters end up clinched against the cage.
Black lands a slapping body shot.
Black has been the more effective fighter overall so far.
That's one minute gone in the round.
Mayer is pinned up against the cage taking some big shots here. The referee is looking closely deciding whether he should stop the fight.
Black lands with a slapping head kick.
Black connects with a single shot there.

Mayer is rocked!
Joe Black is looking to keep the fight on the feet at all costs.
Black steps in with a hook that catches Mayer right on the chin and knocks him to the floor! Black follows him down with more strikes and that's all she wrote! Mayer looks absolutely devastated.
Ladies and gentlemen, after 1:24 of round 2, we have a winner by way of TKO (Strikes). Joe Black!
|
|
|
|
|
|
|
|
|
|
|
|
|
|
|
|
|
|
|
|
|
|
|
| S |
C
A |
G |
S |
C
B |
G |
|
S |
C |
G |
|
energy
A | B |
|
hype
A | B |
|
pop
A | B |
|
mgr
A | B |
|
FIGHT
RATING
38% |
|
|
|
|
|
|
|
Main event
|
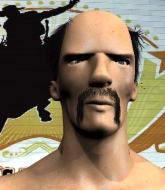
Coming up we have a welterweight MMA rules bout between Lobbie Bawler (ranked 0 p4p, 0 weight class) and Mason Dixon (ranked 0 p4p, 0 weight class). Bawler comes into the arena with Kill them all blaring out of the sound system. Mason Dixon is the more experienced fighter, so let's see if that makes a difference tonight.
 |
|
 |
| 180 cm
25
170 lbs
1 - 0 - 0 |
|
170 cm
22
170 lbs
4 - 3 - 0 |
BJJ White Belt
Solid boxing
KO power |
|
BJJ Blue Belt
Excellent boxer
Heavy handed |
|
| |
|
Ladies and gentlemen. This fight is 5 rounds, for the welterweight championship of the world!
Introducing the champion to my left, fighting out of the red corner.
With a record of
1 - 0 - 0, fighting out of Sydney, Lobbie Bawler!
And introducing the challenger to my right, fighting out of the blue corner.
With a record of
4 - 3 - 0, fighting out of Tokyo, Mason Dixon!
The judges for this bout are Winston Howard, Skip Squint and Ron Honeybunn.
The bell rings for round one and we are underway!
Dixon blocks the body kick.
Bawler goes to the watering hole and comes back with a big thumbs up from the judges as he scores a three punch combo.
Bawler seems to be moving with more speed, compared to his last bout. He must have been working on that in the gym.
Bawler pushes Dixon away with a front kick.
Dixon scores with a three punch combo!
Lobbie Bawler seems to be the more aggressive standup fighter in this bout.
Bawler scores with a hook to the body. Dixon takes a step back and tries to catch his breath.
Bawler misses with a two punch combination.
Dixon connects with a nice looking jab.
Thud! ouch! good body kick from Bawler - that will leave a mark!
Dixon looks winded!
This is a great period of action - very entertaining stuff!
Bawler fakes a head punch and goes low to the body. Nicely done.
Bawler closes the distance and presses his opponent up against the cage.
Dixon blocks an uppercut.
Bawler comes over the top with an elbow. That landed flush.
Bawler lands punches inside but they're not really causing much damage.
Bawler misses with a punch on the inside.
With the two fighters working up against the cage, Bawler just misses with a elbow thrown towards Dixon's brow.
Bawler lands an elbow inside that Dixon shrugs off.
That's one minute gone in the round.
Bawler pushes off an throws an elbow but Dixon leans to the side and avoids it. We're back to clinching against the cage.
A head punch on the inside from Dixon fails to land.
Bawler throws a nice elbow but it doesn't land.
Bawler throws a nice elbow but it doesn't land.
Dixon avoids a wild elbow strike from Bawler.
Bawler has Dixon pressed against the cage, preventing Dixon from circling away and getting back to striking at range.
Dixon blocks an elbow strike.
With the two fighters working up against the cage, Bawler just misses with a elbow thrown towards Dixon's brow.
Dixon lands with a left to the head.
Bawler throws an elbow but it's blocked.
Dixon lands a left hand that snaps the head of Bawler backwards.
Dixon is trying to work out of this bad position, with his back against the cage.
A nice glancing elbow lands by Bawler.

Dixon escapes the clinch and we're back to striking.
Dixon walks into a left hand.
Bawler connects with a leg kick. Dixon looked like he was expecting something else and didn't defend it.
That's two minutes gone in the round.
Dixon uses good footwork to avoid the strikes from Bawler.
Despite the aggression on Dixon's face he doesn't fully commit to the counter.
Dixon lands with a two punch combination before moving back out of range.
The fans in attendance giving it up for the two fighters, who have really let it all hang out in the last minute or so!
Dixon misses with a jab, cross combination.
Dixon ducks right into an uppercut from Bawler.
Dixon misses with a body shot. Nice footwork from Bawler.
Bawler steps to the side to avoid the strikes from Dixon.
Bawler misses with a body shot.
A combination from Dixon does no damage.
Dixon connects with a hook to the side of his opponent's head.
Bawler doesn't manage to clinch there - Dixon circles away.
Bawler throws a nice outside leg kick.
Dixon takes a nice looking leg kick right on the meat of his thigh there.
Dixon ducks down and throws a hook to the body but Bawler moves away.
Dixon takes one to the chin there.
That's three minutes gone in the round.

Bawler cracks Dixon with a big right hand that sends him to the floor! Dixon looks wobbly but he's sprung back up to his feet straight away
can Bawler finish him?

Dixon is rocked!
Bawler looks to land a body kick but Dixon moved away.
Dixon is still on wobbly legs! Can Bawler finish him?
Dixon throws a shot from downtown. Bawler moves away and avoids it.
Bawler is looking to counter the offense by Dixon and move into the clinch.
Bawler looks to score with a jab to the body but Dixon is just out of range.
Dixon throws a jab but it's blocked by Bawler.
Bawler wants to take advantage of his opponent's missed offense by moving into the clinch.
Dixon seems to have recovered his senses.
Bawler looks to land a combination but Dixon avoids it well.
Dixon swings away but doesn't land with a series of punches.
Dixon gets tackled into the cage by Bawler. Bawler maintains the clinch.
The crowd cheering loudly, showing their appreciation for the quality fight we're seeing here.
Bawler tried to land a shot to the body but connects with Dixon's elbow.
Bawler creates a bit of distance and throws an elbow that only just misses.
Dixon wants to push off and get back to the center of the mat but Bawler has him pressed against the cage.
Bawler tries a body shot but Dixon blocks it.
Bawler creates a bit of distance and throws an elbow that only just misses.
Dixon swings wildly with an uppercut but Bawler uses good head movement to avoid it.
Bawler tries to work over Dixon's body with a swooping hook but it only glances the target.
That's four minutes gone in the round.
Bawler lands an uppercut.
Bawler creates a bit of distance and throws an elbow that only just misses.
Dixon dodges an elbow strike from Bawler.
Dixon manages to break the clinch.
Bawler throws a shot to the body.
Bawler wants to clinch but Dixon slips to the side
and Dixon counters with a right hand to the body.
Dixon's hands are dropping dangerously low here and Bawler connects clean with a right hook that sends him down to one knee! Dixon scrambles back to his feet.
Dixon takes a big uppercut there. He seems a bit wobbly but no, he's OK.
Dixon moves into range and throws a lovely three punch combination.
Bawler looking to throw a kick but he's pulled out of it.
That's a knee to de groin and it's over and out! Dixon crumples to the ground after an illegal strike from Bawler - the referee stops the clock and Dixon gets 5 minutes to recover from that one. "I'm sorry" says Bawler. Dixon manages to get back to his feet and the fight resumes.
The crowd applaud the fighters' efforts here as the round comes to an end.
Dixon moves into range and throws a combination. A nice jab followed by a hook to the body.
Bawler sizes up Dixon with a pawing jab and scores with a straight right down the middle.
A shot to the body from Bawler misses
and Dixon counters with a three punch combo that has Bawler backing up. Bawler nods at Dixon to acknowledge the strikes.
Dixon misses with a jab and misses with a cross straight after too.
And thats the end of the round the fighters go back to their corners.
Lobbie Bawler dominated that round.
That's time! Bawler's corner gives him a slap on the ass as he gets ready to fight.
Bawler lands a nice shot to the body.
Bawler tries to score with a leg kick but it misses it's target.
Dixon just misses with a punch to the body.
Bawler fakes a jab and scores with a low kick.
Dixon bobbing and weaving, closes the distance and lands a hook to the side of Bawler's head.
Mason Dixon is looking to throw some combinations by the looks of things.
A slapping body kick lands there for Bawler.
Dixon misses the shot to the body.
As Dixon backs away, Bawler returns fire with a leg kick that just misses.
Bawler is really dominating this fight. Is there anything that Dixon can do to turn this around?
Bawler connects with a solid leg kick.
Bawler ducks under a wild hook from Dixon.
Bawler throws a good cross that connects.
We've had a slow start to the round here - hopefully the action picks up.
Bawler misses with a hook
and Dixon counters with a shot to the ribs. That looked like it hurt.
Bawler cracks Dixon with a good shot that sees him stumbling back into the cage.
The crowd are loving this. Great action here.
Bawler smiles there as he lands a nice right hand right on the button.
Bawler throws a quick inside leg kick.
Dixon slips a jab and a cross from Bawler.
That's one minute gone in the round.
Bawler jabbing away but nothing is landing.
Bawler throws a mid kick that lands with a slap.
Dixon is breathing heavily.
Bawler missing with a left hand there. Dixon was out of range so wasted energy throwing that one.
Bawler closes the distance and clinches.
Bawler misses with a hook from the clinch.
Bawler has a couple of punches blocked by Dixon.
A short body shot lands from Dixon as the two fighters clinch.
Dixon looks like he'd prefer to be striking at range right now.
Bawler gets an overhook and lands an elbow to the side of the head.
Bawler creates a bit of distance and throws an elbow that only just misses.
Bawler misses with a body punch.
Dixon tried to land a shot to the body but connects with Bawler's elbow.
With the fighters up against the cage, Bawler throws an elbow but misses.
Bawler creates a bit of space for himself and sneaks an elbow through Dixon's defenses.
That's two minutes gone in the round.
A left hand lands to the body for Dixon.
Dixon wants to break the clinch but can't.
Bawler misses with a punch to the body.
Bawler throws an elbow but it's blocked.
Dixon blocks an elbow strike.
Dixon blocks an elbow strike from Bawler.
Dixon is trying to force a seperation but Bawler has the dominant position.
Bawler blocks a couple of punches on the inside.
Dixon tries to throw a body punch but Bawler avoids it by throwing Dixon back against the cage.
Bawler throws an elbow but it's blocked.
Fantastic stuff here - a very entertaining period of action, which has drawn cheers from the crowd.
Bawler lands an elbow inside that Dixon shrugs off.
A short uppercut from Bawler.
Bawler pushes Dixon back against the cage and lands a hook to the side of the head.
Bawler tries to land a shot to the body but it's blocked.
Bawler lands an elbow inside.
Dixon misses with a body punch.
That's three minutes gone in the round.
Bawler pushes off an throws an elbow but Dixon leans to the side and avoids it. We're back to clinching against the cage.
A quick uppercut on the inside from Dixon.
Dixon blocks the elbow strike.
Dixon wants to break free but Bawler has control.
Dixon pushes Bawler back against the cage and lands a hook to the side of the head.
With the two fighters working up against the cage, Bawler just misses with a elbow thrown towards Dixon's brow.
Bawler swings away with an uppercut that misses.
Dixon working some nice short punches in the clinch.
Bawler blocks a couple of punches on the inside.
Bawler lands a nice elbow.
Bawler lands on the inside with an uppercut.
Dixon breaks the clinch and we're back to striking at distance.
Bawler drops Dixon with a hook right on the temple. He thinks about going to the ground but Dixon looks back up at him and smiles so Bawler waves him back to his feet - he obviously thinks he can knock him out after that shot landed.
This is a great period of action - very entertaining stuff!
Dixon walks into a picture perfect straight right hand from Bawler! He's gone down face first to the canvas, unconscious before he even hit the floor! Ohhhh. My. Goodness! That boys and girls was a beautiful knockout! Give that man a biscuit!
Ladies and gentlemen, after 4:58 of round 2, we have a winner by way of KO (Punch). Lobbie Bawler!
Lobbie Bawler is the new welterweight champion!
Lobbie Bawler spent the whole post fight interview bigging himself up. It didn't go down that well with the fans after a while as they thought it was a bit arrogant.
|
|
|
|
|
|
|
|
|
|
|
|
|
|
|
|
|
|
|
|
|
|
|
| S |
C
A |
G |
S |
C
B |
G |
|
S |
C |
G |
|
energy
A | B |
|
hype
A | B |
|
pop
A | B |
|
mgr
A | B |
|
FIGHT
RATING
68% |
|
|
|
|
|
|
|
|
|
|
