 |
WFC - 33 PBP Commentary |
Undercard bout
|
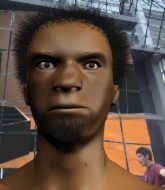
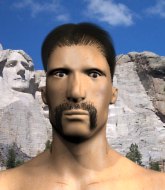
Coming up we have a super heavyweight MMA rules bout between Charles Kamen (ranked 0 p4p, 0 weight class) and Gracij Nezmah (ranked 0 p4p, 0 weight class). Both these guys have really solid chins. Will we see a standup war or will they both decide that a knockout is unlikely and try to win the fight elsewhere?
 |
|
 |
| 190 cm
25
270 lbs
1 - 1 - 0 |
|
217 cm
30
275 lbs
2 - 1 - 0 |
BJJ Blue Belt
World class boxer
Very quick |
|
Good wrestler
Decent boxing
Granite chin |
|
| |
|
Ladies and gentlemen. This fight is 3 rounds, in the super heavyweight division.
Introducing the fighter to my left, fighting out of the red corner.
With a record of
1 - 1 - 0, fighting out of Sydney, Charles Kamen!
And introducing the fighter to my right, fighting out of the blue corner.
With a record of
2 - 1 - 0, fighting out of Sydney, Gracij Nezmah!
The judges for this bout are Ben Hemmingworth, Summer Carpenter and Skip Squint.

The bell rings for round one and we are underway!
Kamen bobs and weaves well there to avoid the strikes.
Nezmah cracks Kamen with a right hand to the side of the head.
Kamen throws a series of strikes that have Nezmah backpedaling.

It looks like Gracij Nezmah has been cut.
Nezmah throws a jab but it's blocked by Kamen.
Nezmah misses with a left hand
enabling Kamen to counter with a crisp jab.
Nezmah getting the better of the striking in that exchange.
Kamen misses with a jab to the body
and Nezmah counters with a straight right hand.
Nezmah misses with an uppercut
and Kamen counters with a lovely straight right hand!
Nezmah walks into a left hand.
This is a great period of action - very entertaining stuff!
Kamen throws a jab, cross combination which is slipped
and Nezmah counters with a crisp hook to the side of the head.
Kamen misses with a few strikes there.
Nezmah changes levels for a counter takedown but doesn't follow through with his attempt.
Kamen misses with a two punch combination.
Kamen jabs at Nezmah's body.
Kamen throws a combination that misses
and Nezmah counters with a lovely straight right hand!

That's one minute gone in the round.
Nezmah doesn't react quick enough there as he takes a shot to the body.
Kamen has his hands up protecting his head but a hook from Nezmah finds it's way round the side to connect with Kamen's head.
Nezmah ducks under a wild hook from Kamen.
Charles Kamen is looking to keep the fight on the feet at all costs.

Nezmah gets to the clinch - let's see what his plan is here.
Nezmah stalling the fight.
Kamen tries to land a shot to the body but it's blocked.
Kamen tries to stall but Nezmah uses the opportunity to gain a better position.
Nezmah working hard to break the clinch.
Kamen tries to land a shot to the body but it's blocked.
Kamen swings wildly with an uppercut but Nezmah uses good head movement to avoid it.
Kamen doesn't land with the attempted body shot.
Nezmah blocks a couple of punches on the inside.
Kamen misses with a shot to the kidneys.

That's two minutes gone in the round.
Kamen tries to work over Nezmah's body with a swooping hook but it only glances the target.
Nezmah blocks an uppercut.
Nezmah blocks an uppercut.
Kamen misses with the head strike.
Nezmah is looking to break free of the clinch but Kamen has double underhooks.
Kamen misses with a punch to the body.
Kamen tries a body shot but Nezmah blocks it.
Kamen lands punches inside but they're not really causing much damage.
Nezmah stalling in the clinch.
Kamen has a couple of punches blocked by Nezmah.
Kamen tries to land a shot to the body but it's blocked.
Kamen working aggressively here.
Kamen lands a shoulder strike.
The fans in attendance giving it up for the two fighters, who have really let it all hang out in the last minute or so!
A bit of stalling here from Kamen.

That's three minutes gone in the round.
Kamen throws a head punch that misses.
Kamen misses with the head strike.
Kamen lands a shoulder strike.
Both fighters working to control the clinch.

Nezmah breaks from the clinch.

Kamen moves into the clinch successfully.
Kamen can't find room to land a body shot as Nezmah controls the action.
Nezmah breaks the clinch.
Nezmah keeping a good distance there, avoiding the body shot.
Nezmah throws out a counter right but Kamen avoids it with no problem.
Nezmah moves into the clinch.
Nezmah prevents a body shot from Kamen.
Nezmah blocks an uppercut.
Nezmah breaks the clinch and we return to the middle of the mat.

That's four minutes gone in the round.
A looping hook to the body misses from Nezmah. Kamen does a little dance to reset his feet.
Nezmah is using his reach advantage to land shots from outside his opponent's range.
Kamen uses good head movement to avoid the hook from Nezmah.
No joy there for Nezmah, who threw a few shots but didn't land.
Kamen is looking for a counter combo.
Kamen slips a straight right by Nezmah.
Nezmah scores with a jab.
Kamen misses with a combination

and Nezmah counters with a driving takedown into guard. Nice work there by Nezmah.

Kamen pushes Nezmah off and scrambles back to his feet.
The fans in attendance giving it up for the two fighters, who have really let it all hang out in the last minute or so!
Kamen works Nezmah's body with a nice hook.
Kamen throws a combination but comes up with nothing but fresh air.
A big right from Nezmah misses.
Kamen lands three nice shots there - that looked like it hurt!
And thats the end of the round the fighters go back to their corners.
Charles Kamen dominated that round.
The cut man is working on Gracij Nezmah's cut.
OK. That's time! The bell goes and we're back to the action.

Kamen takes a punch to the jaw and another one to the bread basket.
Nezmah misses with a few strikes there.
We've been told by Kamen's head coaches at LOD-Guts & Glory Gym that he's been working on his takedown defense in preparation for this fight.
Kamen throws a right hand that misses
and Nezmah counters with a good right hand that lands right on the jaw.
Kamen falls off balance throwing a combination
and Kamen takes a counter punch right on the button for his troubles.
Kamen looks to score with a jab to the body but Nezmah is just out of range.
Charles Kamen is looking to throw some combinations by the looks of things.
Kamen throws a right hand that Nezmah ducks under and follows up with a left that Nezmah also avoids with ease.
It seemed like Nezmah was going to counter with the hook but didn't fully commit to it.
Kamen misses with a lunging right hand
and Nezmah counters with a nice uppercut.
Kamen darts in trying to clinch
and Nezmah counters with a quick right hand to the jaw.
Nezmah lands with a shot to the body.
Nezmah throws a right hand that misses
and Kamen cracks him with a counter punch right on the button.
Fantastic stuff here - a very entertaining period of action, which has drawn cheers from the crowd.
Nezmah fakes high and swings low for a body shot but Kamen manages to avoid it.
Kamen throws a big counter combination but Nezmah scrambles out of danger and avoids any damage.
That's one minute gone in the round.
Nezmah looks to land a left hand but Kamen moved out of range nicely.
Kamen appears to be looking for a counter punch to the body.
Nezmah might want to mix his strikes up a bit more. He's just going for head shots at the moment and that can become a bit predictable.
Kamen tries to move into range but Nezmah moves to the side and lands with a nice right hand.
Nezmah closes the distance and lands a one-two.
Kamen tries to clinch but is not successful on this occasion.
A little jabbing left from Nezmah on the counter but it doesn't find it's target.
Kamen scores with a punch to the gut of his opponent.
Good exchange - Nezmah coming out on top.
Nezmah throws a monster uppercut resembling something out of street fighter but it doesn't land.
A slow jab from Nezmah misses its intended target.
Kamen fails in his attempt to clinch.
Kamen throws a lazy uppercut
and Nezmah counters with a stiff right hand.
Nezmah lands a jab.
Kamen swings away but doesn't land with a series of punches.
That's two minutes gone in the round.
We've seen a great period of action over the last minute or so - credit to both fighters for going all out!
Kamen thows a left - swing and a miss!
Kamen takes a jab right on the nose. That must have hurt but he shrugs his shoulders and looks to return the favor.
Nezmah dodges the punch combination from Kamen.
Nezmah looked like he wanted to counter with a punch but didn't throw it.
Nice shot lands for Kamen.
Nezmah misses with a wild combination.
A big left from Nezmah misses.
Nezmah swings widly with a right hand
and Kamen counters with a left and a right that stings Nezmah.
Nezmah avoids the clinch attempt nicely.
Nezmah throws a nice looking combination but Kamen bobs and weaves to avoid any damage.
Kamen throws a jab, cross combination which is slipped
and Nezmah counters with a shot to the ribs. That looked like it hurt.
That's three minutes gone in the round.
Nezmah moves into the clinch.
Nezmah blocks a body shot from Kamen.
Kamen stalling in the clinch but Nezmah improves position.
Nezmah has clasped his hands together around Kamen's back... aaand, he's got a takedown into side control. Nicely done.
Kamen is being controlled here.

Nezmah stands up and beckons Kamen to his feet.
Nezmah uses some good footwork to avoid the body shot by Kamen.
Kamen tries to clinch but is not successful on this occasion.
Nezmah bobs and weaves and throws out a fast jab that snaps Kamen's head backwards.
That's four minutes gone in the round.
Kamen has managed to clinch.
Kamen lands a shoulder strike.
The fighters are starting to perspire pretty heavily.
Kamen's corner are urging him to control the action in the clinch for a moment, rather than mount any serious offense. I'm sure the crowd appreciate those instructions... not.
Nezmah blocking some punches.
Kamen tries to work over Nezmah's body with a swooping hook but it only glances the target.
An uppercut on the inside fails to land for Kamen.
Nezmah blocks a punch to the side of the head.
Nezmah wants to break the clinch but can't.
Nezmah's corner calls for him to break the clinch, which he does.
Nezmah rushes Kamen and presses him up against the cage.
The crowd cheering loudly, showing their appreciation for the quality fight we're seeing here.
Nezmah looking to slow down the pace here.
And thats the end of the round the fighters go back to their corners.
Gracij Nezmah showed his class in that round. I'd imagine he'll take it on all the scorecards.
The cut man is working on Gracij Nezmah's cut.
The minute break is over - no more time for sponges and pep talks - back to the action! This is the final round!

Nezmah drives through with a takedown into guard.
Kamen has his feet on Nezmah's hips. He pushes off and gets to his feet. Nice work.
Nezmah throws a lazy right hand but Kamen sees it coming a mile off and sidesteps it easily.
Nezmah has used his reach advantage pretty well so far tonight.
Kamen misses with a series of wild punches.
Nezmah looks to land a right hand but Kamen moved out of range.
It looked like Kamen was looking amped, ready to throw a big counter but didn't commit.
Nezmah lands a right hook to the body.
Kamen changes levels and scores with a jab to the body.
Kamen scores with a one two! Nezmah had his feet all tangled up there and couldn't avoid the strikes.
We've seen a great period of action over the last minute or so - credit to both fighters for going all out!
Kamen has his head snapped back a nice jab. A little nod from Kamen there as he acknowledges the shot.
Kamen lands a jab, followed by a cross and another cross, as Nezmah backs up against the cage.
A combination from Kamen does no damage.
That's one minute gone in the round.
Nezmah avoids the body shot from Kamen.
Gracij Nezmah seems to be getting the better of the standup.
Nezmah fails to land with a series of punches.
Kamen seem to be loading up, looking for a big counter.
Nezmah works the jab nicely.
Nezmah scores with a nice right hand.
Kamen slips under a jab from Nezmah.
Nezmah lands a nice shot that snaps Kamen's head back.
Nezmah misses with a jab, cross combination.
Kamen is looking to clinch but Nezmah is avoiding it.
A looping hook to the body misses from Kamen. Nezmah does a little dance to reset his feet.
Left hook, right uppercut from Kamen.
Nezmah lands a jab followed by a nice looking cross.
This has been an exciting period of action!
Kamen gets caught flat footed, as Nezmah shoots in with a quick takedown into guard.
Kamen has scooted to the edge of the canvas and used the cage to get back to his feet. Nezmah has stuck on his opponent and is forcing him back against the cage.
That's two minutes gone in the round.
Kamen misses with a body punch.
Kamen tries a body shot but Nezmah blocks it.
Nezmah stalls.
Nezmah prevents a body shot from Kamen.
Nezmah escapes the clinch and we're back to striking.
Kamen uses some good footwork to avoid the body shot by Nezmah.
Kamen appears to be looking for a counter punch to the body.
Kamen is looking to wear down Nezmah with body shots, infact he's throwing more body shots than head shots at the moment.
Nezmah scores with a nice takedown into half guard. Let's see what he's got on the ground.
Nezmah prevents Kamen from improving his position.
Kamen might be looking to lock onto one of his opponent's long limbs for a submission, whilst we're on the ground.
Nezmah decides to stand and escape the position.
That's three minutes gone in the round.
Kamen needs to keep his hands up - Nezmah had a free shot at his head there.
A jab from Nezmah does it's job there.
Nezmah closes the distance and after a bit of a stuggle, scores a takedown into Kamen's guard.
Nezmah's corner is telling him to maintain position.
Kamen wants to stand and escape but Nezmah is having none of it.
That's four minutes gone in the round.
Nezmah is stalling in the full guard.
Nezmah pushes down on Kamen's leg and manages to get into half guard.
Kamen pushes Nezmah off looking to stand but Nezmah dives back in and keeps control.

The referee decides to stand the fighters back up.
Kamen fails to land with a series of punches.
Nezmah throws out a powerful jab.
Kamen throws the left hand but Nezmah avoids the punch easily.
Kamen swinging wildly here.
Nezmah drops down looking to force a counter takedown but Kamen defends it well.
And that's the end of the fight!
I would just about give that final round to Gracij Nezmah.
I think Nezmah has won this one but let's see whether the judges agree with me. Over to the ring announcer for the scorecards.
Ladies and gentlemen, after 3 rounds of action, we go to the scorecards for a decision.
Judge Ben Hemmingworth scores the fight 28:29
Judge Summer Carpenter scores the fight 28:29
Judge Skip Squint scores the fight 28:29
In favor of your winner, by unanimous decision... Gracij Nezmah!
|
|
|
|
|
|
|
|
|
|
|
|
|
|
|
|
|
|
|
|
|
|
|
| S |
C
A |
G |
S |
C
B |
G |
|
S |
C |
G |
|
energy
A | B |
|
hype
A | B |
|
pop
A | B |
|
mgr
A | B |
|
FIGHT
RATING
63% |
|
|
|
|
|
|
|
Undercard bout
|
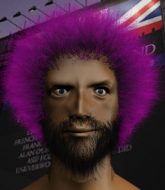
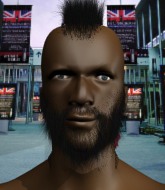
Coming up we have a light heavyweight MMA rules bout between Shifty McShady (ranked 0 p4p, 0 weight class) and Jim Duggen (ranked 0 p4p, 0 weight class). Shifty McShady has the edge in experience - let's see if he can make that count tonight.
 |
|
 |
| 185 cm
24
215 lbs
5 - 2 - 0 |
|
200 cm
25
198 lbs
0 - 3 - 0 |
BJJ Blue Belt
Excellent boxer
Experienced |
|
BJJ White Belt
Excellent MT
Heavy handed |
|
| |
|
Ladies and gentlemen. This fight is 3 rounds, in the light heavyweight division.
Introducing the fighter to my left, fighting out of the red corner.
With a record of
5 - 2 - 0, fighting out of Sydney, Shifty McShady!
And introducing the fighter to my right, fighting out of the blue corner.
With a record of
0 - 3 - 0, fighting out of Sydney, Jim Duggen!
The judges for this bout are Damien Edna, Eliza Hachem and Winston Howard.
The bell rings for round one and we are underway!
Duggen dives in for a single leg takedown but McShady sprawls and the fighters end up clinched against the cage.
Duggen shoots in for a double leg but McShady sprawls well. That's going to sap some energy.
McShady throws a right hand that Duggen ducks under and follows up with a left that Duggen also avoids with ease.
Duggen tries to close the distance and clinch up but McShady swats him away and circles back towards the center.
No luck with that takedown attempt from Duggen.
McShady throws a big counter combination but Duggen scrambles out of danger and avoids any damage.
Shifty McShady has stuffed three takedown attempts in the round now. That's going to take a lot out of Jim Duggen.
Duggen is looking to take this fight into the clinch.
McShady throws a head kick that misses.
We've had a slow start to the round here - hopefully the action picks up.

McShady fakes a strike and closes the distance, dragging Duggen to the ground. McShady is now in Duggen's guard.
McShady might be looking to lock onto one of his opponent's long limbs for a submission, whilst we're on the ground.
McShady lands a nice shot whilst sitting in his opponent's guard.
Duggen really doesn't want to stay on the ground with McShady. If he can't get it back to his feet, it's only a matter of time before he'll be tapping out.
McShady working some strikes from top position.
Duggen has momentary wrist control but McShady slips an elbow through the middle.
That's one minute gone in the round.
McShady advances to half guard.
McShady lands with a punch from half guard.
McShady trying to control the pace.
Duggen trying to control from the bottom.
Duggen on the receiving end of some nice ground and pound.
McShady working the head and body with strikes.
McShady thows a huge punch but Duggen dodges it nicely.

McShady is working for a submission here. He's got hold of the far side arm and he's looking for a kimura. He's cranking on the arm and he's got it! Duggen is tapping out! Ouch, that looked like it hurt!
Ladies and gentlemen, after 2:56 of round 1, we have a winner by way of Submission (Kimura). Shifty McShady!
After the big win, Shifty McShady made sure to do all the important stuff like thanking his sponsors Voodoo Nutrition and telling the interviewer how much he loves him.
|
|
|
|
|
|
|
|
|
|
|
|
|
|
|
|
|
|
|
|
|
|
|
| S |
C
A |
G |
S |
C
B |
G |
|
S |
C |
G |
|
energy
A | B |
|
hype
A | B |
|
pop
A | B |
|
mgr
A | B |
|
FIGHT
RATING
41% |
|
|
|
|
|
|
|
Undercard bout
|
|
|
|
Undercard bout
|
Coming up we have a light heavyweight MMA rules bout between Leigh Adams (ranked 0 p4p, 0 weight class) and Reggie Marlow (ranked 0 p4p, 0 weight class). Leigh Adams is staring across the cage at his opponent, tweaking his nipples... Tweaking his own nipples that is.
 |
|
 |
| 185 cm
27
201 lbs
8 - 4 - 0 |
|
185 cm
27
205 lbs
5 - 4 - 0 |
BJJ Blue Belt
Solid boxing
Very strong |
|
BJJ Purple Belt
Lethal high kicks
Granite chin |
|
| |
|
Ladies and gentlemen. This fight is 3 rounds, in the light heavyweight division.
Introducing the fighter to my left, fighting out of the red corner.
With a record of
8 - 4 - 0, fighting out of Sydney, Leigh Adams!
And introducing the fighter to my right, fighting out of the blue corner.
With a record of
5 - 4 - 0, fighting out of Sydney, Reggie Marlow!
The judges for this bout are Ben Hemmingworth, Chris Dean and Steve Erwin.
The bell rings for round one and we are underway!
Adams throws a lazy right hand but Marlow sees it coming a mile off and sidesteps it easily.
Marlow misses with a half-hearted attempt at a head kick.
Adams lands a really nice looking cross but Marlow seems unphased.
The fight stays on the outside here - Adams looks like he's thinking about clinching though.
Adams throws a series of punches but Marlow moves out of range.
Adams avoids the head kick by Marlow.
Marlow tries a switch kick but it misses it's target.
Adams throws a combination. Marlow tries to block but a couple of punches get through.
Adams tries to clinch but Marlow is having none of it.
Adams throws a combination but it was largely blocked by Marlow.
Marlow tries a switch kick but it misses it's target.
Adams lands a jab to Marlow's midsection.
This fight brought to you by 5M nutrition - it's mmmmm tasty. Nice jab by Adams.
Adams definitely looks more muscular than last time we saw him fight.
This is a great period of action - very entertaining stuff!
Marlow misses with a head kick.
Marlow throws a sloppy head kick and Adams moves out of range easily.
Leigh Adams seems to be the more aggressive standup fighter in this bout.
Adams lands a glancing blow to the side of Marlow's head.
Marlow throws a head kick that looked like it stung.
That's one minute gone in the round.
Adams looks to land a combination but Marlow avoids it well.
Marlow pulls out of a head kick attempt.
Adams was looking to counter that move with a punch but didn't quite pull the trigger.
Adams blocks a head kick by Marlow.
A head kick by Marlow misses
and Adams counters with a nice shoot takedown that brings the fighters to the ground.
Marlow is looking to stand up but Adams isn't so interested in that idea.
Adams wants to control from the top but Marlow keeps moving.
Marlow preventing the ground and pound from doing any damage.
Marlow preventing the ground and pound from doing any damage.
Marlow is working from a closed guard but he's struggling to control his opponent.
That's two minutes gone in the round.

Marlow looking for submissions off his back, moving his hips, looking for an opening.
Marlow is trying to stand up but he's not managed so far.
Adams postures up to throw the ground and pound strikes but they don't connect.
Marlow looking for submissions from the bottom but instead Adams passes into half guard.
Marlow wants to control but Adams is keeping busy and won't allow it.
Adams not throwing his punches with enough precision this time.
Marlow blocking the ground and pound attempt from Adams.
Marlow taking some punishment here, with Adams in his half guard.
That's three minutes gone in the round.
Adams sitting in half guard, looking to land shots. Marlow defending well though.
Adams misses with a head shot. Marlow uses the momentum to regain guard.
Marlow is looking to get back to his feet but can't, whilst Adams is controlling him.
Adams loading up with the ground and pound but he's missing more than he's landing in this flurry.
Adams throws a strike but Marlow rolls with it and manages to sweep. Now he's in guard on top.
Marlow sitting in guard here, content to control.
The referee has stepped in and called for a break in the action. We'll restart on the feet.
Adams closes the distance and presses his opponent up against the cage.
Adams tries to land a knee to the body but he is off balance and Marlow avoids it.
Marlow breaks the clinch.
Adams looks to land a left hand but Marlow moved out of range nicely.
That's four minutes gone in the round.
Marlow throws a head kick but Adams moves out of range.
Adams throws a hard body shot but it just misses.
Marlow is loading up here, looking for a big counter of his own.
Adams throws a wild combination but nothing lands.
Marlow lands a head kick. Adams smiles back at him and beckons him forward.
Adams digs a good body shot into Marlow's ribs.
Adams leaves Marlow with his face pressed against the mat as he sprawls beautifully, defending against a solid takedown attempt.
A little feinted left hand from Adams on the counter but he doesn't commit to it.
Adams moves into range and throws a lovely three punch combination.
Fantastic stuff here - a very entertaining period of action, which has drawn cheers from the crowd.
Adams throws a big shot that misses.
Marlow throws a head kick but Adams moves out of range.
Adams drops down looking for a counter takedown but Marlow sprawls and moves away.
A head kick misses from Marlow.
Adams swung with a counter right hand that didn't connect.
A big left from Adams misses.
A jab from Adams misses.
A left lands for Adams.
Adams avoids the head kick by Marlow.
And thats the end of the round the fighters go back to their corners.
Leigh Adams dominated that round.
OK. That's time! The bell goes and we're back to the action.
Marlow misses with a head kick.
Adams fakes low and throws an overhand right that catches Marlow on the side of the head.
Sloppy strikes from Adams. Those never looked like landing.
Marlow tries to clinch but Adams is having none of it.
Marlow misses with a head kick.
Marlow pulls out of a head kick attempt.
Marlow misses with a half-hearted attempt at a head kick.
Marlow pulls out of a head kick attempt.
Adams lets the fists fly and connects with a left straight followed by a right hook.
Adams scores with a crisp jab that stopped Marlow in his tracks.

Adams lands a big uppercut and Marlow crumbles to the floor! The ref thinks about stopping the fight but Marlow looks OK. Adams waves Marlow back to his feet!

Marlow is rocked!
The fans in attendance giving it up for the two fighters, who have really let it all hang out in the last minute or so!
Adams has managed to clinch.
Marlow is still on wobbly legs! Can Adams finish him?
Marlow pushes off and circles away, back to the middle of the mat.
Adams scores with a jab to the body.
Marlow is breathing heavily.
Adams throws a perfectly timed hook that sends Marlow crashing down! Marlow tries to stagger back to his feet but Adams just hammers him until the ref stops the fight! A confused Marlow asks the ref what just happened. Poor fella.
Ladies and gentlemen, after 0:52 of round 2, we have a winner by way of TKO (Strikes). Leigh Adams!
Leigh Adams made sure to mention his sponsor, Voodoo Nutrition in his post fight interview.
|
|
|
|
|
|
|
|
|
|
|
|
|
|
|
|
|
|
|
|
|
|
|
| S |
C
A |
G |
S |
C
B |
G |
|
S |
C |
G |
|
energy
A | B |
|
hype
A | B |
|
pop
A | B |
|
mgr
A | B |
|
FIGHT
RATING
54% |
|
|
|
|
|
|
|
Undercard bout
|
Coming up we have a middleweight MMA rules bout between Claudio Demaestri (ranked 0 p4p, 0 weight class) and Bolin Jang (ranked 0 p4p, 0 weight class). Both fighters look fresh as a daisy as they make their way towards the cage.
 |
|
 |
| 200 cm
24
197 lbs
5 - 9 - 0 |
|
178 cm
25
195 lbs
4 - 1 - 0 |
Abu Dhabi Champ
World class boxer
Granite chin |
|
Good wrestler
Brawler
Knockout power |
|
| |
|
Ladies and gentlemen. This fight is 3 rounds, in the middleweight division.
Introducing the fighter to my left, fighting out of the red corner.
With a record of
5 - 9 - 0, fighting out of Tokyo, Claudio Demaestri!
And introducing the fighter to my right, fighting out of the blue corner.
With a record of
4 - 1 - 0, fighting out of Sydney, Bolin Jang!
The judges for this bout are Eliza Hachem, Winston Howard and Ben Hemmingworth.
The bell rings for round one and we are underway!
Demaestri gets caught on his heels momentarily as he allows Jang to score an easy takedown into full guard.
Demaestri looking for a guillotine here but Jang defends easily.
Jang looking to control the position here, rather than advance.
Jang wants to control from the top but Demaestri keeps moving.
We've had a slow start to the round here - hopefully the action picks up.
Jang postures up to throw the ground and pound strikes but they don't connect.
Jang is in close to Demaestri's body, working some short punches and elbows.
Demaestri working for a triangle but Jang defends it easily.
Demaestri trying to keep a closed guard but Jang is proving a slippery customer.
That's one minute gone in the round.
Jang is looking to work some ground and pound but Demaestri has wrist control.
Demaestri had isolated an arm as going for a kimura. Jang defends it easily.
Demaestri is throwing his legs up, looking for submissions. Jang is aware though and is defending well.
Jang makes a bit of distance and scores with some ground and pound, still in guard.
Jang really doesn't want to stay on the ground with Demaestri. If he can't get it back to his feet, it's only a matter of time before he'll be tapping out.
Demaestri has his foot on Jang's thigh. He's trying to push off and get in position for a triangle, I think. Jang works his way back into a safe position though.
The fighters are pressed up against the cage, both looking to find a bit of space to work.
Demaestri throwing his legs up looking for a triangle.
Jang lands a nice shot whilst sitting in his opponent's guard.
Demaestri had isolated an arm as going for a kimura. Jang defends it easily.
Demaestri will need to keep those long limbs tucked in whilst he's on the ground, to prevent any submissions.
Jang is intent on slowing down the pace of the fight, simply looking to control.
That's two minutes gone in the round.
Demaestri throws his legs up looking to secure a triangle. Oh, that looks pretty tight, I gotta say! Jang escapes and throws Demaestri's legs to the side, diving into side control!
Jang trying to control the action but Demaestri is working from the bottom.
Jang in side control lands a nice looking series of punches and elbows.
Demaestri takes an elbow right on the bridge of the nose and winces in pain.
Demaestri prevents Jang from improving position.
Demaestri tries to buck Jang off but Jang is having none of it.
That's three minutes gone in the round.
Demaestri being controlled for a moment.
Jang working away diligently from side control. Landing strikes effectively there - that will score him some points on the judges scorecards.
You can see the frustration on Demaestri's face as Jang controls the position.
Jang lands a nice forearm strike.
Jang landing a few strikes.
Jang tries to advance to mount but can't.
Demaestri sneaks a leg under to get back to half guard.
Demaestri looking for submissions off his back.
Jang thows a huge punch but Demaestri dodges it nicely.
Jang performing his best blanket impression for a moment.
Jang is keeping good posture, landing some ground and pound.
That's four minutes gone in the round.
A lull in the action here being met with boos from the crowd.
Demaestri looking to work for a kimura from the bottom.
Jang is trying to control the action in half guard but Demaestri is working away on the bottom, looking perhaps to get back to full guard.
Demaestri regains full guard. Nicely done.
Demaestri really does look like a pencil wearing a pair of gloves. Let's hope he has a gameplan to suit that ridiculous body shape.
Jang wants to control from the top but Demaestri keeps moving.
The referee has motioned to the fighters to stand back up. He just wasn't happy with the level of activity.
Jang tries to clinch
and Demaestri counters with a series of strikes. Jang will be more careful next time no doubt.
Jang takes one to the side of the head.
Claudio Demaestri is looking to keep the fight on the feet at all costs.
No joy there for Demaestri, who threw a few shots but didn't land.
Demaestri scores with a one two! Jang had his feet all tangled up there and couldn't avoid the strikes.
It looks like Bolin Jang has been cut.
A momentary lapse in concentration from Demaestri enables Jang to shoot in and score with a neat double leg. Demaestri manages to secure a closed guard as the fighters hit the mat.
Demaestri keeping moving, preventing Jang from controlling successfully.
Jang sneaks a leg through and gets to half guard. That was like a knife through butter how easily he passed Demaestri's guard.
Demaestri has hold of Jang's hands but Jang slips his arm to the side and lands an elbow.
And thats the end of the round the fighters go back to their corners.
Claudio Demaestri dominated that round.
The cut man is working on Bolin Jang's cut.
The minute break is over - no more time for sponges and pep talks - back to the action!
Jang misses with a straight left.
Demaestri blocks a jab.
Demaestri goes to the watering hole and comes back with a big thumbs up from the judges as he scores a three punch combo.
Demaestri is really dominating this fight. Is there anything that Jang can do to turn this around?
Jang looks shocked there as he takes a right hand to the temple.
Jang is rocked!
Demaestri connects with a stiff jab that staggers Jang - oh and he follows up with a huge uppercut that knocks him out cold! Man, that was brutal!
Ladies and gentlemen, after 0:19 of round 2, we have a winner by way of KO (Punches). Claudio Demaestri!
A pretty intense looking Claudio Demaestri took the opportunity post-fight to ask for a shot at the title.
|
|
|
|
|
|
|
|
|
|
|
|
|
|
|
|
|
|
|
|
|
|
|
| S |
C
A |
G |
S |
C
B |
G |
|
S |
C |
G |
|
energy
A | B |
|
hype
A | B |
|
pop
A | B |
|
mgr
A | B |
|
FIGHT
RATING
37% |
|
|
|
|
|
|
|
Undercard bout
|
Coming up we have a middleweight MMA rules bout between Ron Green (ranked 0 p4p, 0 weight class) and Jarred Solace (ranked 0 p4p, 0 weight class). Green's entrance music is Battle Royal. A fine choice. Both fighters will be looking to make this an exciting fight for the fans, I'm sure!
 |
|
 |
| 183 cm
27
196 lbs
4 - 1 - 0 |
|
182 cm
20
186 lbs
1 - 0 - 0 |
BJJ Blue Belt
Solid boxing
Very strong |
|
BJJ Purple Belt
Good kicks
Heavy handed |
|
| |
|
Ladies and gentlemen. This fight is 3 rounds, in the middleweight division.
Introducing the fighter to my left, fighting out of the red corner.
With a record of
4 - 1 - 0, fighting out of Sydney, Ron Green!
And introducing the fighter to my right, fighting out of the blue corner.
With a record of
1 - 0 - 0, fighting out of Sydney, Jarred Solace!
The judges for this bout are Chris Dean, Ben Hemmingworth and Darius Henderson.
The bell rings for round one and we are underway!
Green throws an ugly left hook that misses
letting Solace counter with a right hand.

It looks like Ron Green has been cut.
A head kick misses from Green.
Green misses with a lunging right hand
and Solace counters with a crisp hook to the side of the head.
Green throws a poor cross that misses
and Solace counters with a body kick that brings a smile to the face of both fighters.
Solace takes the fight into the clinch.
Solace breaks the clinch and we return to the middle of the mat.
Green is on the wrong end of a nice combination from Solace.
Green looks to throw the jab but Solace is out of range.
Green misses with a body shot. Nice footwork from Solace.
Solace scores with a one two! Green had his feet all tangled up there and couldn't avoid the strikes.

Green is rocked!
Wooooo! Give it up for these two warriors! They are putting on a show!
Green moves out of range of the body kick.
Green falls off balance throwing a combination
enabling Solace to counter with a crisp jab.
Oh Green is still all over the place! His legs are completely gone! Will he be able to recover?!!
Green swings and misses with a hook to the body.
Green seems to have got his legs back now.
That's one minute gone in the round.
Green smiles there as he lands a nice right hand right on the button.
Green uses good footwork to get in and out and land a nice right hand before Solace has time to react.
Green takes a step back and watches a body kick go sailing past his mid section.
Solace throws a jab when Green was well out of range.
A shot to the body from Green misses
and Green takes a counter punch right on the button for his troubles.
Green cracks Solace with a hook to the jaw. Both fighters smile at eachother and high-five before getting back down to business.
Green darts in and out, connecting with a jab.

Oooooh!!! Solace has knocked Green down with a huge combo! Solace steps away and waves a wobbly Green back to his feet! This one might not go much longer!
This has been an exciting period of action!
Solace rushes Green and pushes him back against the cage in a clinch.
Green has had enough of the clinch but Solace keeps him there for the moment.
Solace scores with a hook to the body.
Solace's coach down at The Iron Works $800 Elite Coaches was telling us pre-fight that they have been working on Solace's balance. Obviously they view that as a key factor in the outcome of this fight.
Solace breaks the clinch.
Green misses with a lunging right hand
and Solace counters with a crisp one two that drops Green! Solace thinks about following him to the mat for a moment but instead steps back and waves Green to his feet! Green is in big trouble!
Ron Green's cut is getting worse.
Green lands a glancing blow to the side of Solace's head.
Green misses the jab.
Ron Green seems to be the more aggressive standup fighter in this bout.
That's two minutes gone in the round.
Solace cracks Green with a big right hand that sends him crashing to the floor. Solace has the opportunity to follow him to the ground but instead he's beckoning Green to stand back up!
Solace throws a head kick but Green moves out of range.
A big left from Green misses.
Solace swings away with a counter right hand but no contact made.
A shot to the body from Green misses
and Solace counters with a series of strikes that really hurt Green! The ref looks into his eyes and sees nobody home - he's called the fight! This one is all over!
Ladies and gentlemen, after 2:19 of round 1, we have a winner by way of TKO (Strikes). Jarred Solace!
Jarred Solace decided to go for the less than humble approach in his post fight interview, telling everyone how he is going to conquer the world. The crowd seemed to like it when really that sort of approach could have gone either way.
|
|
|
|
|
|
|
|
|
|
|
|
|
|
|
|
|
|
|
|
|
|
|
| S |
C
A |
G |
S |
C
B |
G |
|
S |
C |
G |
|
energy
A | B |
|
hype
A | B |
|
pop
A | B |
|
mgr
A | B |
|
FIGHT
RATING
78% |
|
|
|
|
|
|
|
Undercard bout
|
Coming up we have a welterweight MMA rules bout between Hugo Agogo (ranked 0 p4p, 0 weight class) and Tobias Wall (ranked 0 p4p, 0 weight class). Wall is bouncing up and down as he enters the arena, backed by We Ready- Archie Eversole. These two fighters really are very evenly matched on the feet - it will be fascinating to see who can assert themselves in that aspect of the fight.
 |
|
 |
| 180 cm
31
174 lbs
12 - 6 - 0 |
|
179 cm
27
186 lbs
11 - 6 - 1 |
Great wrestler
Great low kicks
Insanely flexible |
|
Good wrestler
Decent boxing
Good gas tank |
|
| |
|
Ladies and gentlemen. This fight is 3 rounds, in the welterweight division.
Introducing the fighter to my left, fighting out of the red corner.
With a record of
12 - 6 - 0, fighting out of Sydney, Hugo Agogo!
And introducing the fighter to my right, fighting out of the blue corner.
With a record of
11 - 6 - 1, fighting out of Sydney, Tobias Wall!
The judges for this bout are Chris Dean, Donatello Bradman and Eliza Hachem.
The bell rings for round one and we are underway!
Wall fakes a jab and then connects with a hook.
Wall tries to close the distance and clinch up against the cage but Agogo paws at him with a jab and circles away.
Wall misses with a jab to the body
and Wall takes a counter punch right on the button for his troubles.
Agogo tries for a takedown but Wall sees it coming a mile off and avoids it easily.
Wall is trying to avoid his opponent's strikes and get into the clinch.
Agogo takes a punch to the jaw and another one to the bread basket.
Agogo pushes Wall up against the cage in a clinch.
Wall throws a blind hook that connects with the side of Agogos head.
Agogo goes for a takedown in the clinch but Wall prevents it.
Wall goes for a body shot but it's blocked.
Agogo goes for a takedown in the clinch but Wall prevents it.
That's three failed takedown attempts in the round for Hugo Agogo. That's going to take a lot out of him.
Wall is trying to work out of this bad position, with his back against the cage.
Agogo goes for a takedown attempt but Wall pushes him away and we're back to fighting at a distance.
Wall lands with an uppercut that bounces Agogo off the cage and back into range.
That's one minute gone in the round.
Agogo slips a straight right by Wall.
A telegraphed takedown attempt from Wall is defended easily by Agogo.
Agogo rushes Wall and presses him up against the cage.
Agogo slows down the pace here.
Wall is defending well against a takedown attempt.
Wall lands a nice trip takedown into half guard.
Wall wants to advance to full mount but Agogo doesn't think that's going to happen and regains full guard instead.
That's two minutes gone in the round.
Wall throwing strikes from guard but Agogo blocks nicely.
Agogo is controlling Wall's posture.
Agogo utilising some decent striking defenses from the guard, preventing the ground and pound.
Agogo preventing the ground and pound from doing any damage.
Wall wants to pass the guard but Agogo is keeping the position.
Agogo controls Wall momentarily but Wall frees himself.
Wall stopping the sweep attempt from Agogo.
The fighters are pressed up against the cage, both looking to find a bit of space to work.
That's three minutes gone in the round.
Wall throws a big elbow that misses.
Agogo being controlled here, momentarily.
Wall working some ground and pound from guard but it's not doing any damage.
Wall pressing down on his opponent's thigh, looking to pass guard. Agogo is keeping the position for now.
Wall sitting in guard, not really doing much.
The ref stands the fighters back up due to a lack of activity.
Wall fails to land with a series of punches.
Agogo throws a body shot but no joy.
Wall ducks down and throws a hook to the body but Agogo moves away.
That's four minutes gone in the round.
A few boos can be heard. I'm sure they will multiply if the fighters don't pick up the pace.
Agogo shoots for a double leg takedown but Wall sprawls well. He's pushed Agogo's face into the mat and manages to get back to his feet relatively easily.
Agogo clinches.
I was talking to Agogo's coach per-fight and he was telling me that they'd been working on the clinch in the runup to this fight.
Wall lands a left hand.
Wall manages to get underhooks and slows down the pace for a moment.
Stalling in the clinch from Wall.
Wall's corner calls for him to break the clinch, which he does.
Wall shoots in with a takedown attempt and he has Agogo pinned against the cage. Agogo gets the underhooks and manages to circle away.
The crowd thankful this round is nearly over.
Agogo lands an overhand right.
And thats the end of the round the fighters go back to their corners.
Tobias Wall dominated that round.
That's time! Agogo's corner gives him a slap on the ass as he gets ready to fight.
Agogo throws a sloppy head kick and Wall moves out of range easily.
Wall drops down and drives through with a powerful takedown into guard.
Agogo looking to sweep here. No luck so far.
The fighters are starting to perspire pretty heavily.
Wall trying to control but Agogo is working from the bottom.
Agogo wants to control here, rather than go for any submissions from the bottom. At least for now.
We've had a slow start to the round here - hopefully the action picks up.
Wall throwing elbows and punches but not connecting, as Agogo works some decent striking defense from the bottom.
Wall is taking a break and basically stalling. The referee will not allow him to do that for long.
Wall trying to pass the guard but can't manage it just yet.
That's one minute gone in the round.
Agogo keeping moving, preventing Wall from controlling successfully.
The ref stands the fighters back up due to a lack of activity.
Tobias Wall seems to be the more aggressive standup fighter in this bout.
Wall fakes a head shot and lands one to the body.
Agogo gets caught flat footed, as Wall shoots in with a quick takedown into guard.
Wall trying to control but Agogo is working from the bottom.
Wall postures up in Agogo's guard and throws a big left but Agogo blocks it.
Wall wants to pass the guard but Agogo is keeping the position.
Agogo tries to land a sweep but no joy.
That's two minutes gone in the round.
Wall missing there with some ground and pound from the guard.
Wall wants to control from the top but Agogo keeps moving.
Wall sitting in guard, not really doing much.
The ref stands the fighters back up due to a lack of activity.
Agogo takes a big uppercut there. He seems a bit wobbly but no, he's OK.
Wall shoots in for a takedown. "Ole!" shouts Agogo as he jumps to the side.
Wall closes the distance and clinches up with Agogo, looking for a takedown. Wall pushes Agogo against the cage but Agogo circles to the side and manages to break the clinch.
Agogo moves into the clinch.
That's three minutes gone in the round.

Agogo breaks the clinch and we return to the middle of the mat.
Wall throws a hook but Agogo blocks it.
Agogo staying out of range there.
Wall misses with an uppercut. Agogo saw that one coming.
A slow jab from Wall misses its intended target.
Wall uses decent footwork to sidestep a right hand from Agogo.
Agogo connects with a lovely jab that went straight through the gap between Wall's hands.
Wall cracks Agogo with an open hand slap.
Agogo takes a jab on the nose there. A little bit of blood seems to be coming out. Hopefully that won't affect his breathing.
Hugo Agogo is looking to throw some combinations by the looks of things.
Wall is looking for a takedown here. He's shot in and has managed to get it, finishing up in Agogo's half guard.
Agogo won't allow Wall to pass to mount.
Agogo wants to control but Wall is keeping busy.
That's four minutes gone in the round.
Wall missing with the ground and pound from half guard.
Wall is stalling here. Agogo is in no mood to hang around though. He's locked up a kimura from the bottom! Wall seems to be keeping calm but he's forced to roll out of the hold and Agogo has ended up in side control on the top. Nice work.
Agogo working the body and head with strikes.
Agogo looking to punish the body of his opponent here but Wall is avoiding damage well.
Agogo throwing strikes but missing, from side control.
Agogo lands a decent elbow from side control.
The fans in attendance giving it up for the two fighters, who have really let it all hang out in the last minute or so!
Wall tries to bench press Agogo off him but Agogo keeps the position.
The crowd thankful this round is nearly over.
Agogo landing with strikes to the head and body from side control.
Wall tries to get back to half guard but can't.
Agogo looking to punish the body of his opponent here but Wall is avoiding damage well.
And thats the end of the round the fighters go back to their corners.
Tobias Wall showed his class in that round. I'd imagine he'll take it on all the scorecards.
Well, the break between rounds is over. Let's get back to the scrappin! This is the final round!
Wall lands a jab.
Agogo shoots in but no luck this time.
Wall throws out a loose jab but Agogo uses good head movement to avoid it.
Wall misses the shot to the body.
Agogo darts in and clinches Wall up against the cage.
Wall has a couple of punches blocked by Agogo.
Wall wants to get back to striking at distance but Agogo won't allow it.
Wall misses with a hook from the clinch.
Wall gets underhooks to prevent Agogo's takedown attempt.
We've had a slow start to the round here - hopefully the action picks up.
Wall doesn't land with the attempted body shot.
Wall misses with the head strike.
Wall misses with some punches.
Agogo tries to score a body lock takedown but Wall shows good agility there to stay on his feet.
That's three failed takedown attempts in the round for Hugo Agogo. That's going to take a lot out of him.
That's one minute gone in the round.
Wall scores with a shoulder strike.
Agogo lands with a quick shot inside that doesn't really do much damage.
Wall doesn't land with the attempted body shot.
Wall throws a punch but it's blocked by Agogo.
A head punch blocked on the inside by Agogo.
An uppercut on the inside fails to land for Wall.
Wall can't break the clinch.
Wall working aggressively here.
Wall is trying to work out of this bad position, with his back against the cage.
Wall misses with the head strike.
Wall is looking for a takedown.
Wall misses with a hook from the clinch.
That's two minutes gone in the round.
Wall tries a shoulder strike but it doesn't do any damage.
Wall fails to land with a short punch on the inside.
Agogo drops down looking for an ankle pick but Wall pulls his leg out and moves away.
Agogo throws a right and a left that Wall avoids nicely.
Wall fakes high and swings low for a body shot but Agogo manages to avoid it.
Agogo swings away but doesn't land with a series of punches.
Wall goes for a double leg but Agogo avoids the attempt and the two fighters end up clinched against the cage as Agogo continues to drive forward.
Hugo Agogo has stepped it up - he knows he needs a finish here!
Agogo bobs and weaves well there to avoid the strikes.
Wall lands a powerful looking uppercut that connected with his opponent's jaw.
Wall throws a wild combination but nothing lands.
Fantastic stuff here - a very entertaining period of action, which has drawn cheers from the crowd.
Wall swings widly with a right hand
and Agogo counters with a straight right hand.
Agogo fakes high and shoots in for a takedown but Wall avoids it really well and circles away.
That's three minutes gone in the round.
Wall tries to close the distance and clinch up against the cage but Agogo paws at him with a jab and circles away.
Agogo tries to land with a swinging hook to the body but Wall was well out of range. Poor timing from Agogo.
Wall dips down and scores with a jab to the body.
Agogo jabs at Wall's body.
Agogo uses good footwork to get in and out and land a nice right hand before Wall has time to react.
Agogo throws a shot from downtown. Wall moves away and avoids it.
Wall missing with a left hand there. Agogo was out of range so wasted energy throwing that one.
Agogo attempts a counter takedown but Wall avoids it well and moves away.
A telegraphed right hand from Wall misses the target.
Wall scores with a punch to the gut of his opponent.
Wall throws a body shot but no joy.
Tobias Wall is fighting for a decision - hopefully he's judged it right and he's actually winning the fight.
Wall blocks a head kick by Agogo.
Wall defending well as Agogo loads up on a big left hand.
Agogo misses with a takedown
and Wall counters with a stiff right hand.
That's four minutes gone in the round.
Wall lands with a straight right. Agogo didn't see that one coming.
A lazy left from Wall finds it's target.
The crowd are loving this. Great action here.
Wall darts in and clinches Agogo up against the cage.
Agogo lands a left hand that snaps the head of Wall backwards.
Wall misses with some punches.
Wall misses with a punch on the inside.
Wall misses with a body punch.
Wall wants to get back to striking at distance but Agogo won't allow it.
Wall takes a shot to the head.
Wall prevents a body shot from Agogo.
Nice body punch from Agogo - that landed with a thud.
And that's the end of the fight!
Tobias Wall comfortably won the final round on my scorecard.
Well Wall has outworked and out performed his opponent in all aspects of the game today. He was simply too good and the decision should be no more than a formality. Over to the ring announcer for the scorecards.
Ladies and gentlemen, after 3 rounds of action, we go to the scorecards for a decision.
Judge Chris Dean scores the fight 27:30
Judge Donatello Bradman scores the fight 27:30
Judge Eliza Hachem scores the fight 27:30
In favor of your winner, by unanimous decision... Tobias Wall!
Tobias Wall took his opportunity to call for a title shot in his post fight interview.
|
|
|
|
|
|
|
|
|
|
|
|
|
|
|
|
|
|
|
|
|
|
|
| S |
C
A |
G |
S |
C
B |
G |
|
S |
C |
G |
|
energy
A | B |
|
hype
A | B |
|
pop
A | B |
|
mgr
A | B |
|
FIGHT
RATING
39% |
|
|
|
|
|
|
|
Co-main event
|
Coming up we have a heavyweight MMA rules bout between Alexander Hardenov (ranked 0 p4p, 0 weight class) and Chad Glazer (ranked 0 p4p, 0 weight class). Alexander Hardenov has the better chin. Will he look to stand and bang today?
 |
|
 |
| 195 cm
27
265 lbs
7 - 3 - 0 |
|
197 cm
26
270 lbs
7 - 5 - 0 |
BJJ Blue Belt
Solid boxing
KO power |
|
Good wrestler
Decent boxing
Good gas tank |
|
| |
|
Ladies and gentlemen. This fight is 3 rounds, in the heavyweight division.
Introducing the fighter to my left, fighting out of the red corner.
With a record of
7 - 3 - 0, fighting out of Sydney, Alexander Hardenov!
And introducing the fighter to my right, fighting out of the blue corner.
With a record of
7 - 5 - 0, fighting out of Sydney, Chad Glazer!
The judges for this bout are Ben Watson, John Mangel and Hugh Johnson.
The bell rings for round one and we are underway!
Glazer throws a wild combination but nothing lands.
Glazer steps to the side to avoid the strikes from Hardenov.
Glazer scores with a jab.
It looks like Alexander Hardenov has been cut.
A jab lands there for Glazer.
Hardenov throws a nice hook to the body that draws an oooh from the crowd.
Hardenov throws a jab but it's blocked by Glazer.
A looping hook to the body misses from Hardenov. Glazer does a little dance to reset his feet.
A jab from Glazer misses.
Hardenov is looking to counter with a shot to the body.
Good exchange - Hardenov coming out on top.
It looks like Chad Glazer has been cut.
Hardenov throws a hook but Glazer avoids it easily.
Chad Glazer seems to be the more aggressive standup fighter in this bout.
Glazer connects with a hook to the side of his opponent's head.
Glazer walks straight into an uppercut. Luckily it didn't land flush.
We've seen a great period of action over the last minute or so - credit to both fighters for going all out!
Glazer fakes high and swings low for a body shot but Hardenov manages to avoid it.
Hardenov is looking to counter punch.
Hardenov fails to land with a series of punches.
That's one minute gone in the round.
Glazer cracks Hardenov with an open hand slap.
Glazer throws a head kick but Hardenov moves out of range.
Glazer gets the takedown into side control.
You can see the frustration on Hardenov's face, being in this tough position on the bottom.
The fighters are pressed up against the cage, both looking to find a bit of space to work.
Hardenov keeping his opponent close.
Hardenov definitely looks more muscular than last time we saw him fight.
Hardenov tries to improve position but can't.
Hardenov can't do much from the bottom here.
Hardenov tries to buck Glazer off but Glazer is having none of it.
Hardenov sneaks a leg under to get back to half guard.
That's two minutes gone in the round.
Glazer sitting in half guard, looking to land shots. Hardenov defending well though.
Nice strikes from Glazer there.
Glazer wants to control but Hardenov is keeping him busy.
Glazer has the superior BJJ but he's also working some ground strikes into his gameplan.
Glazer prevents Hardenov from improving his position.
Hardenov taking some punishment here, with Glazer in his half guard.
Hardenov wants to improve his position but Glazer is controlling well.
Glazer drops an elbow to the side of Hardenov's head.
Hardenov gets full guard.
Glazer pressing down on his opponent's thigh, looking to pass guard. Hardenov is keeping the position for now.
Glazer is intent on slowing down the pace of the fight, simply looking to control.
That's three minutes gone in the round.
Glazer looking to pass the guard.
Hardenov avoiding any damage from the ground and pound.
Glazer wants to control from the top but Hardenov keeps moving.
The referee has decided to stand the fighters back up, so we'll restart on the feet.
Hardenov scores with a one two! Glazer had his feet all tangled up there and couldn't avoid the strikes.
Hardenov takes a jab on the nose there. A little bit of blood seems to be coming out. Hopefully that won't affect his breathing.
Hardenov throws a lazy right hand but Glazer sees it coming a mile off and sidesteps it easily.
A big right from Hardenov misses.
Glazer closes the distance and clinches up, looking for a takedown. He shifts his weight and gets a nice trip into half guard.
Glazer blocks the strikes from Hardenov.
Hardenov is trying to get back to full guard.
That's four minutes gone in the round.
Glazer lands strikes from half guard.
Hardenov is trying to defend against the ground and pound but Glazer scores with a couple of nice shots.
Hardenov works his way to full guard. Good work.
Glazer trying to control but Hardenov is working from the bottom.
Hardenov looking to sweep here. No luck so far.
Glazer lands a nice shot whilst sitting in his opponent's guard.
Glazer landing some decent shots from guard.
Hardenov keeping full guard, as Glazer tries to pass.
Hardenov keeping moving, preventing Glazer from controlling successfully.
And thats the end of the round the fighters go back to their corners.
Chad Glazer dominated that round.
Both fighters have cut men working on them during the interval.
The fighters' corners scream their final instructions, as the referee calls time. Here we go, back to the action!
Hardenov throws a poor cross that misses
and Glazer counters with a beautiful punch that sends Hardenov to the canvas!
Hardenov knows he needs to get back to his feet asap. He's simply no match for Glazer on the ground.
Glazer seems content to control from guard here. He's going to have to remain active though if he doesn't want to get stood back up.
In the pre-fight buildup videos we saw Glazer working his ground and pound in the gym. So far it seems to be working well.
Glazer throws a big elbow that misses.
Glazer throwing shots from guard but he's hitting more mat than opponent.
Hardenov controls Glazer momentarily but Glazer frees himself.
Glazer chips away with some ground and pound.
We've had a slow start to the round here - hopefully the action picks up.
Glazer sitting in guard, not really doing much.
Glazer cracks Hardenov with a solid left hand.
Hardenov keeping moving, preventing Glazer from controlling successfully.
That's one minute gone in the round.
Hardenov trying to keep a closed guard but Glazer is proving a slippery customer.
Glazer scoring with some ground and pound.
Chad Glazer has got the better of the ground game so far.
Hardenov controlling the position.
Glazer is in close to Hardenov's body, working some short punches and elbows.
Hardenov keeping moving, preventing Glazer from controlling successfully.
Glazer scoring with punches to the head and body.
Hardenov controls Glazer momentarily but Glazer frees himself.
Glazer postures up to throw the ground and pound strikes but they don't connect.
The ref warns both fighters not to hold the cage as they work up against the meshing.
That's two minutes gone in the round.
There's not a lot going on here and the crowd are letting the fighters know they're not willing to tolerate a lack of action.
Glazer trying to control but Hardenov is working from the bottom.
The referee decides to stand the fighters back up.
Glazer throws a body punch but Hardenov moves out of range.
Glazer misses with a looping right.
Hardenov appears to be looking for a counter punch to the body.
Glazer misses with a body shot. Nice footwork from Hardenov.
Hardenov misses with a hook
and Glazer counters with a three punch combo that has Hardenov backing up. Hardenov nods at Glazer to acknowledge the strikes.
Glazer bobs and weaves into range and then changes levels and scores with a nice takedown into side control.
Hardenov throws Glazer to one side and escapes!
Glazer fakes high and swings low for a body shot but Hardenov manages to avoid it.
Hardenov misses with a wild body shot.
Glazer swings away with a counter right hand but no contact made.
Glazer swinging wildly here.
Hardenov is looking to counter punch.
Hardenov looks to land a left hand but Glazer moved out of range nicely.
Glazer misses with a lunging right hand
and Hardenov counters with a quick right hand to the jaw.
That's three minutes gone in the round.
Glazer lands a jab, followed by a cross and another cross, as Hardenov backs up against the cage.
Chad Glazer seems to be getting the better of the standup.
Glazer throws a combination but comes up with nothing but fresh air.
Hardenov scores with a sloppy punch to the body. Not much technique there but it did the business.
Hardenov throws out a loose jab but Glazer uses good head movement to avoid it.
Glazer lands with an overhand left.
Glazer uses some good footwork to avoid the body shot by Hardenov.
Glazer will need to tighten up his combinations if he doesn't want to gas himself out, swinging at thin air.
Glazer displays some good footwork, moving neatly out of range as Hardenov throws out the jab.
Glazer let fly with a counter punch to the body but it didn't land.
Hardenov seems to be squinting his left eye. Perhaps he got a poke in that previous exchange. Glazer shows no mercy and swarms him with a barage of strikes! Hardenov is backing up but Glazer catches him with a final right hook that drops him! Hardenov covers up and the referee steps in to end the fight! Glazer Jumps to his feet and flashes his guns to the crowd. Oh yeah, baby! How'd you like them apples?!
Ladies and gentlemen, after 3:55 of round 2, we have a winner by way of TKO (Strikes). Chad Glazer!
Chad Glazer bigged himself up after the win. The crowd seemed to love it.
|
|
|
|
|
|
|
|
|
|
|
|
|
|
|
|
|
|
|
|
|
|
|
| S |
C
A |
G |
S |
C
B |
G |
|
S |
C |
G |
|
energy
A | B |
|
hype
A | B |
|
pop
A | B |
|
mgr
A | B |
|
FIGHT
RATING
47% |
|
|
|
|
|
|
|
Main event
|
Coming up we have a heavyweight MMA rules bout between Sandor Clegane (ranked 0 p4p, 0 weight class) and Wiremu Williams (ranked 0 p4p, 0 weight class). These two fighters really are very evenly matched on the feet - it will be fascinating to see who can assert themselves in that aspect of the fight.
 |
|
 |
| 190 cm
23
230 lbs
12 - 1 - 0 |
|
185 cm
22
282 lbs
5 - 1 - 0 |
BJJ Blue Belt
Solid boxing
Very quick |
|
BJJ Blue Belt
Decent boxing
Good gas tank |
|
| |
|
Ladies and gentlemen. This fight is 5 rounds, for the heavyweight championship of the world!
Introducing the champion to my left, fighting out of the red corner.
With a record of
12 - 1 - 0, fighting out of Sydney, Sandor Clegane!
And introducing the challenger to my right, fighting out of the blue corner.
With a record of
5 - 1 - 0, fighting out of Sydney, Wiremu Williams!
The judges for this bout are Skip Squint, John Mangel and Summer Carpenter.
The bell rings for round one and we are underway!
Clegane scores with a crisp jab that stopped Williams in his tracks.
Williams takes a swing at Clegane's ribcage but misses.
Williams fails to land with a series of punches.
Williams feints and then winds up with a huge right hand that connects perfectly and sends Clegane sprawling to the canvas! Clegane rolls over backwards and springs off the cage and manages to regain his footing - how acrobatic! Oh, he's still wobbly - can Williams finish him?!
It looks like Sandor Clegane has been cut.
Clegane staying out of range there.
Clegane swings and misses with a hook to the body.
A little jabbing left from Williams on the counter but it doesn't find it's target.
This has been an exciting period of action!
Clegane displays some good footwork, moving neatly out of range as Williams throws out the jab.
Clegane misses the shot to the body.
Williams takes a body punch but keeps moving.
Williams throws a combination but it was largely blocked by Clegane.
Clegane throws a nice hook to the body that draws an oooh from the crowd.
Williams misses with the combination.
Williams throws a wild combination but nothing lands.
Clegane takes a swing at Williams's ribcage but misses.
Clegane throws a shot from downtown. Williams moves away and avoids it.
Clegane throws a hook to the body but it doesn't connect.
Williams moving in and out of range nicely, whilst landing the scoring shot.
That's one minute gone in the round.
Williams throws a left jab followed by a right to the body, Oh Clegane colapses and takes a barrage of punches from Williams as he moves to mount! the ref stops the fight and Clegane is left battered and dazed whilst Williams and his camp cheer!
Ladies and gentlemen, after 1:09 of round 1, we have a winner by way of TKO (Strikes). Wiremu Williams!
Wiremu Williams is the new heavyweight champion!
Post fight, Wiremu Williams took to the microphone: 'Ahuhuhuhuhuhuhuhuhuhu'.
Sandor Clegane was interviewed post fight and said 'Damned assfucker beat me. Good thing I fucked his wife in the parking lot. Well, you can't win them all I guess.'.
|
|
|
|
|
|
|
|
|
|
|
|
|
|
|
|
|
|
|
|
|
|
|
| S |
C
A |
G |
S |
C
B |
G |
|
S |
C |
G |
|
energy
A | B |
|
hype
A | B |
|
pop
A | B |
|
mgr
A | B |
|
FIGHT
RATING
83% |
|
|
|
|
|
|
|
|
|
|
