 |
Solitude 32 PBP Commentary |
Undercard bout
|
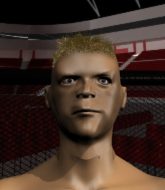
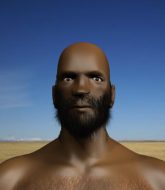
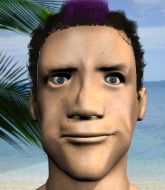
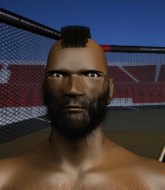
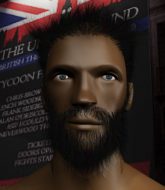
Coming up we have a lightweight MMA rules bout between Martin Teller (ranked 0 p4p, 0 weight class) and Remy Palmar (ranked 0 p4p, 0 weight class). Remy Palmar has the eye of the tiger tonight.
 |
|
 |
| 165 cm
25
166 lbs
4 - 0 - 0 |
|
175 cm
26
158 lbs
4 - 1 - 0 |
Good wrestling
Basic striking
KO power |
|
BJJ White Belt
Excellent MT
Experienced |
|
| |
|
Ladies and gentlemen. This fight is 3 rounds, in the lightweight division.
Introducing the fighter to my left, fighting out of the red corner.
With a record of
4 - 0 - 0, fighting out of The Island, Martin Teller!
And introducing the fighter to my right, fighting out of the blue corner.
With a record of
4 - 1 - 0, fighting out of The Island, Remy Palmar!
The judges for this bout are Santiago Holmes, Sandra Marshall and Dirk Anderson.

The bell rings for round one and we are underway!
Palmar steps to the side to avoid the strikes from Teller.
Palmar connects nicely with a jab. Noted by the judges no doubt.
Teller tries to clinch up.
Palmar throws a front kick that sends Teller stumbling back into the cage.
Palmar scores with a nice head shot.
A jab lands there for Palmar.
Teller darts in looking for a takedown but Palmar gets double underhooks and turns Teller into the cage.
Like a baseball bat into the meat of his leg there - nice leg kick by Palmar.
Palmar connects with a crisp jab.
Palmar lunges at Teller with a hook that half lands and is half blocked by Teller's hand.
Teller tries to move into range but Palmar moves to the side and lands with a nice right hand.
The crowd are loving this. Great action here.
Teller stumbles momentarily as he takes a strong leg kick from Palmar.
Teller walks straight into a jab right on the nose. That one stung - he's blinking and trying to clear his head.
Crunch! Palmar slams his shin into Teller's torso.
Palmar jabs Teller right on the nose. Teller blinks but takes it well.
Teller on the wrong end of a nice jab.

That's one minute gone in the round.
Palmar keeps his opponent at a distance with a nice jab.
Teller tries to check a leg kick but that clearly hurt him.
Palmar slaps away a takedown attempt from Teller, before circling back to the center of the mat.
A thudding body kick lands there by Palmar!
Teller on the wrong end of a nice low kick. He's acting like it's no big deal but he doesn't want to take many more of those.
Palmar has used his reach advantage pretty well so far tonight.
Palmar connects with a solid leg kick.
Teller is looking to clinch but Palmar is avoiding it.
Palmar takes a step towards his opponent and connects with a left hand, before circling away.
Teller looks to score with a jab to the body but Palmar is just out of range.
Teller walks into a stiff left hand from Palmar.
Teller shoots in for a double leg but Palmar sprawls well. That's going to sap some energy.
That's three failed takedown attempts in the round for Martin Teller. That's going to take a lot out of him.
Teller just misses with a punch to the body.

That's two minutes gone in the round.
Palmar stuffs the takedown attempt from Teller. Teller gets slowly back to his feet.
Palmar takes a step towards his opponent and connects with a left hand, before circling away.
Fantastic stuff here - a very entertaining period of action, which has drawn cheers from the crowd.
Teller moves to clinch but Palmar breaks away
and Palmar counters with a solid body kick.
Palmar connects with a solid leg kick.
Teller misses with a hook.
Nice body kick from Palmar.
Teller tries to drive through with a takedown attempt but Palmar defends well and Teller ends up having to push Palmar into the cage where they will battle it out in the clinch.
Palmar thumps Teller with a low kick.
Palmar lands a leg kick and bounces back out of range.
A chopping leg kick lands by Palmar.
Palmar fakes the leg kick and cracks Teller in the body.

That's three minutes gone in the round.
Teller takes a shot right to the bread basket.
Palmar lands a beauty of a right hand that gets the crowd cheering.

It looks like Martin Teller has been cut.
Palmar paws at his opponent with the jab and then lunges in with a straight, right on the button.
Teller stumbles momentarily as he takes a strong leg kick from Palmar.
Teller takes one to the side of the head.
Remy Palmar seems to be the more aggressive standup fighter in this bout.
Teller fails in his attempt to clinch.
Palmar is landing a lot of head punches in this opening round! Teller had better start moving his head a bit unless he wants his face to turn into pâté.
Palmar moves into range and lands a nice leg kick.
Palmar throws a nice outside leg kick.
Boom, another hit is landed. "You're gunna get knocked out" taunts Palmar, as that shot connected.
Palmar scores with a crisp jab that stopped Teller in his tracks.
Palmar thuds his shin into the meat of Teller's side.
The fans in attendance giving it up for the two fighters, who have really let it all hang out in the last minute or so!
Palmar thuds his right hand into Teller's forehead from close range. That could be painful for both fighters.
Palmar connects with the punch.
Ouch! a nice leg kick from Palmar, right into the meat.

That's four minutes gone in the round.
Palmar dances in quickly and lands a nice inside leg kick on Teller. That did some damage!
Teller takes a big uppercut there. He seems a bit wobbly but no, he's OK.
Palmar lands a leg kick. The shin dug right into the meat of the thigh.
Palmar throws a couple of head shots and lands with the final one - a decent hook, which struck Teller on the side of the head.
Teller misses with a body shot. Nice footwork from Palmar.
Teller misses with a hook to the body
enabling Palmar to counter with a crisp jab.

Teller gets to the clinch - let's see what his plan is here.
Palmar digs a right hand underneath Teller's ribcage. Teller let out a lung full of air as it connected.
The fighters are pressed against the cage, as the pace of the fight slows.
Palmar working some nice short punches in the clinch.
The crowd applaud the fighters' efforts here as the round comes to an end.
Palmar lands a hook to the body. It's hard to tell if that hurt Teller or not.
Palmar is working Teller over against the cage.
Palmar lands with a quick shot inside that doesn't really do much damage.

Palmar pushes off and circles away, back to the middle of the mat.
And thats the end of the round the fighters go back to their corners.
Remy Palmar dominated that round.
The cut man is working on Martin Teller's cut.
The minute break is over - no more time for sponges and pep talks - back to the action!

Palmar ducks down and throws a hook to the body.
Teller takes one on the chin but seems OK.
Palmar throws a nice outside leg kick.
Teller throws an off balance right hand
and Palmar counters with an outside leg kick.
Palmar throws a series of punches but Teller avoids them all with ease.
Teller feinted with a counter takedown.
Teller is hobbling a little on that front leg after taking quite a few leg kicks so far in this fight.
Palmar tries to keep at a distance but Teller has taken the fight into the clinch.
Teller trying to stall but Palmar improves his position.
Teller is trying to drag Palmar to the mat but Palmar just about manages to keep his footing. He used the cage to his advantage there.
This is turning into a torrid day at the office for Teller. He's trying desperately to land a takedown but he's failing miserably and getting slapped silly on the feet to compound his misery.
Palmar lands a shoulder strike.
We've had a slow start to the round here - hopefully the action picks up.
Palmar lands with a short head shot on the inside.
Palmar working some nice short punches in the clinch.
Teller drops down looking for an ankle pick but Palmar pulls his leg out and moves away.
Teller will be looking to protect his midsection after taking some solid kicks to the body.
Teller on the wrong end of a kick to the body.
That's one minute gone in the round.
A solid body kick from Palmar.
Both fighters are absolutely exhausted here.
Palmar scores with a nice strike.
Palmar scores with a punch to the head.
Remy Palmar seems to be getting the better of the standup.
Palmar scores with a big left there. The judges will like that one.
Nice uppercut lands for Palmar. That snapped Teller's head back.
Palmar scores with a jab to the jaw.

Palmar drops Teller with a hook right on the temple. He thinks about going to the ground but Teller looks back up at him and smiles so Palmar waves him back to his feet - he obviously thinks he can knock him out after that shot landed.

Teller is rocked!
Wooooo! Give it up for these two warriors! They are putting on a show!
Palmar turns his hip over beautifully as he lands a nice leg kick.
Oh Teller is still all over the place! His legs are completely gone! Will he be able to recover?!!
Palmar bobs and weaves well there to avoid the strikes.
This fight brought to you by 5M nutrition - it's mmmmm tasty. Nice jab by Palmar.
That kick from Palmar tenderised Teller's leg. Teller is trying to keep his angry face on.
Palmar connects with a looping left hand that seems like it dazed Teller momentarily.
Today's fight clock is brought to you by... OOOH that's a huge shot by Palmar! Teller is in big trouble here - the ref steps in to save him and this one is all over!
Ladies and gentlemen, after 2:56 of round 2, we have a winner by way of TKO (Strikes). Remy Palmar!
During a confident post fight interview, Remy Palmar thanked all his fans. He seemed very genuine when describing how motivated his fans keep him.
|
|
|
|
|
|
|
|
|
|
|
|
|
|
|
|
|
|
|
|
|
|
|
| S |
C
A |
G |
S |
C
B |
G |
|
S |
C |
G |
|
energy
A | B |
|
hype
A | B |
|
pop
A | B |
|
mgr
A | B |
|
FIGHT
RATING
78% |
|
|
|
|
|
|
|
Undercard bout
|
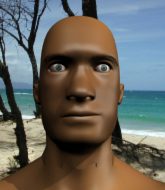
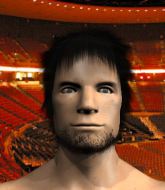
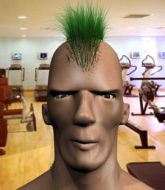
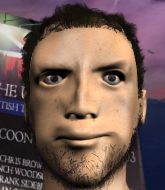
Coming up we have a middleweight MMA rules bout between Steve Bellchambers (ranked 0 p4p, 0 weight class) and Genichiro Shimada (ranked 0 p4p, 0 weight class). Buckle up people - heeeeeeeeeere we go!
 |
|
 |
| 201 cm
25
190 lbs
4 - 1 - 0 |
|
182 cm
26
189 lbs
5 - 2 - 0 |
BJJ Blue Belt
Solid boxing
Good chin |
|
Decent wrestler
Decent boxing
Heavy handed |
|
| |
|
Ladies and gentlemen. This fight is 3 rounds, in the middleweight division.
Introducing the fighter to my left, fighting out of the red corner.
With a record of
4 - 1 - 0, fighting out of The Island, Steve Bellchambers!
And introducing the fighter to my right, fighting out of the blue corner.
With a record of
5 - 2 - 0, fighting out of The Island, Genichiro Shimada!
The judges for this bout are David Hoff, Daniel Franklin and Dirk Anderson.
The bell rings for round one and we are underway!
Shimada looks to throw the jab but Bellchambers is out of range.

Shimada forces Bellchambers back against the cage and clinches.
Bellchambers prevents a body shot from Shimada.
Shimada works for underhooks and lands a body shot in the process.
Good body shot from Shimada.
A quick uppercut on the inside from Shimada.
Shimada throws a hook to the body. More of an arm punch but it's all scoring with the judges.
Shimada lands a body punch in the clinch.
A short right from Shimada on the inside.
Shimada lands with a short punch from the clinch.
Shimada lands a right uppercut that snaps the head of Bellchambers backwards.
Shimada works on Bellchambers's body with a couple of short punches.
Bellchambers is breathing heavily.
Shimada works for underhooks and lands a body shot in the process.
With the fighters clinched against the cage, Shimada creates a bit of distance for himself and scores with a nice uppercut.
The crowd are loving this. Great action here.
Shimada presses Bellchambers against the cage and delivers a mid-strength body shot.
Shimada scores with a nice hook to the head.
Shimada pushes Bellchambers back against the cage and lands a hook to the side of the head.
Shimada stays in close to his opponent and throws a right hand to the body.
That's one minute gone in the round.
A right handed body shot lands from Shimada.
A right hook to the body lands for Shimada.
Shimada lands with a short shot to the head.
Shimada working on landing some head shots here - that one got through nicely.
Shimada lands a nice uppercut.
Bellchambers's head jolts backwards as he takes an uppercut right on the button!
Shimada pushes Bellchambers back against the cage and lands a hook to the side of the head.
Shimada lands a hook that snaps the head of Bellchambers backwards.
Shimada lands a right hand that snaps the head of Bellchambers backwards.
Still in the clinch, Shimada scores with a nice short uppercut.
We've seen a great period of action over the last minute or so - credit to both fighters for going all out!
A short left from Shimada.
Bellchambers is rocked!
Shimada stays in close to his opponent and throws a right hand to the body.
A right handed body shot lands from Shimada.
Bellchambers's head jolts backwards as he takes an uppercut right on the button!
A short left from Shimada.
Oh Bellchambers is still all over the place! His legs are completely gone! Will he be able to recover?!!
Shimada lands a left hand.
Shimada lands a body shot.
Shimada dips a shoulder and cracks Bellchambers with a mighty uppercut! Bellchambers falls back against the cage and Shimada unloads with a barrage of strikes! Bellchambers is completely out with his eyes open, only supported by the cage! Save him ref! Eventually the ref decides to do his job and jumps in - Shimada screams abuse at the incompetent official before going over to celebrate with his corner. Brutal stuff!
Ladies and gentlemen, after 2:57 of round 1, we have a winner by way of TKO (Strikes). Genichiro Shimada!
|
|
|
|
|
|
|
|
|
|
|
|
|
|
|
|
|
|
|
|
|
|
|
| S |
C
A |
G |
S |
C
B |
G |
|
S |
C |
G |
|
energy
A | B |
|
hype
A | B |
|
pop
A | B |
|
mgr
A | B |
|
FIGHT
RATING
76% |
|
|
|
|
|
|
|
Undercard bout
|
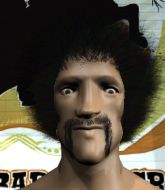
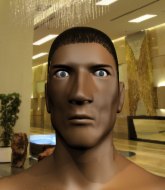
Coming up we have a featherweight MMA rules bout between Tony Montana (ranked 0 p4p, 0 weight class) and Thomas Howard (ranked 0 p4p, 0 weight class). Thomas Howard acknowledges the crowd's support as he enters the cage.
 |
|
 |
| 168 cm
25
145 lbs
4 - 1 - 0 |
|
170 cm
25
130 lbs
3 - 0 - 0 |
BJJ White Belt
Excellent boxer
Very strong |
|
BJJ Blue Belt
Good kicks
Prefers standup |
|
| |
|
Ladies and gentlemen. This fight is 3 rounds, in the featherweight division.
Introducing the fighter to my left, fighting out of the red corner.
With a record of
4 - 1 - 0, fighting out of The Island, Tony Montana!
And introducing the fighter to my right, fighting out of the blue corner.
With a record of
3 - 0 - 0, fighting out of The Island, Thomas Howard!
The judges for this bout are Sandra Marshall, Peter Branson and Daniel Franklin.
The bell rings for round one and we are underway!
Montana lunges at Howard with a hook that half lands and is half blocked by Howard's hand.
Howard takes an uppercut right on the jaw but it doesn't phase him.
Howard scores with a push kick.
Howard uses some good footwork to avoid the body shot by Montana.
Montana ducks down and throws a hook to the body but Howard moves away.
Howard raises up his leg as if looking to counter with a high kick.
A head kick by Howard misses
and Montana cracks him with a counter punch right on the button.
Montana with a jab.
Howard takes a really solid shot there but just smiles back and shrugs his shoulders.

Howard is rocked!
Montana scores with a sloppy punch to the body. Not much technique there but it did the business.
Howard is still on wobbly legs! Can Montana finish him?
Montana moving in and out of range nicely, whilst landing the scoring shot.
This is a great period of action - very entertaining stuff!
Howard tries to land a front kick but Montana steps back. That was a bit too telegraphed.
Montana just misses with a punch to the body.
Howard is looking for the big counter here.
Montana scores with a nice head shot.
Montana swings away but doesn't land with a series of punches.
Montana scores with a straight right hand, right through his opponent's guard.
Montana throws a jab to the body, straight down the pipe. Boom. That sent Howard stumbling backwards but he manages to regain his composure quickly.
A punch combination from Montana misses.
Howard gets caught by a big overhand right and goes down! Montana gets on top of him and starts throwing some serious punches until the ref intervenes and stops the fight!
Ladies and gentlemen, after 0:58 of round 1, we have a winner by way of TKO (Strikes). Tony Montana!
Tony Montana decided to go for the less than humble approach in his post fight interview, telling everyone how he is going to conquer the world. The crowd seemed to like it when really that sort of approach could have gone either way.
|
|
|
|
|
|
|
|
|
|
|
|
|
|
|
|
|
|
|
|
|
|
|
| S |
C
A |
G |
S |
C
B |
G |
|
S |
C |
G |
|
energy
A | B |
|
hype
A | B |
|
pop
A | B |
|
mgr
A | B |
|
FIGHT
RATING
98% |
|
|
|
|
|
|
|
Undercard bout
|
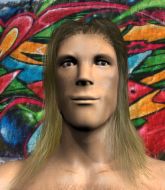
Coming up we have a heavyweight MMA rules bout between Kouro Humbundi (ranked 0 p4p, 0 weight class) and Paddy McGuiness (ranked 0 p4p, 0 weight class). Both these guys have solid standup skills and neither is particularly fantastic on the ground, so let's hope for a nice standup war!
 |
|
 |
| 210 cm
26
245 lbs
3 - 0 - 0 |
|
194 cm
26
275 lbs
4 - 4 - 0 |
Good wrestling
Solid boxing
Very strong |
|
BJJ White Belt
Excellent boxer
Powerful |
|
| |
|
Ladies and gentlemen. This fight is 3 rounds, in the heavyweight division.
Introducing the fighter to my left, fighting out of the red corner.
With a record of
3 - 0 - 0, fighting out of The Island, Kouro Humbundi!
And introducing the fighter to my right, fighting out of the blue corner.
With a record of
4 - 4 - 0, fighting out of The Island, Paddy McGuiness!
The judges for this bout are Dirk Anderson, Santiago Holmes and Daniel Franklin.
The bell rings for round one and we are underway!
McGuiness missing with a left hand there. Humbundi was out of range so wasted energy throwing that one.
McGuiness keeping a good distance there, avoiding the body shot.
McGuiness looked like he wanted to counter with a punch but didn't throw it.
Humbundi misses with a double jab.
Humbundi lands a powerful looking uppercut that connected with his opponent's jaw.
McGuiness is the aggressor but that punch slipped nicely by Humbundi.
Humbundi has McGuiness up against the cage in a clinch.
With the fighters clinched against the cage, Humbundi creates a bit of distance for himself and scores with a nice uppercut.
McGuiness misses with a hook from the clinch.
McGuiness tries to stall but Humbundi uses the opportunity to gain a better position.
McGuiness misses with a short punch on the inside.
Humbundi throws a blind hook that connects with the side of McGuinesss head.
McGuiness tries to throw a body punch but Humbundi avoids it by throwing McGuiness back against the cage.
We've had a slow start to the round here - hopefully the action picks up.
Humbundi goes for a body shot but it's blocked.
McGuiness blocks a punch to the side of the head.
The fighters are pressed against the cage, as the pace of the fight slows.
Humbundi definitely looks more muscular than last time we saw him fight.
Humbundi prevents a body shot from McGuiness.
That's one minute gone in the round.
Humbundi tries to land a shot to the body but it's blocked.
McGuiness content to slow the pace in the clinch.
Humbundi lands a shoulder strike that jolts his opponent's head backwards.
Nice body punch from Humbundi - that landed with a thud.
McGuiness misses with a body punch.
Humbundi lands a shoulder strike that jolts his opponent's head backwards.
McGuiness fails to land with a short punch on the inside.
McGuiness trying to control the position but instead, Humbundi has worked for underhooks and has pushed McGuiness into the cage.
McGuiness's corner calls for him to break the clinch, which he does.
Humbundi misses with a double jab
and McGuiness counters with a nice uppercut.
Humbundi slips a straight right by McGuiness.
A right-left combo lands from Humbundi.
McGuiness misses with a left hand
and Humbundi counters with a lovely straight right hand!
McGuiness doesn't react quick enough there as he takes a shot to the body.
Wooooo! Give it up for these two warriors! They are putting on a show!
Humbundi scores with a jab. McGuiness acknowledges it with a nod of the head.
That's two minutes gone in the round.
McGuiness throws a lazy right hand but Humbundi sees it coming a mile off and sidesteps it easily.
Humbundi stooping low to avoid any incoming strikes and then lunges in with an uppercut come cross that lands flush.
Humbundi lands with a nice combination. McGuiness backs away looking to recover.
McGuiness throws a jab but it's blocked by Humbundi.
McGuiness connects with a crisp jab.
Humbundi throws a body punch but McGuiness moves out of range.
Humbundi slips a jab from McGuiness.
McGuiness takes one on the chin but keeps coming.
McGuiness misses with a looping right.
McGuiness takes a shot right to the liver - Bas would have been proud of that punch.
McGuiness throws an uppercut from half a mile away. Humbundi sees it coming and avoids it easily.
Kouro Humbundi seems to be the more aggressive standup fighter in this bout.
Humbundi misses with a jab and misses with a cross straight after too.
It seemed like McGuiness was going to counter with the hook but didn't fully commit to it.
McGuiness takes a shot to the eye socket. That's gotta hurt.
Humbundi punishes McGuiness's body with a nice straight punch.
McGuiness misses with a hook
and Humbundi connects with a straight left hand counter down the middle.
McGuiness throws a jab but it's blocked by Humbundi.
That's three minutes gone in the round.
Humbundi bobbing and weaving, closes the distance and lands a hook to the side of McGuiness's head.
A jab from Humbundi finds it's way through McGuiness's defenses.
McGuiness is rocked!
Humbundi clinches up with McGuiness and pushes him back against the cage.
McGuiness working aggressively here.
McGuiness blocking some punches.
The fighters are pressed against the cage, as the pace of the fight slows.
McGuiness is really struggling to land any decent head shots against his taller opponent.
Humbundi throws a head punch that misses.
McGuiness throws a head punch that misses.
Humbundi lands a hook to the side of the head.
Humbundi blocks a punch to the side of the head.
A short right from Humbundi.
McGuiness misses with a hook to the ribs.
McGuiness manages to break the clinch.
Humbundi is really peppering his opponent's head with punches.
Nice defenses there by Humbundi.
The fight stays on the outside here - Humbundi looks like he's thinking about clinching though.
That's four minutes gone in the round.
Humbundi lands a vicious shot with the stealth of a sniper and the strength of a viper. Are vipers that strong? I can think of lots of things that are stronger than a viper - not many rhyme with sniper though.
Humbundi cracks McGuiness with a hook to the temple - McGuiness is on wobbly legs here! Humbundi swarms him with hook after hook, landing with each one! McGuiness falls to the canvas face first and the referee dives in to stop the fight! Humbundi wins by TKO!
Ladies and gentlemen, after 4:14 of round 1, we have a winner by way of TKO (Punches). Kouro Humbundi!
|
|
|
|
|
|
|
|
|
|
|
|
|
|
|
|
|
|
|
|
|
|
|
| S |
C
A |
G |
S |
C
B |
G |
|
S |
C |
G |
|
energy
A | B |
|
hype
A | B |
|
pop
A | B |
|
mgr
A | B |
|
FIGHT
RATING
56% |
|
|
|
|
|
|
|
Undercard bout
|
Coming up we have a welterweight MMA rules bout between Royce Gracie (ranked 0 p4p, 0 weight class) and Crank Shaw (ranked 0 p4p, 0 weight class). Royce Gracie could well score a knockout today. He has the power to get to Crank Shaw's chin.
 |
|
 |
| 185 cm
18
176 lbs
4 - 0 - 0 |
|
175 cm
25
170 lbs
4 - 1 - 0 |
BJJ Purple Belt
Basic striking
Cuts easily |
|
Good wrestler
Decent boxing
Heavy handed |
|
| |
|
Ladies and gentlemen. This fight is 3 rounds, in the welterweight division.
Introducing the fighter to my left, fighting out of the red corner.
With a record of
4 - 0 - 0, fighting out of The Island, Royce Gracie!
And introducing the fighter to my right, fighting out of the blue corner.
With a record of
4 - 1 - 0, fighting out of The Island, Crank Shaw!
The judges for this bout are Daniel Franklin, Santiago Holmes and Sandra Marshall.
The bell rings for round one and we are underway!
Gracie has his takedown stuffed
and Shaw counters by clinching up.
Shaw throws a blind hook that connects with the side of Gracies head.
Gracie tries to pull guard but Shaw forces him back to his feet, against the cage.
Shaw prevents a takedown attempt there.
That's three failed takedown attempts in the round for Royce Gracie. That's going to take a lot out of him.
A quick uppercut on the inside from Shaw.
Gracie fails to pull guard.
Shaw lands a body shot in the clinch.
Shaw lands a shot to the body.
A short left from Shaw.
Shaw working some nice short punches in the clinch.
With the fighters clinched against the cage, Shaw creates a bit of distance for himself and scores with a nice uppercut.
Shaw lands a nice shot to the body.
Shaw stays in close to his opponent and throws a right hand to the body.
Gracie is breathing heavily.
Shaw's corner calls for him to break the clinch, which he does.
Fantastic stuff here - a very entertaining period of action, which has drawn cheers from the crowd.
Shaw drives through and clinches with Gracie against the cage.
Shaw scores with a hook to the body.
That's one minute gone in the round.
Nice body punch from Shaw.
Shaw lands an uppercut.
Shaw breaks the clinch and we return to the middle of the mat.
Gracie takes a shot right to the liver - Bas would have been proud of that punch.
Shaw lands with a shot to the body.
Gracie seems to be moving with more speed, compared to his last bout. He must have been working on that in the gym.
Shaw fakes a right and follows up with a big left that drops Gracie to one knee - oooooh, he's wobbly! Gracie looks to clinch but Shaw throws him off and pummels him into the canvas! Gracie taps out under the strikes! The fight is over!
Ladies and gentlemen, after 1:27 of round 1, we have a winner by way of Submission (Strikes). Crank Shaw!
Crank Shaw seemed lost for words in his post fight interview but he remembered to thank his fans and directed everyone to his website.
|
|
|
|
|
|
|
|
|
|
|
|
|
|
|
|
|
|
|
|
|
|
|
| S |
C
A |
G |
S |
C
B |
G |
|
S |
C |
G |
|
energy
A | B |
|
hype
A | B |
|
pop
A | B |
|
mgr
A | B |
|
FIGHT
RATING
68% |
|
|
|
|
|
|
|
Undercard bout
|
Coming up we have a featherweight MMA rules bout between Hans Yamato (ranked 0 p4p, 0 weight class) and Jim Dixon (ranked 0 p4p, 0 weight class). Jim Dixon has the better chin. Will he look to stand and bang today?
 |
|
 |
| 170 cm
26
155 lbs
5 - 1 - 0 |
|
170 cm
26
140 lbs
5 - 5 - 0 |
Powerful takedowns
Counter fighter
Very strong |
|
Good wrestler
Decent boxing
Good gas tank |
|
| |
|
Ladies and gentlemen. This fight is 3 rounds, in the featherweight division.
Introducing the fighter to my left, fighting out of the red corner.
With a record of
5 - 1 - 0, fighting out of The Island, Hans Yamato!
And introducing the fighter to my right, fighting out of the blue corner.
With a record of
5 - 5 - 0, fighting out of The Island, Jim Dixon!
The judges for this bout are Daniel Franklin, Peter Branson and David Hoff.
The bell rings for round one and we are underway!
Yamato looks for a takedown here. Will he get it? Dixon is fending him off so far but Yamato persists. Nope, Dixon circles away and we're back to standing.
Dixon looked like he wanted to counter with a punch but didn't throw it.
Yamato slips under a jab from Dixon.
Yamato changes levels looking for a counter takedown but doesn't commit.
Dixon thows a left - swing and a miss!
Dixon waving his hands out in front of him, looking to distract Yamato.
Yamato misses with a takedown attempt
and Dixon connects with a straight left hand counter down the middle.
Yamato shoots in for a takedown. "I don't think so" says Dixon as he avoids it easily.
That's three failed takedown attempts in the round for Hans Yamato. That's going to take a lot out of him.
We've had a slow start to the round here - hopefully the action picks up.
Dixon tests Yamato's chin there with a solid looking shot.
Dixon darts in and clinches Yamato up against the cage.
That's one minute gone in the round.
Dixon throws a blind hook that connects with the side of Yamatos head.
Dixon lands a right uppercut that snaps the head of Yamato backwards.
Yamato looking for a takedown.
Dixon misses with some punches.
Dixon lands a right hand that snaps the head of Yamato backwards.
Dixon prevents a takedown attempt there.
Dixon lands with a right to the head.
Yamato drops to a knee looking for a takedown but Dixon gets the underhooks and prevents it.
Yamato's head jolts backwards as he takes an uppercut right on the button!
Yamato goes for a takedown attempt but Dixon pushes him away and we're back to fighting at a distance.
Yamato fails to land the takedown.
Dixon looked like he wanted to counter with a punch but didn't throw it.
Dixon has been spending a lot of time sparring his boxing in the run up to the fight, trying to sharpen up those hands and look for a knockout.
That's two minutes gone in the round.
Dixon stuffs the takedown.
And an attempted straight right on the counter from Dixon! But no joy.
Yamato darts in looking for a takedown but Dixon gets double underhooks and turns Yamato into the cage.
Dixon gets in close and instigates a clinch.
Yamato is working for a takedown up against the cage. He can't get it on this occasion though.
A head punch on the inside from Dixon fails to land.
Yamato wants to take the fight to the mat but Dixon manages to get underhooks and keep the fight in the clinch.
We've seen a great period of action over the last minute or so - credit to both fighters for going all out!
Dixon throws a blind hook that connects with the side of Yamatos head.
Dixon working aggressively here.
Dixon working on landing some head shots here - that one got through nicely.
Dixon misses with a short punch on the inside.
That's three minutes gone in the round.
Yamato tries for a takedown but Dixon manages to get underhooks.
Yamato is looking for a takedown.
Dixon softening up his opponent with strikes, against the cage.
Yamato is looking to take this one to the mat.
Dixon is defending well against a takedown attempt.
Yamato's head jolts backwards as he takes an uppercut right on the button!
Dixon lands a right hand.
Dixon lands an uppercut.
Dixon lands a right hand.
Yamato drops down for a takedown but doesn't get it.
Dixon gets double underhooks to prevent a takedown attempt from Yamato.
Yamato is looking to take this one to the mat.
That's four minutes gone in the round.
Yamato wants a takedown.
With the fighters clinched against the cage, Dixon creates a bit of distance for himself and scores with a nice uppercut.
Yamato is working for a takedown up against the cage. He can't get it on this occasion though.
Yamato drops down looking for an ankle pick but Dixon pulls his leg out and moves away.
Yamato shoots in and drives through. Dixon sprawls well.
A little jabbing left from Dixon on the counter but it doesn't find it's target.
Yamato is breathing heavily.
Dixon waving his hands out in front of him, looking to distract Yamato.
Jim Dixon is looking to keep the fight on the feet at all costs.
Dixon misses with a hook

and Yamato counters with a takedown into side control.
The crowd are loving this. Great action here.
A bit of a lull in the action here.
Yamato working away.

Yamato wants to work for a kimura but he's foiled early by Dixon, who protects the arm well.
Yamato working hard here to secure a kimura but he's not really in the right position for it.
And thats the end of the round the fighters go back to their corners.
Jim Dixon dominated that round.
That's the end of the round. The referee orders the cornermen out of the cage so we can get back down to business.
Yamato fails with a takedown attempt.
Dixon jabs. That one connects to the head of his opponent.
We've had a slow start to the round here - hopefully the action picks up.
Yamato darts in and lands a nice takedown into half guard.
Dixon scrambles, trying to get to his feet, but Yamato manages to mount him!
Dixon really doesn't want to stay on the ground with Yamato. If he can't get it back to his feet, it's only a matter of time before he'll be tapping out.
That's one minute gone in the round.
Yamato pausing momentarily but resumes with a couple of decent strikes that do a bit of damage.

It looks like Jim Dixon has been cut.
Yamato misses with some ground and pound and Dixon recovers position to half guard.
Yamato looking for a kimura but he'll have to free his other leg if he wants to finish that. Perhaps he's just using it as a distraction technique.
Yamato trying to control the action but Dixon is working from the bottom.
Dixon has been the more effective fighter overall so far.
That's two minutes gone in the round.
Yamato is thinking about going for an arm triangle but he can't free his leg.
Hans Yamato overall seems to be getting the better of the ground position in the fight so far.
Dixon tries to get to full guard but Yamato has control of the leg.
Yamato is pressing down on Dixon's thigh, looking to free his foot. Dixon is holding on for now.
Dixon is trying to control but can't.
Yamato trying to control the action but Dixon is working from the bottom.
Yamato thows a wild elbow that connects with the canvas.
That's three minutes gone in the round.
Yamato not doing much here.
Yamato thumps the canvas. Not on purpose obviously - he just missed Dixon's head.
Neither fighter is being very active at the moment, with Yamato in particular looking to stall.
Dixon is defending against the submission attempts here by Yamato.
Dixon is refusing to be controlled, as Yamato sits in half guard.
The fighters are pressed up against the cage, both looking to find a bit of space to work.
That's four minutes gone in the round.
The crowd are hurling abuse towards the fighters... You can hardly blame them though because there isn't a lot going on in the fight.
Yamato is working for a submission of some sort.
We get told so often about how wrestlers don't like to be on their backs. Let's see if Dixon can do anything to dispel that myth.
Yamato seems to be working for a kimura but Dixon defends the submission attempt.
Yamato is looking for an arm triangle, whilst trying to pass to side control. Dixon doesn't seem that keen to cooperate though. No luck this time Yamato.
Boooooooooooooooooooo!!! God, this has been a terrible round. Come on you two, sort yourselves out!
Yamato is looking for a kimura here.
And thats the end of the round the fighters go back to their corners.
Hans Yamato dominated that second round.
The cut man is working on Jim Dixon's cut.
The minute break is over - no more time for sponges and pep talks - back to the action! This is the final round!

Yamato slips a straight right by Dixon.
Yamato attempts a counter takedown but Dixon avoids it well and moves away.
Dixon scores with a decent looking hook.
Yamato fails to land the takedown.
Hans Yamato seems to be the more aggressive standup fighter in this bout.
Yamato closes the distance and clinches up with Dixon, looking for a takedown. Yamato pushes Dixon against the cage but Dixon circles to the side and manages to break the clinch.
We've had a slow start to the round here - hopefully the action picks up.
Dixon with a nice cross.
Yamato shoots in for a takedown. He's persisting with it as Dixon sprawls well. Dixon wins this battle and keeps the fight standing. Yamato gets slowly back to his feet.
Dixon throws out a counter right but Yamato avoids it with no problem.
That's three failed takedown attempts in the round for Hans Yamato. That's going to take a lot out of him.
That's one minute gone in the round.
Dixon cracks Yamato with a right hand to the side of the head.
Yamato shoots for a takedown but Dixon saw that one coming a mile off and avoided it easily.
Dixon misses with a looping left.
Dixon scores with a decent looking hook.
That's two minutes gone in the round.
Jab from Dixon.
Yamato is rocked!
Yamato doesn't succeed with the takedown
and Dixon counters with a crisp hook to the side of the head.
Oh Yamato is still all over the place! His legs are completely gone! Will he be able to recover?!!
Yamato doesn't succeed with the takedown
and Dixon counters with a massive hook, right on the button! He's out cold! Damn, that was naaaaaasty! Hopefully he'll be OK.
Ladies and gentlemen, after 2:36 of round 3, we have a winner by way of KO (Punch). Jim Dixon!
Jim Dixon seemed lost for words in his post fight interview but he remembered to thank his fans and directed everyone to his website.
|
|
|
|
|
|
|
|
|
|
|
|
|
|
|
|
|
|
|
|
|
|
|
| S |
C
A |
G |
S |
C
B |
G |
|
S |
C |
G |
|
energy
A | B |
|
hype
A | B |
|
pop
A | B |
|
mgr
A | B |
|
FIGHT
RATING
43% |
|
|
|
|
|
|
|
Undercard bout
|
Coming up we have a featherweight MMA rules bout between Hannu Haapana (ranked 0 p4p, 0 weight class) and Tom King (ranked 0 p4p, 0 weight class). King has chosen Sail - Armin van Buuren as his entrance music. Hannu Haapana could well score a knockout today. He has the power to get to Tom King's chin.
 |
|
 |
| 169 cm
26
145 lbs
7 - 0 - 0 |
|
176 cm
26
147 lbs
6 - 2 - 0 |
Decent wrestler
Excellent MT
Granite chin |
|
Good wrestler
Basic striking
Knockout power |
|
| |
|
Ladies and gentlemen. This fight is 5 rounds, for the featherweight championship of the world!
Introducing the champion to my left, fighting out of the red corner.
With a record of
7 - 0 - 0, fighting out of The Island, Hannu Haapana!
And introducing the challenger to my right, fighting out of the blue corner.
With a record of
6 - 2 - 0, fighting out of The Island, Tom King!
The judges for this bout are Santiago Holmes, David Hoff and Sandra Marshall.
The bell rings for round one and we are underway!
Haapana's jab looks to have found its range, popping King under the eye.
Haapana throws a chopping leg kick but King manages to avoid taking any serious damage.
Haapana swings and misses with a hook to the body.
Haapana misses with the combination.
Haapana closes the distance and clinches.
Haapana is working hard here but doesn't seem to be able to control effectively, up against the cage.
King struggles to land a body shot inside as Haapana controls his hands.
Haapana pushes off an throws an elbow but King leans to the side and avoids it. We're back to clinching against the cage.
King throws a hook to the body. More of an arm punch but it's all scoring with the judges.
Haapana is struggling to control the position.
King looks more muscular than last time we saw him. He must have been on the weights.
King lands a body punch - he's looking to wear down Haapana.
We've had a slow start to the round here - hopefully the action picks up.
King lands on the inside with an uppercut.
Haapana misses with an elbow over the top.
A right handed body shot lands from King.
With the two fighters working up against the cage, Haapana just misses with a elbow thrown towards King's brow.
Haapana lands a glancing elbow in the clinch.
Haapana stalls.
Haapana throws an elbow but it's blocked.
That's one minute gone in the round.
King presses Haapana against the cage and delivers a mid-strength body shot.
Haapana content to slow the pace in the clinch.
King manages to break the clinch.
King gets tackled into the cage by Haapana. Haapana maintains the clinch.
Haapana pushes off an throws an elbow but King leans to the side and avoids it. We're back to clinching against the cage.
King avoids a wild elbow strike from Haapana.
Haapana is struggling to control the position.
King throws a blind hook that connects with the side of Haapanas head.
King avoids a wild elbow strike from Haapana.
The two fighters are working to gain dominance in the clinch.
King misses with a shot to the kidneys.
Haapana is working hard here but doesn't seem to be able to control effectively, up against the cage.
Haapana is trying to slow down the pace of the fight but King is keeping busy.
Haapana trying to stall but King improves his position.
King blocks an elbow strike from Haapana.
A nice glancing elbow lands by Haapana.
King tries to work over Haapana's body with a swooping hook but it only glances the target.
That's two minutes gone in the round.
King tried to land a shot to the body but connects with Haapana's elbow.
Haapana dictating the pace here, as the fighters clinch against the cage.
Haapana creates a bit of distance and throws an elbow that only just misses.
King lands an uppercut.
King misses with a shot to the kidneys.
A short right from King on the inside.
A quick uppercut on the inside from King.
The fans in attendance giving it up for the two fighters, who have really let it all hang out in the last minute or so!
King scores with a hook to the body.
Haapana takes a shot to the head.
King lands with a left to the head.
Haapana content to slow the pace in the clinch.
Haapana blocks an uppercut.
King misses with a punch to the body.
King is leaning against Haapana and scores with a nice uppercut to the body.
Haapana blocks a body shot from King.
A real battle for position is taking place between these two warriors.
Haapana is working hard here but doesn't seem to be able to control effectively, up against the cage.
Haapana can't seem to implement his control oriented gameplan at the moment. That's no bad thing of course, for those of us who want to see a good fight.
A left hand lands to the body for King.
Haapana definitely looks more muscular than last time we saw him fight.
King tries a body shot but Haapana blocks it.
That's three minutes gone in the round.
King blocks an elbow strike.
King swings wildly with an uppercut but Haapana uses good head movement to avoid it.
Nice body punch from King.
King lands a body shot in the clinch.
King misses with some punches.
King scores with a hook to the body.
Haapana lands an elbow just above King 's eye.
Haapana lands an elbow that stopped King in his tracks for a moment.
Haapana throws an elbow but it's blocked.
King lands with a short punch from the clinch.
Haapana lands an elbow just above King 's eye.
King misses with a body punch.
King lands a hook to the side of the head.
King lands a shoulder strike.
A nice right hand lands inside from King.
Fantastic stuff here - a very entertaining period of action, which has drawn cheers from the crowd.
King tries to land a shot to the body but it's blocked.
Haapana blocks a body shot from King.
Both fighters working to control the clinch.
Nice elbow from Haapana.
That's four minutes gone in the round.
An uppercut on the inside fails to land for King.
An uppercut to the body lands inside from King.
Haapana makes some space for himself and lands an uppercut.
King has had enough of the clinch but Haapana keeps him there for the moment.
Haapana pushes off an throws an elbow but King leans to the side and avoids it. We're back to clinching against the cage.
King pushes Haapana back against the cage and unloads with a body punch.
Haapana looks to throw an elbow but misses.
King can't find room to land a body shot as Haapana controls the action.
With the fighters up against the cage, Haapana throws an elbow but misses.
King tries to work over Haapana's body with a swooping hook but it only glances the target.
Haapana throws an elbow but it misses.
King dodges an elbow strike from Haapana.
The fighters are going at a pretty good pace and they're both starting to sweat now.
King working on landing some head shots here - that one got through nicely.
King gets through Haapana's defenses to land a nice punch to the side of the head.
Haapana creates a bit of distance and throws an elbow that only just misses.
King tries to land a shot to the body but it's blocked.
King digs a right hand underneath Haapana's ribcage. Haapana let out a lung full of air as it connected.
A short right hand to the side of the head by King.
Haapana is stalling here. The referee will be looking to step in if he doesn't pick up the pace.
Haapana prevents a body shot from King.
And thats the end of the round the fighters go back to their corners.
A close round but Tom King will probably get the nod.
The fighters get back to their feet, the hooter sounds and we're back to the action!
Haapana clinches up with King and pushes him back against the cage.
An uppercut to the body lands inside from King.
King tries to throw a body punch but Haapana avoids it by throwing King back against the cage.
Haapana lands an elbow that stopped King in his tracks for a moment.
Haapana misses with an elbow over the top.
Haapana working aggressively here.
A bit of stalling here from Haapana.
King lands punches inside but they're not really causing much damage.
Haapana throws an elbow that misses.
Haapana working aggressively here.
King tries to land a shot to the body but it's blocked.
King breaks from the clinch.
King works the jab nicely.
King is the aggressor but that punch slipped nicely by Haapana.
We've had a slow start to the round here - hopefully the action picks up.
Haapana uses some good footwork to avoid the body shot by King.
King works Haapana's body with a nice hook.
Haapana tries to clinch but King moves out of range.
Haapana is looking to slow King down with leg kicks.
The crowd are loving this. Great action here.
King just misses with a punch to the body.
Hannu Haapana seems to be the more aggressive standup fighter in this bout.
King ducks down and throws a hook to the body but Haapana moves away.
That's one minute gone in the round.
Haapana slips under a jab.
King keeps the fight on the outside.
A low kick from Haapana is predictable there
and King counters with a lovely straight right hand!
Haapana clinches up with King and pushes him back against the cage.
King breaks the clinch.
Haapana is looking to clinch.
Haapana closes the distance and clinches.
With the fighters up against the cage, Haapana throws an elbow but misses.
King dodges an elbow strike from Haapana.
King tried to land a shot to the body but connects with Haapana's elbow.
Haapana is trying to slow down the pace in the clinch, to catch his breath.
King lands with a left to the head.
Haapana misses with an elbow strike.
King avoids the elbow strike from Haapana, against the cage.
King lands a right uppercut that snaps the head of Haapana backwards.
King tries to throw a body punch but Haapana avoids it by throwing King back against the cage.
King avoids the elbow strike from Haapana, against the cage.
King goes for a body shot but it's blocked.
That's two minutes gone in the round.
Haapana throws a nice elbow but it doesn't land.
A shot in the inside from Haapana.
This has been an exciting period of action!
King tries to work over Haapana's body with a swooping hook but it only glances the target.
With the fighters up against the cage, Haapana throws an elbow but misses.
Haapana taking a break, stalling in the clinch.
King prevents a body shot from Haapana.
Haapana is struggling to control the position.
Haapana throws an elbow but it misses.
Nice body punch from King - that landed with a thud.
We are yet to see a takedown attempt from King in the fight. On paper you would think he is the more dominant ground fighter so let's see if these unusual tactics pay off.
Haapana misses with an elbow strike.
King lands with a short head shot on the inside.
Haapana lands a nice elbow.
It looks like Tom King has been cut.
King struggles to land a body shot inside as Haapana controls his hands.
King doesn't land with the attempted body shot.
Haapana throws an elbow but it misses.
A quick uppercut on the inside from King.
King lands a hook that snaps the head of Haapana backwards.
Haapana looks to throw an elbow but misses.
A nice left hand lands by King.
That's three minutes gone in the round.
King lands a shoulder strike that jolts his opponent's head backwards.
Haapana lands a nice elbow from the clinch.
Haapana blocking some punches.
King can't find room to land a body shot as Haapana controls the action.
Haapana blocks a body shot from King.
Haapana is trying to maintain a safe position but King gets an underhook and turns Haapana into the cage.
King lands a shoulder strike.
King tried to land a shot to the body but connects with Haapana's elbow.
Haapana creates a bit of distance and throws an elbow that only just misses.
Haapana lands an elbow that stopped King in his tracks for a moment.
Stalling in the clinch from Haapana.
King lands on the inside with an uppercut.
Haapana stalling in the clinch.
King lands a right uppercut that snaps the head of Haapana backwards.
Still in the clinch, King scores with a nice short uppercut.
King tried to land a shot to the body but connects with Haapana's elbow.
Haapana is struggling to control the position.
Good anti-grappling being displayed by King as Haapana tries to tie him up.
That's four minutes gone in the round.
King tries to work over Haapana's body with a swooping hook but it only glances the target.
With the fighters up against the cage, Haapana throws an elbow but misses.
This is a great period of action - very entertaining stuff!
King misses with a body punch.
Haapana is trying to stall.
King tries to work over Haapana's body with a swooping hook but it only glances the target.
Haapana pushes off and fires off an elbow that misses, before clinching up again, against the cage.
King tries a body shot but Haapana blocks it.
Haapana throws an elbow but it's blocked.
King tries to land a shot to the body but it's blocked.
Haapana struggles to land a body shot inside as King controls his hands.
King lands with a short shot to the head.
King misses with a punch to the body.
King tries a body shot but Haapana blocks it.
Haapana misses with some punches.
King misses with a short punch on the inside.
King tried to land a shot to the body but connects with Haapana's elbow.
Haapana creates a bit of distance and throws an elbow that only just misses.
Haapana lands with a light punch inside.
And thats the end of the round the fighters go back to their corners.
Tom King showed his class in that round. I'd imagine he'll take it on all the scorecards.
The cut man is working on Tom King's cut.
OK. That's time! The bell goes and we're back to the action.
Haapana lands a leg kick. The shin dug right into the meat of the thigh.
King thows a left - swing and a miss!
Haapana feints a straight left to the body, then turns around with a flashy move and hits Kings jaw with a dramatic spinning back fist!
King moves into the clinch successfully.
With the fighters up against the cage, Haapana throws an elbow but misses.
Haapana prevents a body shot from King.
King tries to land a shot to the body but it's blocked.
Haapana throws an elbow but it misses.
King misses with a punch to the body.
A quick uppercut on the inside from King.
Haapana is trying to maintain a safe position but King gets an underhook and turns Haapana into the cage.
Haapana lands an elbow inside.
King lands with a light punch inside.
We've had a slow start to the round here - hopefully the action picks up.
The fighters are pressed against the cage, as the pace of the fight slows.
King avoids the elbow strike from Haapana, against the cage.
King can't find room to land a body shot as Haapana controls the action.
King blocks an uppercut.
King blocks an elbow strike.
Tom King seems to be working more effectively in the clinch in the fight so far.
That's one minute gone in the round.
Good anti-grappling being displayed by King as Haapana tries to tie him up.
A left hand lands to the body for King.
Haapana is trying to maintain a safe position but King gets an underhook and turns Haapana into the cage.
With the two fighters working up against the cage, Haapana just misses with a elbow thrown towards King's brow.
King manages to break the clinch.
Haapana displays some good footwork, moving neatly out of range as King throws out the jab.
Haapana tries to clinch but King is having none of it.
Haapana closes the distance looking to clinch
enabling King to counter with a crisp jab.
Haapana wants to clinch
and King counters with a good right hand that lands right on the jaw.
Tom King seems to be getting the better of the standup.
King loads up on a big right hand but Haapana slips the punch.
Haapana fails with an attempt to clinch.
Nice body punch from King.
Haapana is looking to take this fight into the clinch.
That's two minutes gone in the round.
King ducks down and throws a hook to the body but Haapana moves away.
Haapana swings away with a leg kick that misses.
Haapana throws a leg kick but King checks it.
Haapana tries to clinch up against the cage, rushing in to close the distance. King manages to break the clinch and circles back to the middle of the mat.
A little jabbing left from King on the counter but it doesn't find it's target.
King ducks down and throws a hook to the body.
King lands a jab, followed by a cross and another cross, as Haapana backs up against the cage.
It looks like Hannu Haapana has been cut.
The fans in attendance giving it up for the two fighters, who have really let it all hang out in the last minute or so!
Haapana takes a shot to the eye socket. That's gotta hurt.
King looks to throw the jab but Haapana is out of range.
Haapana moves away from the strike by King.
Haapana is looking to take this fight into the clinch.
Haapana misses with a hook.
King walks into a left hand.
King has been the more effective fighter overall so far.
Haapana on the wrong end of a nice jab.
Haapana slips under a jab.
Haapana jabs at King's body.
King throws a hook to the body but it doesn't connect.
King looks to score with a jab to the body but Haapana is just out of range.
That's three minutes gone in the round.
King looks to score with a jab to the body but Haapana is just out of range.
King misses with a hook.
Haapana feinted there with a counter leg kick.
Haapana throws a leg kick which misses King's front leg but catches the back leg as King tries to avoid it.
King scores with a sloppy punch to the body. Not much technique there but it did the business.
Haapana closes the distance and takes a jab right on the nose as he does so.
Haapana misses with a lunging right hand
enabling King to counter with a crisp jab.
Haapana throws a leg kick
and King counters with a lovely straight right hand!
King avoids the clinch attempt nicely.
King throws a body shot but no joy.
King misses with a looping right.
Haapana tries to clinch but King is having none of it.
King lands with a shot to the body.
Haapana scores with a jab to the body.
King throws an overhand right that lands on Haapana's shoulder, as Haapana tries to avoid the shot.
Haapana takes a shot to the body in his stride.
The crowd are loving this. Great action here.
King looks to score with a combo but nothing lands.
That's four minutes gone in the round.
Haapana tries to score with a leg kick but it misses it's target.
Haapana misses with a body shot. Nice footwork from King.
Haapana is looking to clinch.
Haapana fakes with a right hand and throws a good leg kick, right into the thigh. That had to hurt King.
Haapana throws out a leg kick but King moves out of range and Haapana only half commits.
A low kick from Haapana is predictable there
and King counters with a nice body shot.
Haapana wants to clinch.
King digs a good body shot into Haapana's ribs.
King lands a lovely overhand right.
Haapana takes a swing at King's ribcage but misses.
King blocks a leg kick.
King swings wildly with a right hand that was never going to find it's target.
Haapana looks to clinch
and King counters with a two punch combo.
And thats the end of the round the fighters go back to their corners.
Tom King really dominated that round.
Both fighters have cut men working on them during the interval.
Well, the break between rounds is over. Let's get back to the scrappin!

Haapana closes the distance looking to clinch
and King counters with a crisp hook to the side of the head.
Haapana throws a leg kick that is checked
and Haapana takes a counter punch right on the button for his troubles.
Haapana has his head slapped from side to side by a 3 punch combination. That must have hurt him.
Haapana is rocked!
BOOM! King lands a beautiful left hook that drops Haapana. Haapana tries to recover but King is having none of it, landing more punishing shots from mount. One final crushing shot and Haapana lies motionless on the canvas. The fight is over!
Ladies and gentlemen, after 0:23 of round 4, we have a winner by way of TKO (Strikes). Tom King!
Tom King is the new featherweight champion!
Tom King took some time post fight to say the following; 'Many have tried, many have failed! Now give me my bonus!!'.
|
|
|
|
|
|
|
|
|
|
|
|
|
|
|
|
|
|
|
|
|
|
|
| S |
C
A |
G |
S |
C
B |
G |
|
S |
C |
G |
|
energy
A | B |
|
hype
A | B |
|
pop
A | B |
|
mgr
A | B |
|
FIGHT
RATING
67% |
|
|
|
|
|
|
|
Undercard bout
|
Coming up we have a lightweight MMA rules bout between Wilson Wills (ranked 0 p4p, 0 weight class) and Xander Graves (ranked 0 p4p, 0 weight class). Xander Graves is staring across the cage at his opponent, tweaking his nipples.
 |
|
 |
| 181 cm
26
159 lbs
6 - 1 - 0 |
|
175 cm
26
165 lbs
5 - 2 - 0 |
Decent wrestler
Solid Muay Thai
Granite chin |
|
Good takedowns
Counter fighter
Knockout power |
|
| |
|
Ladies and gentlemen. This fight is 5 rounds, for the lightweight championship of the world!
Introducing the champion to my left, fighting out of the red corner.
With a record of
6 - 1 - 0, fighting out of The Island, Wilson Wills!
And introducing the challenger to my right, fighting out of the blue corner.
With a record of
5 - 2 - 0, fighting out of The Island, Xander Graves!
The judges for this bout are Sandra Marshall, Winston Alpacca and Peter Branson.
The bell rings for round one and we are underway!
Graves blocks the body kick.
Wills throws a combination but it was largely blocked by Graves.
Graves with the counter takedown but Wills avoids it easily.
Wills dodges the punch combination from Graves.
Graves misses with an uppercut.
We've been told by Wills's head coaches at RCJ Machado Jiu-Jitsu that he's been working on his takedown defense in preparation for this fight.
Wills fakes with a right hand and throws a good leg kick, right into the thigh. That had to hurt Graves.
We've had a slow start to the round here - hopefully the action picks up.
Wills connects with a single shot there.
Wills looks to land a body kick but Graves moved away.
That's one minute gone in the round.
Graves misses with a takedown attempt - Wills sprawls well and throws a nice strike on the way out which just misses.
The crowd cheers as Wills lands an impressive looking overhand right. Graves doesn't seem phased though.
Graves moves into range and clinches up with Wills.
Graves told us before the fight that he's been working on his elbows. An under utilised technique these days - let's see if it can sway the outcome of the fight.

Wills breaks the clinch and we return to the middle of the mat.
Graves misses with the combination.
That's two minutes gone in the round.
Wills misses with a leg kick

and Graves counters with a nice double leg into half guard.
Wills has guillotine here! It looks pretty tight! Could this be all over! No, Graves escapes and passes into side control at the same time. Nice work there by Graves!
The ground and pound from Graves seems to be hitting the mat more than his opponent.
Graves working the ground and pound but he's contacting the mat, not the fighter.

Graves thinks about going for a far side armbar but bails out and retains the dominant position instead.
This is a great period of action - very entertaining stuff!
Graves working away.
Graves wants to control but Wills is keeping him busy.
Graves goes for an armbar! This could be all over! Wait, no, Wills rolls with the submission and now he's on top in Graves's guard! Nice work there by Wills!
That's three minutes gone in the round.
Wills is pushing down on Graves's leg trying to pass to half guard. Graves is fighting to maintain full guard but Wills has managed to sneak the leg through.
Wills is looking for a kimura but he's never going to get it from there.
Graves trying to control here.
The fighters are pressed up against the cage, both looking to find a bit of space to work.
Graves manages to get to full guard.
Wills won't allow Graves to sweep him here.
That's four minutes gone in the round.
The crowd are hurling abuse towards the fighters... You can hardly blame them though because there isn't a lot going on in the fight.
Graves trying to keep a closed guard but Wills is proving a slippery customer.
Graves wants to hit a switch here but Wills passes into full mount! Oh no, disaster for Graves there!
Wills manages to capitalize on a mistake by Graves to take his back!
Wills not allowing Graves to control his hands.
Graves manages to reverse the position and now he's in Wills's guard. Nice work there by Graves.
The crowd thankful this round is nearly over.
Graves wants to control from the top but Wills keeps moving.
Wills is throwing his legs up, looking for submissions. Graves is aware though and is defending well.
And thats the end of the round the fighters go back to their corners.
That was a close round but I would say that Wilson Wills will probably get the nod.
The fighters get back to their feet, the hooter sounds and we're back to the action!
A punch combination from Graves misses.
Wills looks to land a body kick but Graves moved away.
The sound of bone on bone echoes around the arena as Graves checks a leg kick.
Wills does a little shimmy and throws a leg kick. The leg kick missed by a considerable margin though, making him look a little bit silly for doing the shimmy.
Graves throws a right and a left that both miss.
We've had a slow start to the round here - hopefully the action picks up.
Wills connects with a body shot.
Wills pushes Graves up against the cage in a clinch.
Graves jumps guard but his hands slip and he falls flat on his back. Well, he's made himself look a right mug there, as Wills walks away with a smile on his face. Graves gets slowly back to his feet and shakes his head.
That's one minute gone in the round.
Wills misses with a kick to the body
and Graves counters with a driving takedown into guard. Nice work there by Graves.
Wills has his foot on Graves's thigh. He's trying to push off and get in position for a triangle, I think. Graves works his way back into a safe position though.
Graves throwing strikes from guard but Wills blocks nicely.
Graves looking to pass the guard.
Graves in full guard, throwing the ground and pound. No damage this time.
Wills can't keep his opponent in guard - Graves advances to half guard, no doubt looking to mount.

Graves decides to stand up and try his luck on the feet.
Graves throws a combination but it was largely blocked by Wills.
That's two minutes gone in the round.
A jab lands there for Wills.
Both fighters are looking to counter, which isn't making for the most exciting fight in the world.
Wills has managed to clinch.
Graves is looking to take this one to the mat.
Wills tries a shoulder strike but it doesn't do any damage.
A hook to the body from Wills.
A short right hand to the side of the head by Wills.
This is a great period of action - very entertaining stuff!
Graves tries for a takedown. No joy.
Wilson Wills has stuffed three takedown attempts in the round now. That's going to take a lot out of Xander Graves.
Wills digs a right hand into Graves's ribs. Those have got to be taking their toll on Graves's gas tank.
Wills throws a punch but it's blocked by Graves.
Wills misses with a short punch on the inside.
Graves is working for a takedown up against the cage. He can't get it on this occasion though.
That's three minutes gone in the round.
Wills has a couple of punches blocked by Graves.
Wills has a couple of punches blocked by Graves.
Wills misses with the head strike.
Graves tries to pull guard but can't drag his opponent to the mat. Wills just stands there and leans against the cage.
Wills lands with a quick shot inside that doesn't really do much damage.
Graves tries to pull guard but can't drag his opponent to the mat. Wills just stands there and leans against the cage.
Graves tries to pull guard but can't drag his opponent to the mat. Wills just stands there and leans against the cage.
A head punch on the inside from Wills fails to land.
A head punch on the inside from Wills fails to land.
Wills lands a left hand that snaps the head of Graves backwards.
An uppercut on the inside fails to land for Wills.
Wills misses with some punches.
Wilson Wills has scored more points in the clinch so far.
A body shot lands from Wills.
Graves wants a takedown but no success here.
That's four minutes gone in the round.
Nice body punch from Wills.
Graves is breathing heavily.
Wills lands with a left to the head.
Wills lands with a light punch inside.
Wills lands a nice uppercut.
We've seen a great period of action over the last minute or so - credit to both fighters for going all out!
A head punch on the inside from Wills fails to land.
A short right from Wills.
Wills lands with a left to the head.
Graves is rocked!
Wills fails to land with a short punch on the inside.
Graves is still on wobbly legs! Can Wills finish him?
Wills scores with a shoulder strike.
Wills is pressed up against the cage. Graves has hold of a leg and is looking to drag Wills down to the mat. Wills avoids the attempt though and has circled away. We're back to striking at a distance.
Ouch! a nice leg kick from Wills, right into the meat.
Wilson Wills is looking to keep the fight on the feet at all costs.
Graves throws a left and a right that both miss
and Wills counters with a monster hook and another for good measure! Graves falls to the ground, out cold! Stick some heavy metal music over the top of that clip and it's one for the highlight makers!
Ladies and gentlemen, after 4:48 of round 2, we have a winner by way of KO (Strikes). Wilson Wills!
Wilson Wills retains his lightweight title!
Our winner, Wilson Wills, made sure he spent some time buttering up the crowd during his post fight interview, which will no doubt bring him a few more fans.
|
|
|
|
|
|
|
|
|
|
|
|
|
|
|
|
|
|
|
|
|
|
|
| S |
C
A |
G |
S |
C
B |
G |
|
S |
C |
G |
|
energy
A | B |
|
hype
A | B |
|
pop
A | B |
|
mgr
A | B |
|
FIGHT
RATING
34% |
|
|
|
|
|
|
|
Co-main event
|
Coming up we have a heavyweight MMA rules bout between Renato Laranja (ranked 0 p4p, 0 weight class) and Bruce Honeybottom (ranked 0 p4p, 0 weight class). On his way into the cage it seems that Renato Laranja has been attacked by a crazed fan! It looks like it might have been the just bleed guy! Luckily Renato Laranja seems to be OK! I thought that lunatic was in prison!?
 |
|
 |
| 197 cm
26
275 lbs
4 - 1 - 0 |
|
205 cm
26
250 lbs
7 - 2 - 0 |
Powerful takedowns
Brawler
Very strong |
|
Good wrestler
Counter fighter
Good gas tank |
|
| |
|
Ladies and gentlemen. This fight is 3 rounds, in the heavyweight division.
Introducing the fighter to my left, fighting out of the red corner.
With a record of
4 - 1 - 0, fighting out of The Island, Renato Laranja!
And introducing the fighter to my right, fighting out of the blue corner.
With a record of
7 - 2 - 0, fighting out of The Island, Bruce Honeybottom!
The judges for this bout are Daniel Franklin, Winston Alpacca and David Hoff.
The bell rings for round one and we are underway!
Honeybottom slips a straight right by Laranja.
Honeybottom shapes to counter with a head kick.
Laranja tries to drive through with a takedown attempt but Honeybottom defends well and Laranja ends up having to push Honeybottom into the cage where they will battle it out in the clinch.
Despite the aggression on Honeybottom's face he doesn't fully commit to the counter.
Laranja doesn't succeed with the takedown
and Honeybottom counters with a quick right hand to the jaw.
Laranja misses with an uppercut. Honeybottom saw that one coming.
Honeybottom's coach down at THE GYM (20 Elite coaches on the Island !!!) was telling us pre-fight that they have been working on Honeybottom's balance. Obviously they view that as a key factor in the outcome of this fight.
Laranja shoots and misses
and Honeybottom counters with a big right hand! Oh Laranja is in trouble here! Honeybottom follows up with more strikes and that's it! The ref has stopped it!
Ladies and gentlemen, after 0:28 of round 1, we have a winner by way of TKO (Strikes). Bruce Honeybottom!
|
|
|
|
|
|
|
|
|
|
|
|
|
|
|
|
|
|
|
|
|
|
|
| S |
C
A |
G |
S |
C
B |
G |
|
S |
C |
G |
|
energy
A | B |
|
hype
A | B |
|
pop
A | B |
|
mgr
A | B |
|
FIGHT
RATING
99% |
|
|
|
|
|
|
|
Main event
|
Coming up we have a heavyweight MMA rules bout between Sephiroth Jenova (ranked 0 p4p, 0 weight class) and Grimpen Shatterstone (ranked 0 p4p, 0 weight class). Jenova comes to the cage accompanied by Cher - Believe. Grimpen Shatterstone is staring across the cage at his opponent, tweaking his nipples.
 |
|
 |
| 198 cm
26
255 lbs
8 - 0 - 0 |
|
194 cm
26
225 lbs
5 - 1 - 0 |
Decent wrestler
Solid boxing
Cardio machine |
|
Good wrestler
Counter fighter
Determined |
|
| |
|
Ladies and gentlemen. This fight is 5 rounds, for the heavyweight championship of the world!
Introducing the champion to my left, fighting out of the red corner.
With a record of
8 - 0 - 0, fighting out of The Island, Sephiroth Jenova!
And introducing the challenger to my right, fighting out of the blue corner.
With a record of
5 - 1 - 0, fighting out of The Island, Grimpen Shatterstone!
The judges for this bout are Michael Johnstone, David Hoff and Santiago Holmes.
The bell rings for round one and we are underway!
Jenova fakes high and swings low for a body shot but Shatterstone manages to avoid it.
Shatterstone tries to keep at a distance but Jenova has taken the fight into the clinch.
Jenova tries to throw a body punch but Shatterstone avoids it by throwing Jenova back against the cage.
Shatterstone wants a takedown but no success here.
Jenova breaks the clinch.
Jenova ducks down and throws a hook to the body.
Shatterstone tries to keep at a distance but Jenova has taken the fight into the clinch.
Jenova tried to land a shot to the body but connects with Shatterstone's elbow.
We've had a slow start to the round here - hopefully the action picks up.
Shatterstone takes a shot to the head.
The pace really dropping off here, momentarily.
Shatterstone prevents a body shot from Jenova.
That's one minute gone in the round.
Jenova is working Shatterstone over against the cage.
Shatterstone prevents a body shot from Jenova.
Jenova pushes Shatterstone back against the cage and unloads with a body punch.
Shatterstone looks winded!
Jenova is leaning against Shatterstone and scores with a nice uppercut to the body.
Jenova scores with a hook to the body.
Jenova throws a hook to the body. More of an arm punch but it's all scoring with the judges.
Jenova definitely looks more muscular than last time we saw him fight.
Jenova scores with an uppercut up the middle.
Jenova digs a right hand underneath Shatterstone's ribcage. Shatterstone let out a lung full of air as it connected.
Jenova lands a body shot.
Jenova gets through Shatterstone's defenses to land a nice punch to the side of the head.
Jenova lands a shoulder strike.
A hook to the body from Jenova.
Jenova breaks the clinch and we're back to striking at distance.
That's two minutes gone in the round.
Jenova darts in and clinches Shatterstone up against the cage.
We've seen a great period of action over the last minute or so - credit to both fighters for going all out!
Jenova lands a body punch - he's looking to wear down Shatterstone.
Jenova lands a body shot.
A short right from Jenova.
Jenova lands a left hand that snaps the head of Shatterstone backwards.
Still in the clinch, Jenova scores with a nice short uppercut.
Jenova tries to work over Shatterstone's body with a swooping hook but it only glances the target.
Jenova lands a shot to the body.
An uppercut to the body lands inside from Jenova.
Jenova digs a right hand underneath Shatterstone's ribcage. Shatterstone let out a lung full of air as it connected.
Jenova stays in close to his opponent and throws a right hand to the body.

Jenova drops Shatterstone onto one knee with a big uppercut from the clinch! Shatterstone is propped up by the cage and works his way back to his feet!
Shatterstone is rocked!
Jenova works on Shatterstone's body with a couple of short punches.
That's three minutes gone in the round.
Jenova creates a little bit of space and unloads with a massive uppercut! Shatterstone drops to the mat, out cold! Wow, that was brutal! What a knockout!
Ladies and gentlemen, after 3:10 of round 1, we have a winner by way of KO (Punch). Sephiroth Jenova!
Sephiroth Jenova retains his heavyweight title!
Sephiroth Jenova decided to go for the less than humble approach in his post fight interview, telling everyone how he is going to conquer the world. The crowd seemed to like it when really that sort of approach could have gone either way.
|
|
|
|
|
|
|
|
|
|
|
|
|
|
|
|
|
|
|
|
|
|
|
| S |
C
A |
G |
S |
C
B |
G |
|
S |
C |
G |
|
energy
A | B |
|
hype
A | B |
|
pop
A | B |
|
mgr
A | B |
|
FIGHT
RATING
48% |
|
|
|
|
|
|
|
|
|
|

