 |
WXC 2: Walker vs. Priest PBP Commentary |
Undercard bout
|
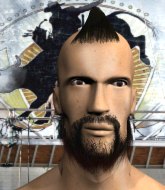
Coming up we have a light heavyweight MMA rules bout between Jason Hill (ranked 0 p4p, 0 weight class) and Phillip Scotsdale (ranked 0 p4p, 0 weight class). Hill's ring entrance music is that housewives' favourite, Moby - Extreme Ways . Phillip Scotsdale has the better chin. Will he look to stand and bang today?
 |
|
 |
| 188 cm
22
204 lbs
1 - 0 - 0 |
|
194 cm
22
215 lbs
0 - 0 - 0 |
BJJ Blue Belt
Brawler
Cuts easily |
|
BJJ White Belt
Solid Muay Thai
Solid chin |
|
| |
|
Ladies and gentlemen. This fight is 3 rounds, in the light heavyweight division.
Introducing the fighter to my left, fighting out of the red corner.
With a record of
1 - 0 - 0, fighting out of Hilo, Jason Hill!
And introducing the fighter to my right, fighting out of the blue corner.
With a record of
0 - 0 - 0, fighting out of Hilo, Phillip Scotsdale!
The judges for this bout are , and .

The bell rings for round one and we are underway!
Hill blocks a head kick by Scotsdale.
Scotsdale throws a series of punches but Hill moves out of range.
Hill throws a right and a left that Scotsdale avoids nicely.
Hill tries to clinch but is not successful on this occasion.
Scotsdale takes a shot to the nose. Hopefully that hasn't broken it.

Scotsdale gets to the clinch - let's see what his plan is here.

Hill has managed to pull guard. Let's see whether he can work an aggressive guard. It will also be interesting to see what tactics Scotsdale uses from the top position.
Hill throws some sloppy strikes off his back.

Scotsdale got a little sloppy there for a moment and Hill has worked his way into a loose triangle - can he finish it?! No, Scotsdale has managed to get both his arms back between Hill's legs - danger averted.

Hill scrambles and gets back to his feet.
Hill steps to the side to avoid the strikes from Scotsdale.
Hill throws a wild combination but nothing lands.
Scotsdale will need to tighten up his combinations if he doesn't want to gas himself out, swinging at thin air.
Hill tries to shoot in for a takedown. He's got hold of a leg but Scotsdale swivels and escapes.

A big head kick from Scotsdale and Hill is sent sprawling to the canvas!

Hill is rocked!

It looks like Jason Hill has been cut.
Fantastic stuff here - a very entertaining period of action, which has drawn cheers from the crowd.
Hill looking to hit a scissor sweep but Scotsdale is one step ahead there.

That's one minute gone in the round.
Hill is trying to stand up but he's not managed so far.
Hill controls Scotsdale momentarily but Scotsdale frees himself.
The ref warns both fighters not to hold the cage as they work up against the meshing.
Scotsdale stopping the sweep attempt from Hill.
Hill has his hands on Scotsdale's head, controlling the position.

That's two minutes gone in the round.
There's not a lot going on here and the crowd are letting the fighters know they're not willing to tolerate a lack of action.
Hill wants to stand but Scotsdale is controlling the position.
Scotsdale postures up.

That's three minutes gone in the round.

It looks like we're going to have a standup here. Neither fighter is doing enough on the ground.
Scotsdale throws a left and a right that both miss
and Hill counters with a quick right hand to the jaw.
Scotsdale misses with a body kick.
Crunch! Scotsdale slams his shin into Hill's torso.
Hill is breathing heavily.
Thud! ouch! good body kick from Scotsdale - that will leave a mark!
The crowd cheering loudly, showing their appreciation for the quality fight we're seeing here.
Scotsdale cracks Hill with an open hand slap.
Scotsdale thuds his shin into the meat of Hill's side.
Scotsdale scores with a push kick.
Scotsdale misses with a half-hearted attempt at a head kick.
Hill slips a jab and a cross from Scotsdale.
Scotsdale throws a sloppy head kick and Hill moves out of range easily.
Scotsdale bobs and weaves and then throws a good body kick.
A head kick from Scotsdale lands but Hill takes it in his stride.
Scotsdale misses with a head kick.
Hill blocks a head kick by Scotsdale.
Scotsdale looks to land a left hand but Hill moved out of range nicely.
Hill fails in his attempt to clinch.
Scotsdale tries a head kick but it misses.
Scotsdale connects with a lovely right hand, straight down the pipe.
Hill tries to clinch there but Scotsdale circles away.

That's four minutes gone in the round.
Hill avoids the head kick by Scotsdale.
Scotsdale scores with a hook.
Scotsdale throws a head kick but Hill moves out of range.
Hill avoids the clinch attempt nicely.
Scotsdale misses with a wild combination.
Scotsdale fails to land with the punch combination there - jab, cross, hook, miss, miss, miss.
Hill thumps Scotsdale with a low kick.
Hill misses with the combination.
Scotsdale keeps the fight standing with a nice sprawl.
Hill takes a head kick and shrugs it off.
Scotsdale drives through and clinches with Hill against the cage.
The crowd are going absolutely nuts as the round comes to an end - what a fantastic round of action!
Scotsdale is looking to break free of the clinch but Hill has double underhooks.
Scotsdale misses with a hook to the ribs.
Hill landing knees to the body.

Scotsdale breaks from the clinch.
Scotsdale keeps the fight on the outside.
And thats the end of the round the fighters go back to their corners.
Phillip Scotsdale dominated that round.
The cut man is working on Jason Hill's cut.
Well, the break between rounds is over. Let's get back to the scrappin!

Scotsdale throws a combination that misses
and Hill counters with a takedown into side control.
Scotsdale tries to bench press Hill off him but Hill keeps the position.
Hill throwing shots but missing, from side control.
Hill is looking to take a break and control but Scotsdale is keeping him honest, looking to work from the bottom.
Hill tries to score with some ground and pound. Scotsdale controls his posture well this time though and the shots don't do any damage.
Both fighters are absolutely exhausted here.
That's one minute gone in the round.
Hill misses with the ground and pound.
Hill decides to take the fight back to the feet.
Hill has a takedown stuffed.
Scotsdale throws a nice looking combination but Hill bobs and weaves to avoid any damage.
Phillip Scotsdale is looking to keep the fight on the feet at all costs.
A thudding body kick lands there by Hill!
Wow, both these guys are really going for it!
A cross from Scotsdale lands.
Hill throws a head kick but Scotsdale moves out of range.
Scotsdale throws a sloppy head kick and Hill moves out of range easily.
Scotsdale scores with a kick to the midsection.
Hill fakes with the hands and throws a leg kick but Scotsdale is out of range.
Nice straight punches there by Scotsdale. You know Roy Jones Jr respects the hands of Scotsdale.
That's two minutes gone in the round.
Scotsdale misses with a head kick.
Scotsdale scores with a sloppy punch to the body. Not much technique there but it did the business.
Jason Hill is looking to throw some combinations by the looks of things.
Hill tries to clinch but Scotsdale moves out of range.
Scotsdale tries a switch kick but it misses it's target.
Hill misses with a jab and misses with a cross straight after too.
Scotsdale plants his feet and lands a nice head kick!
A head kick from Scotsdale lands but Hill takes it in his stride.
Hill takes a head kick and keeps coming.
Hill fails in his attempt to clinch.
Scotsdale misses with a body kick.
Phillip Scotsdale seems to be getting the better of the standup.
Hill tries a head kick but it misses.
Scotsdale takes the fight into the clinch.
Hill looking to stall.
Scotsdale pushes off and circles away, back to the middle of the mat.
Scotsdale ducks down and throws a hook to the body but Hill moves away.
Hill wants to clinch up but Scotsdale keeps it at a distance.
Hill misses with a half-hearted attempt at a head kick.
That's three minutes gone in the round.
Scotsdale throws a head kick but Hill moves out of range.
Hill takes a head kick and shrugs it off.
Crunch! Scotsdale slams his shin into Hill's torso.
Hill tries a head kick but it misses.
Scotsdale throws a head kick that half lands.
Scotsdale scores with a push kick.
A looping hook to the body misses from Scotsdale. Hill does a little dance to reset his feet.
Nice body kick there by Hill.
Hill looking to throw a kick but he's pulled out of it.
Hill fails with a takedown attempt from distance.
Scotsdale throws a nice head kick!
Scotsdale throws a lazy head kick
and Hill counters with a head kick.
Scotsdale misses with a jab to the body
and Hill counters with a head kick. That will keep Scotsdale thinking before he tries any more sloppy attacks!
Hill throws a wild combination but nothing lands.
Scotsdale swinging wildly here.
Scotsdale tries a switch kick but it misses it's target.
Hill tries a head kick but it misses.
That's four minutes gone in the round.
Scotsdale throws a sloppy head kick
and Hill counters with a head kick.
Hill throws a sloppy head kick and Scotsdale moves out of range easily.
Hill throws a head kick that misses
letting Scotsdale counter with a right hand.
Hill tries to clinch but Scotsdale moves out of range.
Scotsdale moves into range and clinches up with Hill.
Hill lands a takedown into guard.
A big thud reverberates around the arena there as Hill accidentally thumps the mat. Hopefully he's not broken his hand.
Hill's corner is telling him to maintain position.
Hill lands a nice shot whilst sitting in his opponent's guard.
We get told so often about how wrestlers don't like to be on their backs. Let's see if Scotsdale can do anything to dispel that myth.
Hill wants to pass the guard but Scotsdale is keeping the position.
A big thud reverberates around the arena there as Hill accidentally thumps the mat. Hopefully he's not broken his hand.
And thats the end of the round the fighters go back to their corners.
Jason Hill dominated that second round.
The cut man is working on Jason Hill's cut.
That's the end of the interval. I'm sure that seemed a lot quicker than a minute for our two fighters! Back to the action. So, we enter the final round. Let's see if either fighter can bring us a finish, or whether we're going to the judges scorecards.

A head kick by Hill misses
and Scotsdale counters by moving into the clinch. Good anticipation by Scotsdale.
Scotsdale breaks from the clinch.
Scotsdale throws a head kick that connects with a bit of head and a bit of hand.
Scotsdale thumps Hill with a low kick.
Scotsdale misses with a jab, cross combination.
Scotsdale misses with a two punch combination.
Hill misses with the combination.
Scotsdale throws a sloppy head kick
and Hill counters with a shoot takedown. Scotsdale fights it but they end up in guard.
Fantastic stuff here - a very entertaining period of action, which has drawn cheers from the crowd.
Hill drops back looking for a leg! Scotsdale is in trouble here! The fighters roll with the hold and Scotsdale manages to kick Hill off! Hill jumps back into Scotsdale's guard.
Scotsdale looking for a sweep. Not yet Scotsdale, not yet.
Both fighters are breathing heavily.
That's one minute gone in the round.
Hill wants to control from the top but Scotsdale keeps moving.
Hill preventing the sweep.
Hill drops back for a leg! It's a sloppy attempt though and Hill jumps back into guard quickly, to retain the dominant position.
Hill trying to control the position from guard on top but Scotsdale is wriggling around, looking for whatever he can.
Hill looking to pass the guard.
That's two minutes gone in the round.
There's not a lot going on here and the crowd are letting the fighters know they're not willing to tolerate a lack of action.
Hill wanted to stand there but Scotsdale had control of the position.
Well, the referee has seen enough. Neither fighter is active enough on the ground so he's stood them back up.
Scotsdale tries a head kick but it misses.
Scotsdale misses with a jab, cross combination.
Hill tries to clinch up.
Hill avoids the head kick by Scotsdale.
Scotsdale doesn't manage to clinch there - Hill circles away.
Scotsdale misses with a head kick.
Hill lands with a head kick! That's gotta hurt.
That's three minutes gone in the round.
Hill with a lazy takedown attempt
and Scotsdale connects with a straight left hand counter down the middle.
Scotsdale throws a head kick that misses and slips in the process. He scrambles back to his feet and the fighters circle.
Hill scores a trip takedown into side control. Nice.
Hill sitting in side control, looking to soften his opponent up with elbows and hammerfists but Scotsdale is avoiding damage well and looking to escape the position.
Scotsdale can't do much from the bottom here.
Scotsdale really doesn't want to stay on the ground with Hill. If he can't get it back to his feet, it's only a matter of time before he'll be tapping out.
Hill fails to land a wild elbow strike.
That's four minutes gone in the round.
Hill tries for a kimura. Not really close to a finish though.
Hill tries to land with some ground and pound but misses.
Scotsdale tries to improve position but can't.
Scotsdale is not content to let Hill control the position.
And that's the end of the fight!
That was a close round. You could make an argument for either fighter but I would give it to Jason Hill.
I think Hill has won this one but let's see what the judges have to say. Over to the ring announcer for the scorecards.
Ladies and gentlemen, after 3 rounds of action, we go to the scorecards for a decision.
Judge Andi Peters scores the fight 29:28
Judge Gordon Ramsey scores the fight 29:28
Judge Frank Skinner scores the fight 28:29
In favor of your winner, by split decision... Jason Hill!
|
|
|
|
|
|
|
|
|
|
|
|
|
|
|
|
|
|
|
|
|
|
|
| S |
C
A |
G |
S |
C
B |
G |
|
S |
C |
G |
|
energy
A | B |
|
hype
A | B |
|
pop
A | B |
|
mgr
A | B |
|
FIGHT
RATING
89% |
|
|
|
|
|
|
|
Undercard bout
|
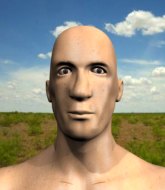
Coming up we have a heavyweight MMA rules bout between Choy Shoop (ranked 0 p4p, 0 weight class) and Ezra Kazee (ranked 0 p4p, 0 weight class). Kazee has chosen Fanfare for the Common Man as his entrance music. Choy Shoop has the edge in experience - let's see if he can make that count tonight.
 |
|
 |
| 196 cm
25
240 lbs
3 - 1 - 0 |
|
180 cm
18
260 lbs
1 - 1 - 0 |
BJJ Purple Belt
Brawler
Granite chin |
|
BJJ Blue Belt
Brawler
Determined |
|
| |
|
Ladies and gentlemen. This fight is 3 rounds, in the heavyweight division.
Introducing the fighter to my left, fighting out of the red corner.
With a record of
3 - 1 - 0, fighting out of Hilo, Choy Shoop!
And introducing the fighter to my right, fighting out of the blue corner.
With a record of
1 - 1 - 0, fighting out of Hilo, Ezra Kazee!
The judges for this bout are , and .
The bell rings for round one and we are underway!
Shoop slips a straight right by Kazee.
Shoop avoids a punch combination nicely.
A telegraphed takedown attempt from Shoop is defended easily by Kazee.
Kazee should think about turning a few of those tyres round his middle into muscle if he wants people to take him seriously as an athlete.
Kazee throws out a token jab with nothing on it.
Shoop tries for a takedown but Kazee sees it coming a mile off and avoids it easily.
Kazee gets a clinch.
Kazee is trying to break the clinch but Shoop has him pressed against the cage.
Kazee breaks the clinch and we're back to striking at distance.
Horrible takedown by Shoop or perhaps it was just good defense by Kazee which made him look bad.
That's three failed takedown attempts in the round for Choy Shoop. That's going to take a lot out of him.
Shoop shoots in for a takedown. "I don't think so" says Kazee as he avoids it easily.
A telegraphed takedown attempt from Shoop is defended easily by Kazee.
Shoop throws a looping left and ducks down for a takedown. He's got his arms around Kazee's waist but Kazee gets an underhook and avoids the takedown by throwing Shoop off to one side.
Shoop shoots in for a takedown. "I don't think so" says Kazee as he avoids it easily.
Kazee jabbing away but nothing is landing.
Kazee ducks down and throws a hook to the body but Shoop moves away.
Kazee closes the distance and scores a nice trip takedown into half guard. Shoop did well to prevent Kazee getting side control.
Shoop is breathing heavily.
That's one minute gone in the round.
Kazee tries to stand but can't do so whilst Shoop controls his leg.
Kazee really doesn't want to stay on the ground with Shoop. If he can't get it back to his feet, it's only a matter of time before he'll be tapping out.
Kazee looking for a kimura but he'll have to free his other leg if he wants to finish that. Perhaps he's just using it as a distraction technique.
Kazee decides to stand up.
Shoop gets his takedown attempt stuffed easily
and Kazee decides to take the opportunity to score a takedown. He's landed in Shoop's guard.
That's two minutes gone in the round.
Kazee postures up in Shoop's guard and throws a big left but Shoop blocks it.
Kazee trying to pass the guard but can't manage it just yet.
Shoop trying to control the position.
Kazee slips effortlessly into side control - very nice.
Kazee decides to stand back up.
Kazee tries to bum rush Shoop with a series of wild strikes but Shoop uses good footwork to avoid the assault.
Kazee throws out a loose jab but Shoop uses good head movement to avoid it.
Kazee wants to clinch.
That's three minutes gone in the round.
Kazee throws a looping overhand right but Shoop ducks down to avoid it.
Shoop misses with a takedown attempt
and Kazee counters with a driving takedown into guard. Nice work there by Kazee.
Kazee stands up and waves to Shoop to follow him.
Shoop ducks under a wild hook from Kazee.
Shoop shoots in but no luck this time.
Ezra Kazee seems to be the more aggressive standup fighter in this bout.
Kazee throws a big shot that misses.
Kazee throws a series of punches but Shoop moves out of range.
Shoop fails with the takedown
and Kazee decides to take the opportunity to score a takedown. He's landed in Shoop's guard.
The crowd cheering loudly, showing their appreciation for the quality fight we're seeing here.
Shoop has his foot on Kazee's thigh. He's trying to push off and get in position for a triangle, I think. Kazee works his way back into a safe position though.
Shoop trying to control the position.
That's four minutes gone in the round.
Shoop is working actively off his back, looking to secure an arm or perhaps work for a triangle.
Shoop is looking for a guillotine. You can't force these things though and Kazee defends well.
Shoop trying to control the position.
As the round comes to an end the crowd are showing their appreciation for a great round of action.
Kazee sneaks a leg through and gets to half guard. That was like a knife through butter how easily he passed Shoop's guard.
And thats the end of the round the fighters go back to their corners.
Ezra Kazee dominated that round.
OK. That's time! The bell goes and we're back to the action.
Shoop has his takedown stuffed
and Kazee counters with a driving takedown into guard. Nice work there by Kazee.
Kazee decides to stand up and beckons his opponent to follow.
Kazee swings and misses with a hook to the body.
Kazee feints and as Shoop raises his hands in defense, Kazee changes levels and drives through with a takedown into guard.
Kazee wanted to stand there but Shoop had control of the position.
Shoop is working actively off his back, looking to secure an arm or perhaps work for a triangle.
We've seen a great period of action over the last minute or so - credit to both fighters for going all out!
Shoop is throwing his legs up, looking for submissions. Kazee is aware though and is defending well.
We're hearing some news coming in from back stage. It's official - Kazee has eaten all the pies!
Both fighters are absolutely exhausted here.
That's one minute gone in the round.
Shoop is throwing his legs up, looking for submissions. Kazee is aware though and is defending well.
Shoop working for a triangle but Kazee defends it easily.
The ref warns both fighters not to hold the cage as they work up against the meshing.
Kazee wants to stand but Shoop is controlling his posture from full guard.
That's two minutes gone in the round.
The crowd are starting to boo a lack of action.
Kazee decides he's had enough of playing guard and decides to stand. Come on Shoop, up you get!
Kazee misses the jab.
Kazee shoots in and bounces Shoop off the cage to secure the takedown into guard.
Kazee is fighting to break Shoop's control of his arms but Shoop is doing a good job of controlling the position at the moment.
Shoop is trying to control the position from the bottom.
That's three minutes gone in the round.
Shoop bucks up whilst keeping hold of a body lock, managing to reverse the position. Now he's in top in Kazee's guard.
Shoop trying to control but Kazee is working from the bottom.
Kazee had isolated an arm as going for a kimura. Shoop defends it easily.
Kazee is throwing his legs up, looking for submissions. Shoop is aware though and is defending well.
Kazee tries to strike from the bottom.
Kazee is active off his back here, looking for submissions.
Kazee working for a triangle but Shoop defends it easily.
That's four minutes gone in the round.
The crowd are showing their displeasure at the lack of action as loud boos ring out around the arena.
Shoop trying to control the position from guard on top but Kazee is wriggling around, looking for whatever he can.
Kazee looking for submissions from the bottom here. Moving his hips around, possibly looking for an armbar.
Kazee has a loose triangle. He'll be looking to tighten that up but Shoop can see exactly what he's planning and manages to posture up and free himself.
Shoop drops back looking for a leg! Kazee is in trouble here! The fighters roll with the hold and Kazee manages to kick Shoop off! Shoop jumps back into Kazee's guard.
Kazee throwing his legs up looking for a triangle.
And thats the end of the round the fighters go back to their corners.
Ezra Kazee showed his class in that round. I'd imagine he'll take it on all the scorecards.
That's the end of the interval. I'm sure that seemed a lot quicker than a minute for our two fighters! Back to the action. And we move into the final round!
Shoop doesn't succeed with the takedown
and Kazee counters with a nice double leg into half guard.
Kazee decides to stand up.
Shoop shoots in for a takedown but Kazee shows good takedown defense there and keeps this one on the feet.
Kazee fakes with an overhand right and moves in to clinch with Shoop, pushing him back against the cage.
Shoop can't get the takedown.
That's three failed takedown attempts in the round for Choy Shoop. That's going to take a lot out of him.
Kazee has moved round to his opponent's back and is looking for a suplex! Oh snap! He's tossed Shoop clear over his head and slammed him to the mat!
Fantastic stuff here - a very entertaining period of action, which has drawn cheers from the crowd.
Kazee has the hooks in. Shoop is trying to push off one leg but he has to do so cautiously to avoid being submitted.
Shoop manages to reverse the position and now he's in Kazee's guard. Nice work there by Shoop.
Kazee is looking for a triangle but Shoop pushes his legs off easily.
Both fighters are breathing heavily.
That's one minute gone in the round.
Kazee avoiding any damage from the ground and pound.
Kazee throwing his legs up looking for a triangle.
Kazee working for a triangle but Shoop defends it easily.
Shoop in full guard, throwing the ground and pound. No damage this time.
Kazee had isolated an arm as going for a kimura. Shoop defends it easily.
Kazee had isolated an arm as going for a kimura. Shoop defends it easily.
That's two minutes gone in the round.
There's not a lot going on here and the crowd are letting the fighters know they're not willing to tolerate a lack of action.
Kazee throwing strikes off his back to little effect.
Both fighters really going for it on the ground here!
Kazee is throwing his legs up, looking for submissions. Shoop is aware though and is defending well.
Kazee keeping moving, preventing Shoop from controlling successfully.
Shoop passes Kazee's right leg, so he's now in half guard.
Kazee wants to improve his position but Shoop is controlling well.
Kazee slips a foot under and gets full guard. Nice work.
Kazee looking for a guillotine here but Shoop defends easily.
Shoop slips effortlessly into side control - very nice.
That's three minutes gone in the round.
Kazee tries to improve position but can't.
Kazee has been the more effective fighter overall so far.
Shoop is trying to get an arm triangle but Kazee is defending well.
Shoop thinks about going for a far side armbar but bails out and retains the dominant position instead.
Kazee tries to bench press Shoop off him but Shoop keeps the position.
Kazee throws a couple of strikes even though he's not really in a good position to do so.
Kazee tries to buck Shoop off but Shoop is having none of it.
Shoop is working to tighten is grip on Kazee's neck. He's isolated an arm and is working for an arm triangle. Kazee has recognised the danger and is trying to turn with the submission but Shoop is really squeezing tight and eventually Kazee passes out! Shoop breaks the hold and jumps onto the cage to celebrate! Submission of the night, I'd say!
Ladies and gentlemen, after 4:03 of round 3, we have a winner by way of Submission (Arm Triangle). Choy Shoop!
|
|
|
|
|
|
|
|
|
|
|
|
|
|
|
|
|
|
|
|
|
|
|
| S |
C
A |
G |
S |
C
B |
G |
|
S |
C |
G |
|
energy
A | B |
|
hype
A | B |
|
pop
A | B |
|
mgr
A | B |
|
FIGHT
RATING
100% |
|
|
|
|
|
|
|
Undercard bout
|
|
|
|
Undercard bout
|
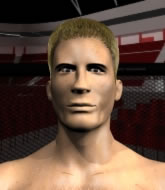
Coming up we have a middleweight MMA rules bout between Jonathan Moxon (ranked 0 p4p, 0 weight class) and Seamus McMacMack (ranked 0 p4p, 0 weight class). McMacMack is bouncing up and down as he enters the arena, backed by Why Can't We Be Friends?. Over to our ring announcer for the fighter introductions!
 |
|
 |
| 190 cm
25
194 lbs
6 - 5 - 1 |
|
182 cm
19
184 lbs
0 - 0 - 0 |
BJJ Purple Belt
Solid boxing
Good chin |
|
BJJ Blue Belt
Decent boxing
Heavy handed |
|
| |
|
Ladies and gentlemen. This fight is 3 rounds, in the middleweight division.
Introducing the fighter to my left, fighting out of the red corner.
With a record of
6 - 5 - 1, fighting out of Hilo, Jonathan Moxon!
And introducing the fighter to my right, fighting out of the blue corner.
With a record of
0 - 0 - 0, fighting out of Hilo, Seamus McMacMack!
The judges for this bout are , and .
The bell rings for round one and we are underway!
Moxon slaps away a takedown attempt from McMacMack, before circling back to the center of the mat.
Moxon lands a nice hook to McMacMack's body. McMacMack takes it in his stride and looks to land his own strikes.
Moxon fakes a head shot and lands one to the body.
McMacMack throws a left that rocks Moxon and follows with a right that sends him tumbling to the canvas! McMacMack dives into side control, looking to finish! Can Moxon regain composure!
It looks like Jonathan Moxon has been cut.
The crowd are loving this. Great action here.
Moxon manages to get back to half guard.
Moxon blocking the ground and pound attempt from McMacMack.
Moxon tries to roll over but McMacMack keeps him under control.
Moxon looking for submissions from an awkward position here.
McMacMack is looking for a kimura but he's never going to get it from there.
Moxon moves his hips nicely and gets into full guard.
Moxon bucks up whilst keeping hold of a body lock, managing to reverse the position. Now he's in top in McMacMack's guard.
Moxon trying to control but McMacMack is working from the bottom.
Moxon avoids a guillotine attempt easily.
Both fighters really going for it on the ground here!
Moxon trying to control but McMacMack is working from the bottom.
That's one minute gone in the round.
McMacMack escapes his hips to the side and looks to be working for an armbar. Moxon gives him a little smile and shakes his head. No chance.
McMacMack has a loose triangle. He'll be looking to tighten that up but Moxon can see exactly what he's planning and manages to posture up and free himself.
McMacMack looks gassed!
Moxon missing there with some ground and pound from the guard.
Moxon passes easily into side control. Nice work.
The fighters are starting to perspire pretty heavily.
Moxon is trying to get an arm triangle but McMacMack is defending well.
The ref warns both fighters not to hold the cage as they work up against the meshing.
McMacMack is positioning himself to get back to half guard.
Moxon works a knee to the body and follows up with a nice elbow to the head.
That's two minutes gone in the round.
Moxon scores with a couple of short elbows.
McMacMack tries to bench press Moxon off him but Moxon keeps the position.
Moxon trying to control the action but McMacMack is working from the bottom.
McMacMack is sneaking out the side here. He's bucked Moxon off and has taken his back!
Moxon turns into McMacMack and is now in his guard.
Moxon trying to pass the guard but can't manage it just yet.
McMacMack can't keep his opponent in guard - Moxon advances to half guard, no doubt looking to mount.
McMacMack tries to kick Moxon off but Moxon keeps his base steady and stays in half guard.
McMacMack is refusing to be controlled, as Moxon sits in half guard.
Moxon looking for a kimura but he'll have to free his other leg if he wants to finish that. Perhaps he's just using it as a distraction technique.
That's three minutes gone in the round.
McMacMack looking to work for a kimura from the bottom.
Moxon seems to be working for a kimura but McMacMack defends the submission attempt.
Moxon stops McMacMack from getting back to his feet.
McMacMack is looking to improve his position.
Moxon sitting in half guard, looking to land shots. McMacMack defending well though.
The referee decides to stand the fighters back up.
Moxon lands with a slapping head kick.
McMacMack fails to land with a series of punches.
Moxon lunges in with an uppercut that skims his opponent's chin.
Seamus McMacMack seems to be the more aggressive standup fighter in this bout.
Moxon cracks McMacMack with a hook to the jaw. Both fighters smile at eachother and high-five before getting back down to business.
That's four minutes gone in the round.
A lull in the action here being met with boos from the crowd.
McMacMack looks for a takedown here. Will he get it? Moxon is fending him off so far but McMacMack persists. Nope, Moxon circles away and we're back to standing.
McMacMack tries to close the distance and clinch up but Moxon swats him away and circles back towards the center.
Moxon decides to change it up a bit and drives through with a nice takedown into half guard.
Moxon is sneakily working for an arm triangle but McMacMack sees it coming and defends easily.
Moxon is looking for a kimura but he's never going to get it from there.
Moxon trying to control from half guard but McMacMack is working away.
McMacMack looking to work for a kimura from the bottom.
Moxon is looking to pass the guard... He's managed it - he's now in full mount!
As the round comes to an end the crowd are showing their appreciation for a great round of action.
McMacMack really trying hard to get back to half guard here.
Moxon looking for a guillotine from mount but McMacMack is having none of it.
And thats the end of the round the fighters go back to their corners.
Jonathan Moxon dominated that round.
The cut man is working on Jonathan Moxon's cut.
The minute break is over - no more time for sponges and pep talks - back to the action!
McMacMack doesn't succeed with the takedown
and Moxon counters with a single leg into guard. McMacMack didn't expect that.
McMacMack had isolated an arm as going for a kimura. Moxon defends it easily.
Moxon sneaks a leg through and gets to half guard. That was like a knife through butter how easily he passed McMacMack's guard.
Moxon in half guard on the top. He's looking for a kimura... He's got it locked and he's managed to free his trapped foot. McMacMack tries to escape but it's on too tight and he has to tap! Great BJJ skills there from Moxon!
Ladies and gentlemen, after 0:38 of round 2, we have a winner by way of Submission (Kimura). Jonathan Moxon!
|
|
|
|
|
|
|
|
|
|
|
|
|
|
|
|
|
|
|
|
|
|
|
| S |
C
A |
G |
S |
C
B |
G |
|
S |
C |
G |
|
energy
A | B |
|
hype
A | B |
|
pop
A | B |
|
mgr
A | B |
|
FIGHT
RATING
100% |
|
|
|
|
|
|
|
Undercard bout
|
|
|
|
Undercard bout
|
|
|
|
Undercard bout
|
|
|
|
Undercard bout
|
|
|
|
Co-main event
|
|
|
|
Main event
|
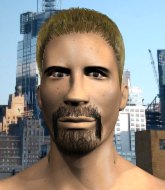
Coming up we have a welterweight MMA rules bout between Derek Walker (ranked 0 p4p, 0 weight class) and Morgan Priest (ranked 0 p4p, 0 weight class). Walker comes to the cage accompanied by Darude - Sandstorm . Over to our ring announcer for the fighter introductions!
 |
|
 |
| 175 cm
19
170 lbs
1 - 0 - 0 |
|
175 cm
25
170 lbs
7 - 6 - 0 |
BJJ Blue Belt
Brawler
Self confident |
|
BJJ Purple Belt
Decent boxing
Powerful |
|
| |
|
Ladies and gentlemen. This fight is 3 rounds, in the welterweight division.
Introducing the fighter to my left, fighting out of the red corner.
With a record of
1 - 0 - 0, fighting out of Hilo, Derek Walker!
And introducing the fighter to my right, fighting out of the blue corner.
With a record of
7 - 6 - 0, fighting out of Hilo, Morgan Priest!
The judges for this bout are , and .
The bell rings for round one and we are underway!
Priest fails to land with a series of punches.
Priest misses with a double jab.
Walker throws a head kick but Priest moves out of range.
Priest closes the distance and pushes Walker back into the cage.
Priest pushes off and circles away, back to the middle of the mat.
Morgan Priest seems to be the more aggressive standup fighter in this bout.
Priest throws a nice hook to the body that draws an oooh from the crowd.
Wow, both these guys are really going for it!
Nice body kick from Walker.
Priest misses with a two punch combination.
Priest swings wildly with a right hand that was never going to find it's target.
Priest throws a series of punches but Walker moves out of range.
Walker dodges the punch combination from Priest.
Priest connects with the punch.
Walker throws a head kick that half lands.
It looks like Morgan Priest has been cut.
Priest works over Walker's head and body with a nice combination.
We've seen a great period of action over the last minute or so - credit to both fighters for going all out!
No luck with that takedown attempt from Walker.
Priest connects with a lovely right hand, straight down the pipe.
Walker is rocked!
A punch combination from Priest misses.
Oh Walker is still all over the place! His legs are completely gone! Will he be able to recover?!!
Priest misses with a two punch combination.
Priest throws a combination but comes up with nothing but fresh air.
Priest looks gassed!
Priest is looking for an opening here. He's unloaded a big left hand that catches Walker flush on the jaw and sends him tumbling to the canvas! Walker is out cold! Priest holds back from landing any unnecessary shots to his unconscious opponent, as the referee reacts slowly to the situation. A brutal knockout and then some excellent sportsmanship - this guy is my new favorite fighter!
Ladies and gentlemen, after 0:58 of round 1, we have a winner by way of KO (Punch). Morgan Priest!
|
|
|
|
|
|
|
|
|
|
|
|
|
|
|
|
|
|
|
|
|
|
|
| S |
C
A |
G |
S |
C
B |
G |
|
S |
C |
G |
|
energy
A | B |
|
hype
A | B |
|
pop
A | B |
|
mgr
A | B |
|
FIGHT
RATING
100% |
|
|
|
|
|
|
|
|
|
|
