 |
world combat 1 PBP Commentary |
Undercard bout
|
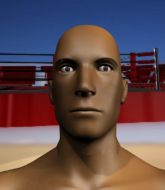
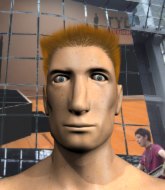
Coming up we have a heavyweight MMA rules bout between Miko Blancia (ranked 0 p4p, 0 weight class) and Bruce Marley (ranked 0 p4p, 0 weight class). We have two fighters making their debuts here, so let's see who comes out of this one with their first professional victory.
 |
|
 |
| 225 cm
18
270 lbs
0 - 0 - 0 |
|
190 cm
25
270 lbs
0 - 0 - 0 |
BJJ White Belt
Excellent MT
Big right hand |
|
BJJ Purple Belt
Decent boxing
Granite chin |
|
| |
|
Ladies and gentlemen. This fight is 3 rounds, in the heavyweight division.
Introducing the fighter to my left, fighting out of the red corner.
With a record of
0 - 0 - 0, fighting out of The Island, Miko Blancia!
And introducing the fighter to my right, fighting out of the blue corner.
With a record of
0 - 0 - 0, fighting out of The Island, Bruce Marley!
The judges for this bout are Sandra Marshall, David Hoff and Michael Johnstone.

The bell rings for round one and we are underway!
Blancia misses with a half-hearted attempt at a head kick.

Marley closes the distance and presses his opponent up against the cage.

Marley manages to pull guard.
Blancia has to be careful here, sitting in the guard of a superior BJJ player.

Marley has thrown up a leg looking for a triangle. Blancia doesn't defend quickly enough and Marley has managed to lock this one up! Can Blancia escape?! NO! He's tapping out! Damn, that was a quick submission - congrats to Marley on a fantastic submission victory.
Ladies and gentlemen, after 0:31 of round 1, we have a winner by way of Submission (Triangle). Bruce Marley!
|
|
|
|
|
|
|
|
|
|
|
|
|
|
|
|
|
|
|
|
|
|
|
| S |
C
A |
G |
S |
C
B |
G |
|
S |
C |
G |
|
energy
A | B |
|
hype
A | B |
|
pop
A | B |
|
mgr
A | B |
|
FIGHT
RATING
100% |
|
|
|
|
|
|
|
Undercard bout
|
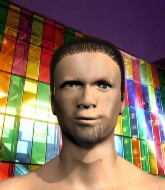
Coming up we have a bantamweight MMA rules bout between Manuel Marcus (ranked 0 p4p, 0 weight class) and Randy Goatboy (ranked 0 p4p, 0 weight class). Randy Goatboy has the eye of the tiger tonight.
 |
|
 |
| 182 cm
18
144 lbs
0 - 0 - 0 |
|
170 cm
26
140 lbs
1 - 1 - 0 |
BJJ Blue Belt
Basic striking
KO power |
|
Good wrestler
Good kicks
Very confident |
|
| |
|
Ladies and gentlemen. This fight is 3 rounds, in the bantamweight division.
Introducing the fighter to my left, fighting out of the red corner.
With a record of
0 - 0 - 0, fighting out of The Island, Manuel Marcus!
And introducing the fighter to my right, fighting out of the blue corner.
With a record of
1 - 1 - 0, fighting out of The Island, Randy Goatboy!
The judges for this bout are David Hoff, Dirk Anderson and Winston Alpacca.
The bell rings for round one and we are underway!
Marcus shoots in for a double leg but Goatboy sprawls well. That's going to sap some energy.
Marcus dives in for a single leg takedown but Goatboy sprawls and the fighters end up clinched against the cage.
Goatboy lands with a hook. Marcus tried to avoid it but it clipped the top of his head.
Marcus misses with a takedown attempt
and Goatboy counters with a stiff right hand.
That's three failed takedown attempts in the round for Manuel Marcus. That's going to take a lot out of him.
A slow jab from Goatboy misses its intended target.
Goatboy scores with a hook.
Goatboy throws a lazy right hand but Marcus sees it coming a mile off and sidesteps it easily.
Marcus takes an uppercut right on the jaw but it doesn't phase him.
Goatboy feints a straight left to the body, then turns around with a flashy move and hits Marcuss jaw with a dramatic spinning back fist!

Marcus is rocked!
Boom, another hit is landed. "You're gunna get knocked out" taunts Goatboy, as that shot connected.
Oh Marcus is still all over the place! His legs are completely gone! Will he be able to recover?!!
Marcus with a poor takedown
and Goatboy counters with a crisp hook to the side of the head.
Marcus seems to have got his legs back now.
The crowd cheering loudly, showing their appreciation for the quality fight we're seeing here.
Ohhhhh! A huge head kick from Goatboy! Marcus is out on his feet! Goatboy rushes in and throws more strikes. The ref is looking closely - Marcus is covering up but the punishment is just too much and the ref steps in to stop the fight! Marcus is staring into space, just thankful that the beatdown has ended. Brutal finish.
Ladies and gentlemen, after 0:55 of round 1, we have a winner by way of TKO (Strikes). Randy Goatboy!
|
|
|
|
|
|
|
|
|
|
|
|
|
|
|
|
|
|
|
|
|
|
|
| S |
C
A |
G |
S |
C
B |
G |
|
S |
C |
G |
|
energy
A | B |
|
hype
A | B |
|
pop
A | B |
|
mgr
A | B |
|
FIGHT
RATING
81% |
|
|
|
|
|
|
|
Undercard bout
|
|
|
|
Undercard bout
|
Coming up we have a welterweight MMA rules bout between Shoddy Body (ranked 0 p4p, 0 weight class) and William Sparrow (ranked 0 p4p, 0 weight class). William Sparrow acknowledges the crowd's support as he enters the cage.
 |
|
 |
| 185 cm
25
180 lbs
4 - 0 - 0 |
|
200 cm
25
160 lbs
0 - 0 - 0 |
Good wrestling
Counter fighter
Very quick |
|
BJJ White Belt
Excellent MT
Granite chin |
|
| |
|
Ladies and gentlemen. This fight is 3 rounds, in the welterweight division.
Introducing the fighter to my left, fighting out of the red corner.
With a record of
4 - 0 - 0, fighting out of The Island, Shoddy Body!
And introducing the fighter to my right, fighting out of the blue corner.
With a record of
0 - 0 - 0, fighting out of The Island, William Sparrow!
The judges for this bout are Peter Branson, Daniel Franklin and Bart Greer.
The bell rings for round one and we are underway!
Body tries to drive through with a takedown attempt but Sparrow defends well and Body ends up having to push Sparrow into the cage where they will battle it out in the clinch.
Sparrow throws a head kick that connects with a bit of head and a bit of hand.
Body tries to close the distance and clinch up against the cage but Sparrow paws at him with a jab and circles away.
A big left from Body misses.
Sparrow lands a high kick!
Sparrow connects with a solid leg kick.
Sparrow throws a head kick that half lands.
Body tries to clinch but Sparrow moves out of range.
Shoddy Body seems to be the more aggressive standup fighter in this bout.
We've had a slow start to the round here - hopefully the action picks up.
Body looks for a takedown but Sparrow sprawls well.
Body misses with a takedown attempt - Sparrow sprawls well and throws a nice strike on the way out which just misses.
That's three failed takedown attempts in the round for Shoddy Body. That's going to take a lot out of him.

That's one minute gone in the round.
Body is looking to clinch.
Sparrow circles away from the clinch attempt.
Body tries to close the distance and clinch up against the cage but Sparrow paws at him with a jab and circles away.
Sparrow tries a counter takedown but it's more of a dummy move, and he uses it to push himself away.
Sparrow throws a head kick that half lands.
Body misses with an attempted mid kick.
Body fails with an attempt to clinch.
Sparrow drops down looking to force a counter takedown but Body defends it well.
A head kick from Sparrow lands but Body takes it in his stride.
Sparrow scores with a kick to the midsection.
We've been told by Body's head coaches at Combat Fitness that he's been working on his takedown defense in preparation for this fight.
Sparrow scores with a head kick.
Sparrow is a painfully thin specimen of a man. You do wonder whether a good body kick would snap him clean in two.

Body shoots in and bounces Sparrow off the cage to secure the takedown into guard.

That's two minutes gone in the round.
Body slips nicely into half guard.
The fans in attendance giving it up for the two fighters, who have really let it all hang out in the last minute or so!
Body passes to full mount!
Body takes a little breather and maintains the position. The referee will be looking for him to stay active from such a dominant position though.

Body jumps to side control looking for an arm triangle but Sparrow manages to avoid the submission attempt.

That's three minutes gone in the round.
Body sitting in side control, looking to soften his opponent up with elbows and hammerfists but Sparrow is avoiding damage well and looking to escape the position.
Sparrow looks winded!
Body is in a dominant position here, looking for a kimura. Sparrow looks calm but he's in trouble here. Body gets his leg over his opponent's head and yanks on the arm. Sparrow is tapping like a morse code operator on the titanic! SOS! SOS! Body lets go of the hold and Sparrow can pop his arm back in it's socket.
Ladies and gentlemen, after 3:53 of round 1, we have a winner by way of Submission (Kimura). Shoddy Body!
A very excited looking Shoddy Body rambled incoherently for about 5 minutes post fight about how awesome he is. It was kinda funny for a while but then everyone got annoyed.
|
|
|
|
|
|
|
|
|
|
|
|
|
|
|
|
|
|
|
|
|
|
|
| S |
C
A |
G |
S |
C
B |
G |
|
S |
C |
G |
|
energy
A | B |
|
hype
A | B |
|
pop
A | B |
|
mgr
A | B |
|
FIGHT
RATING
40% |
|
|
|
|
|
|
|
Undercard bout
|
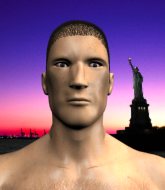
Coming up we have a welterweight MMA rules bout between Lou Hole (ranked 0 p4p, 0 weight class) and Dennis Mac (ranked 0 p4p, 0 weight class). Dennis Mac will no doubt be looking to use his reach advantage to good effect.
 |
|
 |
| 178 cm
25
183 lbs
3 - 2 - 0 |
|
205 cm
25
180 lbs
0 - 0 - 0 |
BJJ Blue Belt
Brawler
Granite chin |
|
BJJ White Belt
Excellent MT
Heavy handed |
|
| |
|
Ladies and gentlemen. This fight is 3 rounds, in the welterweight division.
Introducing the fighter to my left, fighting out of the red corner.
With a record of
3 - 2 - 0, fighting out of The Island, Lou Hole!
And introducing the fighter to my right, fighting out of the blue corner.
With a record of
0 - 0 - 0, fighting out of The Island, Dennis Mac!
The judges for this bout are Bart Greer, Winston Alpacca and Sandra Marshall.
The bell rings for round one and we are underway!
Hole throws a right and a left that both miss.
Hole has been working on his boxing with his coaches at Foot Loves in the buildup to the fight.
Mac goes for a high kick. It partially lands.
Hole lands a vicious shot with the stealth of a sniper and the strength of a viper. Are vipers that strong? I can think of lots of things that are stronger than a viper - not many rhyme with sniper though.
Mac throws a nice outside leg kick.
Mac steps to the side to avoid the strikes from Hole.
Mac moves out of range as Hole strikes.
Mac is looking to slow Hole down with leg kicks.
Nice body kick there by Mac.
Mac lands with a two punch combination before moving back out of range.
Dennis Mac seems to be the more aggressive standup fighter in this bout.
Mac connects with a high kick.
Fantastic stuff here - a very entertaining period of action, which has drawn cheers from the crowd.
Mac thows a body kick. Hole tries to catch it but that hurt him.
Mac avoids a punch combination nicely.
A slapping leg kick lands for Mac.
Hole jabbing away but nothing is landing.
Mac scores with a kick to the body.
Mac showing good head movement there, avoiding the strikes from Hole.
Mac works the jab nicely.
Mac lands a nice looking kick to the body. Hole takes a step back to recover.
Hole throws a right and a left that both miss.
Mac shapes to counter with a head kick.
That's one minute gone in the round.
Hole looks to land a right hand but Mac moved out of range.
Mac moves out of range as Hole strikes.
Hole throws the left hand but Mac avoids the punch easily.
Mac lets it all go there with a big combo counter but none of the punches connected.
Hole thows a left - swing and a miss!
Mac throws a head kick that looked like it stung.
Mac throws a head kick that Hole semi-blocks.
Mac lands a nice looking body kick.
Hole throws a right hand that Mac ducks under and follows up with a left that Mac also avoids with ease.
Hole throws a right hand that Mac ducks under and follows up with a left that Mac also avoids with ease.
Mac replies with a solid counter kick to the body but Hole blocks it well.
Hole lands a jab to the head.

It looks like Dennis Mac has been cut.
Mac lands a head kick!
Fantastic stuff here - a very entertaining period of action, which has drawn cheers from the crowd.

Hole cracks Mac with a big right hand and Mac goes down!

Mac is rocked!
Hole stands and throws Mac's legs to the side, diving into side control.
Mac looks winded!

Hole decides to stand back up.
Mac is a painfully thin specimen of a man. You do wonder whether a good body kick would snap him clean in two.
That's two minutes gone in the round.
Mac throws a body kick but he wasn't in range.
Mac avoids the body shot from Hole.
Hole throws a body shot but no joy.
Hole lands a jab followed by a vicious hook that sends Mac sprawling to the canvas. Hole follows him down, looking for the kill. Can Mac hang on?
Mac is still in real trouble! Can Hole finish him?
Hole moves into full mount! Mac won't be happy about that!
Hole is controlling this nicely and is looking to make no mistakes. Mac is trying to wiggle out of this horrible position. Mac flips to his side and attempts to get a leg in for half guard. Hole anticipates the leg and manages to get behind Mac and secures both hooks! This could be bad! Hole slips an arm under Mac chin and tries to position for a rear naked choke. Hole has worked the choke in now and it looks tight. Hole is squeezing on Mac like an anaconda would it's prey. Mac fails to tap and has fallen unconscious! We've got ourselves a winner by way of a rear naked choke!
Ladies and gentlemen, after 2:40 of round 1, we have a winner by way of Submission (RNC). Lou Hole!
|
|
|
|
|
|
|
|
|
|
|
|
|
|
|
|
|
|
|
|
|
|
|
| S |
C
A |
G |
S |
C
B |
G |
|
S |
C |
G |
|
energy
A | B |
|
hype
A | B |
|
pop
A | B |
|
mgr
A | B |
|
FIGHT
RATING
98% |
|
|
|
|
|
|
|
Undercard bout
|
Coming up we have a bantamweight MMA rules bout between Scotty Fartsmells (ranked 0 p4p, 0 weight class) and Ryan Reynolds (ranked 0 p4p, 0 weight class). Reynolds comes into a darkened arena with his song building. It's Dark n Hell is Hot kicks in, the lights come on and the crowd goes wild! What a showman! These two fighters really are very evenly matched on the feet - it will be fascinating to see who can assert themselves in that aspect of the fight.
 |
|
 |
| 175 cm
26
143 lbs
3 - 1 - 1 |
|
174 cm
25
135 lbs
1 - 0 - 0 |
BJJ White Belt
Excellent MT
Good chin |
|
BJJ Blue Belt
Decent boxing
Determined |
|
| |
|
Ladies and gentlemen. This fight is 3 rounds, in the bantamweight division.
Introducing the fighter to my left, fighting out of the red corner.
With a record of
3 - 1 - 1, fighting out of The Island, Scotty Fartsmells!
And introducing the fighter to my right, fighting out of the blue corner.
With a record of
1 - 0 - 0, fighting out of The Island, Ryan Reynolds!
The judges for this bout are Santiago Holmes, Dirk Anderson and Peter Branson.
The bell rings for round one and we are underway!
Reynolds throws a right hand that Fartsmells ducks under and follows up with a left that Fartsmells also avoids with ease.
Fartsmells is looking to land body kicks.
Reynolds jabs Fartsmells to the body, keeping him at a distance.
Jab by Reynolds.
Fartsmells lands with a nice low kick. That'll leave a bruise.
A looping hook to the body misses from Fartsmells. Reynolds does a little dance to reset his feet.
Reynolds throws a combination that misses
and Fartsmells finishes the little exchange by landing a big kick to the body.
Reynolds fakes high and swings low for a body shot but Fartsmells manages to avoid it.
Reynolds looks to land a left hand but Fartsmells moved out of range nicely.
Fartsmells lifts his leg as if looking to counter with a high kick.
We've had a slow start to the round here - hopefully the action picks up.
Fartsmells looks to land a body kick but Reynolds moved away.
Fartsmells takes a jab right on the nose. That must have hurt but he shrugs his shoulders and looks to return the favor.
Reynolds displays some good footwork, moving neatly out of range as Fartsmells throws out the jab.
Reynolds scores with a jab.
Wooooo! Give it up for these two warriors! They are putting on a show!
Reynolds misses with a two punch combination.
That's one minute gone in the round.
Reynolds on the receiving end of a decent leg kick there by Fartsmells. Fartsmells obviously looking to wear him down.
Reynolds missing with a left hand there. Fartsmells was out of range so wasted energy throwing that one.
Fartsmells delivers a nice body kick.
An inside leg kick lands from Fartsmells.
Fartsmells throws a mid kick that lands with a slap.
Fartsmells buckles his opponent's knee momentarily with a nice leg kick.
Reynolds walks forward, straight into a front kick from Fartsmells.
Fartsmells lands with a nice low kick. That'll leave a bruise.
Fartsmells cracks the inside of Reynolds's front leg.
Fartsmells scores with a kick to the body.
Fartsmells bobs and weaves well there to avoid the strikes.
A chopping leg kick lands by Fartsmells.
Reynolds's coach down at Cozad The Island was telling us pre-fight that they have been working on Reynolds's balance. Obviously they view that as a key factor in the outcome of this fight.
That's two minutes gone in the round.
We've seen a great period of action over the last minute or so - credit to both fighters for going all out!
Reynolds missing with a left hand there. Fartsmells was out of range so wasted energy throwing that one.
Fartsmells cracks the inside of Reynolds's front leg.
A slapping leg kick lands for Fartsmells.
Reynolds misses with an uppercut
and Fartsmells counters with a leg kick that reverborates around the arena.
Reynolds takes a kick to the body and keeps moving.
Reynolds looks winded!
Fartsmells fakes the leg kick and cracks Reynolds in the body.
Fartsmells lands a leg kick and bounces back out of range.
Fartsmells looking to take his opponent's legs away with the low kicks.
Fartsmells throws a leg kick which misses Reynolds's front leg but catches the back leg as Reynolds tries to avoid it.
Fartsmells dances in quickly and lands a nice inside leg kick on Reynolds. That did some damage!
Fartsmells avoids the body shot from Reynolds.
Reynolds looks to score with a combo but nothing lands.
A slapping leg kick lands for Fartsmells.
That's three minutes gone in the round.
Reynolds takes a nice looking leg kick right on the meat of his thigh there.
A slapping leg kick lands for Fartsmells.
Ryan Reynolds seems to be the more aggressive standup fighter in this bout.
A good leg kick by Fartsmells.
Fartsmells scoring well with a low kick there.
Reynolds's leg has a nasty welt from taking a succession of leg kicks. That must be slowing him down.
Fartsmells lands a nice leg kick that just misses Reynolds's sensitive parts.
Fartsmells fakes a couple of low kicks, before throwing one on the third attempt. It connects and Reynolds has to reset his feet before getting ready to engage.
Reynolds swings widly with a right hand
and Fartsmells counters with a body kick that stops Reynolds in his tracks momentarily.
Reynolds throws a jab, cross combination which is slipped
and Fartsmells counters with a body kick that brings a smile to the face of both fighters.
Fartsmells lands a head kick. Reynolds smiles back at him and beckons him forward.
Reynolds walks forward, straight into a front kick from Fartsmells.
This is a great period of action - very entertaining stuff!
Fartsmells turns his hip over beautifully as he lands a nice leg kick.
Nice body kick there by Fartsmells.

That's four minutes gone in the round.
Fartsmells lands a nice looking kick to the body. Reynolds takes a step back to recover.
Nice body kick from Fartsmells.
Fartsmells lands a nice looking kick to the body. Reynolds takes a step back to recover.
Fartsmells throws a hard body shot but it just misses.
Fartsmells lands a nice leg kick that just misses Reynolds's sensitive parts.
Fartsmells lands a big head kick that sends Reynolds tumbling to the mat! Fartsmells takes a step backwards and waves Reynolds back to his feet - he wants the finish!
Reynolds is rocked!
Fartsmells delivers a nice body kick.
Reynolds is still on wobbly legs! Can Fartsmells finish him?
Crunch! Fartsmells slams his shin into Reynolds's torso.
The crowd applaud the fighters' efforts here as the round comes to an end.
Reynolds gets hit by the mother of all head kicks and drops to the canvas in a crumpled heap! Woooow, the Internet is going to be talking about this one for weeks!
Ladies and gentlemen, after 4:53 of round 1, we have a winner by way of KO (Head Kick). Scotty Fartsmells!
Scotty Fartsmells bigged himself up after the win. The crowd seemed to love it.
|
|
|
|
|
|
|
|
|
|
|
|
|
|
|
|
|
|
|
|
|
|
|
| S |
C
A |
G |
S |
C
B |
G |
|
S |
C |
G |
|
energy
A | B |
|
hype
A | B |
|
pop
A | B |
|
mgr
A | B |
|
FIGHT
RATING
66% |
|
|
|
|
|
|
|
Undercard bout
|
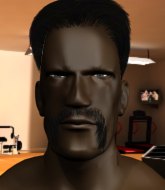
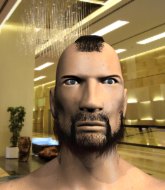
Coming up we have a heavyweight MMA rules bout between Rape Alarm (ranked 0 p4p, 0 weight class) and Ugly Punk (ranked 0 p4p, 0 weight class). This should be a great matchup!
 |
|
 |
| 185 cm
26
235 lbs
3 - 2 - 0 |
|
225 cm
25
245 lbs
0 - 0 - 0 |
BJJ Brown Belt
Solid boxing
Cuts easily |
|
BJJ Blue Belt
Brawler
Experienced |
|
| |
|
Ladies and gentlemen. This fight is 3 rounds, in the heavyweight division.
Introducing the fighter to my left, fighting out of the red corner.
With a record of
3 - 2 - 0, fighting out of The Island, Rape Alarm!
And introducing the fighter to my right, fighting out of the blue corner.
With a record of
0 - 0 - 0, fighting out of The Island, Ugly Punk!
The judges for this bout are Bart Greer, Daniel Franklin and Santiago Holmes.
The bell rings for round one and we are underway!
Alarm connects with a slap. Keep your fist closed son.
Rape Alarm seems to be the more aggressive standup fighter in this bout.
Some wild striking there from Alarm.
Alarm thows a left - swing and a miss!
Punk tries a counter takedown but it's more of a dummy move, and he uses it to push himself away.
A telegraphed right hand from Alarm misses the target.
Alarm jabbing away but nothing is landing.
Punk avoids a punch combination nicely.
Alarm rushes forward with a series of wild hooks but Punk moves out of range and avoids them all easily.
Alarm scores with a reasonable looking shot to the body. Punk doesn't seem bothered though.
Punk wants to clinch up but Alarm keeps it at a distance.
Alarm throws an overhand right that lands on Punk's shoulder, as Punk tries to avoid the shot.
And Punk tries to counter it with a takedown but Alarm pushes his down on his head and steps out.
Punk uses good head movement to avoid the hook from Alarm.
Alarm sizes up Punk with a pawing jab and scores with a straight right down the middle.
Punk scores with a big left there. The judges will like that one.
This has been an exciting period of action!
A swing and a miss from Alarm.
Alarm throws a right and a left that Punk avoids nicely.
Punk throws a fast counter high kick but Alarm manages to duck under it in time.
Alarm throws a hard body shot but it just misses.
Punk changes levels for a counter takedown but doesn't follow through with his attempt.
Alarm looks to throw the jab but Punk is out of range.
That's one minute gone in the round.
Alarm throws an off balance right hand
and Punk counters with a straight right hand.
Alarm throws a hard body shot but it just misses.
Punk scores with a nice takedown into half guard. Let's see what he's got on the ground.
Punk passes the guard and advances to mount!
Alarm working to try and regain half guard.
Punk misses with a head shot.
Alarm is trying desperately to improve position.
We've been hearing good reports from Alarm's training camp. Apparently he has been rolling around with some good quality BJJ practitioners and has been sharpening his skills. Let's see if that has an impact on the fight today.
Alarm is working hard here to advance position.
That's two minutes gone in the round.
Alarm is in a horrible position here, under a barrage of strikes, he's managing to avoid any damage.
The fighters are pressed up against the cage, both looking to find a bit of space to work.
Alarm regains half guard.
Alarm actively working from the bottom here.
Alarm gets back to full guard.
The fans in attendance giving it up for the two fighters, who have really let it all hang out in the last minute or so!
Alarm is working an open guard here, looking to improve his position. No doubt that will leave him open to counters but at least he's being more offensive.
Alarm looking for submissions off his back, moving his hips, looking for an opening.
Alarm looking for a sweep. Not yet Alarm, not yet.
Punk must be cautious of submissions here, given that his opponent has the superior Jiu Jitsu.
Alarm working for a triangle but Punk defends it easily.
The fighters are starting to get a bit slippery now, which will make submissions a bit more difficult.
Alarm had isolated an arm as going for a kimura. Punk defends it easily.
That's three minutes gone in the round.
Punk postures up in Alarm's guard and throws a big left but Alarm blocks it.
Alarm is active off his back here, looking for submissions.
Alarm is throwing his legs up, looking for submissions. Punk is aware though and is defending well.
Alarm had isolated an arm as going for a kimura. Punk defends it easily.
Alarm keeping moving, preventing Punk from controlling successfully.
Alarm avoiding any damage from the ground and pound.
Punk is a painfully thin specimen of a man. You do wonder whether a good body kick would snap him clean in two.
That's four minutes gone in the round.
Alarm is working an open guard here, looking to improve his position. No doubt that will leave him open to counters but at least he's being more offensive.
Punk trying to land body shots but he keeps hitting the mat.
Alarm has his foot on Punk's thigh. He's trying to push off and get in position for a triangle, I think. Punk works his way back into a safe position though.
Alarm looking for submissions from the bottom here. Moving his hips around, possibly looking for an armbar.
Punk stays in close to Alarm's body and controls the position.
Alarm manages to sweep nicely, so he's now on top. Punk manages to get himself to full guard.

Alarm trying to pass the guard but can't manage it just yet.
Punk trying to control the position here.
And thats the end of the round the fighters go back to their corners.
Rape Alarm dominated that round.
OK. That's time! The bell goes and we're back to the action.

Punk walks into a straight right hand from Alarm.
Alarm misses with a series of wild punches.
Punk throws a counter combo.
Punk shoots in and bounces Alarm off the cage to secure the takedown into guard.
Alarm can't keep his opponent in guard - Punk advances to half guard, no doubt looking to mount.
Punk moves nicely into side control.
We've had a slow start to the round here - hopefully the action picks up.
Alarm tries to work a leg under to get back to half guard but Punk wriggles his own leg back out and remains in side control.
Alarm is moving his hips around well on the bottom and has managed to get back to half guard.
Alarm manages to get to full guard.
That's one minute gone in the round.
Punk throws a big elbow that misses.
Alarm is looking for a triangle but Punk pushes his legs off easily.
The ref warns both fighters not to hold the cage as they work up against the meshing.
Punk trying to control the position from guard on top but Alarm is wriggling around, looking for whatever he can.
Alarm might be looking to lock onto one of his opponent's long limbs for a submission, whilst we're on the ground.
Punk throwing elbows and punches but not connecting, as Alarm works some decent striking defense from the bottom.
Alarm isolates an arm and boxes in a triangle. Punk stacks Alarm on his neck as he steps over and passes to the side. He's now in a much more dominant position where he can look to do some serious damage. Nice move by Punk!

Punk decides to take the fight back to the feet.
Punk shoots in looking for a single leg takedown. Alarm is trying to defend but Punk finishes it well and ends up in half guard. Let's see if he can advance position further.
That's two minutes gone in the round.
Punk not throwing his punches with enough precision this time.
Alarm is looking to sinch up a guillotine here but Punk pulls his head out easily.
Alarm looking to work for a kimura from the bottom.
Alarm looking for submissions from an awkward position here.
Alarm looking for submissions off his back.
Alarm moves into full guard.
That's three minutes gone in the round.
Punk controlling from the top position.
Punk is sitting in close to Alarm's body. Alarm has gone for a guillotine from the bottom. Oh damn, that looks pretty tight! Punk is panicking - it looks like this one could be all over! Yes, Punk is tapping! That was a very nice submission by Alarm.
Ladies and gentlemen, after 3:33 of round 2, we have a winner by way of Submission (Guillotine). Rape Alarm!
|
|
|
|
|
|
|
|
|
|
|
|
|
|
|
|
|
|
|
|
|
|
|
| S |
C
A |
G |
S |
C
B |
G |
|
S |
C |
G |
|
energy
A | B |
|
hype
A | B |
|
pop
A | B |
|
mgr
A | B |
|
FIGHT
RATING
43% |
|
|
|
|
|
|
|
Undercard bout
|
Coming up we have a light heavyweight MMA rules bout between William Williams (ranked 0 p4p, 0 weight class) and Damian Koza (ranked 0 p4p, 0 weight class). Both fighters look pumped up here. Let's hope this is a good fight!
 |
|
 |
| 179 cm
25
216 lbs
4 - 0 - 0 |
|
182 cm
26
215 lbs
5 - 2 - 0 |
BJJ White Belt
Excellent MT
Good chin |
|
Good wrestler
Great elbows
Powerful |
|
| |
|
Ladies and gentlemen. This fight is 5 rounds, for the light heavyweight championship of the world!
Introducing the champion to my left, fighting out of the red corner.
With a record of
4 - 0 - 0, fighting out of The Island, William Williams!
And introducing the challenger to my right, fighting out of the blue corner.
With a record of
5 - 2 - 0, fighting out of The Island, Damian Koza!
The judges for this bout are Daniel Franklin, Michael Johnstone and Santiago Holmes.
The bell rings for round one and we are underway!
A solid leg kick lands there for Williams.
Williams throws a two punch combo that lands nicely.
Williams lands a pitter patter jab to the forehead of his opponent.
Boom, another hit is landed. "You're gunna get knocked out" taunts Williams, as that shot connected.
William Williams seems to be the more aggressive standup fighter in this bout.
Williams throws a head kick that misses
and Koza counters by moving into the clinch.
Williams lands a body punch in the clinch.
Koza taking a break, stalling in the clinch.
Koza blocks an uppercut.
Williams takes a knee to the side of the body.
Koza gets underhooks to prevent Williams's takedown attempt.
A bit of stalling here from Koza.
Williams blocks the elbow strike.
This is a great period of action - very entertaining stuff!
Williams managing to block the knees to the body from Koza.
Koza throws an elbow but it's blocked.
Williams wants to break free. God knows he wants to breaaaak freeee.
Koza taking a break, stalling in the clinch.
Koza comes over the top with an elbow. That landed flush.
Williams wants to break free. God knows he wants to breaaaak freeee.
That's one minute gone in the round.
Koza lands an elbow inside.
Koza blocking some punches.
Williams could do with losing a few pounds - he looks very soft around the mid section, to put it politely.
The fighters are pressed against the cage, as the pace of the fight slows.
Williams misses with a punch on the inside.
Williams misses with some punches.
Koza misses the knee to the body. Nice hip positioning from Williams.
Koza misses with a knee to the head.
Koza missing with knees to the body.
Koza misses with a knee strike.
Williams throws a punch but it's blocked by Koza.
Koza blocks a body shot from Williams.
Koza takes a shot to the head.
Williams tries a body shot but Koza blocks it.
Koza taking a break, stalling in the clinch.
Williams misses with a punch on the inside.
Koza blocks a body shot from Williams.
Nice elbow from Koza.

It looks like William Williams has been cut.
Koza lands a damaging elbow.
That's two minutes gone in the round.
Williams lands a hook that snaps the head of Koza backwards.
A nice glancing elbow lands by Koza.
This has been an exciting period of action!
Koza blocks a body shot from Williams.
Williams blocks an elbow strike from Koza.
Williams wants to break free. God knows he wants to breaaaak freeee.
Williams working aggressively here.
Koza's head jolts backwards as he takes an uppercut right on the button!
Williams on the defensive, avoiding the knees to the body.
Williams wants to break the clinch but can't.
Williams managing to block the knees to the body from Koza.
Williams takes an elbow to the forehead.
Koza lands an elbow inside that Williams shrugs off.
Koza blocks an uppercut.
Koza creates a bit of space for himself and sneaks an elbow through Williams's defenses.
Williams avoids the elbow strike from Koza, against the cage.
Williams has a couple of punches blocked by Koza.
Williams lands a shoulder strike.
An uppercut on the inside fails to land for Williams.
With the fighters clinched against the cage, Williams creates a bit of distance for himself and scores with a nice uppercut.
That's three minutes gone in the round.
Koza looking to throw knees to the head but Williams is blocking nicely.
Koza keeps the fight in the clinch, despite Williams's efforts to push away.
Koza is looking to score with knees to the body. Maybe he'll change it up and go body then head. Williams is defending well for now.
Williams is trying to push Koza away but Koza has him pressed against the cage, so he's going nowhere.
Koza unloads a knee to the mid-section. Williams lets out a prehistoric sounding urrrrgh.
Williams is breathing heavily.
With the two fighters working up against the cage, Koza just misses with a elbow thrown towards Williams's brow.
Koza misses with an elbow over the top.
Williams can't break the clinch.
Koza pushes off and fires off an elbow that misses, before clinching up again, against the cage.
The pace really dropping off here, momentarily.
Williams takes an elbow to the temple.
Williams blocks a knee to the body. He'll have a nicely bruised forearm in the morning.
Williams managing to block the knees to the body from Koza.
Williams lands with a short shot to the head.
Koza effectively controlling the action here.
Koza trying to land knees to the body.
That's four minutes gone in the round.
Koza lands a damaging elbow.
Koza has Williams pushed against the cage.
A bit of stalling here from Koza.
Koza takes a shot to the head.
Williams blocks the elbow strike.
Williams working hard to break the clinch.
Williams misses with a hook to the ribs.
Williams misses with a punch on the inside.
Fantastic stuff here - a very entertaining period of action, which has drawn cheers from the crowd.
Williams lands a nice shot to the body.
Koza blocks a couple of punches on the inside.
The fighters are going at a pretty good pace and they're both starting to sweat now.
Williams avoiding damage as Koza throws knees to the body.
Williams is looking to break free of the clinch but Koza has double underhooks.
Williams swings away with an uppercut that misses.
Koza lands a nice elbow.
Williams misses with some punches.
Williams on the defensive, avoiding the knees to the body.
Koza stalling in the clinch.
And thats the end of the round the fighters go back to their corners.
Damian Koza dominated that round.
The cut man is working on William Williams's cut.
Well, the break between rounds is over. Let's get back to the scrappin!
Williams keeps the fight on the outside.
Williams throws a nice outside leg kick.
Koza gets a clinch.
Williams is looking to break free of the clinch but Koza has double underhooks.
Koza is looking to score with knees to the body. Maybe he'll change it up and go body then head. Williams is defending well for now.
A short left from Williams.
Williams tries a body shot but Koza blocks it.
Williams on the defensive, avoiding the knees to the body.
Williams throws a punch but it's blocked by Koza.
Williams dodges an elbow strike from Koza.
Williams misses with a hook to the ribs.
We've had a slow start to the round here - hopefully the action picks up.
Williams tries to break the clinch but Koza is controlling the position.
Williams lands a shoulder strike that jolts his opponent's head backwards.
Williams swings away with an uppercut that misses.
Williams tried to land a shot to the body but connects with Koza's elbow.
Koza misses with a knee to the head.
Koza misses the knee to the body. Nice hip positioning from Williams.
That's one minute gone in the round.
A head punch blocked on the inside by Koza.
Williams is trying to work out of this bad position, with his back against the cage.
Koza throws an elbow that misses.
Koza prevents a takedown attempt there.
Williams can't find room to land a body shot as Koza controls the action.
Williams dodges an elbow strike from Koza.
Koza misses with a knee strike.
Williams working hard to break the clinch.
Koza throws a nice elbow but it doesn't land.
Williams blocks an elbow strike.
Williams has had enough of the clinch but Koza keeps him there for the moment.
With the two fighters working up against the cage, Koza just misses with a elbow thrown towards Williams's brow.
Damian Koza seems to be working more effectively in the clinch in the fight so far.
Williams fails to land with a short punch on the inside.

Williams manages to break the clinch.
Koza moves in looking to clinch but Williams pushes him off.
Williams avoids the clinch attempt nicely.
Williams was looking to counter that move with a punch but didn't quite pull the trigger.
That's two minutes gone in the round.
Williams connects with a leg kick. Koza looked like he was expecting something else and didn't defend it.
Koza misses with a double jab
and Williams counters with a body kick that stops Koza in his tracks momentarily.
Williams lands an overhand right.
Koza takes a hook to the side of the head. I wonder if that's got his ears ringing.
A looping hook to the body misses from Koza. Williams does a little dance to reset his feet.
Williams was looking to counter that move with a punch but didn't quite pull the trigger.
Williams with a jab.
This is a great period of action - very entertaining stuff!
Koza takes a kick to the side of the head.
Koza is pinned up against the cage taking some big shots here. The referee is looking closely deciding whether he should stop the fight.
Williams tries to land a front kick but Koza steps back. That was a bit too telegraphed.
Koza is trying to avoid his opponent's strikes and get into the clinch.
That's three minutes gone in the round.
Koza fails in his attempt to clinch.
Williams fires out a quick counter leg kick but Koza just manages to avoid it.
Williams avoids a punch combination nicely.
Williams turns his hip over beautifully as he lands a nice leg kick.
Williams throws a couple of head shots and lands with the final one - a decent hook, which struck Koza on the side of the head.
A combination from Koza does no damage.
Koza tries to clinch but Williams moves away
and Williams counters with a good right hand that lands right on the jaw.
Koza uses good footwork to avoid the strikes from Williams.
That's four minutes gone in the round.
Williams scores with a hook.
Williams misses with a looping right.
Koza fails in his attempt to clinch.
Williams lands with a head kick! That's gotta hurt.
Koza blocks a jab.
Williams lands a jab to Koza's midsection.
The crowd are loving this. Great action here.
A kick lands to the mid section there for Williams.
Williams turns his hip over beautifully as he lands a nice leg kick.
Koza clinches.
Koza lands an elbow that stopped Williams in his tracks for a moment.
And thats the end of the round the fighters go back to their corners.
William Williams dominated that second round.
The cut man is working on William Williams's cut.
The fighters get back to their feet, the hooter sounds and we're back to the action!

Williams scores with a jab to the head.
Koza takes a jab right on the nose. That must have hurt but he shrugs his shoulders and looks to return the favor.
A jab lands there for Williams.
Williams misses the jab.
Koza throws a counter combo.
Williams uses good footwork to get in and out and land a nice right hand before Koza has time to react.
Koza closes the distance and presses his opponent up against the cage.
Knees in the clinch landing for Koza.
We've had a slow start to the round here - hopefully the action picks up.
Koza creates a bit of space for himself and sneaks an elbow through Williams's defenses.
Williams avoiding damage as Koza throws knees to the body.
Williams avoids a wild elbow strike from Koza.
Koza prevents Williams from breaking the clinch.
Williams has had enough of the clinch but Koza keeps him there for the moment.
Koza is trying to maintain a safe position but Williams gets an underhook and turns Koza into the cage.
Williams looks like he'd prefer to be striking at range right now.
That's one minute gone in the round.
Koza lands an elbow that stopped Williams in his tracks for a moment.
Koza tries a knee to the head but he's missed.
Williams doesn't land with the attempted body shot.
Koza comes over the top with an elbow. That landed flush.
Both fighters are breathing heavily.
Williams is trying to break the clinch but Koza has him pressed against the cage.
Koza lands an elbow just above Williams 's eye.
Koza has Williams pressed against the cage, preventing Williams from circling away and getting back to striking at range.
Koza is stalling here.
Koza is looking to score with knees to the body. Maybe he'll change it up and go body then head. Williams is defending well for now.
Koza blocks an uppercut.
Williams blocks an elbow strike from Koza.
Williams blocks an elbow strike.
Williams takes an elbow to the forehead.
Koza lands a nice knee to the body.
A nice glancing elbow lands by Koza.
A nice glancing elbow lands by Koza.
The fans in attendance giving it up for the two fighters, who have really let it all hang out in the last minute or so!
Koza trying to land knees to the body.
That's two minutes gone in the round.
Koza lands a damaging elbow.
Koza misses the knee to the body. Nice hip positioning from Williams.
Koza throws an elbow that misses.
Nice elbow from Koza.
Koza keeps the fight in the clinch, despite Williams's efforts to push away.
Koza scores with a knee to the head.
Koza dictating the pace here, as the fighters clinch against the cage.
The referee calls for Koza to work.
Williams takes an elbow to the forehead.
Koza scores a nice knee to the body.
Koza lands an elbow inside.
Koza lands a nice elbow from the clinch.
Koza lands a damaging elbow.
Koza lands a nice elbow from the clinch.
Williams is rocked!
That's three minutes gone in the round.
Clinched against the cage, Koza lands a big elbow that drops Williams! The ref dives in to save him from more shots - Williams is complaining that he's OK but he was done.
Ladies and gentlemen, after 3:09 of round 3, we have a winner by way of TKO (Strikes). Damian Koza!
Damian Koza is the new light heavyweight champion!
|
|
|
|
|
|
|
|
|
|
|
|
|
|
|
|
|
|
|
|
|
|
|
| S |
C
A |
G |
S |
C
B |
G |
|
S |
C |
G |
|
energy
A | B |
|
hype
A | B |
|
pop
A | B |
|
mgr
A | B |
|
FIGHT
RATING
57% |
|
|
|
|
|
|
|
Co-main event
|
Coming up we have a welterweight MMA rules bout between Sam MacLeod (ranked 0 p4p, 0 weight class) and Dick Wad (ranked 0 p4p, 0 weight class). MacLeod comes to the cage accompanied by Braveheart Freedom Speech. MacLeod has a slight injury, which hopefully won't affect the fight too much. The key to victory for Sam MacLeod has got to be keeping the fight on the feet.
 |
|
 |
| 178 cm
24
178 lbs
6 - 2 - 0 |
|
185 cm
25
185 lbs
3 - 0 - 0 |
BJJ White Belt
Excellent boxer
Cardio machine |
|
BJJ White Belt
Excellent MT
Determined |
|
| |
|
Ladies and gentlemen. This fight is 3 rounds, in the welterweight division.
Introducing the fighter to my left, fighting out of the red corner.
With a record of
6 - 2 - 0, fighting out of The Island, Sam MacLeod!
And introducing the fighter to my right, fighting out of the blue corner.
With a record of
3 - 0 - 0, fighting out of The Island, Dick Wad!
The judges for this bout are David Hoff, Bart Greer and Santiago Holmes.
The bell rings for round one and we are underway!
MacLeod throws a nice hook to the body that draws an oooh from the crowd.
MacLeod throws a head kick that misses.
Nice shot lands for MacLeod.
MacLeod avoids a lazy jab quite easily.
Wad scores with a punch to the head.
MacLeod takes a shot to the nose. Hopefully that hasn't broken it.
Wad throws a leg kick
and MacLeod counters with a three punch combination, finished off with a leg kick. Nice work.
MacLeod lands a beauty of a right hand that gets the crowd cheering.
MacLeod takes an uppercut right on the button but keeps his composure.
We've seen a great period of action over the last minute or so - credit to both fighters for going all out!
MacLeod misses with a body shot. Nice footwork from Wad.
MacLeod scores with a jab.
MacLeod stooping low to avoid any incoming strikes and then lunges in with an uppercut come cross that lands flush.
Wad tries to clinch up against the cage, rushing in to close the distance. MacLeod manages to break the clinch and circles back to the middle of the mat.
MacLeod avoids a lazy jab quite easily.
MacLeod throwing a counter right hand but Wad manages to avoid it.
Wad with poor footwork there. He got himself in a bit of a tangle, enabling MacLeod to score with a decent uppercut.
That's one minute gone in the round.
MacLeod darts in and out, connecting with a jab.
Wad misses with an uppercut. MacLeod saw that one coming.
MacLeod ducks under a wild hook from Wad.
MacLeod is looking to counter punch.
MacLeod gets tackled into the cage by Wad. Wad maintains the clinch.
Wad lands a left hand that snaps the head of MacLeod backwards.
MacLeod presses Wad against the cage and delivers a mid-strength body shot.
Wad presses MacLeod against the cage and delivers a mid-strength body shot.
Wad doesn't land with the attempted body shot.
Wad fails to land with a short punch on the inside.
MacLeod blocks an uppercut.
Wad will no doubt start fighting again in a minute but for now he's just having a little rest, leaning MacLeod up against the cage.
Wad blocks a couple of punches on the inside.
That's two minutes gone in the round.
Still in the clinch, Wad scores with a nice short uppercut.
Wad looks more muscular than last time we saw him. He must have been on the weights.
Wad lands with a right to the head.
Wad has MacLeod pushed against the cage.
Wad blocks an uppercut.
MacLeod tries to circle away but Wad has him pinned against the cage.
Wad misses with a shot to the kidneys.
Wad fails to land with a short punch on the inside.
Wad working on landing some head shots here - that one got through nicely.
Fantastic stuff here - a very entertaining period of action, which has drawn cheers from the crowd.
Wad misses with a short punch on the inside.
Wad lands a left hand that snaps the head of MacLeod backwards.
MacLeod is rocked!
That's three minutes gone in the round.
A head punch blocked on the inside by MacLeod.
Oh MacLeod is still all over the place! His legs are completely gone! Will he be able to recover?!!
MacLeod blocks a punch to the side of the head.
MacLeod blocks a punch to the side of the head.
Wad has a couple of punches blocked by MacLeod.
Wad throws a head punch that misses.
Wad working aggressively here.
Wad has a couple of punches blocked by MacLeod.

Wad's corner calls for him to break the clinch, which he does.
MacLeod is wiping some vaseline out of his eye. Wad doesn't give a rats ass about fair play and cracks him with a massive hook to the side of the head! MacLeod crumples to the floor out cold! The cornerman is going to be in MacLeod's bad books for that mishap!
Ladies and gentlemen, after 3:16 of round 1, we have a winner by way of KO (Punch). Dick Wad!
|
|
|
|
|
|
|
|
|
|
|
|
|
|
|
|
|
|
|
|
|
|
|
| S |
C
A |
G |
S |
C
B |
G |
|
S |
C |
G |
|
energy
A | B |
|
hype
A | B |
|
pop
A | B |
|
mgr
A | B |
|
FIGHT
RATING
52% |
|
|
|
|
|
|
|
Main event
|
Coming up we have a super heavyweight MMA rules bout between San Terra (ranked 0 p4p, 0 weight class) and Gunnar McGregor (ranked 0 p4p, 0 weight class). San Terra has the better chin. Will he look to stand and bang today?
 |
|
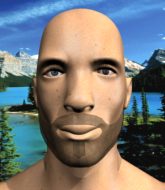 |
| 225 cm
26
296 lbs
7 - 1 - 0 |
|
180 cm
26
246 lbs
6 - 0 - 0 |
BJJ White Belt
Excellent boxer
KO power |
|
Good takedowns
Basic striking
Knockout power |
|
| |
|
Ladies and gentlemen. This fight is 5 rounds, for the super heavyweight championship of the world!
Introducing the champion to my left, fighting out of the red corner.
With a record of
7 - 1 - 0, fighting out of The Island, San Terra!
And introducing the challenger to my right, fighting out of the blue corner.
With a record of
6 - 0 - 0, fighting out of The Island, Gunnar McGregor!
The judges for this bout are Winston Alpacca, Sandra Marshall and Peter Branson.
The bell rings for round one and we are underway!
Terra smiles there as he lands a nice right hand right on the button.
It looks like Gunnar McGregor has been cut.
McGregor is trying hard to land a takedown here. Terra sprawls well and keeps this one on the feet.
McGregor looks frustrated there after his takedown attempt is stuffed easily.
Terra scores with a punch to the gut of his opponent.

Terra has closed the distance and engaged McGregor in a clinch.
Terra breaks the clinch and we return to the middle of the mat.
Terra and McGregor are patiently standing in front of each other looking for an opening. Terra throws a head kick. It's landed, knocking McGregor into next week! Ooooh that was huge! Terra knows it - he's on the cage flexing is biceps. That's a bit weird considering he won by kick but whatever.
Ladies and gentlemen, after 0:26 of round 1, we have a winner by way of KO (Head Kick). San Terra!
San Terra is the new super heavyweight champion!
San Terra tried to hype himself up post fight but didn't word it too well and it ended up with him sounding like a bit of a tool.
|
|
|
|
|
|
|
|
|
|
|
|
|
|
|
|
|
|
|
|
|
|
|
| S |
C
A |
G |
S |
C
B |
G |
|
S |
C |
G |
|
energy
A | B |
|
hype
A | B |
|
pop
A | B |
|
mgr
A | B |
|
FIGHT
RATING
100% |
|
|
|
|
|
|
|
|
|
|

