 |
Exteme MMA-41 PBP Commentary |
Undercard bout
|
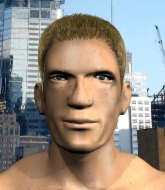
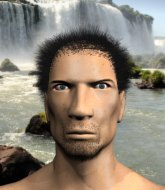
Coming up we have a bantamweight MMA rules bout between Patrick Holohan (ranked 0 p4p, 0 weight class) and Tomohiro Ishii (ranked 0 p4p, 0 weight class). There are an array of beautiful celebrities at ringside tonight! I wonder if any of them paid for their tickets.
 |
|
 |
| 175 cm
21
135 lbs
0 - 1 - 0 |
|
168 cm
19
145 lbs
0 - 0 - 0 |
BJJ Brown Belt
Basic striking
Cardio machine |
|
BJJ Blue Belt
Brawler
Powerful |
|
| |
|
Ladies and gentlemen. This fight is 3 rounds, in the bantamweight division.
Introducing the fighter to my left, fighting out of the red corner.
With a record of
0 - 1 - 0, fighting out of New York, Patrick Holohan!
And introducing the fighter to my right, fighting out of the blue corner.
With a record of
0 - 0 - 0, fighting out of Sydney, Tomohiro Ishii!
The judges for this bout are Francis DeMontford, Summer Carpenter and Eliza Hachem.

The bell rings for round one and we are underway!
Ishii swings away but doesn't land with a series of punches.
No joy there for Ishii, who threw a few shots but didn't land.
We've been hearing reports that Holohan has been drilling takedowns in recent sessions so let's see if that has an impact on the result of this fight.
Ishii scores with a slapping inside leg kick.

Holohan shoots in from a long way out. He's driving through with the takedown attempt and he eventually gets it, landing in Ishii's guard.
Holohan really does look like a pencil wearing a pair of gloves. Let's hope he has a gameplan to suit that ridiculous body shape.
Holohan wants to control from the top but Ishii keeps moving.
Holohan tries to free his leg and advance position but Ishii is retaining full guard.
Holohan passes Ishii's right leg, so he's now in half guard.
Ishii tries to get to full guard but Holohan has control of the leg.
Holohan performing his best blanket impression for a moment.
Ishii is trying to get back to full guard.
We've had a slow start to the round here - hopefully the action picks up.

Holohan is trying for a guillotine from the top but the pressure isn't in the right place so Ishii is just riding it out for now. Holohan eventually gives up the hold.

That's one minute gone in the round.
Holohan controlling the action here.
Holohan works his way into full mount!
Holohan looks like he's working for a submission but he's not found anything just yet.
Holohan looking to control but Ishii is working nicely, looking to advance position himself.

That's two minutes gone in the round.
Ishii is in all sorts of trouble here.
Holohan looking to control but Ishii is working nicely, looking to advance position himself.
Ishii is flailing around, obviously not happy about being mounted. Holohan locks hold of one of his arms and spins for an armbar. He's got it! Ishii is forced to tap!
Ladies and gentlemen, after 2:36 of round 1, we have a winner by way of Submission (Armbar). Patrick Holohan!
|
|
|
|
|
|
|
|
|
|
|
|
|
|
|
|
|
|
|
|
|
|
|
| S |
C
A |
G |
S |
C
B |
G |
|
S |
C |
G |
|
energy
A | B |
|
hype
A | B |
|
pop
A | B |
|
mgr
A | B |
|
FIGHT
RATING
36% |
|
|
|
|
|
|
|
Undercard bout
|
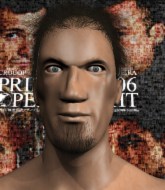
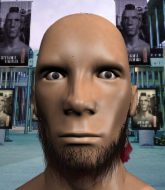
Coming up we have a bantamweight MMA rules bout between Tamiwe Kamanula (ranked 0 p4p, 0 weight class) and Frankie Hoggets (ranked 0 p4p, 0 weight class). Kamanula comes to the cage accompanied by LL Cool J - Mama Said Knock You Out. Frankie Hoggets has the eye of the tiger tonight.
 |
|
 |
| 165 cm
29
145 lbs
8 - 3 - 0 |
|
158 cm
23
146 lbs
9 - 3 - 0 |
BJJ Blue Belt
Lethal high kicks
Experienced |
|
BJJ Brown Belt
Brawler
Determined |
|
| |
|
Ladies and gentlemen. This fight is 3 rounds, in the bantamweight division.
Introducing the fighter to my left, fighting out of the red corner.
With a record of
8 - 3 - 0, fighting out of New York, Tamiwe Kamanula!
And introducing the fighter to my right, fighting out of the blue corner.
With a record of
9 - 3 - 0, fighting out of Sydney, Frankie Hoggets!
The judges for this bout are Summer Carpenter, Topper Green and Ben Hemmingworth.
The bell rings for round one and we are underway!
Horrible takedown attempt by Hoggets or perhaps it was just good defense by Kamanula, which made it look bad.
Hoggets throws a hook but Kamanula blocks it.
Kamanula dodges the punch combination from Hoggets.
Hoggets tries to bum rush Kamanula with a series of wild strikes but Kamanula uses good footwork to avoid the assault.
Kamanula looks to have improved his striking defense since last time we saw him fight.
Like a baseball bat into the meat of his leg there - nice leg kick by Kamanula.
Hoggets tries for a takedown but Kamanula circles away easily
and Kamanula finishes the little exchange by landing a big kick to the body.
Kamanula throws a head kick that misses.
Kamanula lands with a thumping leg kick.
Hoggets tries to land with a swinging hook to the body but Kamanula was well out of range. Poor timing from Hoggets.
Kamanula tries a switch kick but it misses it's target.

Kamanula lands a big head kick that sends Hoggets tumbling to the mat! Kamanula takes a step backwards and waves Hoggets back to his feet - he wants the finish!

Hoggets is rocked!

It looks like Frankie Hoggets has been cut.
The crowd are loving this. Great action here.
A chopping leg kick lands by Kamanula.
Hoggets is still on wobbly legs! Can Kamanula finish him?
Kamanula throws a quick head kick that knocks Hoggets silly! This fight is all over! What a finish! Kamanula is up on the cage, taking in the applause from the crowd.
Ladies and gentlemen, after 0:50 of round 1, we have a winner by way of KO (Head Kick). Tamiwe Kamanula!
Our winner, Tamiwe Kamanula, made sure he spent some time buttering up the crowd during his post fight interview, which will no doubt bring him a few more fans.
|
|
|
|
|
|
|
|
|
|
|
|
|
|
|
|
|
|
|
|
|
|
|
| S |
C
A |
G |
S |
C
B |
G |
|
S |
C |
G |
|
energy
A | B |
|
hype
A | B |
|
pop
A | B |
|
mgr
A | B |
|
FIGHT
RATING
100% |
|
|
|
|
|
|
|
Undercard bout
|
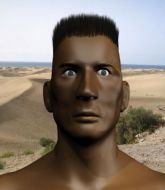
Coming up we have a welterweight MMA rules bout between Tobias Wall (ranked 0 p4p, 0 weight class) and Lucious Giles (ranked 0 p4p, 0 weight class). Wall comes into the arena with We Ready- Archie Eversole blaring out of the sound system. Giles has chosen Jive Talkin' as his entrance music. Both fighters really staring each other down here, as Lucious Giles enters the cage!
 |
|
 |
| 179 cm
23
171 lbs
3 - 2 - 1 |
|
182 cm
19
175 lbs
3 - 0 - 0 |
Good wrestling
Basic striking
Experienced |
|
BJJ Purple Belt
Brawler
Intelligent |
|
| |
|
Ladies and gentlemen. This fight is 3 rounds, in the welterweight division.
Introducing the fighter to my left, fighting out of the red corner.
With a record of
3 - 2 - 1, fighting out of Sydney, Tobias Wall!
And introducing the fighter to my right, fighting out of the blue corner.
With a record of
3 - 0 - 0, fighting out of Sydney, Lucious Giles!
The judges for this bout are Skip Squint, Topper Green and Chris Dean.
The bell rings for round one and we are underway!
Giles with a lazy takedown attempt
and Wall counters with a nice body shot.
Giles takes a jab right on the nose. That must have hurt but he shrugs his shoulders and looks to return the favor.
Giles with a lazy takedown attempt
and Wall counters with a lovely straight right hand!
Giles with a poor takedown
and Wall counters with a left to the body.
Tobias Wall has stuffed three takedown attempts in the round now. That's going to take a lot out of Lucious Giles.
Wall lands a nice looking body shot.
Decent striking displayed by Wall there.
Giles doesn't succeed with the takedown
and Wall cracks him with a counter punch right on the button.
Giles closes the distance and takes a jab right on the nose as he does so.
Wall throws a series of punches but Giles avoids them all with ease.
The crowd are loving this. Great action here.
Wall feints and then dives in with a takedown. That was a long way out but the feint bought him enough time to close the distance and complete the takedown. Now we'll play guard for a bit and see who can get the better of that position.
Wall's corner is telling him to maintain position.

Giles looking for submissions off his back, moving his hips, looking for an opening.
Giles looks winded!
Giles is looking to sweep but instead, Wall has passed into half guard.
Wall wants to stand up but Giles has a hold of him and won't allow it.
That's one minute gone in the round.
Wall takes a deep breath and rests his weight momentarily on top of his opponent, to control the position.
Giles actively working from the bottom here.
Giles tries to roll over but Wall keeps him under control.
Wall controlling the action here.
The fighters are pressed up against the cage, both looking to find a bit of space to work.
It looks like Wall is going to stand back up.
Wall knows he needs to get back to his feet asap. He's simply no match for Giles on the ground.
Giles tries to get to full guard but Wall has control of the leg.
That's two minutes gone in the round.
My god... these two guys really need to pick up the pace or everyone will leave to go get a beer.
Giles has hold of Wall's hands but Wall slips his arm to the side and lands an elbow.
Giles actively working from the bottom here.
Wall looks over to his corner - he wants some instructions but his corner are not responding.
Wall scores with a couple of good hammerfists.
Wall controlling the action here.

That's three minutes gone in the round.
Wall drops an elbow to the side of Giles's head.
Giles wants to get back to full guard.

Wall decides to stand and escape the position.
Wall shoots in for a takedown and gets it.
Giles is looking to regain full guard. Not this time though.

That's four minutes gone in the round.
Wall performing his best blanket impression for a moment.
Wall moves into full mount! Giles won't be happy about that!
Giles is working to get back to half guard.
The crowd thankful this round is nearly over.
Wall looking to control and managing it successfully.
And thats the end of the round the fighters go back to their corners.
Tobias Wall dominated that round.
The referee calls time. The cornermen exit stage left and we're back to business.

Giles tries for a takedown but Wall circles away easily
and Wall counters with a shot to the ribs. That looked like it hurt.
Giles fails with the takedown
and Wall counters with a crisp hook to the side of the head.
Wall lands a straight punch to the body, keeping Giles at a distance.
Wall jabs Giles to the body, keeping him at a distance.
Wall sizes up Giles with a pawing jab and scores with a straight right down the middle.
Wall scores with a reasonable looking shot to the body. Giles doesn't seem bothered though.
Giles with a poor takedown

and Wall counters by clinching up.
Tobias Wall has stuffed three takedown attempts in the round now. That's going to take a lot out of Lucious Giles.
Wall presses Giles against the cage and delivers a mid-strength body shot.
Wall is trying to trip Giles. He has hold of a leg but Giles is hopping around, keeping his balance for the moment. Wall persists though and gets the takedown into guard.
The crowd are loving this. Great action here.
Wall showing good wrestling skills to control the position.
Wall wants to stand but Giles has a closed guard, so he can't escape.
Giles is breathing heavily.
Wall gets to his feet. Giles looking to butt scoot but the ref puts an end to that. On your feet son!
That's one minute gone in the round.
Giles fails with the takedown
and Wall counters with a shot to the ribs. That looked like it hurt.
Wall lands with a two punch combination before moving back out of range.
Wall connects with a looping right hand.
Jab, jab by Wall - just one landing.
Giles takes a solid shot to the body. That one hurt him but he's trying not to show it.
Wall feints and as Giles raises his hands in defense, Wall changes levels and drives through with a takedown into guard.
Wall has to be careful here, sitting in the guard of a superior BJJ player.
Giles wants to sweep here but Wall controlling him for the moment.
Wall would like to get this fight back to the feet but can't get free from the closed guard.
Wall slows down the pace of the fight, as he sits in guard.
Giles is looking for a triangle here but Wall uses the submission attempt to pass into side control.
That's two minutes gone in the round.
The crowd are loving this. Great action here.
Giles is looking for a sweep.
Wall stands up and we're back to a striking position.
Wall throws a two punch combo that lands nicely.
Wall shoots in for a takedown and gets it.
Wall looking to pass the half guard. Not this time.
That's three minutes gone in the round.
Wall lands with an elbow from half guard - that looked like it hurt.
Wall wants to free his trapped foot but Giles is holding on for dear life with his legs.
Wall lands strikes from half guard.
Wall tries to stand and escape but Giles is controlling the position.
Wall is controlling the pace.
Wall gets to his feet - back to striking we go!
That's four minutes gone in the round.
My god... these two guys really need to pick up the pace or everyone will leave to go get a beer.
Wall scores with a shot to the body.
Wall lands with a straight right. Giles didn't see that one coming.
Giles with a poor takedown
and Wall counters with a right hand to the body.
Good standup being displayed there by Wall as he connects with a hook.
Lucious Giles seems to be the more aggressive standup fighter in this bout.
Donk. Wall catches Giles right on the button with a cross.
Giles tries for a takedown but Wall circles away easily
and Wall counters with a right hand to the body.
Wall scores with a hook to the body. Giles takes a step back and tries to catch his breath.
Wall ducks low and lands a nice hook to the body of his opponent.
The fighters circle momentarily. Wall darts into range and connects with a nice straight punch.
Wall lands with a two punch combination before moving back out of range.
Giles is rocked!
Wall is looking to wear down Giles with body shots, infact he's throwing more body shots than head shots at the moment.
Wall connects with a jab, followed by a picture perfect straight right that sends Giles to the canvas, out cold! What a finish by Wall!
Ladies and gentlemen, after 4:57 of round 2, we have a winner by way of KO (Punches). Tobias Wall!
Our winner, Tobias Wall, made sure he spent some time buttering up the crowd during his post fight interview, which will no doubt bring him a few more fans.
|
|
|
|
|
|
|
|
|
|
|
|
|
|
|
|
|
|
|
|
|
|
|
| S |
C
A |
G |
S |
C
B |
G |
|
S |
C |
G |
|
energy
A | B |
|
hype
A | B |
|
pop
A | B |
|
mgr
A | B |
|
FIGHT
RATING
50% |
|
|
|
|
|
|
|
Undercard bout
|
Coming up we have a heavyweight MMA rules bout between Idi Ota (ranked 0 p4p, 0 weight class) and Takuji Kawashima (ranked 0 p4p, 0 weight class). Kawashima has chosen Colossal - Wolfmother as his entrance music. This should be a great matchup!
 |
|
 |
| 184 cm
27
287 lbs
23 - 10 - 0 |
|
190 cm
21
280 lbs
9 - 2 - 0 |
Good wrestling
Great elbows
Very strong |
|
Powerful takedowns
Basic striking
Good gas tank |
|
| |
|
Ladies and gentlemen. This fight is 3 rounds, in the heavyweight division.
Introducing the fighter to my left, fighting out of the red corner.
With a record of
23 - 10 - 0, fighting out of Los Angeles, Idi Ota!
And introducing the fighter to my right, fighting out of the blue corner.
With a record of
9 - 2 - 0, fighting out of Sydney, Takuji Kawashima!
The judges for this bout are Summer Carpenter, Winston Howard and Topper Green.
The bell rings for round one and we are underway!
A looping hook to the body misses from Ota. Kawashima does a little dance to reset his feet.
Ota clinches with his opponent.
Kawashima goes for a takedown attempt but Ota pushes him away and we're back to fighting at a distance.
Kawashima circles away from the clinch attempt.
Ota tries to close the distance and clinch up against the cage but Kawashima paws at him with a jab and circles away.
Kawashima missing with a left hand there. Ota was out of range so wasted energy throwing that one.
Ota is looking to take this fight into the clinch.
Ota is looking to clinch but Kawashima is avoiding it.
Kawashima looks more muscular than last time we saw him. He must have been on the weights.
Ota moves in looking to clinch but Kawashima pushes him off.
Kawashima swats away the attempt to clinch by Ota.
We've had a slow start to the round here - hopefully the action picks up.
Ota takes the fight into the clinch.
Ota unloads a knee to the mid-section. Kawashima lets out a prehistoric sounding urrrrgh.
Ota scores with a hook to the body.
Ota lands a knee to the head there! That was nasty!
That's one minute gone in the round.
Ota lands a damaging elbow.
Kawashima looking for a takedown.
Kawashima takes an elbow to the temple.
Ota lands an elbow inside that Kawashima shrugs off.
It looks like Takuji Kawashima has been cut.
Knees in the clinch landing for Ota.
Kawashima looks winded!
Ota scores a nice knee to the body.
Ota lands a knee to the body.
Ota scores a nice knee to the body.
Nice elbow from Ota.
Ota crunches a lovely knee into Kawashima's ribcage.
Ota with a knee to the head.
This is a great period of action - very entertaining stuff!
Ota landing knees to the body.
Ota lands a nice elbow.
Ota lands a knee to the body.
Ota using the Thai clinch to land knees to the body.
Ota landing some nice looking knees to the body.
Ota with a knee to the head.
That's two minutes gone in the round.
Ota lands a nice knee to the body.
Ota putting his Muay Thai to good use. He has Kawashima in a tight clinch and is doing some damage with knees to the body.
Ota lands an elbow just above Kawashima 's eye.
A body shot lands from Ota.
Kawashima takes an elbow to the forehead.
Ota crunches a lovely knee into Kawashima's ribcage.
Ota unloads a knee to the mid-section. Kawashima lets out a prehistoric sounding urrrrgh.
Kawashima takes a knee to the side of the body.
Ota scores with a knee to the head.
Ota lands a knee to the body.
A knee to the head by Ota.
Ota working Kawashima over with knees to the body.
Ota working Kawashima over with knees to the body.
Ota landing knees to the body. They look like they could hurt.
Ota crunches a lovely knee into Kawashima's ribcage.
Ota crunches a lovely knee into Kawashima's ribcage.
That's three minutes gone in the round.
Ota lands a glancing elbow in the clinch.
Nice elbow from Ota.
Ota landing some nice looking knees to the body.
Kawashima tries to take the fight to the ground by pulling guard but can't manage it.
Idi Ota has stuffed three takedown attempts in the round now. That's going to take a lot out of Takuji Kawashima.
Kawashima takes a knee right on the jaw!
Kawashima is rocked!
Ota lands an elbow that stopped Kawashima in his tracks for a moment.
Kawashima is still on wobbly legs! Can Ota finish him?
Ota lands a big right hand that drops Kawashima! The killer instinct kicks in and Ota finishes his opponent with a series of strikes from mount. A dominating finish by Ota!
Ladies and gentlemen, after 3:33 of round 1, we have a winner by way of TKO (Strikes). Idi Ota!
An out of breath Idi Ota thanked his loyal fans in his post fight interview, giving them credit for his success over the course of his career.
Takuji Kawashima was interviewed post fight and said 'Team Goroshi - Kore Fight Nutrition - Sydney Elite Systems - Extreme MMA'.
|
|
|
|
|
|
|
|
|
|
|
|
|
|
|
|
|
|
|
|
|
|
|
| S |
C
A |
G |
S |
C
B |
G |
|
S |
C |
G |
|
energy
A | B |
|
hype
A | B |
|
pop
A | B |
|
mgr
A | B |
|
FIGHT
RATING
67% |
|
|
|
|
|
|
|
Undercard bout
|
Coming up we have a light heavyweight MMA rules bout between Kev Baylis (ranked 0 p4p, 0 weight class) and Robert Gracie (ranked 0 p4p, 0 weight class). Robert Gracie is the more experienced fighter, so let's see if that makes a difference tonight.
 |
|
 |
| 190 cm
20
210 lbs
5 - 1 - 0 |
|
178 cm
31
224 lbs
11 - 4 - 0 |
BJJ Blue Belt
Solid Muay Thai
Likes comics |
|
Powerful takedowns
Counter fighter
Powerful |
|
| |
|
Ladies and gentlemen. This fight is 3 rounds, in the light heavyweight division.
Introducing the fighter to my left, fighting out of the red corner.
With a record of
5 - 1 - 0, fighting out of Sydney, Kev Baylis!
And introducing the fighter to my right, fighting out of the blue corner.
With a record of
11 - 4 - 0, fighting out of Sydney, Robert Gracie!
The judges for this bout are Ben Watson, Damien Edna and John Mangel.
The bell rings for round one and we are underway!
Gracie moves out of range of the leg kick from Baylis.
Baylis throws a body shot but no joy.
Baylis looks to clinch

and Gracie counters with a single leg into guard. Baylis didn't expect that.
Baylis looking to hit a scissor sweep but Gracie is one step ahead there.
Gracie told us pre-fight that he has been working on his escapes in training. Let's see if he can call on some of his new skills to get back to his feet.
Baylis avoiding any damage from the ground and pound.
Gracie slows down the pace of the fight, as he sits in guard.
Baylis keeping moving, preventing Gracie from controlling successfully.
We've had a slow start to the round here - hopefully the action picks up.
Gracie throws a strike but Baylis rolls with it and manages to sweep. Now he's in guard on top.

That's one minute gone in the round.
Baylis trying to control but Gracie is working from the bottom.
The fighters are pressed up against the cage, both looking to find a bit of space to work.
Gracie escapes his hips to the side and looks to be working for an armbar. Baylis gives him a little smile and shakes his head. No chance.
Gracie had isolated an arm as going for a kimura. Baylis defends it easily.
Gracie has his hands on Baylis's head, controlling the position.
Gracie has the superior BJJ but he's also working some ground strikes into his gameplan.
Gracie had isolated an arm as going for a kimura. Baylis defends it easily.
Baylis wants to control from the top but Gracie keeps moving.
Baylis has to be careful here, sitting in the guard of a superior BJJ player.
Baylis is sitting in close to Gracie's body. Gracie has gone for a guillotine from the bottom. Oh damn, that looks pretty tight! Baylis is panicking - it looks like this one could be all over! Yes, Baylis is tapping! That was a very nice submission by Gracie.
Ladies and gentlemen, after 2:18 of round 1, we have a winner by way of Submission (Guillotine). Robert Gracie!
An out of breath Robert Gracie thanked his loyal fans in his post fight interview, giving them credit for his success over the course of his career.
|
|
|
|
|
|
|
|
|
|
|
|
|
|
|
|
|
|
|
|
|
|
|
| S |
C
A |
G |
S |
C
B |
G |
|
S |
C |
G |
|
energy
A | B |
|
hype
A | B |
|
pop
A | B |
|
mgr
A | B |
|
FIGHT
RATING
43% |
|
|
|
|
|
|
|
Undercard bout
|
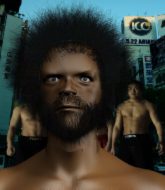
Coming up we have a light heavyweight MMA rules bout between Method Man (ranked 0 p4p, 0 weight class) and Stan Hardy (ranked 0 p4p, 0 weight class). Man comes to the cage accompanied by Method Man - Bring The Pain. Stan Hardy has the eye of the tiger tonight.
 |
|
|
| 191 cm
28
212 lbs
17 - 6 - 0 |
|
183 cm
24
215 lbs
9 - 1 - 0 |
Abu Dhabi Champ
World class boxer
Insanely flexible |
|
Good wrestler
Dangerous knees
Good gas tank |
|
| |
|
Ladies and gentlemen. This fight is 3 rounds, in the light heavyweight division.
Introducing the fighter to my left, fighting out of the red corner.
With a record of
17 - 6 - 0, fighting out of Hilo, Method Man!
And introducing the fighter to my right, fighting out of the blue corner.
With a record of
9 - 1 - 0, fighting out of Sydney, Stan Hardy!
The judges for this bout are John Mangel, Damien Edna and Ron Honeybunn.
The bell rings for round one and we are underway!
Hardy moves out of range of the strikes.
Man fakes a head punch and goes low to the body. Nicely done.
Man lands an overhand right.
Hardy staying out of range there.
Man scores with a straight right hand, right through his opponent's guard.
Man keeping a good distance there, avoiding the body shot.
Man tries to land a leg kick but Hardy saw it coming and moves away.

Hardy moves into the clinch successfully.
Hardy doesn't land with the attempted body shot.
Man working some nice short punches in the clinch.
Hardy misses with a punch on the inside.
Man prevents a body shot from Hardy.
Man lands a left hand.
Man blocks a punch to the side of the head.
Hardy unloads a knee to the mid-section.
The crowd cheering loudly, showing their appreciation for the quality fight we're seeing here.
Man gets through Hardy's defenses to land a nice punch to the side of the head.
Man scores with a shot to the side of Hardy's head.
That's one minute gone in the round.
Hardy landing knees to the body.
Man misses with a knee strike.
Hardy unloads a knee to the mid-section. Man lets out a prehistoric sounding urrrrgh.
Man is breathing heavily.
Hardy tries to land a knee to the body but he is off balance and Man avoids it.
A right hand to the body from Hardy.
Hardy lands a left hand that snaps the head of Man backwards.
Hardy unloads a knee to the mid-section. Man lets out a prehistoric sounding urrrrgh.
Hardy lands a nice knee to the body.
Hardy is looking to score with knees to the body. Maybe he'll change it up and go body then head. Man is defending well for now.
Hardy lands with a left to the head.
Man blocks a knee to the body. He'll have a nicely bruised forearm in the morning.
Hardy throws a blind hook that connects with the side of Mans head.
Man scores with a hook to the body.
This has been an exciting period of action!
Man is trying to maintain a safe position but Hardy gets an underhook and turns Man into the cage.
Hardy tries a knee to the head but Man blocks it.
Hardy throws an elbow but it misses.
Man lands with a short punch from the clinch.
Man lands a shoulder strike.
Hardy scores with a nice hook to the head.
That's two minutes gone in the round.
Man tries to work over Hardy's body with a swooping hook but it only glances the target.
Man tried to land a shot to the body but connects with Hardy's elbow.
Hardy misses with a body punch.
Man prevents a body shot from Hardy.
A head punch blocked on the inside by Man.
Hardy struggles to land a body shot inside as Man controls his hands.
Man looking to stall.
Hardy struggles to land a body shot inside as Man controls his hands.
Hardy is working Man over against the cage.
Hardy lands a nice uppercut.
Hardy misses with a shot to the kidneys.
Hardy throws a vicious knee straight up the middle but Man blocks it with crossed arms.
Man managing to block the knees to the body from Hardy.
Man is trying to slow down the pace in the clinch, to catch his breath.
Hardy doesn't land with the attempted body shot.
Man taking a break, stalling in the clinch.
Man blocks a body shot from Hardy.
That's three minutes gone in the round.
Hardy is leaning against Man and scores with a nice uppercut to the body.
Hardy tries to land a shot to the body but it's blocked.
A head punch on the inside from Man fails to land.
Hardy missing with knees to the body.
Hardy misses with some punches.
Man misses with the head strike.
Hardy lands a body shot in the clinch.
Hardy throws a punch but it's blocked by Man.
Man lands with a short punch from the clinch.
Hardy missing with knees to the body.
Hardy lands a right hand that snaps the head of Man backwards.
Man is stalling here. The referee will be looking to step in if he doesn't pick up the pace.
Man lands a body punch in the clinch.
Hardy lands a short shot on the inside that snaps the head of Man backwards.
Man misses with some punches.
Man on the defensive, avoiding the knees to the body.
Man is looking to control Hardy's arms but Hardy gets an underhook and turns him. Now Man has his back to the cage.
That's four minutes gone in the round.
Hardy lands a right hand that snaps the head of Man backwards.
Man gets through Hardy's defenses to land a nice punch to the side of the head.
The crowd are loving this. Great action here.
Hardy is working Man over against the cage.
Hardy misses with a hook to the ribs.
Hardy throws a hook to the body. More of an arm punch but it's all scoring with the judges.
An uppercut on the inside fails to land for Hardy.
Hardy tries to land a shot to the body but it's blocked.
Hardy tries to land knees in the clinch but Man avoids the damage to the body.
A right hook to the body lands for Hardy.
Hardy trying to land knees to the body.
A body shot lands from Hardy.
Hardy scores a nice knee to the body.
Hardy digs a right hand into Man's ribs. Those have got to be taking their toll on Man's gas tank.
Hardy connects with a knee to the head.

It looks like Method Man has been cut.
Hardy scores with a nice hook to the head.
Hardy lands a hook to the body. It's hard to tell if that hurt Man or not.
The crowd applaud the fighters' efforts here as the round comes to an end.
Hardy missing with knees to the body.
Man misses with a punch to the body.
And thats the end of the round the fighters go back to their corners.
Stan Hardy dominated that round.
The cut man is working on Method Man's cut.
OK. That's time! The bell goes and we're back to the action.
Hardy tries a switch kick but it misses it's target.
Man gets tackled into the cage by Hardy. Hardy maintains the clinch.
A head punch on the inside from Man fails to land.
Hardy blocks a knee to the body. He'll have a nicely bruised forearm in the morning.
Hardy doesn't land with the attempted body shot.
Man fails to land with a short punch on the inside.
Man misses with a hook from the clinch.
Man is working Hardy over against the cage.
Hardy lands a knee to the body.
Hardy scores with an uppercut up the middle.
Man avoiding damage as Hardy throws knees to the body.
Man managing to block the knees to the body from Hardy.
We've had a slow start to the round here - hopefully the action picks up.
Man blocks a body shot from Hardy.
Man misses with a shot to the kidneys.
Hardy has been the more effective fighter overall so far.
Both guys are working to get underhooks.
Hardy tries a body shot but Man blocks it.
Man with a knee to the head.
Man misses with some punches.
That's one minute gone in the round.
Man misses with a shot to the kidneys.
Hardy tries to land a shot to the body but it's blocked.
Man blocks a knee to the body. He'll have a nicely bruised forearm in the morning.
Man landing some nice looking knees to the body.
Man misses with a punch on the inside.
Man misses with some punches.
Hardy tries to land a shot to the body but it's blocked.
A body shot lands from Hardy.
Both fighters are absolutely exhausted here.
Hardy trying to land knees to the body.
Man works for underhooks and lands a body shot in the process.
Hardy tries to land a knee to the body but he is off balance and Man avoids it.
Hardy scores with a knee to the head.
An uppercut on the inside fails to land for Hardy.
Man blocks a body shot from Hardy.
Hardy is trying to wear down his opponent with knees to the body.
Man is looking to control Hardy's arms but Hardy gets an underhook and turns him. Now Man has his back to the cage.
Hardy trying to land knees to the body.
Hardy prevents a body shot from Man.
That's two minutes gone in the round.
Hardy lands a body shot.
Hardy scores with an uppercut up the middle.
Hardy works on Man's body with a couple of short punches.
Hardy lands an elbow that stopped Man in his tracks for a moment.
The crowd are loving this. Great action here.
Hardy lands a knee to the body.
Hardy lands a left hand.
Man throws a punch but it's blocked by Hardy.
Hardy utilising his Muay Thai to score with a knee to the body.
Hardy lands a body punch in the clinch.
Hardy doesn't land with the attempted body shot.
Hardy blocks an uppercut.
Man blocks a knee to the body. He'll have a nicely bruised forearm in the morning.
Both guys are working to get underhooks.
Hardy lands with a right to the head.
Hardy lands a good knee to the midsection. Man won't want to take too many of those.
Hardy lands a body shot in the clinch.
Stan Hardy seems to be working more effectively in the clinch in the fight so far.
Man tries a body shot but Hardy blocks it.
That's three minutes gone in the round.
Hardy tries to work over Man's body with a swooping hook but it only glances the target.
Hardy fails to land with a short punch on the inside.
A body shot lands from Hardy.
Knees to the body from Hardy.
Hardy struggles to land a body shot inside as Man controls his hands.
Hardy misses with a body punch.
Hardy is looking to score with knees to the body. Maybe he'll change it up and go body then head. Man is defending well for now.
Hardy misses with a shot to the kidneys.
Hardy is looking to score with knees to the body. Maybe he'll change it up and go body then head. Man is defending well for now.
Hardy is looking to score with knees to the body. Maybe he'll change it up and go body then head. Man is defending well for now.
Man prevents a body shot from Hardy.
Man managing to block the knees to the body from Hardy.
Hardy throws a hook to the body. More of an arm punch but it's all scoring with the judges.
Man on the defensive, avoiding the knees to the body.
Hardy misses with a body punch.
Man goes for a body shot but it's blocked.
Hardy tries to land knees in the clinch but Man avoids the damage to the body.
That's four minutes gone in the round.
Man misses with a punch to the body.
Man scores with a shot to the side of Hardy's head.
Hardy trying to land knees to the body.
Man unloads a knee to the mid-section. Hardy lets out a prehistoric sounding urrrrgh.
Man misses with a body punch.
Man managing to block the knees to the body from Hardy.
Man misses with a hook from the clinch.
Hardy tries to throw a body punch but Man avoids it by throwing Hardy back against the cage.
A head punch blocked on the inside by Hardy.
Man trying to stall but Hardy improves his position.
Hardy blocks a punch to the side of the head.
Hardy tries a body shot but Man blocks it.
Fantastic stuff here - a very entertaining period of action, which has drawn cheers from the crowd.
Man swings away with an uppercut that misses.
Hardy throws a knee to the head but misses.
Hardy lands a knee to the body.
A right hand to the body from Hardy.
Man stalling in the clinch but Hardy improves position.
The two fighters are working to gain dominance in the clinch.
And thats the end of the round the fighters go back to their corners.
Stan Hardy showed his class in that round. I'd imagine he'll take it on all the scorecards.
The cut man is working on Method Man's cut.
Well, the break between rounds is over. Let's get back to the scrappin! This is the final round!

Hardy clinches.
Man on the defensive, avoiding the knees to the body.
Good body shot from Man.
A battle for position here, against the cage.
Hardy scores with a hook to the body.
A body shot lands from Hardy.
Hardy tries to land a shot to the body but it's blocked.
Man is trying to stall.
Hardy landing knees to the body. They look like they could hurt.
Hardy throws a blind hook that connects with the side of Mans head.
We've had a slow start to the round here - hopefully the action picks up.
Man misses with a punch to the body.
Man avoiding damage as Hardy throws knees to the body.
Man blocks a body shot from Hardy.
Hardy tries to land a shot to the body but it's blocked.
Both fighters are breathing heavily.
Nice body punch from Hardy - that landed with a thud.
That's one minute gone in the round.
Man blocks a knee to the body. He'll have a nicely bruised forearm in the morning.
A head punch on the inside from Man fails to land.
Hardy tries to land a knee to the head but Man blocks with his arms.
Hardy is looking to score with knees to the body. Maybe he'll change it up and go body then head. Man is defending well for now.
Hardy lands an elbow just above Man 's eye.
Hardy scores with an uppercut up the middle.
Hardy tries to work over Man's body with a swooping hook but it only glances the target.
Man tries a knee to the head but he's missed.
Man can't find room to land a body shot as Hardy controls the action.
Hardy prevents a body shot from Man.
Hardy lands a shot to the body.
Hardy lands a good knee to the midsection. Man won't want to take too many of those.
Hardy unloads a knee to the mid-section.
Hardy trying to land knees to the body.
Hardy tried to land a shot to the body but connects with Man's elbow.
Hardy missing with knees to the body.
Hardy working Man over with knees to the body.
Hardy unloads a knee to the mid-section. Man lets out a prehistoric sounding urrrrgh.
Method Man has stepped it up - he knows he needs a finish here!
That's two minutes gone in the round.
This is a great period of action - very entertaining stuff!
Hardy goes for a body shot but it's blocked.
Hardy lands a nice knee to the body.
Hardy scores a nice knee to the body.
Still in the clinch, Hardy scores with a nice short uppercut.
Hardy digs a right hand underneath Man's ribcage. Man let out a lung full of air as it connected.
A hook to the body from Hardy.
Hardy goes for a body shot but it's blocked.
A short uppercut from Hardy.
Man doesn't land with the attempted body shot.
Hardy tried to land a shot to the body but connects with Man's elbow.
Man misses with some punches.
Hardy is looking to score with knees to the body. Maybe he'll change it up and go body then head. Man is defending well for now.
Hardy tries to land a shot to the body but it's blocked.
Hardy scores with an uppercut up the middle.
Man working on landing some head shots here - that one got through nicely.
Hardy stays in close to his opponent and throws a right hand to the body.
Man blocking some punches.
That's three minutes gone in the round.
Man fails to land with a short punch on the inside.
Hardy lands a body shot in the clinch.
Hardy blocks a punch to the side of the head.
Man misses with a shot to the kidneys.
Man working aggressively here.
Hardy tries to land a knee to the body but he is off balance and Man avoids it.
Man tries to throw a body punch but Hardy avoids it by throwing Man back against the cage.
Hardy lands a knee to the head there! That was nasty!
A head punch blocked on the inside by Man.
Hardy misses with a hook to the ribs.
Hardy tries to land a shot to the body but it's blocked.
Man working aggressively here.
Hardy tries to land a knee to the body but he is off balance and Man avoids it.
Man tries to land a knee to the head but Hardy blocks with his arms.
Hardy cracks Man with a nice body shot.
Hardy lands a right hand.
A right handed body shot lands from Hardy.
Hardy unloads a knee to the mid-section. Man lets out a prehistoric sounding urrrrgh.
That's four minutes gone in the round.
Hardy softening up his opponent with strikes, against the cage.
Hardy tries to land a knee to the body but he is off balance and Man avoids it.
Hardy tries to throw a body punch but Man avoids it by throwing Hardy back against the cage.
Fantastic stuff here - a very entertaining period of action, which has drawn cheers from the crowd.
A nice left hand lands by Hardy.
Man tries to land a shot to the body but it's blocked.
Man misses with a knee to the head.
Hardy pushes Man back against the cage and lands a hook to the side of the head.
Hardy blocks a couple of punches on the inside.
Man stalling in the clinch but Hardy improves position.
Man misses with a punch on the inside.
Man scores with an uppercut up the middle.
Hardy lands a short shot on the inside that snaps the head of Man backwards.
A shot in the inside from Hardy.
Hardy tries a body shot but Man blocks it.
Man takes a knee right on the jaw!
Man looking to throw knees to the head but Hardy is blocking nicely.
Stan Hardy is fighting for a decision - hopefully he's judged it right and he's actually winning the fight.
Hardy misses with a punch to the body.
Man takes a knee to the side of the body.
And that's the end of the fight!
Stan Hardy comfortably won the final round on my scorecard.
I've got Hardy winning every round here. Surely the decision will go his way and he'll pick up a well deserved decision victory. Over to the ring announcer for the scorecards.
Ladies and gentlemen, after 3 rounds of action, we go to the scorecards for a decision.
Judge John Mangel scores the fight 27:30
Judge Damien Edna scores the fight 27:30
Judge Ron Honeybunn scores the fight 27:30
In favor of your winner, by unanimous decision... Stan Hardy!
Method Man was interviewed post fight and said 'Patty cake patty cake hey the method man
Don't eat Skippy, Jif or Peter Pan
Peanut butter, cuz I'm not butter
In fact I snap back like a rubber
band!'.
|
|
|
|
|
|
|
|
|
|
|
|
|
|
|
|
|
|
|
|
|
|
|
| S |
C
A |
G |
S |
C
B |
G |
|
S |
C |
G |
|
energy
A | B |
|
hype
A | B |
|
pop
A | B |
|
mgr
A | B |
|
FIGHT
RATING
67% |
|
|
|
|
|
|
|
Co-main event
|
Coming up we have a middleweight MMA rules bout between John McNamara (ranked 0 p4p, 0 weight class) and Gary Grice (ranked 0 p4p, 0 weight class). Grice is bobbing his head along to his entrance song: GZA - Shadowboxin'. Both fighters will be looking to make this an exciting fight for the fans, I'm sure!
 |
|
 |
| 180 cm
34
200 lbs
20 - 21 - 1 |
|
184 cm
27
195 lbs
8 - 0 - 1 |
Great wrestler
World class boxer
Cardio machine |
|
Good wrestler
Lethal high kicks
Good gas tank |
|
| |
|
Ladies and gentlemen. This fight is 3 rounds, in the middleweight division.
Introducing the fighter to my left, fighting out of the red corner.
With a record of
20 - 21 - 1, fighting out of Sydney, John McNamara!
And introducing the fighter to my right, fighting out of the blue corner.
With a record of
8 - 0 - 1, fighting out of Hilo, Gary Grice!
The judges for this bout are Hugh Johnson, Francis DeMontford and Ben Hemmingworth.
The bell rings for round one and we are underway!
Grice throws a leg kick but McNamara sees it coming and checks it nicely.
McNamara scores with a punch to the head.
Grice blocks a jab.
McNamara scores with a jab to the body.
McNamara misses with a hook.
Grice gets cracked there but stands up to it.
McNamara misses with a body shot
and Grice decides to take the opportunity to score a takedown. He's landed in McNamara's guard.
Grice looking to control the position here, rather than advance.
Grice wants to control from the top but McNamara keeps moving.
Grice is just sitting in guard, looking to avoid any submissions.
That's one minute gone in the round.
Grice postures up to throw the ground and pound strikes but they don't connect.
McNamara looking to hit a scissor sweep but Grice is one step ahead there.
Grice tries to free his leg and advance position but McNamara is retaining full guard.

The referee has motioned to the fighters to stand back up. He just wasn't happy with the level of activity.
McNamara swings and misses with a hook to the body.
That's two minutes gone in the round.
A lull in the action here being met with boos from the crowd.
Donk. McNamara catches Grice right on the button with a cross.
McNamara looks to score with a jab to the body but Grice is just out of range.
Grice misses with a right hand
and McNamara counters with a quick right hand to the jaw.
McNamara throws a hook but Grice avoids it easily.
Grice is looking to score with low kicks.
McNamara uses good footwork to get in and out and land a nice right hand before Grice has time to react.
McNamara tries to land with a swinging hook to the body but Grice was well out of range. Poor timing from McNamara.
McNamara ducks down and throws a hook to the body but Grice moves away.
McNamara throws an off balance right hand
and Grice decides to take the opportunity to score a takedown. He's landed in McNamara's guard.
Grice sitting in guard here, content to control.
McNamara looking to hit a scissor sweep but Grice is one step ahead there.
The fighters are pressed up against the cage, both looking to find a bit of space to work.
That's three minutes gone in the round.
Grice wants to pass the guard but McNamara is keeping the position.
Grice postures up and lands a big shot to McNamara's brow.
Grice sitting in guard, not really doing much.
Grice stands and throws McNamara's legs to the side, diving into side control.
That's four minutes gone in the round.
The crowd are showing their displeasure at the lack of action as loud boos ring out around the arena.
Grice wants to control but McNamara is keeping him busy.
The ground and pound from Grice seems to be hitting the mat more than his opponent.
And thats the end of the round the fighters go back to their corners.
A close round but Gary Grice will probably get the nod.
The fighters' corners scream their final instructions, as the referee calls time. Here we go, back to the action!
McNamara misses with a body shot.
McNamara jabbing away but nothing is landing.
Good leg kick by Grice there. It's the ones that make that thud noise that hurt and that was an almighty thud.
McNamara misses with a straight left.
McNamara moves out of range as Grice throws a body kick.
McNamara looks to have improved his striking defense since last time we saw him fight.
McNamara throws a hook to the body but it doesn't connect.
McNamara comes forward and lands a shot to the body, then darts back out of range.
McNamara throws a left and a right that both miss
and Grice counters with a nice double leg into guard.
Grice looking to control the position here, rather than advance.
We've had a slow start to the round here - hopefully the action picks up.
McNamara keeping moving, preventing Grice from controlling successfully.
That's one minute gone in the round.
McNamara keeping full guard, as Grice tries to pass.
The referee looks like he's ready to step in and stand the fighters back up.
That's two minutes gone in the round.
The crowd are getting on the fighters' backs, as the pace has dropped off in the last minute or so.
Grice is stalling in the full guard.
The referee has stepped in and called for a break in the action. We'll restart on the feet.
Grice takes a shot to the eye socket. That's gotta hurt.
Grice avoids the body shot from McNamara.
McNamara throws a jab when Grice was well out of range.
McNamara lands with a straight right. Grice didn't see that one coming.
John McNamara seems to be the more aggressive standup fighter in this bout.
Decent striking displayed by McNamara there.
Grice misses with a leg kick.
Grice throws a front kick aimed at McNamara's knee but McNamara avoids it well.
That's three minutes gone in the round.
Grice slips a jab from McNamara.
Grice turns his hip over beautifully as he lands a nice leg kick.
McNamara takes a swing at Grice's ribcage but misses.
Grice bobs and weaves well there to avoid the strikes.
McNamara throws a body punch but Grice moves out of range.
Grice uses good footwork to avoid the strikes from McNamara.
McNamara throws out a token jab with nothing on it.
McNamara misses with a wild body shot.
Thud! ouch! good body kick from Grice - that will leave a mark!
Grice looks for the body kick but McNamara saw that one coming.
McNamara's jab looks to have found its range, popping Grice under the eye.
McNamara scores with a nice right hand.
That's four minutes gone in the round.
McNamara throws a predictable looking body shot
and Grice counters with a nice double leg into half guard.
We've seen a great period of action over the last minute or so - credit to both fighters for going all out!
Grice stalling.
Grice trying to control the action but McNamara is working from the bottom.
Grice is just sitting in half guard, waiting for something to happen.
The crowd thankful this round is nearly over.
Grice wants to pass the guard but McNamara is defending well.
And thats the end of the round the fighters go back to their corners.
A close second round but Gary Grice will probably get the nod - 10:9.
OK. That's time! The bell goes and we're back to the action. This is the final round!
McNamara moves forwards but Grice connects with a nice, crisp jab.
McNamara throws an uppercut from half a mile away. Grice sees it coming and avoids it easily.
McNamara looks to score with a jab to the body but Grice is just out of range.
John McNamara is winning the standup battle so far.
McNamara looks to throw the jab but Grice is out of range.
McNamara misses with a lunging right hand
so Grice counters with a double leg into guard. Good agility.
Grice wants to pass the guard but McNamara is keeping the position.
Grice content to stall in guard here.
We've had a slow start to the round here - hopefully the action picks up.
That's one minute gone in the round.
McNamara working the defensive guard well to avoid strikes from Grice.
McNamara is trying to control the position from the bottom.
Grice looking to control the position here, rather than advance.
Grice loading up with the ground and pound but he's missing more than he's landing in this flurry.
The referee decides to stand the fighters back up.
That's two minutes gone in the round.
My god... these two guys really need to pick up the pace or everyone will leave to go get a beer.
Grice drops his hands and takes a jab to the jaw for his troubles.
McNamara misses with a looping left.
Decent striking displayed by Grice there.
McNamara connects with a slap. Keep your fist closed son.
McNamara throws a jab when Grice was well out of range.
McNamara throws an ugly left hook that misses
and Grice counters with a takedown into side control! That could mean trouble for McNamara!
Grice wants to control but McNamara is keeping him busy.
Grice tries to score with some ground and pound. McNamara controls his posture well this time though and the shots don't do any damage.
That's three minutes gone in the round.
Grice is looking to take a break and control but McNamara is keeping him honest, looking to work from the bottom.
A lull in the action here as Grice stalls from top position.
Grice tries for a kimura. Not really close to a finish though.
McNamara tries to improve position but can't.
That's four minutes gone in the round.
A few boos can be heard. I'm sure they will multiply if the fighters don't pick up the pace.
McNamara gets one leg under and gets the fight to half guard.
The ref warns both fighters not to hold the cage as they work up against the meshing.
Grice not landing any meaningful shots this time.
Grice is keen to just control but McNamara is a slippery customer.
McNamara blocking the ground and pound attempt from Grice.
We may be looking at a referee standup if the pace doesn't pick up soon.
Boooooooooooooooooooo!!! God, this has been a terrible round. Come on you two, sort yourselves out!
Grice prevents McNamara from improving his position.
The ref stands the fighters back up due to a lack of activity.
John McNamara has stepped it up - he knows he needs a finish here!
Gary Grice is fighting for a decision - hopefully he's judged it right and he's actually winning the fight.
McNamara loads up on a big right hand but Grice slips the punch.
And that's the end of the fight!
Gary Grice comfortably won the final round on my scorecard.
I've got Grice winning every round here. Surely the decision will go his way and he'll pick up a well deserved decision victory. Over to the ring announcer for the scorecards.
Ladies and gentlemen, after 3 rounds of action, we go to the scorecards for a decision.
Judge Hugh Johnson scores the fight 28:30
Judge Francis DeMontford scores the fight 29:28
Judge Ben Hemmingworth scores the fight 27:30
In favor of your winner, by split decision... Gary Grice!
In his post fight interview, Gary Grice started talking himself up. Luckily his charisma kept the crowd on side and gave him a good reception.
|
|
|
|
|
|
|
|
|
|
|
|
|
|
|
|
|
|
|
|
|
|
|
| S |
C
A |
G |
S |
C
B |
G |
|
S |
C |
G |
|
energy
A | B |
|
hype
A | B |
|
pop
A | B |
|
mgr
A | B |
|
FIGHT
RATING
31% |
|
|
|
|
|
|
|
Main event
|
Coming up we have a middleweight MMA rules bout between Joe Smith (ranked 0 p4p, 0 weight class) and Wolfgang Becker (ranked 0 p4p, 0 weight class). Smith comes into the arena with frenzal rhomb - Mum changed the locks blaring out of the sound system. Becker has chosen Mr Boombastic as his entrance music. Wolfgang Becker is the more experienced fighter, so let's see if that makes a difference tonight.
 |
|
 |
| 186 cm
22
199 lbs
5 - 1 - 0 |
|
186 cm
27
200 lbs
9 - 6 - 0 |
Good wrestling
World class boxer
Insanely flexible |
|
Good wrestler
Excellent boxer
Powerful |
|
| |
|
Ladies and gentlemen. This fight is 3 rounds, in the middleweight division.
Introducing the fighter to my left, fighting out of the red corner.
With a record of
5 - 1 - 0, fighting out of Las Vegas, Joe Smith!
And introducing the fighter to my right, fighting out of the blue corner.
With a record of
9 - 6 - 0, fighting out of Sydney, Wolfgang Becker!
The judges for this bout are Hugh Johnson, Eliza Hachem and Ben Hemmingworth.
The bell rings for round one and we are underway!
Becker fails with a takedown attempt.
Smith throws out a powerful jab.
Smith lands a leg kick that knocks Becker off balance momentarily.
Becker just misses with a punch to the body.
Smith gets caught on his heels momentarily as he allows Becker to score an easy takedown into full guard.
Becker throws an elbow that misses. Smith uses the momentum to reverse the position. He's now in Becker's guard. Nice move by Smith!
Smith stands up and looks to throw the legs aside to pass to side control. Becker swivels though and keeps the full guard.
Becker looking to sweep here. No luck so far.
Becker is working from a closed guard but he's struggling to control his opponent.
That's one minute gone in the round.
Becker throwing rabbit punches from the bottom - showing the judges that he's keeping busy.
Becker is working an open guard here, looking to improve his position. No doubt that will leave him open to counters but at least he's being more offensive.
Becker is trying to hold Smith in close to prevent damage but Smith has managed to pass into half guard.
Smith passes to side control.
Becker pushes Smith away and creates a bit of space to escape. He's almost out here... but no, Smith gets a good hold of his legs and remains firmly in side control.
Becker is positioning himself to get back to half guard.
That's two minutes gone in the round.
Becker seems a little lost for a moment, as Smith dominates the positioning.
Becker gets back to half guard.
Becker won't allow Smith to pass to mount.
Becker is looking to improve his position.
Becker tries to kick Smith off but Smith keeps his base steady and stays in half guard.
The ref stands the fighters back up due to a lack of activity.
That's three minutes gone in the round.
Becker checks a low kick. Bone on bone - not my idea of a good time.
Smith pulls out of a head kick attempt.
Smith works the jab nicely.
Smith moving in and out of range nicely, whilst landing the scoring shot.
Horrible takedown attempt by Becker or perhaps it was just good defense by Smith, which made it look bad.
Smith lands a body shot.
Smith leaves Becker with his face pressed against the mat as he sprawls beautifully, defending against a solid takedown attempt.
Joe Smith has stuffed three takedown attempts in the round now. That's going to take a lot out of Wolfgang Becker.
Becker throws an ugly left hook that misses
and Smith counters with an outside leg kick.
Smith scores with a sloppy punch to the body. Not much technique there but it did the business.
Smith with a nice looking leg kick. You could hear that one land in a back row.
Smith throws a head kick but Becker moves out of range.
Becker thows a left - swing and a miss!
That's four minutes gone in the round.
A telegraphed takedown attempt from Becker is defended easily by Smith.
Becker changes levels and looks for a double leg takedown. Smith tries to avoid it but Becker manages to keep hold of a leg and drag Smith to the ground. Smith escapes though and pops straight back up to his feet.
Smith throws a nice hook to the body that draws an oooh from the crowd.
This has been an exciting period of action!
Smith scores with a jab to the body.
Becker looks winded!
Smith jabs at Becker's body.
Good exchange - Smith coming out on top.
Becker on the wrong end of an overhand right that came out of nowhere.
Smith scoring well with a low kick there.
Smith scores with a leg kick.
Joe Smith is looking to keep the fight on the feet at all costs.
Smith feints with a shoulder and throws a nice leg kick to Becker's calf.
Smith with a nice looking leg kick. You could hear that one land in a back row.
Smith moving in and out of range nicely, whilst landing the scoring shot.
Smith slips under a jab from Becker.
And thats the end of the round the fighters go back to their corners.
Joe Smith dominated that round.
OK. That's time! The bell goes and we're back to the action.
Becker dodges the punch combination from Smith.
Becker looks for a takedown but Smith sprawls well.
Smith lands with a nice low kick. That'll leave a bruise.
Nice sprawl there from Smith as Becker shoots in.
Joe Smith is winning the standup battle so far.
Smith lands a head kick!
Smith goes to the watering hole and comes back with a big thumbs up from the judges as he scores a three punch combo.
Smith looking to take his opponent's legs away with the low kicks.
We've had a slow start to the round here - hopefully the action picks up.
Becker doesn't succeed with the takedown
and Smith counters with a leg kick.
Joe Smith has stuffed three takedown attempts in the round now. That's going to take a lot out of Wolfgang Becker.
Like a baseball bat into the meat of his leg there - nice leg kick by Smith.
A solid leg kick lands there for Smith.
Smith uses good footwork to get in and out, landing a nice hook.
That's one minute gone in the round.
A solid leg kick lands there for Smith.
Becker doesn't react quick enough there as he takes a shot to the body.
Becker gets his head snapped back by a nice shot there.
Becker is rocked!
Becker walks straight into a right hand from Smith - that's dropped him! Smith jumps into mount and starts pounding away - can he finish?! More strikes go undefended and the referee has to dive in to save Becker from any more punishment! Becker complains about the stoppage but falls over as he tries to stand back up, so it was clearly a good stoppage.
Ladies and gentlemen, after 1:21 of round 2, we have a winner by way of TKO (Punches). Joe Smith!
Joe Smith very nearly forgot to thank Valhalla Fight Wear amongst all the excitement of his win but just as the interview came to a close, he screamed their name. Hopefully he'll get a few nice freebies in the mail as a thank you.
Wolfgang Becker was interviewed post fight and said 'Fuck this shit I'm outta here!'.
|
|
|
|
|
|
|
|
|
|
|
|
|
|
|
|
|
|
|
|
|
|
|
| S |
C
A |
G |
S |
C
B |
G |
|
S |
C |
G |
|
energy
A | B |
|
hype
A | B |
|
pop
A | B |
|
mgr
A | B |
|
FIGHT
RATING
47% |
|
|
|
|
|
|
|
|
|
|
