 |
QFC Tournament 447 Round 2 PBP Commentary |
Undercard bout
|
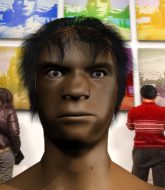
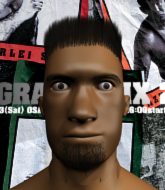
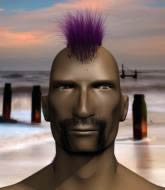
Coming up we have a lightweight MMA rules bout between Styoto Fachida (ranked 0 p4p, 0 weight class) and Nich DiMag (ranked 0 p4p, 0 weight class). Over to our ring announcer for the fighter introductions!
 |
|
 |
| 175 cm
20
155 lbs
1 - 0 - 0 |
|
177 cm
20
163 lbs
1 - 0 - 0 |
BJJ Purple Belt
Counter fighter
KO power |
|
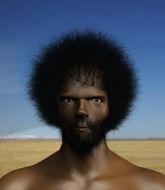
Good takedowns
Brawler
Granite chin |
|
| |
|
Ladies and gentlemen. This fight is 3 rounds, in the lightweight division.
Introducing the fighter to my left, fighting out of the red corner.
With a record of
1 - 0 - 0, fighting out of Tokyo, Styoto Fachida!
And introducing the fighter to my right, fighting out of the blue corner.
With a record of
1 - 0 - 0, fighting out of Tokyo, Nich DiMag!
The judges for this bout are Yukihiro Shimada, Kenichi Hosakawa and Sosuke Kotani.

The bell rings for round one and we are underway!
DiMag doesn't succeed with the takedown

and Fachida counters by moving into the clinch. Good anticipation by Fachida.
DiMag wants a takedown but no success here.

Fachida jumps guard and drags DiMag to the mat. He's obviously going to be looking for submissions off his back.
DiMag slips effortlessly into side control - very nice.

DiMag is looking to finish here, going for an Americana. Fachida knows the correct defense though, so he's OK.
Fachida is looking for a sweep.
We've had a slow start to the round here - hopefully the action picks up.
DiMag throwing shots but missing, from side control.
Fachida is sneaking out the side here. He's bucked DiMag off and has taken his back!
DiMag trying to control the action but Fachida just sinks the hooks in.
DiMag tries to break free.

That's one minute gone in the round.
Fachida is looking to finish with some ground and pound!
DiMag wants to escape the position.
Fachida trying to control momentarily.
DiMag trying to control the action but Fachida just sinks the hooks in.
DiMag staying busy and making it hard for Fachida to control.
Fachida is riding his opponent, not letting DiMag buck him off.
Fachida loading up with punches from the back mount - how long can DiMag hold on?
You can see the frustration on DiMag's face
He knows he is in trouble unless he improves his position sooner rather than later.
The crowd hopeful of a finish here - Fachida's supporters are on their feet, screaming for him to go for the rear naked choke.

That's two minutes gone in the round.
DiMag is trying to break free.
Fachida struggling to keep hold of the position.
DiMag wants to escape the position.
DiMag is very frustrated here, being controlled quite effectively by Fachida.
Fachida tries to keep control of the position but DiMag is staying busy.
DiMag can't escape the position.
DiMag staying busy and making it hard for Fachida to control.
DiMag is defending well here and trying to improve his position.
DiMag is persisting with the attempt to improve his position.
The fighters are pressed up against the cage, both looking to find a bit of space to work.
Both fighters have adopted an aggressive gameplan on the ground!

That's three minutes gone in the round.
DiMag is being controlled on the ground here - he must escape this position otherwise surely the end is near.
DiMag is in bad spot here.
Fachida keeps control of the position easily here as DiMag tries to buck him off.
Fachida doesn't have the hooks in and DiMag manages to turn into his guard.
Fachida manages to sweep nicely, so he's now on top. DiMag manages to get himself to full guard.

Fachida has to be careful here, sitting in the guard of a superior BJJ player.
Fachida is breathing heavily.
DiMag has his foot on Fachida's thigh. He's trying to push off and get in position for a triangle, I think. Fachida works his way back into a safe position though.
The ref warns both fighters not to hold the cage as they work up against the meshing.
DiMag looking for a sweep. Not yet DiMag, not yet.
Fachida working some strikes from top position.
Fachida trying to control but DiMag is working from the bottom.
Fachida is trying to tuck his arms in to keep them safe but DiMag has managed to isolate one of them and has got a loose triangle. Fachida is looking to defend but DiMag has done well to lock his legs together - this could be big trouble for Fachida! DiMag pulls down on the head and a little smile comes across his face - he knows he's got it. Yep, Fachida taps out and this one is all over!
Ladies and gentlemen, after 4:55 of round 1, we have a winner by way of Submission (Triangle). Nich DiMag!
|
|
|
|
|
|
|
|
|
|
|
|
|
|
|
|
|
|
|
|
|
|
|
| S |
C
A |
G |
S |
C
B |
G |
|
S |
C |
G |
|
energy
A | B |
|
hype
A | B |
|
pop
A | B |
|
mgr
A | B |
|
FIGHT
RATING
30% |
|
|
|
|
|
|
|
Undercard bout
|
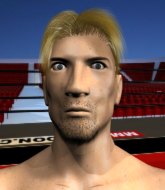
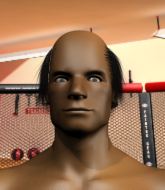
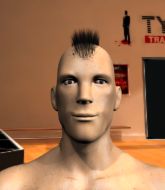
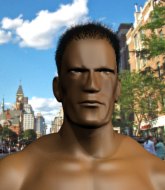
Coming up we have a lightweight MMA rules bout between Jamal Hooktayafeace (ranked 0 p4p, 0 weight class) and Steven McKinney (ranked 0 p4p, 0 weight class). Steven McKinney is the more experienced fighter, so let's see if that makes a difference tonight.
 |
|
 |
| 170 cm
20
155 lbs
1 - 0 - 0 |
|
155 cm
20
155 lbs
1 - 0 - 0 |
BJJ Blue Belt
Brawler
Cuts easily |
|
BJJ Blue Belt
Brawler
Determined |
|
| |
|
Ladies and gentlemen. This fight is 3 rounds, in the lightweight division.
Introducing the fighter to my left, fighting out of the red corner.
With a record of
1 - 0 - 0, fighting out of Tokyo, Jamal Hooktayafeace!
And introducing the fighter to my right, fighting out of the blue corner.
With a record of
1 - 0 - 0, fighting out of Tokyo, Steven McKinney!
The judges for this bout are Kenichi Hosakawa, Yukihiro Shimada and Yukihiro Yamamoto.
The bell rings for round one and we are underway!
McKinney wings a very wild body shot but it does the job and lands to the midsection.
Hooktayafeace is looking to clinch.
Hooktayafeace fails to land with a series of punches.
McKinney throws a body punch but Hooktayafeace moves out of range.
Hooktayafeace throws a right hand that McKinney ducks under and follows up with a left that McKinney also avoids with ease.
McKinney misses with a body shot.
Hooktayafeace moves in looking to clinch but McKinney pushes him off.

The fight moves into the clinch position.
Hooktayafeace taking a break, stalling in the clinch.
Hooktayafeace throws a knee to the head but misses.
Hooktayafeace manages to get underhooks and slows down the pace for a moment.
McKinney on the defensive, avoiding the knees to the body.
We've had a slow start to the round here - hopefully the action picks up.
Hooktayafeace using the Thai clinch to land knees to the body.
McKinney is trying to push Hooktayafeace away but Hooktayafeace has him pressed against the cage, so he's going nowhere.
An uppercut to the body lands inside from McKinney.
McKinney can't break the clinch.
McKinney has had enough of the clinch but Hooktayafeace keeps him there for the moment.
That's one minute gone in the round.
McKinney wants to get back to striking at distance but Hooktayafeace won't allow it.
A frustrated look appears on McKinney's face as he tries to break the clinch.
Hooktayafeace prevents McKinney from breaking the clinch.
Hooktayafeace is struggling to control the position.
McKinney misses with a hook to the ribs.
McKinney takes a knee right on the jaw!
McKinney tries to break the clinch but Hooktayafeace is controlling the position.
Hooktayafeace unloads a knee to the mid-section. McKinney lets out a prehistoric sounding urrrrgh.
Come on Hooktayafeace - let's have some action - none of this stalling nonsense.
Hooktayafeace with a knee to the head.
McKinney tries to circle away but Hooktayafeace has him pinned against the cage.
McKinney tries to break free but Hooktayafeace pushes him back against the cage.
McKinney is trying to break the clinch but Hooktayafeace is controlling him.
A battle for position here, against the cage.
That's two minutes gone in the round.
Hooktayafeace has McKinney pressed against the cage, preventing McKinney from circling away and getting back to striking at range.
Hooktayafeace jumps guard but his hands slip and he falls flat on his back. Well, he's made himself look a right mug there, as McKinney walks away with a smile on his face. Hooktayafeace gets slowly back to his feet and shakes his head.
McKinney tries to check a leg kick but that clearly hurt him.
McKinney throws a right and a left that both miss.
McKinney swings for the body but Hooktayafeace moves out of range.
Hooktayafeace is on the wrong end of a nice combination from McKinney.
McKinney lunges in with swinging rights and lefts but Hooktayafeace circles away quickly and effectively.
This has been an exciting period of action!
Hooktayafeace misses with a body shot. Nice footwork from McKinney.
Hooktayafeace throws a nice outside leg kick.
McKinney feints a straight left to the body, then turns around with a flashy move and hits Hooktayafeaces jaw with a dramatic spinning back fist!
The fight moves into the clinch position.
McKinney is trying to push Hooktayafeace away but Hooktayafeace has him pressed against the cage, so he's going nowhere.
McKinney tries to work over Hooktayafeace's body with a swooping hook but it only glances the target.
McKinney is trying to break the clinch but Hooktayafeace has him pressed against the cage.
McKinney should think about turning a few of those tyres round his middle into muscle if he wants people to take him seriously as an athlete.
That's three minutes gone in the round.
McKinney takes a knee right on the jaw!
Hooktayafeace connects with a knee to the head.
Hooktayafeace goes for a takedown in the clinch but McKinney prevents it.
Hooktayafeace is trying to slow down the pace of the fight but McKinney is keeping busy.
McKinney wants to break free. God knows he wants to breaaaak freeee.
Hooktayafeace tries a shoulder strike but it doesn't do any damage.
Hooktayafeace looking to throw knees to the head but McKinney is blocking nicely.
Hooktayafeace throws a knee to the head but misses.
McKinney lands a body shot.
Hooktayafeace has McKinney pressed against the cage, preventing McKinney from circling away and getting back to striking at range.
Hooktayafeace fails to pull the fight into his guard.
That's three failed takedown attempts in the round for Jamal Hooktayafeace. That's going to take a lot out of him.
A right hand to the body from McKinney.
Hooktayafeace throws a vicious knee straight up the middle but McKinney blocks it with crossed arms.

That's four minutes gone in the round.
Hooktayafeace is looking to score with knees to the body. Maybe he'll change it up and go body then head. McKinney is defending well for now.
Hooktayafeace with a knee to the head.
Hooktayafeace is breathing heavily.
McKinney working hard to break the clinch.
Hooktayafeace misses with a knee strike.
McKinney is trying to break the clinch but Hooktayafeace is controlling him.
McKinney wants to break free but Hooktayafeace has control.
McKinney wants to strike at distance but he can't break free of the clinch.
McKinney blocks a knee to the body. He'll have a nicely bruised forearm in the morning.
Hooktayafeace tries for a takedown. No joy.
A short right hand to the side of the head by McKinney.
McKinney is trying to push Hooktayafeace away but Hooktayafeace has him pressed against the cage, so he's going nowhere.
Hooktayafeace prevents McKinney from breaking the clinch.
Hooktayafeace has McKinney pressed against the cage.
Hooktayafeace using the Thai plumb to throw knees but McKinney has his back arched nicely, preventing the strike.
And thats the end of the round the fighters go back to their corners.
Jamal Hooktayafeace dominated that round.
Well, the break between rounds is over. Let's get back to the scrappin!

McKinney moves into the clinch.
A knee to the head by Hooktayafeace.
McKinney looks like he'd prefer to be striking at range right now.
McKinney misses with a hook to the ribs.
Hooktayafeace blocks a body shot from McKinney.
Hooktayafeace has McKinney pressed against the cage, preventing McKinney from circling away and getting back to striking at range.
Hooktayafeace wants to stall.
McKinney prevents the takedown attempt.
Hooktayafeace is working for takedown but McKinney is calmly controlling the position for now.
Hooktayafeace tries a knee to the head but he's missed.
We're hearing some news coming in from back stage. It's official - McKinney has eaten all the pies!
We've had a slow start to the round here - hopefully the action picks up.
Hooktayafeace jumps guard but his hands slip and he falls flat on his back. Well, he's made himself look a right mug there, as McKinney walks away with a smile on his face. Hooktayafeace gets slowly back to his feet and shakes his head.
That's three failed takedown attempts in the round for Jamal Hooktayafeace. That's going to take a lot out of him.
McKinney uses good footwork to get in and out, landing a nice hook.
McKinney scores with a hook.
McKinney lands a jab, followed by a cross and another cross, as Hooktayafeace backs up against the cage.

Hooktayafeace is rocked!

It looks like Jamal Hooktayafeace has been cut.
Steven McKinney seems to be getting the better of the standup.
McKinney throws a big shot that misses.
Oh Hooktayafeace is still all over the place! His legs are completely gone! Will he be able to recover?!!
McKinney moves into range and connects with a jab.
That's one minute gone in the round.
McKinney scores with a sloppy punch to the body. Not much technique there but it did the business.
Hooktayafeace clinches with his opponent.
Hooktayafeace seems to have got his legs back now.
Hooktayafeace tries to pull guard but McKinney won't allow it.
Hooktayafeace keeps control of McKinney as he tries to wriggle out of the double underhooks.
Hooktayafeace misses with some punches.
McKinney wants to break free but Hooktayafeace has control.
A short right from McKinney on the inside.
Hooktayafeace misses with a knee strike.
Hooktayafeace tries to take the fight to the ground by pulling guard but can't manage it.
Both fighters are absolutely exhausted here.
Hooktayafeace is trying to maintain a safe position but McKinney gets an underhook and turns Hooktayafeace into the cage.
Hooktayafeace keeps the fight in the clinch, despite McKinney's efforts to push away.
McKinney wants to break the clinch but can't.
McKinney wants to break free. God knows he wants to breaaaak freeee.
Hooktayafeace stalling here - the referee won't stand for too much of that.
That's two minutes gone in the round.
McKinney working hard to break the clinch.
Hooktayafeace stalling in the clinch but McKinney improves position.
McKinney blocks a punch to the side of the head.
Good anti-grappling being displayed by McKinney as Hooktayafeace tries to tie him up.
Hooktayafeace prevents McKinney from breaking the clinch.
Hooktayafeace tries to land a knee to the head but McKinney blocks with his arms.
McKinney tries to break free but Hooktayafeace pushes him back against the cage.
Hooktayafeace throws a knee to the head but misses.
McKinney tries to circle away but Hooktayafeace has him pinned against the cage.
Hooktayafeace looking to slow down the pace here.
Jamal Hooktayafeace has scored more points in the clinch so far.
McKinney is trying to break the clinch but Hooktayafeace is controlling him.
Hooktayafeace keeps control of McKinney as he tries to wriggle out of the double underhooks.
That's three minutes gone in the round.
A real battle for position is taking place between these two warriors.
McKinney is trying to force a seperation but Hooktayafeace has the dominant position.
McKinney has had enough of the clinch but Hooktayafeace keeps him there for the moment.
Hooktayafeace has McKinney pressed against the cage, preventing McKinney from circling away and getting back to striking at range.

McKinney pushes off and circles away, back to the middle of the mat.
Hooktayafeace is looking to clinch but McKinney is avoiding it.
Hooktayafeace takes a shot to the body in his stride.
Nice takedown defense from McKinney. No joy for Hooktayafeace on that attempt.
McKinney connects with a right hand. Hooktayafeace shakes it off.
Hooktayafeace tries to close the distance and clinch up but McKinney swats him away and circles back towards the center.
Jamal Hooktayafeace is looking to throw some combinations by the looks of things.
A nice combination there by McKinney.
Some wild striking there from McKinney.
McKinney lunges in with an uppercut that skims his opponent's chin.
Hooktayafeace has a takedown stuffed.
McKinney closes the distance and pushes Hooktayafeace back into the cage.
That's four minutes gone in the round.
Hooktayafeace tries to land a knee to the head but misses.
Hooktayafeace is trying to slow down the pace of the fight but McKinney is keeping busy.
Hooktayafeace is looking to score with knees to the body. Maybe he'll change it up and go body then head. McKinney is defending well for now.
Fantastic stuff here - a very entertaining period of action, which has drawn cheers from the crowd.
A hook to the body from McKinney.
Hooktayafeace can't get the takedown.
Hooktayafeace prevents McKinney from breaking the clinch.
McKinney tries to circle away but Hooktayafeace has him pinned against the cage.
Hooktayafeace tries to land a shot to the body but it's blocked.
McKinney blocks a punch to the side of the head.
McKinney tries to break the clinch but Hooktayafeace is controlling the position.
McKinney wants to break the clinch but can't.
McKinney softening up his opponent with strikes, against the cage.
And thats the end of the round the fighters go back to their corners.
Steven McKinney showed his class in that round. I'd imagine he'll take it on all the scorecards.
The cut man is working on Jamal Hooktayafeace's cut.
The fighters' corners scream their final instructions, as the referee calls time. Here we go, back to the action! This is the final round!

Hooktayafeace shoots for a takedown but McKinney saw that one coming a mile off and avoided it easily.
McKinney throws a body punch but Hooktayafeace moves out of range.
McKinney gets in close and instigates a clinch.
A battle for position here, against the cage.
McKinney tries to break the clinch but Hooktayafeace is controlling the position.
McKinney is trying to work out of this bad position, with his back against the cage.
Both guys are working to get underhooks.
McKinney tries to break free but Hooktayafeace pushes him back against the cage.
A battle for position here, against the cage.
Hooktayafeace lands a knee to the head.
We've had a slow start to the round here - hopefully the action picks up.
McKinney tries to circle away but Hooktayafeace has him pinned against the cage.
McKinney is working Hooktayafeace over against the cage.
McKinney struggles to land a body shot inside as Hooktayafeace controls his hands.
Hooktayafeace landing knees to the head.
That's one minute gone in the round.
Hooktayafeace keeps control of McKinney as he tries to wriggle out of the double underhooks.
A right hand to the body from McKinney.
McKinney tries to break the clinch but Hooktayafeace is controlling the position.
Hooktayafeace trying to stall but McKinney improves his position.
Hooktayafeace tries to land a knee to the head but McKinney blocks with his arms.
Both fighters are breathing heavily.
McKinney is trying to push Hooktayafeace away but Hooktayafeace has him pressed against the cage, so he's going nowhere.
Hooktayafeace is trying to slow down the pace of the fight but McKinney is keeping busy.
Hooktayafeace throws a vicious knee straight up the middle but McKinney blocks it with crossed arms.
Hooktayafeace looking for a takedown.
Hooktayafeace taking a breather.
McKinney is trying to break the clinch but Hooktayafeace is controlling him.
McKinney is trying to break free.
McKinney pushes off and circles away, back to the middle of the mat.
Hooktayafeace shoots in and drives through. McKinney sprawls well.
That's three failed takedown attempts in the round for Jamal Hooktayafeace. That's going to take a lot out of him.
That's two minutes gone in the round.
Hooktayafeace takes a body punch that cleary hurt but he's trying not to show any weakness.
McKinney cracks a nice hook into Hooktayafeace's ribs.
McKinney lands three nice shots there - that looked like it hurt!
McKinney misses with a wild combination.
McKinney ducks low and lands a nice hook to the body of his opponent.
McKinney throws a nice hook to the body that draws an oooh from the crowd.
Steven McKinney is looking to keep the fight on the feet at all costs.
Hooktayafeace tries to close the distance and clinch up but McKinney swats him away and circles back towards the center.
McKinney has been the more effective fighter overall so far.
McKinney lands with a shot to the body.
The fans in attendance giving it up for the two fighters, who have really let it all hang out in the last minute or so!
Hooktayafeace is looking to clinch.
McKinney clinches.
McKinney stops a takedown attempt from Hooktayafeace.
Hooktayafeace keeps the fight in the clinch, despite McKinney's efforts to push away.
A hook to the body from McKinney.
A frustrated look appears on McKinney's face as he tries to break the clinch.
That's three minutes gone in the round.
A frustrated look appears on McKinney's face as he tries to break the clinch.
Hooktayafeace misses the knee to the body. Nice hip positioning from McKinney.
McKinney is trying to break free.
Hooktayafeace has McKinney pressed against the cage, preventing McKinney from circling away and getting back to striking at range.
Hooktayafeace is trying to slow down the pace of the fight but McKinney is keeping busy.
McKinney is trying to break the clinch but Hooktayafeace has him pressed against the cage.
Hooktayafeace is trying to maintain a safe position but McKinney gets an underhook and turns Hooktayafeace into the cage.
McKinney is trying to break free.
Hooktayafeace misses with a knee to the head.
McKinney looks like he'd prefer to be striking at range right now.
McKinney tries a body shot but Hooktayafeace blocks it.
Hooktayafeace with a knee to the head.
That's four minutes gone in the round.
Well. There's a bit of a lull in the action here and the crowd are starting to get restless.
McKinney working hard to break the clinch.
A frustrated look appears on McKinney's face as he tries to break the clinch.
A short uppercut from McKinney.
A real battle for position is taking place between these two warriors.
McKinney lands a hook to the body. It's hard to tell if that hurt Hooktayafeace or not.
McKinney wants to break the clinch but can't.
McKinney working hard to break the clinch.
Hooktayafeace looking to stall.
Hooktayafeace using the Thai plumb to throw knees but McKinney has his back arched nicely, preventing the strike.
Hooktayafeace is trying to stall.
The crowd thankful this round is nearly over.
McKinney is trying to break the clinch but Hooktayafeace has him pressed against the cage.
Jamal Hooktayafeace has stepped it up - he knows he needs a finish here!
Steven McKinney is fighting for a decision here - he's started to take the cautious approach.
McKinney blocks a punch to the side of the head.
And that's the end of the fight!
Steven McKinney comfortably won the final round on my scorecard.
I think McKinney has won this one but let's see whether the judges agree with me. Over to the ring announcer for the scorecards.
Ladies and gentlemen, after 3 rounds of action, we go to the scorecards for a decision.
Judge Kenichi Hosakawa scores the fight for Steven McKinney!
Judge Yukihiro Shimada scores the fight for Steven McKinney!
Judge Yukihiro Yamamoto scores the fight for Steven McKinney!
Steven McKinney wins by unanimous decision!
|
|
|
|
|
|
|
|
|
|
|
|
|
|
|
|
|
|
|
|
|
|
|
| S |
C
A |
G |
S |
C
B |
G |
|
S |
C |
G |
|
energy
A | B |
|
hype
A | B |
|
pop
A | B |
|
mgr
A | B |
|
FIGHT
RATING
26% |
|
|
|
|
|
|
|
Co-main event
|
Coming up we have a lightweight MMA rules bout between Franky Bear (ranked 0 p4p, 0 weight class) and Hori Taka (ranked 0 p4p, 0 weight class). I can't wait for this one - let's get the fighter introductions out of the way and get this one started!
 |
|
 |
| 171 cm
18
163 lbs
1 - 0 - 0 |
|
175 cm
20
165 lbs
1 - 0 - 0 |
BJJ Purple Belt
Counter fighter
Good chin |
|
Good wrestler
Basic striking
Granite chin |
|
| |
|
Ladies and gentlemen. This fight is 3 rounds, in the lightweight division.
Introducing the fighter to my left, fighting out of the red corner.
With a record of
1 - 0 - 0, fighting out of Tokyo, Franky Bear!
And introducing the fighter to my right, fighting out of the blue corner.
With a record of
1 - 0 - 0, fighting out of Tokyo, Hori Taka!
The judges for this bout are Shirou Masuda, Yasuomi Hirokawa and Ren Mimura.
The bell rings for round one and we are underway!
Taka tries to clinch up against the cage, rushing in to close the distance. Bear manages to break the clinch and circles back to the middle of the mat.
Taka closes the distance and clinches.
Taka taking a break, stalling in the clinch.
Taka misses the knee to the body. Nice hip positioning from Bear.
Taka tries to throw a body punch but Bear avoids it by throwing Taka back against the cage.
Bear blocks a body shot from Taka.
Taka taking a break, stalling in the clinch.
Bear on the defensive, avoiding the knees to the body.
Taka has Bear pushed against the cage.
We've had a slow start to the round here - hopefully the action picks up.
Taka tries to land knees in the clinch but Bear avoids the damage to the body.
Stalling in the clinch from Taka.
Taka goes for a body shot but it's blocked.
That's one minute gone in the round.
Taka tries to land a shot to the body but it's blocked.
Taka effectively controlling the action here.
Taka tries a body shot but Bear blocks it.
Bear managing to block the knees to the body from Taka.
Taka is defending well against a takedown attempt.
Taka misses with a shot to the kidneys.
Bear tries to jump guard but he falls flat on his backside. Taka smiles and moves away.
Bear keeps the fight on the outside.
Taka moves into range and clinches up with Bear.
That's two minutes gone in the round.
Taka doesn't land with the attempted body shot.
Bear prevents a body shot from Taka.
Bear is looking for a takedown.
That's three failed takedown attempts in the round for Franky Bear. That's going to take a lot out of him.
Taka manages to get underhooks and slows down the pace for a moment.
Bear jumps guard but Taka stands there with Bear around his waist. Bear gives up and drops back to his feet. We remain in the clinch.
Taka stalling in the clinch.
Taka landing knees to the body.
That's three minutes gone in the round.
Bear blocking some punches.
Taka unloads a knee to the mid-section.
Taka tries a knee to the head but he's missed.
Taka lands a nice uppercut.
Bear has dropped down and is looking to force the takedown but it's defended by Taka after a bit of a struggle.
Taka misses with a body punch.
Taka tries to throw a body punch but Bear avoids it by throwing Taka back against the cage.
Bear goes for a takedown in the clinch but Taka prevents it.
Taka scores a nice knee to the body.
Some stalling of biblical proportions here from Taka.
That's four minutes gone in the round.
An uppercut on the inside fails to land for Taka.
Bear is trying to drag Taka to the mat but Taka just about manages to keep his footing. He used the cage to his advantage there.
Bear is looking for a takedown up against the cage. Taka gets underhooks though and prevents the takedown attempt.
Taka holding his opponent close, against the cage.
Taka trying to land knees to the body.
Boooooooooooooooooooo!!! God, this has been a terrible round. Come on you two, sort yourselves out!
Bear wants a takedown but no success here.
Bear avoiding damage as Taka throws knees to the body.
Taka tries to work over Bear's body with a swooping hook but it only glances the target.
And thats the end of the round the fighters go back to their corners.
Hori Taka dominated that round.
That's time! Back to the action!
Taka tries to clinch there but Bear circles away.
Taka fakes high and swings low for a body shot but Bear manages to avoid it.
Taka fails in his attempt to clinch.
Taka throws a jab but it's blocked by Bear.
Taka closes the distance and clinches.
Bear takes a knee to the side of the body.
Taka stalling against the cage.
Taka crunches a lovely knee into Bear's ribcage.
We've had a slow start to the round here - hopefully the action picks up.
Taka just leaning against Bear, taking a breather.
Taka is looking to score with knees to the body. Maybe he'll change it up and go body then head. Bear is defending well for now.
Taka can't find room to land a body shot as Bear controls the action.
Taka has been the more effective fighter overall so far.
That's one minute gone in the round.
Taka doesn't land with the attempted body shot.
Taka has Bear pressed against the cage.
Bear on the defensive, avoiding the knees to the body.
Bear managing to block the knees to the body from Taka.
Taka misses with a hook to the ribs.
Taka missing with knees to the body.
Taka misses with a punch to the body.
Come on Taka - let's have some action - none of this stalling nonsense.
That's two minutes gone in the round.
The crowd are getting on the fighters' backs, as the pace has dropped off in the last minute or so.
Taka tries to land a shot to the body but it's blocked.
Taka effectively controlling the action here.
Bear is trying to pull guard but being pressed up against the cage enables Taka to keep the fight standing.
Bear jumps guard but his hands slip and he falls flat on his back. Well, he's made himself look a right mug there, as Taka walks away with a smile on his face. Bear gets slowly back to his feet and shakes his head.
The fight moves into the clinch position.
Taka stalling here - the referee won't stand for too much of that.
Taka misses with a hook to the ribs.
That's three minutes gone in the round.
Bear fails to pull the fight into his guard.
That's three failed takedown attempts in the round for Franky Bear. That's going to take a lot out of him.
Taka avoiding damage.
Hori Taka seems to be working more effectively in the clinch in the fight so far.
Bear tries to take the fight to the ground by pulling guard but can't manage it.
Taka doesn't land with the attempted body shot.
Taka is stalling here. The referee will be looking to step in if he doesn't pick up the pace.
The ref breaks the fighters up, due to lack of action by Hori Taka.
Taka is looking to clinch.
That's four minutes gone in the round.
Well. There's a bit of a lull in the action here and the crowd are starting to get restless.
Taka has closed the distance and engaged Bear in a clinch.
Taka misses with a shot to the kidneys.
Bear tries to take the fight to the ground by pulling guard but can't manage it.
Taka misses with a shot to the kidneys.
Taka displaying some good clinch control by pressing Bear up against the cage.
Bear blocks an elbow strike.
Boooooooooooooooooooo!!! God, this has been a terrible round. Come on you two, sort yourselves out!
Taka crunches a lovely knee into Bear's ribcage.
The referee is keeping an eye on Taka - much more stalling and he will separate the fighters.
And thats the end of the round the fighters go back to their corners.
Hori Taka showed his class in that round. I'd imagine he'll take it on all the scorecards.
That's the end of the interval. I'm sure that seemed a lot quicker than a minute for our two fighters! Back to the action. This is the final round!
Bear shoots in but doesn't get the takedown
and Taka counters by moving into the clinch. Good anticipation by Taka.
Taka misses with a punch on the inside.
Bear is trying to pull guard but being pressed up against the cage enables Taka to keep the fight standing.
Taka trying to land knees to the body.
Taka controlling the action here for a moment.
Bear tries for a takedown. No joy.
That's three failed takedown attempts in the round for Franky Bear. That's going to take a lot out of him.
We've had a slow start to the round here - hopefully the action picks up.
Taka effectively controlling the action here.
Taka tries to land knees in the clinch but Bear avoids the damage to the body.
That's one minute gone in the round.
Taka stalls.
Taka misses with a hook to the ribs.
Taka can't find room to land a body shot as Bear controls the action.
Taka slows down the pace here.
Taka continues to stall. The referee tells him to work or he's going to break them up.
That's two minutes gone in the round.
The crowd are hurling abuse towards the fighters... You can hardly blame them though because there isn't a lot going on in the fight.
The ref breaks the fighters up, due to lack of action by Hori Taka.
Taka fails with an attempt to clinch.
Bear swats away the attempt to clinch by Taka.
Taka closes the distance and presses his opponent up against the cage.
Taka throws a head punch that misses.
Bear blocks a body shot from Taka.
Bear blocks a body shot from Taka.
Taka is stalling here. The referee will be looking to step in if he doesn't pick up the pace.
Taka tries to work over Bear's body with a swooping hook but it only glances the target.
That's three minutes gone in the round.
Taka missing with knees to the body.
Bear blocks a knee to the body. He'll have a nicely bruised forearm in the morning.
Taka tries to work over Bear's body with a swooping hook but it only glances the target.
Taka misses with a punch to the body.
Taka pushes Bear back against the cage and lands a hook to the side of the head.
Taka leaning against his opponent.
Bear drops down for a takedown but doesn't get it.
Taka tries to land a shot to the body but it's blocked.
That's four minutes gone in the round.
Bear tries to jump guard but he falls flat on his backside. Taka smiles and moves away.
Bear shoots in with a lovely double leg takedown. Taka manages to land in full guard to minimise the damage.
Taka keeping moving, preventing Bear from controlling successfully.
Taka trying to control the position.
Boooooooooooooooooooo!!! God, this has been a terrible round. Come on you two, sort yourselves out!
Taka trying to control the position here.
And that's the end of the fight!
Hori Taka comfortably won the final round on my scorecard.
I've got Taka winning every round here. Surely the decision will go his way and he'll pick up a well deserved decision victory. Over to the ring announcer for the scorecards.
Ladies and gentlemen, after 3 rounds of action, we go to the scorecards for a decision.
Judge Shirou Masuda scores the fight for Hori Taka!
Judge Yasuomi Hirokawa scores the fight for Hori Taka!
Judge Ren Mimura scores the fight for Hori Taka!
Hori Taka wins by unanimous decision!
|
|
|
|
|
|
|
|
|
|
|
|
|
|
|
|
|
|
|
|
|
|
|
| S |
C
A |
G |
S |
C
B |
G |
|
S |
C |
G |
|
energy
A | B |
|
hype
A | B |
|
pop
A | B |
|
mgr
A | B |
|
FIGHT
RATING
10% |
|
|
|
|
|
|
|
Main event
|
Coming up we have a lightweight MMA rules bout between Hiro Tsanaka (ranked 0 p4p, 0 weight class) and Julian Amber (ranked 0 p4p, 0 weight class). Hiro Tsanaka has the better chin. Will he look to stand and bang today?
 |
|
 |
| 180 cm
20
155 lbs
1 - 0 - 0 |
|
180 cm
20
165 lbs
1 - 0 - 0 |
BJJ Purple Belt
Brawler
Cuts easily |
|
BJJ Purple Belt
Basic striking
Intelligent |
|
| |
|
Ladies and gentlemen. This fight is 3 rounds, in the lightweight division.
Introducing the fighter to my left, fighting out of the red corner.
With a record of
1 - 0 - 0, fighting out of Tokyo, Hiro Tsanaka!
And introducing the fighter to my right, fighting out of the blue corner.
With a record of
1 - 0 - 0, fighting out of Tokyo, Julian Amber!
The judges for this bout are Shirou Masuda, Taro Takaoka and Sosuke Kotani.
The bell rings for round one and we are underway!

Amber shoots in looking for a single leg takedown. Tsanaka is trying to defend but Amber finishes it well and ends up in half guard. Let's see if he can advance position further.

Tsanaka looking for submissions off his back.
Amber perhaps working for something from half guard, or maybe not. It looks like he's just sitting there.
We've had a slow start to the round here - hopefully the action picks up.
That's one minute gone in the round.
Tsanaka trying to get back to full guard but Amber takes advantage of the position and moves to full mount!
Tsanaka tries to lock up and control but Amber gives him a forearm to the face and pushes him away.
Tsanaka is desperately trying to improve his position but Amber has a good base and remains in mount.
The ref warns both fighters not to hold the cage as they work up against the meshing.
Amber manages to capitalize on a mistake by Tsanaka to take his back!
Tsanaka turns into Amber and is now in his guard.
The fighters are pressed up against the cage, both looking to find a bit of space to work.
Tsanaka throwing shots from guard but he's hitting more mat than opponent.
That's two minutes gone in the round.
Tsanaka wants to stand but Amber is controlling his posture from full guard.
The fighters are going at a pretty good pace and they're both starting to sweat now.
Amber looking for submissions off his back, moving his hips, looking for an opening.
Amber has his feet on Tsanaka's thighs here. He's pushed Tsanaka off and worked for a very quick armbar from the bottom! He's flipped onto his stomach and he's cranking hard on the arm! Tsanaka screams in pain and taps out! This one is all over!
Ladies and gentlemen, after 2:37 of round 1, we have a winner by way of Submission (Armbar). Julian Amber!
|
|
|
|
|
|
|
|
|
|
|
|
|
|
|
|
|
|
|
|
|
|
|
| S |
C
A |
G |
S |
C
B |
G |
|
S |
C |
G |
|
energy
A | B |
|
hype
A | B |
|
pop
A | B |
|
mgr
A | B |
|
FIGHT
RATING
22% |
|
|
|
|
|
|
|
|
|
|
