 |
Happy Easters PBP Commentary |
Undercard bout
|
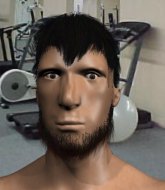
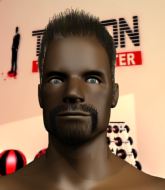
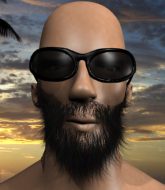
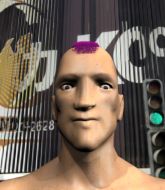
Coming up we have a super heavyweight MMA rules bout between Fujiyama Akagono (ranked 0 p4p, 0 weight class) and Conde Koma (ranked 0 p4p, 0 weight class). Both fighters look fresh as a daisy as they make their way towards the ring.
 |
|
 |
| 187 cm
19
184 lbs
1 - 1 - 0 |
|
175 cm
20
181 lbs
5 - 9 - 0 |
BJJ Purple Belt
Counter fighter
Big heart |
|
BJJ Blue Belt
Brawler
Granite chin |
|
| |
|
Ladies and gentlemen. This fight is 5 rounds, in the super heavyweight division.
Introducing the fighter to my left, fighting out of the red corner.
With a record of
1 - 1 - 0, fighting out of Tokyo, Fujiyama Akagono!
And introducing the fighter to my right, fighting out of the blue corner.
With a record of
5 - 9 - 0, fighting out of St Petersburg, Conde Koma!
The judges for this bout are Ren Mimura, Tatsuya Matsuyama and Hirohito Nitta.

The bell rings for round one and we are underway!
Koma misses with the combination.
Koma leaves Akagono with his face pressed against the mat as he sprawls beautifully, defending against a solid takedown attempt.
Koma throws an uppercut from half a mile away. Akagono sees it coming and avoids it easily.
Akagono stuffs a takedown. It's all about dictating where the fight takes place and Akagono wants it to stay on the feet.
Akagono moves out of range of the strikes.
Akagono throws a right and a left that Koma avoids nicely.
Koma is looking to clinch.

Koma gets caught flat footed, as Akagono shoots in with a quick takedown into guard.
Akagono loading up with the ground and pound but he's missing more than he's landing in this flurry.
The fighters are trapped in the ropes so we're going to have a reposition here. The ref calls for a break and repositions the fighters in the center of the ring.
Akagono not doing a lot at the moment. He'll have to show some more aggression or the fight will get stood up.
Akagono pressing down on his opponent's thigh, looking to pass guard. Koma is keeping the position for now.

That's one minute gone in the round.
Akagono advances position into side control!
Akagono definitely looks more muscular than last time we saw him fight.
Akagono lands a few punches from side control.

Akagono tries for a kimura. Not really close to a finish though.
Koma is trying to escape and get back to his feet.
Akagono scoring with punches and elbows.
Akagono prevents Koma from escaping the position.
Koma really doesn't want to stay on the ground with Akagono. If he can't get it back to his feet, it's only a matter of time before he'll be tapping out.
Akagono is looking to finish here, going for an Americana. Koma knows the correct defense though, so he's OK.
The fighters are tangled up in the ropes here. We might need a restart if the fighters can't break free themselves.
Akagono tries to land with some ground and pound but misses.
Akagono happy to just control the position for now.

That's two minutes gone in the round.
Akagono working hard here to secure a kimura but he's not really in the right position for it.
Koma is trying to escape and get back to his feet.
Koma is using up a lot of energy trying to get back to his feet. Perhaps he should improve his position first.
Akagono will need to keep those long limbs tucked in whilst he's on the ground, to prevent any submissions.
Akagono creates some space and throws a big elbow, but Koma sees it coming and moves his head just enough to avoid the strike.
We've seen a great period of action over the last minute or so - credit to both fighters for going all out!
Akagono working hard here to secure a kimura but he's not really in the right position for it.
Akagono is trying to get an arm triangle but Koma is defending well.

That's three minutes gone in the round.
Koma gives up the full mount - oops, sloppy defensive grappling there!
The fighters are starting to perspire pretty heavily.
Koma squirming around on the bottom, looking to escape.
Akagono can't quite control the action as he would like just now, as Koma is looking to escape.
Koma tries to buck Akagono off but he can't manage it.
Akagono misses with a series of strikes from mount. He'll no doubt be working on his ground and pound when he gets back to the gym.
Akagono wants to control the pace but Koma is squirming around nicely.
Koma avoids a series of strikes thrown by Akagono.
Akagono has his opponent pinned against the ropes, landing some nasty ground and pound that is really making a bit of a mess out of Koma's face.

That's four minutes gone in the round.
Koma wants to use the ropes to get back to his feet here.
Akagono is going oldschool here, as he tries to force Koma to tap using a forearm choke. This isn't 1993 though, so Koma shrugs it off.
Akagono tries to control but Koma wriggling away.
The crowd are loving this. Great action here.
Akagono throwing strikes here but Koma is writhing around nicely and avoiding any serious damage.
Akagono misses with a series of strikes from mount. He'll no doubt be working on his ground and pound when he gets back to the gym.
Akagono is going oldschool here, as he tries to force Koma to tap using a forearm choke. This isn't 1993 though, so Koma shrugs it off.
Koma wants to get back to his feet.
Akagono looking to ground and pound but Koma is blocking nicely.

That's five minutes gone in the round.
Akagono throwing shots from mount but they're not landing.
Akagono trying to control but he's not successful this time.
Koma blocking the ground and pound.
Koma really wants to buck Akagono off and get back to his feet.
Akagono misses with a head shot.
Akagono looking to control but Koma is working nicely, looking to advance position himself.
Koma is trying to stand.
Akagono looking to control but Koma is working nicely, looking to advance position himself.
Koma avoids a series of strikes thrown by Akagono.
Koma wants to try and get back to his feet.
Akagono lands a big shot there that rocks Koma but he's holding on and managing to survive for now.
Koma is in a horrible position here, under a barrage of strikes, he's managing to avoid any damage.
Akagono has been looking to land a fair amount of strikes on the ground. He might be looking to soften his opponent up in order to work for a submission.

That's six minutes gone in the round.
Akagono thowing strikes but they're hitting the gloves, not doing any damage.
Akagono throws some wild stikes that Koma manages to avoid easily.
The crowd are loving this. Great action here.
Akagono controlling the position easily from mount.
Akagono misses with a series of strikes from mount. He'll no doubt be working on his ground and pound when he gets back to the gym.
Akagono takes a little breather and maintains the position. The referee will be looking for him to stay active from such a dominant position though.
Akagono throws some wild stikes that Koma manages to avoid easily.
Akagono working to secure an arm triangle but it's not happening for him just yet.
You get the feeling that Koma really doesn't like being in this position too much.
Koma is squirming around, avoiding Akagono's attempts to control the action.
Koma trying desperately to get to his feet.

That's seven minutes gone in the round.
Akagono looking to control and managing it successfully.
You get the feeling that Koma really doesn't like being in this position too much.
Akagono trying to control but Koma is having none of it.
Akagono looking to control and managing it successfully.
Akagono won't let Koma get back to his feet... He wants to keep the fight where it is for now.
Akagono tries to control but Koma wriggling away.

That's eight minutes gone in the round.
Akagono throws some wild stikes that Koma manages to avoid easily.
Akagono looking to ground and pound but Koma is blocking nicely.
Akagono is giving the impression that he's looking to ground and pound but he switches suddenly into a beautiful far side armbar! Koma is forced to tap! Great finish!
Ladies and gentlemen, after 8:33 of round 1, we have a winner by way of Submission (Armbar). Fujiyama Akagono!
|
|
|
|
|
|
|
|
|
|
|
|
|
|
|
|
|
|
|
|
|
|
|
| S |
C
A |
G |
S |
C
B |
G |
|
S |
C |
G |
|
energy
A | B |
|
hype
A | B |
|
pop
A | B |
|
mgr
A | B |
|
FIGHT
RATING
34% |
|
|
|
|
|
|
|
Co-main event
|
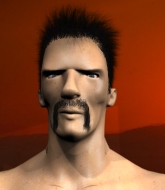
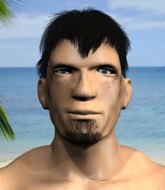
Coming up we have a lightweight MMA rules bout between Naya Shinoki (ranked 0 p4p, 0 weight class) and Shrab Kabovik (ranked 0 p4p, 0 weight class). Shinoki 's ring entrance music is that housewives' favourite, wadiako. The atmosphere really building for this one as we go over to our ring announcer for the fighter introductions!
 |
|
 |
| 180 cm
24
169 lbs
8 - 4 - 0 |
|
179 cm
25
160 lbs
1 - 3 - 0 |
BJJ Brown Belt
Counter fighter
KO power |
|
Decent wrestler
Brawler
Granite chin |
|
| |
|
Ladies and gentlemen. This fight is 5 rounds, in the lightweight division.
Introducing the fighter to my left, fighting out of the red corner.
With a record of
8 - 4 - 0, fighting out of Tokyo, Naya Shinoki !
And introducing the fighter to my right, fighting out of the blue corner.
With a record of
1 - 3 - 0, fighting out of Tokyo, Shrab Kabovik!
The judges for this bout are Hirohito Nitta, Shigeki Fujiwara and Shigeki Sano.
The bell rings for round one and we are underway!
A really sloppy takedown attempt there from Shinoki .
Kabovik looks frustrated there after his takedown attempt is stuffed easily.

Kabovik drops down and drives through with a powerful takedown into guard.
Shinoki is trying to control the position from the bottom.
Kabovik really doesn't want to stay on the ground with Shinoki . If he can't get it back to his feet, it's only a matter of time before he'll be tapping out.
Shinoki has managed to work for a loose triangle. I think Kabovik should be able to defend this one pretty easily though. Oh, Shinoki has tightened it up now! Kabovik should have reacted faster there - he's in big trouble and yes, he's tapped out! This one is all over!
Ladies and gentlemen, after 0:43 of round 1, we have a winner by way of Submission (Triangle). Naya Shinoki !
Naya Shinoki gave a mention to Kemists ↑ 5x160Q in his post fight interview. That will please them (and hopefully generate some sales).
|
|
|
|
|
|
|
|
|
|
|
|
|
|
|
|
|
|
|
|
|
|
|
| S |
C
A |
G |
S |
C
B |
G |
|
S |
C |
G |
|
energy
A | B |
|
hype
A | B |
|
pop
A | B |
|
mgr
A | B |
|
FIGHT
RATING
34% |
|
|
|
|
|
|
|
Main event
|
Coming up we have a super heavyweight MMA rules bout between William Barker (ranked 0 p4p, 0 weight class) and Oakley Bark (ranked 0 p4p, 0 weight class). Barker comes to the ring accompanied by The Way of the Fist - Five Finger Death Punch. Bark has chosen RUN DMC its like that as his entrance music. The atmosphere really building for this one as we go over to our ring announcer for the fighter introductions!
 |
|
 |
| 180 cm
36
182 lbs
31 - 17 - 0 |
|
190 cm
41
235 lbs
43 - 24 - 0 |
Abu Dhabi Champ
Lethal high kicks
Very quick |
|
Excellent grappler
Excellent boxer
Good gas tank |
|
| |
|
Ladies and gentlemen. This fight is 5 rounds, for the super heavyweight championship of the world!
Introducing the champion to my left, fighting out of the red corner.
With a record of
31 - 17 - 0, fighting out of Tokyo, William Barker!
And introducing the challenger to my right, fighting out of the blue corner.
With a record of
43 - 24 - 0, fighting out of Tokyo, Oakley Bark!
The judges for this bout are Shigeki Fujiwara, Tatsuya Matsuyama and Yuuki Gou.
The bell rings for round one and we are underway!

Barker instigates a clinch.
Barker is fighting off a takedown attempt but Bark is just too persistent for him and manages to trip Barker to the mat. Barker regains guard as soon as the fighters hit the mat.
Bark stopping the sweep attempt from Barker.

Bark drops back, looking for a kneebar! Barker looks panicked! The fighters roll across the mat, one looking to finish, one looking to escape. Barker looks to have wriggled free... Yes, he's got his leg free and he's dived into side control! Good work there from Barker!
Barker misses with a strike but at least he's keeping busy, looking to cause some damage - that will still help him when it comes to the judges scorecards.
The fighters are tangled up in the ropes here. We might need a restart if the fighters can't break free themselves.
Bark prevents Barker from improving position.
Barker wants to work for a kimura but he's foiled early by Bark, who protects the arm well.
Bark struggling a bit here.
Bark wants to get back to his feet.
That's one minute gone in the round.
Bark struggling a bit here.
Barker tries to cartwheel into mount but he doesn't manage it.
Bark sneaks a leg under to get back to half guard.
Bark is trying to control but can't.
Bark is trying to get back to full guard.
Barker wants to lay and pray for a moment but Bark keeps working.
Barker not landing any meaningful shots this time.
Bark makes his way to full guard. A much better position for Bark.
That's two minutes gone in the round.
Bark looking for submissions from the bottom here. Moving his hips around, possibly looking for an armbar.
Barker trying to control but Bark is working from the bottom.
Barker slips effortlessly into side control - very nice.
Barker in side control, throwing shots but Bark defends.
Barker creates some space and throws a big elbow, but Bark sees it coming and moves his head just enough to avoid the strike.
An elbow from Barker crashes against the mat.
Bark is looking to regain half guard here but Barker keeps moving and retains side control.
This has been an exciting period of action!
Barker working the ground and pound but Bark is defending the strikes.
That's three minutes gone in the round.
Bark is not content to let Barker control the position.
Bark takes a big shot right to the temple there but he's taken it well.
Bark is not content to let Barker control the position.
Bark avoids any damage from the ground and pound of Barker.
Barker wants to control but Bark is keeping him busy.
Bark is being controlled here.
Bark manages to get one leg in to regain half guard.
Barker seems to be looking for submissions.
That's four minutes gone in the round.
Bark is staying active underneath Barker, who seems content to just control the action from this position.
The fighters are trapped in the ropes so we're going to have a reposition here. The ref calls for a break and repositions the fighters in the center of the ring.
Bark is looking to sinch up a guillotine here but Barker pulls his head out easily.
Barker has freed up his trapped foot and advances to mount.
Barker misses with a head shot.
Barker with a couple of short strikes.
This is a great period of action - very entertaining stuff!
Bark regains half guard.
Barker looks towards his corner to check for any instructions. The corner give him nothing to work with, so he cracks Bark with a short hammerfist. I guess that's as good as any advice he could get in this position.

Bark kicks off Barker and gets to his feet.
Bark works his jab well there, keeping his opponent at a distance.
That's five minutes gone in the round.
Barker is on the wrong end of a nice combination from Bark.
Good exchange - Barker coming out on top.
Bark throws a loose over hand right and dives in with a double leg takedown. Barker tries to sprawl but it's too late and the fighters hit the mat. Bark is in Barker's guard.
Barker is throwing his legs up, looking for submissions. Bark is aware though and is defending well.
Barker keeping moving, preventing Bark from controlling successfully.
Bark pressing down on his opponent's thigh, looking to pass guard. Barker is keeping the position for now.
Barker looking to sweep here. No luck so far.
Barker had isolated an arm as going for a kimura. Bark defends it easily.
This is a great period of action - very entertaining stuff!
Bark trying to control but Barker is working from the bottom.
That's six minutes gone in the round.
Bark advances to half guard.
Bark is working for a submission of some sort.
Bark trying to pass the guard but Barker defending well.
Bark is sneakily working for an arm triangle but Barker sees it coming and defends easily.
Bark prevents Barker from improving his position.
Bark is working for submissions here but there's nothing on.
That's seven minutes gone in the round.
Barker is looking to improve his position.
Bark is looking for a kimura here.
Barker gets back to full guard.
Bark advances to half guard.
That's eight minutes gone in the round.
Barker wants to get back to full guard.
Bark is sneakily working for an arm triangle but Barker sees it coming and defends easily.
Bark is looking for a kimura here.
Barker manages to get to full guard.
Bark trying to control the position from guard on top but Barker is wriggling around, looking for whatever he can.

That's nine minutes gone in the round.
Barker looking for submissions off his back, moving his hips, looking for an opening.
Bark wants to control from the top but Barker keeps moving.
Bark is holding a leg here, probably looking for an ankle lock - he drops back and goes for it! Barker is in trouble! Is it all over??? No! Barker has escaped and now he's on top!
Barker throws an elbow that misses. Bark uses the momentum to reverse the position. He's now in Barker's guard. Nice move by Bark!
As the round comes to an end the crowd are showing their appreciation for a great round of action.
Bark wants to control from the top but Barker keeps moving.
Bark looking to sit in guard and control but Barker gets the butterfly guard and sweeps. He's now in the guard on the top.
And thats the end of the round the fighters go back to their corners.
A close round but Oakley Bark will probably get the nod.
That's time! Back to the action!

Barker throws a sloppy head kick
and Bark counters with a three punch combination, finished off with a leg kick. Nice work.
Barker misses with a head kick.
Bark gets the takedown into side control.
Bark goes for an armbar here - this could be all over! But no, Barker has escaped beautifully and is now on top in side control! Oh, that's unlucky for Bark but great work by Barker.
Barker is looking to finish here, going for an Americana. Bark knows the correct defense though, so he's OK.
Bark sneaks a leg under to get back to half guard.
Barker wants to control but Bark is keeping him busy.
The fans in attendance giving it up for the two fighters, who have really let it all hang out in the last minute or so!
Barker thumps the canvas. Not on purpose obviously - he just missed Bark's head.
Barker missing with some ground and pound from the half guard.
Bark tries to kick Barker off but Barker keeps his base steady and stays in half guard.
Bark actively working from the bottom here.
That's one minute gone in the round.
Barker is trying to control. Bark wants to improve his position but can't escape this time.
Bark wants to improve his position but Barker is controlling well.
Barker wants to pass the guard but Bark is defending well.
Bark is trying to stand up here but Barker is controlling him well.
Bark is looking to improve his position.
Barker is pressing down on Bark's thigh, looking to free his foot. Bark is holding on for now.
That's two minutes gone in the round.
Bark wants to get back to his feet.
Bark keeping his head moving to avoid the ground and pound.
Bark manages to get to full guard.
Barker trying to control but Bark is working from the bottom.
Bark has Barker pulled in close to control his posture.
Barker won't allow Bark to get back to his feet.
Bark looking for a guillotine here but Barker defends easily.
That's three minutes gone in the round.
A big thud reverberates around the arena there as Barker accidentally thumps the mat. Hopefully he's not broken his hand.
Barker working in close now, lands a nice elbow to the side of Bark's head.
Barker lands a nice shot whilst sitting in his opponent's guard.
Barker trying to control the position from guard on top but Bark is wriggling around, looking for whatever he can.
Barker throwing shots from guard but he's hitting more mat than opponent.
That's four minutes gone in the round.
Bark not looking particularly offensive just at the moment.
Bark has a loose triangle. He'll be looking to tighten that up but Barker can see exactly what he's planning and manages to posture up and free himself.
Barker wants to control from the top but Bark keeps moving.
Barker won't allow Bark to sweep him here.
Barker passes Bark's left leg - he's now in half guard.
Bark keeping his head moving to avoid the ground and pound.
Wooooo! Give it up for these two warriors! They are putting on a show!
Barker stops Bark from getting back to his feet.
Barker lands strikes from half guard.
Barker keeping composed on the top, looking to control the action.
That's five minutes gone in the round.
Bark trying to hold on to Barker's head to control him but Barker postures up.
Bark moves into full guard.
Barker won't allow Bark to get back to his feet.
Barker drops back, looking for a kneebar! Bark looks panicked! The fighters roll across the mat, one looking to finish, one looking to escape. Bark looks to have wriggled free... Yes, he's got his leg free and he's dived into side control! Good work there from Bark!
Barker tries to get back to half guard but can't.
Barker is in a tricky position but he's been working on his transitions down at Lock and Roll Grappling Gym, so we'll see if he gets out of it.
Both fighters are absolutely exhausted here.
Bark working hard here to secure a kimura but he's not really in the right position for it.
Barker is positioning himself to get back to half guard.
That's six minutes gone in the round.
Bark is looking to finish here, going for an Americana. Barker knows the correct defense though, so he's OK.
Bark laying and praying for a moment but Barker takes advantage and regains half guard.
Bark is looking for an arm triangle, whilst trying to pass to side control. Barker doesn't seem that keen to cooperate though. No luck this time Bark.
That's seven minutes gone in the round.
Bark is sneakily working for an arm triangle but Barker sees it coming and defends easily.
Barker works his way to full guard. Good work.
Bark won't allow Barker to sweep him here.
Bark trying to pass the guard but can't manage it just yet.
Barker wants to sweep but no luck.
Bark postures up as if he's going to throw some strikes but drops back for an ankle! Barker is in big trouble! He looks ready to tap! But no, he's escaped and dives on top of Bark, into his guard.
That's eight minutes gone in the round.
Bark trying to keep a closed guard but Barker is proving a slippery customer.
Bark utilising some decent striking defenses from the guard, preventing the ground and pound.
Barker throwing strikes but missing.
Barker working in close now, lands a nice elbow to the side of Bark's head.
Barker trying to pass the guard but can't manage it just yet.
Bark had isolated an arm as going for a kimura. Barker defends it easily.
Bark looking for a triangle here. Barker is fighting it but it looks tight! Bark pulls the arm across and this one won't last much longer! Nope, Barker is tapping out - this one is all over!
Ladies and gentlemen, after 9:58 of round 2, we have a winner by way of Submission (Triangle Choke). Oakley Bark!
Oakley Bark is the new super heavyweight champion!
Oakley Bark very nearly forgot to thank Project Mayhem amongst all the excitement of his win but just as the interview came to a close, he screamed their name. Hopefully he'll get a few nice freebies in the mail as a thank you.
|
|
|
|
|
|
|
|
|
|
|
|
|
|
|
|
|
|
|
|
|
|
|
| S |
C
A |
G |
S |
C
B |
G |
|
S |
C |
G |
|
energy
A | B |
|
hype
A | B |
|
pop
A | B |
|
mgr
A | B |
|
FIGHT
RATING
41% |
|
|
|
|
|
|
|
|
|
|
