 |
Extreme-MMA 20 PBP Commentary |
Undercard bout
|
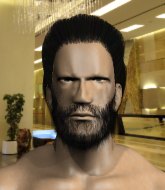
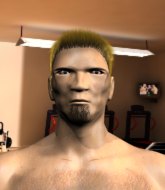
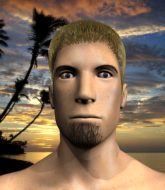
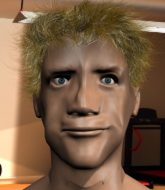
Coming up we have a heavyweight MMA rules bout between Rory Velko (ranked 0 p4p, 0 weight class) and Rowdy Rousey (ranked 0 p4p, 0 weight class). Chooooooooon! I think Velko might be my favorite fighter, now he's come out to Wild Eyes. Rousey has chosen Bad Reputation as his entrance music. Rory Velko had a look across the cage there at his opponent. He definitely means business
 |
|
 |
| 190 cm
29
260 lbs
8 - 10 - 1 |
|
200 cm
19
267 lbs
2 - 10 - 0 |
BJJ Blue Belt
Solid Muay Thai
Good chin |
|
BJJ Blue Belt
Brawler
Determined |
|
| |
|
Ladies and gentlemen. This fight is 3 rounds, in the heavyweight division.
Introducing the fighter to my left, fighting out of the red corner.
With a record of
8 - 10 - 1, fighting out of Sydney, Rory Velko!
And introducing the fighter to my right, fighting out of the blue corner.
With a record of
2 - 10 - 0, fighting out of Sydney, Rowdy Rousey!
The judges for this bout are Damien Edna, Donatello Bradman and Hugh Johnson.

The bell rings for round one and we are underway!
Velko moves into range and throws a combination. A nice jab followed by a hook to the body.
Rousey throws an uppercut from half a mile away. Velko sees it coming and avoids it easily.
Velko misses with a wild combination.

Rousey closes the distance and pushes Velko back into the cage.

Rousey manages to pull guard.
The fighters are pressed up against the cage, both looking to find a bit of space to work.
We must be close to a standup if these guys don't pick up the pace.

Velko decides he's had enough of playing guard and decides to stand. Come on Rousey, up you get!
Velko looks to have improved his striking defense since last time we saw him fight.
Velko throws a nice looking combination but Rousey bobs and weaves to avoid any damage.
Rousey dives in for a single leg takedown but Velko sprawls and the fighters end up clinched against the cage.
Rousey tries to pull guard but Velko forces him back to his feet, against the cage.
The crowd cheering loudly, showing their appreciation for the quality fight we're seeing here.
Velko can't break the clinch.

Velko breaks from the clinch.
Velko scores with a one two! Rousey had his feet all tangled up there and couldn't avoid the strikes.

That's one minute gone in the round.
Rousey misses with a takedown attempt - Velko sprawls well and throws a nice strike on the way out which just misses.
Rory Velko has stuffed three takedown attempts in the round now. That's going to take a lot out of Rowdy Rousey.
Rousey dodges the punch combination from Velko.
Rousey tries a switch kick but it misses it's target.
Rousey misses with a takedown attempt
and Velko counters with a crisp hook to the side of the head.
Rousey tries a switch kick but it misses it's target.
Rousey stumbles momentarily as he takes a strong leg kick from Velko.
Rousey looks winded!
Rousey has a takedown stuffed.
Velko connects with a hook to the side of his opponent's head.
Rowdy Rousey seems to be the more aggressive standup fighter in this bout.

That's two minutes gone in the round.
Velko lands three nice shots there - that looked like it hurt!
The fans in attendance giving it up for the two fighters, who have really let it all hang out in the last minute or so!
Velko lands a leg kick that knocks Rousey off balance momentarily.
Rousey takes a push kick to the midsection and stumbles backwards.

Oooooh!!! Velko has knocked Rousey down with a huge combo! Velko steps away and waves a wobbly Rousey back to his feet! This one might not go much longer!

Rousey is rocked!

It looks like Rowdy Rousey has been cut.
OH! Rousey has been rocked by a huge right hand and is in deep trouble! Velko smells blood and charges in for the finish! Velko unloads a vicious overhand right and connects to the jaw of Rousey sending him face first to the canvas! Unbelievable!
Ladies and gentlemen, after 2:33 of round 1, we have a winner by way of KO (Punches). Rory Velko!
Rory Velko thanked the fans post fight for their support.
|
|
|
|
|
|
|
|
|
|
|
|
|
|
|
|
|
|
|
|
|
|
|
| S |
C
A |
G |
S |
C
B |
G |
|
S |
C |
G |
|
energy
A | B |
|
hype
A | B |
|
pop
A | B |
|
mgr
A | B |
|
FIGHT
RATING
64% |
|
|
|
|
|
|
|
Undercard bout
|
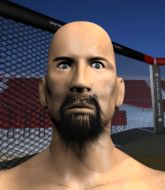
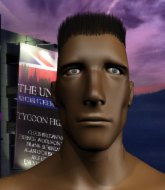
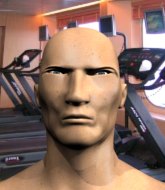
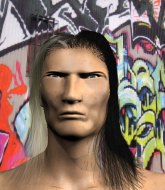
Coming up we have a heavyweight MMA rules bout between Arnold Schwarzenegger (ranked 0 p4p, 0 weight class) and Just Do It (ranked 0 p4p, 0 weight class). Over to our ring announcer for the fighter introductions!
 |
|
 |
| 200 cm
25
265 lbs
2 - 1 - 0 |
|
182 cm
26
265 lbs
1 - 2 - 0 |
BJJ Blue Belt
Solid boxing
Big heart |
|
BJJ Purple Belt
Excellent boxer
Heavy handed |
|
| |
|
Ladies and gentlemen. This fight is 3 rounds, in the heavyweight division.
Introducing the fighter to my left, fighting out of the red corner.
With a record of
2 - 1 - 0, fighting out of Sydney, Arnold Schwarzenegger!
And introducing the fighter to my right, fighting out of the blue corner.
With a record of
1 - 2 - 0, fighting out of Sydney, Just Do It!
The judges for this bout are Steve Erwin, Chris Dean and Darius Henderson.
The bell rings for round one and we are underway!
Schwarzenegger throws a sloppy head kick and Do It moves out of range easily.
Schwarzenegger tries a head kick but it misses.
Do It's coach down at Doctors Office: Throwdown was telling us pre-fight that they have been working on Do It's balance. Obviously they view that as a key factor in the outcome of this fight.
Schwarzenegger pulls out of a head kick attempt.
Some wild striking there from Do It.
Schwarzenegger avoids a punch combination nicely.
Do It blocks a head kick by Schwarzenegger.
Do It throws a jab but it's blocked by Schwarzenegger.
Do It throws a wild combination but nothing lands.
A head kick misses from Schwarzenegger.
Do It misses with a looping left.
Do It blocks a head kick by Schwarzenegger.
Do It misses with a two punch combination.
Schwarzenegger tries a head kick but it misses.
Schwarzenegger throws a head kick that misses.
A head kick misses from Schwarzenegger.
Schwarzenegger throws a head kick but Do It moves out of range.
Schwarzenegger pulls out of a head kick attempt.
Schwarzenegger throws a head kick that misses and slips in the process. He scrambles back to his feet and the fighters circle.
Do It looks to land a combination but Schwarzenegger avoids it well.
Do It throws an overhand right that lands on Schwarzenegger's shoulder, as Schwarzenegger tries to avoid the shot.
Do It ducks down and throws a big overhand right - it lands flush on the jaw, knocking Schwarzenegger out cold! The fight is over!
Ladies and gentlemen, after 1:58 of round 1, we have a winner by way of KO (Punch). Just Do It!
|
|
|
|
|
|
|
|
|
|
|
|
|
|
|
|
|
|
|
|
|
|
|
| S |
C
A |
G |
S |
C
B |
G |
|
S |
C |
G |
|
energy
A | B |
|
hype
A | B |
|
pop
A | B |
|
mgr
A | B |
|
FIGHT
RATING
54% |
|
|
|
|
|
|
|
Undercard bout
|
Coming up we have a light heavyweight MMA rules bout between Rafael Silva (ranked 0 p4p, 0 weight class) and Benito Carnera (ranked 0 p4p, 0 weight class). Carnera comes into a darkened arena with his song building. Liberi o no! kicks in, the lights come on and the crowd goes wild! What a showman! Rafael Silva had real problems making weight for this fight. After initially coming in at 207.1lbs, he had two hours to make the official fight weight. He made it but it will have taken a lot out of him to cut those extra few pounds. Benito Carnera will no doubt be trying to keep this one on the feet, where he has a distinct advantage.
 |
|
 |
| 195 cm
26
215 lbs
5 - 0 - 0 |
|
189 cm
19
208 lbs
1 - 0 - 0 |
Decent wrestler
Solid boxing
Big right hand |
|
BJJ Blue Belt
Excellent boxer
Determined |
|
| |
|
Ladies and gentlemen. This fight is 3 rounds, in the light heavyweight division.
Introducing the fighter to my left, fighting out of the red corner.
With a record of
5 - 0 - 0, fighting out of Rio de Janeiro, Rafael Silva!
And introducing the fighter to my right, fighting out of the blue corner.
With a record of
1 - 0 - 0, fighting out of Sydney, Benito Carnera!
The judges for this bout are Donatello Bradman, Damien Edna and Ben Hemmingworth.
The bell rings for round one and we are underway!
Carnera pushes forward with a 1-2 combination that forces Silva back to the cage. Carnera follows up with a solid lead hook to the liver.
Carnera lands a really nice looking cross but Silva seems unphased.
Silva misses with an uppercut
and Carnera counters with a lovely shot to the body.
The fight stays on the outside here - Silva looks like he's thinking about clinching though.
Carnera throws a left and a right that both miss

and Silva moves into the clinch.
Silva has a couple of punches blocked by Carnera.
Silva tries to throw a body punch but Carnera avoids it by throwing Silva back against the cage.
Silva keeps the fight in the clinch, despite Carnera's efforts to push away.
Carnera tries to circle away but Silva has him pinned against the cage.
Carnera with an attempt at a knee that misses.

Carnera's corner calls for him to break the clinch, which he does.
Good shot there by Carnera.
Silva has been working on his boxing with his coaches at Tenacity Elite - 17 Coaches in the buildup to the fight.
Carnera looks to land a combination but Silva avoids it well.
That's one minute gone in the round.
Silva waving his hands out in front of him, looking to distract Carnera.
Silva swings and misses with a hook to the body.
Both fighters are looking to counter, which isn't making for the most exciting fight in the world.
Carnera lands a straight punch to the body, keeping Silva at a distance.
Carnera cracks Silva with a nice right hand that draws applause from the crowd.
Silva takes one to the side of the head.
Carnera has been working on his striking defense in training and it's paying off as Silva is landing a low percentage of strikes.
Silva throws a predictable looking body shot
and Carnera counters with a lovely straight right hand!
Silva is breathing heavily.
Carnera looks to land a combination. Silva sees it coming but can only parry a couple of the shots.
Carnera lands with a straight right. Silva didn't see that one coming.
That's two minutes gone in the round.
Carnera lands with an overhand left.
We've seen a great period of action over the last minute or so - credit to both fighters for going all out!
Carnera works his jab well there, keeping his opponent at a distance.
A decent looking cross lands there for Carnera.

Silva is rocked!
Carnera throws a monster overhand right that drops Silva! Carnera follows up with more strikes from mount and the fight is all over!
Ladies and gentlemen, after 2:33 of round 1, we have a winner by way of TKO (Strikes). Benito Carnera!
Benito Carnera decided to thank the fans in attendance for making a great atmosphere. It seemed to go down pretty well.
|
|
|
|
|
|
|
|
|
|
|
|
|
|
|
|
|
|
|
|
|
|
|
| S |
C
A |
G |
S |
C
B |
G |
|
S |
C |
G |
|
energy
A | B |
|
hype
A | B |
|
pop
A | B |
|
mgr
A | B |
|
FIGHT
RATING
42% |
|
|
|
|
|
|
|
Undercard bout
|
Coming up we have a light heavyweight MMA rules bout between Floyd Pacquiao (ranked 0 p4p, 0 weight class) and John McNamara (ranked 0 p4p, 0 weight class). Pacquiao comes to the cage accompanied by Sometimes when we Fight. Floyd Pacquiao could well score a knockout today. He has the power to get to John McNamara's chin.
 |
|
 |
| 172 cm
28
205 lbs
9 - 5 - 0 |
|
180 cm
32
200 lbs
16 - 17 - 1 |
Good wrestling
Excellent boxer
Cardio machine |
|
Good wrestler
World class boxer
Good gas tank |
|
| |
|
Ladies and gentlemen. This fight is 3 rounds, in the light heavyweight division.
Introducing the fighter to my left, fighting out of the red corner.
With a record of
9 - 5 - 0, fighting out of Sydney, Floyd Pacquiao!
And introducing the fighter to my right, fighting out of the blue corner.
With a record of
16 - 17 - 1, fighting out of Sydney, John McNamara!
The judges for this bout are Eliza Hachem, Steve Erwin and Francis DeMontford.
The bell rings for round one and we are underway!
McNamara throws a big shot that misses.
McNamara throws a hard body shot but it just misses.
Floyd Pacquiao seems to be the more aggressive standup fighter in this bout.
McNamara throws a jab when Pacquiao was well out of range.
McNamara moves out of range as Pacquiao throws a body kick.
Pacquiao takes one to the side of the head.
A jab from McNamara misses.
McNamara looks to score with a jab to the body but Pacquiao is just out of range.
Pacquiao throws a head kick that misses.

McNamara tries to sprawl but Pacquiao drives through with a takedown into half guard.
We must be close to a standup if these guys don't pick up the pace.

Pacquiao is thinking about going for an arm triangle but he can't free his leg.
Pacquiao with the ground and pound but McNamara uses the opportunity to regain guard.
A big thud reverberates around the arena there as Pacquiao accidentally thumps the mat. Hopefully he's not broken his hand.
Pacquiao won't allow McNamara to get back to his feet.
That's one minute gone in the round.
Pacquiao drops back, looking for a kneebar! McNamara looks panicked! The fighters roll across the mat, one looking to finish, one looking to escape. McNamara looks to have wriggled free... Yes, he's got his leg free and he's dived into side control! Good work there from McNamara!
Pacquiao is positioning himself to get back to half guard.
McNamara has control of an arm but Pacquiao manages to advance to McNamara's back!
That's two minutes gone in the round.
McNamara wants to get back to his feet.
McNamara is in a world of trouble here. He's outmatched on the ground here and he'd better get Pacquiao off his back sharpish unless he wants to be submitted.
McNamara is having to fend off submission attempts from Pacquiao, who is looking to sink in the choke. Pacquiao doesn't have the hooks in though and McNamara manages to reverse position! He's now on top, in his opponent's guard.
Pacquiao looking to sweep here. No luck so far.
McNamara would like to get this fight back to the feet but can't get free from the closed guard.

That's three minutes gone in the round.
Pacquiao tries to land a sweep but no joy.
Pacquiao wants to stand up but McNamara is controlling him.
McNamara postures up.

The ref stands the fighters back up. Floyd Pacquiao wasn't doing enough on the ground.
Pacquiao throws a hard body shot but it just misses.
Pacquiao looks for a takedown here. Will he get it? McNamara is fending him off so far but Pacquiao persists. Nope, McNamara circles away and we're back to standing.
Pacquiao throws a series of strikes that have McNamara backpedaling.
McNamara wings a very wild body shot but it does the job and lands to the midsection.

That's four minutes gone in the round.
McNamara swings and misses with a hook to the body.
McNamara throws a lazy uppercut
so Pacquiao counters with a double leg into guard. Good agility.
Fantastic stuff here - a very entertaining period of action, which has drawn cheers from the crowd.
McNamara has a closed guard, preventing anything of note from happening. Perhaps he's looking to stall.
McNamara looking to sweep here. No luck so far.
Pacquiao pressing down on his opponent's thigh, looking to pass guard. McNamara is keeping the position for now.
Pacquiao working in close now, lands a nice elbow to the side of McNamara's head.
As the round comes to an end the crowd are showing their appreciation for a great round of action.
Pacquiao trying to pass the guard but can't manage it just yet.
And thats the end of the round the fighters go back to their corners.
Floyd Pacquiao dominated that round.
Well, the break between rounds is over. Let's get back to the scrappin!

Pacquiao moves his head to the side to avoid a jab but walks straight into a cross.
Pacquiao cracks a nice hook into McNamara's ribs.
McNamara looks to land a left hand but Pacquiao moved out of range nicely.
McNamara avoids the head kick by Pacquiao.
McNamara misses with a looping left.
Floyd Pacquiao is looking to throw some combinations by the looks of things.
Pacquiao darts in and lands a nice takedown into half guard.
Pacquiao is looking for a kimura. It's pretty deep but McNamara still has the half guard so he's probably OK. Oh, McNamara has exploded into a beautiful escape there and after a quick scramble, he's ended up in side control on top! Nice work!

McNamara stands up and beckons Pacquiao to his feet.
That's one minute gone in the round.
McNamara looks to throw the jab but Pacquiao is out of range.
McNamara rushes forward with a series of wild hooks but Pacquiao moves out of range and avoids them all easily.
Pacquiao uses good head movement to avoid the hook from McNamara.
Pacquiao throws a series of punches but McNamara avoids them all with ease.
Pacquiao moves away from the strike by McNamara.
McNamara throws a monster uppercut resembling something out of street fighter but it doesn't land.
McNamara throws a body punch but Pacquiao moves out of range.
Pacquiao shoots in for a double leg but McNamara sprawls well. That's going to sap some energy.
McNamara connects with a nice looking jab.
McNamara throws a monster uppercut resembling something out of street fighter but it doesn't land.
Pacquiao attempts a leg kick but it's missed by a good margin.
That's two minutes gone in the round.
McNamara cracks Pacquiao with a nasty uppercut that draws ooohs from the crowd and sends Pacquiao tumbling backwards onto the mat. He tries to recover but McNamara pounces and lands a hail of unanswered strikes that forces the referee to step in to end the fight! Pacquiao is not happy but he gave the referee no choice!
Ladies and gentlemen, after 2:06 of round 2, we have a winner by way of TKO (Strikes). John McNamara!
Our winner, John McNamara, made sure he spent some time buttering up the crowd during his post fight interview, which will no doubt bring him a few more fans.
|
|
|
|
|
|
|
|
|
|
|
|
|
|
|
|
|
|
|
|
|
|
|
| S |
C
A |
G |
S |
C
B |
G |
|
S |
C |
G |
|
energy
A | B |
|
hype
A | B |
|
pop
A | B |
|
mgr
A | B |
|
FIGHT
RATING
42% |
|
|
|
|
|
|
|
Undercard bout
|
Coming up we have a bantamweight MMA rules bout between Esta me Dinero (ranked 0 p4p, 0 weight class) and Aron Burza (ranked 0 p4p, 0 weight class). Burza has chosen Du Hast - Rammstein as his entrance music. I'm sure you'll be fascinated to know that I was talking to some pointless Z list celebrity before the fight and he thought that Aron Burza was going to win. Let's see if he was right.
 |
|
 |
| 185 cm
39
130 lbs
11 - 27 - 0 |
|
168 cm
26
148 lbs
5 - 0 - 0 |
BJJ Purple Belt
Excellent MT
Experienced |
|
Good wrestler
Basic striking
Good gas tank |
|
| |
|
Ladies and gentlemen. This fight is 3 rounds, in the bantamweight division.
Introducing the fighter to my left, fighting out of the red corner.
With a record of
11 - 27 - 0, fighting out of Sydney, Esta me Dinero!
And introducing the fighter to my right, fighting out of the blue corner.
With a record of
5 - 0 - 0, fighting out of Tokyo, Aron Burza!
The judges for this bout are Steve Erwin, Donatello Bradman and Hugh Johnson.
The bell rings for round one and we are underway!
Burza blocks a head kick by Dinero.
Burza drives through with a really nice takedown into side control.
If this pace continues, the referee will definitely step in and force a standup.

Burza is looking to finish here, going for an Americana. Dinero knows the correct defense though, so he's OK.
Burza is looking for a kimura. He might have it! No, Dinero has escaped the position, nice work there.
Burza scoring with punches and elbows.
Burza lands an elbow.
Dinero is rocked!
The fans in attendance giving it up for the two fighters, who have really let it all hang out in the last minute or so!
Burza is working for what looks like an arm triangle here. Dinero is trying to escape and Burza transitions quickly into an armbar! He's slapped it on tight and Dinero is forced to tap! Nice work there by Burza! Very nice indeed!
Ladies and gentlemen, after 1:59 of round 1, we have a winner by way of Submission (Armbar). Aron Burza!
An intense looking Aron Burza took to the microphone post fight and gave a little speech: 'I have a lot of things going on in my personal life. I might need to take some time away from the sport to clear my mind.'.
|
|
|
|
|
|
|
|
|
|
|
|
|
|
|
|
|
|
|
|
|
|
|
| S |
C
A |
G |
S |
C
B |
G |
|
S |
C |
G |
|
energy
A | B |
|
hype
A | B |
|
pop
A | B |
|
mgr
A | B |
|
FIGHT
RATING
71% |
|
|
|
|
|
|
|
Undercard bout
|
Coming up we have a heavyweight MMA rules bout between Johnny Hotsauce (ranked 0 p4p, 0 weight class) and Nathan Jones (ranked 0 p4p, 0 weight class). Nathan Jones will no doubt be trying to keep this one on the feet, where he has a distinct advantage.
 |
|
 |
| 188 cm
25
254 lbs
5 - 2 - 0 |
|
195 cm
25
282 lbs
3 - 3 - 0 |
Decent wrestler
Counter fighter
Very quick |
|
Decent wrestler
Decent boxing
Good gas tank |
|
| |
|
Ladies and gentlemen. This fight is 3 rounds, in the heavyweight division.
Introducing the fighter to my left, fighting out of the red corner.
With a record of
5 - 2 - 0, fighting out of Sydney, Johnny Hotsauce!
And introducing the fighter to my right, fighting out of the blue corner.
With a record of
3 - 3 - 0, fighting out of Sydney, Nathan Jones!
The judges for this bout are Summer Carpenter, Damien Edna and Hugh Johnson.
The bell rings for round one and we are underway!
Hotsauce bobs and weaves well there to avoid the strikes.
Jones throws a big shot that misses.
Hotsauce dives in and grabs Jones's left leg, looking for a takedown. Jones pushes down on Hotsauce's head and hops out.
Jones tests Hotsauce's chin there with a solid looking shot.

It looks like Johnny Hotsauce has been cut.
Jones pushing out the jab but it's not landing.
Hotsauce misses with a takedown attempt. He shot from a bit too far out.
Wooooo! Give it up for these two warriors! They are putting on a show!
A jab from Jones misses.
Jones throws a lazy right hand but Hotsauce sees it coming a mile off and sidesteps it easily.
Hotsauce closes the distance and after a bit of a stuggle, scores a takedown into Jones's guard.
Jones pulls Hotsauce in close to prevent any damage.
A big thud reverberates around the arena there as Hotsauce accidentally thumps the mat. Hopefully he's not broken his hand.
That's one minute gone in the round.
Jones pulls Hotsauce in close to prevent any damage.
Jones looking to control.

The ref calls for a clean break and stands the fighters back up. Nathan Jones wasn't active enough on the ground.
Jones connects with a good right hand that stumbles Hotsauce. Hotsauce circles away out of range and recomposes himself.
Hotsauce slips a jab from Jones.
Jones missing with a left hand there. Hotsauce was out of range so wasted energy throwing that one.
Jones throws an ugly left hook that misses
and Hotsauce counters with a single leg into guard. Jones didn't expect that.
Wooooo! Give it up for these two warriors! They are putting on a show!
Hotsauce is in close to Jones's body, working some short punches and elbows.
Hotsauce working from the guard for now, landing some ground and pound.
Hotsauce trying to land body shots but he keeps hitting the mat.
Jones avoiding any damage from the ground and pound.
Hotsauce throwing strikes but missing.
That's two minutes gone in the round.
Hotsauce lands a couple of elbows.
Jones wants to stand and escape but Hotsauce is having none of it.
Hotsauce in full guard, throwing the ground and pound. No damage this time.
Jones really doesn't want to stay on the ground with Hotsauce. If he can't get it back to his feet, it's only a matter of time before he'll be tapping out.
Jones looking to sweep here. No luck so far.
Hotsauce working from the guard for now, landing some ground and pound.
Jones keeping full guard, as Hotsauce tries to pass.
Hotsauce postures up.
Hotsauce makes a bit of distance and scores with some ground and pound, still in guard.
Hotsauce postures up to throw the ground and pound strikes but they don't connect.
Jones wants to stand and escape but Hotsauce is having none of it.
Hotsauce postures up to throw the ground and pound strikes but they don't connect.
Hotsauce is looking to work some ground and pound but Jones has wrist control.
That's three minutes gone in the round.
Hotsauce throws a big right hand that misses.
Jones looking for a sweep. Not yet Jones, not yet.
Jones wants to stand but Hotsauce is controlling the position.
Hotsauce makes a bit of distance and scores with some ground and pound, still in guard.
Jones keeping moving, preventing Hotsauce from controlling successfully.
Hotsauce missing there with some ground and pound from the guard.
Jones is controlling Hotsauce's posture.
Hotsauce with a nice head shot there.
Hotsauce with a couple of shots to the head there. Not particularly brutal.
Hotsauce lands a couple of decent looking shots.
That's four minutes gone in the round.
This is a great period of action - very entertaining stuff!
Hotsauce sneaks a leg through and gets to half guard. That was like a knife through butter how easily he passed Jones's guard.
Hotsauce scores with a couple of good hammerfists.
Hotsauce not throwing his punches with enough precision this time.
Jones is trying to get back to full guard.
Hotsauce thows a wild elbow that connects with the canvas.
Hotsauce has been looking to land a fair amount of strikes on the ground. He might be looking to soften his opponent up in order to work for a submission.
Hotsauce throwing punches and elbows but they're not doing any damage.
Hotsauce throwing punches and elbows but they're not doing any damage.
Hotsauce wants to take a breather but Jones is having none of it.
Hotsauce looks towards his corner to check for any instructions. The corner give him nothing to work with, so he cracks Jones with a short hammerfist. I guess that's as good as any advice he could get in this position.
The crowd are going absolutely nuts as the round comes to an end - what a fantastic round of action!
Jones keeping his head moving to avoid the ground and pound.
Hotsauce wants to take a breather but Jones is having none of it.
Hotsauce missing with some ground and pound from the half guard.
The fighters are pressed up against the cage, both looking to find a bit of space to work.
Jones taking some punishment here, with Hotsauce in his half guard.
And thats the end of the round the fighters go back to their corners.
Johnny Hotsauce dominated that round.
The cut man is working on Johnny Hotsauce's cut.
The fighters get back to their feet, the hooter sounds and we're back to the action!
Hotsauce takes one to the chin there.
Hotsauce has a takedown stuffed.
Hotsauce keeping his hands up high there, blocking the jab from Jones.
Johnny Hotsauce is looking to throw some combinations by the looks of things.
Jones throws an overhand right that lands on Hotsauce's shoulder, as Hotsauce tries to avoid the shot.
Jones jabs Hotsauce right on the nose. Hotsauce blinks but takes it well.
Hotsauce tries for a takedown but Jones sees it coming a mile off and avoids it easily.
Nice takedown defense from Jones. No joy for Hotsauce on that attempt.
Hotsauce looks to have improved his striking defense since last time we saw him fight.
That's three failed takedown attempts in the round for Johnny Hotsauce. That's going to take a lot out of him.
Jones cracks Hotsauce with a hook to the jaw. Both fighters smile at eachother and high-five before getting back down to business.
Fantastic stuff here - a very entertaining period of action, which has drawn cheers from the crowd.
Jones lands a leg kick. The shin dug right into the meat of the thigh.
Jones throws a hard body shot but it just misses.
Hotsauce walks into a straight right hand from Jones.
Johnny Hotsauce's cut is getting worse.
Nice takedown defense from Jones. No joy for Hotsauce on that attempt.

Jones cracks Hotsauce with a big right hand that sends him to the floor! Hotsauce looks wobbly but he's sprung back up to his feet straight away
can Jones finish him?
Hotsauce is rocked!
That's one minute gone in the round.
Jones pushing out the jab but it's not landing.
The fighters circling - Jones throws out the jab but it was never going to land.
Hotsauce slips under a jab.
Hotsauce looks for a takedown but Jones sprawls well.
Jones drops a shoulder and throws a monster hook that connects perfectly to the side of Hotsauce's head, knocking him out cold! Jones is extatic as he celebrates with his cornermen.
Ladies and gentlemen, after 1:25 of round 2, we have a winner by way of KO (Punch). Nathan Jones!
Nathan Jones seemed lost for words in his post fight interview but he remembered to thank his fans and directed everyone to his website.
|
|
|
|
|
|
|
|
|
|
|
|
|
|
|
|
|
|
|
|
|
|
|
| S |
C
A |
G |
S |
C
B |
G |
|
S |
C |
G |
|
energy
A | B |
|
hype
A | B |
|
pop
A | B |
|
mgr
A | B |
|
FIGHT
RATING
100% |
|
|
|
|
|
|
|
Undercard bout
|
Coming up we have a heavyweight MMA rules bout between Bob Boughner (ranked 0 p4p, 0 weight class) and Takuji Kawashima (ranked 0 p4p, 0 weight class). Boughner's entrance music is Mother. A fine choice. The key to victory for Bob Boughner has got to be keeping the fight on the feet.
 |
|
 |
| 190 cm
18
225 lbs
1 - 0 - 0 |
|
190 cm
19
280 lbs
4 - 0 - 0 |
BJJ Brown Belt
Basic striking
Granite chin |
|
Powerful takedowns
Basic striking
Good gas tank |
|
| |
|
Ladies and gentlemen. This fight is 3 rounds, in the heavyweight division.
Introducing the fighter to my left, fighting out of the red corner.
With a record of
1 - 0 - 0, fighting out of Sydney, Bob Boughner!
And introducing the fighter to my right, fighting out of the blue corner.
With a record of
4 - 0 - 0, fighting out of Sydney, Takuji Kawashima!
The judges for this bout are Summer Carpenter, Donatello Bradman and Ben Hemmingworth.
The bell rings for round one and we are underway!
Boughner misses with a low kick.
Boughner looking to throw a kick but he's pulled out of it.
Boughner thows a body shot but no joy.
Wow, both these guys are really going for it!
Boughner throws a hard body shot but it just misses.
Kawashima dives in and scores a takedown into Boughner's guard.
Boughner working a defensive guard here.
Kawashima with a nice head shot there.
Kawashima stays in close to Boughner's body and controls the position.
This is a great period of action - very entertaining stuff!
Boughner wants to control the position but Kawashima says "no thanks buddy" and passes to half guard.
Kawashima throwing shots but they're hitting the canvas more than the man.
Kawashima thows a huge punch but Boughner dodges it nicely.
Kawashima is trying for a guillotine from the top but the pressure isn't in the right place so Boughner is just riding it out for now. Kawashima eventually gives up the hold.
Kawashima is trying to work for a kimura. This could be trouble! No, Boughner has managed to free his arm - good work.
That's one minute gone in the round.
Kawashima is thwarting Boughner's attempts to control the position.
Kawashima has been taking part in the yoga sessions down at Sydney Elite Systems. Presumably he's going to look for a slick submission... Or maybe he's looking to avoid one.
Kawashima trying to mount his opponent but Boughner defends it.
Kawashima controlling the action here.
Kawashima lands with an elbow from half guard - that looked like it hurt.
Kawashima is looking for a kimura but he's never going to get it from there.
Still in half guard, Kawashima seems content to control.
Boughner is in a tricky position but he's been working on his transitions down at Finch Farm, so we'll see if he gets out of it.
That's two minutes gone in the round.
Kawashima thumps the canvas. Not on purpose obviously - he just missed Boughner's head.
Kawashima not doing much here.
Kawashima is sneakily working for an arm triangle but Boughner sees it coming and defends easily.
Kawashima seems content to maintain position for now, rather than mounting any offense.
Boughner gets back to full guard.
The fans in attendance giving it up for the two fighters, who have really let it all hang out in the last minute or so!
Kawashima is in close to Boughner's body, working some short punches and elbows.
Kawashima chips away with some ground and pound.
Kawashima works over Boughner with some ground and pound from guard.
Kawashima content to strike from guard, landing some decent shots.
Boughner looking to sweep here. No luck so far.
Boughner has an active guard here but Kawashima has managed to pass into half guard.
That's three minutes gone in the round.
Kawashima lands with an elbow from half guard - that looked like it hurt.
Boughner is trying to defend against the ground and pound but Kawashima scores with a couple of nice shots.
Boughner is breathing heavily.
Boughner is trying to defend against the ground and pound but Kawashima scores with a couple of nice shots.
The fans in attendance giving it up for the two fighters, who have really let it all hang out in the last minute or so!
Kawashima working some ground and pound from close in. He's looking to maintain this position and strike for a while by the looks of things... although he'll probably advance to full mount in a minute now I've said that.
Boughner trying to control here.
Kawashima perhaps working for something from half guard, or maybe not. It looks like he's just sitting there.
Boughner has hold of Kawashima's hands but Kawashima slips his arm to the side and lands an elbow.
Boughner has hold of Kawashima's hands but Kawashima slips his arm to the side and lands an elbow.
Kawashima creates some space for himself and unloads with a monster right hand! That one landed with a sickening thud - Boughner is out cold and this one is all over! Kawashima climbs onto the cage to celebrate with his corner!! He's shouting something into the camera but he's still got his mouthpiece in so God knows what he's actually saying.
Ladies and gentlemen, after 4:56 of round 1, we have a winner by way of KO (Strikes). Takuji Kawashima!
Takuji Kawashima managed to slip a mention for his sponsors, Kore Fight Nutrition [TG], into his post fight interview.
The defeated Bob Boughner had this to say: 'If i cant win in the ring, The Boogie Man will get you in your sleep'.
|
|
|
|
|
|
|
|
|
|
|
|
|
|
|
|
|
|
|
|
|
|
|
| S |
C
A |
G |
S |
C
B |
G |
|
S |
C |
G |
|
energy
A | B |
|
hype
A | B |
|
pop
A | B |
|
mgr
A | B |
|
FIGHT
RATING
67% |
|
|
|
|
|
|
|
Undercard bout
|
Coming up we have a light heavyweight MMA rules bout between Ed Gein (ranked 0 p4p, 0 weight class) and Michael Eldridge (ranked 0 p4p, 0 weight class). This should be a great matchup!
 |
|
 |
| 198 cm
35
217 lbs
16 - 12 - 0 |
|
188 cm
35
220 lbs
22 - 14 - 0 |
BJJ Purple Belt
World class boxer
Very quick |
|
BJJ Purple Belt
Great elbows
Heavy handed |
|
| |
|
Ladies and gentlemen. This fight is 3 rounds, in the light heavyweight division.
Introducing the fighter to my left, fighting out of the red corner.
With a record of
16 - 12 - 0, fighting out of Hilo, Ed Gein!
And introducing the fighter to my right, fighting out of the blue corner.
With a record of
22 - 14 - 0, fighting out of London, Michael Eldridge!
The judges for this bout are Topper Green, Eliza Hachem and Summer Carpenter.
The bell rings for round one and we are underway!
Gein blocks the body kick.
Eldridge takes a jab on the nose. He smiles like he loves it and keeps coming.
Gein throws a lazy right hand but Eldridge sees it coming a mile off and sidesteps it easily.
Gein looks to land a combination but Eldridge avoids it well.
Gein keeping a good distance there, avoiding the body shot.
A slow jab from Gein misses its intended target.
Gein scores with a jab to the jaw.
Gein throws a one two combo.
Gein wants to slow Eldridge down by chopping away at his legs.
Gein throws a nice looking combination but Eldridge bobs and weaves to avoid any damage.
Gein misses with a looping left.
Eldridge throws a feint and then finishes with a kick to the body.
Gein has been working on his boxing with his coaches at Steel Penn/Heavy Hands Gym in the buildup to the fight.
Gein looks to throw the jab but Eldridge is out of range.
Eldridge thumps Gein with a low kick.
A decent looking cross lands there for Gein.
Eldridge takes one to the chin there.
Eldridge steps to the side to avoid the strikes from Gein.
Wooooo! Give it up for these two warriors! They are putting on a show!
Gein throws out a loose jab but Eldridge uses good head movement to avoid it.
Gein takes a kick to the body and keeps moving.
That's one minute gone in the round.
Gein catches Eldridge with a nice straight right. He seems pissed - ooooh, it's on now! On like donkey kong!
Gein misses with a body kick.
Eldridge looking to land some kicks to the body here.
Eldridge looks to land a left hand but Gein moved out of range nicely.
Eldridge staying out of range there.
Gein throws a lazy uppercut
and Eldridge counters with a good low kick that Gein was not able to check.
Eldridge is looking to chop away at Gein's legs.
Gein is really head hunting here, hardly looking to strike to the body at all.
Eldridge punishes Gein's body with a nice straight punch.
Gein throws a combination but it was largely blocked by Eldridge.
Eldridge throws a series of punches but Gein avoids them all with ease.
Gein lands a right hook to the body.
Some wild striking there from Gein.
Eldridge throws a right hand that Gein ducks under and follows up with a left that Gein also avoids with ease.
Eldridge throws a head kick but Gein moves out of range.
Eldridge tries to clinch there but Gein circles away.
That's two minutes gone in the round.
Gein throws a body punch but Eldridge moves out of range.
Eldridge dodges the punch combination from Gein.
Eldridge misses the body punch
and Gein counters with a left and a right that stings Eldridge.
Gein misses with a two punch combination.
A decent looking body kick lands there for Eldridge.
Fantastic stuff here - a very entertaining period of action, which has drawn cheers from the crowd.
Gein takes an uppercut right on the jaw but it doesn't phase him.
Gein scores with a hook to the body. Eldridge takes a step back and tries to catch his breath.
Gein scores with a jab to the jaw.
Eldridge tries to close the distance and clinch up but Gein swats him away and circles back towards the center.
Eldridge takes one on the button.
Gein misses with a double jab.
Eldridge blocks a head kick by Gein.
Eldridge dips down and scores with a jab to the body.
Gein missing with a left hand there. Eldridge was out of range so wasted energy throwing that one.
Eldridge throws a hook to the body but it doesn't connect.
Gein misses with a jab, cross combination.
That's three minutes gone in the round.
Good work by Eldridge as he checks the leg kick.
Eldridge is looking to take this fight into the clinch.
Ed Gein seems to be the more aggressive standup fighter in this bout.
Eldridge takes one on the button.
Gein cracks Eldridge with an open hand slap.
Gein clobbers Eldridge with an overhand right that has the crowd gasping. That made a horrendous noise.
Eldridge throws a chopping leg kick but Gein manages to avoid taking any serious damage.
Gein throws a low kick, looking for Eldridge's leg but Eldridge calmly moves out of range.
Gein is looking to chop away at Eldridge's legs.
Gein fails to land with the punch combination there - jab, cross, hook, miss, miss, miss.
Gein looks to land a left hand but Eldridge moved out of range nicely.
Gein looks to land a combination but Eldridge avoids it well.
Gein fakes high and swings low for a body shot but Eldridge manages to avoid it.
Eldridge moves out of range of the strikes.
Gein misses with a head kick.
That's four minutes gone in the round.
Some wild striking there from Gein.
Gein is really peppering his opponent's head with punches.
Gein takes a body punch that cleary hurt but he's trying not to show any weakness.
Eldridge misses with a wild body shot.
Eldridge moves his head to the side to avoid a jab but walks straight into a cross.
Eldridge throws a hard body shot but it just misses.
Gein will need to tighten up his combinations if he doesn't want to gas himself out, swinging at thin air.
Eldridge misses with an uppercut. Gein saw that one coming.
Gein throws a hook to the side of Eldridge's head but Eldridge sees it coming and ducks under it beautifully.
Fantastic stuff here - a very entertaining period of action, which has drawn cheers from the crowd.
Eldridge connects with a leg kick. Gein looked like he was expecting something else and didn't defend it.
Eldridge moves into the clinch.
The crowd are going absolutely nuts as the round comes to an end - what a fantastic round of action!
Gein has had enough of the clinch and is looking to separate.
Eldridge dictating the pace here, as the fighters clinch against the cage.
Gein working hard to break the clinch.
And thats the end of the round the fighters go back to their corners.
That was a close round but I would say that Ed Gein will probably get the nod.
The corners get their ten second warning. Both fighters stand from their stools and stare eachother down, ready to get back to the action.
A slow jab from Eldridge misses its intended target.
Eldridge keeping his hands up high there, blocking the jab from Gein.
Eldridge loads up on a big right hand but Gein slips the punch.
Jab by Gein.
Gein misses with an uppercut. Eldridge saw that one coming.
Eldridge uses good footwork to get in and out and land a nice right hand before Gein has time to react.
Eldridge moves out of range of the leg kick from Gein.
Eldridge swings for the body but Gein moves out of range.
Eldridge slips a straight right by Gein.
Gein throws a monster uppercut resembling something out of street fighter but it doesn't land.
Eldridge has his head slapped from side to side by a 3 punch combination. That must have hurt him.
Gein looks to score with a combo but nothing lands.
Eldridge looks shocked there as he takes a right hand to the temple.
Gein scores with a jab.
Gein thuds his right hand into Eldridge's forehead from close range. That could be painful for both fighters.
Gein looks to land a combination. Eldridge sees it coming but can only parry a couple of the shots.
Gein blocks a head kick by Eldridge.
That's one minute gone in the round.
Gein lands a nice looking body shot.
Gein misses the shot to the body.
Eldridge lands a pitter patter jab to the forehead of his opponent.
A telegraphed right hand from Gein misses the target.
Gein scores with a nice right hand.
Gein throws out a token jab with nothing on it.
Gein misses with a body shot.
Gein takes a body punch but keeps moving.
Eldridge tries to clinch but is not successful on this occasion.
Left hook, right uppercut from Gein.
Gein tries to land with a swinging hook to the body but Eldridge was well out of range. Poor timing from Gein.
Eldridge scores with a three punch combo!
Gein tries to score with a low kick but Eldridge moves his leg out of the way.
A nice inside leg kick there by Eldridge. That's going to slow Gein down.
This is a great period of action - very entertaining stuff!
Gein missing with a left hand there. Eldridge was out of range so wasted energy throwing that one.
That's two minutes gone in the round.
Eldridge moves into range and clinches up with Gein.
Eldridge tries to land knees in the clinch but Gein avoids the damage to the body.
Eldridge misses with an elbow over the top.
Eldridge tries to land a knee to the body but he is off balance and Gein avoids it.
Eldridge using the Thai clinch to land knees to the body.
Eldridge tries to land knees in the clinch but Gein avoids the damage to the body.
Gein has had enough of the clinch and is looking to separate.
Gein has had enough of the clinch but Eldridge keeps him there for the moment.
Gein tries to break the clinch but Eldridge is controlling the position.
Gein can't break the clinch.
Eldridge lands a damaging elbow.
It looks like Ed Gein has been cut.
Eldridge lands a shoulder strike that jolts his opponent's head backwards.
Gein wants to get back to striking at distance but Eldridge won't allow it.
Gein tries to break the clinch but Eldridge is controlling the position.
The pace slowing considerably in the clinch, as Eldridge takes a break from that fighting nonsense to think about the finer things in life.
Eldridge lands a short shot on the inside that snaps the head of Gein backwards.
That's three minutes gone in the round.
Eldridge keeps control of Gein as he tries to wriggle out of the double underhooks.
Eldridge has Gein pressed against the cage, preventing Gein from circling away and getting back to striking at range.
Gein wants to strike at distance but he can't break free of the clinch.
Gein is trying to push Eldridge away but Eldridge has him pressed against the cage, so he's going nowhere.
Gein wants to push off and get back to the center of the mat but Eldridge has him pressed against the cage.
Gein wants to break free. God knows he wants to breaaaak freeee.
Eldridge keeps the fight in the clinch, despite Gein's efforts to push away.
Gein is trying to force a seperation but Eldridge has the dominant position.
The referee calls for Eldridge to work.
Gein manages to break the clinch.
Eldridge lands a jab to the head.
Gein falls off balance throwing a combination
and Eldridge counters with a good low kick that Gein was not able to check.
That's four minutes gone in the round.
Gein throws a jab when Eldridge was well out of range.
Eldridge steps to the side to avoid the strikes from Gein.
Gein looks to land a right hand but Eldridge moved out of range.
Gein throws a jab but it's blocked by Eldridge.
Eldridge tries to clinch up but Gein circles away and keeps his distance.
Gein throws a hook to the side of Eldridge's head but Eldridge sees it coming and ducks under it beautifully.
Eldridge is throwing a lot of body shots here, looking to wear down Gein rather than just go for the knockout.
Eldridge dips down and scores with a jab to the body.
The fans in attendance giving it up for the two fighters, who have really let it all hang out in the last minute or so!
Eldridge is on the wrong end of a nice combination from Gein.
Both fighters are absolutely exhausted here.
Gein throws a body kick but he wasn't in range.
Eldridge throws a combination but it was largely blocked by Gein.
Gein takes a step back and watches a body kick go sailing past his mid section.
The crowd are going absolutely nuts as the round comes to an end - what a fantastic round of action!
Eldridge steps to the side to avoid the strikes from Gein.
Eldridge tries a switch kick but it misses it's target.
Eldridge misses with a body shot. Nice footwork from Gein.
Eldridge displays some good footwork, moving neatly out of range as Gein throws out the jab.
And thats the end of the round the fighters go back to their corners.
A close second round but Michael Eldridge will probably get the nod - 10:9.
The cut man is working on Ed Gein's cut.
The corners get their ten second warning. Both fighters stand from their stools and stare eachother down, ready to get back to the action. Let's hear some noise people - this is the final round!

Gein takes one on the chin but seems OK.
Nice body punch from Gein.
Gein scores with a jab.
Eldridge throws a hook to the body but it doesn't connect.
Eldridge throws a head kick that misses and slips in the process. He scrambles back to his feet and the fighters circle.
Gein fails to land with the punch combination there - jab, cross, hook, miss, miss, miss.
Gein fakes low and throws an overhand right that catches Eldridge on the side of the head.
Gein lands a slapping body shot.
Ed Gein is looking to throw some combinations by the looks of things.
No joy there for Gein, who threw a few shots but didn't land.
Gein connects nicely with a jab. Noted by the judges no doubt.
Gein blocks a jab.
Eldridge misses with a head kick.
Eldridge avoids a kick to the body.
Gein moves into range and throws a lovely three punch combination.
Eldridge motions for Gein to come forward. Eldridge throws a leg kick but it misses it's target.
Eldridge has a pretty nasty looking mouse under his right eye.
That's one minute gone in the round.
Eldridge thows a left - swing and a miss!
Eldridge misses with a double jab.
Eldridge throws a right and a left that both miss.
Gein misses with a jab, cross combination.
Eldridge misses with a body shot. Nice footwork from Gein.
Gein throws a jab to the body, straight down the pipe. Boom. That sent Eldridge stumbling backwards but he manages to regain his composure quickly.
Eldridge fakes high and swings low for a body shot but Gein manages to avoid it.
Eldridge wants to clinch.
Eldridge throws a head kick that misses
and Gein counters with a right hand to the body.
Eldridge takes a big intake of breath there - he's definitely tired.
Gein with a body punch. A glancing blow.
A punch combination from Gein misses.
Decent striking displayed by Gein there.
Gein uses good footwork to get in and out and land a nice right hand before Eldridge has time to react.
Eldridge tries a switch kick but it misses it's target.
Eldridge cracks Gein with a good jab.
That's two minutes gone in the round.
Gein lands a lovely overhand right.
Eldridge scores with a sloppy right hand. Gein should have avoided that one.
Gein throws a monster uppercut resembling something out of street fighter but it doesn't land.
Eldridge misses with a head kick.
Gein lands a two punch combo.
This is a great period of action - very entertaining stuff!
Eldridge tries to land with a swinging hook to the body but Gein was well out of range. Poor timing from Eldridge.
Gein misses with a straight left.
Gein throws a feint and then finishes with a kick to the body.
Eldridge checks a low kick from Gein.
Gein looks to land a left hand but Eldridge moved out of range nicely.
Eldridge tries to clinch but Gein moves out of range.
A punch combination from Gein misses.
Gein digs a good body shot into Eldridge's ribs.
Eldridge avoids a lazy jab quite easily.
That's three minutes gone in the round.
Gein uses decent footwork to sidestep a right hand from Eldridge.
A big right from Eldridge misses.
Eldridge swings wildly with a right hand that was never going to find it's target.
Gein throws a combination but it was largely blocked by Eldridge.
Eldridge gets his head snapped back by a nice shot there.
Gein throws a sloppy head kick and Eldridge moves out of range easily.
Gein staying out of range there.
Eldridge attempts a leg kick but it's missed by a good margin.
Eldridge rushes forward with a series of wild hooks but Gein moves out of range and avoids them all easily.
Eldridge blocks a leg kick.
Gein uses some good footwork to avoid the body shot by Eldridge.
Gein misses with a leg kick
letting Eldridge counter with a right hand.
Gein throws out a token jab with nothing on it.
Eldridge takes one on the chin but seems OK.
That's four minutes gone in the round.
Gein misses with a jab and misses with a cross straight after too.
Gein lands with a good body shot.
Gein throws a good cross that connects.
Gein looks to score with a combo but nothing lands.
Gein throws a right hand that Eldridge ducks under and follows up with a left that Eldridge also avoids with ease.
Gein misses with a straight right.
Eldridge slips a jab from Gein.
Eldridge slips a straight right by Gein.
Gein takes a swing at Eldridge's ribcage but misses.
Ed Gein is winning the standup battle so far.
Eldridge misses with a looping left.
Gein jabbing away but nothing is landing.
Fantastic stuff here - a very entertaining period of action, which has drawn cheers from the crowd.
As the round comes to an end the crowd are showing their appreciation for a great round of action.
Gein misses with a body shot. Nice footwork from Eldridge.
Eldridge looks to score with a jab to the body but Gein is just out of range.
A big right from Gein misses.
Gein swings away but doesn't land with a series of punches.
And that's the end of the fight!
Ed Gein showed his dominance in that final round.
I think Gein has won this one but let's see what the judges have to say. Over to the ring announcer for the scorecards.
Ladies and gentlemen, after 3 rounds of action, we go to the scorecards for a decision.
Judge Topper Green scores the fight 29:28
Judge Eliza Hachem scores the fight 29:28
Judge Summer Carpenter scores the fight 28:29
In favor of your winner, by split decision... Ed Gein!
|
|
|
|
|
|
|
|
|
|
|
|
|
|
|
|
|
|
|
|
|
|
|
| S |
C
A |
G |
S |
C
B |
G |
|
S |
C |
G |
|
energy
A | B |
|
hype
A | B |
|
pop
A | B |
|
mgr
A | B |
|
FIGHT
RATING
90% |
|
|
|
|
|
|
|
Co-main event
|
Coming up we have a heavyweight MMA rules bout between El Pintos (ranked 0 p4p, 0 weight class) and Matthew Lucas (ranked 0 p4p, 0 weight class). Lucas has chosen Jesus I Was Evil as his entrance music. These two fighters really are very evenly matched on the feet - it will be fascinating to see who can assert themselves in that aspect of the fight.
 |
|
 |
| 189 cm
26
264 lbs
6 - 7 - 0 |
|
200 cm
25
290 lbs
9 - 2 - 0 |
Good wrestling
World class MT
Insanely flexible |
|
Good wrestler
Good kicks
Granite chin |
|
| |
|
Ladies and gentlemen. This fight is 3 rounds, in the heavyweight division.
Introducing the fighter to my left, fighting out of the red corner.
With a record of
6 - 7 - 0, fighting out of Sydney, El Pintos!
And introducing the fighter to my right, fighting out of the blue corner.
With a record of
9 - 2 - 0, fighting out of Sydney, Matthew Lucas!
The judges for this bout are Damien Edna, Bruno Hogan and Steve Erwin.
The bell rings for round one and we are underway!
Lucas jabbing away but nothing is landing.
Pintos stooping low to avoid any incoming strikes and then lunges in with an uppercut come cross that lands flush.
Lucas is looking to land body kicks.
Lucas throws a hook to the side of Pintos's head but Pintos sees it coming and ducks under it beautifully.
Lucas throws a leg kick that misses.
Pintos fakes a head shot and lands one to the body.
Pintos misses with a looping left.
Lucas with a nice cross.
Pintos shapes like he's going to throw a leg kick but settles back down.
Pintos throws a right hand that Lucas ducks under and follows up with a left that Lucas also avoids with ease.
Lucas throws a jab to the body, straight down the pipe. Boom. That sent Pintos stumbling backwards but he manages to regain his composure quickly.
Pintos scores with a kick to the body.
This is a great period of action - very entertaining stuff!
Lucas misses with a body shot. Nice footwork from Pintos.
Pintos lands a jab to Lucas's midsection.
Lucas thows a left - swing and a miss!
That's one minute gone in the round.
Good leg kick by Pintos there. It's the ones that make that thud noise that hurt and that was an almighty thud.
Lucas doesn't react quick enough there as he takes a shot to the body.
Pintos lunges in with an uppercut that skims his opponent's chin.
Lucas throws a body kick but he was well out of range there.
Pintos jabs Lucas right on the nose. Lucas blinks but takes it well.
Lucas closes the distance and takes a jab right on the nose as he does so.
The crowd cheering loudly, showing their appreciation for the quality fight we're seeing here.
Lucas misses with a lunging right hand
and Pintos counters with a nice kick to the body.
Pintos looking to land some kicks to the body here.
Pintos connects with a body shot that sends Lucas's belly button to the back.
Pintos scoring well with a low kick there.
Lucas looks winded!
Pintos digs a good hook to Lucas's body.
Pintos throws out a powerful jab.
Pintos lands three nice shots there - that looked like it hurt!
That's two minutes gone in the round.
Pintos throws out a powerful jab.
Pintos misses with a half-hearted attempt at a head kick.
Pintos dips to his left and cracks Lucas with an uppercut!
Pintos lands with a shot to the body.
Pintos connects with an inside leg kick.
Decent striking displayed by Pintos there.
Lucas throws a looping overhand right but Pintos ducks down to avoid it.
Lucas jabs Pintos to the body, keeping him at a distance.
Pintos is really peppering his opponent's head with punches.
Pintos scores with a push kick.
A looping hook to the body misses from Pintos. Lucas does a little dance to reset his feet.
Lucas takes one on the button.
Pintos connects with a solid leg kick.
That's three minutes gone in the round.
Pintos stuns Lucas with a nice body shot, before stepping back out of range.
Pintos lands a nice leg kick that just misses Lucas's sensitive parts.
Pintos dips to his left and cracks Lucas with an uppercut!
Lucas takes a jab right on the nose. That must have hurt but he shrugs his shoulders and looks to return the favor.
Pintos throws a nice outside leg kick.
The fighters circle, before Pintos throws a beautiful high kick that crashes into Lucas's neck, sending him stumbling to the floor! Pintos lands more strikes and forces a referee stoppage! That one ended in an instant!
Ladies and gentlemen, after 3:32 of round 1, we have a winner by way of TKO (Kick & Punches). El Pintos!
El Pintos thanked the fans post fight for their support.
|
|
|
|
|
|
|
|
|
|
|
|
|
|
|
|
|
|
|
|
|
|
|
| S |
C
A |
G |
S |
C
B |
G |
|
S |
C |
G |
|
energy
A | B |
|
hype
A | B |
|
pop
A | B |
|
mgr
A | B |
|
FIGHT
RATING
59% |
|
|
|
|
|
|
|
Main event
|
Coming up we have a heavyweight MMA rules bout between Idi Ota (ranked 0 p4p, 0 weight class) and Patrick Harper (ranked 0 p4p, 0 weight class). These two fighters really are very evenly matched on the feet - it will be fascinating to see who can assert themselves in that aspect of the fight.
 |
|
 |
| 184 cm
25
287 lbs
16 - 9 - 0 |
|
183 cm
20
263 lbs
6 - 0 - 0 |
Good wrestling
Great elbows
Very strong |
|
BJJ Blue Belt
Solid Muay Thai
Solid chin |
|
| |
|
Ladies and gentlemen. This fight is 3 rounds, in the heavyweight division.
Introducing the fighter to my left, fighting out of the red corner.
With a record of
16 - 9 - 0, fighting out of Los Angeles, Idi Ota!
And introducing the fighter to my right, fighting out of the blue corner.
With a record of
6 - 0 - 0, fighting out of Sydney, Patrick Harper!
The judges for this bout are Topper Green, Steve Erwin and Skip Squint.
The bell rings for round one and we are underway!
Ota clinches.
Harper wants a takedown but no success here.
Harper tries to pull guard but can't drag his opponent to the mat. Ota just stands there and leans against the cage.
Ota lands a nice uppercut.
With the fighters up against the cage, Harper throws an elbow but misses.
Harper is trying to pull guard but Ota turns him against the cage and we stay in the clinch.
Idi Ota has stuffed three takedown attempts in the round now. That's going to take a lot out of Patrick Harper.
Ota connects with a knee to the head.
It looks like Patrick Harper has been cut.
Ota lands an elbow inside.
Ota trying to land knees to the body.
Harper takes a knee right on the jaw!
A left hand lands to the body for Ota.
This is a great period of action - very entertaining stuff!
Ota unloads a knee to the mid-section.
Harper looks winded!
Ota creates a bit of space for himself and sneaks an elbow through Harper's defenses.
Ota lands a shot to the body.
Ota throws a blind hook that connects with the side of Harpers head.
Harper takes a knee right on the jaw!
Ota lands a nice knee to the body.
Ota lands a damaging elbow.
Ota working Harper over with knees to the body.
That's one minute gone in the round.
Harper's head jolts backwards as he takes an uppercut right on the button!
Ota utilising his Muay Thai to score with a knee to the body.
Harper has been looking to improve his clinch game in recent weeks. Ota seems to have the measure of him in the clinch so far, so let's see if Harper can turn it around.
Ota lands a hook to the body. It's hard to tell if that hurt Harper or not.
Ota lands a body shot.
Ota lands a body shot.
The fans in attendance giving it up for the two fighters, who have really let it all hang out in the last minute or so!
A knee to the head by Ota.
Ota utilising his Muay Thai to score with a knee to the body.
Our sources have told us that Ota has been working on his elbows in the gym.
Ota lands a knee to the head there! That was nasty!
Ota landing some nice looking knees to the body.
Ota throws a big uppercut that drops Harper! More strikes from Ota and the referee jumps in to stop the fight! Harper lies dazed against the cage as Ota celebrates with his cornermen!
Ladies and gentlemen, after 1:50 of round 1, we have a winner by way of TKO (Strikes). Idi Ota!
In defeat, Patrick Harper stepped up to the mic, saying 'He's a good fighter, and I will learn a lot from this experience. I'll be back stronger and better than I am now!'.
|
|
|
|
|
|
|
|
|
|
|
|
|
|
|
|
|
|
|
|
|
|
|
| S |
C
A |
G |
S |
C
B |
G |
|
S |
C |
G |
|
energy
A | B |
|
hype
A | B |
|
pop
A | B |
|
mgr
A | B |
|
FIGHT
RATING
100% |
|
|
|
|
|
|
|
|
|
|
