 |
LMS 7th War PBP Commentary |
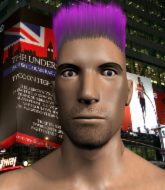
Undercard bout
|
|
|
|
Undercard bout
|
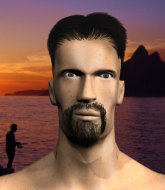
Coming up we have a super heavyweight MMA rules bout between Scott Cliffton (ranked 0 p4p, 0 weight class) and Terence Ready (ranked 0 p4p, 0 weight class). Scott Cliffton has a significant reach advantage - let's see if he can make it count.
 |
|
 |
| 195 cm
17
250 lbs
2 - 2 - 0 |
|
153 cm
18
262 lbs
1 - 2 - 0 |
BJJ White Belt
Excellent boxer
Very strong |
|
BJJ White Belt
Excellent MT
Good gas tank |
|
| |
|
Ladies and gentlemen. This fight is 3 rounds, in the super heavyweight division.
Introducing the fighter to my left, fighting out of the red corner.
With a record of
2 - 2 - 0, fighting out of Las Vegas, Scott Cliffton!
And introducing the fighter to my right, fighting out of the blue corner.
With a record of
1 - 2 - 0, fighting out of Montreal, Terence Ready!
The judges for this bout are Dean Styles, Steve Montenegro and Alyssa Summers.

The bell rings for round one and we are underway!
Ready wants to clinch up but Cliffton keeps it at a distance.
Ready needs to keep his hands up - Cliffton had a free shot at his head there.

It looks like Terence Ready has been cut.
Cliffton throws a sloppy head kick and Ready moves out of range easily.

Ready rushes Cliffton and presses him up against the cage.

Cliffton breaks the clinch and we're back to striking at distance.
Ready looks for a takedown but Cliffton sprawls well.
The crowd are loving this. Great action here.
Ready avoids the head kick by Cliffton.
Ready shoots in for a takedown but doesn't get it.
Cliffton thuds his right hand into Ready's forehead from close range. That could be painful for both fighters.

Cliffton cracks Ready with a big right hand that sends him to the floor! Ready looks wobbly but he's sprung back up to his feet straight away
can Cliffton finish him?
Cliffton fires a straight punch through the middle that cracks Ready square on the jaw! Damn, Ready is out cold on his feet and topples face first to the canvas! Wow, I haven't seen a knockout that brutal in a long time!
Ladies and gentlemen, after 0:38 of round 1, we have a winner by way of KO (Punch). Scott Cliffton!
A victorious Scott Cliffton thanked his army of followers in his post fight interview, telling people to make sure they follow him on Twitter.
|
|
|
|
|
|
|
|
|
|
|
|
|
|
|
|
|
|
|
|
|
|
|
| S |
C
A |
G |
S |
C
B |
G |
|
S |
C |
G |
|
energy
A | B |
|
hype
A | B |
|
pop
A | B |
|
mgr
A | B |
|
FIGHT
RATING
100% |
|
|
|
|
|
|
|
Undercard bout
|
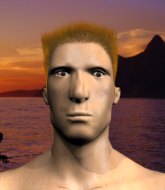
Coming up we have a super heavyweight MMA rules bout between Koji Kanegi (ranked 0 p4p, 0 weight class) and Ville Alasin (ranked 0 p4p, 0 weight class). Alasin has chosen Be Aggressive - Faith No More as his entrance music, which hasn't gone down very well with the crowd. This should be a great matchup!
 |
|
 |
| 179 cm
18
215 lbs
0 - 0 - 0 |
|
185 cm
19
210 lbs
2 - 2 - 0 |
BJJ Blue Belt
Basic striking
Cardio machine |
|
BJJ Blue Belt
Decent boxing
Good gas tank |
|
| |
|
Ladies and gentlemen. This fight is 3 rounds, in the super heavyweight division.
Introducing the fighter to my left, fighting out of the red corner.
With a record of
0 - 0 - 0, fighting out of Montreal, Koji Kanegi!
And introducing the fighter to my right, fighting out of the blue corner.
With a record of
2 - 2 - 0, fighting out of Helsinki, Ville Alasin!
The judges for this bout are John Roberts, Jorge Garcia and Russell Pearce.
The bell rings for round one and we are underway!
Kanegi will have to do better than that with his takedown attempts.
Kanegi shoots in for a takedown but doesn't get it.
Kanegi takes a hook to the side of the head. I wonder if that's got his ears ringing.
Alasin uses some good footwork to avoid the body shot by Kanegi.
Alasin works over Kanegi's head and body with a nice combination.

It looks like Koji Kanegi has been cut.
Alasin connects with the punch.
The crowd cheering loudly, showing their appreciation for the quality fight we're seeing here.
Kanegi dives in and grabs Alasin's left leg, looking for a takedown. Alasin pushes down on Kanegi's head and hops out.
That's three failed takedown attempts in the round for Koji Kanegi. That's going to take a lot out of him.
A swing and a miss from Kanegi.
Kanegi throws a combination but it was largely blocked by Alasin.
Alasin changes levels and scores with a jab to the body.
Kanegi misses with a head kick.
The crowd cheers as Alasin lands an impressive looking overhand right. Kanegi doesn't seem phased though.
Ville Alasin seems to be the more aggressive standup fighter in this bout.
Alasin smiles there as he lands a nice right hand right on the button.
Alasin connects with a body shot that sends Kanegi's belly button to the back.
Alasin throws a right and a left that both miss.
Alasin slips a straight right by Kanegi.
Boom, another hit is landed. "You're gunna get knocked out" taunts Alasin, as that shot connected.

That's one minute gone in the round.
Alasin lands with a shot to the body.
Alasin scores with a jab to the head.
Kanegi walks straight into a right hand from Alasin - that's dropped him! Alasin jumps into mount and starts pounding away - can he finish?! More strikes go undefended and the referee has to dive in to save Kanegi from any more punishment! Kanegi complains about the stoppage but falls over as he tries to stand back up, so it was clearly a good stoppage.
Ladies and gentlemen, after 1:17 of round 1, we have a winner by way of TKO (Punches). Ville Alasin!
An out of breath Ville Alasin thanked his loyal fans in his post fight interview, giving them credit for his success over the course of his career.
|
|
|
|
|
|
|
|
|
|
|
|
|
|
|
|
|
|
|
|
|
|
|
| S |
C
A |
G |
S |
C
B |
G |
|
S |
C |
G |
|
energy
A | B |
|
hype
A | B |
|
pop
A | B |
|
mgr
A | B |
|
FIGHT
RATING
87% |
|
|
|
|
|
|
|
Undercard bout
|
Coming up we have a super heavyweight MMA rules bout between Tajju Bagumbha (ranked 0 p4p, 0 weight class) and Markie Gono (ranked 0 p4p, 0 weight class). Gono comes into a darkened arena with his song building. Hearts on Fire kicks in, the lights come on and the crowd goes wild! What a showman! Man, I cannot wait for this one!
 |
|
 |
| 196 cm
25
210 lbs
3 - 1 - 0 |
|
199 cm
25
250 lbs
2 - 2 - 0 |
BJJ White Belt
Excellent boxer
Big right hand |
|
BJJ Blue Belt
Brawler
Likes musicals |
|
| |
|
Ladies and gentlemen. This fight is 3 rounds, in the super heavyweight division.
Introducing the fighter to my left, fighting out of the red corner.
With a record of
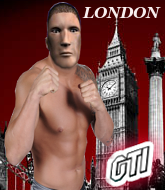
3 - 1 - 0, fighting out of London, Tajju Bagumbha!
And introducing the fighter to my right, fighting out of the blue corner.
With a record of
2 - 2 - 0, fighting out of Tokyo, Markie Gono!
The judges for this bout are Steve Montenegro, John Roberts and Eddie Farnsworth.
The bell rings for round one and we are underway!
Gono takes one on the chin but keeps coming.
The fighters circling - Bagumbha throws out the jab but it was never going to land.
Gono has closed the distance and engaged Bagumbha in a clinch.
Gono has Bagumbha pressed against the cage, preventing Bagumbha from circling away and getting back to striking at range.
Bagumbha is trying to break the clinch but Gono is controlling him.

Gono jumps into guard, dragging Bagumbha to the mat.
Bagumbha wants to stand but Gono has a closed guard, so he can't escape.
A big thud reverberates around the arena there as Bagumbha accidentally thumps the mat. Hopefully he's not broken his hand.
Gono seems keen to control Bagumbha's posture.
Bagumbha in full guard, throwing the ground and pound. No damage this time.
Bagumbha missing there with some ground and pound from the guard.
Gono is trying to control the position from the bottom.
Bagumbha has decided he wants to stand but the closed guard of Gono is proving hard to escape from.
We've seen a great period of action over the last minute or so - credit to both fighters for going all out!
Gono looking to sweep here. No luck so far.
Bagumbha has to be careful here, sitting in the guard of a superior BJJ player.
That's one minute gone in the round.
Gono working the defensive guard well to avoid strikes from Bagumbha.
Bagumbha throws a strike but Gono rolls with it and manages to sweep. Now he's in guard on top.
Bagumbha tries to land a sweep but no joy.
Bagumbha knows he needs to get back to his feet asap. He's simply no match for Gono on the ground.
Gono controlling from the guard. I say controlling but really, he's stalling.
The ref warns both fighters not to hold the cage as they work up against the meshing.

Bagumbha escapes his hips to the side and looks to be working for an armbar. Gono gives him a little smile and shakes his head. No chance.
Bagumbha tries to land a sweep but no joy.
Bagumbha is looking to sweep but instead, Gono has passed into half guard.
Bagumbha is looking for a sweep. Gono is wise to his cunning plan and keeps the top position.

That's two minutes gone in the round.

Gono escapes and gets back to his feet.
Bagumbha throws a hook but Gono blocks it.
Gono tries to clinch but Bagumbha moves out of range.
Bagumbha with a jab.
This is a great period of action - very entertaining stuff!
Bagumbha cracks Gono with an open hand slap.
Bagumbha listening to his corner there, landing a nice uppercut.
Gono closes the distance and gets a double leg, slamming Bagumbha to the mat! Bagumbha manages to get full guard.
Gono sneaks a leg through and gets to half guard. That was like a knife through butter how easily he passed Bagumbha's guard.
Bagumbha is not content to let Gono control the position.
Gono stands, ready to strike. The ref makes him back up and allows Bagumbha to get to his feet.
Gono fakes with the hands and throws a leg kick but Bagumbha is out of range.
Gono moves in looking to clinch but Bagumbha pushes him off.
Bagumbha digs a good body shot into Gono's ribs.
Bagumbha lands a big uppercut and Gono crumbles to the floor! The ref thinks about stopping the fight but Gono looks OK. Bagumbha waves Gono back to his feet!

Gono is rocked!
Gono switches off momentarily and Bagumbha cracks him with a monster right hand! Gono topples backwards and makes a semi conscious attempt to cover up, as Bagumbha dives in to land one more shot, before the referee has time to call the fight. What a finish by Bagumbha!
Ladies and gentlemen, after 3:59 of round 1, we have a winner by way of KO (Punch). Tajju Bagumbha!
A victorious Tajju Bagumbha thanked his army of followers in his post fight interview, telling people to make sure they follow him on Twitter.
Markie Gono was interviewed post fight and said 'I cant stand this shit i shall train ten fold and be back B.T.E byezeezs bitches'.
|
|
|
|
|
|
|
|
|
|
|
|
|
|
|
|
|
|
|
|
|
|
|
| S |
C
A |
G |
S |
C
B |
G |
|
S |
C |
G |
|
energy
A | B |
|
hype
A | B |
|
pop
A | B |
|
mgr
A | B |
|
FIGHT
RATING
100% |
|
|
|
|
|
|
|
Undercard bout
|
Coming up we have a super heavyweight MMA rules bout between Asda Price (ranked 0 p4p, 0 weight class) and Mariusz Kolonko (ranked 0 p4p, 0 weight class). Asda Price is staring across the cage at his opponent, tweaking his nipples... Tweaking his own nipples that is.
 |
|
 |
| 189 cm
19
206 lbs
4 - 2 - 0 |
|
200 cm
25
275 lbs
1 - 0 - 0 |
BJJ Blue Belt
Solid Muay Thai
KO power |
|
Good wrestler
Great elbows
Powerful |
|
| |
|
Ladies and gentlemen. This fight is 3 rounds, in the super heavyweight division.
Introducing the fighter to my left, fighting out of the red corner.
With a record of
4 - 2 - 0, fighting out of London, Asda Price!
And introducing the fighter to my right, fighting out of the blue corner.
With a record of
1 - 0 - 0, fighting out of New York, Mariusz Kolonko!
The judges for this bout are Alyssa Summers, Jorge Garcia and John Kavanagh.
The bell rings for round one and we are underway!
Price fakes a head punch and goes low to the body. Nicely done.
Kolonko takes one on the chin but seems OK.
Kolonko clinches.
Price is looking to take this one to the mat.
Price is trying to work out of this bad position, with his back against the cage.
Price fails to land with a short punch on the inside.
Price is trying to force a seperation but Kolonko has the dominant position.
Knees to the body from Kolonko.
We've seen a great period of action over the last minute or so - credit to both fighters for going all out!
Kolonko creates a bit of space for himself and sneaks an elbow through Price's defenses.
It looks like Asda Price has been cut.
Price fails to pull guard.
Price wants to strike at distance but he can't break free of the clinch.
Kolonko crunches a lovely knee into Price's ribcage.
Price is breathing heavily.
Kolonko landing some nice looking knees to the body.
Kolonko lands a glancing elbow in the clinch.
Price takes a knee right on the jaw!
Kolonko gets an overhook and lands an elbow to the side of the head.
Kolonko landing some nice looking knees to the body.
Price takes an elbow to the forehead.
Kolonko tries to land a knee to the body but he is off balance and Price avoids it.
Nice elbow from Kolonko.
That's one minute gone in the round.
Kolonko using the Thai clinch to land knees to the body.
Kolonko gets an overhook and lands an elbow to the side of the head.
Kolonko scores a nice knee to the body.
Kolonko lands an elbow that stopped Price in his tracks for a moment.
Kolonko landing knees to the body. They look like they could hurt.
Kolonko scores a nice knee to the body.
Wooooo! Give it up for these two warriors! They are putting on a show!
Kolonko is looking to score with knees to the body. Maybe he'll change it up and go body then head. Price is defending well for now.
Kolonko utilising his Muay Thai to score with a knee to the body.
Kolonko lands an elbow just above Price 's eye.
Kolonko using the Thai clinch to land knees to the body.
Price wants to push off and get back to the center of the mat but Kolonko has him pressed against the cage.
Price takes an elbow to the temple.
Kolonko lands a good knee to the midsection. Price won't want to take too many of those.
Kolonko lands a damaging elbow.
Price takes an elbow to the forehead.
Price tries to pull guard but Kolonko holds him up against the cage and eventually Price drops back down to his feet.
That's three failed takedown attempts in the round for Asda Price. That's going to take a lot out of him.
Kolonko lands a damaging elbow.
That's two minutes gone in the round.
Price drops to a knee looking for a takedown but Kolonko gets the underhooks and prevents it.
Price tries to circle away but Kolonko has him pinned against the cage.
Kolonko working Price over with knees to the body.
Price tries to pull guard but Kolonko forces him back to his feet, against the cage.
Price is trying to pull guard but Kolonko turns him against the cage and we stay in the clinch.
Kolonko lands a knee to the head there! That was nasty!
Kolonko is looking to score with knees to the body. Maybe he'll change it up and go body then head. Price is defending well for now.
Price jumps guard but Kolonko stands there with Price around his waist. Price gives up and drops back to his feet. We remain in the clinch.
Kolonko crunches a lovely knee into Price's ribcage.
Price tries to jump guard but he falls flat on his backside. Kolonko smiles and moves away.
Kolonko misses with a half-hearted attempt at a head kick.

That's three minutes gone in the round.
Kolonko misses with a double jab

and Price counters with a driving takedown into guard. Nice work there by Price.
Price wants to control from the top but Kolonko keeps moving.
Kolonko tries to strike from the bottom.
Kolonko wants to stand but Price is controlling the position.
Price trying to control the position from guard on top but Kolonko is wriggling around, looking for whatever he can.
Price might be looking to lock onto one of his opponent's long limbs for a submission, whilst we're on the ground.
Price pushing down on Kolonko's thigh, trying to pass to half guard. He's managed it... Nice work.
Price is trying to work for a kimura. This could be trouble! No, Kolonko has managed to free his arm - good work.
Wooooo! Give it up for these two warriors! They are putting on a show!
It looks like Price is going to stand back up.

That's four minutes gone in the round.
Kolonko is looking to improve his position.
Kolonko wants to control the action here but instead Price manages to pass to full mount!
The ref warns both fighters not to hold the cage as they work up against the meshing.
Price looking to secure an arm triangle but Kolonko defends it well.
Kolonko tries to reverse the position but Price maintains control.
The crowd are going absolutely nuts as the round comes to an end - what a fantastic round of action!
Kolonko tries to lock up and control but Price gives him a forearm to the face and pushes him away.
We get told so often about how wrestlers don't like to be on their backs. Let's see if Kolonko can do anything to dispel that myth.
Price scoring with some good ground and pound from mount here. Will he manage to finish Kolonko?
And thats the end of the round the fighters go back to their corners.
Mariusz Kolonko dominated that round.
The cut man is working on Asda Price's cut.
The fighters' corners scream their final instructions, as the referee calls time. Here we go, back to the action!

Kolonko throws a front kick aimed at Price's knee but Price avoids it well.
Kolonko tries to close the distance and clinch up against the cage but Price paws at him with a jab and circles away.
Price throws a head kick that misses.
Kolonko tries to close the distance and clinch up against the cage but Price paws at him with a jab and circles away.
Price throws a head kick that half lands.
Price swats away the attempt to clinch by Kolonko.
Price swats away the attempt to clinch by Kolonko.
Price throws a leg kick which misses Kolonko's front leg but catches the back leg as Kolonko tries to avoid it.
Kolonko throws a lazy uppercut
and Price counters with a shoot takedown into half guard.
The fans in attendance giving it up for the two fighters, who have really let it all hang out in the last minute or so!
Price thows a huge punch but Kolonko dodges it nicely.
Price has freed up his trapped foot and advances to mount.
Kolonko tries to hold on but Price postures up.
That's one minute gone in the round.
Kolonko working to try and regain half guard.
Price trying to control but Kolonko is having none of it.
Kolonko is in a horrible position here. Price smacks him with another shot as he tries to escape the position.
That's two minutes gone in the round.
Price jumps to side control looking for an arm triangle but Kolonko manages to avoid the submission attempt.
Price trying to control the action but Kolonko is working from the bottom.
You can see the frustration on Kolonko's face, being in this tough position on the bottom.
We've seen a great period of action over the last minute or so - credit to both fighters for going all out!
Price cracks Kolonko with a big right hand but Kolonko just smiles back at him and invites him to have another go.
Price is looking to take a break and control but Kolonko is keeping him honest, looking to work from the bottom.
Price tries for a kimura. Not really close to a finish though.
That's three minutes gone in the round.
Price wants to stand but Kolonko is controlling his arm.
You can see the frustration on Kolonko's face, being in this tough position on the bottom.
Kolonko is looking to regain half guard here but Price keeps moving and retains side control.
Price wants to stand but Kolonko has his arm trapped.
Price has hold of Kolonko's arm. He's looking for a kimura. Kolonko seems comfortable defending it but Price has shifted his position slighty and is cranking on the arm! Kolonko is real pain and he's forced to tap out! Kolonko is disgusted with himself for not defending it better but Price couldn't care less - he's delighted!
Ladies and gentlemen, after 4:56 of round 2, we have a winner by way of Submission (Kimura). Asda Price!
|
|
|
|
|
|
|
|
|
|
|
|
|
|
|
|
|
|
|
|
|
|
|
| S |
C
A |
G |
S |
C
B |
G |
|
S |
C |
G |
|
energy
A | B |
|
hype
A | B |
|
pop
A | B |
|
mgr
A | B |
|
FIGHT
RATING
86% |
|
|
|
|
|
|
|
Undercard bout
|
Coming up we have a heavyweight MMA rules bout between Shigeo Miyato (ranked 0 p4p, 0 weight class) and Kid Vera (ranked 0 p4p, 0 weight class). Vera has chosen You are just a JOKE! as his entrance music. Over to our ring announcer for the fighter introductions!
 |
|
 |
| 174 cm
34
177 lbs
19 - 16 - 0 |
|
185 cm
31
192 lbs
17 - 18 - 0 |
Good takedowns
Counter fighter
Granite chin |
|
Good wrestler
World class boxer
Good gas tank |
|
| |
|
Ladies and gentlemen. This fight is 3 rounds, in the heavyweight division.
Introducing the fighter to my left, fighting out of the red corner.
With a record of
19 - 16 - 0, fighting out of Sydney, Shigeo Miyato!
And introducing the fighter to my right, fighting out of the blue corner.
With a record of
17 - 18 - 0, fighting out of Sydney, Kid Vera!
The judges for this bout are Steve Montenegro, Chad Campbell and Columbo Gatti.
The bell rings for round one and we are underway!
Miyato gets caught flat footed, as Vera shoots in with a quick takedown into guard.
Vera wants to control from the top but Miyato keeps moving.
Miyato might be looking to lock onto one of his opponent's long limbs for a submission, whilst we're on the ground.
Vera trying to land body shots but he keeps hitting the mat.
Vera trying to control but Miyato is working from the bottom.
Miyato looking for subs off his back but Vera has passed one foot through into half guard.
Vera slows the pace down in half guard.
Miyato tries to get to full guard but Vera has control of the leg.
Vera passes to side control.
Miyato tries to work a leg under to get back to half guard but Vera wriggles his own leg back out and remains in side control.
Vera postures up a little and throws a couple of hammerfists but they don't connect properly.
That's one minute gone in the round.
Miyato is looking to reverse the position.
Miyato gets one leg under and gets the fight to half guard.
Miyato looking for submissions from an awkward position here.
Vera takes a deep breath and rests his weight momentarily on top of his opponent, to control the position.
The fighters are pressed up against the cage, both looking to find a bit of space to work.
Miyato has a hand on Vera's thigh, trying to get back to full guard. Vera takes advantage of the position though and mounts him!
Vera throwing shots from mount but they're not landing.
Miyato keeping his composure momentarily, calmly looking to get back to half guard.
The ref warns both fighters not to hold the cage as they work up against the meshing.
Vera throwing sloppy strikes here. Perhaps if he tightened up his striking from such a dominant position, he'd be able to finish easier.
Miyato is looking to get to half guard.
Vera throws an elbow from mount that misses. Lucky escape for Miyato because Vera loaded up on that one.
That's two minutes gone in the round.
Miyato is trying desperately to improve position.
The fighters are starting to perspire pretty heavily.
Vera wants to control the pace but Miyato is squirming around nicely.
Miyato is desperately trying to improve his position but Vera has a good base and remains in mount.
Vera controlling the position easily from mount.
Wooooo! Give it up for these two warriors! They are putting on a show!
Vera can't quite control the action as he would like just now, as Miyato is looking to escape.
Miyato is trying to escape the mount.
Vera tucks in and makes sure he doesn't lose the dominant position.
Miyato is trying desperately to improve position.
That's three minutes gone in the round.
Vera dominating with strikes here.
Miyato is working to get back to half guard.
Miyato regains half guard.
Vera has freed up his trapped foot and advances to mount.
Miyato is trying to escape the mount.
Vera throwing sloppy strikes, which aren't doing any damage.
That's four minutes gone in the round.
Miyato is working to get back to half guard.
Vera content just to control the position here.
Vera can't quite control the action as he would like just now, as Miyato is looking to escape.
Miyato working to try and regain half guard.
Miyato is working hard here to advance position.
This is a great period of action - very entertaining stuff!
Vera takes a little breather and maintains the position. The referee will be looking for him to stay active from such a dominant position though.
As the round comes to an end the crowd are showing their appreciation for a great round of action.
Miyato is desperately trying to improve his position but Vera has a good base and remains in mount.
And thats the end of the round the fighters go back to their corners.
Kid Vera dominated that round.
The cut man is working on Shigeo Miyato's cut.
That's time! Miyato's corner gives him a slap on the ass as he gets ready to fight.
Miyato does a little shimmy and throws a leg kick. The leg kick missed by a considerable margin though, making him look a little bit silly for doing the shimmy.
Vera is looking for a takedown here. He's shot in and has managed to get it, finishing up in Miyato's half guard.
Vera is keen to just control but Miyato is a slippery customer.
Vera perhaps working for something from half guard, or maybe not. It looks like he's just sitting there.
Miyato actively working from the bottom here.
Miyato is looking to improve his position.
The fighters are battling for position here. Miyato manages to regain full guard. Nice work.
Miyato is throwing his legs up, looking for submissions. Vera is aware though and is defending well.
Vera throwing elbows and punches but not connecting, as Miyato works some decent striking defense from the bottom.
Vera controlling from the top position.
Kid Vera has got the better of the ground game so far.
Wooooo! Give it up for these two warriors! They are putting on a show!
Miyato looking for a guillotine here but Vera defends easily.
That's one minute gone in the round.
Miyato throwing his legs up looking for a triangle.
Vera gets to his feet. Miyato looking to butt scoot but the ref puts an end to that. On your feet son!
Vera looking to shoot here. He's gone for it and he's landed a takedown into side control! Oh, that's bad for Miyato!
Miyato tries to improve position but can't.
That's two minutes gone in the round.
Vera stands up.
Vera is looking for a takedown here. He's shot in and has managed to get it, finishing up in Miyato's half guard.
Both fighters are absolutely exhausted here.
This has been an exciting period of action!
Neither fighter is being very active at the moment, with Vera in particular looking to stall.
Miyato is looking to improve his position.
Vera content to sit in half guard and control for a moment.
Miyato tries to roll over but Vera keeps him under control.
That's three minutes gone in the round.
The referee claps his hands together and tells the fighters to work.
Vera perhaps working for something from half guard, or maybe not. It looks like he's just sitting there.

The ref stands the fighters back up. Kid Vera was stalling too much, according to the referee.
Miyato gets caught napping as Vera dives in and scores a takedown. Miyato manages to retain guard.
Miyato tries to land a sweep but no joy.
Vera controlling from the top position.
Miyato is looking for a guillotine. You can't force these things though and Vera defends well.
Vera stands up from guard. Let's bang!
Miyato gets taken down but at least he's managed to land in guard.
That's four minutes gone in the round.
The fans in attendance giving it up for the two fighters, who have really let it all hang out in the last minute or so!
Vera content to stall in guard here.
Miyato has his foot on Vera's thigh. He's trying to push off and get in position for a triangle, I think. Vera works his way back into a safe position though.
Vera postures up to throw the ground and pound strikes but they don't connect.
Miyato looking for submissions off his back, moving his hips, looking for an opening.
Vera seems content to control from guard here. He's going to have to remain active though if he doesn't want to get stood back up.
Vera won't allow Miyato to sweep him here.
The crowd are going absolutely nuts as the round comes to an end - what a fantastic round of action!
Miyato throws his legs up looking for a submission but Vera uses it to pass to side control.
Vera controlling the position from side mount.
And thats the end of the round the fighters go back to their corners.
Kid Vera showed his class in that round. I'd imagine he'll take it on all the scorecards.
The cut man is working on Shigeo Miyato's cut.
OK. That's time! The bell goes and we're back to the action. Let's hear some noise people - this is the final round!

Vera dives in and scores a takedown into Miyato's guard.
Miyato throwing his legs up looking for a triangle.
Vera controlling from the top position.
Vera wants to control from the top but Miyato keeps moving.
Miyato is working actively off his back, looking to secure an arm or perhaps work for a triangle.
Vera is intent on slowing down the pace of the fight, simply looking to control.
That's one minute gone in the round.
Vera trying to control the position from guard on top but Miyato is wriggling around, looking for whatever he can.
We must be close to a standup if these guys don't pick up the pace.
Kid Vera has forced the referee to step in and restart the fight on the feet.
Vera drives through with a takedown into Miyato's guard. Let's see what he can do from the top position.
Miyato is throwing his legs up, looking for submissions. Vera is aware though and is defending well.
Vera passes easily into side control. Nice work.
Vera working the ground and pound but Miyato is defending the strikes.
Miyato tries to improve position but can't.
Miyato parries the strikes from Vera easily there. Vera is wary of posturing up too much because it might enable Miyato to escape.
Vera wants to control but Miyato is keeping him busy.
Miyato is looking for a sweep.
Kid Vera is fighting for a decision - hopefully he's judged it right and he's actually winning the fight.
That's two minutes gone in the round.
Both fighters are breathing heavily.
Vera has had enough of the ground for now and decides to stand.
Shigeo Miyato is looking to keep the fight on the feet at all costs.
The crowd are loving this. Great action here.
Vera feints and as Miyato raises his hands in defense, Vera changes levels and drives through with a takedown into guard.
Miyato is looking for a triangle but Vera pushes his legs off easily.
Vera decides he's had enough of playing guard and decides to stand. Come on Miyato, up you get!
Vera drives through with a takedown into guard.
Vera slows down the pace of the fight, as he sits in guard.
That's three minutes gone in the round.
Miyato working from the bottom, still in full guard. He's managed to get a loose triangle. Vera doesn't seem to be doing much to defend here, obviously he feels comfortable in the position. Vera manages to throw the legs off his shoulder and he's back into guard - no problem.
A big thud reverberates around the arena there as Vera accidentally thumps the mat. Hopefully he's not broken his hand.
Miyato tries to land a sweep but no joy.
Vera pushing down on Miyato's thigh, trying to pass to half guard. He's managed it... Nice work.
Miyato actively working from the bottom here.
Miyato wants to get back to full guard.
Vera content to control rather than advance.
Miyato is looking to sinch up a guillotine here but Vera pulls his head out easily.
That's four minutes gone in the round.
Miyato tries to roll over but Vera keeps him under control.
Well, if Vera is going to just lie there, perhaps we should talk about what we're having for dinner tonight
I'm having a ham and pineapple pizza
Yum. Can't wait.
Kid Vera has forced the referee to step in and restart the fight on the feet.
Vera looking to shoot here. He's gone for it and he's landed a takedown into side control! Oh, that's bad for Miyato!
Vera postures up a little and throws a couple of hammerfists but they don't connect properly.
The crowd are loving this. Great action here.
Miyato is looking to regain half guard here but Vera keeps moving and retains side control.
As the round comes to an end the crowd are showing their appreciation for a great round of action.
You can see the frustration on Miyato's face as Vera controls the position.
Miyato is looking for a sweep.
Shigeo Miyato has stepped it up - he knows he needs a finish here!
Vera throws an elbow but Miyato slips to the side and avoids it well.
And that's the end of the fight!
Kid Vera comfortably won the final round on my scorecard.
Well Vera has outworked and out performed his opponent in all aspects of the game today. He was simply too good and the decision should be no more than a formality. Over to the ring announcer for the scorecards.
Ladies and gentlemen, after 3 rounds of action, we go to the scorecards for a decision.
Judge Steve Montenegro scores the fight 27:30
Judge Chad Campbell scores the fight 27:30
Judge Columbo Gatti scores the fight 27:30
In favor of your winner, by unanimous decision... Kid Vera!
Kid Vera really struggled to get his t-shirt on before his hand was raised. Making sure that Steel Penn's Laundry 80% LAUNDRY IS AVAILABLE logo gets some air time is pretty tricky when you're all sweaty.
|
|
|
|
|
|
|
|
|
|
|
|
|
|
|
|
|
|
|
|
|
|
|
| S |
C
A |
G |
S |
C
B |
G |
|
S |
C |
G |
|
energy
A | B |
|
hype
A | B |
|
pop
A | B |
|
mgr
A | B |
|
FIGHT
RATING
92% |
|
|
|
|
|
|
|
Co-main event
|
Coming up we have a heavyweight MMA rules bout between Ralfus Presting (ranked 0 p4p, 0 weight class) and Mustaffa Spliff (ranked 0 p4p, 0 weight class). Spliff has a pretty significant injury - he really shouldn't be fighting right now but he's a warrior and he's here none the less! I don't know about you partner, but I'm pumped for this one!
 |
|
 |
| 182 cm
28
180 lbs
12 - 6 - 1 |
|
188 cm
33
185 lbs
26 - 19 - 0 |
Abu Dhabi Champ
Dangerous knees
KO power |
|
Olympic wrestler
World class boxer
Good gas tank |
|
| |
|
Ladies and gentlemen. This fight is 3 rounds, in the heavyweight division.
Introducing the fighter to my left, fighting out of the red corner.
With a record of
12 - 6 - 1, fighting out of Sydney, Ralfus Presting!
And introducing the fighter to my right, fighting out of the blue corner.
With a record of
26 - 19 - 0, fighting out of London, Mustaffa Spliff!
The judges for this bout are Steve Montenegro, John Kavanagh and Dean Styles.
The bell rings for round one and we are underway!
Presting scores with a nice takedown into half guard. Let's see what he's got on the ground.
Spliff looks winded!
Presting trying to control from half guard but Spliff is working away.
Presting is thinking about going for an arm triangle but he can't free his leg.
Presting is looking for a kimura here.
Spliff is looking to regain full guard. Not this time though.
Presting is looking for an arm triangle, whilst trying to pass to side control. Spliff doesn't seem that keen to cooperate though. No luck this time Presting.
Presting wants to control but Spliff is keeping him busy.
That's one minute gone in the round.
The two fighters exchange a few words. I couldn't hear what they were saying but maybe it's more fun if you make it up yourself. Presting connects with a nice short shot to Spliff's temple.
Presting is thinking about going for an arm triangle but he can't free his leg.
The ref warns both fighters not to hold the cage as they work up against the meshing.
Spliff is staying active underneath Presting, who seems content to just control the action from this position.
Presting is really struggling to control Spliff but he's trying to hold on to the position.
Presting wants to work for an arm triangle but Spliff is really keeping half guard well and defending the submission attempt.
Both fighters really going for it on the ground here!
Presting is looking for a kimura but he's never going to get it from there.
Presting wants to work for an arm triangle but Spliff is really keeping half guard well and defending the submission attempt.
Presting scores with a couple of good hammerfists.
Presting works his way into full mount!
Spliff tries to get back to half guard but can't.
That's two minutes gone in the round.
Presting looking for a guillotine from mount but Spliff is having none of it.
Fantastic stuff here - a very entertaining period of action, which has drawn cheers from the crowd.
Presting is thinking about an arm triangle here, looking to tighten it up before moving to side control. Spliff can see it coming though and defends well with a couple of strikes to the head and some good arm positioning.
Presting connects with a couple of good shots from mount.
The fighters are pressed up against the cage, both looking to find a bit of space to work.
Presting is working on an americana here. Ooh, that looks pretty nasty! Nope, Spliff has managed to escape the submission attempt.
Presting looking for a guillotine from mount but Spliff is having none of it.
Spliff defends a decent attempt at a guillotine from Presting.
That's three minutes gone in the round.
Presting looking to control but Spliff is working nicely, looking to advance position himself.
Presting working from mount. He moves in close and looks like he might be going for an arm triangle... He's hopped off to the side and he's transitioned into an Anaconda choke. Spliff turning a nasty shade of purple. He's refusing to tap but he's gone! He's out! The ref rips Presting off and cradles Spliff's limp body as Presting celebrates with his corner.
Ladies and gentlemen, after 3:35 of round 1, we have a winner by way of Submission (Anaconda Choke). Ralfus Presting!
After winning the bout, Ralfus Presting thanked all his fans and promised he'd do even better in his next fight. The crowd seemed to love his humility.
|
|
|
|
|
|
|
|
|
|
|
|
|
|
|
|
|
|
|
|
|
|
|
| S |
C
A |
G |
S |
C
B |
G |
|
S |
C |
G |
|
energy
A | B |
|
hype
A | B |
|
pop
A | B |
|
mgr
A | B |
|
FIGHT
RATING
45% |
|
|
|
|
|
|
|
Main event
|
Coming up we have a heavyweight MMA rules bout between Sean McMorrow (ranked 0 p4p, 0 weight class) and Gibson Rickenbacker v.2 (ranked 0 p4p, 0 weight class). 2. Rickenbacker v.2 comes into a darkened arena with his song building. Back Stabber! kicks in, the lights come on and the crowd goes wild! What a showman! Buckle up people - heeeeeeeeeere we go!
 |
|
 |
| 183 cm
37
273 lbs
38 - 16 - 0 |
|
175 cm
29
180 lbs
26 - 11 - 0 |
Great wrestler
World class boxer
Cardio machine |
|
Good wrestler
Dangerous knees
Good gas tank |
|
| |
|
Ladies and gentlemen. This fight is 3 rounds, in the heavyweight division.
Introducing the fighter to my left, fighting out of the red corner.
With a record of
38 - 16 - 0, fighting out of New York, Sean McMorrow!
And introducing the fighter to my right, fighting out of the blue corner.
With a record of
26 - 11 - 0, fighting out of Sydney, Gibson Rickenbacker v.2!
The judges for this bout are Anthony Taglia, Russell Pearce and John Kavanagh.
The bell rings for round one and we are underway!
McMorrow digs a good body shot into Rickenbacker v.2's ribs.
Rickenbacker v.2 has his head slapped from side to side by a 3 punch combination. That must have hurt him.
McMorrow swats away the attempt to clinch by Rickenbacker v.2.
The crowd are loving this. Great action here.
A thudding body kick lands there by McMorrow!
Rickenbacker v.2 takes a push kick to the midsection and stumbles backwards.
That's a knee to de groin and it's over and out! Rickenbacker v.2 crumples to the ground after an illegal strike from McMorrow - the referee stops the clock and Rickenbacker v.2 gets 5 minutes to recover from that one. "I'm sorry" says McMorrow. Rickenbacker v.2 manages to get back to his feet and the fight resumes.
Rickenbacker v.2 looks winded!
McMorrow throws a nice inside leg kick.
Rickenbacker v.2 throws a body kick but he wasn't in range.
McMorrow ducks down and throws a hook to the body but Rickenbacker v.2 moves away.
Rickenbacker v.2 tries to sprawl but McMorrow drives through with a takedown into half guard.
The referee is asking the fighters to pick up the pace.
Rickenbacker v.2 avoiding damage under a succession of punches from McMorrow.
Rickenbacker v.2 taking some punishment here, with McMorrow in his half guard.
Rickenbacker v.2 blocking the ground and pound attempt from McMorrow.
The fighters are pressed up against the cage, both looking to find a bit of space to work.
McMorrow sitting in half guard, looking to land shots. Rickenbacker v.2 defending well though.
That's one minute gone in the round.
McMorrow missing with some ground and pound from the half guard.
McMorrow not landing any meaningful shots this time.
The referee walks around the fighters to get a better view of the action. McMorrow lands a nice short elbow.
McMorrow prevents Rickenbacker v.2 from improving his position.
McMorrow thows a huge punch but Rickenbacker v.2 dodges it nicely.
Rickenbacker v.2 blocking the ground and pound attempt from McMorrow.
Rickenbacker v.2 is not content to let McMorrow control the position.
McMorrow prevents Rickenbacker v.2 from improving his position.
That's two minutes gone in the round.
The referee walks around the fighters to get a better view of the action. McMorrow lands a nice short elbow.
McMorrow is keen to just control but Rickenbacker v.2 is a slippery customer.
McMorrow missing with some ground and pound from the half guard.
The crowd cheering loudly, showing their appreciation for the quality fight we're seeing here.
Rickenbacker v.2 tries to roll over but McMorrow keeps him under control.
McMorrow has been looking to land a fair amount of strikes on the ground. He might be looking to soften his opponent up in order to work for a submission.
Rickenbacker v.2 trying to control here.
Rickenbacker v.2 wants to get back to full guard.
McMorrow working some ground and pound from close in. He's looking to maintain this position and strike for a while by the looks of things... although he'll probably advance to full mount in a minute now I've said that.
McMorrow is scoring with some nice ground and pound from the dominant position.
That's three minutes gone in the round.
Rickenbacker v.2 is controlling McMorrow's trapped leg to prevent McMorrow from advancing to side control.
McMorrow throwing shots but they're hitting the canvas more than the man.
McMorrow slows the pace down in half guard.
The referee walks around the fighters to get a better view of the action. McMorrow lands a nice short elbow.
McMorrow misses with a head shot. Rickenbacker v.2 uses the momentum to regain guard.
McMorrow stays in close to Rickenbacker v.2's body and controls the position.
That's four minutes gone in the round.
McMorrow postures up in Rickenbacker v.2's guard and throws a big left but Rickenbacker v.2 blocks it.
Rickenbacker v.2 not looking particularly offensive just at the moment.
McMorrow trying to control but Rickenbacker v.2 is working from the bottom.
Rickenbacker v.2 working the defensive guard well to avoid strikes from McMorrow.
Rickenbacker v.2 pulls McMorrow in close to prevent any damage.
The crowd are going absolutely nuts as the round comes to an end - what a fantastic round of action!
McMorrow won't allow Rickenbacker v.2 to get back to his feet.
And thats the end of the round the fighters go back to their corners.
Sean McMorrow dominated that round.
That's the end of the interval. I'm sure that seemed a lot quicker than a minute for our two fighters! Back to the action.
McMorrow connects with a slap. Keep your fist closed son.
A really sloppy takedown attempt there from McMorrow.
McMorrow scores with a reasonable looking shot to the body. Rickenbacker v.2 doesn't seem bothered though.
McMorrow shoots in looking for a takedown. Rickenbacker v.2 tries to sprawl out of it but McMorrow keeps driving through. The fighters are pinned against the cage. Rickenbacker v.2 manages to get underhooks and after a bit of a struggle, circles away and we're back to standing.
Rickenbacker v.2 staying out of range there.
McMorrow shoots in and bounces Rickenbacker v.2 off the cage to secure the takedown into guard.
Rickenbacker v.2 wants to stand but McMorrow is controlling the position.
McMorrow trying to control the position from guard on top but Rickenbacker v.2 is wriggling around, looking for whatever he can.
That's one minute gone in the round.
McMorrow is sitting in guard, working some ground and pound.
McMorrow trying to control the position from guard on top but Rickenbacker v.2 is wriggling around, looking for whatever he can.
McMorrow loading up with the ground and pound but he's missing more than he's landing in this flurry.
McMorrow is working Rickenbacker v.2 over from the guard. He should look to pass the guard and do a little more damage with these strikes.
Rickenbacker v.2 avoiding any damage from the ground and pound.
McMorrow content to strike from guard, landing some decent shots.
Fantastic stuff here - a very entertaining period of action, which has drawn cheers from the crowd.
Rickenbacker v.2 is trying to control the position but McMorrow postures up.
That's two minutes gone in the round.
McMorrow slows down the pace of the fight for a moment. He'll need to remain active if he doesn't want to see the fight stood back up.
McMorrow trying to land body shots but he keeps hitting the mat.
McMorrow trying to land body shots but he keeps hitting the mat.
McMorrow trying to control the position from guard on top but Rickenbacker v.2 is wriggling around, looking for whatever he can.
We may be looking at a referee standup if the pace doesn't pick up soon.
McMorrow throwing strikes but missing.
McMorrow throwing elbows and punches but not connecting, as Rickenbacker v.2 works some decent striking defense from the bottom.
That's three minutes gone in the round.
McMorrow working some ground and pound from guard but it's not doing any damage.
McMorrow looking to sit in guard and control but Rickenbacker v.2 gets the butterfly guard and sweeps. He's now in the guard on the top.
McMorrow bucks up whilst keeping hold of a body lock, managing to reverse the position. Now he's in top in Rickenbacker v.2's guard.
Rickenbacker v.2 wants to stand and escape but McMorrow is having none of it.
McMorrow throws an elbow that misses. Rickenbacker v.2 uses the momentum to reverse the position. He's now in McMorrow's guard. Nice move by Rickenbacker v.2!
McMorrow is doing well to control the posture of his opponent and prevent any damage.
Sean McMorrow overall seems to be getting the better of the ground position in the fight so far.

Rickenbacker v.2 has gone for a leg lock! McMorrow slips out almost immediately though and dives into Rickenbacker v.2's guard.
That's four minutes gone in the round.
McMorrow lands a couple of decent looking shots.
The fans in attendance giving it up for the two fighters, who have really let it all hang out in the last minute or so!
McMorrow won't allow Rickenbacker v.2 to get back to his feet.
McMorrow is stalling in the full guard.
As the round comes to an end the crowd are showing their appreciation for a great round of action.
McMorrow throwing strikes but missing.
And thats the end of the round the fighters go back to their corners.
Sean McMorrow dominated that second round.
That's the end of the interval. I'm sure that seemed a lot quicker than a minute for our two fighters! Back to the action. And we move into the final round!
Rickenbacker v.2 does a little shimmy and throws a leg kick. The leg kick missed by a considerable margin though, making him look a little bit silly for doing the shimmy.
Rickenbacker v.2 keeping a good distance there, avoiding the body shot.
McMorrow shapes like he's going to throw a leg kick but settles back down.
Rickenbacker v.2 tries to close the distance and clinch up against the cage but McMorrow paws at him with a jab and circles away.
McMorrow shoots in for a takedown and gets it.
Rickenbacker v.2 is trying to stand up here but McMorrow is controlling him well.
McMorrow working some ground and pound from close in. He's looking to maintain this position and strike for a while by the looks of things... although he'll probably advance to full mount in a minute now I've said that.
McMorrow throws a big elbow that misses, also allowing Rickenbacker v.2 to regain full guard.
McMorrow engaging in some classic timewasting tactics.
That's one minute gone in the round.
McMorrow throwing shots from guard but he's hitting more mat than opponent.
McMorrow looking to sit in guard and control but Rickenbacker v.2 gets the butterfly guard and sweeps. He's now in the guard on the top.
Rickenbacker v.2 trying to control but McMorrow is working from the bottom.
Rickenbacker v.2 won't allow McMorrow to sweep him here.
McMorrow has Rickenbacker v.2 pulled in close to control his posture.
McMorrow trying to keep a closed guard but Rickenbacker v.2 is proving a slippery customer.
Gibson Rickenbacker v.2 has stepped it up - he knows he needs a finish here!
That's two minutes gone in the round.
Rickenbacker v.2 preventing the sweep.
Rickenbacker v.2 showing good wrestling skills to control the position.
Gibson Rickenbacker v.2 has forced the referee to step in and restart the fight on the feet.
McMorrow dances in quickly and lands a nice inside leg kick on Rickenbacker v.2. That did some damage!
Some bone on bone action there as McMorrow checks a low kick. Luckily it wasn't a particularly hard one.
McMorrow scores to the head and body with a nice combination!
The fans in attendance giving it up for the two fighters, who have really let it all hang out in the last minute or so!
McMorrow throws a body kick that misses.
Sean McMorrow seems to be the more aggressive standup fighter in this bout.
McMorrow fails with a takedown attempt.
Rickenbacker v.2 scores with a nice body kick.
That's three minutes gone in the round.
McMorrow scores with a punch to the gut of his opponent.
McMorrow misses with a double jab.
McMorrow ducks down and throws a hook to the body but Rickenbacker v.2 moves away.
Rickenbacker v.2 tries to shoot in for a takedown. He's got hold of a leg but McMorrow swivels and escapes.
McMorrow lands a body shot.
Sean McMorrow is fighting for a decision here - he's started to take the cautious approach.
McMorrow is looking to wear down Rickenbacker v.2 with body shots, infact he's throwing more body shots than head shots at the moment.
Rickenbacker v.2 takes a big intake of breath there - he's definitely tired.
Rickenbacker v.2 does a little shimmy and throws a leg kick. The leg kick missed by a considerable margin though, making him look a little bit silly for doing the shimmy.
Rickenbacker v.2 just misses with a punch to the body.
Rickenbacker v.2 has a nice red mark on his side after a thudding body kick by McMorrow.
McMorrow moves into range and lands a nice leg kick.
Nice cross by McMorrow.
Rickenbacker v.2 avoids the body shot from McMorrow.
A chopping leg kick lands by McMorrow.
A good leg kick by McMorrow.
That's four minutes gone in the round.
This is a great period of action - very entertaining stuff!
McMorrow scores with a jab to the jaw.
A kick lands to the mid section there for McMorrow.
McMorrow scores with a nice right hand.
Rickenbacker v.2 takes one on the chin but keeps coming.
Gibson Rickenbacker v.2 is looking to throw some combinations by the looks of things.
McMorrow feints and then cracks Rickenbacker v.2's leading leg with a nice low kick. He's obviously looking to slow Rickenbacker v.2 down.
Rickenbacker v.2 takes an uppercut right on the button but keeps his composure.
McMorrow is really dominating this fight. Is there anything that Rickenbacker v.2 can do to turn this around?
Rickenbacker v.2 throws a leg kick that is checked
and McMorrow counters with a stiff right hand.
Rickenbacker v.2 has a nice red mark on his side after a thudding body kick by McMorrow.
McMorrow moves into range and lands a nice body kick.
McMorrow scores with a takedown into Rickenbacker v.2's guard.
The crowd are going absolutely nuts as the round comes to an end - what a fantastic round of action!
McMorrow postures up in Rickenbacker v.2's guard and throws a big left but Rickenbacker v.2 blocks it.
And that's the end of the fight!
Sean McMorrow showed his dominance in that final round.
Well McMorrow has outscored his opponent in every aspect of the fight today. Only a scarily incompetent judge or two will keep him from a well deserved win... Over to the ring announcer for the scorecards.
Ladies and gentlemen, after 3 rounds of action, we go to the scorecards for a decision.
Judge Anthony Taglia scores the fight 30:27
Judge Russell Pearce scores the fight 30:27
Judge John Kavanagh scores the fight 30:27
In favor of your winner, by unanimous decision... Sean McMorrow!
A victorious Sean McMorrow thanked his army of followers in his post fight interview, telling people to make sure they follow him on Twitter.
|
|
|
|
|
|
|
|
|
|
|
|
|
|
|
|
|
|
|
|
|
|
|
| S |
C
A |
G |
S |
C
B |
G |
|
S |
C |
G |
|
energy
A | B |
|
hype
A | B |
|
pop
A | B |
|
mgr
A | B |
|
FIGHT
RATING
64% |
|
|
|
|
|
|
|
|
|
|
