 |
KOMMA 16: Gonzalez vs. Kage PBP Commentary |
Undercard bout
|
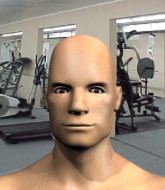
Coming up we have a heavyweight MMA rules bout between Sandro Poletto (ranked 0 p4p, 0 weight class) and Kamil Klinczerski (ranked 0 p4p, 0 weight class). Both these guys have really solid chins. Will we see a standup war or will they both decide that a knockout is unlikely and try to win the fight elsewhere?
 |
|
 |
| 188 cm
28
260 lbs
10 - 9 - 0 |
|
182 cm
25
265 lbs
2 - 2 - 0 |
BJJ White Belt
Excellent MT
Granite chin |
|
Good wrestler
Great elbows
Solid chin |
|
| |
|
Ladies and gentlemen. This fight is 3 rounds, in the heavyweight division.
Introducing the fighter to my left, fighting out of the red corner.
With a record of
10 - 9 - 0, fighting out of Rio de Janeiro, Sandro Poletto!
And introducing the fighter to my right, fighting out of the blue corner.
With a record of
2 - 2 - 0, fighting out of Rio de Janeiro, Kamil Klinczerski!
The judges for this bout are Seu Braga, Alexandre Firmino and Thiago Cunha.

The bell rings for round one and we are underway!
Klinczerski tries to clinch up but Poletto circles away and keeps his distance.
A head kick from Poletto lands but Klinczerski takes it in his stride.

It looks like Kamil Klinczerski has been cut.
The crowd cheering loudly, showing their appreciation for the quality fight we're seeing here.
Klinczerski moves to clinch but Poletto breaks away
and Poletto counters with a slapping leg kick.
Klinczerski has his front leg slapped to the side - a nice low kick landing there from Poletto.
Ouch! a nice leg kick from Poletto, right into the meat.
Poletto tries a switch kick but it misses it's target.
Poletto keeps the fight on the outside.
Poletto tries a head kick but it misses.
Klinczerski tries to clinch but Poletto is having none of it.
Poletto throws a push kick but Klinczerski slaps the foot to one side.

Poletto rushes Klinczerski and pushes him back against the cage in a clinch.
Poletto wants to strike at distance but he can't break free of the clinch.
Klinczerski avoiding damage as Poletto throws knees to the body.
Klinczerski tries a shoulder strike but it doesn't do any damage.
Poletto misses with a knee strike.
Poletto letting Klinczerski take a breather here.
Poletto working hard to break the clinch.
Poletto is trying to maintain a safe position but Klinczerski gets an underhook and turns Poletto into the cage.

That's one minute gone in the round.
An uppercut on the inside fails to land for Klinczerski.
Poletto blocks a punch to the side of the head.
Klinczerski controlling the action here for a moment.
Klinczerski tries a shoulder strike but it doesn't do any damage.

Poletto manages to break the clinch.
Poletto keeps the fight on the outside.
Sandro Poletto seems to be the more aggressive standup fighter in this bout.
Klinczerski takes a nice looking leg kick right on the meat of his thigh there.
Poletto clinches with his opponent.
Poletto's corner are urging him to control the action in the clinch for a moment, rather than mount any serious offense. I'm sure the crowd appreciate those instructions... not.
Poletto landing some nice looking knees to the body.
Klinczerski looks winded!
Poletto is trying to slow down the pace of the fight but Klinczerski is keeping busy.
This is a great period of action - very entertaining stuff!
Poletto blocking some punches.

That's two minutes gone in the round.
Poletto looking to slow down the pace here.
Poletto lands a knee to the body.
Poletto lands an elbow inside.
Poletto tries to land a knee to the head but misses.
Poletto blocking some punches.
Poletto tries to land a knee to the head but Klinczerski blocks with his arms.
Poletto blocks a couple of punches on the inside.
Klinczerski keeps the fight in the clinch, despite Poletto's efforts to push away.
Klinczerski working aggressively here.
Poletto trying to stall but Klinczerski improves his position.
Klinczerski looks to throw an elbow but misses.
Klinczerski scores with a shoulder strike.
Klinczerski misses with the head strike.
Poletto is trying to work out of this bad position, with his back against the cage.

That's three minutes gone in the round.
Poletto breaks from the clinch.
Klinczerski tries to close the distance and clinch up against the cage but Poletto paws at him with a jab and circles away.
Ooooh, nice body kick lands from Poletto. Klinczerski shrugs it off though.
Klinczerski tries to keep at a distance but Poletto has taken the fight into the clinch.
Poletto breaks the clinch and we're back to striking at distance.
Poletto drives through and clinches with Klinczerski against the cage.
Poletto misses with a knee to the head.
With the two fighters working up against the cage, Klinczerski just misses with a elbow thrown towards Poletto's brow.
Poletto blocks a couple of punches on the inside.
Poletto tries to land a knee to the head but Klinczerski blocks with his arms.
Klinczerski trying to land knees to the body.
Poletto lands a knee to the head.
The crowd are loving this. Great action here.
Poletto leaning against his opponent.
Poletto is trying to wear down his opponent with knees to the body.
Poletto with an attempt at a knee that misses.
Klinczerski blocks an elbow strike from Poletto.

That's four minutes gone in the round.
Poletto missing with knees to the body.
Poletto lands a nice elbow from the clinch.
Poletto is looking to control Klinczerski's arms but Klinczerski gets an underhook and turns him. Now Poletto has his back to the cage.
Poletto using the Thai plumb to throw knees but Klinczerski has his back arched nicely, preventing the strike.
Poletto tries a knee to the head but he's missed.
Poletto is struggling to control the position.
Klinczerski misses the knee to the body. Nice hip positioning from Poletto.
Poletto is trying to slow down the pace of the fight but Klinczerski is keeping busy.
Poletto seems a little flustered. He's come in with the intention of controlling the clinch but Klinczerski is preventing him from doing so, at least for the moment.
Klinczerski throws a head punch that misses.
Poletto blocking some punches.
The crowd are going absolutely nuts as the round comes to an end - what a fantastic round of action!
Poletto wants to break free. God knows he wants to breaaaak freeee.
Poletto landing knees to the body.
Poletto tries to land a knee to the body but he is off balance and Klinczerski avoids it.
Poletto breaks the clinch and we're back to striking at distance.
And thats the end of the round the fighters go back to their corners.
Sandro Poletto dominated that round.
The cut man is working on Kamil Klinczerski's cut.
That's the end of the interval. I'm sure that seemed a lot quicker than a minute for our two fighters! Back to the action.

Poletto clinches up with Klinczerski and pushes him back against the cage.
Nice elbow from Poletto.
A head punch blocked on the inside by Poletto.
Klinczerski throws a nice elbow but it doesn't land.
Poletto manages to break the clinch.
Poletto moves into the clinch successfully.
Klinczerski managing to block the knees to the body from Poletto.
Poletto misses with an elbow strike.
We are yet to see a takedown attempt from Klinczerski in the fight. On paper you would think he is the more dominant ground fighter so let's see if these unusual tactics pay off.
Both fighters working to control the clinch.
Klinczerski lands on the inside with an uppercut.
Poletto blocks an uppercut.
Klinczerski throws a head punch that misses.
Poletto pushes off and fires off an elbow that misses, before clinching up again, against the cage.
Poletto lands an elbow just above Klinczerski 's eye.
Klinczerski working aggressively here.
Klinczerski stalling here - the referee won't stand for too much of that.
Klinczerski blocks a knee to the body. He'll have a nicely bruised forearm in the morning.
That's one minute gone in the round.
Poletto blocks an elbow strike.
Sandro Poletto has scored more points in the clinch so far.
An uppercut on the inside fails to land for Klinczerski.
Poletto misses with a knee to the head.
Poletto throws a knee to the head but misses.
Klinczerski is stalling here.
Poletto breaks the clinch and we return to the middle of the mat.
Poletto goes for a spinning back kick but it misses.
Klinczerski tries to clinch there but Poletto circles away.
Klinczerski is looking to clinch but Poletto is avoiding it.
Poletto looks to throw the jab but Klinczerski is out of range.
Klinczerski moves in looking to clinch but Poletto pushes him off.
Poletto throws a sloppy head kick and Klinczerski moves out of range easily.
Poletto throws out a leg kick but Klinczerski moves out of range and Poletto only half commits.
Klinczerski fails with an attempt to clinch.
Klinczerski wants to clinch up but Poletto keeps it at a distance.
A leg kick checked by Klinczerski.
That's two minutes gone in the round.
Klinczerski wants to clinch up but Poletto keeps it at a distance.
Poletto swats away the attempt to clinch by Klinczerski.
Poletto closes the distance and clinches.
Poletto blocking some punches.
Klinczerski on the defensive, avoiding the knees to the body.
Klinczerski struggles to land a body shot inside as Poletto controls his hands.
With the fighters up against the cage, Klinczerski throws an elbow but misses.
Poletto manages to break the clinch.
Poletto looks to score with a jab to the body but Klinczerski is just out of range.
Poletto has closed the distance and engaged Klinczerski in a clinch.
The crowd cheering loudly, showing their appreciation for the quality fight we're seeing here.
Poletto looking to throw knees to the head but Klinczerski is blocking nicely.
Poletto putting his Muay Thai to good use. He has Klinczerski in a tight clinch and is doing some damage with knees to the body.
Klinczerski is breathing heavily.
Poletto looking to throw knees to the head but Klinczerski is blocking nicely.
Klinczerski trying to land knees to the body.
Klinczerski misses with a hook to the ribs.
Poletto misses with a knee strike.
That's three minutes gone in the round.
Poletto pushes off and circles away, back to the middle of the mat.
Poletto throws a head kick but Klinczerski moves out of range.
Klinczerski takes a nasty kick to the mid section... That should keep him thinking. Does he try and block and risk a head kick landing?
Poletto has managed to clinch.
Poletto tries a knee to the head but Klinczerski blocks it.
Poletto lands an elbow just above Klinczerski 's eye.
That has opened up Kamil Klinczerski's cut even more.
Klinczerski keeps the fight in the clinch, despite Poletto's efforts to push away.
Poletto is really dominating this fight. Is there anything that Klinczerski can do to turn this around?
Poletto tries to break the clinch but Klinczerski is controlling the position.
Klinczerski fails to land with a short punch on the inside.
Poletto is trying to push Klinczerski away but Klinczerski has him pressed against the cage, so he's going nowhere.
Klinczerski blocks a knee to the body. He'll have a nicely bruised forearm in the morning.
Klinczerski blocks an elbow strike.
Poletto prevents a body shot from Klinczerski.
Poletto stalling in the clinch but Klinczerski improves position.
That's four minutes gone in the round.
The crowd are loving this. Great action here.
Poletto on the defensive, avoiding the knees to the body.
A real battle for position is taking place between these two warriors.
Poletto misses with a knee to the head.
Poletto is trying to break the clinch but Klinczerski is controlling him.
Poletto misses the knee to the body. Nice hip positioning from Klinczerski.
Poletto connects with a nasty looking knee right to Klinczerski's face.
Poletto blocks an uppercut.
Poletto is working hard here but doesn't seem to be able to control effectively, up against the cage.
Klinczerski looking to stall.
Poletto is working hard here but doesn't seem to be able to control effectively, up against the cage.
As the round comes to an end the crowd are showing their appreciation for a great round of action.
Klinczerski pushes off an throws an elbow but Poletto leans to the side and avoids it. We're back to clinching against the cage.
A head punch blocked on the inside by Poletto.
Poletto blocks a punch to the side of the head.
And thats the end of the round the fighters go back to their corners.
Sandro Poletto dominated that second round.
The cut man is working on Kamil Klinczerski's cut.
OK. That's time! The bell goes and we're back to the action. And we move into the final round!

Poletto turns his hip over beautifully as he lands a nice leg kick.
Poletto throws a head kick that misses.
Poletto drives through and clinches with Klinczerski against the cage.
Poletto misses with a knee to the head.
Poletto blocks a couple of punches on the inside.
Klinczerski misses with some punches.
Klinczerski working aggressively here.
Klinczerski tries a shoulder strike but it doesn't do any damage.
Poletto looking to slow down the pace here.
Klinczerski swings wildly with an uppercut but Poletto uses good head movement to avoid it.
Klinczerski blocks the elbow strike.
Klinczerski misses with some punches.
Poletto breaks the clinch.
Klinczerski tries to clinch but fails miserably
and Poletto counters with a perfectly timed head kick, knocking Klinczerski out cold! Wow, that took some serious skill and not a little luck! Poletto is taking it in his stride though, strolling around like it's no big deal. What a guy.
Ladies and gentlemen, after 1:58 of round 3, we have a winner by way of KO (Head Kick). Sandro Poletto!
Sandro Poletto seemed lost for words in his post fight interview but he remembered to thank his fans and directed everyone to his website.
|
|
|
|
|
|
|
|
|
|
|
|
|
|
|
|
|
|
|
|
|
|
|
| S |
C
A |
G |
S |
C
B |
G |
|
S |
C |
G |
|
energy
A | B |
|
hype
A | B |
|
pop
A | B |
|
mgr
A | B |
|
FIGHT
RATING
100% |
|
|
|
|
|
|
|
Undercard bout
|
Coming up we have a middleweight MMA rules bout between Rawdy Sewing (ranked 0 p4p, 0 weight class) and Paulo Fransisco (ranked 0 p4p, 0 weight class). Fransisco is bouncing up and down as he enters the arena, backed by Mr.President - Coco Jambo. Paulo Fransisco is staring across the cage at his opponent, tweaking his nipples.
 |
|
 |
| 182 cm
26
195 lbs
4 - 1 - 0 |
|
180 cm
25
185 lbs
4 - 0 - 0 |
Good wrestling
Solid boxing
Big right hand |
|
Dangerous GnP
Counter fighter
Powerful |
|
| |
|
Ladies and gentlemen. This fight is 3 rounds, in the middleweight division.
Introducing the fighter to my left, fighting out of the red corner.
With a record of
4 - 1 - 0, fighting out of Rio de Janeiro, Rawdy Sewing!
And introducing the fighter to my right, fighting out of the blue corner.
With a record of
4 - 0 - 0, fighting out of Rio de Janeiro, Paulo Fransisco !
The judges for this bout are Leandro Rodrigues, Felipe Paraventi and Edson Gomes.
The bell rings for round one and we are underway!
Sewing throws a series of punches but Fransisco moves out of range.
Fransisco shoots in for a takedown - he's clinched up with Sewing but Sewing pushes him off and we're back to square one.
Fransisco moves his head to the side to avoid a jab but walks straight into a cross.
Sewing lands a two punch combo.
Sewing takes the fight into the clinch.
A short right from Sewing.
Fransisco takes a shot to the head.
Sewing lands a shot to the body.
Fransisco looks winded!
The fans in attendance giving it up for the two fighters, who have really let it all hang out in the last minute or so!
Sewing lands a body punch.
Sewing lands a left hand.
A short left from Sewing.
I was talking to Sewing's coach per-fight and he was telling me that they'd been working on the clinch in the runup to this fight.
Sewing lands punches inside but they're not really causing much damage.
Sewing lands a nice uppercut.
Sewing lands with a right to the head.

Fransisco is rocked!
That's one minute gone in the round.
Sewing swings wildly with an uppercut but Fransisco uses good head movement to avoid it.
Fransisco takes a shot to the head.
Fransisco is still on wobbly legs! Can Sewing finish him?
Sewing swings wildly with an uppercut but Fransisco uses good head movement to avoid it.
Sewing tries a shoulder strike but it doesn't do any damage.
Sewing misses with a short punch on the inside.
A head punch blocked on the inside by Fransisco .
Sewing throws a punch but it's blocked by Fransisco .
Fransisco blocks a couple of punches on the inside.
Fransisco blocking some punches.
Fransisco blocks a punch to the side of the head.
Fransisco seems to have recovered his senses.
Sewing lands with a quick shot inside that doesn't really do much damage.
Sewing dips a shoulder and cracks Fransisco with a mighty uppercut! Fransisco falls back against the cage and Sewing unloads with a barrage of strikes! Fransisco is completely out with his eyes open, only supported by the cage! Save him ref! Eventually the ref decides to do his job and jumps in - Sewing screams abuse at the incompetent official before going over to celebrate with his corner. Brutal stuff!
Ladies and gentlemen, after 1:37 of round 1, we have a winner by way of TKO (Strikes). Rawdy Sewing!
The defeated Paulo Fransisco had this to say: 'YOLO'.
|
|
|
|
|
|
|
|
|
|
|
|
|
|
|
|
|
|
|
|
|
|
|
| S |
C
A |
G |
S |
C
B |
G |
|
S |
C |
G |
|
energy
A | B |
|
hype
A | B |
|
pop
A | B |
|
mgr
A | B |
|
FIGHT
RATING
65% |
|
|
|
|
|
|
|
Undercard bout
|
Coming up we have a heavyweight MMA rules bout between Sean Watson (ranked 0 p4p, 0 weight class) and Artur Glowacki (ranked 0 p4p, 0 weight class). Watson comes to the cage accompanied by Ace Hood - Bugatti (Explicit) ft. Future, Rick Ross . Sean Watson has the edge in experience - let's see if he can make that count tonight.
 |
|
 |
| 188 cm
20
270 lbs
2 - 0 - 0 |
|
225 cm
25
275 lbs
0 - 1 - 0 |
Good wrestling
Counter fighter
Very strong |
|
BJJ White Belt
Excellent MT
Determined |
|
| |
|
Ladies and gentlemen. This fight is 3 rounds, in the heavyweight division.
Introducing the fighter to my left, fighting out of the red corner.
With a record of
2 - 0 - 0, fighting out of Rio de Janeiro, Sean Watson!
And introducing the fighter to my right, fighting out of the blue corner.
With a record of
0 - 1 - 0, fighting out of Rio de Janeiro, Artur Glowacki!
The judges for this bout are Daniel Cesar, Alexandre Firmino and Emerson Jorge.
The bell rings for round one and we are underway!

Watson shoots in for a takedown and gets it. Let's see what he's got on the mat.
We've been hearing that Watson has been drilling a lot of ground and pound in training, so let's see if he get the finish.
We must be close to a standup if these guys don't pick up the pace.
Watson works over Glowacki with some ground and pound from guard.
It looks like Artur Glowacki has been cut.
Watson connects with a couple of short punches.
Glowacki is a painfully thin specimen of a man. You do wonder whether a good body kick would snap him clean in two.
Watson trying to control the position from guard on top but Glowacki is wriggling around, looking for whatever he can.
The crowd are loving this. Great action here.
Watson throwing shots from guard but he's hitting more mat than opponent.
Watson throws a big elbow that misses.
Glowacki really doesn't want to stay on the ground with Watson. If he can't get it back to his feet, it's only a matter of time before he'll be tapping out.
Watson keeps in close for a moment and lands a decent shot to the side of Glowacki's head.
That has opened up Artur Glowacki's cut even more.
Watson trying to control the position from guard on top but Glowacki is wriggling around, looking for whatever he can.
Watson postures up and lands a big shot to Glowacki's brow.
Watson lands a couple of decent looking shots.
The fighters are pressed up against the cage, both looking to find a bit of space to work.
Watson is intent on slowing down the pace of the fight, simply looking to control.

Watson thinks about going for a leg but decides against it, in order to maintain the position.
That's one minute gone in the round.
Watson throwing elbows and punches but not connecting, as Glowacki works some decent striking defense from the bottom.
Watson has been looking to land a fair amount of strikes on the ground. He might be looking to soften his opponent up in order to work for a submission.
Watson's corner is telling him to maintain position.
Watson seems to have a rather negative gameplan on the ground. He seems keen to just score the takedown and hold down Glowacki for as long as he can get away with.
Watson scores with a decent looking elbow strike.
The cut above Artur Glowacki's eye is starting to cause him problems now.
The referee calls the doctor in to look at Artur Glowacki's cut. Oh no, the doctor has called an end to the bout!
Ladies and gentlemen, after 1:57 of round 1, we have a winner by way of TKO (Cut). Sean Watson!
|
|
|
|
|
|
|
|
|
|
|
|
|
|
|
|
|
|
|
|
|
|
|
| S |
C
A |
G |
S |
C
B |
G |
|
S |
C |
G |
|
energy
A | B |
|
hype
A | B |
|
pop
A | B |
|
mgr
A | B |
|
FIGHT
RATING
48% |
|
|
|
|
|
|
|
Undercard bout
|
Coming up we have a heavyweight MMA rules bout between Stephen Sevilla (ranked 0 p4p, 0 weight class) and James White (ranked 0 p4p, 0 weight class). White is bobbing his head along to his entrance song: gLAdiator - Magnum. Buckle up people - heeeeeeeeeere we go!
 |
|
 |
| 180 cm
26
265 lbs
3 - 2 - 0 |
|
190 cm
26
275 lbs
5 - 0 - 0 |
Good takedowns
Brawler
KO power |
|
BJJ Brown Belt
Brawler
Intelligent |
|
| |
|
Ladies and gentlemen. This fight is 3 rounds, in the heavyweight division.
Introducing the fighter to my left, fighting out of the red corner.
With a record of
3 - 2 - 0, fighting out of Rio de Janeiro, Stephen Sevilla!
And introducing the fighter to my right, fighting out of the blue corner.
With a record of
5 - 0 - 0, fighting out of Rio de Janeiro, James White!
The judges for this bout are Alexandre Firmino, Seu Braga and Matheus Silva.
The bell rings for round one and we are underway!
Sevilla shoots in for a takedown but White shows good takedown defense there and keeps this one on the feet.
Sevilla closes the distance and gets a trip takedown into side control. White quickly recovers to half guard.
We could do with one of the fighters taking the initiative a bit more on the ground - they're both waiting to capitalize on a mistake.

White looking for submissions off his back.
Sevilla could do with losing a few pounds - he looks very soft around the mid section, to put it politely.
Sevilla is working for a submission of some sort.
Sevilla is looking for a kimura but he's never going to get it from there.
Sevilla is looking for a kimura but he's never going to get it from there.
Sevilla is trying a forearm choke
I don't think that's going to do much at this level of the game.
White is looking for a sweep. Sevilla is wise to his cunning plan and keeps the top position.
White actively working from the bottom here.
Sevilla thows a wild elbow that connects with the canvas.
That's one minute gone in the round.
White regains full guard. Nicely done.
White is looking for a guillotine. You can't force these things though and Sevilla defends well.
Sevilla loading up with the ground and pound but he's missing more than he's landing in this flurry.
White throwing his legs up looking for a triangle.

Sevilla stands up from White's guard - Sevilla perhaps looking for a knockout.
Sevilla shoots in and drives through. White sprawls well.
Sevilla closes the distance and gets a trip takedown into side control. White quickly recovers to half guard.
White avoiding damage under a succession of punches from Sevilla.
White is looking to sinch up a guillotine here but Sevilla pulls his head out easily.
The ref warns both fighters not to hold the cage as they work up against the meshing.
The crowd are loving this. Great action here.
Sevilla throwing shots but they're hitting the canvas more than the man.
White actively working from the bottom here.
That's two minutes gone in the round.
Sevilla is trying to work for a kimura. This could be trouble! No, White has managed to free his arm - good work.
Sevilla thumps the canvas. Not on purpose obviously - he just missed White's head.
White is looking to sinch up a guillotine here but Sevilla pulls his head out easily.
Sevilla looking to pass the half guard. Not this time.
White keeping his head moving to avoid the ground and pound.
Sevilla not landing any meaningful shots this time.
White looking for submissions off his back.
Sevilla missing with the ground and pound from half guard.
Sevilla is looking for an arm triangle, whilst trying to pass to side control. White doesn't seem that keen to cooperate though. No luck this time Sevilla.
White has hold of a guillotine but he's not going to be able to crank on it really with only half guard, so it's no trouble for Sevilla. Oh but White has got full guard now! Oh boy! This one could be over very soon! Sevilla goes limp - he's gone! White jumps up and celebrates with the crowd - fantastic submission finish!
Ladies and gentlemen, after 3:56 of round 1, we have a winner by way of Submission (Guillotine). James White!
James White looked relieved post fight as he said the following; 'Peri ciota'.
|
|
|
|
|
|
|
|
|
|
|
|
|
|
|
|
|
|
|
|
|
|
|
| S |
C
A |
G |
S |
C
B |
G |
|
S |
C |
G |
|
energy
A | B |
|
hype
A | B |
|
pop
A | B |
|
mgr
A | B |
|
FIGHT
RATING
58% |
|
|
|
|
|
|
|
Undercard bout
|
Coming up we have a heavyweight MMA rules bout between Waldemar Koksowicz Drugi (ranked 0 p4p, 0 weight class) and Brian Cowherd (ranked 0 p4p, 0 weight class). Both fighters look fresh as a daisy as they make their way towards the cage.
 |
|
 |
| 183 cm
25
265 lbs
9 - 2 - 0 |
|
200 cm
27
280 lbs
7 - 3 - 0 |
BJJ White Belt
Excellent boxer
Granite chin |
|
Good wrestler
Brawler
Powerful |
|
| |
|
Ladies and gentlemen. This fight is 3 rounds, in the heavyweight division.
Introducing the fighter to my left, fighting out of the red corner.
With a record of
9 - 2 - 0, fighting out of Rio de Janeiro, Waldemar Koksowicz Drugi!
And introducing the fighter to my right, fighting out of the blue corner.
With a record of
7 - 3 - 0, fighting out of Rio de Janeiro, Brian Cowherd!
The judges for this bout are Seu Braga, Felipe Paraventi and Emerson Jorge.
The bell rings for round one and we are underway!
Koksowicz Drugi thuds his right hand into Cowherd's forehead from close range. That could be painful for both fighters.
Some wild striking there from Koksowicz Drugi.
Koksowicz Drugi misses with the combination.
Cowherd moves his head to the side to avoid a jab but walks straight into a cross.
It looks like Brian Cowherd has been cut.
Cowherd shoots in but no luck this time.
Cowherd misses with a body shot.
Cowherd moves forwards but Koksowicz Drugi connects with a nice, crisp jab.
The crowd cheering loudly, showing their appreciation for the quality fight we're seeing here.
Cowherd shoots in for a takedown but doesn't get it.
Jab, jab by Koksowicz Drugi - just one landing.
Waldemar Koksowicz Drugi seems to be the more aggressive standup fighter in this bout.

Cowherd closes the distance and clinches.
Koksowicz Drugi wants to get back to striking at distance but Cowherd won't allow it.
A short right from Cowherd on the inside.
Cowherd working on landing some head shots here - that one got through nicely.
Cowherd keeps the fight in the clinch, despite Koksowicz Drugi's efforts to push away.
Koksowicz Drugi tries to break the clinch but Cowherd is controlling the position.
That's one minute gone in the round.
Koksowicz Drugi is trying to break the clinch but Cowherd has him pressed against the cage.
Cowherd lands a right hand.
Cowherd slows down the pace here.
Koksowicz Drugi tries to break free but Cowherd pushes him back against the cage.
Cowherd missing with knees to the body.
A head punch on the inside from Cowherd fails to land.
Cowherd works for underhooks and lands a body shot in the process.
Koksowicz Drugi is breathing heavily.
Cowherd can't find room to land a body shot as Koksowicz Drugi controls the action.
A short right from Cowherd on the inside.
This has been an exciting period of action!
Koksowicz Drugi wants to break free but Cowherd has control.
That's two minutes gone in the round.
Koksowicz Drugi is pressed up against the cage. Cowherd has hold of a leg and is looking to drag Koksowicz Drugi down to the mat. Koksowicz Drugi avoids the attempt though and has circled away. We're back to striking at a distance.
Waldemar Koksowicz Drugi has stuffed three takedown attempts in the round now. That's going to take a lot out of Brian Cowherd.
Koksowicz Drugi bobs and weaves and unloads with a good uppercut.
Cowherd dodges the punch combination from Koksowicz Drugi.
A punch combination from Koksowicz Drugi misses.
Cowherd shoots in for a takedown. He's persisting with it as Koksowicz Drugi sprawls well. Koksowicz Drugi wins this battle and keeps the fight standing. Cowherd gets slowly back to his feet.
Cowherd uses good footwork to get in and out and land a nice right hand before Koksowicz Drugi has time to react.
Cowherd doesn't manage to clinch there - Koksowicz Drugi circles away.
Koksowicz Drugi tries to keep at a distance but Cowherd has taken the fight into the clinch.
Cowherd swings wildly with an uppercut but Koksowicz Drugi uses good head movement to avoid it.
Koksowicz Drugi blocks a couple of punches on the inside.
That's three minutes gone in the round.
Cowherd lands a body shot.
A nice left hand lands by Cowherd.
Cowherd lands a hook that snaps the head of Koksowicz Drugi backwards.
Koksowicz Drugi breaks the clinch and we're back to striking at distance.
Koksowicz Drugi stuns Cowherd with a nice body shot, before stepping back out of range.
Koksowicz Drugi misses with a few strikes there.
Koksowicz Drugi cracks Cowherd with a hook to the jaw. Both fighters smile at eachother and high-five before getting back down to business.
Cowherd fakes with an overhand right and moves in to clinch with Koksowicz Drugi, pushing him back against the cage.
Koksowicz Drugi prevents a body shot from Cowherd.
Cowherd scores with a shoulder strike.
Cowherd lands a right uppercut that snaps the head of Koksowicz Drugi backwards.
Cowherd makes some space for himself and lands an uppercut.
This has been an exciting period of action!

Cowherd manages to pull guard.
We may be looking at a referee standup if the pace doesn't pick up soon.
Cowherd working away from the bottom but not quite defensive enough there because Koksowicz Drugi has passed into half guard!
That's four minutes gone in the round.
Cowherd wants to get back to his feet.
It looks like Koksowicz Drugi is going to stand back up.
Cowherd is looking for a sweep. Koksowicz Drugi is wise to his cunning plan and keeps the top position.
The crowd are going absolutely nuts as the round comes to an end - what a fantastic round of action!
Cowherd is looking to get back to full guard here but Koksowicz Drugi has managed to pass to side control instead.
And thats the end of the round the fighters go back to their corners.
A close round but Brian Cowherd will probably get the nod.
The cut man is working on Brian Cowherd's cut.
That's the end of the interval. I'm sure that seemed a lot quicker than a minute for our two fighters! Back to the action.
Koksowicz Drugi connects with a lovely right hand, straight down the pipe.
Koksowicz Drugi throws a hard body shot but it just misses.
Koksowicz Drugi throws a good cross that connects.
Koksowicz Drugi lands the left hand.
Cowherd showing good head movement there, avoiding the strikes from Koksowicz Drugi.
Cowherd takes a shot to the nose. Hopefully that hasn't broken it.
It looks like Koksowicz Drugi has been trying to sharpen up his punching technique, as it looks crisper than last time we saw him.
Wooooo! Give it up for these two warriors! They are putting on a show!
Koksowicz Drugi throws the left hand but Cowherd avoids the punch easily.
Koksowicz Drugi misses with a lunging right hand
letting Cowherd counter with a right hand.
Koksowicz Drugi lands a body shot.
Cowherd is looking to clinch.
Koksowicz Drugi misses with the combination.
A swing and a miss from Cowherd.
Waldemar Koksowicz Drugi is looking to throw some combinations by the looks of things.
Koksowicz Drugi lunges in with swinging rights and lefts but Cowherd circles away quickly and effectively.
Koksowicz Drugi keeps the fight on the outside.
Koksowicz Drugi ducks down and throws a hook to the body but Cowherd moves away.
Waldemar Koksowicz Drugi is winning the standup battle so far.
That's one minute gone in the round.
Cowherd is on the wrong end of a nice combination from Koksowicz Drugi.
Both fighters are absolutely exhausted here.
Koksowicz Drugi misses with a jab, cross combination.
Cowherd changes levels and looks for a double leg takedown. Koksowicz Drugi tries to avoid it but Cowherd manages to keep hold of a leg and drag Koksowicz Drugi to the ground. Koksowicz Drugi escapes though and pops straight back up to his feet.

Oooooh!!! Koksowicz Drugi has knocked Cowherd down with a huge combo! Koksowicz Drugi steps away and waves a wobbly Cowherd back to his feet! This one might not go much longer!
Cowherd is rocked!
Wooooo! Give it up for these two warriors! They are putting on a show!
Cowherd uses some good footwork to avoid the body shot by Koksowicz Drugi.
Koksowicz Drugi works the jab nicely.
Koksowicz Drugi lands with a nice body punch.
Koksowicz Drugi missing with a left hand there. Cowherd was out of range so wasted energy throwing that one.
Cowherd has closed the distance and engaged Koksowicz Drugi in a clinch.
Cowherd tries to work over Koksowicz Drugi's body with a swooping hook but it only glances the target.
Cowherd scores with a shot to the side of Koksowicz Drugi's head.
Cowherd lands a nice looking hook to the body, against the cage.
Cowherd lands a hook that snaps the head of Koksowicz Drugi backwards.
A right hand to the body from Cowherd.
Nice body punch from Cowherd - that landed with a thud.
That's two minutes gone in the round.
Nice body punch from Cowherd - that landed with a thud.
A short right from Cowherd on the inside.
Cowherd throws an elbow that misses.
Cowherd is looking to score with knees to the body. Maybe he'll change it up and go body then head. Koksowicz Drugi is defending well for now.
A right handed body shot lands from Cowherd.
Cowherd is stalling here.
Good body shot from Cowherd.
Cowherd pulls guard effortlessly.
Cowherd working from the bottom, still in full guard. He's managed to get a loose triangle. Koksowicz Drugi doesn't seem to be doing much to defend here, obviously he feels comfortable in the position. Koksowicz Drugi manages to throw the legs off his shoulder and he's back into guard - no problem.
Cowherd has his foot on Koksowicz Drugi's thigh. He's trying to push off and get in position for a triangle, I think. Koksowicz Drugi works his way back into a safe position though.
That's three minutes gone in the round.
Cowherd working for a triangle but Koksowicz Drugi defends it easily.
Cowherd has an active guard here but Koksowicz Drugi has managed to pass into half guard.
That's four minutes gone in the round.
Neither fighter has done anything of merit for a good minute or two here and the crowd are not happy about it.
Cowherd wants to get back to full guard.
Cowherd is looking to get full guard. It looks like he might be successful but at the last minute Koksowicz Drugi jumps into side control!
The ref warns both fighters not to hold the cage as they work up against the meshing.
The crowd are going absolutely nuts as the round comes to an end - what a fantastic round of action!
Cowherd looking for a sweep but Koksowicz Drugi has passed into full mount! Oh no!
Koksowicz Drugi prevents Cowherd from getting the reversal.
And thats the end of the round the fighters go back to their corners.
That was a close second round but I would say that Waldemar Koksowicz Drugi will probably get the nod.
The cut man is working on Brian Cowherd's cut.
That's time! Back to the action! This is the final round!
Koksowicz Drugi throws a combination. Cowherd tries to block but a couple of punches get through.
Koksowicz Drugi throws a combination. Cowherd tries to block but a couple of punches get through.
Cowherd throws a body punch but Koksowicz Drugi moves out of range.
Cowherd fails in his attempt to clinch.
Wooooo! Give it up for these two warriors! They are putting on a show!
A nice combination there by Koksowicz Drugi.
Cowherd is looking to take this fight into the clinch.
Nice straight punches there by Koksowicz Drugi. You know Roy Jones Jr respects the hands of Koksowicz Drugi.
Koksowicz Drugi misses with a jab and misses with a cross straight after too.
Koksowicz Drugi looks to land a combination but Cowherd avoids it well.
Koksowicz Drugi throws a series of punches but Cowherd moves out of range.
Cowherd instigates a clinch.
Cowherd lands with a short shot to the head.
Cowherd lands a body shot in the clinch.
Both fighters are breathing heavily.
Cowherd tries to pull guard but can't drag his opponent to the mat. Koksowicz Drugi just stands there and leans against the cage.
A body shot lands from Cowherd.
That's one minute gone in the round.
Cowherd is leaning against Koksowicz Drugi and scores with a nice uppercut to the body.
Cowherd lands a right uppercut that snaps the head of Koksowicz Drugi backwards.
Cowherd pulls guard successfully.
Cowherd wants to sweep but no luck.
Cowherd wants to stand and escape but Koksowicz Drugi is having none of it.
Cowherd working from the bottom, still in full guard. He's managed to get a loose triangle. Koksowicz Drugi doesn't seem to be doing much to defend here, obviously he feels comfortable in the position. Koksowicz Drugi manages to throw the legs off his shoulder and he's back into guard - no problem.
The fighters are pressed up against the cage, both looking to find a bit of space to work.
Cowherd is looking to sweep but instead, Koksowicz Drugi has passed into half guard.
That's two minutes gone in the round.
Cowherd tries to roll over but Koksowicz Drugi keeps him under control.
That's three minutes gone in the round.
Cowherd wants to control but Koksowicz Drugi passes into side.
Cowherd is trying to work for a sweep but Koksowicz Drugi has mounted him!
Cowherd is wriggling around trying to escape.
Cowherd wants to use the cage to get back to his feet here.
Cowherd tries to get back to half guard but can't.
That's four minutes gone in the round.
Cowherd looking to escape from mount but he's given up his back!
You can see the frustration on Cowherd's face
He knows he is in trouble unless he improves his position sooner rather than later.
And that's the end of the fight!
I would just about give that final round to Brian Cowherd.
I think Cowherd has won this one but let's see whether the judges agree with me. Over to the ring announcer for the scorecards.
Ladies and gentlemen, after 3 rounds of action, we go to the scorecards for a decision.
Judge Seu Braga scores the fight 28:29
Judge Felipe Paraventi scores the fight 28:29
Judge Emerson Jorge scores the fight 28:29
In favor of your winner, by unanimous decision... Brian Cowherd!
The defeated Waldemar Koksowicz Drugi had this to say: 'Nie oszukasz mnie tępy huju. Myślisz, że jak jesteś wyższy to jesteś lepszy? Wezme ciebie, twojego trenera i zakopie was i inne wasze zaspermione cioty przy najbliższym cmentarzu w jakiejś diurze!!!'.
|
|
|
|
|
|
|
|
|
|
|
|
|
|
|
|
|
|
|
|
|
|
|
| S |
C
A |
G |
S |
C
B |
G |
|
S |
C |
G |
|
energy
A | B |
|
hype
A | B |
|
pop
A | B |
|
mgr
A | B |
|
FIGHT
RATING
100% |
|
|
|
|
|
|
|
Undercard bout
|
Coming up we have a light heavyweight MMA rules bout between Robb Stark (ranked 0 p4p, 0 weight class) and Kyle Babcock (ranked 0 p4p, 0 weight class). Kyle Babcock is the more experienced fighter, so let's see if that makes a difference tonight.
 |
|
 |
| 195 cm
24
215 lbs
6 - 0 - 0 |
|
175 cm
24
213 lbs
12 - 6 - 0 |
BJJ Brown Belt
Counter fighter
Good chin |
|
BJJ Purple Belt
Decent boxing
Good gas tank |
|
| |
|
Ladies and gentlemen. This fight is 3 rounds, in the light heavyweight division.
Introducing the fighter to my left, fighting out of the red corner.
With a record of
6 - 0 - 0, fighting out of Rio de Janeiro, Robb Stark!
And introducing the fighter to my right, fighting out of the blue corner.
With a record of
12 - 6 - 0, fighting out of Rio de Janeiro, Kyle Babcock!
The judges for this bout are Felipe Paraventi, Seu Braga and Daniel Cesar.
The bell rings for round one and we are underway!
Stark staying out of range there.
Babcock will need to tighten up his combinations if he doesn't want to gas himself out, swinging at thin air.
Stark moves out of range as Babcock strikes.
Stark looks frustrated there after his takedown attempt is stuffed easily.
Stark misses with a takedown
and Babcock counters with a straight punch to the midsection.
Stark walks into a left hand.
Babcock with a body punch. A glancing blow.
Babcock slips in close and lands a nice hook before moving back out of range.
Babcock looks to land a combination but Stark avoids it well.
A cross from Babcock lands.
Babcock ducks down and throws a hook to the body.
Babcock lands a nice hook to Stark's body. Stark takes it in his stride and looks to land his own strikes.
That's one minute gone in the round.
Babcock misses with a looping right.
Babcock thuds his right hand into Stark's forehead from close range. That could be painful for both fighters.
Babcock thuds a left hand into Stark's body.
Stark looks to have improved his striking defense since last time we saw him fight.
Babcock with a body punch. A glancing blow.
Babcock lands a jab to the nose.
Boom, another hit is landed. "You're gunna get knocked out" taunts Babcock, as that shot connected.
Babcock lands a right hook to the body.
Babcock changes levels and scores with a jab to the body.
Stark has his takedown stuffed
and Babcock counters with a shot to the ribs. That looked like it hurt.
That's three failed takedown attempts in the round for Robb Stark. That's going to take a lot out of him.
Babcock lands with a straight right. Stark didn't see that one coming.
That's two minutes gone in the round.
The crowd cheering loudly, showing their appreciation for the quality fight we're seeing here.
Babcock throws a body punch but Stark moves out of range.
Babcock stuns Stark with a nice body shot, before stepping back out of range.
Babcock scores with a hook to the body. Stark takes a step back and tries to catch his breath.
Nice jab there from Babcock.
Babcock lands a nice hook to Stark's body. Stark takes it in his stride and looks to land his own strikes.
Babcock ducks down and throws a hook to the body but Stark moves away.
Babcock scores with a hook to the body. Stark takes a step back and tries to catch his breath.
Babcock looks to score with a combo but nothing lands.
Babcock smiles there as he lands a nice right hand right on the button.
Stark changes levels and looks for a double leg takedown. Babcock tries to avoid it but Stark manages to keep hold of a leg and drag Babcock to the ground. Babcock escapes though and pops straight back up to his feet.
Babcock misses with a series of wild punches.
That's three minutes gone in the round.
A combination from Babcock does no damage.
Babcock lands a body shot.
Babcock misses with a body shot. Nice footwork from Stark.
Babcock swings wildly with a hook that is half blocked by Stark.
A nice combination there by Babcock.
Kyle Babcock seems to be the more aggressive standup fighter in this bout.
Stark fails with a rather predictable takedown attempt.
Stark swings and misses with a shot to the body
and Babcock counters with a stiff right hand.
Babcock lands with a good body shot.
Kyle Babcock is looking to keep the fight on the feet at all costs.
Babcock takes a swing at Stark's ribcage but misses.
Babcock is throwing a lot of body shots here, looking to wear down Stark rather than just go for the knockout.
Stark on the wrong end of a nice jab.
That's four minutes gone in the round.
Babcock missing with a left hand there. Stark was out of range so wasted energy throwing that one.
A nice combination there by Babcock.
We've seen a great period of action over the last minute or so - credit to both fighters for going all out!
Babcock fakes high and swings low for a body shot but Stark manages to avoid it.
Babcock is landing a lot of head punches in this opening round! Stark had better start moving his head a bit unless he wants his face to turn into pâté.
Babcock swings wildly with a right hand that was never going to find it's target.
Stark tries for a takedown but Babcock circles away easily
and Babcock counters nicely by changing levels and landing a hook to the body.
Babcock ducks down and throws a hook to the body but Stark moves away.
The fight stays on the outside here - Stark looks like he's thinking about clinching though.
Babcock scores with a hook to the body. Stark takes a step back and tries to catch his breath.
The crowd are going absolutely nuts as the round comes to an end - what a fantastic round of action!
Babcock throws a wild combination but nothing lands.
And thats the end of the round the fighters go back to their corners.
Kyle Babcock dominated that round.
The fighters' corners scream their final instructions, as the referee calls time. Here we go, back to the action!
Babcock looks to score with a jab to the body but Stark is just out of range.
Babcock thows a body shot but no joy.
Stark fails with a takedown attempt.
Babcock lands with a hook. Stark tried to avoid it but it clipped the top of his head.
This entire fight has taken place on the feet so far and you wonder whether Stark might be better served trying to take this one to the ground because he's losing the standup battle so far.
Babcock lands a head shot.
Stark shoots in for a takedown. "I don't think so" says Babcock as he avoids it easily.
Babcock dips down and scores with a jab to the body.
Babcock jabs at Stark's body.
Robb Stark is looking to throw some combinations by the looks of things.
Stark tries for a takedown but Babcock circles away easily
and Babcock counters with a nice uppercut.
That's three failed takedown attempts in the round for Robb Stark. That's going to take a lot out of him.
That's one minute gone in the round.
Stark walks into a jab.
Stark misses with a takedown attempt
letting Babcock counter with a right hand.
Babcock lands a pitter patter jab to the forehead of his opponent.
Stark takes a really solid shot there but just smiles back and shrugs his shoulders.
Babcock misses with a wild combination.
Babcock digs a good hook to Stark's body.
Babcock cracks Stark with an open hand slap.
Babcock lands an overhand right.
This has been an exciting period of action!
Babcock catches Stark with a nice straight right. He seems pissed - ooooh, it's on now! On like donkey kong!
Babcock scores to the head and body with a nice combination!

It looks like Robb Stark has been cut.
That's two minutes gone in the round.
No joy there for Babcock, who threw a few shots but didn't land.
Babcock looks to land a combination. Stark sees it coming but can only parry a couple of the shots.
Babcock misses with a jab and misses with a cross straight after too.
Nice jab there from Babcock.
Stark ducks right into an uppercut from Babcock.
This is turning into a torrid day at the office for Stark. He's trying desperately to land a takedown but he's failing miserably and getting slapped silly on the feet to compound his misery.
Stark showing good head movement there, avoiding the strikes from Babcock.
Babcock jabbing away but nothing is landing.
Stark looks for a takedown here. Will he get it? Babcock is fending him off so far but Stark persists. Nope, Babcock circles away and we're back to standing.
No luck with that takedown attempt from Stark.
A looping hook to the body misses from Babcock. Stark does a little dance to reset his feet.
That's three minutes gone in the round.
Babcock connects with a body shot that sends Stark's belly button to the back.
Babcock punishes Stark's body with a nice straight punch.
Babcock jabbing away but nothing is landing.
Stark showing good head movement there, avoiding the strikes from Babcock.
Stark feints and then dives in with a takedown. That was a long way out but the feint bought him enough time to close the distance and complete the takedown. Now we'll play guard for a bit and see who can get the better of that position.
Stark is looking to work some ground and pound but Babcock has wrist control.
Stark stands up and looks to throw the legs aside to pass to side control. Babcock swivels though and keeps the full guard.
Stark gets to his feet - Babcock follows without any prompting.
Babcock scores with a sloppy punch to the body. Not much technique there but it did the business.
That's four minutes gone in the round.
Babcock lands a nice hook to Stark's body. Stark takes it in his stride and looks to land his own strikes.
Babcock misses the shot to the body.
The crowd cheering loudly, showing their appreciation for the quality fight we're seeing here.
Stark is on the wrong end of a nice combination from Babcock.
Babcock swings wildly with a right hand that was never going to find it's target.
Stark closes this distance looking for a takedown but Babcock circles away.
Babcock has been the more effective fighter overall so far.
Babcock misses with an uppercut. Stark saw that one coming.
Babcock lands with a nice body punch.
Kyle Babcock seems to be getting the better of the standup.
Babcock goes to the watering hole and comes back with a big thumbs up from the judges as he scores a three punch combo.
The crowd are going absolutely nuts as the round comes to an end - what a fantastic round of action!
Babcock misses with a series of wild punches.
Babcock throws a wild combination but nothing lands.
And thats the end of the round the fighters go back to their corners.
Kyle Babcock showed his class in that round. I'd imagine he'll take it on all the scorecards.
The cut man is working on Robb Stark's cut.
The minute break is over - no more time for sponges and pep talks - back to the action! This is the final round!
Good exchange - Babcock coming out on top.
Stark doesn't succeed with the takedown
and Babcock counters with a left and a right that stings Stark.
Babcock fakes a jab and then connects with a hook.
Babcock avoids the clinch attempt nicely.
Babcock misses with an uppercut.
Babcock throws a body punch but Stark moves out of range.
Babcock scores with a nice one two combo and darts back out of range to avoid anything coming in the opposite direction.
Stark darts in trying to clinch
and Babcock counters with a left to the body.
That's one minute gone in the round.
Stark uses good footwork to avoid the strikes from Babcock.
Babcock scores with a hook to the body. Stark takes a step back and tries to catch his breath.
Stark avoids a punch combination nicely.
Babcock misses with a jab, cross combination.
A punch combination from Babcock misses.
Babcock swings wildly with a right hand that was never going to find it's target.
Stark fails with the takedown.
Babcock throws a jab to the body, straight down the pipe. Boom. That sent Stark stumbling backwards but he manages to regain his composure quickly.
Stark on the wrong end of a vicious looking body shot.
That's two minutes gone in the round.
Babcock lands with a shot to the body.
A slow jab from Babcock misses its intended target.
Babcock connects with a good right hand that stumbles Stark. Stark circles away out of range and recomposes himself.
Babcock throws out a token jab with nothing on it.
Babcock lands an overhand left. A wild punch that just about connected.
Robb Stark has stepped it up - he knows he needs a finish here!
Babcock uses good footwork to get in and out, landing a nice hook.
Stark takes a hook to the side of the head. I wonder if that's got his ears ringing.
The crowd cheering loudly, showing their appreciation for the quality fight we're seeing here.
Nice sprawl there from Babcock as Stark shoots in.
That's three failed takedown attempts in the round for Robb Stark. That's going to take a lot out of him.
Babcock lands a nice looking body shot.
Babcock fakes a jab and then connects with a hook.
That's three minutes gone in the round.
Stark wants to clinch up but Babcock keeps it at a distance.
Babcock's corner calls for a 1, 2 combination and Babcock duly obliges.
Stark ducks under an overhand right and circles away with a smile on his face.
Babcock misses with a double jab.
Babcock swinging wildly here.
Babcock stuffs the takedown attempt from Stark. Stark gets slowly back to his feet.
Stark looks like he's developed a pretty tasty lump over his left eye. He'll need to avoid taking much more damage to that.
Both fighters are breathing heavily.
Decent striking displayed by Babcock there.
Babcock cracks Stark with an open hand slap.
That's four minutes gone in the round.
Stark with poor footwork there. He got himself in a bit of a tangle, enabling Babcock to score with a decent uppercut.
A punch combination from Babcock misses.
Babcock scores with a punch to the gut of his opponent.
Babcock dips down and scores with a jab to the body.
Babcock lands a powerful looking uppercut that connected with his opponent's jaw.
We've seen a great period of action over the last minute or so - credit to both fighters for going all out!
Babcock punishes Stark's body with a nice straight punch.
Babcock thuds a left hand into Stark's body.
Stark shoots and misses
and Babcock counters with a right hand to the body.
As the round comes to an end the crowd are showing their appreciation for a great round of action.
Babcock looks to land a combination but Stark avoids it well.
Stark takes a big uppercut there. He seems a bit wobbly but no, he's OK.
Kyle Babcock is fighting for a decision - hopefully he's judged it right and he's actually winning the fight.
Stark takes a body punch but keeps moving.
And that's the end of the fight!
Kyle Babcock comfortably won the final round on my scorecard.
I've got Babcock winning every round here. Surely the decision will go his way and he'll pick up a well deserved decision victory. Over to the ring announcer for the scorecards.
Ladies and gentlemen, after 3 rounds of action, we go to the scorecards for a decision.
Judge Felipe Paraventi scores the fight 27:30
Judge Seu Braga scores the fight 26:30
Judge Daniel Cesar scores the fight 26:30
In favor of your winner, by unanimous decision... Kyle Babcock!
A very excited looking Kyle Babcock made sure he remembered to thank all the fans both in the arena and on the internet. He said all the coolest people spend all day on MMA websites, which got a big reaction.
|
|
|
|
|
|
|
|
|
|
|
|
|
|
|
|
|
|
|
|
|
|
|
| S |
C
A |
G |
S |
C
B |
G |
|
S |
C |
G |
|
energy
A | B |
|
hype
A | B |
|
pop
A | B |
|
mgr
A | B |
|
FIGHT
RATING
74% |
|
|
|
|
|
|
|
Undercard bout
|
Coming up we have a heavyweight MMA rules bout between Roger Howlingate (ranked 0 p4p, 0 weight class) and Tamba Watson (ranked 0 p4p, 0 weight class). Tamba Watson has the power to score a knockout today if he connects clean with Roger Howlingate's chin.
 |
|
 |
| 185 cm
28
265 lbs
8 - 8 - 0 |
|
215 cm
27
277 lbs
7 - 3 - 0 |
BJJ Blue Belt
Excellent boxer
Big right hand |
|
BJJ Purple Belt
Excellent boxer
Granite chin |
|
| |
|
Ladies and gentlemen. This fight is 3 rounds, in the heavyweight division.
Introducing the fighter to my left, fighting out of the red corner.
With a record of
8 - 8 - 0, fighting out of Rio de Janeiro, Roger Howlingate!
And introducing the fighter to my right, fighting out of the blue corner.
With a record of
7 - 3 - 0, fighting out of Rio de Janeiro, Tamba Watson!
The judges for this bout are Mauricio Rocha, Emerson Jorge and Luis Engracia.
The bell rings for round one and we are underway!
Watson misses with a body shot. Nice footwork from Howlingate.
Watson misses with a takedown attempt. He shot from a bit too far out.
Howlingate loads up on a big right hand but Watson slips the punch.
Watson misses with a head kick.
Howlingate throws a hard body shot but it just misses.
A looping hook to the body misses from Watson. Howlingate does a little dance to reset his feet.
Watson misses the shot to the body.
Howlingate rushes forward with a series of wild hooks but Watson moves out of range and avoids them all easily.
A looping hook to the body misses from Watson. Howlingate does a little dance to reset his feet.
Watson fakes high and swings low for a body shot but Howlingate manages to avoid it.
Howlingate misses with a looping right.
Watson connects with a lovely right hand, straight down the pipe.
Howlingate moves into range and connects with a jab.
It looks like Tamba Watson has been cut.
We've seen a great period of action over the last minute or so - credit to both fighters for going all out!
Howlingate lands a jab to Watson's midsection.
Howlingate will need to tighten up his combinations if he doesn't want to gas himself out, swinging at thin air.
Watson takes a body punch that cleary hurt but he's trying not to show any weakness.
Watson looks to land a left hand but Howlingate moved out of range nicely.
Roger Howlingate seems to be the more aggressive standup fighter in this bout.
Howlingate misses with the combination.
Howlingate misses with a wild body shot.
That's one minute gone in the round.
Watson wings a very wild body shot but it does the job and lands to the midsection.
Watson slips a jab from Howlingate.
A left and a right from Howlingate both land. Nice combination.
Howlingate throws a body punch but Watson moves out of range.
Watson paws at his opponent with the jab and then lunges in with a straight, right on the button.
The crowd cheering loudly, showing their appreciation for the quality fight we're seeing here.
Watson is trying hard to land a takedown here. Howlingate sprawls well and keeps this one on the feet.
Watson takes a solid shot to the body. That one hurt him but he's trying not to show it.
Watson looks winded!
Howlingate swinging wildly here.
Watson avoids a punch combination nicely.
Howlingate throws a combination that misses
and Howlingate takes a counter punch right on the button for his troubles.
Watson steps to the side to avoid the strikes from Howlingate.
Watson dips down and scores with a jab to the body.
Nice uppercut there from Watson.
Watson shoots for a takedown but Howlingate saw that one coming a mile off and avoided it easily.
Roger Howlingate has stuffed three takedown attempts in the round now. That's going to take a lot out of Tamba Watson.
That's two minutes gone in the round.
Watson dives in for a single leg takedown but Howlingate sprawls and the fighters end up clinched against the cage.
Watson misses with a body punch.
Watson jumps guard but his hands slip and he falls flat on his back. Well, he's made himself look a right mug there, as Howlingate walks away with a smile on his face. Watson gets slowly back to his feet and shakes his head.
Howlingate connects nicely with a jab. Noted by the judges no doubt.
Watson lands a vicious shot with the stealth of a sniper and the strength of a viper. Are vipers that strong? I can think of lots of things that are stronger than a viper - not many rhyme with sniper though.
Watson takes a swing at Howlingate's ribcage but misses.
Howlingate takes a punch right to his stomach. That took the wind out of him momentarily.
Watson displays some good footwork, moving neatly out of range as Howlingate throws out the jab.
A punch combination from Howlingate misses.
Watson lands a head shot.
Watson shoots in for a takedown but doesn't get it.
Watson will have to do better than that with his takedown attempts.
Howlingate dips down and scores with a jab to the body.
Watson shoots in for a takedown but Howlingate shows good takedown defense.
Roger Howlingate is looking to keep the fight on the feet at all costs.
That's three minutes gone in the round.
Howlingate throws a nice hook to the body that draws an oooh from the crowd.
Howlingate throws a hook to the body but it doesn't connect.
Howlingate misses with a combination
and Watson counters with a good right hand that lands right on the jaw.
Watson is pinned up against the cage taking some big shots here. The referee is looking closely deciding whether he should stop the fight.
Howlingate throws a nice looking combination but Watson bobs and weaves to avoid any damage.
Watson punishes Howlingate's body with a nice straight punch.
Good standup being displayed there by Howlingate as he connects with a hook.
Howlingate throws a series of punches but Watson avoids them all with ease.
Howlingate misses with a looping right.
Howlingate takes a swing at Watson's ribcage but misses.
Watson ducks down and throws a hook to the body.
The fans in attendance giving it up for the two fighters, who have really let it all hang out in the last minute or so!
Watson lands with an overhand left.

Watson drops Howlingate with a big left hand and mounts him. Howlingate is in big trouble!

Howlingate is rocked!
It looks like Roger Howlingate has been cut.
The referee looks like he's ready to step in and stand the fighters back up.
Watson has hold of an arm here, looking to extend it. He's committed to the armbar attempt here! Will he get it?! Yes! Howlingate is forced to tap!
Ladies and gentlemen, after 4:57 of round 1, we have a winner by way of Submission (Armbar). Tamba Watson!
|
|
|
|
|
|
|
|
|
|
|
|
|
|
|
|
|
|
|
|
|
|
|
| S |
C
A |
G |
S |
C
B |
G |
|
S |
C |
G |
|
energy
A | B |
|
hype
A | B |
|
pop
A | B |
|
mgr
A | B |
|
FIGHT
RATING
100% |
|
|
|
|
|
|
|
Undercard bout
|
Coming up we have a middleweight MMA rules bout between Dawid Roznicz (ranked 0 p4p, 0 weight class) and Andrzej Sternik (ranked 0 p4p, 0 weight class). Roznicz comes to the cage accompanied by Gangsta's Paradise. Sternik has chosen J Dash as his entrance music, which hasn't gone down very well with the crowd. Dawid Roznicz could well score a knockout today. He has the power to get to Andrzej Sternik's chin.
 |
|
 |
| 185 cm
25
185 lbs
5 - 1 - 0 |
|
182 cm
20
200 lbs
4 - 0 - 0 |
Good takedowns
Solid boxing
KO power |
|
BJJ Purple Belt
Excellent boxer
Good gas tank |
|
| |
|
Ladies and gentlemen. This fight is 5 rounds, for the middleweight championship of the world!
Introducing the champion to my left, fighting out of the red corner.
With a record of
5 - 1 - 0, fighting out of Rio de Janeiro, Dawid Roznicz!
And introducing the challenger to my right, fighting out of the blue corner.
With a record of
4 - 0 - 0, fighting out of Rio de Janeiro, Andrzej Sternik!
The judges for this bout are Mauricio Rocha, Leandro Rodrigues and Emerson Jorge.
The bell rings for round one and we are underway!
Roznicz gets his takedown attempt stuffed easily
and Sternik counters with a lovely shot to the body.
Sternik throws a couple of head shots and lands with the final one - a decent hook, which struck Roznicz on the side of the head.
It looks like Dawid Roznicz has been cut.
Roznicz fails with the takedown
and Sternik counters with a huge uppercut, hook combination that drops Roznicz! The ref has seen enough - he's dived in to stop the fight! Brutal strikes by Sternik!
Ladies and gentlemen, after 0:15 of round 1, we have a winner by way of TKO (Strikes). Andrzej Sternik! Andrzej Sternik retains his middleweight title!
Andrzej Sternik gave a mention to GRAND Royal Wear in his post fight interview. That will please them (and hopefully generate some sales).
|
|
|
|
|
|
|
|
|
|
|
|
|
|
|
|
|
|
|
|
|
|
|
| S |
C
A |
G |
S |
C
B |
G |
|
S |
C |
G |
|
energy
A | B |
|
hype
A | B |
|
pop
A | B |
|
mgr
A | B |
|
FIGHT
RATING
90% |
|
|
|
|
|
|
|
Co-main event
|
Coming up we have a heavyweight MMA rules bout between Adam Peri (ranked 0 p4p, 0 weight class) and Sam Angel (ranked 0 p4p, 0 weight class). Peri comes to the cage accompanied by Anthem of Israel. Adam Peri has the edge in experience - let's see if he can make that count tonight.
 |
|
 |
| 200 cm
28
270 lbs
10 - 8 - 0 |
|
199 cm
25
286 lbs
1 - 0 - 0 |
Good takedowns
Brawler
Experienced |
|
Good wrestler
Great elbows
Powerful |
|
| |
|
Ladies and gentlemen. This fight is 3 rounds, in the heavyweight division.
Introducing the fighter to my left, fighting out of the red corner.
With a record of
10 - 8 - 0, fighting out of Rio de Janeiro, Adam Peri!
And introducing the fighter to my right, fighting out of the blue corner.
With a record of
1 - 0 - 0, fighting out of Rio de Janeiro, Sam Angel!
The judges for this bout are Luis Engracia, Thiago Cunha and Mauricio Rocha.
The bell rings for round one and we are underway!
A combination from Peri does no damage.
Peri dives in and grabs Angel's left leg, looking for a takedown. Angel pushes down on Peri's head and hops out.
Peri shoots for a takedown but Angel saw that one coming a mile off and avoided it easily.
Angel misses with a double jab.
Peri fails with the takedown
and Angel makes him pay by landing a nice hook to the body before moving out of range.
That's three failed takedown attempts in the round for Adam Peri. That's going to take a lot out of him.
Peri is breathing heavily.
Angel rushes Peri and pushes him back against the cage in a clinch.
The fans in attendance giving it up for the two fighters, who have really let it all hang out in the last minute or so!
Angel unloads a knee to the mid-section. Peri lets out a prehistoric sounding urrrrgh.
Peri takes a knee to the side of the body.
Angel lands an elbow inside.
It looks like Adam Peri has been cut.
Angel connects with a knee to the head.
Angel scores a nice knee to the body.
Angel lands a nice elbow from the clinch.
Angel creates a bit of space for himself and sneaks an elbow through Peri's defenses.
A nice glancing elbow lands by Angel.
Angel landing knees to the body.
Angel comes over the top with an elbow. That landed flush.
Angel lands a glancing elbow in the clinch.
Angel lands a glancing elbow in the clinch.
Angel scores a nice knee to the body.
Angel lands a damaging elbow.
That's one minute gone in the round.
Angel creates a bit of space for himself and sneaks an elbow through Peri's defenses.
Angel is struggling to control the position.
Angel lands an elbow inside.
Angel lands a nice elbow from the clinch.
Adam Peri's cut is getting worse.
Angel lands a nice elbow from the clinch.
Angel lands a glancing elbow in the clinch.
Angel using the Thai clinch to land knees to the body.
Angel using the Thai clinch to land knees to the body.
Wooooo! Give it up for these two warriors! They are putting on a show!
Angel gets an overhook and lands an elbow to the side of the head.
Angel lands a knee to the head.
Adam Peri's cut is bleeding quite badly. He's got to try and protect it.
Angel taking a breather.
Angel lands a damaging elbow.
Peri takes a knee right on the jaw!
Angel landing knees to the body. They look like they could hurt.
Angel unloads a knee to the mid-section. Peri lets out a prehistoric sounding urrrrgh.
Angel lands a nice elbow.
That's two minutes gone in the round.
Angel lands a knee to the head.
Peri is rocked!
Angel unloads a knee to the mid-section.
Angel lands a glancing elbow in the clinch.
Oh Peri is still all over the place! His legs are completely gone! Will he be able to recover?!!
Angel gets an overhook and lands an elbow to the side of the head.
Angel lands an elbow that stopped Peri in his tracks for a moment.
Jeez, Adam Peri's cut is really nasty now. The referee must be thinking about getting that checked.
Angel gets an overhook and lands an elbow to the side of the head.
Angel pulls back and lands a big elbow that stuns Peri! Angel unloads with more strikes and Peri sinks to his knees! This one is all over!
Ladies and gentlemen, after 2:31 of round 1, we have a winner by way of TKO (Strikes). Sam Angel!
|
|
|
|
|
|
|
|
|
|
|
|
|
|
|
|
|
|
|
|
|
|
|
| S |
C
A |
G |
S |
C
B |
G |
|
S |
C |
G |
|
energy
A | B |
|
hype
A | B |
|
pop
A | B |
|
mgr
A | B |
|
FIGHT
RATING
100% |
|
|
|
|
|
|
|
Main event
|
Coming up we have a lightweight MMA rules bout between Raijin Kage (ranked 0 p4p, 0 weight class) and Devon Gonzalez (ranked 0 p4p, 0 weight class). The crowd giving both fighters a great reception on their way into the arena. That's good to see.
 |
|
 |
| 165 cm
24
162 lbs
7 - 2 - 0 |
|
170 cm
25
150 lbs
17 - 5 - 0 |
Good wrestling
Lethal high kicks
Insanely flexible |
|
Excellent grappler
Decent boxing
Good gas tank |
|
| |
|
Ladies and gentlemen. This fight is 3 rounds, in the lightweight division.
Introducing the fighter to my left, fighting out of the red corner.
With a record of
7 - 2 - 0, fighting out of Rio de Janeiro, Raijin Kage!
And introducing the fighter to my right, fighting out of the blue corner.
With a record of
17 - 5 - 0, fighting out of Rio de Janeiro, Devon Gonzalez!
The judges for this bout are Daniel Cesar, Seu Braga and Paulo Santos.
The bell rings for round one and we are underway!
Gonzalez dives in and scores a takedown into Kage's guard.
The referee claps his hands together and tells the fighters to work.
Kage is working actively off his back, looking to secure an arm or perhaps work for a triangle.
Gonzalez trying to control the position from guard on top but Kage is wriggling around, looking for whatever he can.
My spies in Franklin D. Bluth Memorial Supergym inform me that Gonzalez has been getting involved in the gym's BJJ sparring sessions. Let's see whether that pays dividends!
Gonzalez postures up to throw the ground and pound strikes but they don't connect.
Kage looking for a sweep. Not yet Kage, not yet.
The ref warns both fighters not to hold the cage as they work up against the meshing.
Kage is working hard here to advance position.
Gonzalez wants to control from the top but Kage keeps moving.
Kage lands a beautiful switch and he's in full mount! That could spell trouble for Gonzalez!
Gonzalez has the superior BJJ but he's also working some ground strikes into his gameplan.
Gonzalez gets back to half guard.
That's one minute gone in the round.
Kage looking for a submission but Gonzalez manages to get full guard, putting an end to that submission attempt.
Gonzalez keeping full guard, as Kage tries to pass.
Kage throws an elbow that misses. Gonzalez uses the momentum to reverse the position. He's now in Kage's guard. Nice move by Gonzalez!
Kage tries to land a sweep but no joy.
Gonzalez trying to control the position from guard on top but Kage is wriggling around, looking for whatever he can.
The fighters are starting to perspire pretty heavily.
Gonzalez looking to sit in guard and control but Kage gets the butterfly guard and sweeps. He's now in the guard on the top.
The fighters are pressed up against the cage, both looking to find a bit of space to work.
Gonzalez is trying to control the position but Kage postures up.
That's two minutes gone in the round.
Gonzalez pulls Kage in close to his closed guard and prevents Kage from doing any damage or advancing position.
Gonzalez has managed to work for a loose triangle. I think Kage should be able to defend this one pretty easily though. Oh, Gonzalez has tightened it up now! Kage should have reacted faster there - he's in big trouble and yes, he's tapped out! This one is all over!
Ladies and gentlemen, after 2:35 of round 1, we have a winner by way of Submission (Triangle). Devon Gonzalez!
Devon Gonzalez got down on his knees post fight and begged the management for a title shot. 'Please, I want that title shot so bad! Give it to me!'
|
|
|
|
|
|
|
|
|
|
|
|
|
|
|
|
|
|
|
|
|
|
|
| S |
C
A |
G |
S |
C
B |
G |
|
S |
C |
G |
|
energy
A | B |
|
hype
A | B |
|
pop
A | B |
|
mgr
A | B |
|
FIGHT
RATING
43% |
|
|
|
|
|
|
|
|
|
|
