 |
T$T- HW Grand Prix Round 1 PBP Commentary |
Undercard bout
|
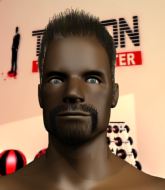
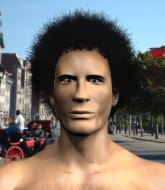
Coming up we have a heavyweight MMA rules bout between Conde Koma (ranked 0 p4p, 0 weight class) and Davide Dileo (ranked 0 p4p, 0 weight class). Dileo has chosen Sole Silenzioso by SUBSONICA as his entrance music. The key to victory for Conde Koma has got to be keeping the fight on the feet.
 |
|
 |
| 175 cm
20
181 lbs
4 - 6 - 0 |
|
192 cm
20
223 lbs
0 - 0 - 0 |
BJJ Blue Belt
Brawler
Granite chin |
|
Good wrestler
Good kicks
Granite chin |
|
| |
|
Ladies and gentlemen. This fight is 3 rounds, in the heavyweight division.
Introducing the fighter to my left, fighting out of the red corner.
With a record of
4 - 6 - 0, fighting out of St Petersburg, Conde Koma!
And introducing the fighter to my right, fighting out of the blue corner.
With a record of
0 - 0 - 0, fighting out of Tokyo, Davide Dileo!
The judges for this bout are Yasuomi Hirokawa, Sosuke Kotani and Shirou Masuda.

The bell rings for round one and we are underway!
Koma takes a nice looking leg kick right on the meat of his thigh there.
Koma throws a looping left and ducks down for a takedown. He's got his arms around Dileo's waist but Dileo gets an underhook and avoids the takedown by throwing Koma off to one side.
Dileo connects with a crisp jab.
Dileo lands with a cross to side of his opponent's head.
Koma throws a looping left and ducks down for a takedown. He's got his arms around Dileo's waist but Dileo gets an underhook and avoids the takedown by throwing Koma off to one side.
Dileo lands with a nice low kick. That'll leave a bruise.

Dileo gets in close and instigates a clinch.
The crowd are loving this. Great action here.
Nice elbow from Dileo.

It looks like Conde Koma has been cut.
Dileo lands with a light punch inside.
Dileo lands a nice elbow from the clinch.
Koma tries to land knees in the clinch but Dileo avoids the damage to the body.
Dileo lands a shoulder strike.
Dileo lands an elbow just above Koma 's eye.
Dileo gets double underhooks to prevent a takedown attempt from Koma.
That's three failed takedown attempts in the round for Conde Koma. That's going to take a lot out of him.
Koma is trying to force a seperation but Dileo has the dominant position.
Dileo makes some space for himself and lands an uppercut.

Koma is rocked!
Koma is pressed against the ropes. Dileo pushes back and unleashes a big elbow that really hurts Koma! Two more big strikes from Dileo and Koma crumples to the mat and taps out furiously due to the strikes!
Ladies and gentlemen, after 1:56 of round 1, we have a winner by way of Submission (Strikes). Davide Dileo!
A victorious Davide Dileo thanked his army of followers in his post fight interview, telling people to make sure they follow him on Twitter.
|
|
|
|
|
|
|
|
|
|
|
|
|
|
|
|
|
|
|
|
|
|
|
| S |
C
A |
G |
S |
C
B |
G |
|
S |
C |
G |
|
energy
A | B |
|
hype
A | B |
|
pop
A | B |
|
mgr
A | B |
|
FIGHT
RATING
100% |
|
|
|
|
|
|
|
Undercard bout
|
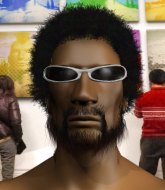
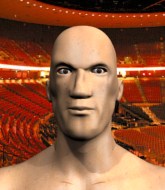
Coming up we have a heavyweight MMA rules bout between Carl Pulis (ranked 0 p4p, 0 weight class) and Mophaf Bungradidoa (ranked 0 p4p, 0 weight class). Carl Pulis had a look across the ring there at his opponent. He definitely means business
 |
|
 |
| 190 cm
21
275 lbs
1 - 0 - 0 |
|
178 cm
19
250 lbs
0 - 0 - 0 |
BJJ Purple Belt
Solid boxing
Big heart |
|
BJJ Purple Belt
Brawler
Solid chin |
|
| |
|
Ladies and gentlemen. This fight is 3 rounds, in the heavyweight division.
Introducing the fighter to my left, fighting out of the red corner.
With a record of
1 - 0 - 0, fighting out of Tokyo, Carl Pulis!
And introducing the fighter to my right, fighting out of the blue corner.
With a record of
0 - 0 - 0, fighting out of Tokyo, Mophaf Bungradidoa!
The judges for this bout are Yasuomi Hirokawa, Taro Takaoka and Yukihiro Shimada.
The bell rings for round one and we are underway!
Bungradidoa blocks a head kick by Pulis.
Pulis falls off balance throwing a combination
and Bungradidoa holds on and brings the fighters into a clinch.

Bungradidoa is trying to trip Pulis. He has hold of a leg but Pulis is hopping around, keeping his balance for the moment. Bungradidoa persists though and gets the takedown into guard.
Pulis seems to have improved his submission grappling technique since last time we saw him. Let's see if he can pull off a submission.
Bungradidoa pushing down on Pulis's thigh, trying to pass to half guard. He's managed it... Nice work.
Bungradidoa stalling.
Pulis keeping his head moving to avoid the ground and pound.
Bungradidoa is pressing down on Pulis's thigh, looking to free his foot. Pulis is holding on for now.
Bungradidoa not doing much here.
Pulis won't allow Bungradidoa to pass to mount.
Bungradidoa throwing shots but Pulis is blocking nicely.

That's one minute gone in the round.
Pulis trying to hold on to Bungradidoa's head to control him but Bungradidoa postures up.
Pulis has hold of Bungradidoa's hands but Bungradidoa slips his arm to the side and lands an elbow.
Still in half guard, Bungradidoa seems content to control.

Well, the referee has seen enough. Neither fighter is active enough on the ground so he's stood them back up.
Bungradidoa throws a front kick that sends Pulis stumbling back into the ropes.
Bungradidoa checks a low kick from Pulis.
Bungradidoa fails to land with the punch combination there - jab, cross, hook, miss, miss, miss.
Pulis gets taken down but at least he's managed to land in guard.
Bungradidoa sitting in guard here, content to control.

Bungradidoa gets to his feet and steps away from his opponent.
Carl Pulis seems to be the more aggressive standup fighter in this bout.

That's two minutes gone in the round.
Wooooo! Give it up for these two warriors! They are putting on a show!
Bungradidoa looks for a takedown. He's got it. We're now in half guard.
Bungradidoa is working hard to pass the guard. He's done it - he's now in full mount! Trouble for Pulis!
Pulis is desperately trying to improve his position but Bungradidoa has a good base and remains in mount.
Bungradidoa lands with some strikes.
Pulis is bucking up trying to escape but Bungradidoa cracks him with another couple of good strikes.
Bungradidoa is in the full mount, landing strikes.
Pulis is breathing heavily.
Bungradidoa landing shots from mount.
Bungradidoa controlling the position easily from mount.

The fighters are going at a pretty good pace and they're both starting to sweat now.
Bungradidoa is going oldschool here, as he tries to force Pulis to tap using a forearm choke. This isn't 1993 though, so Pulis shrugs it off.
Bungradidoa content just to control the position here.

That's three minutes gone in the round.
Pulis takes a big shot to the head but keeps on trying to improve his position.
Bungradidoa trying to control but he's not successful this time.
Bungradidoa looking to ground and pound his opponent to a finish here.
Bungradidoa controlling the position easily from mount.
Bungradidoa trying to control but he's not successful this time.
Bungradidoa controlling his opponent.

That's four minutes gone in the round.
The fans in attendance giving it up for the two fighters, who have really let it all hang out in the last minute or so!
Bungradidoa trying to control but he's not successful this time.
We may be looking at a referee standup if the pace doesn't pick up soon.
The crowd growing excited in anticipation of a finish here! Right on cue, Bungradidoa cracks his opponent with a massive right hand that draws loud cheers!
The fighters are tangled up in the ropes here. We might need a restart if the fighters can't break free themselves.
Bungradidoa jumps to side control looking for an arm triangle but Pulis manages to avoid the submission attempt.
The fighters are trapped in the ropes so we're going to have a reposition here. The ref calls for a break and repositions the fighters in the center of the ring.
Bungradidoa tries to score with some ground and pound. Pulis controls his posture well this time though and the shots don't do any damage.
The crowd are going absolutely nuts as the round comes to an end - what a fantastic round of action!
Bungradidoa trying to control the action but Pulis is working from the bottom.
Bungradidoa connects with a decent looking elbow from side control that caused Pulis some visible discomfort.
And thats the end of the round the fighters go back to their corners.
Mophaf Bungradidoa dominated that round.
That's the end of the round. The referee orders the cornermen out of the ring so we can get back down to business.

Pulis throws a jab, cross combination which is slipped
and Bungradidoa counters with a nice shoot takedown that brings the fighters to the ground.
Bungradidoa controlling from the top position.
Bungradidoa lands a nice shot whilst sitting in his opponent's guard.
Pulis will need to keep those long limbs tucked in whilst he's on the ground, to prevent any submissions.
Pulis bucks up whilst keeping hold of a body lock, managing to reverse the position. Now he's in top in Bungradidoa's guard.
Pulis wants to stand but Bungradidoa is controlling his posture from full guard.
The crowd cheering loudly, showing their appreciation for the quality fight we're seeing here.
Pulis wants to stand and escape but instead Bungradidoa has hit a sweep and he's now on top in guard.
That's one minute gone in the round.
Bungradidoa passes Pulis's left leg - he's now in half guard.
Bungradidoa seems to be looking for submissions.
Bungradidoa has been the more effective fighter overall so far.
Bungradidoa is trying to control. Pulis wants to improve his position but can't escape this time.
The step up in weight doesn't seem to be a problem for Bungradidoa. He's performing admirably here against the bigger man.
Bungradidoa thumps the canvas. Not on purpose obviously - he just missed Pulis's head.
Bungradidoa looks to land a strike but Pulis avoids it nicely and regains full guard.
Pulis keeping moving, preventing Bungradidoa from controlling successfully.
Pulis avoiding any damage from the ground and pound.
Bungradidoa stands up and waves to Pulis to follow him.
A telegraphed takedown attempt from Bungradidoa is defended easily by Pulis.
That's two minutes gone in the round.
Pulis tries to clinch but Bungradidoa moves out of range.
Bungradidoa takes the fight into the clinch.
Bungradidoa lands with a short head shot on the inside.
Pulis is trying to pull guard but being pressed up against the ropes enables Bungradidoa to keep the fight standing.
Bungradidoa throws a vicious knee straight up the middle but Pulis blocks it with crossed arms.
Bungradidoa is struggling to control the position.
Pulis wants to break free. God knows he wants to breaaaak freeee.
That's three minutes gone in the round.
Bungradidoa holding his opponent close, against the ropes.
Bungradidoa turns his back and goes for a hip toss. It's a bit messy but it gets the job done and Bungradidoa manages to end up in side control.
An elbow from Bungradidoa crashes against the mat.
Bungradidoa trying to control the action but Pulis is working from the bottom.
Pulis takes a nasty elbow to the side of the head.
Bungradidoa taking a breather here.
You can see the frustration on Pulis's face, being in this tough position on the bottom.
That's four minutes gone in the round.
Bungradidoa controls the position from side control.
Pulis regains half guard, as Bungradidoa was trying to land strikes.
This has been an exciting period of action!
Bungradidoa not landing any meaningful shots this time.
Bungradidoa sitting and controlling from the half guard.
It looks like the ref is thinking about a standup.
As the round comes to an end the crowd are showing their appreciation for a great round of action.
Pulis wants to improve his position but Bungradidoa is controlling well.
And thats the end of the round the fighters go back to their corners.
Mophaf Bungradidoa showed his class in that round. I'd imagine he'll take it on all the scorecards.
OK. That's time! The bell goes and we're back to the action. And we move into the final round!

Bungradidoa closes the distance and presses his opponent up against the ropes.
Bungradidoa gets double underhooks and manages to take the fight to the ground.
Pulis utilising some decent striking defenses from the guard, preventing the ground and pound.
Pulis could do with losing a few pounds - he looks very soft around the mid section, to put it politely.
Bungradidoa throws a big right hand that misses.
Bungradidoa controls from within his opponent's guard.
Bungradidoa scores with a decent looking elbow strike.
Bungradidoa prevents Pulis from getting back to his feet.
Pulis wants to hit a switch here but Bungradidoa passes into full mount! Oh no, disaster for Pulis there!
BOOM! Bungradidoa connects with a massive shot to the dome!
Bungradidoa has the superior BJJ but he's also working some ground strikes into his gameplan.
That's one minute gone in the round.
Pulis in a bad spot here, taking shots to the head.
Both fighters are breathing heavily.
Bungradidoa in mount throwing good strikes here, bouncing his opponent's head off the canvas.
Pulis is in a horrible position here. Bungradidoa smacks him with another shot as he tries to escape the position.
Pulis is rocked!
Wooooo! Give it up for these two warriors! They are putting on a show!
Bungradidoa sitting in mount, just looking to control for the moment.
Oh Pulis is still in real trouble! Will he be able to recover?!!
Mophaf Bungradidoa has got the better of the ground game so far.
Bungradidoa breaks from Pulis's wrist control and lands an elbow.
Bungradidoa postures up and throws a big right hand. BOOM! Right on the button! Pulis is out cold - huge knockout for Bungradidoa!
Ladies and gentlemen, after 2:58 of round 3, we have a winner by way of KO (Strikes). Mophaf Bungradidoa!
|
|
|
|
|
|
|
|
|
|
|
|
|
|
|
|
|
|
|
|
|
|
|
| S |
C
A |
G |
S |
C
B |
G |
|
S |
C |
G |
|
energy
A | B |
|
hype
A | B |
|
pop
A | B |
|
mgr
A | B |
|
FIGHT
RATING
100% |
|
|
|
|
|
|
|
Undercard bout
|
Coming up we have a heavyweight MMA rules bout between Bobby Ray Freeman (ranked 0 p4p, 0 weight class) and Buckley Starchwhite (ranked 0 p4p, 0 weight class). Freeman comes to the ring accompanied by Some Bodies Gonna Get It. Bobby Ray Freeman has the better chin. Will he look to stand and bang today?
 |
|
 |
| 189 cm
27
269 lbs
4 - 6 - 0 |
|
197 cm
28
271 lbs
5 - 6 - 0 |
BJJ White Belt
Excellent boxer
KO power |
|
Good wrestler
Counter fighter
Powerful |
|
| |
|
Ladies and gentlemen. This fight is 3 rounds, in the heavyweight division.
Introducing the fighter to my left, fighting out of the red corner.
With a record of
4 - 6 - 0, fighting out of Los Angeles, Bobby Ray Freeman!
And introducing the fighter to my right, fighting out of the blue corner.
With a record of
5 - 6 - 0, fighting out of Las Vegas, Buckley Starchwhite!
The judges for this bout are Shigeki Fujiwara, Yukihiro Yamamoto and Hirohito Nitta.
The bell rings for round one and we are underway!
Starchwhite shoots in and gets a takedown into half guard. Starchwhite showed some decent athleticism there.
It looks like the ref is thinking about a standup.
Starchwhite tries to pass the half guard into mount. Freeman knows what he's doing though and prevents the attempt.
Starchwhite throwing punches and elbows but they're not doing any damage.
Starchwhite thows a wild elbow that connects with the canvas.
Freeman keeping his head moving to avoid the ground and pound.
Freeman is trying to get back to full guard.
Freeman taking some punishment here, with Starchwhite in his half guard.
Starchwhite looks to score some points with some ground and pound.
The fans in attendance giving it up for the two fighters, who have really let it all hang out in the last minute or so!
Starchwhite drops an elbow to the side of Freeman's head.
Starchwhite is keeping good posture, landing some ground and pound.
Starchwhite throwing punches and elbows but they're not doing any damage.
Starchwhite not throwing his punches with enough precision this time.
That's one minute gone in the round.
Freeman on the receiving end of some nice ground and pound.
The referee walks around the fighters to get a better view of the action. Starchwhite lands a nice short elbow.
Starchwhite looks towards his corner to check for any instructions. The corner give him nothing to work with, so he cracks Freeman with a short hammerfist. I guess that's as good as any advice he could get in this position.
Starchwhite scores with a couple of good hammerfists.
The fans in attendance giving it up for the two fighters, who have really let it all hang out in the last minute or so!
Starchwhite lands strikes from half guard.
Starchwhite throwing shots but they're hitting the canvas more than the man.
Freeman is breathing heavily.
Starchwhite lands with an elbow from half guard - that looked like it hurt.
Starchwhite frees up his trapped foot and advances to mount.
Starchwhite fakes a shot to the body and cracks his opponent in the head. Nice ground and pound there!
The crowd growing excited in anticipation of a finish here! Right on cue, Starchwhite cracks his opponent with a massive right hand that draws loud cheers!
Freeman is rocked!
That's two minutes gone in the round.
Freeman in a bad spot here, taking shots to the head.
Oh Freeman is still in real trouble! Will he be able to recover?!!
Starchwhite lands a heavy shot. That's hurt Freeman! Starchwhite sees the opportunity and turns up the heat - strike after strike land to the defenseless Freeman and the ref dives in to save him! This one is all over!
Ladies and gentlemen, after 2:25 of round 1, we have a winner by way of KO (Strikes). Buckley Starchwhite!
An out of breath Buckley Starchwhite thanked his loyal fans in his post fight interview, giving them credit for his success over the course of his career.
|
|
|
|
|
|
|
|
|
|
|
|
|
|
|
|
|
|
|
|
|
|
|
| S |
C
A |
G |
S |
C
B |
G |
|
S |
C |
G |
|
energy
A | B |
|
hype
A | B |
|
pop
A | B |
|
mgr
A | B |
|
FIGHT
RATING
100% |
|
|
|
|
|
|
|
Undercard bout
|
Coming up we have a heavyweight MMA rules bout between Kuma Shiroma (ranked 0 p4p, 0 weight class) and Nebojsa Lopez (ranked 0 p4p, 0 weight class). Nebojsa Lopez is the more experienced fighter, so let's see if that makes a difference tonight.
 |
|
 |
| 193 cm
24
254 lbs
6 - 1 - 0 |
|
205 cm
26
265 lbs
5 - 4 - 0 |
Decent wrestler
Dangerous knees
Self confident |
|
BJJ Purple Belt
Decent boxing
Knockout power |
|
| |
|
Ladies and gentlemen. This fight is 3 rounds, in the heavyweight division.
Introducing the fighter to my left, fighting out of the red corner.
With a record of
6 - 1 - 0, fighting out of Tokyo, Kuma Shiroma!
And introducing the fighter to my right, fighting out of the blue corner.
With a record of
5 - 4 - 0, fighting out of Tokyo, Nebojsa Lopez!
The judges for this bout are Yukihiro Yamamoto, Taro Takaoka and Yasuomi Hirokawa.
The bell rings for round one and we are underway!
Lopez tries a switch kick but it misses it's target.
Lopez drives through and clinches with Shiroma against the ropes.
Shiroma scores a nice knee to the body.
Knees to the body from Shiroma.
Lopez looks winded!
Wooooo! Give it up for these two warriors! They are putting on a show!
Knees to the body from Shiroma.
Knees in the clinch landing for Shiroma.
The referee is keeping an eye on Shiroma - much more stalling and he will separate the fighters.
Shiroma working Lopez over with knees to the body.
Shiroma unloads a knee to the mid-section.
Shiroma landing knees to the body. They look like they could hurt.
Shiroma lands a nice knee to the body.
Shiroma is stalling here.
Shiroma using the Thai clinch to land knees to the body.
Kneeeeees! The crowd are calling for knees to the body. Shiroma obliges.
Shiroma unloads a knee to the mid-section.
That's one minute gone in the round.
Shiroma is trying to wear down his opponent with knees to the body.
Shiroma connects with a nasty looking knee right to Lopez's face.
Shiroma working Lopez over with knees to the body.
Shiroma stalling.
Shiroma lands a nice knee to the body.
Knees in the clinch landing for Shiroma.
Shiroma avoiding damage.
Shiroma landing knees to the body.
The crowd cheering loudly, showing their appreciation for the quality fight we're seeing here.
Shiroma controlling the action here for a moment.
That's two minutes gone in the round.
Shiroma blocks a punch to the side of the head.
Shiroma working Lopez over with knees to the body.
Shiroma scores with a knee to the head.
Shiroma landing knees to the body.
Kneeeeees! The crowd are calling for knees to the body. Shiroma obliges.
Shiroma landing knees to the head.
Shiroma effectively controlling the action here.
Shiroma utilising his Muay Thai to score with a knee to the body.
Shiroma stalling against the ropes.
Shiroma lands a nice knee to the body.
That's three minutes gone in the round.
Shiroma landing knees to the head.

It looks like Nebojsa Lopez has been cut.
Shiroma lands a knee to the head.
Shiroma utilising his Muay Thai to score with a knee to the body.
Shiroma avoiding damage.
Shiroma seems to have come into the fight with the intention of avoiding any damage in the clinch, rather than actually showing any aggression.

Shiroma drops Lopez with a big knee straight up the middle! Lopez is covering up against the ropes but manages to escape and gets back to his feet!

Lopez is rocked!
Fantastic stuff here - a very entertaining period of action, which has drawn cheers from the crowd.
Shiroma throws a quick head kick that knocks Lopez silly! This fight is all over! What a finish! Shiroma is up on the ropes, taking in the applause from the crowd.
Ladies and gentlemen, after 3:53 of round 1, we have a winner by way of KO (Head Kick). Kuma Shiroma!
|
|
|
|
|
|
|
|
|
|
|
|
|
|
|
|
|
|
|
|
|
|
|
| S |
C
A |
G |
S |
C
B |
G |
|
S |
C |
G |
|
energy
A | B |
|
hype
A | B |
|
pop
A | B |
|
mgr
A | B |
|
FIGHT
RATING
82% |
|
|
|
|
|
|
|
Undercard bout
|
Coming up we have a heavyweight MMA rules bout between Mario Bones (ranked 0 p4p, 0 weight class) and Jet Chan (ranked 0 p4p, 0 weight class). Mario Bones looks tired to me. Hopefully he has got enough gas left in the tank to put in a good performance.
 |
|
 |
| 198 cm
24
265 lbs
2 - 9 - 0 |
|
204 cm
26
260 lbs
5 - 5 - 0 |
BJJ Blue Belt
Brawler
Experienced |
|
BJJ Blue Belt
Brawler
Determined |
|
| |
|
Ladies and gentlemen. This fight is 3 rounds, in the heavyweight division.
Introducing the fighter to my left, fighting out of the red corner.
With a record of
2 - 9 - 0, fighting out of Tokyo, Mario Bones!
And introducing the fighter to my right, fighting out of the blue corner.
With a record of
5 - 5 - 0, fighting out of Tokyo, Jet Chan!
The judges for this bout are Hirohito Nitta, Shirou Masuda and Yukihiro Yamamoto.
The bell rings for round one and we are underway!
Chan closes the distance and looks for a trip takedown... aaaand he's got it - Chan lands in his opponent's guard.
Bones looks exhausted already! Oh dear, he should have come in in better shape than this!
Chan prevents Bones from getting back to his feet.
Chan trying to control the position from guard on top but Bones is wriggling around, looking for whatever he can.
Chan landing with the ground and pound.
Chan stops Bones from standing up.
Chan controlling from the top position.
Chan with a couple of shots to the head there. Not particularly brutal.
Chan is pushing down on Bones's leg trying to pass to half guard. Bones is fighting to maintain full guard but Chan has managed to sneak the leg through.
Bones wants to get back to his feet.
Chan is looking for a kimura but Bones is holding onto that half guard position, so it's hard for Chan to get the leverage.
This has been an exciting period of action!
Bones tries to push off, looking to stand up, but Chan manages to move to mount!
Chan controlling the position easily from mount.
That's one minute gone in the round.
You get the feeling that Bones really doesn't like being in this position too much.
Chan controlling the position easily from mount.
Bones is trying to escape but when you're mounted that's not too easy.
Chan looking to control but Bones is working nicely, looking to advance position himself.
Chan controlling from mount.
That's two minutes gone in the round.
Bones is trying to get back to his feet but can't.
Chan trying to control but Bones is having none of it.

The ref stands the fighters back up, due to lack of action by Jet Chan.
Chan chopping away at his opponent's legs.
Chan clinches up against the ropes.
Chan manages to pull guard. Let's see whether he can land a sub off his back.
Chan manages to land a sweep and now he's in mount on top!
The fighters are tangled up in the ropes here. We might need a restart if the fighters can't break free themselves.
This has been an exciting period of action!
Chan cracks Bones with a nasty head shot there - the crowd let out an audible gasp there, as the noise reverberated around the arena.
Chan is still in mount, landing shots to his trapped opponent. Bones can't stay in a position like this for much longer.
Bones is in a horrible position here. Chan smacks him with another shot as he tries to escape the position.
Chan looking to control and managing it successfully.
That's three minutes gone in the round.
Chan breaks from Bones's wrist control and lands an elbow.
Chan trying to control but he's not successful this time.
Chan is thinking about an arm triangle here, looking to tighten it up before moving to side control. Bones can see it coming though and defends well with a couple of strikes to the head and some good arm positioning.
Chan breaks from Bones's wrist control and lands an elbow.
Chan can't quite control the action as he would like just now, as Bones is looking to escape.
Chan content just to control the position here.
Chan working Bones over with strikes here.
Bones is rocked!
That's four minutes gone in the round.
Chan controlling from mount.
This has been an exciting period of action!
Bones is trying to get to the ropes to help him get back to his feet.
The fighters are trapped in the ropes so we're going to have a reposition here. The ref calls for a break and repositions the fighters in the center of the ring.
Chan wants to control the pace but Bones is squirming around nicely.
Chan might have to switch it up a bit here because his efforts to control Bones haven't been going to plan, at least at the current moment in time.
Bones wants to try and get back to his feet.
The crowd are going absolutely nuts as the round comes to an end - what a fantastic round of action!
Chan works his way to his opponent's back.
Chan trying desperately to keep hold of the dominant position.
And thats the end of the round the fighters go back to their corners.
Jet Chan dominated that round.
The corners get their ten second warning. Both fighters stand from their stools and stare eachother down, ready to get back to the action.
Chan turns his hip over beautifully as he lands a nice leg kick.
Bones looks to have improved his striking defense since last time we saw him fight.
Chan moves into the clinch.
Chan pulls guard successfully.
Chan is active off his back here, looking for submissions.
Chan has been the more effective fighter overall so far.
Chan is doing well to control the posture of his opponent and prevent any damage.
Chan tries to land a sweep but no joy.
Bones has to be careful here, sitting in the guard of a superior BJJ player.

Bones has gone for a leg lock! Chan slips out almost immediately though and dives into Bones's guard.
Chan passes Bones's left leg - he's now in half guard.
Jet Chan has got the better of the ground game so far.
Wooooo! Give it up for these two warriors! They are putting on a show!
Chan drops an elbow to the side of Bones's head.
Bones is trying to stand.
Both fighters are absolutely exhausted here.
That's one minute gone in the round.
Chan controlling the action here.
Bones is looking to escape.
Chan passes to side control.
Chan has the superior BJJ but he's also working some ground strikes into his gameplan.
Bones taking a bit of punishment here - Chan scoring with strikes.
Chan controls the position.
Chan advances to mount.
Bones tries to buck Chan off but Chan takes his back!
Chan has his opponent trapped and is landing shots. Not a good position for Bones.
Bones holding both Chan 's hands and preventing any damage.
That's two minutes gone in the round.
Chan is working for the choke. It looks like he might have got it... has he...? Yes! Bones is tapping out! This one is all over!
Ladies and gentlemen, after 2:20 of round 2, we have a winner by way of Submission (RNC). Jet Chan!
|
|
|
|
|
|
|
|
|
|
|
|
|
|
|
|
|
|
|
|
|
|
|
| S |
C
A |
G |
S |
C
B |
G |
|
S |
C |
G |
|
energy
A | B |
|
hype
A | B |
|
pop
A | B |
|
mgr
A | B |
|
FIGHT
RATING
100% |
|
|
|
|
|
|
|
Undercard bout
|
Coming up we have a heavyweight MMA rules bout between Andrzej Kozak (ranked 0 p4p, 0 weight class) and Redjo Majkan (ranked 0 p4p, 0 weight class). Majkan has chosen Silent Gun as his entrance music, which hasn't gone down very well with the crowd. Both fighters look fresh as a daisy as they make their way towards the ring.
 |
|
 |
| 190 cm
25
270 lbs
4 - 0 - 0 |
|
190 cm
25
245 lbs
2 - 3 - 0 |
BJJ White Belt
Brawler
Intelligent |
|
Decent wrestler
Counter fighter
Enjoys gardening |
|
| |
|
Ladies and gentlemen. This fight is 3 rounds, in the heavyweight division.
Introducing the fighter to my left, fighting out of the red corner.
With a record of
4 - 0 - 0, fighting out of Tokyo, Andrzej Kozak!
And introducing the fighter to my right, fighting out of the blue corner.
With a record of
2 - 3 - 0, fighting out of Tokyo, Redjo Majkan!
The judges for this bout are Ren Mimura, Yukihiro Yamamoto and Yasuomi Hirokawa.
The bell rings for round one and we are underway!
Kozak throws a hook to the body but it doesn't connect.
Kozak lands with an overhand left.
Kozak misses with a head kick.
Kozak throws a jab when Majkan was well out of range.
Majkan avoids the body shot from Kozak.
Majkan fails with a takedown attempt.
Majkan gets the takedown into side control.
We could do with one of the fighters taking the initiative a bit more on the ground - they're both waiting to capitalize on a mistake.
It looks like the ref is thinking about a standup.
Kozak tries to bench press Majkan off him but Majkan keeps the position.
Kozak struggling a bit here.
Majkan landing with strikes to the head and body from side control.
The crowd are loving this. Great action here.
Kozak is trying to stand back up. He's worked his way up against the ropes but Majkan has just dragged him back down to the mat.
Majkan looking to punish the body of his opponent here but Kozak is avoiding damage well.
That's one minute gone in the round.
Majkan misses with an attempted head punch from side control.
Kozak is not in a great position here, taking some shots.
Majkan has the superior BJJ but he's also working some ground strikes into his gameplan.
Kozak parries the strikes from Majkan easily there. Majkan is wary of posturing up too much because it might enable Kozak to escape.
Kozak knows he needs to get back to his feet asap. He's simply no match for Majkan on the ground.
Majkan scores with a couple of nice shots to the head there. The referee takes a look at Kozak to see if he's OK.
Kozak dodges the ground and pound from Majkan.
Kozak wants to get back to his feet but Majkan drags him back down.
Majkan grinds an elbow into Kozak's temple.
Majkan is chipping away with strikes.
The crowd are loving this. Great action here.
Kozak takes a nasty elbow to the side of the head.
Majkan scores with a couple of short elbows.
Kozak on the wrong end of some ground and pound.
Kozak is rocked!
Kozak is breathing heavily.
Majkan looks up at the clock and then as Kozak takes his cue and looks up at the clock too, Majkan smacks him right in the chops with a big elbow! How rude!
Oh Kozak is still in real trouble! Will he be able to recover?!!
Kozak can't do much from the bottom here.
A big shot lands for Majkan! That's hurt Kozak! Will he recover? Majkan fires away with more strikes and the referee has to step in to stop the fight!
Ladies and gentlemen, after 2:59 of round 1, we have a winner by way of TKO (Strikes). Redjo Majkan!
Redjo Majkan got down on his knees post fight and begged the management for a title shot. 'Please, I want that title shot so bad! Give it to me!'
|
|
|
|
|
|
|
|
|
|
|
|
|
|
|
|
|
|
|
|
|
|
|
| S |
C
A |
G |
S |
C
B |
G |
|
S |
C |
G |
|
energy
A | B |
|
hype
A | B |
|
pop
A | B |
|
mgr
A | B |
|
FIGHT
RATING
86% |
|
|
|
|
|
|
|
Co-main event
|
Coming up we have a heavyweight MMA rules bout between Heifei Jsjfie (ranked 0 p4p, 0 weight class) and Davey Smith (ranked 0 p4p, 0 weight class). I don't know about you partner, but I'm pumped for this one!
 |
|
 |
| 213 cm
18
280 lbs
3 - 0 - 0 |
|
210 cm
25
260 lbs
1 - 0 - 0 |
BJJ Purple Belt
Brawler
KO power |
|
BJJ Blue Belt
Solid Muay Thai
Solid chin |
|
| |
|
Ladies and gentlemen. This fight is 3 rounds, in the heavyweight division.
Introducing the fighter to my left, fighting out of the red corner.
With a record of
3 - 0 - 0, fighting out of Tokyo, Heifei Jsjfie!
And introducing the fighter to my right, fighting out of the blue corner.
With a record of
1 - 0 - 0, fighting out of Tokyo, Davey Smith!
The judges for this bout are Shigeki Fujiwara, Yasuomi Hirokawa and Kenichi Hosakawa.
The bell rings for round one and we are underway!
Jsjfie throws a combination but comes up with nothing but fresh air.
Smith dives in and scores a takedown into Jsjfie's guard.
The referee looks like he's ready to step in and stand the fighters back up.
Jsjfie is working for submissions here. He's thrown up his legs looking for a triangle but Smith frees his head nicely. Oh but Jsjfie has switched to an armbar! Smith is tapping furiously! Lovely submission there!
Ladies and gentlemen, after 0:22 of round 1, we have a winner by way of Submission (Triangle Armbar). Heifei Jsjfie!
|
|
|
|
|
|
|
|
|
|
|
|
|
|
|
|
|
|
|
|
|
|
|
| S |
C
A |
G |
S |
C
B |
G |
|
S |
C |
G |
|
energy
A | B |
|
hype
A | B |
|
pop
A | B |
|
mgr
A | B |
|
FIGHT
RATING
42% |
|
|
|
|
|
|
|
Main event
|
Coming up we have a super heavyweight MMA rules bout between William Barker (ranked 0 p4p, 0 weight class) and Tony Jaa (ranked 0 p4p, 0 weight class). Barker's ring entrance music is that housewives' favourite, The Way of the Fist - Five Finger Death Punch. I can't wait for this one - let's get the fighter introductions out of the way and get this one started!
 |
|
|
| 180 cm
35
182 lbs
27 - 16 - 0 |
|
180 cm
35
180 lbs
13 - 26 - 0 |
Abu Dhabi Champ
Lethal high kicks
Very quick |
|
BJJ Purple Belt
Dangerous knees
Determined |
|
| |
|
Ladies and gentlemen. This fight is 5 rounds, in the super heavyweight division.
Introducing the fighter to my left, fighting out of the red corner.
With a record of
27 - 16 - 0, fighting out of Tokyo, William Barker!
And introducing the fighter to my right, fighting out of the blue corner.
With a record of
13 - 26 - 0, fighting out of Tokyo, Tony Jaa!
The judges for this bout are Yasuomi Hirokawa, Ren Mimura and Yukihiro Yamamoto.
The bell rings for round one and we are underway!
Barker scores with a one two! Jaa had his feet all tangled up there and couldn't avoid the strikes.
It looks like Tony Jaa has been cut.
Jaa is looking to take this fight into the clinch.
Barker will need to tighten up his combinations if he doesn't want to gas himself out, swinging at thin air.
Jaa pulls out of a head kick attempt.
Barker drops Jaa with a right and a left! Barker comes rushing in but Jaa regains his composure and manages to keep Barker in guard.
Jaa is rocked!
Wooooo! Give it up for these two warriors! They are putting on a show!
Barker trying to control but Jaa is working from the bottom.
Jaa is still in real trouble! Can Barker finish him?
Jaa isolates an arm and boxes in a triangle. Barker stacks Jaa on his neck as he steps over and passes to the side. He's now in a much more dominant position where he can look to do some serious damage. Nice move by Barker!
Jaa seems to have recovered his senses.
Barker works to advance to full mount. Jaa defends for a few seconds but eventually he succumbs.
Jaa really doesn't want to stay on the ground with Barker. If he can't get it back to his feet, it's only a matter of time before he'll be tapping out.
Barker working the ground and pound effectively.
Barker swings around for an armbar but it's a sloppy attempt and Jaa is now in Barker's guard. A big mistake from Barker there, giving up the dominant position!
Barker wants to stand but Jaa is controlling the position.
That's one minute gone in the round.
Jaa avoids a guillotine attempt easily.
Jaa slips effortlessly into side control - very nice.
Barker is trying to get back to half guard.
Barker is sneaking out the side here. He's bucked Jaa off and has taken his back!
Barker tries to get the hooks in deep but Jaa pushed the leg off.
That's two minutes gone in the round.
Jaa is staying cool under pressure, defending well against the rear naked choke attempt from his opponent.
Fantastic stuff here - a very entertaining period of action, which has drawn cheers from the crowd.
Jaa preventing the rear naked choke attempt from Barker.
Jaa is covering up but some of the strikes from Barker are getting through and doing damage.
Jaa rolls, trying to escape but Barker keeps control of the position.
Jaa looking to stop the rear naked choke attempt by controlling the hands.
The fighters are tangled up in the ropes here. We might need a restart if the fighters can't break free themselves.
Barker lands a shot to the head.
Barker has been looking to land a fair amount of strikes on the ground. He might be looking to soften his opponent up in order to work for a submission.
Barker is landing with strikes. Jaa can't take much more of this.
Barker patiently working for the choke. Which fighter will keep their nerve here?
Jaa tries to escape but Barker has the hooks in and won't let him break free.
Barker has his hand under the chin of his opponent looking for the choke. He's nearly got it! This one could be all over! But no, Jaa has freed his hand and lives to survive another
well, another couple of seconds at least!
That's three minutes gone in the round.
Barker is looking for the choke from the back position but Jaa is controlling his hands well.
Jaa is in bad spot here.
Barker gets his hooks in and is throwing strikes.
Jaa rolls and manages to get back to half guard. Nicely done.
Barker working the head and body with strikes.
Jaa slips a foot under and gets full guard. Nice work.
This is a great period of action - very entertaining stuff!
Barker pressing down on his opponent's thigh, looking to pass guard. Jaa is keeping the position for now.
Jaa is working actively off his back, looking to secure an arm or perhaps work for a triangle.
Barker advances to half guard.
That's four minutes gone in the round.
Barker is sneakily working for an arm triangle but Jaa sees it coming and defends easily.
Nice strikes from Barker there.
Barker lands with an elbow from half guard - that looked like it hurt.
Barker perhaps working for something from half guard, or maybe not. It looks like he's just sitting there.
Jaa makes his way to full guard. A much better position for Jaa.
Barker sitting in guard here, content to control.
Jaa trying to keep a closed guard but Barker is proving a slippery customer.
Barker wants to control from the top but Jaa keeps moving.
Barker stands up and looks to throw the legs aside to pass to side control. Jaa swivels though and keeps the full guard.

That's five minutes gone in the round.
Barker is taking a break and basically stalling. The referee will not allow him to do that for long.
Barker trying to control the position from guard on top but Jaa is wriggling around, looking for whatever he can.

We're going to have a standup here because William Barker wasn't active enough for the referee's liking.
Jab, cross, leg kick. Nice combination by Barker!
Jaa misses with a wild combination.
Barker connects with a jab and follows up with a big overhand right! Oh that's hurt Jaa! He's out on his feet! Barker rushes in and drops Jaa with another big right hand, forcing the referee to stop the fight!
Ladies and gentlemen, after 5:33 of round 1, we have a winner by way of TKO (Punches). William Barker!
A very excited looking William Barker rambled incoherently for about 5 minutes post fight about how awesome he is. It was kinda funny for a while but then everyone got annoyed.
|
|
|
|
|
|
|
|
|
|
|
|
|
|
|
|
|
|
|
|
|
|
|
| S |
C
A |
G |
S |
C
B |
G |
|
S |
C |
G |
|
energy
A | B |
|
hype
A | B |
|
pop
A | B |
|
mgr
A | B |
|
FIGHT
RATING
79% |
|
|
|
|
|
|
|
|
|
|
