 |
SPFT Challengers 2 PBP Commentary |
Undercard bout
|
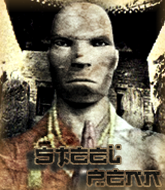
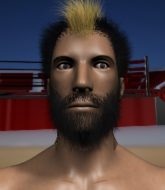
Coming up we have a super heavyweight MMA rules bout between Wooden Pencil (ranked 0 p4p, 0 weight class) and Douglas Fergleson (ranked 0 p4p, 0 weight class). Both fighters really staring each other down here, as Douglas Fergleson enters the cage!
 |
|
 |
| 185 cm
19
193 lbs
2 - 0 - 0 |
|
160 cm
22
215 lbs
1 - 1 - 0 |
BJJ Blue Belt
Good knees
Self confident |
|
BJJ Blue Belt
Brawler
Tends to cut |
|
| |
|
Ladies and gentlemen. This fight is 3 rounds, in the super heavyweight division.
Introducing the fighter to my left, fighting out of the red corner.
With a record of
2 - 0 - 0, fighting out of Hilo, Wooden Pencil!
And introducing the fighter to my right, fighting out of the blue corner.
With a record of
1 - 1 - 0, fighting out of Los Angeles, Douglas Fergleson!
The judges for this bout are Colin Fray, Paul Gruel and Chris Saunders.

The bell rings for round one and we are underway!
Pencil dips down and scores with a jab to the body.
Pencil throws a leg kick but Fergleson sees it coming and checks it nicely.
Jab, cross, leg kick. Nice combination by Pencil!

It looks like Douglas Fergleson has been cut.
Fergleson tries to shoot in for a takedown. He's got hold of a leg but Pencil swivels and escapes.
Fergleson looks frustrated there after his takedown attempt is stuffed easily.
The crowd cheering loudly, showing their appreciation for the quality fight we're seeing here.
Fergleson fails with an attempt to clinch.
Fergleson fails to land the takedown.
Wooden Pencil has stuffed three takedown attempts in the round now. That's going to take a lot out of Douglas Fergleson.
Pencil connects nicely with a jab. Noted by the judges no doubt.
Pencil throws a nice inside leg kick.
Pencil scoring well with a low kick there.
Pencil fakes low and throws an overhand right that catches Fergleson on the side of the head.
Fergleson fails with an attempt to clinch.
Pencil lands with a thumping leg kick.
Fergleson looks winded!

That's one minute gone in the round.
Some bone on bone action there as Fergleson checks a low kick. Luckily it wasn't a particularly hard one.
Fergleson fails with a rather predictable takedown attempt.
Pencil is looking to chop away at Fergleson's legs.
Pencil swats away the attempt to clinch by Fergleson.
Pencil lands a jab to Fergleson's midsection.
Fergleson shoots in looking for a double leg takedown. Pencil defends it nicely.
Pencil scores with a punch to the gut of his opponent.
Fergleson chopped to the floor by a nice leg kick but he springs right back up before Pencil can pounce on him.
Pencil thumps Fergleson with a low kick.
This has been an exciting period of action!
Pencil works the jab nicely.

That's two minutes gone in the round.
Nice uppercut there from Pencil.
Fergleson takes a body punch that cleary hurt but he's trying not to show any weakness.
Fergleson darts in trying to clinch
and Pencil counters with a nice low kick that buckles Fergleson's knee momentarily.
Wooden Pencil is looking to keep the fight on the feet at all costs.
Pencil lands a leg kick. The shin dug right into the meat of the thigh.
Fergleson on the wrong end of a nice low kick. He's acting like it's no big deal but he doesn't want to take many more of those.
Pencil throws a series of punches but Fergleson avoids them all with ease.
Pencil throws a quick inside leg kick.

Pencil lands a big head kick that sends Fergleson tumbling to the mat! Pencil takes a step backwards and waves Fergleson back to his feet - he wants the finish!

Fergleson is rocked!
That has opened up Douglas Fergleson's cut even more.
Pencil throws a quick head kick that knocks Fergleson silly! This fight is all over! What a finish! Pencil is up on the cage, taking in the applause from the crowd.
Ladies and gentlemen, after 2:55 of round 1, we have a winner by way of KO (Head Kick). Wooden Pencil!
|
|
|
|
|
|
|
|
|
|
|
|
|
|
|
|
|
|
|
|
|
|
|
| S |
C
A |
G |
S |
C
B |
G |
|
S |
C |
G |
|
energy
A | B |
|
hype
A | B |
|
pop
A | B |
|
mgr
A | B |
|
FIGHT
RATING
76% |
|
|
|
|
|
|
|
Undercard bout
|
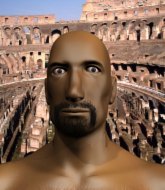
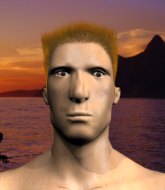
Coming up we have a super heavyweight MMA rules bout between Chris Ambrose (ranked 0 p4p, 0 weight class) and Benzi Kato (ranked 0 p4p, 0 weight class). Well, the cameraman is lingering on a pretty young lady for a bit too long there. Keep your eyes on the fighters buddy or you'll miss the fighter intros!
 |
|
 |
| 182 cm
23
181 lbs
3 - 0 - 0 |
|
188 cm
22
190 lbs
1 - 1 - 0 |
BJJ White Belt
Solid boxing
Cuts easily |
|
BJJ Blue Belt
Brawler
Determined |
|
| |
|
Ladies and gentlemen. This fight is 3 rounds, in the super heavyweight division.
Introducing the fighter to my left, fighting out of the red corner.
With a record of
3 - 0 - 0, fighting out of Montreal, Chris Ambrose!
And introducing the fighter to my right, fighting out of the blue corner.
With a record of
1 - 1 - 0, fighting out of Tokyo, Benzi Kato!
The judges for this bout are Paul Gruel, Micheangelo Fripello and Ryoma Takatsuka.
The bell rings for round one and we are underway!
Sloppy strikes from Ambrose. Those never looked like landing.
Kato walks into a straight right hand from Ambrose.
Ambrose throws a nice looking combination but Kato bobs and weaves to avoid any damage.
Ambrose fails to land with the punch combination there - jab, cross, hook, miss, miss, miss.
Kato shoots in for a takedown - he's clinched up with Ambrose but Ambrose pushes him off and we're back to square one.
Kato showing good head movement there, avoiding the strikes from Ambrose.
Ambrose's corner calls for a 1, 2 combination and Ambrose duly obliges.
Ambrose rushes forward with a series of wild hooks but Kato moves out of range and avoids them all easily.
A combination from Ambrose does no damage.
Kato thuds his shin into the meat of Ambrose's side.
Ambrose fails to land with the punch combination there - jab, cross, hook, miss, miss, miss.
Ambrose avoids a punch combination nicely.
This has been an exciting period of action!
Kato feints and then cracks Ambrose's leading leg with a nice low kick. He's obviously looking to slow Ambrose down.
Ambrose is breathing heavily.

Kato shoots in and gets a takedown into half guard. Kato showed some decent athleticism there.
The referee must be thinking about standing these guys back up.
Kato keeping composed on the top, looking to control the action.
That's one minute gone in the round.
Ambrose is looking to improve his position.
Kato not landing any meaningful shots this time.
Kato wants to take a breather but Ambrose is having none of it.
Kato working some ground and pound from close in. He's looking to maintain this position and strike for a while by the looks of things... although he'll probably advance to full mount in a minute now I've said that.
Kato thumps the canvas. Not on purpose obviously - he just missed Ambrose's head.
Ambrose is trying is best to control the position here.
Ambrose avoiding damage under a succession of punches from Kato.
Ambrose is looking to regain full guard. Not this time though.
Kato trying to control from half guard but Ambrose is working away.
That's two minutes gone in the round.
Kato thumps the canvas. Not on purpose obviously - he just missed Ambrose's head.
Ambrose on his back here. We all know that wrestlers don't like being on their back so let's see if Ambrose tries to get out of the position.
Ambrose tries to kick Kato off in order to stand up. Kato Avoids the leg push though and dives into side control.
Ambrose is trying to improve his position.
Kato misses with an attempted head punch from side control.
Kato wants to control but Ambrose is keeping him busy.
The crowd are loving this. Great action here.
Ambrose struggling a bit here.

Kato is looking to finish here, going for an Americana. Ambrose knows the correct defense though, so he's OK.
Kato is putting a hurting on Ambrose here, landing some big shots from side control.
The fighters are pressed up against the cage, both looking to find a bit of space to work.

That's three minutes gone in the round.
Kato wants to lay and pray for a moment but Ambrose keeps working.
Ambrose is trying to get back to half guard.
Kato working the ground and pound but he's contacting the mat, not the fighter.
Kato wants to work for a kimura but he's foiled early by Ambrose, who protects the arm well.
The fighters are starting to get a bit slippery now, which will make submissions a bit more difficult.
Kato looking for an arm triangle but it's way too loose to do anything.

Kato decides to stand up, so the ref orders Ambrose to his feet.
Kato showing good head movement there, avoiding the strikes from Ambrose.
Kato tries to clinch but Ambrose is having none of it.

That's four minutes gone in the round.
Kato swings away with a leg kick that misses.

Kato instigates a clinch.
Kato successfully pulls guard.
Kato is trying to control the position from the bottom.
Ambrose would like to get this fight back to the feet but can't get free from the closed guard.
As the round comes to an end the crowd are showing their appreciation for a great round of action.
Kato is looking to sinch up a triangle. Ambrose throws the leg off to one side though and gets in tight to Kato's body to avoid the submission. Kato has instead reached around Ambrose's neck and now has a guillotine! Oh, this is biiiig trouble! Kato arches his back and squeezes and forces the tap from his hapless opponent.
Ladies and gentlemen, after 4:58 of round 1, we have a winner by way of Submission (Guillotine). Benzi Kato!
|
|
|
|
|
|
|
|
|
|
|
|
|
|
|
|
|
|
|
|
|
|
|
| S |
C
A |
G |
S |
C
B |
G |
|
S |
C |
G |
|
energy
A | B |
|
hype
A | B |
|
pop
A | B |
|
mgr
A | B |
|
FIGHT
RATING
42% |
|
|
|
|
|
|
|
Undercard bout
|
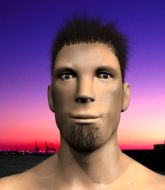
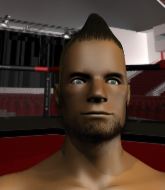
Coming up we have a super heavyweight MMA rules bout between Ron Aldo (ranked 0 p4p, 0 weight class) and Henry Hamilton (ranked 0 p4p, 0 weight class). Hamilton has chosen Brain Damage - Easy Star All-Stars as his entrance music. Both these guys have solid standup skills and neither is particularly fantastic on the ground, so let's hope for a nice standup war!
 |
|
 |
| 195 cm
25
285 lbs
5 - 3 - 0 |
|
193 cm
25
275 lbs
3 - 1 - 0 |
BJJ Purple Belt
Excellent boxer
Very strong |
|
BJJ White Belt
Excellent boxer
Heavy handed |
|
| |
|
Ladies and gentlemen. This fight is 3 rounds, in the super heavyweight division.
Introducing the fighter to my left, fighting out of the red corner.
With a record of
5 - 3 - 0, fighting out of Tokyo, Ron Aldo!
And introducing the fighter to my right, fighting out of the blue corner.
With a record of
3 - 1 - 0, fighting out of Hilo, Henry Hamilton!
The judges for this bout are Josh West, Roger Salmon and Jeff Smith.
The bell rings for round one and we are underway!
Hamilton ducks under a wild hook from Aldo.
Aldo swings for the body but Hamilton moves out of range.
A big left from Hamilton misses.
Hamilton punishes Aldo's body with a nice straight punch.
Aldo ducks under an overhand right and circles away with a smile on his face.
Hamilton scores with a nice one two combo and darts back out of range to avoid anything coming in the opposite direction.

It looks like Ron Aldo has been cut.
The crowd are loving this. Great action here.
Aldo throws a poor cross that misses
and Hamilton counters with a lovely shot to the body.
Hamilton ducks down and throws a hook to the body but Aldo moves away.
Aldo throws an overhand right that lands on Hamilton's shoulder, as Hamilton tries to avoid the shot.
Hamilton fakes low and throws an overhand right that catches Aldo on the side of the head.
Aldo darts in and out, connecting with a jab.
Aldo just misses with a punch to the body.
Aldo fakes low and throws an overhand right that catches Hamilton on the side of the head.
Aldo takes a shot right to the bread basket.
Aldo needs to keep his hands up - Hamilton had a free shot at his head there.
Hamilton wings a very wild body shot but it does the job and lands to the midsection.
Aldo is breathing heavily.
A looping hook to the body misses from Hamilton. Aldo does a little dance to reset his feet.
Aldo looks to land a left hand but Hamilton moved out of range nicely.
That's one minute gone in the round.
Hamilton ducks under a wild hook from Aldo.

Hamilton cracks Aldo with a big right hand that sends him to the floor! Aldo looks wobbly but he's sprung back up to his feet straight away
can Hamilton finish him?

Aldo is rocked!
Ron Aldo's cut is getting worse.
The fans in attendance giving it up for the two fighters, who have really let it all hang out in the last minute or so!
Aldo misses the jab.
Oh Aldo is still all over the place! His legs are completely gone! Will he be able to recover?!!
Aldo drops his hands momentarily. Hamilton doesn't need a second invitation, landing a shot to the temple. Aldo staggers and falls to the mat and the ref dives in to save him from any more punishment. Aldo doesn't seem happy with the stoppage but he was done.
Ladies and gentlemen, after 1:19 of round 1, we have a winner by way of KO (Punch). Henry Hamilton!
Henry Hamilton was full of energy after the big win and talked about how he thinks he can do big things in this sport. The crowd were appreciative of his determination to succeed.
|
|
|
|
|
|
|
|
|
|
|
|
|
|
|
|
|
|
|
|
|
|
|
| S |
C
A |
G |
S |
C
B |
G |
|
S |
C |
G |
|
energy
A | B |
|
hype
A | B |
|
pop
A | B |
|
mgr
A | B |
|
FIGHT
RATING
100% |
|
|
|
|
|
|
|
Undercard bout
|
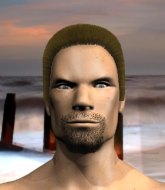
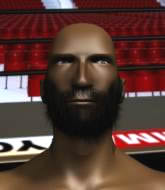
Coming up we have a featherweight MMA rules bout between Jan Olov Hermansson (ranked 0 p4p, 0 weight class) and Greg Dellaria (ranked 0 p4p, 0 weight class). Hermansson comes to the cage accompanied by Rammstein - Ich Will!. Both fighter's entrance songs getting the crowd jumping here.
 |
|
 |
| 178 cm
25
158 lbs
5 - 2 - 0 |
|
165 cm
28
152 lbs
3 - 6 - 0 |
Good wrestling
Excellent boxer
Cardio machine |
|
Decent wrestler
Excellent boxer
Heavy handed |
|
| |
|
Ladies and gentlemen. This fight is 3 rounds, in the featherweight division.
Introducing the fighter to my left, fighting out of the red corner.
With a record of
5 - 2 - 0, fighting out of Hilo, Jan Olov Hermansson!
And introducing the fighter to my right, fighting out of the blue corner.
With a record of
3 - 6 - 0, fighting out of Hilo, Greg Dellaria!
The judges for this bout are Josh West, Chris Saunders and Paul Gruel.
The bell rings for round one and we are underway!
Dellaria throws the overhand right but ducks down into a quick takedown attempt. Hermansson was covering up waiting for the punch and Dellaria finishes the takedown easily into guard.
Hermansson is working the butterfly guard. He manages to land a nice scissor sweep and is now in half guard on the top. Nice move.
Hermansson is just sitting in half guard, waiting for something to happen.
Hermansson tries to pass to full mount but Dellaria defends it.
Dellaria trying to control here.
That's one minute gone in the round.
Hermansson stalling.
Dellaria wants to get back to full guard.

The ref stands the fighters back up because Jan Olov Hermansson just wasn't active enough.
Hermansson tries to land with a swinging hook to the body but Dellaria was well out of range. Poor timing from Hermansson.

Hermansson rushes Dellaria and pushes him back against the cage in a clinch.
Still in the clinch, Hermansson scores with a nice short uppercut.
Hermansson swings wildly with an uppercut but Dellaria uses good head movement to avoid it.
With the fighters clinched against the cage, Hermansson creates a bit of distance for himself and scores with a nice uppercut.
Dellaria working hard to break the clinch.
That's two minutes gone in the round.
Dellaria is trying to break the clinch but Hermansson has him pressed against the cage.
Hermansson scores with a shot to the side of Dellaria's head.
Hermansson throws a head punch that misses.
Hermansson holding his opponent close, against the cage.
Dellaria has moved round to his opponent's back and is looking for a suplex! Oh snap! He's tossed Hermansson clear over his head and slammed him to the mat!
The fighters are pressed up against the cage, both looking to find a bit of space to work.
Hermansson trying to control but not successfully.
Dellaria doesn't have the hooks in and Hermansson manages to turn into his guard.
The crowd cheering loudly, showing their appreciation for the quality fight we're seeing here.
Dellaria looking to sweep here. No luck so far.
Hermansson won't allow Dellaria to get back to his feet.
Hermansson is frustrating his opponent with some stalling tactics from top position.
Hermansson passes Dellaria's left leg - he's now in half guard.
That's three minutes gone in the round.
Hermansson stops Dellaria from getting back to his feet.
Hermansson is taking a breather. Dellaria says something to him but it's hard to make out. Perhaps he's telling him to get on with it and actually do something.
Hermansson has controlled the position for a good 20 seconds, which will no doubt be starting to frustrate his opponent.
The referee must be thinking about standing these guys back up.
The referee decides to stand the fighters back up, due to lack of activity on the part of Jan Olov Hermansson.
Dellaria tries to close the distance and clinch up against the cage but Hermansson paws at him with a jab and circles away.
A clash of legs there as Hermansson blocks the low kick.
Dellaria throws a looping overhand right but Hermansson ducks down to avoid it.
That's four minutes gone in the round.
Hermansson tries to clinch up but Dellaria circles away and keeps his distance.
Hermansson misses with a looping right.
Hermansson connects with a single shot there.
Hermansson misses with an uppercut.
Hermansson pushing out the jab but it's not landing.
Hermansson drops Dellaria with a left right combo! Hermansson follows him down to the ground into side control.
Dellaria is rocked!
We've seen a great period of action over the last minute or so - credit to both fighters for going all out!

Hermansson stands up and beckons Dellaria to his feet.
Dellaria is still on wobbly legs! Can Hermansson finish him?
BOOM! Hermansson lands a beautiful left hook that drops Dellaria. Dellaria tries to recover but Hermansson is having none of it, landing more punishing shots from mount. One final crushing shot and Dellaria lies motionless on the canvas. The fight is over!
Ladies and gentlemen, after 4:30 of round 1, we have a winner by way of TKO (Strikes). Jan Olov Hermansson!
During a confident post fight interview, Jan Olov Hermansson thanked all his fans. He seemed very genuine when describing how motivated his fans keep him.
|
|
|
|
|
|
|
|
|
|
|
|
|
|
|
|
|
|
|
|
|
|
|
| S |
C
A |
G |
S |
C
B |
G |
|
S |
C |
G |
|
energy
A | B |
|
hype
A | B |
|
pop
A | B |
|
mgr
A | B |
|
FIGHT
RATING
48% |
|
|
|
|
|
|
|
Undercard bout
|
Coming up we have a light heavyweight MMA rules bout between Arana Kahui (ranked 0 p4p, 0 weight class) and Joe Candy (ranked 0 p4p, 0 weight class). Kahui comes to the cage accompanied by Mustasch - Dogwash. Both fighters look fresh as a daisy as they make their way towards the cage.
 |
|
 |
| 193 cm
23
221 lbs
2 - 0 - 0 |
|
193 cm
27
211 lbs
6 - 1 - 0 |
BJJ Purple Belt
Excellent boxer
Cardio machine |
|
BJJ Blue Belt
Good kicks
Solid chin |
|
| |
|
Ladies and gentlemen. This fight is 3 rounds, in the light heavyweight division.
Introducing the fighter to my left, fighting out of the red corner.
With a record of
2 - 0 - 0, fighting out of Hilo, Arana Kahui!
And introducing the fighter to my right, fighting out of the blue corner.
With a record of
6 - 1 - 0, fighting out of Hilo, Joe Candy!
The judges for this bout are Paul Gruel, Colin Fray and Chris Saunders.
The bell rings for round one and we are underway!
Candy is on the wrong end of a nice combination from Kahui.
Kahui throws a hard body shot but it just misses.
Kahui scores with a sloppy right hand. Candy should have avoided that one.
Kahui fails to land with a series of punches.
Nice body kick there by Candy.
The crowd cheering loudly, showing their appreciation for the quality fight we're seeing here.
Kahui checks a low kick. Bone on bone - not my idea of a good time.
Kahui moving in and out of range nicely, whilst landing the scoring shot.
Kahui throws a right hand that misses
and Candy counters with a big head kick but Kahui shrugs it off.
Candy fails to land with the punch combination there - jab, cross, hook, miss, miss, miss.
Kahui lands with a two punch combination before moving back out of range.
Kahui ducks down and throws a hook to the body.
Candy walks straight into a right hand from Kahui - that's dropped him! Kahui jumps into mount and starts pounding away - can he finish?! More strikes go undefended and the referee has to dive in to save Candy from any more punishment! Candy complains about the stoppage but falls over as he tries to stand back up, so it was clearly a good stoppage.
Ladies and gentlemen, after 0:45 of round 1, we have a winner by way of TKO (Punches). Arana Kahui!
An out of breath Arana Kahui thanked his loyal fans in his post fight interview, giving them credit for his success over the course of his career.
|
|
|
|
|
|
|
|
|
|
|
|
|
|
|
|
|
|
|
|
|
|
|
| S |
C
A |
G |
S |
C
B |
G |
|
S |
C |
G |
|
energy
A | B |
|
hype
A | B |
|
pop
A | B |
|
mgr
A | B |
|
FIGHT
RATING
100% |
|
|
|
|
|
|
|
Co-main event
|
Coming up we have a super heavyweight MMA rules bout between Dolph Lundgren (ranked 0 p4p, 0 weight class) and Jacob Saunders (ranked 0 p4p, 0 weight class). Lundgren comes into the arena with Till I Collapse blaring out of the sound system. Both fighters look fresh as a daisy as they make their way towards the cage.
 |
|
 |
| 195 cm
21
250 lbs
4 - 0 - 0 |
|
205 cm
25
300 lbs
6 - 0 - 0 |
BJJ Blue Belt
Solid boxing
Cuts easily |
|
BJJ White Belt
Excellent MT
Granite chin |
|
| |
|
Ladies and gentlemen. This fight is 5 rounds, in the super heavyweight division.
Introducing the fighter to my left, fighting out of the red corner.
With a record of
4 - 0 - 0, fighting out of New York, Dolph Lundgren!
And introducing the fighter to my right, fighting out of the blue corner.
With a record of
6 - 0 - 0, fighting out of London, Jacob Saunders!
The judges for this bout are Ryoma Takatsuka, Paul Gruel and Roger Salmon.
The bell rings for round one and we are underway!
Saunders takes a punch to the jaw and another one to the bread basket.
Sloppy strikes from Saunders. Those never looked like landing.
Saunders throws a head kick that misses.
Saunders swinging wildly here.
Saunders throws a wild combination but nothing lands.
Lundgren throws a series of punches but Saunders moves out of range.
Lundgren shoots in for a takedown but doesn't get it.
Lundgren connects with a lovely jab that went straight through the gap between Saunders's hands.
Lundgren swings for the body but Saunders moves out of range.
Lundgren takes a step towards his opponent and connects with a left hand, before circling away.
Saunders fails to land with the punch combination there - jab, cross, hook, miss, miss, miss.
Lundgren ducks down and throws a hook to the body but Saunders moves away.
Lundgren has a takedown stuffed.
Lundgren tries to shoot in for a takedown. He's got hold of a leg but Saunders swivels and escapes.
That's three failed takedown attempts in the round for Dolph Lundgren. That's going to take a lot out of him.
Lundgren throws out a token jab with nothing on it.
Saunders displays good takedown defense there as he swats away a double leg from Lundgren.
Saunders throws a combination but comes up with nothing but fresh air.
That's one minute gone in the round.
Lundgren takes a swing at Saunders's ribcage but misses.
Lundgren wings a very wild body shot but it does the job and lands to the midsection.
Lundgren looks frustrated there after his takedown attempt is stuffed easily.
Lundgren shoots in looking for a takedown but Saunders manages to keep the fight standing, pushing Lundgren's face into the canvas for good measure before circling away.
Lundgren fails with the takedown.
Lundgren throws a series of punches but Saunders moves out of range.
Saunders tries a head kick but it misses.
A really sloppy takedown attempt there from Lundgren.
Saunders misses with a series of wild punches.
Saunders throws a head kick that misses and slips in the process. He scrambles back to his feet and the fighters circle.
Saunders looks to score with a combo but nothing lands.
Saunders misses with a half-hearted attempt at a head kick.
Lundgren tries to score a power double leg takedown but Saunders sees that one coming and sprawls well. That will dishearten Lundgren somewhat.
Jacob Saunders is looking to keep the fight on the feet at all costs.
A looping hook to the body misses from Saunders. Lundgren does a little dance to reset his feet.
That's two minutes gone in the round.
Saunders keeping a good distance there, avoiding the body shot.
Lundgren shoots in for a takedown but Saunders shows good takedown defense.
Saunders lunges in with swinging rights and lefts but Lundgren circles away quickly and effectively.
Saunders throws a head kick that misses.
Lundgren lands three nice shots there - that looked like it hurt!
Lundgren lands a nice looking body shot.
Saunders uses good head movement to avoid the hook from Lundgren.
This is a great period of action - very entertaining stuff!
Saunders fails to land with a series of punches.
Lundgren jabs Saunders to the body, keeping him at a distance.
A head kick misses from Saunders.
Saunders looks winded!
Lundgren lands a jab to the head.
Lundgren shoots in for a takedown - he's clinched up with Saunders but Saunders pushes him off and we're back to square one.
Lundgren uses good footwork to get in and out, landing a nice hook.
That's three minutes gone in the round.
Saunders throws a right and a left that both miss.
Lundgren lands a lovely overhand right.
Lundgren throws a series of strikes that have Saunders backpedaling.
Saunders will need to tighten up his combinations if he doesn't want to gas himself out, swinging at thin air.
Lundgren moves out of range as Saunders throws a body kick.
Saunders misses with a half-hearted attempt at a head kick.
Lundgren digs a good body shot into Saunders's ribs.
Lundgren tries to shoot in for a takedown. He's got hold of a leg but Saunders swivels and escapes.
Lundgren has a takedown stuffed.
Saunders goes for a high kick. It partially lands.
It looks like Dolph Lundgren has been cut.
Saunders misses with a half-hearted attempt at a head kick.
Dolph Lundgren seems to be the more aggressive standup fighter in this bout.
Some wild striking there from Lundgren.
Lundgren lands with a good body shot.
That's four minutes gone in the round.
The fans in attendance giving it up for the two fighters, who have really let it all hang out in the last minute or so!
Saunders keeps the fight standing with a nice sprawl.
Lundgren dives in and grabs Saunders's left leg, looking for a takedown. Saunders pushes down on Lundgren's head and hops out.
Lundgren fakes high and swings low for a body shot but Saunders manages to avoid it.
A punch combination from Lundgren misses.
Lundgren slips a jab and a cross from Saunders.
Saunders throws a head kick that misses and slips in the process. He scrambles back to his feet and the fighters circle.

Lundgren feints and as Saunders raises his hands in defense, Lundgren changes levels and drives through with a takedown into guard.
Lundgren trying to control the position from guard on top but Saunders is wriggling around, looking for whatever he can.
Lundgren missing there with some ground and pound from the guard.
Saunders wants to sweep but no luck.
The crowd are going absolutely nuts as the round comes to an end - what a fantastic round of action!
Lundgren postures up to throw the ground and pound strikes but they don't connect.
Lundgren wants to control from the top but Saunders keeps moving.
Lundgren prevents Saunders from getting back to his feet.
And thats the end of the round the fighters go back to their corners.
Dolph Lundgren dominated that round.
The cut man is working on Dolph Lundgren's cut.
The fighters get back to their feet, the hooter sounds and we're back to the action!

Lundgren lands a jab followed by a nice looking cross.
Saunders throws a wild combination but nothing lands.
Lundgren wants to clinch.
Lundgren throws a right hand that Saunders ducks under and follows up with a left that Saunders also avoids with ease.
Saunders pivots, looking for a leg kick but Lundgren is out of range and Saunders settles back down.
Saunders throws a head kick that misses and slips in the process. He scrambles back to his feet and the fighters circle.
Saunders's corner calls for a 1, 2 combination and Saunders duly obliges.
Jacob Saunders is looking to throw some combinations by the looks of things.
Lundgren shoots in and scores a nice double leg takedown into half guard.
The crowd are loving this. Great action here.
Saunders wants to get back to his feet.
We get told so often about how wrestlers don't like to be on their backs. Let's see if Saunders can do anything to dispel that myth.
The fighters are starting to perspire pretty heavily.
Saunders tries to roll over but Lundgren keeps him under control.
Lundgren thows a wild elbow that connects with the canvas.
Lundgren seems to be taking a bit of a break to think of his next move. He lands a short punch in the meantime.
That's one minute gone in the round.
Lundgren is thwarting Saunders's attempts to control the position.
Lundgren wants to take a breather but Saunders is having none of it.
It looks like Lundgren is going to stand back up.
Lundgren content to control rather than advance.
The ref warns both fighters not to hold the cage as they work up against the meshing.
Lundgren seems to have a rather negative gameplan on the ground. He seems keen to just score the takedown and hold down Saunders for as long as he can get away with.
It looks like the ref is thinking about a standup.
The referee decides to stand the fighters back up, due to lack of activity on the part of Dolph Lundgren.
Lundgren lands a jab to Saunders's midsection.
Saunders misses with a head kick.
Lundgren shoots in for a takedown. "I don't think so" says Saunders as he avoids it easily.
Saunders keeping a good distance there, avoiding the body shot.
That's two minutes gone in the round.
Saunders uses some good footwork to avoid the body shot by Lundgren.
Saunders scores with the left hand. Lundgren knows he should have avoided that one.
This has been an exciting period of action!
Lundgren misses with a wild body shot.
Lundgren is looking to wear down Saunders with body shots, infact he's throwing more body shots than head shots at the moment.
Oooooh!!! Saunders has knocked Lundgren down with a huge combo! Saunders steps away and waves a wobbly Lundgren back to his feet! This one might not go much longer!
Lundgren is rocked!
Dolph Lundgren's cut is getting worse.
Saunders avoids the body shot from Lundgren.
Lundgren misses with a body shot. Nice footwork from Saunders.
Lundgren fails with a rather predictable takedown attempt.
Both fighters are absolutely exhausted here.
Lundgren misses with a body shot.
Saunders throws a sloppy head kick and Lundgren moves out of range easily.
Saunders swings away but doesn't land with a series of punches.
Lundgren throws a looping left and ducks down for a takedown. He's got his arms around Saunders's waist but Saunders gets an underhook and avoids the takedown by throwing Lundgren off to one side.
That's three failed takedown attempts in the round for Dolph Lundgren. That's going to take a lot out of him.
Good exchange - Lundgren coming out on top.
Saunders swinging wildly here.
Lundgren fakes high and shoots in for a takedown but Saunders avoids it really well and circles away.
That's three minutes gone in the round.
Lundgren rushes forward with a series of wild hooks but Saunders moves out of range and avoids them all easily.
Lundgren lands a straight punch to the body, keeping Saunders at a distance.
Lundgren ducks low and lands a nice hook to the body of his opponent.
Saunders feints a jab and as Lundgren dips his head, Saunders unleashes a brutal head kick that catches Lundgren right on the jaw! Timbeeer! Lundgren falls backwards in slow motion, only propped up by the cage! Saunders smiles a psychotic smile as he stares down his unconscious opponent. That is a scary man.
Ladies and gentlemen, after 3:27 of round 2, we have a winner by way of KO (Head Kick). Jacob Saunders!
Jacob Saunders took to the mic in his post fight interview and said 'I want to thanks SPFT Hilo for the wonderful oppertunity and i want to congratz Bambang Ridwan for his victory against Salim Abous that title is yours bro i don't wanna fight you,and thank you God for everything!'.
|
|
|
|
|
|
|
|
|
|
|
|
|
|
|
|
|
|
|
|
|
|
|
| S |
C
A |
G |
S |
C
B |
G |
|
S |
C |
G |
|
energy
A | B |
|
hype
A | B |
|
pop
A | B |
|
mgr
A | B |
|
FIGHT
RATING
69% |
|
|
|
|
|
|
|
Main event
|
Coming up we have a heavyweight MMA rules bout between Lola DaCola (ranked 0 p4p, 0 weight class) and Michael Banks (ranked 0 p4p, 0 weight class). Banks is bouncing up and down as he enters the arena, backed by White and Nerdy. Lola DaCola has the better chin. Will he look to stand and bang today?
 |
|
 |
| 190 cm
23
290 lbs
10 - 6 - 0 |
|
191 cm
28
255 lbs
8 - 4 - 0 |
BJJ Brown Belt
Excellent boxer
Cardio machine |
|
BJJ Brown Belt
Decent boxing
Good gas tank |
|
| |
|
Ladies and gentlemen. This fight is 3 rounds, in the heavyweight division.
Introducing the fighter to my left, fighting out of the red corner.
With a record of
10 - 6 - 0, fighting out of Hilo, Lola DaCola!
And introducing the fighter to my right, fighting out of the blue corner.
With a record of
8 - 4 - 0, fighting out of Hilo, Michael Banks!
The judges for this bout are Jeff Smith, Micheangelo Fripello and Ryoma Takatsuka.
The bell rings for round one and we are underway!
Banks throws a hook to the side of DaCola's head but DaCola sees it coming and ducks under it beautifully.
Banks throws out a token jab with nothing on it.
Banks misses with a hook
and DaCola counters by clinching up.
DaCola letting Banks take a breather here.
DaCola is fighting off a takedown attempt but Banks is just too persistent for him and manages to trip DaCola to the mat. DaCola regains guard as soon as the fighters hit the mat.
Banks with a flurry of punches that miss.
Banks not doing a lot at the moment. He'll have to show some more aggression or the fight will get stood up.

DaCola is looking for a guillotine. You can't force these things though and Banks defends well.
DaCola working for a triangle but Banks defends it easily.
Banks thinks about going for a leg but decides against it, in order to maintain the position.
Banks pressing down on his opponent's thigh, looking to pass guard. DaCola is keeping the position for now.
That's one minute gone in the round.
Banks passes into half guard.
DaCola looking for submissions off his back.
The ref warns both fighters not to hold the cage as they work up against the meshing.
Banks is figuring out what he wants to do next.
Banks throwing shots but they're hitting the canvas more than the man.
Banks trying to control the action but DaCola is working from the bottom.
DaCola is looking to regain full guard. Not this time though.
DaCola looking for submissions off his back.
DaCola wants to control but Banks is keeping busy.
That's two minutes gone in the round.
Banks seems content to maintain position for now, rather than mounting any offense.
DaCola looking for submissions off his back.
The fighters are starting to perspire pretty heavily.
Banks is looking to take a break and control but DaCola is keeping him honest, looking to work from the bottom.
DaCola wants to improve his position but Banks is controlling well.
Banks missing with some ground and pound from the half guard.
DaCola taking some punishment here, with Banks in his half guard.
Banks is working for submissions here but there's nothing on.
Banks scoring with strikes to the body and head.
That's three minutes gone in the round.
DaCola keeping his head moving to avoid the ground and pound.
Banks passes to full mount!
Banks can't quite control the action as he would like just now, as DaCola is looking to escape.
DaCola is wriggling around trying to escape.
DaCola in a bad spot here, taking shots to the head.
The fighters are pressed up against the cage, both looking to find a bit of space to work.
DaCola is desperately trying to get back to half guard.
DaCola takes a big shot to the head but keeps on trying to improve his position.
Banks controlling the position easily from mount.
Banks goes for an armbar but he's not got it
DaCola turns into him and now he's in Banks's guard.
Banks looking for a guillotine here but DaCola defends easily.
That's four minutes gone in the round.
Wooooo! Give it up for these two warriors! They are putting on a show!
Banks tries to land a sweep but no joy.
Banks is working the butterfly guard. He manages to land a nice scissor sweep and is now in half guard on the top. Nice move.
Banks seems very keen to just sit and control from half guard but DaCola does not like that idea so much and is remaining active off his back.
DaCola trying to control here.
As the round comes to an end the crowd are showing their appreciation for a great round of action.
Banks sitting in half guard, looking to land shots. DaCola defending well though.
DaCola on the receiving end of some nice ground and pound.
And thats the end of the round the fighters go back to their corners.
Michael Banks dominated that round.
That's the end of the round. The referee orders the cornermen out of the cage so we can get back down to business.
Banks loads up on a big right hand but DaCola slips the punch.
DaCola slips under a jab.
DaCola tries to shoot in for a takedown. He's got hold of a leg but Banks swivels and escapes.
The step up in weight doesn't seem to be a problem for Banks. He's performing admirably here against the bigger man.
Banks misses with a looping left.
DaCola looks to land a right hand but Banks moved out of range.
DaCola scores with a nice looking left hook and follows it up with an uppercut!
DaCola misses with a takedown
and Banks counters by moving into the clinch.
Banks has hold of a leg and is looking for a trip takedown. DaCola avoids it nicely though and we remain in the clinch.
Banks stalling against the cage.
Banks tries to circle away but DaCola has him pinned against the cage.
Banks wants a takedown.
DaCola blocks an uppercut.
That's one minute gone in the round.
DaCola stops a takedown attempt from Banks.
Lola DaCola has stuffed three takedown attempts in the round now. That's going to take a lot out of Michael Banks.
Banks tries to score a body lock takedown but DaCola shows good agility there to stay on his feet.
Banks goes for a takedown attempt but DaCola pushes him away and we're back to fighting at a distance.
Banks stuffs a takedown. It's all about dictating where the fight takes place and Banks wants it to stay on the feet.
DaCola lunges at Banks with a hook that half lands and is half blocked by Banks's hand.
It looks like Michael Banks has been cut.
Banks wants to clinch
and DaCola holds on and brings the fighters into a clinch.
Banks misses with a short punch on the inside.
Banks is looking for a takedown.
DaCola keeps the fight in the clinch, despite Banks's efforts to push away.
Banks wants a takedown but no success here.
That's two minutes gone in the round.
DaCola lands a right uppercut that snaps the head of Banks backwards.
Banks taking a breather.
DaCola blocks a couple of punches on the inside.
The fans in attendance giving it up for the two fighters, who have really let it all hang out in the last minute or so!
Banks is looking to take this one to the mat.
DaCola lands a right hand that snaps the head of Banks backwards.
Banks wants a takedown.
Banks wants to stall.
Banks goes for a takedown attempt but DaCola pushes him away and we're back to fighting at a distance.
DaCola throws a left jab followed by a right to the body, Oh Banks colapses and takes a barrage of punches from DaCola as he moves to mount! the ref stops the fight and Banks is left battered and dazed whilst DaCola and his camp cheer!
Ladies and gentlemen, after 2:56 of round 2, we have a winner by way of TKO (Strikes). Lola DaCola!
Jumping up and down and very excited, Lola DaCola waved his t-shirt featuring Elite Fighter© w/$10-$35 Clothing and 90% LAUNDRY!'s logo in front of the cameras.
|
|
|
|
|
|
|
|
|
|
|
|
|
|
|
|
|
|
|
|
|
|
|
| S |
C
A |
G |
S |
C
B |
G |
|
S |
C |
G |
|
energy
A | B |
|
hype
A | B |
|
pop
A | B |
|
mgr
A | B |
|
FIGHT
RATING
57% |
|
|
|
|
|
|
|
|
|
|

