 |
Divinity- War on the shore 2 PBP Commentary |
Undercard bout
|
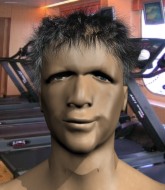
Coming up we have a featherweight MMA rules bout between Benny St Breeze (ranked 0 p4p, 0 weight class) and Iezaih Morgan (ranked 0 p4p, 0 weight class). Iezaih Morgan has the better chin. Will he look to stand and bang today?
 |
|
 |
| 175 cm
20
145 lbs
2 - 1 - 0 |
|
175 cm
20
157 lbs
2 - 2 - 0 |
Good takedowns
Brawler
Intelligent |
|
BJJ White Belt
Excellent boxer
Granite chin |
|
| |
|
Ladies and gentlemen. This fight is 3 rounds, in the featherweight division.
Introducing the fighter to my left, fighting out of the red corner.
With a record of
2 - 1 - 0, fighting out of Hilo, Benny St Breeze!
And introducing the fighter to my right, fighting out of the blue corner.
With a record of
2 - 2 - 0, fighting out of Hilo, Iezaih Morgan!
The judges for this bout are Ryoma Takatsuka, Colin Fray and Jeff Smith.

The bell rings for round one and we are underway!
No luck with that takedown attempt from St Breeze.
Morgan lands a jab followed by a nice looking cross.
Morgan swinging wildly here.
St Breeze misses with a takedown attempt - Morgan sprawls well and throws a nice strike on the way out which just misses.
St Breeze tries to shoot in for a takedown. He's got hold of a leg but Morgan swivels and escapes.
That's three failed takedown attempts in the round for Benny St Breeze. That's going to take a lot out of him.
Morgan fakes high and shoots in for a takedown but St Breeze avoids it really well and circles away.
St Breeze shoots in looking for a double leg takedown. Morgan defends it nicely.
St Breeze fails with a rather predictable takedown attempt.

Morgan drives through and clinches with St Breeze against the cage.

That's one minute gone in the round.
Morgan lands punches inside but they're not really causing much damage.
St Breeze taking a breather.
Morgan lands a body punch in the clinch.

Morgan breaks the clinch and we're back to striking at distance.
Morgan clinches up against the cage.
Morgan working on landing some head shots here - that one got through nicely.

Morgan jumps into guard, dragging St Breeze to the mat.
We could do with one of the fighters taking the initiative a bit more on the ground - they're both waiting to capitalize on a mistake.
Morgan wants to stand but St Breeze is controlling the position.
St Breeze trying to control but Morgan is working from the bottom.
Morgan wants to stand but St Breeze is controlling the position.

That's two minutes gone in the round.
St Breeze with a nice head shot there.
The fighters are pressed up against the cage, both looking to find a bit of space to work.
Morgan is looking to get back to his feet but can't, whilst St Breeze is controlling him.
The ref warns both fighters not to hold the cage as they work up against the meshing.
St Breeze sitting in guard, not really doing much.
This is a great period of action - very entertaining stuff!
St Breeze pushes down on Morgan's leg and manages to get into half guard.
Morgan is looking to escape.
Morgan is staying active underneath St Breeze, who seems content to just control the action from this position.
Morgan really doesn't want to stay on the ground with St Breeze. If he can't get it back to his feet, it's only a matter of time before he'll be tapping out.

That's three minutes gone in the round.
Morgan tries to kick St Breeze off but St Breeze keeps his base steady and stays in half guard.
Morgan blocking the ground and pound attempt from St Breeze.
St Breeze keeping composed on the top, looking to control the action.

Benny St Breeze has forced the referee to step in and bring the fight back to the feet.
Morgan swings away but doesn't land with a series of punches.
Morgan looks for a takedown but St Breeze sprawls well.
St Breeze tries to clinch but fails miserably
and Morgan counters by moving into the clinch. Good anticipation by Morgan.
Morgan pushes off and circles away, back to the middle of the mat.
St Breeze tries to clinch there but Morgan circles away.
St Breeze tries for a takedown but Morgan sees it coming a mile off and avoids it easily.
Morgan scores with a punch to the gut of his opponent.
Morgan lands a nice hook to St Breeze's body. St Breeze takes it in his stride and looks to land his own strikes.

That's four minutes gone in the round.
St Breeze shoots in but no luck this time.
St Breeze wants to clinch.
Morgan tries a head kick but it misses.
Morgan lands a straight punch to the body, keeping St Breeze at a distance.
Morgan scores with a three punch combo!
This is a great period of action - very entertaining stuff!
A head kick misses from Morgan.
St Breeze misses with a jab and misses with a cross straight after too.
St Breeze moves out of range of the body kick.
As the round comes to an end the crowd are showing their appreciation for a great round of action.
St Breeze needs to keep his hands up - Morgan had a free shot at his head there.
Horrible takedown by St Breeze or perhaps it was just good defense by Morgan which made him look bad.
St Breeze is breathing heavily.
St Breeze on the wrong end of a vicious looking body shot.
And thats the end of the round the fighters go back to their corners.
Iezaih Morgan dominated that round.
The fighters' corners scream their final instructions, as the referee calls time. Here we go, back to the action!

The fighters are starting to get sweaty, which will make takedowns a bit more tricky.
St Breeze shoots in for a takedown but Morgan shows good takedown defense.
St Breeze tries to clinch but Morgan is having none of it.
St Breeze throws a hook but Morgan avoids it easily.
Morgan lets the fists fly and connects with a left straight followed by a right hook.

St Breeze shoots in for a takedown from distance. He catches Morgan napping and manages to drive through into side control!
Morgan pushes St Breeze away and creates a bit of space to escape. He's almost out here... but no, St Breeze gets a good hold of his legs and remains firmly in side control.

St Breeze wants to work for a kimura but he's foiled early by Morgan, who protects the arm well.
St Breeze wants to control but Morgan is keeping him busy.
That's one minute gone in the round.
Morgan is putting a lot of effort into getting back to his feet here.
St Breeze wants to work for a kimura but he's foiled early by Morgan, who protects the arm well.
Morgan is working hard to escape and get back to his feet. After a battle for position, St Breeze asserts his dominance and retains side control.
That's two minutes gone in the round.
Morgan wants to get back to his feet but St Breeze is dominant here and he's now got Morgan's back!
Morgan is trying to get back to his feet but he's not managed it yet.
St Breeze has his hand under the chin of his opponent looking for the choke. He's nearly got it! This one could be all over! But no, Morgan has freed his hand and lives to survive another
well, another couple of seconds at least!
St Breeze looking for the rear naked choke. And he's got it! Morgan taps!
Ladies and gentlemen, after 2:39 of round 2, we have a winner by way of Submission (RNC). Benny St Breeze!
|
|
|
|
|
|
|
|
|
|
|
|
|
|
|
|
|
|
|
|
|
|
|
| S |
C
A |
G |
S |
C
B |
G |
|
S |
C |
G |
|
energy
A | B |
|
hype
A | B |
|
pop
A | B |
|
mgr
A | B |
|
FIGHT
RATING
52% |
|
|
|
|
|
|
|
Undercard bout
|
|
|
|
Undercard bout
|
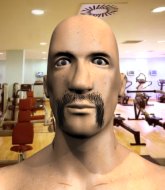
Coming up we have a lightweight MMA rules bout between Jack Watts (ranked 0 p4p, 0 weight class) and Ricardo Awa (ranked 0 p4p, 0 weight class). Ricardo Awa is the more experienced fighter, so let's see if that makes a difference tonight.
 |
|
 |
| 172 cm
18
159 lbs
3 - 2 - 0 |
|
198 cm
22
168 lbs
8 - 6 - 0 |
BJJ White Belt
Counter striker
KO power |
|
BJJ Blue Belt
Good kicks
Knockout power |
|
| |
|
Ladies and gentlemen. This fight is 3 rounds, in the lightweight division.
Introducing the fighter to my left, fighting out of the red corner.
With a record of
3 - 2 - 0, fighting out of St Petersburg, Jack Watts!
And introducing the fighter to my right, fighting out of the blue corner.
With a record of
8 - 6 - 0, fighting out of Hilo, Ricardo Awa!
The judges for this bout are Ryoma Takatsuka, Chris Saunders and Jeff Smith.
The bell rings for round one and we are underway!
Awa moving in and out of range nicely, whilst landing the scoring shot.
Awa connects with a right hand. Watts shakes it off.
Watts tries to clinch but Awa moves away
and Awa counters with a three punch combo that has Watts backing up. Watts nods at Awa to acknowledge the strikes.
Awa fakes and then throws a beautiful body shot. Watts looks a bit winded and takes a step backwards to take a breath.
Watts takes one on the chin but seems OK.
Awa throws a series of strikes that have Watts backpedaling.
Fantastic stuff here - a very entertaining period of action, which has drawn cheers from the crowd.
Awa jabs at Watts's body.
Awa is a painfully thin specimen of a man. You do wonder whether a good body kick would snap him clean in two.
Awa catches Watts with a nice straight right. He seems pissed - ooooh, it's on now! On like donkey kong!
Awa throws a combination but it was largely blocked by Watts.
Awa with a jab.
Awa scores with a jab to the jaw of his opponent.
That's one minute gone in the round.
Awa misses with a double jab.
Watts takes a head kick and shrugs it off.
Awa throws a head kick that looked like it stung.
Watts takes a body punch but keeps moving.
Awa scores with a nice one two combo and darts back out of range to avoid anything coming in the opposite direction.
Awa has used his reach advantage pretty well so far tonight.
A head kick from Awa lands but Watts takes it in his stride.
Awa lands a head kick. Watts smiles back at him and beckons him forward.
The crowd cheering loudly, showing their appreciation for the quality fight we're seeing here.
Awa throws a head kick that connects with a bit of head and a bit of hand.
Awa is using his reach advantage to land shots from outside his opponent's range.
Watts tries to clinch

and Awa counters with a head kick that drops Watts - he's looking to finish, following his stunned foe to the ground!

Watts is rocked!
Awa not landing any meaningful shots this time.
Oh Watts is still in real trouble! Will he be able to recover?!!
That's two minutes gone in the round.
Awa sitting and controlling from the half guard.
Watts seems to have got his legs back now.
Awa missing with the ground and pound from half guard.
Awa missing with the ground and pound from half guard.

Awa seems to be looking for submissions.
Awa looks over to his corner - he wants some instructions but his corner are not responding.
Awa throwing punches and elbows but they're not doing any damage.
That's three minutes gone in the round.
Awa content to sit in half guard and control for a moment.
The fighters are pressed up against the cage, both looking to find a bit of space to work.
Awa thumps the canvas. Not on purpose obviously - he just missed Watts's head.
Watts is breathing heavily.
Awa looks over to his corner - he wants some instructions but his corner are not responding.
That's four minutes gone in the round.

The ref stands the fighters back up, due to lack of action by Ricardo Awa.
Awa lands a jab-cross combination.
A nice inside leg kick there by Awa. That's going to slow Watts down.
Awa jabs Watts to the body, keeping him at a distance.
Nice uppercut there from Awa.
The crowd cheering loudly, showing their appreciation for the quality fight we're seeing here.
Awa lands with a thumping leg kick.
Awa cracks Watts with a right hand to the side of the head.
The crowd are going absolutely nuts as the round comes to an end - what a fantastic round of action!
Awa lands a nice leg kick that just misses Watts's sensitive parts.
Awa lands a jab, followed by a cross and another cross, as Watts backs up against the cage.
And thats the end of the round the fighters go back to their corners.
Ricardo Awa dominated that round.
The minute break is over - no more time for sponges and pep talks - back to the action!
Awa comes forward and lands a shot to the body, then darts back out of range.
Awa lands with a kick to the temple. Watts shrugs as if to say "is that all you've got?"
Awa scores with a leg kick.
Awa throws a two punch combo that lands nicely.
Jack Watts is looking to throw some combinations by the looks of things.
Awa moves into range and lands a nice leg kick.
Awa bobbing and weaving, closes the distance and lands a hook to the side of Watts's head.
The crowd are loving this. Great action here.
Awa moves into range and throws a combination. A nice jab followed by a hook to the body.
Awa gets in close and tags Watts with a short punch that almost sends Watts to the mat! Oh Watts is in big trouble! He turns his back on Awa, trying to create some distance but Awa rushes him, striking wildly and Watts goes down! The referee tackles Awa into the cage to end the fight! Awa is one violent man!
Ladies and gentlemen, after 0:51 of round 2, we have a winner by way of TKO (Strikes). Ricardo Awa!
After the big win, Ricardo Awa made sure to do all the important stuff like thanking his sponsors Happy Pills and telling the interviewer how much he loves him.
|
|
|
|
|
|
|
|
|
|
|
|
|
|
|
|
|
|
|
|
|
|
|
| S |
C
A |
G |
S |
C
B |
G |
|
S |
C |
G |
|
energy
A | B |
|
hype
A | B |
|
pop
A | B |
|
mgr
A | B |
|
FIGHT
RATING
100% |
|
|
|
|
|
|
|
Undercard bout
|
|
|
|
Undercard bout
|
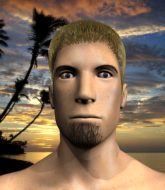
Coming up we have a middleweight MMA rules bout between Kunta Kinte (ranked 0 p4p, 0 weight class) and Laus Pipko (ranked 0 p4p, 0 weight class). Kinte's entrance music is NATIONAL ANTHEM OF GAMBIA . A fine choice. Kunta Kinte has the edge in experience - let's see if he can make that count tonight.
 |
|
 |
| 187 cm
25
197 lbs
2 - 0 - 0 |
|
185 cm
25
180 lbs
2 - 0 - 0 |
BJJ Purple Belt
Excellent MT
Very strong |
|
Powerful takedowns
Excellent boxer
Granite chin |
|
| |
|
Ladies and gentlemen. This fight is 3 rounds, in the middleweight division.
Introducing the fighter to my left, fighting out of the red corner.
With a record of
2 - 0 - 0, fighting out of Hilo, Kunta Kinte!
And introducing the fighter to my right, fighting out of the blue corner.
With a record of
2 - 0 - 0, fighting out of Hilo, Laus Pipko!
The judges for this bout are Jeff Smith, Josh West and Colin Fray.
The bell rings for round one and we are underway!
Pipko is trying hard to land a takedown here. Kinte sprawls well and keeps this one on the feet.
Nice takedown defense from Kinte. No joy for Pipko on that attempt.
The fight moves into the clinch position.
A short right hand to the side of the head by Kinte.
Pipko prevents a body shot from Kinte.

Kinte breaks the clinch and we're back to striking at distance.
Pipko takes the fight into the clinch.
Kinte misses with a shot to the kidneys.
Pipko tries for a takedown. No joy.
Kunta Kinte has stuffed three takedown attempts in the round now. That's going to take a lot out of Laus Pipko.
Kinte tries to work over Pipko's body with a swooping hook but it only glances the target.
Kinte tries to land a shot to the body but it's blocked.
Kinte breaks the clinch.
Pipko looks frustrated there after his takedown attempt is stuffed easily.
Pipko shoots in for a takedown and gets it. Oh and he's advanced to full mount straight away.
This is a great period of action - very entertaining stuff!
The referee is pacing around the two fighters - he looks like he's thinking about a standup.
Kinte is working to get back to half guard.
That's one minute gone in the round.
Pipko thuds his fist into the canvas! Oooouch!
Kinte gets back to half guard.
Pipko thows a wild elbow that connects with the canvas.
Kinte manages to get to full guard.
Pipko throwing elbows and punches but not connecting, as Kinte works some decent striking defense from the bottom.
Pipko working some ground and pound from guard but it's not doing any damage.
Kinte working the defensive guard well to avoid strikes from Pipko.
Kinte is trying to keep Pipko in close.
The fighters are pressed up against the cage, both looking to find a bit of space to work.
Pipko trying to land body shots but he keeps hitting the mat.
That's two minutes gone in the round.
Kinte working a defensive guard here.
Pipko trying to land body shots but he keeps hitting the mat.
Pipko throws a strike but Kinte rolls with it and manages to sweep. Now he's in guard on top.
Pipko trying to punch from his back but it's not doing any damage.
Pipko is controlling Kinte's posture.
Kinte stopping the sweep attempt from Pipko.
Pipko is persisting with the attempt to improve his position.
That's three minutes gone in the round.
A real slowdown in the pace of the fight for a moment, as Pipko holds on and takes a little breather.
Kinte is looking to stand up but Pipko won't let him.
We get told so often about how wrestlers don't like to be on their backs. Let's see if Pipko can do anything to dispel that myth.
Pipko pulls Kinte in to control the position.
The ref warns both fighters not to hold the cage as they work up against the meshing.
OK we're going to have a standup here. Laus Pipko hasn't been effective enough on the ground and the referee wants a restart.

Kinte rushes Pipko and presses him up against the cage.
Kinte breaks from the clinch.
Pipko closes the distance and clinches up with Kinte, looking for a takedown. Pipko pushes Kinte against the cage but Kinte circles to the side and manages to break the clinch.
Kinte moves into the clinch.
Kinte has a couple of punches blocked by Pipko.
Pipko jumps guard but Kinte turns him against the cage and keeps the fight standing.
Kinte pushes off and circles away, back to the middle of the mat.
Kinte pushes Pipko up against the cage in a clinch.
Kinte manages to break the clinch.
Pipko gets a clinch.
That's four minutes gone in the round.
Kinte breaks from the clinch.
Pipko throws a looping left and ducks down for a takedown. He's got his arms around Kinte's waist but Kinte gets an underhook and avoids the takedown by throwing Pipko off to one side.
Laus Pipko seems to be the more aggressive standup fighter in this bout.
This is a great period of action - very entertaining stuff!
Pipko will have to do better than that with his takedown attempts.
Kunta Kinte is looking to keep the fight on the feet at all costs.
Pipko shoots in and scores a nice double leg takedown into half guard.
Kinte keeping his head moving to avoid the ground and pound.
Pipko throws a strike but Kinte avoids it easily and moves to full guard.
Kinte is working from a closed guard but he's struggling to control his opponent.
Kinte wants to stand but Pipko is controlling the position.
As the round comes to an end the crowd are showing their appreciation for a great round of action.
Pipko working some ground and pound from guard but it's not doing any damage.
And thats the end of the round the fighters go back to their corners.
A close round but Laus Pipko will probably get the nod.
That's time! Kinte's corner gives him a slap on the ass as he gets ready to fight.
Kinte keeps Pipko at a distance using the push kick.
Pipko clinches up against the cage.
Pipko has Kinte pressed up against the cage and is working for takedown. Kinte manages to improve position though and keeps the fight standing.
Kinte escapes the clinch and we're back to striking.
Pipko takes a head kick and shrugs it off.
Kinte clinches.
Pipko fails to pull the fight into his guard.
Kinte breaks from the clinch.
Kinte clinches up with Pipko and pushes him back against the cage.
Kinte looking to slow down the pace here.
Kinte escapes the clinch and we're back to striking.
Wooooo! Give it up for these two warriors! They are putting on a show!
Kinte defends well against a solid takedown attempt from Pipko.
Kunta Kinte has stuffed three takedown attempts in the round now. That's going to take a lot out of Laus Pipko.
Kinte moves into the clinch.
Kinte breaks the clinch and we return to the middle of the mat.
That's one minute gone in the round.
Kinte fakes with an overhand right and moves in to clinch with Pipko, pushing him back against the cage.
Kinte scores with a shoulder strike.
Pipko is working on a leg, looking for a takedown but Kinte is defending well.
Pipko tries for a takedown but Kinte manages to get underhooks.
Kinte cracks Pipko with a nice body shot.
Kinte escapes the clinch and we're back to striking.
Pipko shoots in looking for a takedown but Kinte manages to keep the fight standing, pushing Pipko's face into the canvas for good measure before circling away.
Pipko shoots for a takedown but Kinte saw that one coming a mile off and avoided it easily.
Pipko is breathing heavily.
Kinte gets in close and instigates a clinch.
Kinte breaks the clinch and we're back to striking at distance.
Kinte fakes a couple of low kicks, before throwing one on the third attempt. It connects and Pipko has to reset his feet before getting ready to engage.
Kinte darts in and clinches Pipko up against the cage.
Kinte misses with a shot to the kidneys.
A nice left hand lands by Kinte.
The fans in attendance giving it up for the two fighters, who have really let it all hang out in the last minute or so!
Kinte pushes off and circles away, back to the middle of the mat.
That's two minutes gone in the round.
Pipko looks for a takedown but Kinte sprawls well.
Kinte clinches with his opponent.
Kinte breaks the clinch and we return to the middle of the mat.
Pipko takes a head kick and shrugs it off.
Kinte clinches with his opponent.
Kinte misses with a shot to the kidneys.
Pipko looking for a takedown.
Pipko is looking for a takedown.
Kinte pushes off and circles away, back to the middle of the mat.
Kinte gets in close and instigates a clinch.
Pipko is trying to work for a single leg takedown but Kinte pulls him back up using the underhooks.
Kinte lands with a short head shot on the inside.
Kinte presses Pipko against the cage and delivers a mid-strength body shot.
Pipko is working for a takedown up against the cage. He can't get it on this occasion though.
That's three minutes gone in the round.
Pipko drops down looking for an ankle pick but Kinte pulls his leg out and moves away.
Kinte lands an overhand right.
Kinte looking to take his opponent's legs away with the low kicks.
Pipko closes the distance and clinches.
Pipko wants to take the fight to the mat but Kinte manages to get underhooks and keep the fight in the clinch.
Kinte breaks the clinch and we're back to striking at distance.
Kinte gets to the clinch - let's see what his plan is here.
Kinte lands a right hand that snaps the head of Pipko backwards.
Kinte manages to break the clinch.
Pipko gets his takedown attempt stuffed easily
and Kinte counters with a three punch combo that has Pipko backing up. Pipko nods at Kinte to acknowledge the strikes.
Kinte buckles his opponent's knee momentarily with a nice leg kick.
That's four minutes gone in the round.
Kinte gets to the clinch - let's see what his plan is here.
Wooooo! Give it up for these two warriors! They are putting on a show!
Kinte's corner calls for him to break the clinch, which he does.
Pipko shoots in for a takedown. "Ole!" shouts Kinte as he jumps to the side.
Kinte lands a head kick. Pipko smiles back at him and beckons him forward.

It looks like Laus Pipko has been cut.
Pipko changes levels and looks for a double leg takedown. Kinte tries to avoid it but Pipko manages to keep hold of a leg and drag Kinte to the ground. Kinte escapes though and pops straight back up to his feet.
Kinte fakes with an overhand right and moves in to clinch with Pipko, pushing him back against the cage.
A left hand lands to the body for Kinte.
Kinte breaks from the clinch.
Pipko fails with the takedown
and Kinte counters with an outside leg kick.
The crowd are going absolutely nuts as the round comes to an end - what a fantastic round of action!
An inside leg kick lands from Kinte.
A good leg kick by Kinte.
And thats the end of the round the fighters go back to their corners.
Kunta Kinte dominated that second round.
The cut man is working on Laus Pipko's cut.
Well, the break between rounds is over. Let's get back to the scrappin! This is the final round!

Pipko shoots in but doesn't get the takedown
and Kinte makes him pay by landing a thudding low kick.
Kinte has taken the fight to the clinch.
Kinte tries to land a shot to the body but it's blocked.
Kinte manages to break the clinch.
A solid leg kick lands there for Kinte.
Pipko looks for a takedown here. Will he get it? Kinte is fending him off so far but Pipko persists. Nope, Kinte circles away and we're back to standing.
Pipko will have to do better than that with his takedown attempts.
Kunta Kinte has stuffed three takedown attempts in the round now. That's going to take a lot out of Laus Pipko.
Pipko tries for a takedown but Kinte sees it coming a mile off and avoids it easily.
Pipko takes a nice looking leg kick right on the meat of his thigh there.
Pipko chopped to the floor by a nice leg kick but he springs right back up before Kinte can pounce on him.
Pipko's leg has a nasty welt from taking a succession of leg kicks. That must be slowing him down.
Kinte drives through and clinches with Pipko against the cage.
Kinte just leaning against Pipko, taking a breather.
Pipko takes a big intake of breath there - he's definitely tired.
Kinte breaks the clinch and we return to the middle of the mat.
That's one minute gone in the round.
Kinte forces Pipko back against the cage and clinches.
Kinte lands a right uppercut that snaps the head of Pipko backwards.
Kinte manages to break the clinch.
Pipko looking for a takedown here - he's got it.
Kinte is working from a closed guard but he's struggling to control his opponent.
Pipko stops Kinte from standing up.
Kinte is pulling down on Pipko's head. It's preventing any offense from Pipko, at least for the moment.
Pipko throwing strikes but missing.
That's two minutes gone in the round.
Kinte lands a beautiful switch and he's in full mount! That could spell trouble for Pipko!
Kinte trying to control but he's not successful this time.
Kinte sitting in mount, just looking to control for the moment.
The fans in attendance giving it up for the two fighters, who have really let it all hang out in the last minute or so!
Kinte avoids the attempt from Pipko to control.
That's three minutes gone in the round.
Pipko is desperately trying to get back to half guard.

Kinte stands up from the dominant position. He obviously fancies his chances standing.
Pipko closes the distance and clinches.
Kinte stays in close to his opponent and throws a right hand to the body.
Kinte breaks the clinch and we return to the middle of the mat.
Kinte moves into the clinch.
A short right from Kinte.
Pipko has hold of a leg and is looking for a trip takedown. Kinte avoids it nicely though and we remain in the clinch.
Kinte manages to break the clinch.
A nice inside leg kick there by Kinte. That's going to slow Pipko down.
Kinte has Pipko up against the cage in a clinch.
Kinte pushes off and circles away, back to the middle of the mat.
That's four minutes gone in the round.
The fans in attendance giving it up for the two fighters, who have really let it all hang out in the last minute or so!
Pipko shoots in for a takedown - he's clinched up with Kinte but Kinte pushes him off and we're back to square one.
Kinte has managed to clinch.
Pipko jumps guard but Kinte stands there with Pipko around his waist. Pipko gives up and drops back to his feet. We remain in the clinch.
Kinte breaks the clinch.
Kinte closes the distance and clinches.
Kinte tries to work over Pipko's body with a swooping hook but it only glances the target.
Pipko has hold of a leg and is looking for a trip takedown. Kinte avoids it nicely though and we remain in the clinch.
Kinte pushes off and circles away, back to the middle of the mat.
As the round comes to an end the crowd are showing their appreciation for a great round of action.
Kinte moves into the clinch.
Pipko wants the takedown. Kinte is fighting it off but Pipko persists and manages to bring the fight to the ground, ending up in Kinte's guard against the cage.
Kinte working a defensive guard here.
And that's the end of the fight!
Kunta Kinte showed his dominance in that final round.
I think Kinte has won this one but let's see what the judges have to say. Over to the ring announcer for the scorecards.
Ladies and gentlemen, after 3 rounds of action, we go to the scorecards for a decision.
Judge Jeff Smith scores the fight 29:28
Judge Josh West scores the fight 29:28
Judge Colin Fray scores the fight 29:28
In favor of your winner, by unanimous decision... Kunta Kinte!
An out of breath and clearly excited Kunta Kinte thanked Hellraiser Fightgear ($10 and above) for their help and support (and free stuff they sent him).
|
|
|
|
|
|
|
|
|
|
|
|
|
|
|
|
|
|
|
|
|
|
|
| S |
C
A |
G |
S |
C
B |
G |
|
S |
C |
G |
|
energy
A | B |
|
hype
A | B |
|
pop
A | B |
|
mgr
A | B |
|
FIGHT
RATING
80% |
|
|
|
|
|
|
|
Undercard bout
|
Coming up we have a heavyweight MMA rules bout between Tita Zen (ranked 0 p4p, 0 weight class) and James Shrimp (ranked 0 p4p, 0 weight class). Shrimp has chosen drowning pool-step up as his entrance music. James Shrimp is the more experienced fighter, so let's see if that makes a difference tonight.
 |
|
 |
| 195 cm
21
250 lbs
4 - 1 - 0 |
|
219 cm
34
276 lbs
15 - 15 - 0 |
BJJ Brown Belt
Excellent boxer
Cardio machine |
|
Decent wrestler
Excellent boxer
Determined |
|
| |
|
Ladies and gentlemen. This fight is 3 rounds, in the heavyweight division.
Introducing the fighter to my left, fighting out of the red corner.
With a record of
4 - 1 - 0, fighting out of Hilo, Tita Zen!
And introducing the fighter to my right, fighting out of the blue corner.
With a record of
15 - 15 - 0, fighting out of Hilo, James Shrimp!
The judges for this bout are Colin Fray, Jeff Smith and Chris Saunders.
The bell rings for round one and we are underway!
Zen uses good footwork to avoid the strikes from Shrimp.
Zen connects with an inside leg kick.
That kick from Zen tenderised Shrimp's leg. Shrimp is trying to keep his angry face on.
Shrimp takes a jab right on the nose. That must have hurt but he shrugs his shoulders and looks to return the favor.
Zen throws a head kick that misses.
Zen's hands are dropping dangerously low here and Shrimp connects clean with a right hook that sends him down to one knee! Zen scrambles back to his feet.

It looks like Tita Zen has been cut.
We've seen a great period of action over the last minute or so - credit to both fighters for going all out!
Zen keeping a good distance there, avoiding the body shot.
Zen moves out of range of the strikes.
A solid leg kick lands there for Zen.
Zen lets loose with a powerful body kick. Shrimp will feel that in the morning.
Shrimp looks gassed!
Zen misses the jab.

Zen lands a big head kick that sends Shrimp tumbling to the mat! Zen takes a step backwards and waves Shrimp back to his feet - he wants the finish!
It looks like James Shrimp has been cut.
Zen throws a sloppy head kick and Shrimp moves out of range easily.
Zen chopping away at his opponent's legs.
Shrimp walks straight into an uppercut. Luckily it didn't land flush.
Shrimp on the wrong end of a nice low kick. He's acting like it's no big deal but he doesn't want to take many more of those.
Zen pushes Shrimp away with a front kick.
That's one minute gone in the round.
Zen connects with a leg kick. Shrimp looked like he was expecting something else and didn't defend it.
Zen lands a big uppercut and Shrimp crumbles to the floor! The ref thinks about stopping the fight but Shrimp looks OK. Zen waves Shrimp back to his feet!

Shrimp is rocked!
The fans in attendance giving it up for the two fighters, who have really let it all hang out in the last minute or so!
Zen cracks Shrimp with a left hook right on the temple and Shrimp goes down! He's out! Referee! Stop the fight! Zen lands a few more punches before the dopey ref steps in - hopefully Shrimp is OK!
Ladies and gentlemen, after 1:17 of round 1, we have a winner by way of KO (Punch). Tita Zen!
A very excited looking Tita Zen made sure he remembered to thank all the fans both in the arena and on the internet. He said all the coolest people spend all day on MMA websites, which got a big reaction.
|
|
|
|
|
|
|
|
|
|
|
|
|
|
|
|
|
|
|
|
|
|
|
| S |
C
A |
G |
S |
C
B |
G |
|
S |
C |
G |
|
energy
A | B |
|
hype
A | B |
|
pop
A | B |
|
mgr
A | B |
|
FIGHT
RATING
100% |
|
|
|
|
|
|
|
Undercard bout
|
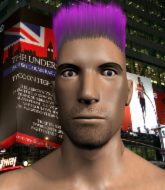
Coming up we have a light heavyweight MMA rules bout between Gream Shroom (ranked 0 p4p, 0 weight class) and Darth Vader (ranked 0 p4p, 0 weight class). Vader has chosen Imperial March as his entrance music. Over to our ring announcer for the fighter introductions!
 |
|
 |
| 187 cm
25
211 lbs
1 - 0 - 0 |
|
189 cm
24
218 lbs
4 - 8 - 0 |
BJJ White Belt
Decent elbows
Very strong |
|
BJJ Purple Belt
Basic striking
Granite chin |
|
| |
|
Ladies and gentlemen. This fight is 3 rounds, in the light heavyweight division.
Introducing the fighter to my left, fighting out of the red corner.
With a record of
1 - 0 - 0, fighting out of Hilo, Gream Shroom!
And introducing the fighter to my right, fighting out of the blue corner.
With a record of
4 - 8 - 0, fighting out of Hilo, Darth Vader!
The judges for this bout are Josh West, Roger Salmon and Chris Saunders.
The bell rings for round one and we are underway!
Shroom defends well against a solid takedown attempt from Vader.
Vader tries for a takedown but Shroom sees it coming a mile off and avoids it easily.
Vader closes the distance and clinches up with Shroom, looking for a takedown. Vader pushes Shroom against the cage but Shroom circles to the side and manages to break the clinch.
Gream Shroom has stuffed three takedown attempts in the round now. That's going to take a lot out of Darth Vader.
Shroom tries to score with a leg kick but it misses it's target.
Vader shoots for a double leg takedown but Shroom sprawls well. He's pushed Vader's face into the mat and manages to get back to his feet relatively easily.
Vader keeping a good distance there, avoiding the body shot.
Vader looks for a takedown but Shroom sprawls well.
Shroom tries to clinch but is not successful on this occasion.
Shroom works his jab well there, keeping his opponent at a distance.
It looks like Darth Vader has been cut.
Vader tries to score a power double leg takedown but Shroom sees that one coming and sprawls well. That will dishearten Vader somewhat.
Vader is looking to take this fight into the clinch.
Shroom closes the distance and pushes Vader back into the cage.
Vader jumps guard but his hands slip and he falls flat on his back. Well, he's made himself look a right mug there, as Shroom walks away with a smile on his face. Vader gets slowly back to his feet and shakes his head.
The crowd cheering loudly, showing their appreciation for the quality fight we're seeing here.
Vader rushes Shroom and pushes him back against the cage in a clinch.
Vader fails to pull the fight into his guard.
That's one minute gone in the round.
Shroom misses with an elbow strike.
Shroom lands a right uppercut that snaps the head of Vader backwards.
Vader tries to jump guard but he falls flat on his backside. Shroom smiles and moves away.
Shroom moves into the clinch.
With the fighters up against the cage, Shroom throws an elbow but misses.
Shroom scores with a nice hook to the head.
Shroom scores with an uppercut up the middle.
Shroom lands a nice uppercut.
Shroom working on landing some head shots here - that one got through nicely.
Vader jumps guard but Shroom stands there with Vader around his waist. Vader gives up and drops back to his feet. We remain in the clinch.
Shroom softening up his opponent with strikes, against the cage.
Vader jumps guard but his hands slip and he falls flat on his back. Well, he's made himself look a right mug there, as Shroom walks away with a smile on his face. Vader gets slowly back to his feet and shakes his head.
Shroom closes the distance and clinches.
A short left from Shroom.
That's two minutes gone in the round.
Vader takes an elbow to the forehead.
Wooooo! Give it up for these two warriors! They are putting on a show!
Vader drags the fight down to the ground.
We must be close to a standup if these guys don't pick up the pace.
Vader has his foot on Shroom's thigh. He's trying to push off and get in position for a triangle, I think. Shroom works his way back into a safe position though.
Shroom wants to pass the guard but Vader is keeping the position.
Vader had isolated an arm as going for a kimura. Shroom defends it easily.
The ref warns both fighters not to hold the cage as they work up against the meshing.
Shroom has decided he wants to stand but the closed guard of Vader is proving hard to escape from.
Shroom stopping the sweep attempt from Vader.
Vader is working actively off his back, looking to secure an arm or perhaps work for a triangle.
Vader is throwing his legs up, looking for submissions. Shroom is aware though and is defending well.
Shroom throws a big elbow that misses.
Shroom would like to get this fight back to the feet but can't get free from the closed guard.
Vader has a loose triangle. He'll be looking to tighten that up but Shroom can see exactly what he's planning and manages to posture up and free himself.
That's three minutes gone in the round.
Shroom trying to control but Vader is working from the bottom.
Vader is looking for a triangle but Shroom pushes his legs off easily.
Vader keeping moving, preventing Shroom from controlling successfully.
The fighters are starting to perspire pretty heavily.
Vader is actively looking for submissions from his back. He's worked himself a little space on the bottom and seems to be going for a triangle. No, he's switched into an armbar! That was slick! Shroom rolls with it to try and escape but Vader cranks on the arm and Shroom is forced to tap out! This one is aaaaaaaaall over!
Ladies and gentlemen, after 3:51 of round 1, we have a winner by way of Submission (Armbar). Darth Vader!
Darth Vader looked relieved post fight as he said the following; 'Wossup, ma niggas?'.
|
|
|
|
|
|
|
|
|
|
|
|
|
|
|
|
|
|
|
|
|
|
|
| S |
C
A |
G |
S |
C
B |
G |
|
S |
C |
G |
|
energy
A | B |
|
hype
A | B |
|
pop
A | B |
|
mgr
A | B |
|
FIGHT
RATING
69% |
|
|
|
|
|
|
|
Undercard bout
|
|
|
|
Co-main event
|
Coming up we have a featherweight MMA rules bout between Tommy Morrison (ranked 0 p4p, 0 weight class) and Jo Jo (ranked 0 p4p, 0 weight class). Morrison's ring entrance music is that housewives' favourite, Crawling. Jo comes into a darkened arena with his song building. Set You Free kicks in, the lights come on and the crowd goes wild! What a showman! Jo Jo acknowledges the crowd's support as he enters the cage.
 |
|
 |
| 180 cm
23
159 lbs
6 - 3 - 0 |
|
170 cm
20
155 lbs
4 - 3 - 0 |
Good wrestling
Excellent boxer
Very strong |
|
BJJ Brown Belt
Decent boxing
Granite chin |
|
| |
|
Ladies and gentlemen. This fight is 3 rounds, in the featherweight division.
Introducing the fighter to my left, fighting out of the red corner.
With a record of
6 - 3 - 0, fighting out of Hilo, Tommy Morrison!
And introducing the fighter to my right, fighting out of the blue corner.
With a record of
4 - 3 - 0, fighting out of Hilo, Jo Jo!
The judges for this bout are Roger Salmon, Paul Gruel and Micheangelo Fripello.
The bell rings for round one and we are underway!
Morrison throws a chopping leg kick but Jo manages to avoid taking any serious damage.
Jo ducks under an overhand right and circles away with a smile on his face.
Morrison moves into the clinch.
Jo throws a punch but it's blocked by Morrison.
Jo looking to stall.
Jo swings wildly with an uppercut but Morrison uses good head movement to avoid it.
Morrison lands with a light punch inside.
Morrison blocks a couple of punches on the inside.
Morrison lands a nice shot to the body.
Jo fails to land with a short punch on the inside.
Jo doesn't land with the attempted body shot.
Jo misses with the head strike.
Morrison working some nice short punches in the clinch.
A frustrated look appears on Jo's face as he tries to break the clinch.
Morrison scores with a shot to the side of Jo's head.
Jo's head jolts backwards as he takes an uppercut right on the button!
Morrison lands a shot to the body.
Morrison lands a hook to the body. It's hard to tell if that hurt Jo or not.
That's one minute gone in the round.
Jo throws an elbow that misses.
Jo misses with some punches.
Jo misses with a punch on the inside.
Morrison scores with a nice hook to the head.
A right handed body shot lands from Morrison.
Morrison scores with a nice hook to the head.
Jo working aggressively here.
Morrison scores with an uppercut up the middle.
Morrison lands a right hand that snaps the head of Jo backwards.
A short right from Morrison.
A short right hand to the side of the head by Morrison.
Jo taking a breather.
Still in the clinch, Jo scores with a nice short uppercut.
Morrison lands a hook that snaps the head of Jo backwards.
Jo misses with the head strike.
Jo fails to land with a short punch on the inside.
A head punch on the inside from Jo fails to land.
Morrison lands with a quick shot inside that doesn't really do much damage.
Both fighters working to control the clinch.
Jo has a couple of punches blocked by Morrison.
That's two minutes gone in the round.
Morrison blocks a couple of punches on the inside.
Wooooo! Give it up for these two warriors! They are putting on a show!
A body shot lands from Morrison.
Jo throws a knee to the head but misses.
Jo takes an elbow to the forehead.
Morrison pushes Jo back against the cage and lands a hook to the side of the head.
Morrison blocks a punch to the side of the head.
Jo tries a shoulder strike but it doesn't do any damage.
Jo's head jolts backwards as he takes an uppercut right on the button!
Jo is looking to break free of the clinch but Morrison has double underhooks.
Morrison scores with a shoulder strike.
An uppercut on the inside fails to land for Jo.
A right hand to the body from Morrison.
Jo misses with a short punch on the inside.
Morrison throws a blind hook that connects with the side of Jos head.
Morrison pushes Jo back against the cage and lands a hook to the side of the head.
An uppercut on the inside fails to land for Jo.
A right hook to the body lands for Morrison.
Jo tries to break the clinch but Morrison is controlling the position.
A head punch blocked on the inside by Morrison.
Jo is trying to work out of this bad position, with his back against the cage.
Jo looks like he'd prefer to be striking at range right now.
That's three minutes gone in the round.
Morrison softening up his opponent with strikes, against the cage.
Jo is trying to force a seperation but Morrison has the dominant position.
Morrison lands a body punch in the clinch.
A frustrated look appears on Jo's face as he tries to break the clinch.
A nice right hand lands inside from Morrison.
Morrison lands punches inside but they're not really causing much damage.
Morrison lands a short shot on the inside that snaps the head of Jo backwards.
Morrison throws a hook to the body. More of an arm punch but it's all scoring with the judges.
Morrison lands a right hand that snaps the head of Jo backwards.
Morrison blocks a couple of punches on the inside.
Morrison keeps the fight in the clinch, despite Jo's efforts to push away.
Morrison is working Jo over against the cage.
Jo doesn't land with the attempted body shot.
Morrison working on landing some head shots here - that one got through nicely.
Morrison digs a right hand underneath Jo's ribcage. Jo let out a lung full of air as it connected.
This is a great period of action - very entertaining stuff!
Morrison lands a left hand that snaps the head of Jo backwards.
Jo has had enough of the clinch but Morrison keeps him there for the moment.
Morrison working on landing some head shots here - that one got through nicely.
Morrison lands a body punch.
That's four minutes gone in the round.
Morrison blocks an uppercut.
Morrison lands with a left to the head.
A quick uppercut on the inside from Morrison.
Jo swings away with an uppercut that misses.
A hook to the body from Morrison.
Jo misses with the head strike.
Jo is clearly stalling here... Pick up the pace son.
Morrison throws a blind hook that connects with the side of Jos head.
Jo tries a shoulder strike but it doesn't do any damage.
Morrison landing knees to the body. They look like they could hurt.
Jo looks gassed!
Jo has a couple of punches blocked by Morrison.
Morrison pushes Jo back against the cage and unloads with a body punch.
Jo misses with a punch on the inside.
The crowd are going absolutely nuts as the round comes to an end - what a fantastic round of action!
Morrison lands a short shot on the inside that snaps the head of Jo backwards.
Morrison cracks Jo with a nice body shot.
Jo working aggressively here.
Jo takes a shot to the head.
Jo throws a punch but it's blocked by Morrison.
And thats the end of the round the fighters go back to their corners.
Tommy Morrison dominated that round.
That's time! Back to the action!
Nice uppercut lands for Morrison. That snapped Jo's head back.
Morrison clinches up against the cage.
Morrison scores with a nice hook to the head.
A head punch blocked on the inside by Morrison.
Jo managing to block the knees to the body from Morrison.
Jo has a couple of punches blocked by Morrison.
Morrison lands a nice looking hook to the body, against the cage.
Morrison working on landing some head shots here - that one got through nicely.
Jo misses with some punches.
Jo creates a bit of distance and throws an elbow that only just misses.
Morrison stays in close to his opponent and throws a right hand to the body.
Morrison blocks an uppercut.
Morrison blocks an uppercut.
Jo misses with a hook from the clinch.
Nice elbow from Morrison.
A short body shot lands from Morrison as the two fighters clinch.
The crowd cheering loudly, showing their appreciation for the quality fight we're seeing here.
Morrison lands with a short shot to the head.
Morrison lands a body punch in the clinch.
That's one minute gone in the round.
Jo misses with the head strike.
Morrison lands a body punch in the clinch.
Jo is breathing heavily.
A body shot lands from Morrison.
Morrison lands with a short head shot on the inside.
Jo working aggressively here.
Jo misses with some punches.
A hook to the body from Morrison.
Jo fails to land with a short punch on the inside.
Morrison lands with a short punch from the clinch.
Morrison makes some space for himself and lands an uppercut.
Morrison lands with a quick shot inside that doesn't really do much damage.
Morrison lands on the inside with an uppercut.
A right handed body shot lands from Morrison.
We've seen a great period of action over the last minute or so - credit to both fighters for going all out!
Morrison lands a right hand.
Jo pushes off and circles away, back to the middle of the mat.
Jab from Morrison.
Morrison scores with a crisp jab that stopped Jo in his tracks.
Morrison misses with a series of wild punches.
Jo Jo is looking to throw some combinations by the looks of things.
That's two minutes gone in the round.
Nice sprawl there from Morrison as Jo shoots in.
Jo misses with a takedown attempt
and Morrison counters with a stiff right hand.
Jo takes a jab right on the nose. That must have hurt but he shrugs his shoulders and looks to return the favor.
Morrison keeps his opponent at a distance with a nice jab.
Morrison lands a jab to the head.
Morrison lands with a nice body punch.
Morrison scores a takedown into full mount!
That's three minutes gone in the round.
The referee must be thinking about standing these guys back up.
Morrison sitting in mount, just looking to control for the moment.
Jo tries to buck Morrison off but he can't manage it.
That's four minutes gone in the round.
Morrison get's back to his feet.
Jo takes a shot to the eye socket. That's gotta hurt.
Morrison looks to score with a combo but nothing lands.
Morrison misses with a wild body shot.
The crowd are going absolutely nuts as the round comes to an end - what a fantastic round of action!
Morrison lands an overhand right.
Morrison is using his height advantage well here, landing a good percentage of his punches.
Jo tries for a takedown but Morrison circles away easily
and Morrison counters with a quick right hand to the jaw.
And thats the end of the round the fighters go back to their corners.
Tommy Morrison dominated that second round.
OK. That's time! The bell goes and we're back to the action. This is the final round!
Morrison lands a right hook to the body.
Morrison throws an uppercut from half a mile away. Jo sees it coming and avoids it easily.
Horrible takedown by Jo or perhaps it was just good defense by Morrison which made him look bad.
Jo fails with the takedown
and Morrison counters nicely by changing levels and landing a hook to the body.
Jo gets cracked there but stands up to it.
Morrison gets to the clinch - let's see what his plan is here.
Still in the clinch, Morrison scores with a nice short uppercut.
Jo misses with some punches.
Morrison lands a right hand.
Jo takes a shot to the head.
Morrison lands with a short punch from the clinch.
That's one minute gone in the round.
Morrison blocks an uppercut.
Morrison lands a left hand that snaps the head of Jo backwards.
Jo misses with a short punch on the inside.
Jo tries a shoulder strike but it doesn't do any damage.
Morrison lands punches inside but they're not really causing much damage.
Morrison softening up his opponent with strikes, against the cage.
Morrison throws a hook to the body. More of an arm punch but it's all scoring with the judges.
Jo takes a big intake of breath there - he's definitely tired.
Morrison lands a body punch in the clinch.
A left hand lands to the body for Morrison.
Morrison lands a shoulder strike that jolts his opponent's head backwards.
Morrison gets through Jo's defenses to land a nice punch to the side of the head.
This is a great period of action - very entertaining stuff!
Jo takes a shot to the head.
Jo misses with a short punch on the inside.
Jo throws a punch but it's blocked by Morrison.
A hook to the body from Morrison.
Morrison lands a shoulder strike.
Morrison lands punches inside but they're not really causing much damage.
Nice body punch from Morrison - that landed with a thud.
Morrison lands on the inside with an uppercut.
That's two minutes gone in the round.
Morrison lands punches inside but they're not really causing much damage.
Tommy Morrison has scored more points in the clinch so far.
Morrison lands on the inside with an uppercut.
Morrison lands a right uppercut that snaps the head of Jo backwards.
Jo is rocked!
A short right from Morrison.
Jo is still on wobbly legs! Can Morrison finish him?
Morrison lands a nice looking hook to the body, against the cage.
Morrison is really dominating this fight. Is there anything that Jo can do to turn this around?
Morrison softening up his opponent with strikes, against the cage.
Morrison working on landing some head shots here - that one got through nicely.
Morrison scores with a shoulder strike.
Morrison pulls back and lands a big elbow that stuns Jo! Morrison unloads with more strikes and Jo sinks to his knees! This one is all over!
Ladies and gentlemen, after 2:37 of round 3, we have a winner by way of TKO (Strikes). Tommy Morrison!
Tommy Morrison managed to slip a mention for his sponsors, {xXx} iFight Nut. Energy Recovery 160 $55, into his post fight interview.
|
|
|
|
|
|
|
|
|
|
|
|
|
|
|
|
|
|
|
|
|
|
|
| S |
C
A |
G |
S |
C
B |
G |
|
S |
C |
G |
|
energy
A | B |
|
hype
A | B |
|
pop
A | B |
|
mgr
A | B |
|
FIGHT
RATING
100% |
|
|
|
|
|
|
|
Main event
|
Coming up we have a welterweight MMA rules bout between Boner Patrol (ranked 0 p4p, 0 weight class) and Lou Fung (ranked 0 p4p, 0 weight class). Patrol's entrance music is Kanye West - Ni**as In Paris. A fine choice. Buckle up people - heeeeeeeeeere we go!
 |
|
 |
| 183 cm
35
177 lbs
23 - 10 - 1 |
|
176 cm
23
160 lbs
12 - 2 - 0 |
Good wrestling
Basic striking
Cardio machine |
|
BJJ Purple Belt
World class MT
Knockout power |
|
| |
|
Ladies and gentlemen. This fight is 5 rounds, for the welterweight championship of the world!
Introducing the champion to my left, fighting out of the red corner.
With a record of
23 - 10 - 1, fighting out of Hilo, Boner Patrol!
And introducing the challenger to my right, fighting out of the blue corner.
With a record of
12 - 2 - 0, fighting out of Hilo, Lou Fung!
The judges for this bout are Josh West, Micheangelo Fripello and Roger Salmon.
The bell rings for round one and we are underway!
Fung goes for a high kick. It partially lands.
Patrol closes the distance and clinches up, looking for a takedown. He shifts his weight and gets a nice trip into half guard.
Patrol not landing any meaningful shots this time.
Fung really doesn't want to stay on the ground with Patrol. If he can't get it back to his feet, it's only a matter of time before he'll be tapping out.
Fung is trying to stand up here but Patrol is controlling him well.
Patrol wants to pass to mount but Fung is defending the position.
Patrol missing with some ground and pound from the half guard.
Patrol thumps the canvas. Not on purpose obviously - he just missed Fung's head.
Patrol is pressing down on Fung's thigh, looking to free his foot. Fung is holding on for now.
Fung avoiding damage under a succession of punches from Patrol.
Patrol thows a wild elbow that connects with the canvas.
Fantastic stuff here - a very entertaining period of action, which has drawn cheers from the crowd.
Patrol is looking for an arm triangle, whilst trying to pass to side control. Fung doesn't seem that keen to cooperate though. No luck this time Patrol.
Patrol looking to pass the half guard. Not this time.
That's one minute gone in the round.
Patrol is trying to control. Fung wants to improve his position but can't escape this time.
Patrol thows a wild elbow that connects with the canvas.
Patrol seems to be taking a bit of a break to think of his next move. He lands a short punch in the meantime.
Patrol frees up his trapped foot and advances to mount.
Patrol trying to control but he's not successful this time.
That's two minutes gone in the round.
Patrol is really struggling to control Fung but he's trying to hold on to the position.
Patrol has been looking to land a fair amount of strikes on the ground. He might be looking to soften his opponent up in order to work for a submission.
Patrol lands a big shot there that rocks Fung but he's holding on and managing to survive for now.
Patrol unloads with some shots from mount but Fung bucks and avoids them well.
Patrol misses with a head shot.
Patrol lands a couple of nice shots there from mount.
Fantastic stuff here - a very entertaining period of action, which has drawn cheers from the crowd.
Patrol wants to control the pace but Fung is squirming around nicely.
Patrol throws an elbow from mount that misses. Lucky escape for Fung because Patrol loaded up on that one.
Patrol unloads with some vicious shots from mount and Fung wants out - he looks towards the referee who steps in to save him! Patrol celebrates on the cage and the crowd goes wild!
Ladies and gentlemen, after 3:56 of round 1, we have a winner by way of TKO (Strikes). Boner Patrol!
Boner Patrol retains his welterweight title!
Boner Patrol bigged himself up after the win. The crowd seemed to love it.
|
|
|
|
|
|
|
|
|
|
|
|
|
|
|
|
|
|
|
|
|
|
|
| S |
C
A |
G |
S |
C
B |
G |
|
S |
C |
G |
|
energy
A | B |
|
hype
A | B |
|
pop
A | B |
|
mgr
A | B |
|
FIGHT
RATING
35% |
|
|
|
|
|
|
|
|
|
|
