 |
D.E.C 5: Russell vs Kincaid PBP Commentary |
Undercard bout
|
Coming up we have a bantamweight MMA rules bout between Billy Dorian (ranked 0 p4p, 0 weight class) and Tiny Twist (ranked 0 p4p, 0 weight class). Billy Dorian has the better chin. Will he look to stand and bang today?
 |
|
 |
| 165 cm
19
140 lbs
0 - 0 - 0 |
|
185 cm
19
135 lbs
0 - 1 - 0 |
BJJ Blue Belt
Improved boxing
Intelligent |
|
BJJ Brown Belt
Basic striking
Likes ground |
|
| |
|
Ladies and gentlemen. This fight is 3 rounds, in the bantamweight division.
Introducing the fighter to my left, fighting out of the red corner.
With a record of
0 - 0 - 0, fighting out of Sydney, Billy Dorian!
And introducing the fighter to my right, fighting out of the blue corner.
With a record of
0 - 1 - 0, fighting out of Sydney, Tiny Twist!
The judges for this bout are Damien Edna, Eliza Hachem and Steve Erwin.

The bell rings for round one and we are underway!
Dorian throws a series of punches but Twist moves out of range.
Dorian sizes up Twist with a pawing jab and scores with a straight right down the middle.
Wow, both these guys are really going for it!
A combination from Dorian does no damage.
Twist fails with a rather predictable takedown attempt.
Dorian lands a leg kick. The shin dug right into the meat of the thigh.
Dorian throws a series of strikes that have Twist backpedaling.
Dorian lands with a right that hurts Twist. Twist looks to clinch but Dorian throws a short knee that drops Twist. This one is all over!
Ladies and gentlemen, after 0:20 of round 1, we have a winner by way of TKO (Punch and Knee). Billy Dorian!
|
|
|
|
|
|
|
|
|
|
|
|
|
|
|
|
|
|
|
|
|
|
|
| S |
C
A |
G |
S |
C
B |
G |
|
S |
C |
G |
|
energy
A | B |
|
hype
A | B |
|
pop
A | B |
|
mgr
A | B |
|
FIGHT
RATING
100% |
|
|
|
|
|
|
|
Undercard bout
|
Coming up we have a featherweight MMA rules bout between Kent Wire (ranked 0 p4p, 0 weight class) and Slim Pickens (ranked 0 p4p, 0 weight class). Wire comes to the cage accompanied by Bust Back. Well, the cameraman is lingering on a pretty young lady for a bit too long there. Keep your eyes on the fighters buddy or you'll miss the fighter intros!
 |
|
 |
| 195 cm
22
150 lbs
0 - 0 - 0 |
|
160 cm
20
150 lbs
0 - 1 - 0 |
BJJ Blue Belt
Brawler
Inexperienced |
|
BJJ Blue Belt
Brawler
Solid chin |
|
| |
|
Ladies and gentlemen. This fight is 3 rounds, in the featherweight division.
Introducing the fighter to my left, fighting out of the red corner.
With a record of
0 - 0 - 0, fighting out of Sydney, Kent Wire!
And introducing the fighter to my right, fighting out of the blue corner.
With a record of
0 - 1 - 0, fighting out of Sydney, Slim Pickens!
The judges for this bout are Donatello Bradman, John Mangel and Hugh Johnson.
The bell rings for round one and we are underway!

Wire has Pickens up against the cage in a clinch.

Wire manages to break the clinch.
Wow, both these guys are really going for it!
Wire tries to land a front kick but Pickens steps back. That was a bit too telegraphed.
Pickens tries to clinch but Wire is having none of it.
Wire tries a switch kick but it misses it's target.
Wire fails miserably with a takedown attempt.
Wire lands three nice shots there - that looked like it hurt!
Wire fails to land with a series of punches.
Wire swings away but doesn't land with a series of punches.
Pickens should think about turning a few of those tyres round his middle into muscle if he wants people to take him seriously as an athlete.
Wire shoots in for a takedown. "I don't think so" says Pickens as he avoids it easily.
Wire takes the fight into the clinch.
Wire changes levels and goes for a takedown here. Pickens fights it off and pushes away nicely.
That's three failed takedown attempts in the round for Kent Wire. That's going to take a lot out of him.
Pickens instigates a clinch.
Wire looking for a takedown.
Pickens stalling in the clinch but Wire improves position.
Wire's corner are urging him to control the action in the clinch for a moment, rather than mount any serious offense. I'm sure the crowd appreciate those instructions... not.
Wire has hold of a leg and is looking for a trip takedown. Pickens avoids it nicely though and we remain in the clinch.
A short right hand to the side of the head by Wire.
Wire prevents a takedown attempt there.
Pickens has a body lock and is looking for a takedown. Wire is bouncing around trying to prevent the takedown and somehow he has indeed managed to stay on his feet.
Pickens has Wire pressed up against the cage and is working for takedown. Wire manages to improve position though and keeps the fight standing.
Wire really does look like a pencil wearing a pair of gloves. Let's hope he has a gameplan to suit that ridiculous body shape.

That's one minute gone in the round.
Wire tries to land knees in the clinch but Pickens avoids the damage to the body.
Wire is breathing heavily.
Pickens tries to score a body lock takedown but Wire shows good agility there to stay on his feet.
Pickens wants a takedown but no success here.
Pickens fails to pull the fight into his guard.
Wire breaks from the clinch.
Kent Wire seems to be the more aggressive standup fighter in this bout.

Wire gets the takedown into side control.
Pickens tries to bench press Wire off him but Wire keeps the position.
Pickens manages to land a sweep and he's now on top! Lovely Jiu Jitsu!
Pickens sitting in half guard, looking to land shots. Wire defending well though.
Wire moves into full guard.

Wire working for a triangle but Pickens defends it easily.
Pickens landing some decent shots from guard.
Wire bucks up whilst keeping hold of a body lock, managing to reverse the position. Now he's in top in Pickens's guard.
Wire passes into half guard.
Wire is keen to just control but Pickens is a slippery customer.
The ref warns both fighters not to hold the cage as they work up against the meshing.
Wire working Pickens over with strikes.

That's two minutes gone in the round.
Wire passes the guard and advances to mount!
Wire looking to control and managing it successfully.
Wire is working on an americana here. Ooh, that looks pretty nasty! Nope, Pickens has managed to escape the submission attempt.
Pickens tries to get back to half guard but can't.
Both fighters really going for it on the ground here!
Wire trying to control but Pickens is having none of it.

Wire stands up from mount. Strange move.
Wire moves into the clinch successfully.
We've seen a great period of action over the last minute or so - credit to both fighters for leaving it all in the cage!
Wire tries for a takedown but Pickens manages to get underhooks.
Wire is trying to trip Pickens. He has hold of a leg but Pickens is hopping around, keeping his balance for the moment. Wire persists though and gets the takedown into guard.
Pickens has the superior BJJ but he's also working some ground strikes into his gameplan.
Pickens thows some rabbit punches from the bottom but they don't do any damage.
Wire works a leg free and moves into half guard.
Wire is tying to control. Pickens wants to improve his position but can't escape this time.
The two fighters exchange a few words. I couldn't hear what they were saying but maybe it's more fun if you make it up yourself. Wire connects with a nice short shot to Pickens's temple.

That's three minutes gone in the round.
Wire tries to stand but his arm is trapped.
Wire is trying to work for a kimura but Pickens is defending well.
Wire is looking to stall here but Pickens recovers full guard.
Wire wants to control from the top but Pickens keeps moving.
Wire decides he's had enough of playing guard and decides to stand. Come on Pickens, up you get!
Wire misses with a head kick.
Crack! A monster head kick from Wire and Pickens falls like a tree - timbeeeeeeeeeeerrrr! A highlight reel knockout by Wire!
Ladies and gentlemen, after 3:41 of round 1, we have a winner by way of KO (Head Kick). Kent Wire!
|
|
|
|
|
|
|
|
|
|
|
|
|
|
|
|
|
|
|
|
|
|
|
| S |
C
A |
G |
S |
C
B |
G |
|
S |
C |
G |
|
energy
A | B |
|
hype
A | B |
|
pop
A | B |
|
mgr
A | B |
|
FIGHT
RATING
70% |
|
|
|
|
|
|
|
Undercard bout
|
|
|
|
Undercard bout
|
Coming up we have a welterweight MMA rules bout between Art Vandelay (ranked 0 p4p, 0 weight class) and Otacilio Neto (ranked 0 p4p, 0 weight class). Otacilio Neto will no doubt be trying to keep this one on the feet, where he has a distinct advantage.
 |
|
 |
| 182 cm
22
170 lbs
1 - 0 - 0 |
|
180 cm
22
172 lbs
0 - 0 - 0 |
BJJ Blue Belt
Improved boxing
Good chin |
|
BJJ White Belt
Excellent boxer
Granite chin |
|
| |
|
Ladies and gentlemen. This fight is 3 rounds, in the welterweight division.
Introducing the fighter to my left, fighting out of the red corner.
With a record of
1 - 0 - 0, fighting out of Sydney, Art Vandelay!
And introducing the fighter to my right, fighting out of the blue corner.
With a record of
0 - 0 - 0, fighting out of Sydney, Otacilio Neto!
The judges for this bout are John Mangel, Winston Howard and Damien Edna.
The bell rings for round one and we are underway!
Vandelay changes levels and drives through with a really nice takedown into side control. Neto looks really pissed at himself for not defending that better.
Neto wants to get back to his feet but Vandelay is dominant here and he's now got Neto's back!
The fighters are pressed up against the cage, both looking to find a bit of space to work.
Neto working to try and regain half guard.
Neto has given up his back here. Will Vandelay look for the submission or keep pounding away?
Vandelay is working for a rear naked choke. Neto is not defending it well and Vandelay has tightened it up quickly! This could be all over! Neto refuses to tap and goes to sleep, forcing the referee to intervene. A little trickle of blood came out of Neto's nose as his head slumped to the floor. That is naaaasty!
Ladies and gentlemen, after 0:32 of round 1, we have a winner by way of Submission (RNC). Art Vandelay!
|
|
|
|
|
|
|
|
|
|
|
|
|
|
|
|
|
|
|
|
|
|
|
| S |
C
A |
G |
S |
C
B |
G |
|
S |
C |
G |
|
energy
A | B |
|
hype
A | B |
|
pop
A | B |
|
mgr
A | B |
|
FIGHT
RATING
69% |
|
|
|
|
|
|
|
Undercard bout
|
Coming up we have a heavyweight MMA rules bout between Jerome McGraw (ranked 0 p4p, 0 weight class) and Ivan Drago (ranked 0 p4p, 0 weight class). McGraw comes to the cage accompanied by Born Winner (Wrecth Of England). Drago has chosen Imperial March as his entrance music. Ivan Drago will no doubt be trying to keep this one on the feet, where he has a distinct advantage.
 |
|
 |
| 166 cm
22
240 lbs
0 - 0 - 0 |
|
196 cm
18
261 lbs
0 - 1 - 0 |
Good takedowns
Basic striking
Good chin |
|
BJJ Blue Belt
Solid Muay Thai
Intelligent |
|
| |
|
Ladies and gentlemen. This fight is 3 rounds, in the heavyweight division.
Introducing the fighter to my left, fighting out of the red corner.
With a record of
0 - 0 - 0, fighting out of Sydney, Jerome McGraw!
And introducing the fighter to my right, fighting out of the blue corner.
With a record of
0 - 1 - 0, fighting out of Sydney, Ivan Drago!
The judges for this bout are Donatello Bradman, Eliza Hachem and Hugh Johnson.
The bell rings for round one and we are underway!
Drago closes the distance and clinches up with McGraw, looking for a takedown. Drago pushes McGraw against the cage but McGraw circles to the side and manages to break the clinch.
McGraw scores a trip takedown into side control. Nice.
Drago tries to improve position but can't.
McGraw decides to take the fight back to the feet.
McGraw changes levels and drives through with a really nice takedown into side control. Drago looks really pissed at himself for not defending that better.
McGraw tries for a kimura. Not really close to a finish though.
McGraw advances to mount.
Drago gets back to half guard.
Drago trying to control but McGraw postures up.
Drago tries to roll over but McGraw keeps him under control.
Well, if McGraw is going to just lie there, perhaps we should talk about what we're having for dinner tonight
I'm having a ham and pineapple pizza
Yum. Can't wait.
The fighters are pressed up against the cage, both looking to find a bit of space to work.
That's one minute gone in the round.
Drago tries to roll over but McGraw keeps him under control.
Drago looking for submissions from an awkward position here.
McGraw trying to pass the guard but Drago defending well.
McGraw is working hard here to advance position.
McGraw takes a deep breath and rests his weight momentarily on top of his opponent, to control the position.

Well, the referee has seen enough. Neither fighter is active enough on the ground so he's stood them back up.
McGraw drives through with a takedown into guard.
Drago keeping busy on the bottom but McGraw has passed one foot through into half guard.
Drago looks gassed!
Drago is looking to improve his position.
That's two minutes gone in the round.
Well, if McGraw is going to just lie there, perhaps we should talk about what we're having for dinner tonight
I'm having a ham and pineapple pizza
Yum. Can't wait.
McGraw is working for a submission of some sort.
Drago trying to control from the bottom.
McGraw is working for a submission of some sort.
Drago wants to improve his position but McGraw is controlling well.
That's three minutes gone in the round.
Drago trying to hold on to McGraw's head to control him but McGraw postures up.
Drago tries to get to full guard but McGraw has control of the leg.
McGraw with a momentary lay and pray from half guard.

That's four minutes gone in the round.
There's not a lot going on here and the crowd are letting the fighters know they're not willing to tolerate a lack of action.
McGraw is working for a submission of some sort.
Drago tries to roll over but McGraw keeps him under control.
McGraw is looking for a kimura. It's going to be difficult to finish that from half guard though and Drago defends it well.
McGraw passes to side control.
McGraw controls the position.
And thats the end of the round the fighters go back to their corners.
Jerome McGraw dominated that round.
That's the end of the round. The referee orders the cornermen out of the cage so we can get back down to business.

Drago shoots and misses
and McGraw counters with a single leg into guard. Drago didn't expect that.
McGraw is just sitting in guard, looking to avoid any submissions.
McGraw works a leg free and moves into half guard.
Drago wants to get back to his feet.
McGraw is taking a breather. Drago says something to him but it's hard to make out. Perhaps he's telling him to get on with it and actually do something.
The referee stands the fighters back up. Jerome McGraw just wasn't active enough from the dominant position.
Drago with a lazy takedown attempt
so McGraw counters with a double leg into guard. Good agility.
McGraw controls from within his opponent's guard.
McGraw's ground tactics aren't going to win him many fans. Let's hope he's got fireworks for us if he gets back to his feet because he's not doing much on the ground.
McGraw slips nicely into half guard.
Both fighters are absolutely exhausted here.
This is a great period of action - very entertaining stuff!
McGraw not doing much here.
That's one minute gone in the round.
Drago is looking to improve his position.
McGraw takes a deep breath and rests his weight momentarily on top of his opponent, to control the position.
McGraw has controlled the position for a good 20 seconds, which will no doubt be starting to frustrate his opponent.
The referee stands the fighters back up. Jerome McGraw just wasn't active enough from the dominant position.
McGraw fakes an overhand right and shoots for a takedown. Drago sprawls well initially but McGraw persists and gets the takedown into half guard.
McGraw is just sitting in half guard, waiting for something to happen.
Drago tries to roll over but McGraw keeps him under control.
That's two minutes gone in the round.
McGraw decides to stand up and try his luck on the feet.
Drago doesn't succeed with the takedown
and McGraw counters with a shoot takedown. Drago fights it but they end up in guard.
Jerome McGraw has stuffed three takedown attempts in the round now. That's going to take a lot out of Ivan Drago.
McGraw controlling from the guard. I say controlling but really, he's stalling.
Drago is working an open guard here, looking to improve his position. No doubt that will leave him open to counters but at least he's being more offensive.
Drago is working actively off his back, looking to secure an arm or perhaps work for a triangle.
Drago bucks up whilst keeping hold of a body lock, managing to reverse the position. Now he's in top in McGraw's guard.
Drago trying to control the position from guard on top but McGraw is wriggling around, looking for whatever he can.
That's three minutes gone in the round.
Jerome McGraw overall seems to be getting the better of the ground position in the fight so far.
McGraw is trying to control the position but Drago postures up.
Drago must be cautious of submissions here, given that his opponent has the superior Jiu Jitsu.
McGraw throws his legs up looking to secure a triangle. Oh, that looks pretty tight, I gotta say! Drago escapes and throws McGraw's legs to the side, diving into side control!
McGraw isn't going anywhere.
McGraw manages to land a sweep and he's now on top! Lovely Jiu Jitsu!
McGraw content to sit in half guard and control for a moment.
Drago missing with punches from the bottom.
Drago won't allow McGraw to pass to mount.
That's four minutes gone in the round.
A few boos can be heard. I'm sure they will multiply if the fighters don't pick up the pace.
Drago wants to get back to his feet.
McGraw is figuring out what he wants to do next.
McGraw prevents Drago from improving his position.
Drago is trying to stand back up but McGraw is controlling him
McGraw controlling the action here.
Drago gets back to full guard.
The crowd applaud the fighters efforts here as the round comes to an end.
Drago trying to keep a closed guard but McGraw is proving a slippery customer.
And thats the end of the round the fighters go back to their corners.
Jerome McGraw dominated that second round.
That's time! McGraw's corner gives him a slap on the ass as he gets ready to fight. Let's get this one finished - here comes the final round!

Drago misses with a takedown attempt
and McGraw counters with a takedown into full mount! That could mean trouble for Drago!
McGraw has control of Drago's right arm, working for a kimura. It's a bit of a token attempt though and Drago regains control of the situation pretty easily.
Drago really trying hard to get back to half guard here.
McGraw takes a little breather and maintains the position. The referee will be looking for him to stay active from such a dominant position though.
Drago bucks up and manages to get a nice reversal! He's in guard on the top - nicely done!
McGraw might be looking to lock onto one of his opponent's long limbs for a submission, whilst we're on the ground.
McGraw is working actively from the bottom, looking for submissions. He's escaped his hips to the side and he's going for an armbar! Drago has his hands clasped together but McGraw extends an breaks Drago's desperate grasp, forcing a tap out due to armbar! Nice BJJ displayed there by McGraw.
Ladies and gentlemen, after 0:54 of round 3, we have a winner by way of Submission (Armbar). Jerome McGraw!
|
|
|
|
|
|
|
|
|
|
|
|
|
|
|
|
|
|
|
|
|
|
|
| S |
C
A |
G |
S |
C
B |
G |
|
S |
C |
G |
|
energy
A | B |
|
hype
A | B |
|
pop
A | B |
|
mgr
A | B |
|
FIGHT
RATING
100% |
|
|
|
|
|
|
|
Undercard bout
|
|
|
|
Undercard bout
|
Coming up we have a heavyweight MMA rules bout between Kayne Diaz (ranked 0 p4p, 0 weight class) and Leon Archibald (ranked 0 p4p, 0 weight class). Fingers crossed for an exciting fight - I'm sure both fighters are looking for a nice under the table bonus!
 |
|
 |
| 190 cm
22
250 lbs
1 - 0 - 0 |
|
185 cm
18
221 lbs
1 - 0 - 0 |
BJJ Purple Belt
Brawler
Good chin |
|
BJJ Blue Belt
Brawler
Solid chin |
|
| |
|
Ladies and gentlemen. This fight is 3 rounds, in the heavyweight division.
Introducing the fighter to my left, fighting out of the red corner.
With a record of
1 - 0 - 0, fighting out of Sydney, Kayne Diaz!
And introducing the fighter to my right, fighting out of the blue corner.
With a record of
1 - 0 - 0, fighting out of Sydney, Leon Archibald!
The judges for this bout are Steve Erwin, Winston Howard and John Mangel.
The bell rings for round one and we are underway!
Diaz tries to clinch there but Archibald circles away.
Excellent takedown into side control there by Diaz.
Archibald wants to get back to his feet but Diaz drags him back down.
Archibald is positioning himself to get back to half guard.
Diaz is trying to land an Americana. He has the arm isolated but Archibald is keeping cool and he's avoided the danger for now.
Diaz trying to control the position but Archibald is working away.
Diaz fails to land a wild elbow strike.
You can see the frustration on Archibald's face, being in this tough position on the bottom.
Archibald tries to escape but Diaz is in control.
That's one minute gone in the round.
Diaz stands up and beckons Archibald to his feet.
Diaz shoots for a takedown but Archibald saw that one coming a mile off and avoided it easily.
Nice takedown defense from Archibald. No joy for Diaz on that attempt.
Diaz tries to close the distance and clinch but Archibald swats him to one side with an open hand palm strike and circles away.
Diaz stuffs the takedown.
Archibald shoots in and bounces Diaz off the cage to secure the takedown into guard.
The fighters are pressed up against the cage, both looking to find a bit of space to work.
Archibald looks gassed!
Archibald sitting in guard here, content to control.
Diaz has a closed guard, preventing Archibald from standing up.
Diaz working from the bottom, still in full guard. He's managed to get a loose triangle. Archibald doesn't seem to be doing much to defend here, obviously he feels comfortable in the position. Archibald manages to throw the legs off his shoulder and he's back into guard - no problem.
Diaz escapes his hips to the side and looks to be working for an armbar. Archibald gives him a little smile and shakes his head. No chance.
That's two minutes gone in the round.
Diaz is trying to control the position from the bottom.
Archibald trying to stand up but can't free himself from Diaz's guard.
Diaz working for a triangle but Archibald defends it easily.
Archibald wants to control from the top but Diaz keeps moving.
Archibald controls from within his opponent's guard.
That's three minutes gone in the round.
Diaz bucks up whilst keeping hold of a body lock, managing to reverse the position. Now he's in top in Archibald's guard.
Archibald pushes Diaz off for just long enough to get back to his feet. Very athletic spring there.
No luck for Diaz with that takedown attempt.
That's three failed takedown attempts in the round for Kayne Diaz. That's going to take a lot out of him.
Diaz tries for a takedown but Archibald circles away easily
and Archibald counters with a nice double leg into side control. Diaz won't be happy with that.
Diaz is letting Archibald control him for a moment.
Diaz struggling a bit here.
Archibald taking a breather here.
Diaz is trying to control Archibald's posture but Archibald avoids it.
That's four minutes gone in the round.
Diaz is looking for a sweep.
Diaz is working hard here to advance position.
Diaz manages to get back to half guard.
Diaz is not content to let Archibald control the position.
Diaz is trying to get back to full guard.
Archibald is just sitting in half guard, waiting for something to happen.
Archibald is thwarting Diaz's attempts to control the position.
And thats the end of the round the fighters go back to their corners.
Leon Archibald dominated that round.
The referee calls time. The cornermen exit stage left and we're back to business.
Archibald throws a right high kick that is partially blocked by Diaz.
Diaz with a poor takedown
and Archibald counters with a takedown into full mount! That could mean trouble for Diaz!
Diaz working to try and regain half guard.
Diaz tries to hold on but Archibald postures up.
Diaz tries to reverse the position but Archibald maintains control.
Archibald content just to control the position here.
The fans in attendance giving it up for the two fighters, who have really let it all hang out in the last minute or so!
Archibald avoids the attempt from Diaz to control.
Diaz is in all sorts of trouble here.
Diaz bucks up and manages to get a nice reversal! He's in guard on the top - nicely done!
Both fighters are absolutely exhausted here.
That's one minute gone in the round.
Archibald working the defensive guard well to avoid strikes from Diaz.
Archibald working for submissions but it's allowed Diaz to get to half guard.
The ref warns both fighters not to hold the cage as they work up against the meshing.
Diaz is working for submissions here but there's nothing on.
Archibald moves his hips nicely and gets into full guard.
Archibald wants to sweep here but Diaz controlling him for the moment.
Diaz drops back for a leg here. A bit of a high risk move... He's looking for a kneebar by the looks of things. Now both of them are looking for submissions. Diaz seems to have locked his on tight now - Archibald screams in pain and taps out furiously! It certainly was a high risk move but it's paid off for Diaz, as he picks up the win!
Ladies and gentlemen, after 2:03 of round 2, we have a winner by way of Submission (Kneebar). Kayne Diaz!
|
|
|
|
|
|
|
|
|
|
|
|
|
|
|
|
|
|
|
|
|
|
|
| S |
C
A |
G |
S |
C
B |
G |
|
S |
C |
G |
|
energy
A | B |
|
hype
A | B |
|
pop
A | B |
|
mgr
A | B |
|
FIGHT
RATING
59% |
|
|
|
|
|
|
|
Undercard bout
|
|
|
|
Co-main event
|
Coming up we have a lightweight MMA rules bout between Bruce Bruce (ranked 0 p4p, 0 weight class) and Sean Walton (ranked 0 p4p, 0 weight class). Bruce Bruce has the better chin. Will he look to stand and bang today?
 |
|
 |
| 175 cm
20
164 lbs
1 - 0 - 0 |
|
175 cm
20
165 lbs
1 - 0 - 0 |
BJJ White Belt
Brawler
Self confident |
|
BJJ Purple Belt
Basic striking
Tends to cut |
|
| |
|
Ladies and gentlemen. This fight is 3 rounds, in the lightweight division.
Introducing the fighter to my left, fighting out of the red corner.
With a record of
1 - 0 - 0, fighting out of Sydney, Bruce Bruce!
And introducing the fighter to my right, fighting out of the blue corner.
With a record of
1 - 0 - 0, fighting out of Sydney, Sean Walton!
The judges for this bout are Winston Howard, Steve Erwin and Skip Squint.
The bell rings for round one and we are underway!
Bruce tries to clinch up but Walton circles away and keeps his distance.
Bruce throws a wild combination but nothing lands.
Walton fakes an overhand right and shoots for a takedown. Bruce sprawls well initially but Walton persists and gets the takedown into half guard.
Walton trying to control the action but Bruce is working from the bottom.
Walton throwing punches and elbows but they're not doing any damage.
Bruce is trying to get back to full guard.
Walton is working for a submission of some sort.
Bruce tries to roll over but Walton keeps him under control.
The ref warns both fighters not to hold the cage as they work up against the meshing.
Walton seems to be looking for submissions.
Walton is looking to take a break and control but Bruce is keeping him honest, looking to work from the bottom.
Walton decides to return to a standing position.
That's one minute gone in the round.
Bruce misses with a head kick.
Bruce misses with a half-hearted attempt at a head kick.
Walton blocks a head kick by Bruce.
Bruce Bruce is looking to keep the fight on the feet at all costs.
Walton fails with a rather predictable takedown attempt.
Walton avoids a kick to the body.
Bruce is breathing heavily.
Bruce lands with a nice body kick.
Walton fails with a takedown attempt from distance.
Bruce misses with a head kick.
Bruce doesn't manage to clinch there - Walton circles away.
Bruce rushes Walton and presses him up against the cage.
Bruce has Walton pushed against the cage.
Walton tries to take the fight to the ground by pulling guard but can't manage it.
Bruce Bruce has stuffed three takedown attempts in the round now. That's going to take a lot out of Sean Walton.
Walton tries to take the fight to the ground by pulling guard but can't manage it.
Walton is working for takedown but Bruce is calmly controlling the position for now.
Bruce gets double underhooks to prevent a takedown attempt from Walton.
Walton is looking for a takedown up against the cage. Bruce gets underhooks though and prevents the takedown attempt.
That's two minutes gone in the round.
The pace slowing considerably in the clinch, as Bruce takes a break from that fighting nonsense to think about the finer things in life.
Bruce lands a nice knee to the body.
Walton tries to pull guard but Bruce holds him up against the cage and eventually Walton drops back down to his feet.
Walton is working for a takedown up against the cage. He can't get it on this occasion though.
Walton has Bruce pressed up against the cage. He's trying to work for a single leg takedown. Walton pulls back from the cage and twists to the side, sending Bruce tumbling to the mat - Walton dives into Bruce's guard.
Bruce can't keep his opponent in guard - Walton advances to half guard, no doubt looking to mount.
Bruce on the receiving end of some nice ground and pound.
Bruce wants to get back to his feet.
Walton lands with an elbow from half guard - that looked like it hurt.
Walton is trying for a kimura here. Bruce looks like he's in a lot of pain... and he's tapping out! Walton wins by kimura!
Ladies and gentlemen, after 3:05 of round 1, we have a winner by way of Submission (Kimura). Sean Walton!
|
|
|
|
|
|
|
|
|
|
|
|
|
|
|
|
|
|
|
|
|
|
|
| S |
C
A |
G |
S |
C
B |
G |
|
S |
C |
G |
|
energy
A | B |
|
hype
A | B |
|
pop
A | B |
|
mgr
A | B |
|
FIGHT
RATING
46% |
|
|
|
|
|
|
|
Main event
|
Coming up we have a light heavyweight MMA rules bout between Aidan Kincaid (ranked 0 p4p, 0 weight class) and Kent Russell (ranked 0 p4p, 0 weight class). These two fighters really are very evenly matched on the feet - it will be fascinating to see who can assert themselves in that aspect of the fight.
 |
|
 |
| 183 cm
22
210 lbs
3 - 0 - 0 |
|
183 cm
22
208 lbs
3 - 0 - 0 |
BJJ Blue Belt
Improved boxing
Good chin |
|
BJJ Purple Belt
Solid Muay Thai
Likes ground |
|
| |
|
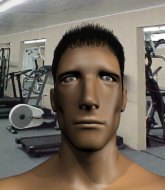
Ladies and gentlemen. This fight is 5 rounds, for the light heavyweight championship of the world!
Introducing the champion to my left, fighting out of the red corner.
With a record of
3 - 0 - 0, fighting out of Sydney, Aidan Kincaid!
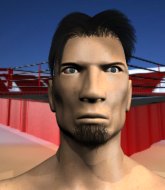
And introducing the challenger to my right, fighting out of the blue corner.
With a record of
3 - 0 - 0, fighting out of Sydney, Kent Russell!
The judges for this bout are Skip Squint, Donatello Bradman and Steve Erwin.
The bell rings for round one and we are underway!
Russell slips a jab and a cross from Kincaid.
Russell takes one on the button.
Russell fails with a rather predictable takedown attempt.
Russell slips a jab and a cross from Kincaid.
Kincaid misses with a few strikes there.
Russell shoots in with a takedown attempt and he has Kincaid pinned against the cage. Kincaid gets the underhooks and manages to circle away.
Kincaid rushes Russell and presses him up against the cage.
A short uppercut from Kincaid.
Kincaid is trying to break the clinch but Russell has him pressed against the cage.
Kincaid tries to break the clinch but Russell is controlling the position.
Kincaid is trying to break the clinch but Russell has him pressed against the cage.
Russell comes over the top with an elbow. That landed flush.
Russell prevents Kincaid from breaking the clinch.
Russell tries to pull guard but Kincaid won't allow it.
Aidan Kincaid has stuffed three takedown attempts in the round now. That's going to take a lot out of Kent Russell.
Kincaid is looking to break free of the clinch but Russell has double underhooks.
Russell throws an elbow that misses.
Kincaid wants to push off and get back to the center of the mat but Russell has him pressed against the cage.
Kincaid wants to break the clinch but can't.
Kincaid wants to get back to striking at distance but Russell won't allow it.
That's one minute gone in the round.
Kincaid breaks the clinch.
Kincaid moves into range and throws a combination. A nice jab followed by a hook to the body.
Kincaid throws a right and a left that Russell avoids nicely.
Kincaid lands a jab. Then a cross. Then finally a nice hook to the body. Good work there by Kincaid.
Nice takedown defense from Kincaid. No joy for Russell on that attempt.
A punch combination from Kincaid misses.
Kincaid gets a clinch.
Kincaid avoiding damage.
Russell wants to get back to striking at distance but Kincaid won't allow it.
Kincaid prevents the takedown attempt.
Russell can't get the takedown.
Kincaid wants to break free. God knows he wants to breaaaak freeee.
Russell lands a nice elbow from the clinch.
Kincaid is trying to break the clinch but Russell has him pressed against the cage.
Kincaid wants to get back to striking at distance but Russell won't allow it.
Kincaid leaning against his opponent.
Kincaid lands with a light punch inside.
Kincaid wants to break the clinch but can't.
That's two minutes gone in the round.
Kincaid wants to get back to striking at distance but Russell won't allow it.
Kincaid stalling against the cage.
Kincaid seems to have come into the fight with the intention of avoiding any damage in the clinch, rather than actually showing any aggression.
Kincaid is trying to break free.
The two fighters are working to gain dominance in the clinch.
The ref breaks the fighters up, due to lack of action by Aidan Kincaid.
Kincaid has taken the fight to the clinch.
Kincaid scores with an uppercut up the middle.
Kincaid manages to break the clinch.
Kincaid scores with a jab to the head.
Russell tries to clinch but is not successful on this occasion.
Kincaid closes the distance looking to clinch
and Russell counters with a three punch combo that has Kincaid backing up. Kincaid nods at Russell to acknowledge the strikes.
Russell misses with a takedown attempt - Kincaid sprawls well and throws a nice strike on the way out which just misses.
Russell fails with a takedown attempt from distance.
Kincaid has managed to clinch.
That's three minutes gone in the round.
Kincaid is trying to work out of this bad position, with his back against the cage.
A shot in the inside from Kincaid.
Kincaid pressing his opponent against the cage.
Russell looking for a takedown.
Russell looks gassed!
Russell is looking to break free of the clinch but Kincaid has double underhooks.
Kincaid wants to break the clinch but can't.
Kincaid prevents the takedown attempt.
Kincaid lands a left hand that snaps the head of Russell backwards.
Kincaid wants to strike at distance but he can't break free of the clinch.
Russell keeps control of Kincaid as he tries to wriggle out of the double underhooks.
Kincaid stalling against the cage.
Kincaid lands with a light punch inside.
Kincaid stalls.
Russell keeps control of Kincaid as he tries to wriggle out of the double underhooks.
That's four minutes gone in the round.
The crowd are showing their displeasure at the lack of action as loud boos ring out around the arena.
Kincaid lands a shoulder strike.
Kincaid lands a shoulder strike.
Kincaid is pressed up against the cage. Russell has hold of a leg and is looking to drag Kincaid down to the mat. Kincaid avoids the attempt though and has circled away. We're back to striking at a distance.
Kincaid lands a slapping body shot.
Kincaid rushes forward with a series of wild hooks but Russell moves out of range and avoids them all easily.
No joy there for Russell, who threw a few shots but didn't land.
Russell avoids a lazy jab quite easily.
Russell tries for a takedown but Kincaid sees it coming a mile off and avoids it easily.
Russell is pinned up against the cage taking some big shots here. The referee is looking closely deciding whether he should stop the fight.
Some wild striking there from Russell.
Russell keeps the fight on the outside.
Russell shoots in looking for a takedown. Kincaid tries to sprawl out of it but Russell keeps driving through. The fighters are pinned against the cage. Kincaid manages to get underhooks and after a bit of a struggle, circles away and we're back to standing.
Russell pushes Kincaid up against the cage in a clinch.
Kincaid has had enough of the clinch but Russell keeps him there for the moment.
Kincaid stalling.
Kincaid has had enough of the clinch but Russell keeps him there for the moment.
Russell drops down looking for an ankle pick but Kincaid pulls his leg out and moves away.
And thats the end of the round the fighters go back to their corners.
Aidan Kincaid dominated that round.
That's the end of the interval. I'm sure that seemed a lot quicker than a minute for our two fighters! Back to the action.
Russell closes this distance looking for a takedown but Kincaid circles away.
Russell fails with a takedown attempt.
Kincaid misses with a series of wild punches.
Russell throws a looping left and ducks down for a takedown. He's got his arms around Kincaid's waist but Kincaid gets an underhook and avoids the takedown by throwing Russell off to one side.
Aidan Kincaid has stuffed three takedown attempts in the round now. That's going to take a lot out of Kent Russell.
Kincaid swings wildly with a couple of big hooks
and Russell counters with a good right hand that lands right on the jaw.
Kincaid pushes Russell up against the cage in a clinch.
Russell goes for a takedown attempt but Kincaid pushes him away and we're back to fighting at a distance.
Kincaid throws a right hand that Russell ducks under and follows up with a left that Russell also avoids with ease.
We've had a slow start to the round here - hopefully the action picks up.
Kincaid throws a hook to the body but it doesn't connect.
Kincaid clinches with his opponent.
Russell has Kincaid pressed up against the cage and is working for takedown. Kincaid manages to improve position though and keeps the fight standing.
Russell is breathing heavily.
The two fighters are working to gain dominance in the clinch.
Kincaid wants to break free but Russell has control.
Kincaid is stalling here. The referee will be looking to step in if he doesn't pick up the pace.
Kincaid avoiding damage as Russell throws knees to the body.
That's one minute gone in the round.
Kincaid is stalling here.
Kincaid breaks the clinch and we return to the middle of the mat.
Russell dances in quickly and lands a nice inside leg kick on Kincaid. That did some damage!
Kincaid has Russell up against the cage in a clinch.
Kincaid wants to break free but Russell has control.
Kincaid is looking to break free of the clinch but Russell has double underhooks.
Kincaid tries to break the clinch but Russell is controlling the position.
Russell tries to pull guard but Kincaid won't allow it.
Russell lands a damaging elbow.
Kincaid wants to strike at distance but he can't break free of the clinch.
A nice right hand lands inside from Kincaid.
Russell keeps control of Kincaid as he tries to wriggle out of the double underhooks.
Kincaid just leaning against Russell, taking a breather.
Kincaid escapes the clinch and we're back to striking.
Kincaid thows a left - swing and a miss!
Russell shoots for a takedown but Kincaid saw that one coming a mile off and avoided it easily.
That's two minutes gone in the round.
Kincaid scores with a punch to the head.
Aidan Kincaid seems to be the more aggressive standup fighter in this bout.
The fight moves into the clinch position.
Kincaid avoiding damage.
Kincaid throws a blind hook that connects with the side of Russells head.
Kincaid tries to break the clinch but Russell is controlling the position.
Russell is trying to break free.
Kincaid wants to push off and get back to the center of the mat but Russell has him pressed against the cage.
Kincaid wants to break the clinch but can't.
Russell's head jolts backwards as he takes an uppercut right on the button!
A short right from Kincaid on the inside.
Kincaid is looking to break free of the clinch but Russell has double underhooks.
Kincaid has had enough of the clinch but Russell keeps him there for the moment.
Kincaid is clearly stalling here... Pick up the pace son.
That's three minutes gone in the round.
Russell is trying to slow down the pace in the clinch, to catch his breath.
Kincaid avoids the elbow strike from Russell, against the cage.
Kincaid tries to break the clinch but Russell is controlling the position.
Russell is trying to work out of this bad position, with his back against the cage.
Kincaid taking a breather.
The ref breaks the fighters up, due to lack of action by Aidan Kincaid.
Kincaid throws a series of punches but Russell moves out of range.
Kincaid pushes Russell up against the cage in a clinch.
Kincaid is looking to break free of the clinch but Russell has double underhooks.
Kincaid wants to get back to striking at distance but Russell won't allow it.
Russell looking for a takedown.
That's four minutes gone in the round.
A lull in the action here being met with boos from the crowd.
Kincaid lands with a right to the head.
Russell keeps control of Kincaid as he tries to wriggle out of the double underhooks.
Kincaid wants to push off and get back to the center of the mat but Russell has him pressed against the cage.
Kincaid is trying to break free.
Some stalling of biblical proportions here from Kincaid.
Kincaid prevents Russell from breaking the clinch.
Kincaid has had enough of the clinch but Russell keeps him there for the moment.
Stalling in the clinch from Kincaid.
Russell lands an elbow that stopped Kincaid in his tracks for a moment.
Kincaid stops a takedown attempt from Russell.
Kincaid wants to break free. God knows he wants to breaaaak freeee.
Kincaid lands a hook to the side of the head.
Kincaid escapes the clinch and we're back to striking.
Kincaid lands with an uppercut that bounces Russell off the cage and back into rage.
The crowd thankful this round is nearly over.
Kincaid swings wildly with a hook that is half blocked by Russell.
Russell swings for the body but Kincaid moves out of range.
Aidan Kincaid is looking to keep the fight on the feet at all costs.
Kincaid has taken the fight to the clinch.
Russell prevents Kincaid from breaking the clinch.
Kincaid stalling.
And thats the end of the round the fighters go back to their corners.
Aidan Kincaid dominated that second round.
The fighters' corners scream their final instructions, as the referee calls time. Here we go, back to the action!
Kincaid smiles there as he lands a nice right hand right on the button.
Kincaid tries to clinch there but Russell circles away.
Kincaid misses with a jab and misses with a cross straight after too.
Kincaid scores with a one two! Russell had his feet all tangled up there and couldn't avoid the strikes.
Kincaid displaying good standup as he scores with a three punch combination.
Russell shoots in for a takedown. "I don't think so" says Kincaid as he avoids it easily.
Kincaid fails to land with the punch combination there - jab, cross, hook, miss, miss, miss.
Kincaid connects with a single shot there.
Kincaid gets to the clinch - let's see what his plan is here.
Kincaid lands a hook that snaps the head of Russell backwards.
Kincaid is trying to break free.
Kincaid lands a shoulder strike that jolts his opponent's head backwards.
Kincaid can't break the clinch.
Russell pulls guard.
The ref warns both fighters not to hold the cage as they work up against the meshing.
Kincaid throwing strikes but missing.
Both fighters are breathing heavily.
Kincaid working from the guard for now, landing some ground and pound.
Russell looking for a guillotine here but Kincaid defends easily.
The fighters are pressed up against the cage, both looking to find a bit of space to work.
Russell keeping full guard, as Kincaid tries to pass.
That's one minute gone in the round.
Russell tries to land a sweep but no joy.
Kincaid prevents Russell from getting back to his feet.
Kincaid landing some decent shots from guard.
Kincaid would like to get this fight back to the feet but can't get free from the closed guard.
Kincaid with a nice head shot there.
Russell looking to sweep here. No luck so far.
Russell trying to control the position.
It looks like we're going to have a standup here. Neither fight is doing enough on the ground.
A slapping body kick lands there for Russell.
Left hook, right uppercut from Russell.
Russell shoots in but no luck this time.
Aidan Kincaid is looking to throw some combinations by the looks of things.
Russell shoots in for a takedown. "I don't think so" says Kincaid as he avoids it easily.
Aidan Kincaid has stuffed three takedown attempts in the round now. That's going to take a lot out of Kent Russell.
Russell uses some good footwork to avoid the body shot by Kincaid.
Horrible takedown by Russell or perhaps it was just good defense by Kincaid which made him look bad.
That's two minutes gone in the round.
A combination from Kincaid does no damage.
Russell takes a jab on the nose there. A little bit of blood seems to be coming out. Hopefully that won't affect his breathing.
Kincaid cracks Russell with a nice right hand that draws applause from the crowd.
Kincaid throws a jab, cross combination which is slipped
and Russell counters with a leg kick.
Russell staying out of range there.
A nice combination there by Russell.
Kincaid throws a jab, cross combination which is slipped
and Russell counters with a right hand to the body.
Kincaid is really head hunting here, hardly looking to strike to the body at all.
Russell fails with a takedown attempt from distance.
Kincaid scores with a nice looking left hook and follows it up with an uppercut!

Russell is rocked!
Kincaid throws a left and a right that both miss
and Russell counters with a nice body shot.
Russell is still on wobbly legs! Can Kincaid finish him?
Kincaid moves into range and clinches up with Russell.
A short right from Kincaid.
Kincaid breaks from the clinch.
Kincaid pushes Russell up against the cage in a clinch.
Kincaid lands a big right hand that drops Russell! The killer instinct kicks in and Kincaid finishes his opponent with a series of strikes from mount. A dominating finish by Kincaid!
Ladies and gentlemen, after 2:50 of round 3, we have a winner by way of TKO (Strikes). Aidan Kincaid!
Aidan Kincaid is the new light heavyweight champion!
|
|
|
|
|
|
|
|
|
|
|
|
|
|
|
|
|
|
|
|
|
|
|
| S |
C
A |
G |
S |
C
B |
G |
|
S |
C |
G |
|
energy
A | B |
|
hype
A | B |
|
pop
A | B |
|
mgr
A | B |
|
FIGHT
RATING
69% |
|
|
|
|
|
|
|
|
|
|

