 |
FFC 70 PBP Commentary |
Undercard bout
|
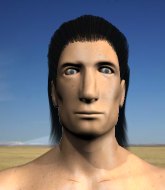
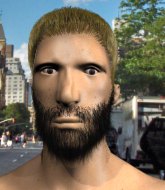
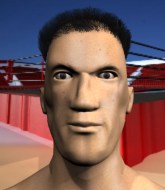
Coming up we have a middleweight MMA rules bout between James Madison (ranked 0 p4p, 0 weight class) and Jimmy Harms (ranked 0 p4p, 0 weight class). James Madison could well score a knockout today. He has the power to get to Jimmy Harms's chin.
 |
|
 |
| 180 cm
30
180 lbs
8 - 4 - 0 |
|
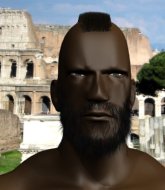
165 cm
27
199 lbs
10 - 4 - 0 |
Good wrestling
Solid Muay Thai
Very quick |
|
BJJ Purple Belt
Dangerous knees
Determined |
|
| |
|
Ladies and gentlemen. This fight is 3 rounds, in the middleweight division.
Introducing the fighter to my left, fighting out of the red corner.
With a record of
8 - 4 - 0, fighting out of Amsterdam, James Madison!
And introducing the fighter to my right, fighting out of the blue corner.
With a record of
10 - 4 - 0, fighting out of Amsterdam, Jimmy Harms!
The judges for this bout are Nard Betker, Radbod Blank and Paul Aken.

The bell rings for round one and we are underway!
Madison misses with a takedown attempt - Harms sprawls well and throws a nice strike on the way out which just misses.
Madison misses with a takedown
and Madison takes a counter punch right on the button for his troubles.
Madison fakes high and shoots in for a takedown but Harms avoids it really well and circles away.
That's three failed takedown attempts in the round for James Madison. That's going to take a lot out of him.
That kick from Harms tenderised Madison's leg. Madison is trying to keep his angry face on.

Harms moves into the clinch successfully.
Harms throws a knee to the head but misses.
Harms tries to land a knee to the head but Madison blocks with his arms.
Harms tries to land a knee to the head but Madison blocks with his arms.
Madison is trying to pull guard but being pressed up against the cage enables Harms to keep the fight standing.
Harms tries a knee to the head but he's missed.
Madison has a body lock and is looking for a takedown. Harms is bouncing around trying to prevent the takedown and somehow he has indeed managed to stay on his feet.
Harms misses with a knee to the head.
Harms landing knees to the head.
Madison is breathing heavily.
A knee to the head by Harms.
Madison goes for a takedown in the clinch but Harms prevents it.
This is a great period of action - very entertaining stuff!
Harms taking a break, stalling in the clinch.
Harms using the Thai plumb to throw knees but Madison has his back arched nicely, preventing the strike.
Knees in the clinch landing for Harms.

That's one minute gone in the round.
Harms landing knees to the head.
A nice glancing elbow lands by Harms.
Harms is stalling here. The referee will be looking to step in if he doesn't pick up the pace.
Madison takes a knee right on the jaw!
Harms scores with a knee to the head.

James Madison's cut is getting worse.
Harms lands a knee to the head.
Harms lands a nice knee to the body.
Harms with the Thai clinch, lands a knee to the head.
Harms landing knees to the head.
The referee is keeping an eye on Harms - much more stalling and he will separate the fighters.
Harms landing some nice looking knees to the body.
Madison has hold of a leg and is looking for a trip takedown. Harms avoids it nicely though and we remain in the clinch.
We've seen a great period of action over the last minute or so - credit to both fighters for going all out!
Harms lands a knee to the head.
Harms tries a knee to the head but Madison blocks it.
Harms scores with a knee to the head.
Madison drops down for a takedown but doesn't get it.

That's two minutes gone in the round.
Harms landing knees to the head.
Harms with a knee to the head.
Harms prevents the takedown attempt.
Harms stalling against the cage.
Harms tries a knee to the head but Madison blocks it.
Madison drops down for a takedown but doesn't get it.
Madison wants a takedown but no success here.
Harms using the Thai clinch to land knees to the body.
Madison goes for a takedown attempt but Harms pushes him away and we're back to fighting at a distance.
Harms closes the distance and clinches.

That's three minutes gone in the round.
Harms connects with a nasty looking knee right to Madison's face.
Harms connects with a nasty looking knee right to Madison's face.
Harms prevents the takedown attempt.
Harms with the Thai clinch. He's looking to land a big knee but he's not managed it this time.
Harms scores with a knee to the head.
Harms connects with a knee to the head.
Harms lands a knee to the head there! That was nasty!
Madison tries to pull guard but Harms holds him up against the cage and eventually Madison drops back down to his feet.
Harms stalling in the clinch.
Harms misses with a knee to the head.
Madison drops to a knee looking for a takedown but Harms gets the underhooks and prevents it.
Harms connects with a nasty looking knee right to Madison's face.
Madison goes for a takedown in the clinch but Harms prevents it.

That's four minutes gone in the round.
Madison takes a knee right on the jaw!
Madison drops down looking for an ankle pick but Harms pulls his leg out and moves away.
Harms lands a powerful looking uppercut that connected with his opponent's jaw.
James Madison seems to be the more aggressive standup fighter in this bout.
Harms misses with the combination.
Madison fails with a takedown attempt.
Madison takes a punch to the jaw and another one to the bread basket.
Jimmy Harms is looking to keep the fight on the feet at all costs.
This is a great period of action - very entertaining stuff!
Harms ducks low and lands a nice hook to the body of his opponent.
The crowd are going absolutely nuts as the round comes to an end - what a fantastic round of action!
Madison shoots in looking for a takedown. Harms tries to sprawl out of it but Madison keeps driving through. The fighters are pinned against the cage. Harms manages to get underhooks and after a bit of a struggle, circles away and we're back to standing.
Harms has Madison up against the cage in a clinch.
And thats the end of the round the fighters go back to their corners.
Jimmy Harms dominated that round.
The cut man is working on James Madison's cut.
The minute break is over - no more time for sponges and pep talks - back to the action!

Harms has closed the distance and engaged Madison in a clinch.
Harms putting his Muay Thai to good use. He has Madison in a tight clinch and is doing some damage with knees to the body.
Harms connects with a nasty looking knee right to Madison's face.
Harms stops a takedown attempt from Madison.
Harms utilising his Muay Thai to score with a knee to the body.
Harms avoiding damage.
Harms lands a knee to the head there! That was nasty!
Wooooo! Give it up for these two warriors! They are putting on a show!
The fighters are starting to get sweaty, which will make takedowns a bit more tricky.
Harms pushes off and fires off an elbow that misses, before clinching up again, against the cage.
Madison goes for a takedown attempt but Harms pushes him away and we're back to fighting at a distance.
Harms fails to land with the punch combination there - jab, cross, hook, miss, miss, miss.
Both fighters are absolutely exhausted here.
Madison shoots and misses
enabling Harms to counter with a crisp jab.
That's three failed takedown attempts in the round for James Madison. That's going to take a lot out of him.
Harms closes the distance and clinches.
Knees in the clinch landing for Harms.
That's one minute gone in the round.
Harms scores with a knee to the head.
Harms with a knee to the head.
James Madison's cut is bleeding quite badly. He's got to try and protect it.
Harms landing knees to the body.
Harms's corner are urging him to control the action in the clinch for a moment, rather than mount any serious offense. I'm sure the crowd appreciate those instructions... not.
Harms with the Thai clinch. He's looking to land a big knee but he's not managed it this time.
Madison changes levels and goes for a takedown here. Harms fights it off and pushes away nicely.
Madison tries to keep at a distance but Harms has taken the fight into the clinch.
Harms tries a knee to the head but he's missed.
Madison is looking for a takedown up against the cage. Harms gets underhooks though and prevents the takedown attempt.
Harms throws a knee to the head but misses.
Harms lands a good knee to the midsection. Madison won't want to take too many of those.
Harms lands with a short punch from the clinch.
Harms landing some nice looking knees to the body.
That's two minutes gone in the round.
Fantastic stuff here - a very entertaining period of action, which has drawn cheers from the crowd.
Harms throws a vicious knee straight up the middle but Madison blocks it with crossed arms.
Harms scores with a shoulder strike.
Harms scores with a knee to the head.
Madison is working on a leg, looking for a takedown but Harms is defending well.
Madison takes a knee right on the jaw!
Madison looking for a takedown.
Harms with the Thai clinch, lands a knee to the head.
Harms misses the knee to the body. Nice hip positioning from Madison.
Madison goes for a takedown in the clinch but Harms prevents it.
Harms throws a knee to the head but misses.
Madison blocks a knee to the body. He'll have a nicely bruised forearm in the morning.
Madison can't get the takedown.
Harms landing some nice looking knees to the body.
With the fighters up against the cage, Harms throws an elbow but misses.
Harms tries to land a knee to the head but misses.
That's three minutes gone in the round.
Madison jumps guard but his hands slip and he falls flat on his back. Well, he's made himself look a right mug there, as Harms walks away with a smile on his face. Madison gets slowly back to his feet and shakes his head.
Harms listening to his corner there, landing a nice uppercut.
Madison doesn't succeed with the takedown
and Harms counters with a crisp hook to the side of the head.
Nice uppercut lands for Harms. That snapped Madison's head back.
Madison changes levels and looks for a double leg takedown. Harms tries to avoid it but Madison manages to keep hold of a leg and drag Harms to the ground. Harms escapes though and pops straight back up to his feet.
Harms moves in looking to clinch but Madison pushes him off.
Madison thows a leg kick but Harms checks it
and Harms counters with a three punch combo that has Madison backing up. Madison nods at Harms to acknowledge the strikes.
Madison throws a solid leg kick but Harms takes the impact on his shin and smiles at Madison.
Harms tries to close the distance and clinch up but Madison swats him away and circles back towards the center.
Harms darts in and clinches Madison up against the cage.
Harms scores with a knee to the head.
Harms looking to slow down the pace here.
Madison avoids the elbow strike from Harms, against the cage.
Harms using the Thai plumb to throw knees but Madison has his back arched nicely, preventing the strike.
That's four minutes gone in the round.
Madison has hold of a leg and is looking for a trip takedown. Harms avoids it nicely though and we remain in the clinch.
Madison has Harms pressed up against the cage and is working for takedown. Harms manages to improve position though and keeps the fight standing.
Harms connects with a nasty looking knee right to Madison's face.
Harms is trying to slow down the pace in the clinch, to catch his breath.
Harms misses with a knee strike.
Madison wants a takedown but no success here.
Jimmy Harms seems to be working more effectively in the clinch in the fight so far.
Harms prevents the takedown attempt.
Wooooo! Give it up for these two warriors! They are putting on a show!
Madison being controlled against the cage.
Harms prevents the takedown attempt.
Madison is looking for a takedown up against the cage. Harms gets underhooks though and prevents the takedown attempt.
The crowd are going absolutely nuts as the round comes to an end - what a fantastic round of action!
Harms scores with a knee to the head.
Harms taking a breather.
Harms tries to land a knee to the head but misses.
And thats the end of the round the fighters go back to their corners.
Jimmy Harms showed his class in that round. I'd imagine he'll take it on all the scorecards.
The cut man is working on James Madison's cut.
That's time! Madison's corner gives him a slap on the ass as he gets ready to fight. This is the final round!

Madison keeping a good distance there, avoiding the body shot.
Harms lands a jab-cross combination.
Harms wants to clinch up but Madison keeps it at a distance.
Harms scores with a one two! Madison had his feet all tangled up there and couldn't avoid the strikes.
Madison shoots in for a double leg but Harms sprawls well. That's going to sap some energy.
Harms tries to close the distance and clinch up against the cage but Madison paws at him with a jab and circles away.
Harms is looking to take this fight into the clinch.
Madison on the wrong end of an overhand right that came out of nowhere.
Harms misses with a hook. Madison ducked under it nicely.
Harms is looking to clinch but Madison is avoiding it.
Madison avoids a punch combination nicely.
Harms connects with a body shot that sends Madison's belly button to the back.
Madison takes a jab right on the kisser.
Harms closes the distance and clinches.
Both fighters are breathing heavily.
Harms with the Thai clinch. He's looking to land a big knee but he's not managed it this time.
That's one minute gone in the round.
Madison has hold of a leg and is looking for a trip takedown. Harms avoids it nicely though and we remain in the clinch.
Madison is trying to drag Harms to the mat but Harms just about manages to keep his footing. He used the cage to his advantage there.
That's three failed takedown attempts in the round for James Madison. That's going to take a lot out of him.
Harms tries to land a knee to the head but Madison blocks with his arms.
Harms gets double underhooks to prevent a takedown attempt from Madison.
Madison can't get the takedown.
Harms putting his Muay Thai to good use. He has Madison in a tight clinch and is doing some damage with knees to the body.
Harms lands a knee to the head.
Harms connects with a knee to the head.
Harms lands a knee to the body.
Harms misses with a knee to the head.
Madison has Harms pressed up against the cage and is working for takedown. Harms manages to improve position though and keeps the fight standing.
Madison has Harms pressed up against the cage and is working for takedown. Harms manages to improve position though and keeps the fight standing.
Harms is pushing Madison up against the cage, for a bit of lean and pray action. Action being used the in the loosest possible sense of the word.
James Madison has stepped it up - he knows he needs a finish here!
Harms has been the more effective fighter overall so far.
That's two minutes gone in the round.
A battle for position here, against the cage.
Harms creates a bit of space for himself and sneaks an elbow through Madison's defenses.
Madison changes levels and goes for a takedown here. Harms fights it off and pushes away nicely.
Harms with a nice cross.
This is a great period of action - very entertaining stuff!
Harms misses with a straight right.
Jimmy Harms seems to be getting the better of the standup.
Madison shoots in for a takedown but doesn't get it.
Madison shoots in for a takedown but Harms shows good takedown defense there and keeps this one on the feet.
Harms forces Madison back against the cage and clinches.
Harms throws a vicious knee straight up the middle but Madison blocks it with crossed arms.
That's three minutes gone in the round.
Harms misses with a knee strike.
Harms stops a takedown attempt from Madison.
Harms lands a knee to the head.
Madison avoids the elbow strike from Harms, against the cage.
Harms scores with a knee to the head.
With the fighters up against the cage, Harms throws an elbow but misses.
Harms gets underhooks to prevent Madison's takedown attempt.
Madison wants to take the fight to the mat but Harms manages to get underhooks and keep the fight in the clinch.
Madison is looking to take this one to the mat.
Harms with a knee to the head.
Harms tries a knee to the head but Madison blocks it.
Madison tries to take the fight to the ground by pulling guard but can't manage it.
Knees in the clinch landing for Harms.
Harms landing knees to the body. They look like they could hurt.
Harms connects with a knee to the head.
Madison is looking for a takedown.
Harms comes over the top with an elbow. That landed flush.
That's four minutes gone in the round.
Madison goes for a takedown attempt but Harms pushes him away and we're back to fighting at a distance.
Harms slaps away a takedown attempt from Madison, before circling back to the center of the mat.
Harms feints a straight left to the body, then turns around with a flashy move and hits Madisons jaw with a dramatic spinning back fist!
Harms closes the distance and lands a one-two.
Fantastic stuff here - a very entertaining period of action, which has drawn cheers from the crowd.
Madison tries a head kick but it misses.
Jimmy Harms is fighting for a decision - hopefully he's judged it right and he's actually winning the fight.
Harms has managed to clinch.
Harms lands a knee to the head.
Madison has a body lock and is looking for a takedown. Harms is bouncing around trying to prevent the takedown and somehow he has indeed managed to stay on his feet.
As the round comes to an end the crowd are showing their appreciation for a great round of action.
Madison changes levels and goes for a takedown here. Harms fights it off and pushes away nicely.
Harms throws the kick towards the body but Madison avoids it.
And that's the end of the fight!
Jimmy Harms comfortably won the final round on my scorecard.
Well Harms has outworked and out performed his opponent in all aspects of the game today. He was simply too good and the decision should be no more than a formality. Over to the ring announcer for the scorecards.
Ladies and gentlemen, after 3 rounds of action, we go to the scorecards for a decision.
Judge Nard Betker scores the fight 27:30
Judge Radbod Blank scores the fight 27:30
Judge Paul Aken scores the fight 27:30
In favor of your winner, by unanimous decision... Jimmy Harms!
|
|
|
|
|
|
|
|
|
|
|
|
|
|
|
|
|
|
|
|
|
|
|
| S |
C
A |
G |
S |
C
B |
G |
|
S |
C |
G |
|
energy
A | B |
|
hype
A | B |
|
pop
A | B |
|
mgr
A | B |
|
FIGHT
RATING
87% |
|
|
|
|
|
|
|
Undercard bout
|
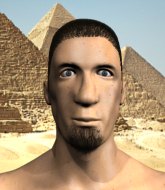
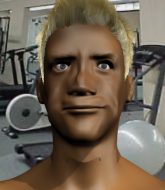
Coming up we have a bantamweight MMA rules bout between Tatsuya Kawajiri (ranked 0 p4p, 0 weight class) and Tombstone Terry (ranked 0 p4p, 0 weight class). Kawajiri comes to the cage accompanied by Water Pow . Tombstone Terry is the more experienced fighter, so let's see if that makes a difference tonight.
 |
|
 |
| 171 cm
23
146 lbs
3 - 0 - 0 |
|
188 cm
30
135 lbs
19 - 25 - 0 |
Great wrestler
Counter striker
Cardio machine |
|
BJJ Brown Belt
Excellent MT
Powerful |
|
| |
|
Ladies and gentlemen. This fight is 3 rounds, in the bantamweight division.
Introducing the fighter to my left, fighting out of the red corner.
With a record of
3 - 0 - 0, fighting out of St Petersburg, Tatsuya Kawajiri!
And introducing the fighter to my right, fighting out of the blue corner.
With a record of
19 - 25 - 0, fighting out of Amsterdam, Tombstone Terry!
The judges for this bout are Saam Ante, Radbod Blank and Paul Aken.
The bell rings for round one and we are underway!
Terry shoots in looking for a double leg takedown. Kawajiri defends it nicely.
Terry shoots and misses

so Kawajiri counters with a double leg into guard. Good agility.
Terry looks gassed!
We must be close to a standup if these guys don't pick up the pace.
A big thud reverberates around the arena there as Kawajiri accidentally thumps the mat. Hopefully he's not broken his hand.
Terry keeping moving, preventing Kawajiri from controlling successfully.
Kawajiri content to stall in guard here.
The ref warns both fighters not to hold the cage as they work up against the meshing.
Kawajiri trying to control but Terry is working from the bottom.

Tatsuya Kawajiri has forced the referee to step in and bring the fight back to the feet.
Kawajiri works the jab nicely.
Terry tries for a takedown but Kawajiri sees it coming a mile off and avoids it easily.
Tatsuya Kawajiri has stuffed three takedown attempts in the round now. That's going to take a lot out of Tombstone Terry.
That's one minute gone in the round.
Kawajiri fakes high and swings low for a body shot but Terry manages to avoid it.
Terry misses with a looping left.
Kawajiri scores with a jab to the head.
Kawajiri feints and then dives in with a takedown. That was a long way out but the feint bought him enough time to close the distance and complete the takedown. Now we'll play guard for a bit and see who can get the better of that position.
Kawajiri is looking to work some ground and pound but Terry has wrist control.
Kawajiri passes easily into side control. Nice work.
Terry is not content to let Kawajiri control the position.
Kawajiri scoring with punches from side control.
That's two minutes gone in the round.
The referee tells the fighters to keep busy.
Kawajiri working the head and body with strikes.
Wooooo! Give it up for these two warriors! They are putting on a show!
Kawajiri wants to control for a moment but Terry uses the opportunity to move back to half guard.
The fighters are pressed up against the cage, both looking to find a bit of space to work.
Kawajiri not landing any meaningful shots this time.
Kawajiri slips a nice elbow through Terry's hands, connecting with Terry's forehead.
Kawajiri working Terry over with strikes.

Kawajiri in half guard on the top. He's looking for a kimura... He's got it locked and he's managed to free his trapped foot. Terry tries to escape but it's on too tight and he has to tap! Great BJJ skills there from Kawajiri!
Ladies and gentlemen, after 3:55 of round 1, we have a winner by way of Submission (Kimura). Tatsuya Kawajiri!
Our winner, Tatsuya Kawajiri, made sure he spent some time buttering up the crowd during his post fight interview, which will no doubt bring him a few more fans.
|
|
|
|
|
|
|
|
|
|
|
|
|
|
|
|
|
|
|
|
|
|
|
| S |
C
A |
G |
S |
C
B |
G |
|
S |
C |
G |
|
energy
A | B |
|
hype
A | B |
|
pop
A | B |
|
mgr
A | B |
|
FIGHT
RATING
40% |
|
|
|
|
|
|
|
Undercard bout
|
Coming up we have a heavyweight MMA rules bout between Sagan Hawking (ranked 0 p4p, 0 weight class) and Lock Bresner (ranked 0 p4p, 0 weight class). There are an array of beautiful celebrities at ringside tonight! I wonder if any of them paid for their tickets.
 |
|
 |
| 195 cm
25
275 lbs
3 - 1 - 0 |
|
191 cm
23
278 lbs
3 - 1 - 0 |
BJJ Brown Belt
Good kicks
KO power |
|
Good wrestler
Basic striking
Powerful |
|
| |
|
Ladies and gentlemen. This fight is 3 rounds, in the heavyweight division.
Introducing the fighter to my left, fighting out of the red corner.
With a record of
3 - 1 - 0, fighting out of Amsterdam, Sagan Hawking!
And introducing the fighter to my right, fighting out of the blue corner.
With a record of
3 - 1 - 0, fighting out of London, Lock Bresner!
The judges for this bout are Saam Ante, Patrick Alders and Albert Achterberg.
The bell rings for round one and we are underway!
Bresner avoids the head kick by Hawking.
Hawking dodges the punch combination from Bresner.
Hawking misses with a head kick.

Bresner tries to keep at a distance but Hawking has taken the fight into the clinch.
Bresner lands a body shot in the clinch.
A quick uppercut on the inside from Bresner.
A short right from Bresner.
Hawking is working on a leg, looking for a takedown but Bresner is defending well.
Hawking changes levels and goes for a takedown here. Bresner fights it off and pushes away nicely.
Bresner lands with a good body shot.
Bresner on the wrong end of a kick to the body.
The crowd cheering loudly, showing their appreciation for the quality fight we're seeing here.

Bresner sends Hawking crashing to the mat with a devastating uppercut! Bresner is motioning to the referee to let Hawking up. He wants to try and finish this one on the feet!
It looks like Sagan Hawking has been cut.
Bresner clinches up against the cage.
A hook to the body from Bresner.
Hawking is breathing heavily.
That's one minute gone in the round.
Hawking has dropped down and is looking to force the takedown but it's defended by Bresner after a bit of a struggle.
That's three failed takedown attempts in the round for Sagan Hawking. That's going to take a lot out of him.
Nice body punch from Bresner - that landed with a thud.
With the fighters clinched against the cage, Bresner creates a bit of distance for himself and scores with a nice uppercut.
Bresner lands a body punch - he's looking to wear down Hawking.
Bresner tries to land a shot to the body but it's blocked.
Bresner lands with a short punch from the clinch.
A short right from Bresner on the inside.

Hawking is rocked!
Bresner is pushing Hawking up against the cage, for a bit of lean and pray action. Action being used the in the loosest possible sense of the word.
Bresner works on Hawking's body with a couple of short punches.
Bresner scores with a shoulder strike.
A short uppercut from Bresner.
Hawking wants a takedown.
We've seen a great period of action over the last minute or so - credit to both fighters for going all out!
Bresner stalls.
That's two minutes gone in the round.
Bresner lands with a short shot to the head.
Bresner misses with a shot to the kidneys.
Bresner is stalling here.
Bresner lands a nice shot to the body.
Bresner lands a left hand.
Bresner's corner are urging him to control the action in the clinch for a moment, rather than mount any serious offense. I'm sure the crowd appreciate those instructions... not.
Bresner stops a takedown attempt from Hawking.
Bresner lands a body punch in the clinch.
That's three minutes gone in the round.
Bresner struggles to land a body shot inside as Hawking controls his hands.
A nice right hand lands inside from Bresner.
Bresner lands on the inside with an uppercut.
Bresner pushes Hawking back against the cage and unloads with a body punch.
Bresner drops Hawking onto one knee with a big uppercut from the clinch! Hawking is propped up by the cage and works his way back to his feet!
Oh Hawking is still all over the place! His legs are completely gone! Will he be able to recover?!!
The crowd cheering loudly, showing their appreciation for the quality fight we're seeing here.
Bresner lands an uppercut in the clinch that drops Hawking to his knees! Bresner keeps firing more shots against his stricken opponent and the referee jumps in to save him!
Ladies and gentlemen, after 3:29 of round 1, we have a winner by way of TKO (Strikes). Lock Bresner!
Lock Bresner seemed lost for words in his post fight interview but he remembered to thank his fans and directed everyone to his website.
|
|
|
|
|
|
|
|
|
|
|
|
|
|
|
|
|
|
|
|
|
|
|
| S |
C
A |
G |
S |
C
B |
G |
|
S |
C |
G |
|
energy
A | B |
|
hype
A | B |
|
pop
A | B |
|
mgr
A | B |
|
FIGHT
RATING
96% |
|
|
|
|
|
|
|
Undercard bout
|
Coming up we have a heavyweight MMA rules bout between Death Before Dishonor (ranked 0 p4p, 0 weight class) and Martin Rozalski (ranked 0 p4p, 0 weight class). Martin Rozalski has the eye of the tiger tonight.
 |
|
 |
| 192 cm
23
284 lbs
6 - 3 - 0 |
|
203 cm
23
278 lbs
7 - 6 - 0 |
Good wrestling
Solid boxing
Granite chin |
|
BJJ Blue Belt
Excellent MT
Heavy handed |
|
| |
|
Ladies and gentlemen. This fight is 3 rounds, in the heavyweight division.
Introducing the fighter to my left, fighting out of the red corner.
With a record of
6 - 3 - 0, fighting out of Amsterdam, Death Before Dishonor!
And introducing the fighter to my right, fighting out of the blue corner.
With a record of
7 - 6 - 0, fighting out of Amsterdam, Martin Rozalski!
The judges for this bout are Nard Betker, Radbod Blank and Saam Ante.
The bell rings for round one and we are underway!
Dishonor throws a loose over hand right and dives in with a double leg takedown. Rozalski tries to sprawl but it's too late and the fighters hit the mat. Dishonor is in Rozalski's guard.
The ref warns both fighters not to hold the cage as they work up against the meshing.
We've had a lack of effective grappling in the last minute or so, which could well see a referee standup.
Dishonor trying to land body shots but he keeps hitting the mat.
Rozalski preventing the ground and pound from doing any damage.
Dishonor is stalling in the full guard.
Rozalski is doing well to control the posture of his opponent and prevent any damage.
Dishonor engaging in some classic timewasting tactics.
Dishonor might be looking to lock onto one of his opponent's long limbs for a submission, whilst we're on the ground.
Dishonor loading up with the ground and pound but he's missing more than he's landing in this flurry.
Dishonor prevents Rozalski from getting back to his feet.
That's one minute gone in the round.
Dishonor trying to control the position from guard on top but Rozalski is wriggling around, looking for whatever he can.
The ref stands the fighters back up because Death Before Dishonor just wasn't active enough.
Rozalski closes the distance but Dishonor moves to the side
and Dishonor counters with a two punch combo.
Rozalski is looking to clinch but Dishonor is avoiding it.
Rozalski on the wrong end of a vicious looking body shot.
Nice takedown defense from Rozalski. No joy for Dishonor on that attempt.
Dishonor scores with the left hand. Rozalski knows he should have avoided that one.
Rozalski blocks a head kick by Dishonor.
Dishonor fails with a takedown attempt.
Rozalski on the wrong end of an overhand right that came out of nowhere.
Rozalski is looking to clinch but Dishonor is avoiding it.
Dishonor scores with a reasonable looking shot to the body. Rozalski doesn't seem bothered though.
Rozalski looks to clinch
and Dishonor counters with a nice shoot takedown that brings the fighters to the ground.
The crowd cheering loudly, showing their appreciation for the quality fight we're seeing here.
Rozalski preventing the ground and pound from doing any damage.
Rozalski is looking to get back to his feet but can't, whilst Dishonor is controlling him.
That's two minutes gone in the round.
Dishonor wants to pass the guard but Rozalski is keeping the position.
Dishonor is working hard here to advance position.
Dishonor lands a couple of decent looking shots.
Dishonor content to strike from guard, landing some decent shots.
Dishonor throwing shots from guard but he's hitting more mat than opponent.
Rozalski really doesn't want to stay on the ground with Dishonor. If he can't get it back to his feet, it's only a matter of time before he'll be tapping out.
Dishonor wants to control from the top but Rozalski keeps moving.
Rozalski working the defensive guard well to avoid strikes from Dishonor.
That's three minutes gone in the round.
Dishonor trying to control the position from guard on top but Rozalski is wriggling around, looking for whatever he can.
Dishonor throwing shots from guard but he's hitting more mat than opponent.
The fighters are pressed up against the cage, both looking to find a bit of space to work.
Dishonor passes Rozalski's left leg - he's now in half guard.
Dishonor moves nicely into side control.
Rozalski takes a couple of big shots there - the referee warns him that he has to defend himself better.
Rozalski is not content to let Dishonor control the position.
That's four minutes gone in the round.
Dishonor postures up a little and throws a couple of hammerfists but they don't connect properly.
Dishonor has knee on belly and now moves to full mount! Trouble for Rozalski!
Dishonor is going oldschool here, as he tries to force Rozalski to tap using a forearm choke. This isn't 1993 though, so Rozalski shrugs it off.
Dishonor raining down hammerfists from mount.
The crowd are loving this. Great action here.
Rozalski taking shots to the head.
The crowd are going absolutely nuts as the round comes to an end - what a fantastic round of action!
Dishonor throwing sloppy strikes here. Perhaps if he tightened up his striking from such a dominant position, he'd be able to finish easier.
Dishonor working away from the top, dropping strikes.
And thats the end of the round the fighters go back to their corners.
Death Before Dishonor dominated that round.
That's the end of the interval. I'm sure that seemed a lot quicker than a minute for our two fighters! Back to the action.
Dishonor avoids the clinch attempt nicely.
Nice body punch from Dishonor.
Martin Rozalski is looking to throw some combinations by the looks of things.
Dishonor shoots in with a lovely double leg takedown. Rozalski manages to land in full guard to minimise the damage.
Rozalski working the defensive guard well to avoid strikes from Dishonor.
Dishonor wants to control from the top but Rozalski keeps moving.
Dishonor missing there with some ground and pound from the guard.
Dishonor is working the ground and pound from guard. He might want to try advancing position though to get more of an impact.
Dishonor missing there with some ground and pound from the guard.
Dishonor stands up and looks to throw the legs aside to pass to side control. Rozalski swivels though and keeps the full guard.
Rozalski avoiding any damage from the ground and pound.
That's one minute gone in the round.
Dishonor in full guard, throwing the ground and pound. No damage this time.
Dishonor throwing strikes but missing.
Dishonor has been looking to land a fair amount of strikes on the ground. He might be looking to soften his opponent up in order to work for a submission.
Dishonor wants to control from the top but Rozalski keeps moving.
Rozalski preventing the ground and pound from doing any damage.
Rozalski trying to keep a closed guard but Dishonor is proving a slippery customer.
Dishonor missing there with some ground and pound from the guard.
Dishonor wants to control from the top but Rozalski keeps moving.
That's two minutes gone in the round.
Rozalski is trying to keep Dishonor in close.
Dishonor loading up with the ground and pound but he's missing more than he's landing in this flurry.
Dishonor pressing down on his opponent's thigh, looking to pass guard. Rozalski is keeping the position for now.
Dishonor forces his way into half guard.
Dishonor is keen to just control but Rozalski is a slippery customer.
Dishonor is stalling here. Rozalski is in no mood to hang around though. He's locked up a kimura from the bottom! Dishonor seems to be keeping calm but he's forced to roll out of the hold and Rozalski has ended up in side control on the top. Nice work.
Dishonor manages to get one leg in to regain half guard.
Death Before Dishonor overall seems to be getting the better of the ground position in the fight so far.
That's three minutes gone in the round.
Dishonor tries to get to full guard but Rozalski has control of the leg.
Dishonor is pressing down on Rozalski's left leg trying to get back to full guard. He's managed it.
Rozalski wants to stand but Dishonor has a closed guard, so he can't escape.
Dishonor has thrown up a leg looking for a triangle. Rozalski doesn't defend quickly enough and Dishonor has managed to lock this one up! Can Rozalski escape?! NO! He's tapping out! Damn, that was a quick submission - congrats to Dishonor on a fantastic submission victory.
Ladies and gentlemen, after 3:50 of round 2, we have a winner by way of Submission (Triangle). Death Before Dishonor!
Death Before Dishonor took some time post fight to say the following; 'damn that hash was good!!'.
|
|
|
|
|
|
|
|
|
|
|
|
|
|
|
|
|
|
|
|
|
|
|
| S |
C
A |
G |
S |
C
B |
G |
|
S |
C |
G |
|
energy
A | B |
|
hype
A | B |
|
pop
A | B |
|
mgr
A | B |
|
FIGHT
RATING
41% |
|
|
|
|
|
|
|
Undercard bout
|
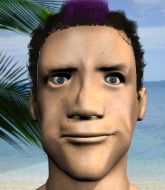
Coming up we have a middleweight MMA rules bout between Jayden Slash (ranked 0 p4p, 0 weight class) and God Zilla (ranked 0 p4p, 0 weight class). Zilla has chosen Your arms feel like home. as his entrance music. This should be a great matchup!
 |
|
 |
| 185 cm
21
193 lbs
4 - 2 - 0 |
|
201 cm
27
191 lbs
6 - 4 - 0 |
BJJ Purple Belt
Solid Muay Thai
Cardio machine |
|
Good takedowns
Solid Muay Thai
Knockout power |
|
| |
|
Ladies and gentlemen. This fight is 3 rounds, in the middleweight division.
Introducing the fighter to my left, fighting out of the red corner.
With a record of
4 - 2 - 0, fighting out of Amsterdam, Jayden Slash!
And introducing the fighter to my right, fighting out of the blue corner.
With a record of
6 - 4 - 0, fighting out of Amsterdam, God Zilla!
The judges for this bout are Patrick Alders, Paul Aken and Radbod Blank.
The bell rings for round one and we are underway!
Zilla is the aggressor but that punch slipped nicely by Slash.
Slash checks a leg kick nicely.
Zilla ducks down and throws a hook to the body but Slash moves away.
Slash throws a body punch but Zilla moves out of range.
Slash has closed the distance and engaged Zilla in a clinch.
Zilla is a painfully thin specimen of a man. You do wonder whether a good body kick would snap him clean in two.

Slash's corner calls for him to break the clinch, which he does.
Slash pushes Zilla up against the cage in a clinch.

Zilla escapes the clinch and we're back to striking.
Slash takes a kick to the side of the head.
Zilla lands a jab to Slash's midsection.
Zilla fakes a jab and scores with a low kick.
Zilla throws a half hearted mid kick.
Slash blocks the body kick.
Jayden Slash seems to be the more aggressive standup fighter in this bout.
Slash forces Zilla back against the cage and clinches.
Slash breaks the clinch and we return to the middle of the mat.
That's one minute gone in the round.
Zilla lands with a shot to the body.
Slash swings and misses with a hook to the body.
Slash has managed to clinch.
Slash misses with a hook to the ribs.
Slash missing with knees to the body.
Zilla tries to circle away but Slash has him pinned against the cage.
Slash is trying to work out of this bad position, with his back against the cage.
Slash lands a knee to the body.
Slash is trying to work out of this bad position, with his back against the cage.
Slash wants the takedown. Zilla is fighting it off but Slash persists and manages to bring the fight to the ground, ending up in Zilla's guard against the cage.
Slash might be looking to lock onto one of his opponent's long limbs for a submission, whilst we're on the ground.
The crowd are loving this. Great action here.
Slash working some strikes from top position.
Zilla bucks up whilst keeping hold of a body lock, managing to reverse the position. Now he's in top in Slash's guard.
Slash looking to sweep here. No luck so far.
That's two minutes gone in the round.
Slash keeping full guard, as Zilla tries to pass.
Zilla wants to control from the top but Slash keeps moving.
Zilla might have to switch it up a bit here because his efforts to control Slash kaven't been going to plan, at least at the current moment in time.
Zilla slips effortlessly into side control - very nice.

Zilla is trying to land an Americana. He has the arm isolated but Slash is keeping cool and he's avoided the danger for now.
Slash is sneaking out the side here. He's bucked Zilla off and has taken his back!
That's three minutes gone in the round.
Slash looking to break Zilla's wrist control so he can sink in the choke. Zilla remaining controlled and patient though - he really has to keep calm otherwise Slash will wrap this one up with the rear naked choke!
Zilla rolls and manages to get back to half guard. Nicely done.
Slash seems very keen to just sit and control from half guard but Zilla does not like that idea so much and is remaining active off his back.
Zilla looking for submissions off his back.
Zilla manages to get to full guard.
Zilla had isolated an arm as going for a kimura. Slash defends it easily.
Slash preventing the sweep.
Slash trying to control the position from guard on top but Zilla is wriggling around, looking for whatever he can.
Slash stands up and looks to throw the legs aside to pass to side control. Zilla swivels though and keeps the full guard.
That's four minutes gone in the round.
Slash passes easily into side control. Nice work.
Zilla wants to control but Slash postures up.
Zilla manages to work his way to half guard, despite Slash's best efforts.
The ref warns both fighters not to hold the cage as they work up against the meshing.
The fans in attendance giving it up for the two fighters, who have really let it all hang out in the last minute or so!
Zilla is defending against the submission attempts here by Slash.
Zilla is looking to improve his position.
Slash is working for submissions here but there's nothing on.
The crowd are going absolutely nuts as the round comes to an end - what a fantastic round of action!
Zilla is looking to improve his position.
Zilla is looking to sinch up a guillotine here but Slash pulls his head out easily.
And thats the end of the round the fighters go back to their corners.
That was a close round but I would say that Jayden Slash will probably get the nod.
The fighters' corners scream their final instructions, as the referee calls time. Here we go, back to the action!
Zilla throws a hook to the body but it doesn't connect.
Zilla uses good footwork to avoid the strikes from Slash.
Jayden Slash is looking to throw some combinations by the looks of things.
Slash rushes Zilla and pushes him back against the cage in a clinch.
Slash has had enough of the clinch but Zilla keeps him there for the moment.
Slash cracks Zilla with a nice body shot.
Slash breaks from the clinch.
Horrible takedown by Zilla or perhaps it was just good defense by Slash which made him look bad.
Slash avoids the head kick by Zilla.
Slash closes the distance and clinches.
A frustrated look appears on Slash's face as he tries to break the clinch.
Zilla is trying to break the clinch but Slash is controlling him.
That's one minute gone in the round.
Slash with a knee to the head.
Slash gets a trip takedown into half guard.
Zilla is looking for a sweep. Slash is wise to his cunning plan and keeps the top position.
Zilla looking to work for a kimura from the bottom.
Zilla works his way to full guard. Good work.
Slash postures up in Zilla's guard and throws a big left but Zilla blocks it.
Zilla is throwing his legs up, looking for submissions. Slash is aware though and is defending well.
The fighters are pressed up against the cage, both looking to find a bit of space to work.
Slash throwing strikes from guard but Zilla blocks nicely.
Zilla working for a triangle but Slash defends it easily.
Slash got a little sloppy there for a moment and Zilla has worked his way into a loose triangle - can he finish it?! No, Slash has managed to get both his arms back between Zilla's legs - danger averted.
Zilla is breathing heavily.
That's two minutes gone in the round.
Fantastic stuff here - a very entertaining period of action, which has drawn cheers from the crowd.
Zilla keeping moving, preventing Slash from controlling successfully.
Slash works over Zilla with some ground and pound from guard.
Slash with a nice head shot there.
Zilla is working actively off his back, looking to secure an arm or perhaps work for a triangle.
God Zilla has got the better of the ground game so far.
Slash keeps in close for a moment and lands a decent shot to the side of Zilla's head.
Slash drops back looking for a leg! Zilla is in trouble here! The fighters roll with the hold and Zilla manages to kick Slash off! Slash jumps back into Zilla's guard.
Slash throws a big elbow that misses.
Slash preventing the sweep.
That's three minutes gone in the round.
Zilla looking for a triangle here. Slash is fighting it but it looks tight! Zilla pulls the arm across and this one won't last much longer! Nope, Slash is tapping out - this one is all over!
Ladies and gentlemen, after 3:19 of round 2, we have a winner by way of Submission (Triangle Choke). God Zilla!
An out of breath and clearly excited God Zilla thanked [GTI] Divine Clothing for their help and support (and free stuff they sent him).
|
|
|
|
|
|
|
|
|
|
|
|
|
|
|
|
|
|
|
|
|
|
|
| S |
C
A |
G |
S |
C
B |
G |
|
S |
C |
G |
|
energy
A | B |
|
hype
A | B |
|
pop
A | B |
|
mgr
A | B |
|
FIGHT
RATING
59% |
|
|
|
|
|
|
|
Undercard bout
|
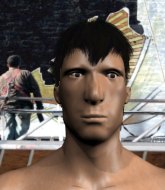
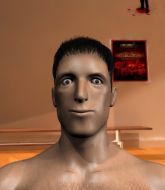
Coming up we have a light heavyweight MMA rules bout between Clark Wayne (ranked 0 p4p, 0 weight class) and Viktors Bricis (ranked 0 p4p, 0 weight class). Bricis comes into a darkened arena with his song building. Rammstein - Ich Will kicks in, the lights come on and the crowd goes wild! What a showman! Both fighters look pumped up here. Let's hope this is a good fight!
 |
|
 |
| 187 cm
27
217 lbs
11 - 4 - 0 |
|
191 cm
28
208 lbs
21 - 11 - 0 |
Good wrestling
World class boxer
Very quick |
|
Good wrestler
Excellent MT
Heavy handed |
|
| |
|
Ladies and gentlemen. This fight is 3 rounds, in the light heavyweight division.
Introducing the fighter to my left, fighting out of the red corner.
With a record of
11 - 4 - 0, fighting out of Tokyo, Clark Wayne!
And introducing the fighter to my right, fighting out of the blue corner.
With a record of
21 - 11 - 0, fighting out of London, Viktors Bricis!
The judges for this bout are Paul Aken, Nard Betker and Wagner Zegers.
The bell rings for round one and we are underway!
Bricis throws out a leg kick but Wayne moves out of range and Bricis only half commits.
Wayne lunges in with an uppercut that skims his opponent's chin.
Bricis lands a beauty of a right hand that gets the crowd cheering.
Wayne throws a head kick that Bricis semi-blocks.

It looks like Viktors Bricis has been cut.
An inside leg kick from Bricis misses.
Bricis lands with a nice body kick.
Fantastic stuff here - a very entertaining period of action, which has drawn cheers from the crowd.
Bricis throws a monster uppercut resembling something out of street fighter but it doesn't land.
Bricis fails with an attempt to clinch.
Wayne checks a low kick. Bone on bone - not my idea of a good time.
Bricis fakes a couple of low kicks, before throwing one on the third attempt. It connects and Wayne has to reset his feet before getting ready to engage.
Wayne is breathing heavily.
Bricis throws a hook to the side of Wayne's head but Wayne sees it coming and ducks under it beautifully.
Bricis connects with an inside leg kick.
Bricis feints and then cracks Wayne's leading leg with a nice low kick. He's obviously looking to slow Wayne down.
Wayne takes a jab right on the nose. That must have hurt but he shrugs his shoulders and looks to return the favor.
Bricis lands an uppercut out of nowhere! Wayne falls backwards - clearly groggy! Bricis dives in and finishes the fight with more strikes for a TKO finish!
Ladies and gentlemen, after 0:45 of round 1, we have a winner by way of TKO (Strikes). Viktors Bricis!
Our winner, Viktors Bricis, made sure he spent some time buttering up the crowd during his post fight interview, which will no doubt bring him a few more fans.
|
|
|
|
|
|
|
|
|
|
|
|
|
|
|
|
|
|
|
|
|
|
|
| S |
C
A |
G |
S |
C
B |
G |
|
S |
C |
G |
|
energy
A | B |
|
hype
A | B |
|
pop
A | B |
|
mgr
A | B |
|
FIGHT
RATING
100% |
|
|
|
|
|
|
|
Co-main event
|
Coming up we have a middleweight MMA rules bout between Brian Douglas (ranked 0 p4p, 0 weight class) and Jack Infamous (ranked 0 p4p, 0 weight class). Douglas comes to the cage accompanied by Rocky's Theme. Over to our ring announcer for the fighter introductions!
 |
|
 |
| 183 cm
26
197 lbs
17 - 10 - 0 |
|
190 cm
25
189 lbs
10 - 8 - 0 |
Decent wrestler
Excellent MT
Cardio machine |
|
Olympic wrestler
Basic striking
Good gas tank |
|
| |
|
Ladies and gentlemen. This fight is 3 rounds, in the middleweight division.
Introducing the fighter to my left, fighting out of the red corner.
With a record of
17 - 10 - 0, fighting out of Amsterdam, Brian Douglas!
And introducing the fighter to my right, fighting out of the blue corner.
With a record of
10 - 8 - 0, fighting out of Amsterdam, Jack Infamous!
The judges for this bout are Paul Aken, Aafke Stam and Saam Ante.
The bell rings for round one and we are underway!
Infamous circles away from the clinch attempt.
Infamous tries to bum rush Douglas with a series of wild strikes but Douglas uses good footwork to avoid the assault.
Douglas tries to close the distance and clinch up but Infamous swats him away and circles back towards the center.
Douglas tries to clinch up but Infamous circles away and keeps his distance.
Douglas keeps the fight standing with a nice sprawl.
Infamous changes levels and looks for a double leg takedown. Douglas tries to avoid it but Infamous manages to keep hold of a leg and drag Douglas to the ground. Douglas escapes though and pops straight back up to his feet.
Infamous shoots in with a takedown attempt and he has Douglas pinned against the cage. Douglas gets the underhooks and manages to circle away.
Brian Douglas has stuffed three takedown attempts in the round now. That's going to take a lot out of Jack Infamous.
Douglas misses with a two punch combination.
Douglas swings wildly with a right hand that was never going to find it's target.

Douglas lands a big head kick that sends Infamous tumbling to the mat! Douglas takes a step backwards and waves Infamous back to his feet - he wants the finish!

Infamous is rocked!
It looks like Jack Infamous has been cut.
Wooooo! Give it up for these two warriors! They are putting on a show!
Infamous avoids the head kick by Douglas.
Infamous is still on wobbly legs! Can Douglas finish him?
Infamous is trying desperately to land a takedown but Douglas is having absolutely none of it. This is turning into a bit of a nightmare for Infamous.
Douglas misses with a head kick.
Douglas looks to score with a combo but nothing lands.
Infamous avoids the head kick by Douglas.
Douglas misses with a head kick.
Infamous blocks a head kick by Douglas.
Infamous avoids the head kick by Douglas.
A head kick misses from Douglas.
Infamous throws a jab but it's blocked by Douglas.
Douglas misses with a half-hearted attempt at a head kick.
Douglas is breathing heavily.
Douglas misses with a two punch combination.
Douglas tries a switch kick but it misses it's target.
Douglas throws a sloppy head kick and Infamous moves out of range easily.
Infamous avoids the head kick by Douglas.
Douglas keeping his hands up high there, blocking the jab from Infamous.
Infamous tries to shoot in for a takedown. He's got hold of a leg but Douglas swivels and escapes.
Douglas looks to land a combination but Infamous avoids it well.
Douglas tries to close the distance and clinch but Infamous swats him to one side with an open hand palm strike and circles away.
Infamous has a takedown stuffed.
Infamous shoots in looking for a takedown. Douglas tries to sprawl out of it but Infamous keeps driving through. The fighters are pinned against the cage. Douglas manages to get underhooks and after a bit of a struggle, circles away and we're back to standing.
Douglas throws a head kick that misses and slips in the process. He scrambles back to his feet and the fighters circle.
That's one minute gone in the round.
Infamous throws the left hand but Douglas avoids the punch easily.
Wow, both these guys are really going for it!

Infamous feints and then dives in with a takedown. That was a long way out but the feint bought him enough time to close the distance and complete the takedown. Now we'll play guard for a bit and see who can get the better of that position.
The referee is pacing around the two fighters - he looks like he's thinking about a standup.
Douglas working from the bottom, still in full guard. He's managed to get a loose triangle. Infamous doesn't seem to be doing much to defend here, obviously he feels comfortable in the position. Infamous manages to throw the legs off his shoulder and he's back into guard - no problem.
Douglas keeping full guard, as Infamous tries to pass.
Infamous throwing strikes but missing.
Infamous in full guard, throwing the ground and pound. No damage this time.
Douglas trying to strike from the bottom but really, it's not the best position to be doing that from!
Douglas escapes his hips to the side and looks to be working for an armbar. Infamous gives him a little smile and shakes his head. No chance.
Infamous throws a big right hand that misses.
Douglas looking to sweep here. No luck so far.
Infamous throws a big elbow that misses.
Douglas has his foot on Infamous's thigh. He's trying to push off and get in position for a triangle, I think. Infamous works his way back into a safe position though.
Infamous throws a big elbow that misses.
Douglas throwing strikes off his back to little effect.
Infamous wants to control from the top but Douglas keeps moving.
Infamous throwing strikes from guard but Douglas blocks nicely.
Infamous throwing shots from guard but he's hitting more mat than opponent.
The crowd are loving this. Great action here.
Douglas looking for submissions off his back, moving his hips, looking for an opening.
Infamous avoids a guillotine attempt easily.
Douglas is throwing his legs up, looking for submissions. Infamous is aware though and is defending well.
Infamous throwing strikes from guard but Douglas blocks nicely.
Infamous has the superior BJJ but he's also working some ground strikes into his gameplan.
Douglas throwing his legs up looking for a triangle.
Infamous postures up and lands some nice ground and pound.
Infamous throwing strikes from guard but Douglas blocks nicely.
Douglas has a loose triangle. He'll be looking to tighten that up but Infamous can see exactly what he's planning and manages to posture up and free himself.
Infamous prevents Douglas from getting back to his feet.
Infamous postures up in Douglas's guard and throws a big left but Douglas blocks it.
The ref warns both fighters not to hold the cage as they work up against the meshing.
Infamous trying to control but Douglas is working from the bottom.
Douglas has an active guard here but Infamous has managed to pass into half guard.
Douglas looking for submissions from an awkward position here.
That's two minutes gone in the round.
Infamous not landing any meaningful shots this time.
Infamous thows a huge punch but Douglas dodges it nicely.
Infamous not throwing his punches with enough precision this time.
Douglas looking for submissions off his back.
Douglas looking to work for a kimura from the bottom.
Douglas blocking the ground and pound attempt from Infamous.
Douglas is staying active underneath Infamous, who seems content to just control the action from this position.
Douglas tries to strike from the bottom but it doesn't land.
Infamous seems to have recovered his senses.
Douglas is trying to defend against the ground and pound but Infamous scores with a couple of nice shots.
Infamous passes the guard and advances to mount!
Infamous is giving the impression that he's looking to ground and pound but he switches suddenly into a beautiful far side armbar! Douglas is forced to tap! Great finish!
Ladies and gentlemen, after 2:48 of round 1, we have a winner by way of Submission (Armbar). Jack Infamous!
Jack Infamous seemed lost for words in his post fight interview but he remembered to thank his fans and directed everyone to his website.
|
|
|
|
|
|
|
|
|
|
|
|
|
|
|
|
|
|
|
|
|
|
|
| S |
C
A |
G |
S |
C
B |
G |
|
S |
C |
G |
|
energy
A | B |
|
hype
A | B |
|
pop
A | B |
|
mgr
A | B |
|
FIGHT
RATING
100% |
|
|
|
|
|
|
|
Main event
|
Coming up we have a super heavyweight MMA rules bout between Super Jobber (ranked 0 p4p, 0 weight class) and Ultimate Jobber (ranked 0 p4p, 0 weight class). The fight MMA fans around the world have waited their entire lives for!
 |
|
 |
| 188 cm
27
213 lbs
5 - 16 - 0 |
|
190 cm
27
210 lbs
16 - 3 - 0 |
BJJ White Belt
Solid boxing
Cardio machine |
|
Good wrestler
Decent boxing
Powerful |
|
| |
|
Ladies and gentlemen. This fight is 3 rounds, in the super heavyweight division.
Introducing the fighter to my left, fighting out of the red corner.
With a record of
5 - 16 - 0, fighting out of Amsterdam, Super Jobber!
And introducing the fighter to my right, fighting out of the blue corner.
With a record of
16 - 3 - 0, fighting out of Amsterdam, Ultimate Jobber!
The judges for this bout are Radbod Blank, Patrick Alders and Wagner Zegers.
The bell rings for round one and we are underway!
Ultimate Jobber tries to clinch up against the cage, rushing in the close the distance. Super Jobber manages to break the clinch and circles back to the middle of the mat.
Ultimate Jobber tries to close the distance and clinch up but Super Jobber swats him away and circles back towards the center.
Ultimate Jobber has closed the distance and engaged Super Jobber in a clinch.
Ultimate Jobber prevents the takedown attempt.
Ultimate Jobber lands a shoulder strike that jolts his opponent's head backwards.
Ultimate Jobber gets underhooks to prevent Super Jobber's takedown attempt.
Nice body punch from Ultimate Jobber - that landed with a thud.
Ultimate Jobber is defending well against a takedown attempt.
That's three failed takedown attempts in the round for Super Jobber. That's going to take a lot out of him.
Ultimate Jobber gets through Super Jobber's defenses to land a nice punch to the side of the head.
Ultimate Jobber gets underhooks to prevent Super Jobber's takedown attempt.
Ultimate Jobber stalls.
Ultimate Jobber presses Super Jobber against the cage and delivers a mid-strength body shot.
Super Jobber jumps guard but Ultimate Jobber turns him against the cage and keeps the fight standing.
The crowd cheering loudly, showing their appreciation for the quality fight we're seeing here.
Super Jobber has Ultimate Jobber pressed up against the cage and is working for takedown. Ultimate Jobber manages to improve position though and keeps the fight standing.
Ultimate Jobber lands a left hand that snaps the head of Super Jobber backwards.
Ultimate Jobber lands a body shot.
A quick uppercut on the inside from Ultimate Jobber.
Super Jobber tries for a takedown but Ultimate Jobber manages to get underhooks.
Super Jobber goes for a takedown in the clinch but Ultimate Jobber prevents it.
Super Jobber goes for a takedown attempt but Ultimate Jobber pushes him away and we're back to fighting at a distance.
Ultimate Jobber seems to be the more aggressive standup fighter in this bout.
Super Jobber is breathing heavily.
That's one minute gone in the round.
Ultimate Jobber has closed the distance and engaged Super Jobber in a clinch.
Stalling in the clinch from Ultimate Jobber.
Ultimate Jobber lands with a short punch from the clinch.
Super Jobber is looking to take this one to the mat.
Super Jobber tries for a takedown but Ultimate Jobber manages to get underhooks.
Super Jobber tries for a takedown. No joy.
Super Jobber changes levels and goes for a takedown here. Ultimate Jobber fights it off and pushes away nicely.
Ultimate Jobber is looking to keep the fight on the feet at all costs.
Super Jobber fails with the takedown.
Ultimate Jobber rushes Super Jobber and presses him up against the cage.
Super Jobber jumps guard but Ultimate Jobber stands there with Super Jobber around his waist. Super Jobber gives up and drops back to his feet. We remain in the clinch.
Super Jobber is trying to pull guard but Ultimate Jobber turns him against the cage and we stay in the clinch.
That's two minutes gone in the round.
Ultimate Jobber lands a right hand.
Ultimate Jobber lands with a right to the head.
Super Jobber is working for a takedown up against the cage. He can't get it on this occasion though.
A nice left hand lands by Ultimate Jobber.
Super Jobber has Ultimate Jobber pressed up against the cage and is working for takedown. Ultimate Jobber manages to improve position though and keeps the fight standing.
Ultimate Jobber throws a blind hook that connects with the side of Super Jobbers head.
The crowd are loving this. Great action here.
Ultimate Jobber lands a shoulder strike that jolts his opponent's head backwards.
Ultimate Jobber works for underhooks and lands a body shot in the process.
Super Jobber tries to pull guard but can't drag his opponent to the mat. Ultimate Jobber just stands there and leans against the cage.
Ultimate Jobber lands a body shot in the clinch.
A left hand lands to the body for Ultimate Jobber.
Super Jobber letting Ultimate Jobber take a breather here.
Super Jobber tries to pull guard but Ultimate Jobber forces him back to his feet, against the cage.
A nice left hand lands by Ultimate Jobber.
Some stalling of biblical proportions here from Ultimate Jobber.
Ultimate Jobber pushes Super Jobber back against the cage and lands a hook to the side of the head.
Ultimate Jobber holding his opponent close, against the cage.
Ultimate Jobber working some nice short punches in the clinch.
That's three minutes gone in the round.
A short right from Ultimate Jobber on the inside.
Super Jobber is looking for a takedown up against the cage. Ultimate Jobber gets underhooks though and prevents the takedown attempt.
Super Jobber tries to jump guard but he falls flat on his backside. Ultimate Jobber smiles and moves away.
A telegraphed takedown attempt from Super Jobber is defended easily by Ultimate Jobber.
Ultimate Jobber steps in with a hook that catches Super Jobber right on the chin and knocks him to the floor! Ultimate Jobber follows him down with more strikes and that's all she wrote! Super Jobber looks absolutely devastated.
Ladies and gentlemen, after 3:29 of round 1, we have a winner by way of TKO (Strikes). Ultimate Jobber!
After winning the bout, Ultimate Jobber thanked all his fans and promised he'd do even better in his next fight. The crowd seemed to love his humility.
|
|
|
|
|
|
|
|
|
|
|
|
|
|
|
|
|
|
|
|
|
|
|
| S |
C
A |
G |
S |
C
B |
G |
|
S |
C |
G |
|
energy
A | B |
|
hype
A | B |
|
pop
A | B |
|
mgr
A | B |
|
FIGHT
RATING
65% |
|
|
|
|
|
|
|
|
|
|
